1
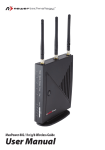
MaxPower 802.11n/g/b Wireless Guide User Manual Table of Contents Introduction 3 Package Contents 3 Indicators & Ports 4 Front Panel 4 Rear Panel 4 Basic Setup Hardware Installation Router Configuration 2 5 5 5 DDNS Settings 11 MAC Address Clone 13 Basic Wireless Configuration 14 Wireless Security 15 Wireless MAC Filter 16 Advanced Wireless Settings 18 Wireless WDS Settings 21 VPN Passthrough 22 Internet Access Policy 23 Port Range Forwarding 24 Port Range Triggering 26 DMZ 27 Management 28 Log 29 Diagnostics 30 Factory Defaults 31 Router Status 32 Local Network Status 33 Wireless Network Status 34 Troubleshooting Contacting Tech Support/Customer Service 35 37 Introduction Thank you for purchasing the Newer Technology MaxPower 802.11n/g/b Wireless Router! This guide will walk you through the setup process step by step and get you up and running with your new storage device quickly. Setup of the Newer Technology MaxPower 802.11n/g/b Wireless Router is straightforward, but you do need to follow this guide for proper setup. We suggest reading through the whole manual before hooking up the MaxPower 802.11n/g/b Wireless Router.. Package Contents t t t t t t MaxPower 802.11n/g/b Wireless Router User Guide CD-ROM Three dipole 2dBi RSMA detachable Antennas AC/DC Power Adapter User Manual Warranty Card 3 Indicators and Ports Front Panel The front panel consists of device status LEDs. Use the table below to determine what each means. Indicator Color Function Power Green Indicates whether the unit is getting power or not Security Orange When blinking, this LED indicates the WPS encryption function is active. Wireless Green Indicates wireless network availability and activity. Router Green Lit when unit is working as a “Bridge.” Diag Red Lights during startup diagnosis and firmware updating. Also indicates when system is functioning abnormally. Internet/LAN 1-4 Green These indicators will light up when a link has been established. Data transmission is indicated by rapid blinking. Rear Panel 4 Power The power adapter attaches here. WAN Your broadband internet connection attaches here. LAN 1-4 These ports connect the router to your networked PCs and other Ethernet network devices. Reset The RESET button can restore device to factory default settings by press this button for approx. 10 seconds while the unit is powered on Router Mode Switch Allows you to switch between Router and Access Point modes. Basic Setup Hardware Installation This installation is suitable for most hardware setups. 1. Power off your network devices. 2. Locate an optimum location for the MaxPower 802.11n/g/b Wireless Router. The best place for the unit is usually at the center of your wireless network, with line of sight to all of your wireless devices. 3. Attach and adjust the antennas. Normally, a higher location of your MaxPower 802.11n/g/b Wireless Router should get better performance. 4. Using a standard Ethernet network cable, connect to the MaxPower 802.11n/g/b Wireless Router’s WAN port to your broadband modem. 5. Connect your network PCs or Ethernet devices to the Router’s LAN ports using standard Ethernet network cable. 6. Connect the AC power adapter to the MaxPower 802.11n/ g/b Wireless Router’s Power port, Then connect the other end to an electrical outlet. Only use the power adapter supplied with the unit. Use of a different adapter may cause product damage. 7. The Hardware installation is completed. You may now configure the unit. Router Configuration You will need to use a modern web browser in order to configure your MaxPower 802.11n/g/b Wireless Router. Once you have logged-in as the administrator, it is a good idea to change the administrator password to ensure a secure connection. You can do this under the Administration tab on configuration page. 1. Open a Web browser window on computer that is either connected to the router via Ethernet or that you have chosen to connect via wireless, as per the instructions for that particular machine. 2. Connect to http://192.168.1.1 3. In order to configure the MaxPower 802.11n/g/b Wireless Router, you must input the password into the Password box, leaving the username field blank. The default password is “admin”. 5 4. Once you have entered the password, a screen with the following information will be displayed. Most users will be able to configure the MaxPower 802.11n/g/b Wireless Router and get it working properly using the default settings. Some Internet Service Providers (ISPs) will require that you enter broadband specific information into this device, such as User Name, Password, IP Address, Default Gateway Address, or DNS IP Address for Internet access. This information can be obtained from your ISP, if required. More detailed information about the different options for different settings follows. Internet Setup Internet Connection Type: t Automatic Configuration – DHCP 6 This is default connection type. If your ISP supports DHCP assigning dynamic IP address then please select this type. t Static IP If you are required to use a fixed IP address to connect to the Internet, then select Static IP. Internet IP Address: This is the Router’s WAN IP address. It is provided by your ISP. Subnet Mask: This is the Router’s Subnet Mask. If needed, it will be provided by your ISP. Default Gateway: This is the Router’s Gateway Address. It, too, will be provided by your ISP. DNS (1-3): Your ISP will provide you with at least one DNS Server IP Address, which you will need to input here t PPPoE PPPoE (Point-to-Point Protocol over Ethernet) is a very common connection type. If you are connected to the Internet through DSL, check with your ISP to see if they use PPPoE. If so, you will need to enable PPPoE. User Name and Password: Enter the User Name and Password provided by your ISP. Connect on Demand: The Max Idle Time is allows the Router to disconnect the Internet connection if there is no traffic through this Router during a specified period of time. If your Internet connection has been terminated due to going over this idle time, the Connect on Demand option will trigger the Router to automatically re-establish your connection as soon as you try to access the Internet again. Keep Alive: The Redial Period causes the Router to periodically check your Internet connection by a set period of time. If the connection is terminated, then the Router will automatically reconnect. t PPTP Point-to-Point Tunneling Protocol (PPTP), is a VPN tunnel method that can use to encrypt data and prevent the unauthorized viewing of confidential data that is transmitted across public networks. Internet IP Address and Subnet Mask: This is the Router’s IP Address and Subnet Mask. If your Internet connection requires a Static IP address, then your ISP will provide these numbers to you. 7 Default Gateway: Your ISP will provide you with the Gateway IP Address. User Name and Password: This is PPTP login User Name and Password. Your ISP will provide you this information. Keep Alive: The Redial Period causes the Router to periodically check your Internet connection by a set period of time. If the connection is terminated, then the Router will automatically reconnect. These connection types can be selected from the Internet Connection Type drop-down menu. Fields for the appropriate information will be displayed, depending on the connection type selected. Optional Settings Your ISP may require these settings. If your ISP provides this information, make sure to enter it in the appropriate fields here. Host Name and Domain Name: These fields allow you to input a host and domain name for the Router. Some ISPs require these names as identification. You may have to check with your ISP to see if your broadband Internet service has been configured with a host and domain name. In most cases, leaving these fields blank will work. MTU: MTU is the Maximum Transmission Unit. It specifies the largest packet size permitted for Internet transmission. Select Manual if you want to manually enter the largest packet size that will be transmitted. The recommended size, entered in the Size field, is 1500. You should leave this value in the 1200 to 1500 range. To have the Router select the best MTU for your Internet connection, please select the default setting--Auto. Network Setup The Network Setup section changes the Router’s local network settings. Router IP 8 IP Address and Subnet Mask: This is your router’s LAN IP Address and Subnet Mask. The default IP Address is 192.168.1.1 and the default Subnet Mask is 255.255.255.0. DHCP Server Settings The settings allow you to configure the Router’s Dynamic Host Configuration Protocol (DHCP) server function. The Router can be used as a DHCP server for your network. A DHCP server automatically assigns an IP address to each computer on your network. If you choose to enable the Router’s DHCP server option, you must make sure there is no other DHCP server on your network. If you disable the Router’s DHCP server function, you must configure the IP Address, Subnet Mask, and DNS for each connected computer (note that each IP Address must be unique). DHCP Server: DHCP is enabled by factory default. If you already have a DHCP server on your network or you do not want a DHCP server, then select Disable from the options. Assign Static DHCP: This function can enable the DHCP server to assign a particular IP address for an appointed computer. If you want a computer to be assigned the same IP address every time, then click the Assign Static IP button. How to set a PC as Static DHCP client On the Static DHCP Client List screen, enter the static local IP address in the Assign this IP field, and enter the MAC address of the computer in the “To this MAC” field. Then, click the Enabled checkbox. When you have finished your entries, click the Save Settings button to save your changes or click the Cancel Changes button to cancel your changes. To exit this screen, click the Close button. How to set a DHCP client as Static DHCP client Click the DHCP Client Table button can see a list of DHCP client. On the DHCP Client Table, you will see a list of DHCP clients with the following information: Client Names, Interfaces, IP Addresses, and MAC Addresses. From the “To Sort by” drop-down menu, you can sort the table by Client Name, Interface, IP Address, or MAC Address. If you want to add any of the DHCP clients to the Static DHCP Client List, then click the Save to Static DHCP Client List checkbox and then click the Save Settings button. Click the Cancel Changes button to cancel your changes. To view the most up-to-date information, click the Refresh button. To exit this screen, click the Close button. Start IP Address: Enter a value for the DHCP server to start with when issuing IP addresses. Because the Router’s default IP address is 192.168.1.1, the Starting IP Address must be 192.168.1.2 or greater, but smaller than 192.168.1.254. The default Starting IP Address is 192.168.1.100. 9 Maximum Number of Users: Enter the maximum number of PCs that you want the DHCP server to assign IP addresses to. The absolute maximum is 253 - possible if 192.168.1.1 is your starting IP address. The default is 50. IP Address Range: The range of DHCP addresses. This range is determined by the Maximum Number of Users. Client Lease Time: The Client Lease Time is the amount of time a network user will be allowed connection to the Router with their current dynamic IP address. Enter the amount of time, in minutes, that the user will be “leased” this dynamic IP address. Once the leased time is up, the user will get a new dynamic IP address automatically. The default is 0 minutes, which means one day. Static DNS 1-3: The Domain Name System (DNS) is how the Internet translates domain or website names into Internet addresses or URLs. Your ISP will provide you with at least one DNS Server IP Address. If you wish to utilize another, enter that IP Address in one of these fields. You can enter up to 3 DNS Server IP Addresses here. The Router will use these for quicker access to functioning DNS servers. WINS: The Windows Internet Naming Service (WINS) manages each PC’s interaction with the Internet. If you use a WINS server, enter that server’s IP Address here. Otherwise, leave this blank. Time Settings Select your time zone from this pull-down menu. Click the check box if you want to automatically adjust for daylight savings time. Once you are done changing the settings, click the Save Settings button to apply your changes or Cancel Changes to revert to what they were before. For further information click Help. 10 DDNS Settings The Router offers a Dynamic Domain Name System (DDNS) feature. DDNS lets you assign a fixed host and domain name to a dynamic Internet IP address. It is useful when you are hosting your own website, FTP server, or other server behind the Router. Before using this feature, you need to sign up for DDNS service with one of two DDNS service providers, DynDNS.org or TZO. DynDNS service To enable DDNS Service using DynDNS.org, follow these instructions: 1. On the DDNS screen, select DynDNS.org from the DDNS Service Provider drop-down menu. 2. Sign up for DynDNS service at www.dyndns.org for applying one DDNS account. Write down your account information. 3. Complete the User Name, Password, and Host Name fields. 4. Once you are done changing the settings, click the Save Settings button to apply your changes or Cancel Changes to revert to what they were before. For further information click Help. 11 TZO service To enable DDNS Service using TZO, follow these instructions: 1. On the DDNS screen, select TZO.com from the DDNS Service Provider drop-down menu. 2. Sign up for a free, 30-day trial of TZO service at www.tzo. com/order.html . Write down your account information. 3. Complete the Email Address, TZO Password Key, and Domain Name fields. 4. Once you are done changing the settings, click the Save Settings button to apply your changes or Cancel Changes to revert to what they were before. For further information, click Help. Internet IP Address: The Router’s current Internet IP Address is displayed here. Status: The status of the DDNS service connection is displayed here. 12 MAC Address Clone A MAC address is a 12-digit code assigned to a unique piece of hardware for identification. Some ISPs will require you to register a MAC address in order to access the Internet. If you do not wish to re-register the MAC address with your ISP, you may assign the MAC address you have currently registered with your ISP to the Router with the MAC Address Clone feature. MAC Address Clone Enabled/Disabled: To have the MAC Address cloned, select Enabled. MAC Address: Enter the MAC Address registered with your ISP here. Clone My PC’s MAC: Clicking this button will clone the MAC address of the PC you are currently using. Once you are done changing the settings, click the Save Settings button to apply your changes or Cancel Changes to revert to what they were before. For further information, click Help. 13 Basic Wireless Configuration Wireless Network Basic Wireless Settings If you are connecting computers via an 802.11b, 802.11g, 802.11n or any combination of those protocols to your network, you may need to configure one or more of these settings. Wireless: You can enable or disable the wireless function. Network Mode: From this drop-down menu, you can select the wireless standards running on your network. If you are only using one 802.11 variant, then select that one. Otherwise select the option the consists of the versions that will be connecting. Network Name (SSID): The service set identifier (SSID) or network name. It is case sensitive and must not exceed 32 characters, which may be any keyboard character. Radio Band: This determines which band you’re using, which can affect transmission speed. 20MHz Channel could reach 150 Mbps, and 40 MHz could reach 300 Mbps. Channel: Select the appropriate channel from the list provided to correspond with your network settings. All devices in your wireless network must broadcast on the same channel in order to communicate. Ext Channel: When 40MHz has been selected with Band Width, two channels - a Control Channel and an Extension Channel - are used. This chooses the extension channel. 14 SSID Broadcast: When wireless clients survey the local area for wireless networks to associate with, they will detect the SSID broadcast by the Router. To broadcast the Router’s SSID, keep the default setting, Enabled. If you do not want to broadcast the Router’s SSID, then select Disabled. WPS: WPS function is an easy-to-use encryption, so you can keep your wireless connection safe. The default setting is to have it enabled. If you do not want to enable the WPS function, then select Disabled. PIN Code of client: Type the client’s PIN code here then click “Connect” button in order to enable that machine’s WPS connection. Once you are done changing the settings, click the Save Settings button to apply your changes or Cancel Changes to revert to what they were before. Wireless Security The Wireless Security settings configure the security of your wireless network. There are six wireless security mode options supported by the Router: WEP, WPA-Personal(WPA-PSK), WPA-Enterprise(WPA), WPA2-Personal(WPA2-PSK), WPA2Enterprise(WPA2). and 802.1X. In the following descriptions, WEP stands for Wired Equivalent Privacy, while RADIUS stands for Remote Authentication Dial-In User Service. Wireless Security The security options are the same and independent for your Wireless-B and Wireless-G networks. You can use different wireless security methods for your networks; however, within each network (Wireless-B or Wireless-G), all devices must use the same security method and settings. Security Mode: t WEP: WEP is a basic encryption method; select a level of WEP encryption, 40/64-bit or 128-bit. If you want to use a Passphrase, then enter it in the Passphrase field and click the Generate button. If you want to enter the WEP key manually, then enter it in the WEP Key 1-4 field(s). To indicate which WEP key to use, select the appropriate TX Key number. t WPA-Personal(WPA-PSK), WPA-Personal(WPA-PSK): This method offers two encryption methods, TKIP and AES, with dynamic encryption keys. Select the type of encryption method you want to use, TKIP or AES. Enter the Passphrase, which can have 8 to 63 characters. Then enter the Key Renewal period, which instructs the Router how often it should change the encryption keys. 15 t WPA-Enterprise(WPA), WPA-Enterprise(WPA): These options feature a WPA-Personal used in coordination with a RADIUS server that uses either EAP-TLS or PEAP as its authentication method. (This should only be used when a RADIUS server is connected to the Router.) First, select the type of encryption method you want to use, TKIP or AES. Enter the RADIUS servers IP address and port number, along with the authentication key shared by the Router and the server. Finally, enter the Key Renewal period, which instructs the Router how often it should change the encryption keys. t .x: Is designed to enhance the security of wireless local area networks (WLANs) that follow the IEEE 802.11 standard. 802.1X provides an authentication framework for wireless LANs, allowing a user to be authenticated by a central authority. This central authority is commonly called RADIUS Server. Once you are done changing the settings, click the Save Settings button to apply your changes or Cancel Changes to revert to what they were before. Wireless MAC Filter This function allows administrator to have access control by enter MAC address of wireless devices which transmitting within your wireless network. Wireless MAC Filter Access Restrictions This policy can effectively control each wireless device using the wireless network. Enable this function to filter wireless devices by MAC Address, either permitting or blocking access. If you do not want to filter users by MAC Address, select Disabled. Prevent PCs listed below from accessing the wireless network: Select this option will block selected wireless client by MAC address. Permit PCs listed below to access the wireless network: Select this option will permit selected wireless client by MAC Address. Wireless Address Filter List 16 Wireless Client Table: Click the Wireless Client MAC Table button to display a list of wireless clients by MAC Address. From the “Sort by” drop-down menu, you can sort the table by Client Name, Interface, IP Address, MAC Address. If you want to add any of the wireless clients to the Wireless MAC Filter List, then click the On the List checkbox and then click the Save Settings button. Click the Cancel Changes button to cancel your changes. To view the most updated information, click the Refresh button. To exit this screen, click the Close button. Once you are done changing the settings, click the Save Settings button to apply your changes or Cancel Changes to revert to what they were before. 17 Advanced Wireless Settings This section provides Router’s advanced wireless settings. These settings should be adjusted carefully. Any improper settings will affect the Router’s wireless performance. Advanced Wireless Frame Burst Mode Enabling this option should provide your network with greater performance, depending on the manufacturer of your wireless products. If you are not sure how to use this option, keep the default, Enabled. AP Isolation This isolates all wireless clients and wireless devices on your network from each other. Wireless devices will be able to communicate with the Router but not with each other. To use this function, click Enabled. AP Isolation is disabled by default. Authentication Type The default is set to Auto (Default), allows either Open System or Shared Key authentication to be used. With Open System authentication, the sender and the recipient do NOT use a WEP key for authentication. With Shared Key authentication, the sender and recipient use a WEP key for authentication. Basic Rate The Basic Rate setting is not actually one rate of transmission but a series of rates at which the Router can transmit. The Router will advertise its Basic Rate to the other wireless devices in your network, so they know which rates will be used. The Router will also advertise that it will automatically select the best rate for transmission. The default setting is Default, when the Router can transmit at all standard wireless rates (1-2Mbps, 5.5Mbps, 11Mbps, 18Mbps, and 24Mbps). Other options are 1-2Mbps, for use with older wireless technology, and All, when the Router can transmit at all wireless rates. The Basic Rate is not the actual rate of data transmission. If you want to specify the Router's rate of data transmission, configure the Transmission Rate setting. 18 Transmission Rate The rate of data transmission should be set depending on the speed of your wireless network. You can select from a range of transmission speeds, or you can select Auto (Default) to have the Router automatically use the fastest possible data rate and enable the Auto-Fallback feature. Auto-Fallback will negotiate the best possible connection speed between the Router and a wireless client. The default value is Auto (Default). Transmission Power (Transmit Power Control) The greater the transmission power used, the larger the area a wireless network covers. To minimize the likelihood of eavesdropping by unauthorized wireless users, do not use more transmission power than necessary to cover the range needed by your wireless network. Try using the Router at different levels of transmission power, and determine how much power is needed to reach the wireless client, such as a PC or access point, that is farthest from the Router. Then select the appropriate level, Full (Default), Half, Quarter, Eighth, or Min, from the drop-down menu. The default is Full (Default). CTS Protection Mode CTS (Clear-To-Send) Protection Mode should be set to Auto (Default). The Router will automatically use CTS Protection Mode when your Wireless-G products are experiencing severe problems and are not able to transmit to the Router in an environment with heavy 802.11b traffic. This function boosts the Router's ability to catch all Wireless-G transmissions but will severely decrease performance. If you do not want to use CTS Protection Mode at all, select Disabled. Beacon Interval The default value is 100. The Beacon Interval value indicates the frequency interval of the beacon. A beacon is a packet broadcast by the Router to synchronize the wireless network. DTIM Interval This value indicates the interval of the Delivery Traffic Indication Message (DTIM). A DTIM field is a countdown field informing clients of the next window for listening to broadcast and multicast messages. When the Router has buffered broadcast or multicast messages for associated clients, it sends the next DTIM with a DTIM Interval value. Its clients hear the beacons and awaken to receive the broadcast and multicast messages. The default value is 1. Fragmentation Threshold This value specifies the maximum size for a packet before data is fragmented into multiple packets. If you experience a high packet error rate, you may slightly increase the Fragmentation Threshold. Setting the Fragmentation Threshold too low may result in poor network performance. Only minor reduction of the default value is recommended. In most cases, it should remain at its default value of 2346. 19 RTS Threshold Should you encounter inconsistent data flow, only minor reduction of the default value, 2312, is recommended. If a network packet is smaller than the preset RTS threshold size, the RTS/CTS mechanism will not be enabled. The Router sends Request to Send (RTS) frames to a particular receiving station and negotiates the sending of a data frame. After receiving an RTS, the wireless station responds with a Clear to Send (CTS) frame to acknowledge the right to begin transmission. The RTS Threshold value should remain at its default value of 2312. Once you are done changing the settings, click the Save Settings button to apply your changes or Cancel Changes to revert to what they were before. 20 Wireless WDS Settings WDS (Wireless Distribution System) is comprised of a bridging and/or a repeater mode. Wireless bridging is where the WDS APs communicate only with each other to bridge together two separate networks. Wireless repeating is where the WDS APs rebroadcasts the received signals to extend reach and range. Wireless Network WDS Mode: Restricted Mode - It's working as a repeater. Disabled - WDS function disabled. AP List: You can enter the MAC address which you would like to connect to. Once you are done changing the settings, click the Save Settings button to apply your changes or Cancel Changes to revert to what they were before. 21 VPN Passthrough VPN Passthrough This Router provides VPN Pass through function for LAN clients behind the Router to build VPN tunnels for secure networking. Use the settings on this tab to allow VPN tunnels using IPSec, L2TP, or PPTP protocols to pass through the Router’s firewall. IPSec Passthrough: Internet Protocol Security (IPSec) is a suite of protocols used to implement secure exchange of packets at the IP layer. IPSec Pass-Through is enabled by default. To disable IPSec Passthrough, select Disabled. L2TP Passthrough: Layer 2 Tunneling Protocol is the method used to enable Point-to-Point sessions via the Internet on the Layer 2 level. L2TP Pass-Through is enabled by default. To disable L2TP Passthrough, select Disabled. PPTP Passthrough: Point-to-Point Tunneling Protocol (PPTP) allows the Point-to-Point Protocol (PPP) to be tunneled through an IP network. PPTP Pass-Through is enabled by default. To disable PPTP Passthrough, select Disabled. Once you are done changing the settings, click the Save Settings button to apply your changes or Cancel Changes to revert to what they were before. 22 Internet Access Policy The Internet Access Policy screen allows you to block or allow specific kinds of Internet usage and traffic, such as Internet access, designated applications, web sites, and inbound traffic during specific days and times. Internet Access Policy Access Policy Access can be managed by a policy. Use the settings on this screen to establish an access policy (after the Save Settings button is clicked). Selecting a policy from the drop-down menu will display that policy’s settings. To delete a policy, select that policy’s number and click the Delete This Policy button. To view all the policies, click the Summary button. On the Summary screen, the policies are listed with the following information: Number, Policy Name, Access, Days, Time, and status (Enabled) to view. To delete a policy, click its Delete button. Click the Save Settings button to save your changes, or click the Cancel Changes button to cancel your changes. To return to the Internet Access Policy tab, click the Close button. To create an Internet Access policy: 1. Select a number from the Access Policy drop-down menu. 2. Enter a Policy Name in the field provided. 3. Select a number from the Access Policy drop-down menu. 4. Enter a Policy Name in the field provided. 5. To enable this policy, click Enabled. 6. Click the Edit List button to select which computers will be affected by the policy. The Internet Access PCs List screen will appear. You can select a computer by MAC Address or IP Address. You can also enter a range of IP Addresses if you want this policy to affect a group of computers. After making your changes, click the Save Settings button to apply your changes or Cancel Changes to cancel your changes. Then click the Close button. 7. Click the appropriate option, Deny or Allow, depending on whether you want to block or allow Internet access for the computers you listed on the List of PCs screen. 23 8. Decide which days and what times you want this policy to be enforced. Select the individual days during which the policy will be in effect, or select Everyday. Then enter a range of hours and minutes during which the policy will be in effect, or select 24 Hours. 9. You can also block access by URL address by entering it in the Website Blocking by URL Address field or by Keyword by entering it in the Website Blocking by Keyword field. Click the >> button to add a selection to the Blocked Applications list. 10. You can filter access to various applications accessed over the Internet, such as FTP or telnet, by selecting up to three applications from the drop-down menus under Applications. If the application you want to block is not listed or you want to edit an application’s settings, then create a new one by entering an Application Name, Port Range, and Protocol. Then, click Add. Once you are done changing the settings, click the Save Settings button to apply your changes or Cancel Changes to revert to what they were before. Port Range Forwarding The Port Range Forwarding screen allows you to set up public services on your network, such as web servers, ftp servers, email servers, or other specialized Internet applications. Before using forwarding, you should assign static IP addresses to the designated PCs. Port Range Forwarding To forward a service from local network, please fill in the relevant information on each field. Application Name In this field, enter the name you wish to give the application. 24 Start/End This is the port range. Enter the port number or range of external ports used by the server or Internet application. Check with the software documentation of the Internet application for more information. Protocol Select the protocol(s) used for this application, TCP and/or UDP. To IP Address For each application, enter the IP address of the PC running the specific application. Enabled Click the “Enabled” check box to enable port forwarding for the relevant application. Once you are done changing the settings, click the Save Settings button to apply your changes or Cancel Changes to revert to what they were before. 25 Port Range Triggering The Port Range Triggering screen allows the Router to watch outgoing data for specific port numbers. The IP address of the computer that sends the matching data is remembered by the Router, so that when the requested data returns through the Router, the data is pulled back to the proper computer by way of IP address and port mapping rules. Port Range Triggering Application Name: Enter the application name of the trigger. Triggered Range: For each application, list the triggered port number range. Check with the Internet application documentation for the port number(s) needed. In the first field, enter the starting port number of the Triggered Range: In the second field, enter the ending port number of the Triggered Range. Forwarded Range: For each application, list the forwarded port number range. Check with the Internet application documentation for the port number(s) needed. In the first field, enter the starting port number of the Forwarded Range. In the second field, enter the ending port number of the Forwarded Range. Enabled: Click the Enabled check box to enable port range triggering for the relevant application. 26 Once you are done changing the settings, click the Save Settings button to apply your changes or Cancel Changes to revert to what they were before. DMZ The DMZ feature allows one network user to be exposed to the Internet for use of a special-purpose service such as Internet gaming or videoconferencing. DMZ hosting forwards all the ports at the same time to one computer. The Port Range Forwarding feature is more secure because it only opens the ports you want to have opened, while DMZ hosting opens all the ports of one computer, exposing the computer to the Internet. Any computer whose port is being forwarded must have its DHCP client function disabled and should have a new static IP address assigned to it because its IP address may change when using the DHCP function DMZ To expose one computer, select Enabled. Internet Source IP Address: If you want to allow any Internet IP address to access the exposed computer, select Any IP Address. If you want to allow a specific IP address or range of IP addresses to access the exposed computer, select the second option and enter the IP address or range of IP addresses in the fields provided. Destination Host IP Address: Enter the IP address of the computer you want to expose. Once you are done changing the settings, click the Save Settings button to apply your changes or Cancel Changes to revert to what they were before. 27 Management This section allows the network’s administrator to manage specific Router functions for access and security. Router Password Router Password and Re-enter to Confirm: You can change the Router’s password from here. Enter a new Router password and then type it again in the Re-enter to Confirm field to confirm. Remote Router Access Remote Management: To access the Router remotely, from outside of local network, select Enabled. Otherwise, leave it set to Disabled. Remote Upgrade: If you want to be able to upgrade the Router remotely, from outside of local network, select Enabled. (You must have the Remote Management feature enabled as well.) Otherwise, leave it set to Disabled. Allow Remote IP Address: If you want to be able to access the Router from outside with any external IP address, select Any IP Address. If you want to specify an external IP address or range of IP addresses, then select the second option and complete the fields provided. Remote Management Port: Enter the port number that will be open to outside access. 28 UPnP Universal Plug and Play (UPnP) is a distributed, open networking architecture that leverages TCP/IP and the Web technologies to enable seamless proximity networking in addition to control and data transfer among networked devices in the home, office, and public spaces. UPnP: If you want to use UPnP, keep the default setting, Enabled. Otherwise, select Disabled. Backup and Restore Backup Settings: To back up the Router’s configuration, click this button and follow the on-screen instructions. Restore Settings: To restore the Router’s configuration, click this button and follow the on-screen instructions. (You must have previously backed up the Router’s configuration.) Once you are done changing the settings, click the Save Settings button to apply your changes or Cancel Changes to revert to what they were before. Log The Router can keep logs of all traffic for your Internet connection. This feature is disabled by default. To keep activity logs, select Enable. Log To disable the Log function, keep the default setting, Disabled. To monitor traffic between the network and the Internet, select Enabled. Log viewer IP Address: For a permanent record of the Router’s activity logs, Log viewer software must be used.The Log viewer saves all incoming and outgoing activity in a permanent file on your PC’s hard drive. In the Logviewer IP Address field, enter the fixed IP address of the PC running the Log viewer software. The Router will now send updated logs to that PC. View Log: When you wish to view the logs, click View Log. A new screen will appear. Select Incoming Log or Outgoing Log from the Type drop-down menu. The Incoming Log will display a temporary log of the Source IP Addresses and Destination Port Numbers for the incoming Internet traffic. Click the Save the Log 29 button to save this information to a file on your PC’s hard drive. Click the Refresh button to update the log. Click the Clear button to clear all the information that is displayed. The Outgoing Log will display a temporary log of the LAN IP Addresses, Destination URLs or IP Addresses, and Service or Port Numbers for the outgoing Internet traffic. Click the Save the Log button to save this information to a file on your PC’s hard drive. Click the Refresh button to update the log. Click the Clear button to clear all the information that is displayed. Once you are done changing the settings, click the Save Settings button to apply your changes or Cancel Changes to revert to what they were before. Diagnostics The diagnostics function provides two ways to check Router’s status of Internet connection. Diagnostics Ping Test This utility verifies configurations and tests IP connectivity between two computers. Ping sends an ICMP request from the source computer, and the destination computer responds with an ICMP reply. To IP or URL Address: Enter the IP address or URL that you want to ping. Packet Size: Enter the size of the packet you want to use. Times to Ping: Select the number of times you wish to ping: 5, 10, 15, or Unlimited. 30 Start to Ping: Click this button to begin the test. A new screen will appear and display the test results. Click the Close button to return to the Diagnostics screen. Traceroute Test The Traceroute function provides a trace for the route that a packet takes to destination. To IP or URL Address: Enter the destination IP address or URL that you want to trace the routes. Start to Traceroute: Click this button to begin the Tracerouter. A new screen will appear and display the trace results. Click the Close button to return to the Diagnostics screen. Factory Defaults This Factory Defaults allows you to restore the Router’s configuration to its factory default settings. Factory Defaults Restore Factory Defaults: Click this button to reset all configuration settings to their default values. Any settings you have saved will be lost when the default settings are restored. 31 Router Status The Router screen on the Status Tab displays information about the Router and its current settings. The Internet Connection information will vary depending on the Internet Connection Type you use. Router Information Firmware Version: This is the Router’s current firmware. Current Time: This shows the time by the time zone you selected on the Setup Tab. Internet MAC Address: This is the Router’s MAC Address. Host Name: If required by your ISP, it would be entered on the Setup Tab. Domain Name: If required by your ISP, it would be entered on the Setup Tab. Internet Connection Connection Type: This indicates the current Internet connection type you are using. Login Status: The status of the connection is displayed only for a PPPoE connection. For this dial-up style connection, click the Connect button to click if there is no connection and you want to establish an Internet connection. When your PPPoE connection is active, you can click the Disconnect button to end the connection. Internet IP Address: The Router’s Internet IP Address. Subnet Mask and Default Gateway: The Router’s Subnet Mask and Default Gateway address are displayed here. DNS1-3: The DNS (Domain Name System) IP addresses currently is used by the Router. At least one DNS IP should be used for domain name resolution. 32 MTU: MTU is the Maximum Transmission Unit. It specifies the largest packet size permitted for Internet transmission. Select Manual if you want to manually enter the largest packet size that will be transmitted. The recommended size, entered in the Size field, is 1500. You should leave this value in the 1200 to 1500 range. To have the Router select the best MTU for your Internet connection, please select the default setting – Auto. IP Release: Available for a DHCP connection, click this button to release the current IP address of the device connected to the Routers Internet port. IP Renew: Available for a DHCP connection, click this button to replace the current IP address of the device connected to the Routers Internet port with a new IP address. Click the Refresh button to update the on-screen information. Local Network Status The Local Network screen on the Status Tab displays the status of your network. Local Network Local MAC Address: This is the Router’s local MAC Address. Router IP Address: This is the Router’s local IP Address. Subnet Mask: This is the Router’s local subnet mask. DHCP Server DHCP Server: The Router’s embedded DHCP server status. Start IP Address: This is beginning range of assigned IP by Router’s DHCP server. 33 End IP Address: This is end range of assigned IP by Router’s DHCP server. DHCP Client Table: Clicking this button will open a screen to show which hosts are using the Router as a DHCP server. On the DHCP Client Table screen, you will see a list of DHCP clients with the following information: Client Names, Interfaces, IP Addresses, MAC Addresses, and the assigned IP addresses expired time. From the To Sort by drop-down menu, you can sort the table by Client Name, Interface, IP Address, or MAC Address. To remove a DHCP client from this list, click its Delete button. To view the most up-to-date information, click the Refresh button. To exit this screen, click the Close button. Wireless Network Status The Wireless Network screen on the Status Tab displays the information of your Wireless networks. Wireless Network MAC Address: This is the Router’s Wireless-G band MAC Address. Mode: This displays the Wireless-G band network mode. Network Name (SSID): The Wireless-G band network name. Channel: The current G band channel you are using. Security: This displays what type of encryption you are using. SSID Broadcast: This displays the Router’s SSID Broadcast status. 34 Troubleshooting I’m trying to log on the MaxPower 802.11n/g/b Wireless Router’s Web configuration page, but I do not see the login screen. Possible Solutions t Make sure you have typed the IP address (default address 192.168.1.1) correctly in the address field in your Web browser. t Make sure the physical connection is established. If you have a wired connection to this Router, check whether the relevant LAN LED is lit or not. I need to set up a server behind my MaxPower 802.11n/g/b Wireless Router and make it available to the public. This is the MaxPower 802.11n/g/b Wireless Router’s forwarding function. Please refer to the section in this manual on Port Range Forwarding. Generally, when setting up a web, ftp, or mail server, you need to know which port numbers they are using. For example, port 80 (HTTP) is used for web; port 21 (FTP) is used for FTP, and port 25 (SMTP outgoing) and port 110 (POP3 incoming). Below is an example for how to set up a FTP server behind Router for public network access. 1. Log on to the MaxPower 802.11n/g/b Wireless Router’s configuration page, by going to http://192.168.1.1 (or the IP address that you have changed it to) in your Web browser. 2. Select the Applications & Gaming => Port Range Forwarding tab. 3. Enter any name you want to use, such as “FTP service”. 4. Enter the appropriate External Port range of the FTP service you are using. For example, your FTP service port range should be port 20 ~ 21. 5. Select the protocol, TCP and UDP. 6. Enter the FTP server’s local IP address. For example, if your FTP server’s IP address is 192.168.1.10, then you should enter 10 in the address field. 7. Click the Enabled checkbox to enable this service then click the Save Settings button to apply your changes 35 I forgot my password. How do I log in to reset it? 1. Reset the MaxPower 802.11n/g/b Wireless Router by pressing the Reset button for 10 seconds then releasing it. 2. Log on to the MaxPower 802.11n/g/b Wireless Router’s configuration page, by going to http://192.168.1.1 (or the IP address that you have changed it to) in your Web browser. 3. Leave the username blank. The default password is “admin”. How do I reset the MaxPower 802.11n/g/b Wireless Router to it’s default settings? Reset the Router to factory default by pressing the Reset button for 10 seconds then releasing it. After releasing the Reset button, the Router revert to factory defaults and then reboot itself. My MaxPower 802.11n/g/b Wireless Router will not turn on. No LED’s light up. Most of the time, this is simply a result in a break in the power chain, from the wall outlet to the Router, itself. Double check all connections, making sure all points are securely attached I can’t access the MaxPower 802.11n/g/b Wireless Router from a wireless client. Usually, inability to connect to the MaxPower 802.11n/g/b Wireless Router is caused by one of the following issues: t Settings are not the same among each wireless adapter. t Out of range. t IP Address is not set correctly. Make sure that the mode, SSID, Channel and encryption settings are set the same on each wireless adapter. Make sure that your computer is within range and free from any strong electrical devices that may cause interference. What devices cause interference? 36 The MaxPower 802.11n/g/b Wireless Router is operating in the unlicensed 2.4 GHz band. Other devices operating in this frequency range that may cause interference include microwave ovens and 2.4 GHz portable phones. Computers and analog cellular phones do not operate at 2.4 GHz and do not cause interference. Proper placement of access points usually eliminates interference problems created by other 2.4 GHz devices. Contacting Tech Support / Customer Service If you still need support, there are two ways to contact Technical Support / Customer Service t Phone » 815-308-7001 » 8am–9pm CST Monday–Friday » 9am–4pm CST Saturday t email » You can Submit your email support request at: http://helpcenter.newertech.com/ 37 Copyrights Copyright © 2007 Newer Technology, Inc. All rights reserved. No part of this publication may be reproduced, stored in a retrieval system, or transmitted in any form or by any means, electronic, mechanical, photocopying, recording or otherwise, without the prior written consent of Newer Technology. Changes The material in this document is for information only and subject to change without notice. While reasonable efforts have been made in the preparation of this document to assure its accuracy, Newer Technology assumes no liability resulting from errors or omissions in this document, or from the use of the information contained herein. Newer Technology reserves the right to make changes or revisions in the product design or the product manual without reservation and without obligation to notify any person of such revisions and changes. FCC Interference Statement: This equipment has been tested and found to comply with the limits for a Class B digital device, pursuant to Part 15 of the FCC Rules. These limits are designed to provide reasonable protection against harmful interference in a residential installation. This equipment generates, uses and can radiate radio frequency energy and, if not installed and used in accordance with the instructions, may cause harmful interference to radio communications. However, there is no guarantee that interference will not occur in a particular installation. If this equipment does cause harmful interference to radio or television reception, which can be determined by turning the equipment off and on, the user is encouraged to try to correct the interference by one of the following measures: t Reorient or relocate the receiving antenna. t Increase the separation between the equipment and receiver. t Connect the equipment into an outlet on a circuit different from that to which the receiver is connected. t Consult the dealer or an experienced radio/TV technician for help. FCC Caution: Any changes or modifications not expressly approved by the party responsible for compliance could void the user’s authority to operate this equipment. This device complies with Part 15 of the FCC Rules. Operation is subject to the following two conditions: (1) This device may not cause harmful interference, and (2) this device must accept any interference received, including interference that may cause undesired operation. IMPORTANT NOTE: FCC Radiation Exposure Statement: This equipment complies with FCC radiation exposure limits set forth for an uncontrolled environment. This equipment should be installed and operated with minimum distance 20cm between the radiator & your body. This transmitter must not be co-located or operating in conjunction with any other antenna or transmitter. The availability of some specific channels and/or operational frequency bands are country dependent and are firmware programmed at the factory to match the intended destination. The firmware setting is not accessible by the end user. The MXP802NPCM / MXP802NU2C / MXP802NPCI / MXP802NRTR (FCC ID UNH - MXP802NPCM, MXP802NU2C, MXP802NPCI, MXP802NRTR) is limited in CH1~CH11 for 2.5GHz by specified firmware controlled in U.S.A. R&TTE Compliance Statement Product Article Code: MXP802NPCM / MXP802NU2C / MXP802NPCI / MXP802NRTR Product Description: Wireless-N Notebook Adapter / Wireless-N USB Dongle / Wireless-N PCI Adapter / Wireless-N Broadband AP/Router Product Manufacturer / Importer: Newer Technology, Inc. 38 This equipment complies with all the requirements of DIRECTIVE 1999/5/EC OF THE EUROPEAN PARLIAMENT AND THE COUNCIL of March 9, 1999 on radio equipment and telecommunication terminal Equipment and the mutual recognition of their conformity (R&TTE) The R&TTE Directive repeals and replaces in the directive 98/13/EEC (Telecommunications Terminal Equipment and Satellite Earth Station Equipment) As of April 8, 2000. Safety This equipment is designed with the utmost care for the safety of those who install and use it. However, special attention must be paid to the dangers of electric shock and static electricity when working with electrical equipment. All guidelines of this and of the computer manufacture must therefore be allowed at all times to ensure the safe use of the equipment. EU Countries Intended for Use The ETSI version of this device is intended for home and office use in Austria, Belgium, Denmark, Finland, France, Germany, Greece, Ireland, Italy, Luxembourg, the Netherlands, Portugal, Spain, Sweden, and the United Kingdom. The ETSI version of this device is also authorized for use in EFTA member states: Iceland, Liechtenstein, Norway, and Switzerland. EU Countries prohibited for use None. EU Countries where usage of the product as described below is limited to: France: The use of other channels than 10 through 13 is prohibited by law. Health And Safety Precautions t Read this User’s Guide carefully, and follow the correct procedure when setting up the device. t Do not open your wireless product or attempt to disassemble or modify it. Never insert any metallic object into the drive to avoid any risk of electrical shock, fire, short-circuiting or dangerous emissions. Your wireless product contains no user-serviceable parts. If it appears to be malfunctioning, have it inspected by a qualified Newer Technology Technical Support representative. t Never expose your device to rain, or use it near water, or in damp or wet conditions. Never place objects containing liquids on the drive, as they may spill into its openings. Doing so increases the risk of electrical shock, short-circuiting, fire or personal injury. General Use Precautions: t Do not expose the wireless product to temperatures outside the range of 5° C to 40° C (41° F to 104° F). Doing so may damage the drive or disfigure its casing. Avoid placing your wireless product near a source of heat or exposing it to sunlight (even through a window). Inversely, placing your wireless product in an environment that is too cold or humid may damage the unit. t Always unplug the wireless product from the electrical outlet if there is a risk of lightning or if it will be unused for an extended period of time. Otherwise, there is an increased risk of electrical shock, short-circuiting or fire. t Use only the power supply shipped with the device. t Do not use the wireless product near other electrical appliances such as televisions, radios or speakers. Doing so may cause interference which will adversely affect the operation of the other products. t Do not place the wireless product near sources of magnetic interference, such as computer displays, televisions or speakers. Magnetic interference can affect the operation and stability of your wireless product. t Do not place heavy objects on top of the wireless product or use excessive force on it. t Never use excessive force on your wireless product. If you detect a problem, consult the Troubleshooting section in this manual. t Protect your wireless product from excessive exposure to dust during use or storage. Dust can build up inside the device, increasing the risk of damage or malfunction. t Newer Technology recommends the use of normal glass cleaning products to keep the high lustre finish at it’s finest with this product. Be sure to not get any moisture inside the holes and if you do, allow time to air dry before use. t Do not block the ventilation outlets on the rear of the wireless product. These help to keep your drive cool during operation. Blocking the ventilation outlets may cause damage to your drive and cause an increased risk of short-circuiting or fire. 39 NWTMAN802NRTR ®2007 Newer Technology, Inc. All Rights Reserved Revision 1, 11/07 - MCS