1
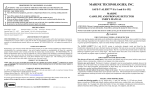
MARINE TECHNOLOGIES, INC.
TROUBLE SHOOTING GUIDE
Problem
Cause
No Power
Wire connections, missing or blown fuse, reversed wires, or defective unit.
Immediate Alarm When Turned On
Connecting Wire disconnected or broken Sensor assembly, check sensor assembly red light
No Audible Alarm
Return unit for repair or replacement.
No Alarm During Supervision Tests
Return unit for repair or replacement.
Red LED On Sensor Assembly Is Off
Unit is off, Cable disconnected or broken..
Continuous Alarm
Float Sensor installed upside down.
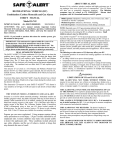
SA-1000XL MARINE
HIGH BILGE WATER ALARM
USER’S MANUAL
NOTE: To order a SA-1000XL call 1-800-383-0269
SPECIFICATIONS
0
0
• Operating Temp -22 F - 158 F
• Float Switch does not contain Mercury.
• Power 12 VAC, operational range 7-28 volts.
• 10 mA (.01 amp.) current draw
• Alarm triggers before maximum bilge water level is reached.
• Loud 100 decibel alarm
• Display Panel Size: 3-1/4"W x 2-3/4"H x 3/4"D.
-
• Meets ABYC H-22 section 22.7.3 effective
7/31/2006.
IMPORTANT
PLEASE READ CAREFULLY AND SAVE
ATTENTION: This user’s manual contains important alarm installation, operation, trouble shooting
and warranty information. Read, follow, and keep this manual for future reference.
NOTE: If you install or purchase this alarm for another person, give this manual to that person.
LIMITED PRODUCTS WARRANTY
MTI INDUSTRIES, INC. warrants to the original retail purchaser that its products will be free from defects of material or workmanship for a
period of One (1) year from the date of retail purchase. If proven to have been defective in original materials or workmanship and returned,
delivery costs prepaid, MTI INDUSTRIES, INC. will replace this product free of charge.
LIMITS OF WARRANTY
Replacement is your exclusive remedy under this limited warranty or any other warranty (including any implied warranty of merchantability for
a particular purpose). Any and all implied warranties or merchantability or fitness for a particular purpose shall be limited to the warranty period
from the original date of retail purchase. MTI INDUSTRIES, INC., its dealers and distributors shall in no case be responsible or in any way
liable for any incidental or consequential damages for any reason. Some states do not allow the limitation or exclusion of incidental or
consequential damages, or allow limitations on how long an implied warranty lasts, so the above limitations may not apply to you. This warranty
gives you specific rights, and you may also have other rights, which may vary, from state to state.
PRODUCT NOT WARRANTED
NOTE- There are no user serviceable parts inside the case. Opening any SAFE-T-ALERTTM product for any reason voids the
warranty. This warranty does not cover damage or failure resulting from acts of God, abuse, misuse, neglect, or faulty installation.
WARRANTY RETURN PROCEDURES
It is MTI’s experience that an alarm is sounding for a reason. Call, ask your dealer to call, or e-mail our Customer Service Department (as listed
below) to trouble shoot the situation.
Customer Service Phone No. - 800-383-0269
Fax No. 847-546-9007
E-mail [email protected]
Web Site: www.mtiindustries.com If Customer Service determines that the unit is defective, a Replacement Authorization (RA) number will be
issued. No product will be accepted for service or replacement without first obtaining a RA number.
©2006 MTI Industries, Inc. ALL RIGHTS RESERVED
MTI FORM NO: SA1000-1
! WARNING
WHY EVERY BOAT NEEDS A HIGH BILGE WATER ALARM
Every year, injuries, deaths and insurance loses can be attributed to boats sinking. Studies show that 80% of
boats sink at the dock while the other 20% sink in open water. Installing a bilge alarm is an important safety
measure. The ABYC has required a Bilge Alarm be installed on all new boats with an enclosed
accommodation compartment since July 1, 2006.
The SAFE-T-ALERT™ SA-1000 High Bilge Water Alarm is exclusively designed and tested for use in the
harsh marine environment. The unit is an early warning alarm that monitors for high bilge water.
! WARNING
LIMITATIONS OF HIGH BILGE WATER ALARMS
Alarms will not work without power. Some reasons your alarm may not have power include an open circuit breaker,
a blown or missing fuse, a broken wire or improper wire crimp connection.
This alarm may not be heard. The alarm’s loudness is designed to meet or exceed regulatory standards; however,
the alarm may not be heard if units are remotely located. Individuals who are hard-of-hearing, have consumed
alcoholic beverages, have taken prescription, non-prescription or illegal drugs may not hear the alarm. If your boat has
many sleeping areas, consider installing additional alarms in each area. Neighboring boaters or Marina personal may
not hear the alarm.
This alarm will only indicate the presence of high water at the float sensor. The float sensor cannot monitor a
compartment that is separated by a bulkhead. High water may be present in other areas of the boat. MTI recommends
that additional High water alarms be installed in areas where water may accumulate.
A High Water Bilge Alarm is not a replacement for an insurance policy on your boat. Always fully insure your
boat and make sure it covers sinking and other water damage coverage.
2.
When the sensor detects bilge water above the alarm threshold levels, the alarm will sound and the RED alarm light
will activate. The alarm will continue until the water level returns to safe levels. See PROCEDURES TO TAKE
DURING AN ALARM.
INSTALLATION INSTRUCTIONS
Assemble the following supplies: An electric drill, ¼” and 3/8” drill bits, screwdrivers (Phillips and slotted),
stainless-steel screws, 18 gauge wire, inline fuse holder, 1A fuse, wire stripper, crimping tool, crimp
connectors, cable ties.
The SA-1000XL has supervision circuits to warn of a missing float sensor, malfunction, and disconnected or broken
wires.
When you have the supplies on hand, take the following steps:
TESTING
Installing the Control Panel
1. Locate the control panel at the helm or in the cabin where it can be easily seen and heard. Check first to be
sure that there is at least 3 inches of clearance behind the location to allow for mounting and wiring. Mark
and drill holes for mounting screws and wires. DO NOT CONNECT POWER UNTIL THE
INSTALLATION IS COMPLETE.
2. Connect the wire assembly to the control panel and run it to the bilge compartment. Secure the run every 18
inches with plastic wire supports.
Installing the Float Sensor
3. Using the two screws mount the water sensor about 4” above the automatic bilge pump switch or below the
MAXIMUN BILGE WATER LEVEL, as defined by ABYC H-22. Connect one wire lead to a water sensor wire
and the second lead to the other water sensor wire. Do not mount the sensor where it will get submerged in
water during normal boat operation. Mount the float sensor so the float hangs straight down from the
mounting bracket. The wires should enter the float sensor from the top. Leave extra wire so they can
travel up and down with the float and not interfere with its movement. If necessary attach wires to the wall
near the float sensor - do not pierce the wires.
!
WARNING - TEST THIS ALARM’S OPERATION AFTER THE BOAT HAS BEEN IN STORAGE,
BEFORE
EACH TRIP AND AT LEAST ONCE PER WEEK DURING USE.
Note: The SA-1000XL is designed to fail safe, but will only notify you of problems if power is supplied to the
Control panel of the alarm.
To Test the Control Panel:
1.
When the GREEN normal operation light is lit on the control panel, the sensor assembly can be tested.
2.
Press and hold in the Test / Reset button area on the control panel until the alarm sounds and RED Led flashes.
3.
Note: Pressing the Test/Reset Button will silence the alarm for 5 minutes. Wait 5 minutes before continuing
other tests.
To Test the Float Sensor Operation:
4.
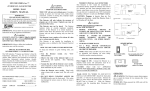
The assembled system should look similar to the following:
•
•
ADDITIONAL INSTALLATION TIPS
DO NOT mount the control panel under a cowling, or glass or plastic panel where it may not be seen or heard.
DO NOT locate the float switch within 12 inches of any heat or exhaust source. High heat may damage the float
sensor.
Power Supply 12vDC
Recommended Wire
Gauge 18-24 Ga.
FLOAT SENSOR: Hold the float sensor up as high as it well travel for at least 10 seconds. The alarm should
sound and the RED alarm light on the control panel should be flashing. Press Mute button to silence.
IF THE UNIT DID NOT TEST PROPERLY, REFER TO THE TROUBLE SHOOTING GUIDE
1.
2.
MAINTENANCE
Keep the Float sensor free of debris at all times, make sure float travels freely and inspect wire connections.
Clean the Control Panel by wiping with a damp cloth. Do not spray liquids into the sounder openings.
PROCEDURES TO TAKE DURING AN ALARM
! WARNING--ACTIVATION OF THIS ALARM INDICATES RISING WATER IN YOUR BOAT.
NEVER IGNORE A SOUNDING ALARM. TAKE THESE STEPS IF AN ALARM SOUNDS:
OPERATION
1.
Press the control panel’s Test/Mute Pad. The ALARM (RED light should light. Press the TEST pad to check the
operation of the alarm sounder and alarm light. This also temporarily silences the alarm. In about five minutes the ON
(GREEN) light will light and the ALARM (RED) light will turn off. The unit is now operational and is monitoring for
high bilge water conditions.
- Do not panic.
- Continue safe navigation and operation of your vessel.
- Check if the bilge pump is running and make sure water is discharging overboard.
- If it is not running, manually start bilge pump.
- Open the hatch or compartment and try to determine the cause of the water leak.
If water is entering the boat faster than the pump can discharge, put on life jackets
and head for safe harbor. Safe navigation and operation always applies.
- Radio the Coast Guard and inform them of your situation.