1
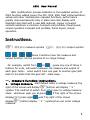
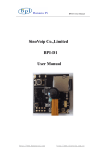
LB01 User Manual
LB01 User M anual
LB01 multifunction process calibrator is the updated version of
Z001,function added,covers the PLC, DCS, ESD, field instrumentation,
valves and other maintenance required functions, performance
greatly improved.Security fully in place and clear display with
backlight and shell with a new ABS material, copper connector
contact resistance is minimal. Compact and portable, Panel layout,
simple operation.Compact and portable, Panel layout, simple
operation.
Instructions:
:测量标识 measure symbol
: 输出标识 output symbol
、
、
、
those 4 buttons have the measure and
output function, On the premise of no range change
(for example, switch from
to
),press any one of those 4
buttons for once, will switch between the measure and output of
each gear. Note: when switch from one gear to another gear,Will
back to the state that this gear left(state keep).
一、m easure function instruction :
1、 voltage m easure:start default state is voltage measure,Top
right of the screen will display
,bottom will display“ V ”
symbol. The method of switch from other gear to voltage measure
state:whichever gear you at,press
display
display
measure.
; if Top right of the screen
,press again
,wait Top right of the screen
,bottom display“ V ”symbol,then can enter voltage
1
2、 Current m easure:whichever gear you at,press
right of the screen display
,press again
,if Top
,wait Top right of
the screen display
,bottom display“ mA ”symbol,then can
enter current measure.
3、 m V m easure and Therm ocouple tem perature m easure:
3.1、m V m easure:whichever gear you at,press
of the screen display
,press again
,if Top right
,wait Top right of the
screen display
,bottom display“ mV 、E、K、B、S、R、J、T、
n”any one of the symbol,under this state,if don’t display the
“mV ”symbol,press
or
to up/down page,wait bottom
display “ mV“symbol,then can enter mV measure.
3.2、E type Therm ocouple tem perature m easure :
whichever gear you at,press
,if Top right of the screen
display
,press again
,wait Top right of the screen
display
,bottom display “ mV 、E、K、B、S、R、J、T、n”
any one of the symbol,under this state,if don’t display the“E ”
symbol,press
or
to up/down page,wait bottom display “ E
“symbol,then can enter E type Thermocouple temperature measure.
2
At this moment, display the temperature value that Thermocouple
temperature measuring. Note:Thermocouple temperature measure
involves cold end compensation issue,So, when do the
Thermocouple temperature measure,Lower left of the screen will
display the Cold end temperature indication,how many number
shows,cold degree compensation will be the numbers. When doing
the Thermocouple temperature measure,make sure set the correct
Cold end temperature value. If wrong set, will lead to big error.The
method of setting Cold end temperature: press
,will see There’s one number at both right and left
side,left side number indicate it's the manually input Cold end
temperature value,when the number flashing,press
to
3
increase/reduce; right side number is the measured value by
the inner temperature measurement element of meter,cann”t
change,cycle press
,will change the flash turn of these 2
numbers,whichever those number flash, indicate which comes
into effect.
3.3 、other types Therm ocouple tem perature m easure:
This meter designed for 8 kinds of regular Thermocouple
temperature measure function(E、K、B、S、R 、J 、T、N ),the
detail use instruction is the same as E type Thermocouple
temperature measure.
4、resistance m easure and Pt10 0 、Cu50 tem perature
m easure:
4.1 、resistance m easure:whichever gear you at,press
Top right of the screen display
,press again
,if
,wait Top right
of the screen display
,bottom display “ Ω、Pt100、Cu50”any
one of the symbol,under this state,if don’t display the “Ω”
symbol,press
or
to up/down page,wait bottom display
“Ω“symbol,then can enter resistance measure.
4.2 、Pt10 0 tem perature m easure:whichever gear you
at,press
,if Top right of the screen display
,press again
,wait Top right of the screen display
,bottom display “ Ω、
Pt100、Cu50”any one of the symbol,under this state,if don’t
4
display the “Pt100”symbol,press
or
to up/down
page,wait bottom display “Pt100 “symbol,then can enter Pt100
temperature measure. Because this meter use two-wire system
measure method,if Pt100 measure element far from this meter,will
bring additional error,in order to compensate this error,there’s
compensation option setting. The method as below: first use the
resistance measure function, to measure the resistance value sent
by three-wire system pt100,choose the min resistance(normally,
only few ohm),write down. Cycle press“set”button,when the
bottom indicate“ Ω”symbol,use
to set the resistance
value that measured just now. Then back to Pt100 temperature
measure function,measure those 2 wires that with bigger resistance
of three-wire system,so can get the correct temperature value.
4.3、Cu50 tem perature m easure m ethod is the sam e as
Pt10 0 tem perature m easure.
二、Output function instruction:
1、voltage output:whichever gear you at,press
,if Top right
of the screen display
,press again
,wait Top right of the
screen display
,bottom display“ V ”symbol,then can enter
voltage output.Output voltage setted by
. These 2
buttons control increase/reduce by little
,work with“STEP”
button,can change step,can increase/reduce 0.1V once or 0.01V, the
default step is 0.1V.These 2 buttons control
increase/reduce
by big,step is 1V.
2、Current output:
2.1、source current output:whichever gear you
at,press
,if Top right of the screen display
,press
again
,wait Top right of the screen display
,check whether
top of the screen will display“有源 source”symbol,bottom only
display “ mA ”symbol,but don’t display“Prog 1”、 “Prog 2”、
5
“Prog 3”. If don’t display “有源 source”symbol ,press
or
to up/down page,until display “有源 source”、“ mA ”,then
can enter source current output state. Output current setted by
. These 2 buttons
control increase/reduce by
little,work with“STEP”button,can change step,can increase/reduce
0.1 mA or 0.01 mA once ,the default step is 0.1 mA.These 2 buttons
control
increase/reduce by big,step is 4 mA.
2.2、Source current program output:
最小值--M in
最大值--M ax
“Prog 1”state:Curve of current change:
“Prog 2”state:Curve of current change:
“Prog 3”state:Curve of current change:
There’re 3 methods of programming for source current program
output,detail output time as above curves. The method as below:
“Prog 1”program output method:whichever gear you
6
at,press
,if Top right of the screen display
,press
again
,wait Top right of the screen display
,check whether
top of the screen will display“有源 source”symbol,bottom only
display “Prog 1”and“ mA ”symbol. If don’t display “有源
source”symbol ,press
or
to up/down the page,until
display “有源 source”、 “Prog 1”、“ mA ”,then can enter
source program current output state. Under this state, the current
step is 1mA,but the step range and change speed can be setted
manually. The method of setting the max and min as below: press
“set”,will display 2 numbers ,left number indicates the min
current,right number indicates the max
current ,use
those 4 buttons can revise the min, the
max. These 2 buttons
can revise the range of the min、These
2 buttons
can revise the range of the max. Note: the min
can’t less than 0,the max can’t bigger than 24,the min can’t bigger
than the max . Press again“set”,enter the speed change setting
option,use
these 2 buttons to revise range of speed
change,the setting range can be 0.5~5s .“Prog 2”、 “Prog 3”
program output method refer “Prog 1”.
2.3、sink current program output:whichever gear you
at,press
,if Top right of the screen display
,press
again
,wait Top right of the screen display
,check whether
top of the screen will display“无源 sink”symbol,bottom only
display“ mA ”symbol,but don’t display“Prog 1”、 “Prog 2”、
“Prog 3”,If don’t display “无源 sink”symbol,press
or
to up/down page,until display“无源 sink”、“ mA ”,then can
enter sink current output state. The output current setted by those 4
buttons
. These 2 buttons
control
increase/reduce by little,work with“STEP”,can change
step,increase/reduce 0.1 mA or 0.01 mA once ,the default step is 0.1
mA. These 2 buttons control
increase/reduce by big,step is 4
mA.
7
Note:Under All current output state, if the test pen 如果表笔开
路.The setting number on the screen will flash.
3、 m V output and Therm ocouple tem perature output:
3.1 、m V output:whichever gear you at,press
,if Top right
of the screen display
,press again
,wait Top right of the
screen display
,bottom will display “ mV 、E、K、B、S、R、
J、T、n”any one of the symbol,under this state,if don’t display
“mV ”symbol,press
or
to up/down page,wait bottom of
the screen display “ mV“symbol,then can enter mV output. The
output setting by these 4 buttons
. These 2 buttons
,control increase/reduce by little,work with“STEP”,can
change step,increase/reduce 1 mV or 0.1 mV once, the default step
is 1 mV.These 2 buttons control
increase/reduce by big,step
is 10 mV.
3.2、E type Therm ocouple tem perature output :
whichever gear you at,press
,if Top right of the screen
display
,press again
,wait Top right of the screen
display
,bottom will display “ mV 、E、K、B、S、R、J、T、
n”any one of the symbol,under this state,if don’t display “E ”
symbol,press
or
to up/down page,wait bottom of the screen
display“ E“symbol,then can enter E type Thermocouple
temperature output. At this moment, will show the value of
Thermocouple temperature output. The output set by these 4
buttons
. These 2 buttons
control
increase/reduce by little,work with“STEP”,can change
step,increase/reduce 10 ℃ or 1 ℃ once, the default step is 10 ℃.
These 2 buttons control
increase/reduce by big,step is 10 0
℃ . Note: Thermocouple temperature output comes to cold end
temperature compensation issues. when Thermocouple temperature
output, there’s cold end temperature indication at the Lower left of
8
the screen, How much it displays, then how much cold end
temperature compensates . when Thermocouple temperature output,
make sure set the correct cold end temperature value, If set wrong,
then will bring big error. The setting method of cold end
temperature: press
, will see there’s 1 number at left side and
right side, the left number is cold end temperature value that input
by manually, When the number flashing, can use these 2 buttons
to increase or reduce; The right number is the value that
measured by Internal temperature element Of the meter , the
number can’t be changed, Cycle press
, will change the Flashing
sequence of the left and right number. Which of these 2 number
flashing, which comes to be effective.
3.3 、Other types of Therm ocouple tem perature output
This meter designed for 8 kinds of commonly used Thermocouple
(E、K、B、S、R、J、T、N)temperature output function, the use
method is the same as E type Thermocouple temperature output. To
set a value that lower than cold end temperature output is nonsense.
4 、Resistance output and Pt1 00 、Cu50 tem perature
output :
9
4.1 、Resistance output :whichever gear you at, press
,
if Top right of the screen display
, press again
, wait Top
right of the screen display
, bottom will display “ Ω、Pt100、
Cu50”any one of the symbol,under this state,if don’t display “Ω”
symbol,press
or
to up/down page,wait bottom of the
screen display“Ω“symbol,then can enter Resistance output. The
output set by these 4 buttons
. These 2 buttons
control increase/reduce by little,work with“STEP”,can
change step,increase/reduce 10Ω or 1Ω once. the default step is 10
Ω. These 2 buttons control
100Ω.
increase/reduce by big,step is
4.2、Pt1 00 tem perature output:whichever gear you
at,press
,if Top right of the screen display
,press again
,wait Top right of the screen display
,bottom will display
“ Ω、Pt100、Cu50”any one of the symbol,under this state,if don’t
display “Pt100”symbol,press
or
to up/down page,wait
bottom of the screen display “Pt100 “symbol,then can enter Pt100
temperature output. The output set by these 4
buttons
. These 2 buttons
control
increase/reduce by little,work with“STEP”,can change
step,increase/reduce 10
℃ or 1℃
once, the default step is
10℃. These 2 buttons control
increase/reduce by big,step is
100℃. The setting method of Cu50 temperature output is the same
as Pt100 temperature output.
Note:Resistance output starts from 50Ω; Pt100、Cu50temperature
output starts from 0℃. When external exciting current doesn’t
10
exist or connect is reversed, the setting value will flash.
5. 24V output with current measurement:whichever gear you
at,press
,enter 24V output with current measurement state.
This state indicates the external equipment provide the 24V power
supply,output current can”t less than 24mA(this is
determined by equivalent internal resistance of the external
equipment)
When output 24V voltage,meanwhile measure the current that
flows through the 24V power supply, the current will display on
the screen.
三、Other functions introduction:
1. autom atic shutdow n:
By pressing the switch, if long time no use the meter( around 30
minutes), it will automatic shutdown. Instead of toggle switch
11
2. Can charging, meantime, working
3. Charging status indicator
四、Note of use
1、whichever gear of this meter,can’t connect the voltage that
bigger than DC30V or AC20V. If don’t obey the note, then will
cause personal injury, meter damage.
2、when the meter is working, the Interior will produce some
heat, the heat will affect Internal temperature element
measurement accuracy at a certain extent .The size of this error
has relationship with the High and low of the environment
temperature , with the Current Size of source current output,
with the size of load resistance, with the hand”s temperature
of the operator. This error is common in all Internal
temperature measurements. If you want overcome this error,
12
use external Pt100 Temperature probe is recommended.
3、When resistance output, the Resistance output accuracy has
relationship with the current size of external source. If current
too small, will cause resistance output error. So, Use
ordinary multimeter to detect the Resistance output accuracy
can”t to be a Reference.
This meter is Calibrated in exciting current 1 mA, very near the
exciting current of temperature measure parts of PLC、DCS. So,
measure on these equipment, can has accurate output.
13