1
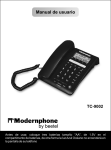
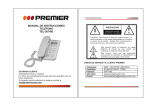
USER F E A Caller ID display ( FSK/DTMF dual mode ) Intelligent Caller ID dial back Hot key dialing mode 16 different ring tones Distinct ring tone for VIP caller Do Not Disturb LCD brightness control Last number redial Mute function Memory data never lost 20 one-touch function keys Speaker/Ringer volume control Hearing-aid compatible handset MANUAL T U R E S Headset/Handset operation Headset receiver volume control PABX compatible Transfer ( Recall ) key Message waiting indicator Incoming call indicator Anti ring back for PBX Desk/Wall mountable Headset hanger ( Optional ) Model K-361: Full duplex Hands-free speaker phone Model K-362: Hands-free dialing only ( no microphone ) INSTALLATION Parts List Each phone is shipped with the following parts : ¾ Handset ¾ Coiled cord ¾ Flat telephone cord ¾ Wall socket ¾ Headset Hanger ( Optional ) Installing ¾ Plug one end of the coiled cord into the handset and the other end into the telephone. ¾ Plug one end of the flat telephone cord into the telephone and the other end into the wall-socket. Use the enclosed wall-socket if the existing wall-socket in your office/home is not compatible with the telephone cord. ¾ If you wish to mount your phone on the wall, you must make sure that you remove the wall-mount clip by sliding it out of the slot, rotate it 180 degrees and re-insert it back into the slot. This will hold the handset in place when the phone is mounted on the wall. ¾ When you want to use the headset, just plug the headset into the headset Jack on the phone. ¾ Plug the headset hanger into the relevant slot at the bottom of the phone. ¾ Contact your PBX supplier for some PBX compatible setting. 1 SETTING To Adjust the Volume ¾ During ringing , press the or key to increase or decrease the ring volume ¾ During the hands-free dialing , press the the Dial Tone volume or key to increase or decrease ¾ During the hands-free speaking , press the the speaker volume ( model K-361 only) or key to increase or decrease ¾ While talking in Headset mode , press the the headset receiver volume or key to increase or decrease ¾ While talking in Handset mode, slide the switch on the side of the handset to set the receiver volume to either High ( n ) or Low (i) To set the Date & Time 1. Press and hold the Transfer/Setting key until “ SET 12345678 “ is displayed on the LCD display and then release. 2. Press 1 , the LCD displays “ 1-DATE 2-CL “. 3. Press 1 to set the Date . 4. Press 2 to set the Time ( 24-hours ) 5. Press the Del key to delete the incorrect selection digit if required 6. Press the Transfer/Setting key to confirm the setting 7. Press the 8. Press the or key to scroll UP or DOWN the page. key to exit. To set the Ring Tone 1. There are 16 different Ring Tones that you can select. 2. Press and hold the Transfer/Setting key until “ SET 12345678 “ is displayed on the LCD display and then release . 2 SETTING 3. Press 2 , the LCD displays “ 1T 2VIP 3VOL “. 4. Press 1 to set the Ring tone for a standard incoming call. 5. Press the 6. Press the Transfer/Setting key to confirm the setting 7. Press 2 to set the Ring tone for a VIP call. 8. Press the 9. Press the Transfer/Setting key to confirm the setting or or key to select the Ring tone of your choice key to select the Ring tone of your choice 10. Press 3 to set the Ring volume ON or OFF. ( default : ON ) 11. Press the or key to select the Ring volume ON or OFF 12. Press the Transfer/Setting key to confirm the setting 13. Press the 14. Press the or key to scroll UP or DOWN the page. key to exit. To set the DND ( Do Not Disturb ) time period 1. Press and hold the Transfer/Setting key until “ SET 12345678 “ is displayed on the LCD display and then release. 2. Press 3 , the LCD displays “ OFFr_S 00 - 00 “. 3. Key in the DND Start time ( 24-hour format, i.e. 12 - 05 ) 4. Press the Del key to delete the wrong enter digit 5. Press the Transfer/Setting key to confirm the setting 6. The LCD will show “ OFFr_E 00 - 00 “. 7. Key in the DND End time ( 24-hour format, i.e. 13 - 19 ) 3 SETTING 8. Press the Del key to delete the incorrect selection digit if required 9. Press the Transfer/Setting key to confirm the setting 10. Press the key to exit. 11. The DND setting time period is Cyclically [Note]: During “Do Not Disturb” mode , a standard incoming call will not ring, but the LED will flash. A VIP call however will ring. To cancel this setting , simply set both the start and end time to 00 – 00 To set the PBX Parameters for your phone 1. Press and hold the Transfer/Setting key until “ SET 12345678 “ is displayed on the LCD display and then release. 2. Press 4 , the LCD displays “ 1F 2H 3P 4L “. 3. Press the 4. Press 1 to set the Flash time for the PBX. Please consult with your local PBX supplier for the correct setting ( default : 110 ms ) 5. Press 2 to set the Anti Ring back time for the PBX. Please consult with your local PBX supplier for the correct setting ( default : 300 ms ) 6. Press 3 to set the Pause time for the PBX. Please consult with your local PBX supplier for the correct setting ( default : 2000 ms ) 7. Press 4 to set the status of phone connected in parallel , please press the key to select the status of your choice ( default : OPEN ) or key to scroll UP or DOWN the page. ¾ OPEN : Allow parallel phone connection but do not show it’s status ¾ INUSE : Allow parallel phone connection and will show it’s status. ¾ CONFINE : Phone inaccessible when parallel phone is in use ¾ ALERT : Disallows parallel phone connection and sends high noise signal if another phone is connected in parallel 4 or SETTING 8. Press the Transfer/Setting key to confirm the setting 9. Press the key to exit. [Note]: Do not change the 1F , 2H , 3P settings above without first consulting with your local PBX supplier. Incorrect settings may cause your phone not to work properly To set the Trunk prefix & Local Area prefix Code for Caller ID dialing 1. Press and hold the Transfer/Setting key until “ SET 12345678 “ is displayed on the LCD display and then release 2. Press 5 , the LCD displays “ 1-LOC 2-OL “. 3. Press 1 to set the local area prefix code. 4. Press 2 to set the Trunk prefix for out going calls 5. Press the Del key to delete the incorrect selection digit if required 6. Press the Transfer/Setting key to confirm the setting 7. Press the 8. Press the or key to scroll UP or DOWN the page. key to exit. [Note]: Some Caller ID numbers will contain the local area code. When using the Caller ID auto dial back feature in saome areas however, it may not be possible to dial the saved local area code attached to the stored number. By programming the correct local area prefix code as per above, the stored local prefix area code will be automatically erased when dialing. When the phone is connected behind a PBX , the pre-programmed trunk prefix & Pause period will be automatically added when the Caller ID auto dial back function is initiated. 5 SETTING To set the LCD brightness 1. Press and hold the Transfer/Setting key until “ SET 12345678 “ is displayed on the LCD display and then release. 2. Press 6 , the LCD displays “ LCD CON 3 “. 3. Press the 4. Press the Transfer/Setting key to confirm the setting 5. Press the or key to adjust the brightness of LCD ( level from 1 – 5 ) key to exit. To set Hot Keys function ON / OFF 1. Press and hold the Transfer/Setting key until “ SET 12345678 “ is displayed on the LCD display and then release 2. Press 7 , the LCD displays “ AUTODIAL ON “. 3. Press the 4. Press the Transfer/Setting key to confirm the setting 5. Press the or key to select the status of your choice. key to exit. [Note]: If set to ON, you can simply press a numberon the key pad or press one of the memory keys to initiate dialing To set LED flash ON/OFF for New Caller ID 1. Press and hold the Transfer/Setting key until “ SET 12345678 “ is displayed on the LCD display and then release. 2. Press 8 , the LCD displays “ CL ON “. 3. Press the 4. Press the Transfer/Setting key to confirm the setting 5. Press the or key to select the status of your choice. key to exit. [Note]: If set to ON, the LED will flash when a new Caller ID is detected. 6 OPERATION To Answer a call When the phone rings: ¾ Lift the Handset or press the key to talk ( Model K-361 ) ¾ Lift the Handset to talk ( Model K-362 ) ¾ When headset is connected , press the key to answer the call on headset. To Make a call 1. Lift Handset or press the key 2. When headset is connected , press the 3. Wait for dial tone 4. Dial the number. 5. Or, just press a number on the keypad to initiate dialing. 6. Lift the Handset to talk ( Model K-362 ) key to make the call on headset. To place a call on Hold ( with music ) During a conversation , you can place the call on " Music-on-hold " to prevent the other party from hearing you. 1. Press the Hold key ( the other party hears music ). 2. 3. Replace the handset. You can retrieve the call on hold by just lifting the Handset or by pressing the key. If left on-hold , the call will automatically terminate after 5 minutes (goes On-Hook). 4. [Note]: If the phone is connected behind a PBX , DO NOT press the Hold key to transfer the call to another extension. To transfer the call to other extension press the Transfer/Setting key only OPERATION To Transfer a call While talking to the other party: 1. Press the Transfer/Setting key. 2. 3. 4. Listen for PBX dial tone. Dial the number of the extension the call needs to be transferred to. Replace handset. 【Note】: The flash time is preset to 110 m.s. , this feature is only used when the phone is connected behind a PBX. To Mute a call 1. During a conversation, press the Mute/Store key , the LED will light up. 2. The other party will not be able to hear you speaking , but you will still be able to hear what the other party is saying. 3. To deactivate the mute mode, press the Mute/Store key again. To Check the Incoming Caller ID records 1. Press the key 2. Press the or key to scroll through the Incoming Caller ID records ( maximum 70 sets ) 3. You can press the key to automatically dial the displayed Caller ID number 4. You can press the Mute/Store key to set the displayed Caller ID record as a VIP number. The VIP symbol will then show up on the LCD 5. Press the Mute/Store key again to cancel the VIP setting 6. You can press the Del key to delete the displayed Caller ID record . A VIP caller record can not be deleted 7. To delete all Incoming Caller ID records , press and hold the Del key. VIP caller records will not be deleted 2 OPERATION To Check the Outgoing Calls records 1. Press the key 2. Press the or key to scroll through the Outgoing calls records ( maximum 30 set ) 3. You can press the 4. You can press the Del key to delete the displayed call number 5. To delete all Outgoing call records , press and hold the Del key key to automatically dial the displayed call number Store a telephone number into One-Touch memory keys ( M1 – M20 ) During On-Hook status: 1. Press Mute/Store key and enter the telephone number that you want to store , including any signal ( i.e. Pause: Redial key , On-Hook: key , Transfer: Transfer/Setting key "). 2. When the phone is connected behind a PBX , you have to key in the "PBX prefix " -- " Pause single " -- " telephone number " . ( For example : " 0 ( or 9 ) " -- " Redial key " -- " 2915 8598 " ) 3. The Pause signal time duration is programmable as described in this manual 4. Stored data is never lost and does not require batteries or line power. 【Note】: Only one number can be stored per memory key. Storing a new number will automatically erase the previous stored number, , unless that memory key is locked. DIALLING A SPEED DIAL NUMBER 1. Lift up the handset ,or Press the key when using a headset. 2. Wait for dial tone. 3. Press one of memory keys ( M1 -- M20 ). 3 OPERATION 4. 5. The number stored in that specific memory key will be dialed out automatically. You can also press one of the memory keys directly to initiate dialing. To Lock the Specific Memory Key 1. You can Lock a specific memory key to prevent a user from accidentally erasing the stored data 2. Set the Hot Key function to OFF ( Reference the SETTING procedure as described earlier within this manual) 3. During On-Hook , Press “ 0 * Redial * # 1 # Specific Memory key “ 4. Lock the any other specific Memory key using the same process described above if required 5. Once you’ve finished locking all the required memory keys, you can set the Hot Keys function back to ON To Unlock the Specific Memory Key 1. 2. Set the Hot Key function to OFF ( Reference the SETTING procedure as described earlier within this manual) During On-Hook , Press “ 1 * Redial * # 1 # Specific Memory key “ 3. Unlock the any other specific Memory key using the same process described above if required 4. Once you’ve finished unlocking all the required memory keys, you can set the Hot Keys function back to ON The Last Number Redial 1. Lift up the handset or Press the key when using a headset. 2. Press the Redial key. 3. The phone will auto-redial the last dialed number. 4. You can also press the Redial key directly during the on-hook status 4 OPERATION The Message Waiting facility The message waiting LED will be activated by the PBX when a message has been left in the user’s voice mail box. 【Note】 This facility will only work behind a PBX or Voice Mail System. Please consult with your local PBX supplier for the correct message waiting signal setting (i.e. polarity/line reversal, FSK, DTM, High voltage, etc), Automatic Headset/ Handset Mode Detection ¾ As soon as a headset is connected to the phone, it’s automatically detected by the phone and the status is switched to Headset Mode. ¾ The Key becomes the headset ON / OFF key. ¾ You can still make call using the handset with the headset connected.. ¾ When the headset is disconnected from the phone, the phone will automatically change back to Handset Mode. To Change between Headset and Handset ¾ Change to handset while talking on headset : key will turn OFF Just lift the handset. The LED of ¾ Change to headset while talking on handset : Just press the key , the LED will turn ON Dimension & Weight Dimension: 21 cm ( L ) x 15 cm ( W ) x 8 cm ( H ) Weight: 860 grams 5