1
It’s important to ground the yellow/green conductor to earth in order to avoid electric
y
Do not touch any wire during operation and there may be a hazard of electric shock.
To prevent or reduce the risk of electrical shock or fire, do not expose the fixture to rain
y
y
There are no user serviceable parts inside the fixture. Do not open the housing or
y
y
Do not look directly at the LED light beam while the fixture is on.
y
unit.
2-
Direct sunlight can cause heat to build up inside of the unit, which will seriously damage
Due to the magnifying type lens, please keep the lens out of contact with direct sunlight.
please contact your nearest dealer.
attempt any repairs by yourself. In the unlikely event your fixture may require service,
The housing must be replaced if they are visibly damaged.
y
or moisture.
Do not connect the unit to any dimmer pack.
y
center. Always use the same type spare parts.
damage or malfunction. Please contact the nearest authorized technical assistance
to repair the fixture by yourself. Repairs carried out by unskilled people can lead to
In the event of serious operating problem, stop using the fixture immediately. Never try
higher than this.
Maximum ambient temperature is Ta : 40℃. Don’t operate it where the temperature is
y
y
Disconnect main power before servicing and maintenance.
y
shock.
Unpack and check carefully there is no transportation damage before using the fixture.
user, be sure that they also receive this instruction booklet.
Please keep this User Manual for future consultation. If you sell the fixture to another
y
y
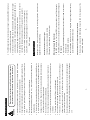
WARNING
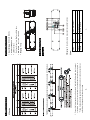
Pin4/5: not used
5 pin XLR: Pin 1: GND, Pin 2: Negative signal (-), Pin 3: Positive signal (+),
3 pin XLR: Pin 1: GND, Pin 2: Negative signal (-), Pin 3: Positive signal (+)
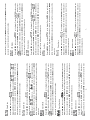
controller. The address number is between 0-511 (usually 0 & 1 are equal to 1).
Each lighting fixture needs to have an address set to receive the data sent by the
master/ slave mode signal.
11-
1. You may have a break in the DMX cabling. Check the LED for the response of the
C. Some fixtures don’t respond to the easy controller
cause interference to DMX interface circuit.
5. Check if the DMX cables run near or run alongside to high voltage cables that may
4. Try another DMX controller.
the previous one.
3. If you have intermittent DMX signal problems, check the cables or PCB of the fixture or
DMX polarity.
2. If the DMX LED is on and no response to the channel, check the address settings and
1. DMX LED should be on. If not, check DMX connectors, cables to see if linked properly.
B. Not responding to DMX controller
2. Measure the mains voltage on the main connector.
1. Check the connection of power and main fuse.
A. The fixture does not work, no light
suggestions for easy troubleshooting:
Following are a few common problems that may occur during operation. Here are some
7. Troubleshooting
5.
4.
3-pin XLR-plug and plug it in the DMX-output of the last fixture.
errors. Solder a 120-ohm 1/4W resistor between pin 2(DMX-) and pin 3(DMX+) into a
one of the units’ power is disconnected.
At last fixture, the DMX cable has to be terminated with a terminator to reduce signal
3.
The DMX output and input connectors pass-through to maintain the DMX circuit when
information about the installation, operation and maintenance.
2.
Please read the instructions carefully which includes important
1. Safety Introductions