1
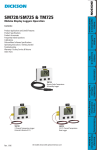
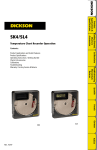
DICKSON Touchscreen Logger User Manual FT500/FT520/FT525/FT535
FT500/FT520/FT525/FT535/FH520/FH525/FH535
/FT520/FT525/FT535/FH520/FH525/FH535
Getting Started
Your Color Touch Screen
Screen Logger includes the following
•
AC Adapter, Manual, Standard Dickson Certificate of Calibration
(Flash Memory Card, USB Download Cable and DicksonWare Software are sold separately)
Presets
Model: FT500 /FT520/FT525/FT530
Time Scale:
1 Hour / Sample every 6 sec.
Temperature Range: 0 to 100
Unit of Measure: Deg. F
Alarm: OFF
Model: FH520/525/535
Time Scale:
1 Hour / Sample every 6 sec.
Temperature Range: 0 to 100
Humidity Range: 0 to 100
Unit of Measure: Deg. F; %RH
Alarm: OFF
How the Touchscreen
Touchscreen Works
•
The Touchscreen is a data logger with a large real time graphing display.
•
Logging
Up to 32,000 data points can be stored at any time. The default logger setting is Wrap When Full. This
means that once all 32,000 data points are used, the next data point will write over the oldest data point.
If using a two channel model, up to 16,000 data points are stored per channel.
•
Time Scale (X Axis)
o The graph X axis represents time. Up to 600 sample points are displayed on the graph at any
time. When setting the time scale for the X axis, you are telling the logger to collect 600 data
points within a set period of time. For example when selecting a Time Scale of 1 hour, you will
see 1 hours worth of data on the graph at any time. The logger calculates that a 6 second
sample rate is required to fill the graph in an hour. The Scroll feature will allow you to view data
older than 1 hour that has shifted off the graph.
o The Preset Time Scales and correlating Sample Rates are:
1 Hour = 6 Second Sample Rate
8 Hour = 48 Second Sample Rate
1 Day = 2 minute 24 second Sample Rate
3 Day = 7 minute 12 second Sample Rate
7 Day = 16 minute 48 second Sample Rate
Custom = Any Time Scale from a minimum of 10 Minutes (1 second Sample Rate) up to
31 days (1 hour, 14 minute and 25 second Sample Rate)
o Changing the Time Scale will clear the logger of all saved data.
•
Ranges (Y Axis)
o The graph Y axis represents the set ranges for each channel. The ranges selected can not
exceed the full range specified for the model in use.
o Changing the Ranges will not clear the logger.
•
Downloading Data
o In order to download data to a PC, DicksonWare v17.1 or better is required.
o The logger must be cleared via DicksonWare by USB connection to the PC before any data can
be logged and downloaded.
downloaded.
o Logged data can be downloaded via a USB connection or to a Flash Memory Card.
o “Automatic Clock Adjust Clock for Daylight Savings” should be set to OFF.
Right click on the time and date displayed in the Windows task bar
Select Adjust Time/Date
Select Change Tim Zone
Uncheck: “Automatic Clock Adjust Clock for Daylight Savings”
If currently in daylight savings, you will need to adjust your clock.
•
Viewing Data
o VIEW
o
o
There are 3 user selectable views, press the “View” button to scroll through each.
NOTE: Current Reading box will update with current readings every 10 seconds
regardless of sample rate. If the sample rate is less than 10 seconds, the graph will
update with all new readings every 10 seconds when the Current Readings window is
refreshed.
Scroll Bar
Once the graph is full the “Scroll” bar will appear.
•
Press and drag the bar to the right and left to view all saved data.
•
When the scroll bar is in the left most position, the most recently saved data is
displayed on the graph. When in the right most position, the oldest saved data is
displayed on the graph.
Zoom
Press the ZOOM button to activate Zoom
•
Place your finger on the graph and drag along the graph to draw a box over the
desired data.
•
To exit Zoom, press UNZOOM. The graph will default to the standard Time Scale with
the most recent data displayed.
Unit Operation
Quick Start
The Touchscreen Logger is a PC device and must be set and restarted before using.
1) Connect the AC adapter to the Logger then plug into a standard electrical outlet. Slide the power switch
up to the “On” position.
2) Set Time: Press “Menu”, “Setup”, “Set Time” set then “Save”, “OK”
3) Set Date: Press “Menu”, “Setup”, “Set Date” set then “Save”, “OK”
4) Set Time Scale: Press “Menu”, “Set Scales”, “Set Time Scales”, set then “Save”, “OK”
5) Turn Logger Off wait 10 seconds then turn the unit On.
6) Press “Current” to see current readings. If no readings are displayed, repeat steps above. If readings are
displayed the logger is ready.
7) If using DicksonWare to view saved
saved data, the Touchscreen must be cleared with DicksonWare via USB
connection before logging begins or data will be invalid.
Configuring the Touchscreen Logger
•
Set Time Scale: This is the amount of saved logged data that will display on the graph
•
Set Channel 1 and 2 Unit of Measure and Range(s): “Menu”, “Setup”, “Set Scales”, “Set Ranges”
•
Set High and Low Alarms: “Menu”, “Setup”, “Set Alarms”
Data Export
Logged data can be exported using a USB cable or Flash Memory Card. (To view exported data, DicksonWare
software is required.) NOTE: Unit must be cleared via DicksonWare v17.1 or greater before logging and
downloading data.
data.
•
The logger must be cleared via DicksonWare before logging beings if you intend to download
saved data to the DicksonWare.
a. The logger
logger must be powered on via AC and logging.
b. Connect the logger via USB to the PC
c. Open DicksonWare
d. Click on the CLEAR button in DicksonWare to clear the logger.
e. Once complete, remove the USB cable from the logger.
f. You can now adjust the logger sample rate, date,
date, time, scales and alarms to begin logging.
•
Exporting via USB:
o Bring the Touchscreen along with the AC adapter to a PC running DicksonWare.
o Power on the Touchscreen via AC power and wait for the logger graph to display. Connect the
Touchscreen to the PC via USB.
o DicksonWare will recognize the Touchscreen.
o Download saved data and clear.
Exporting via Flash Card:
o Insert Flash card into slot on the left side of the Touchscreen case.
o Go to Menu then Download and press Start.
o All saved data will be exported to the flash card.
o Bring the Flash card to a PC running DicksonWare.
•
Insert Card into PC SD card slot and from the DicksonWare main screen select Flash Card - locate
removable disk drive.
o Download saved data and clear.
DicksonWare Features:
o All Touchscreen settings are to be made via the Touchscreen and are grayed out in
Dicksonware with the exception of the following:
In “Setup” under “Samples” tab, Wrap When Full can be change to Stop When Full
In “Setup”, “Identification”, User ID, Calibration Date and Calibration Interval can be set
o The Touchscreen can be downloaded and cleared via DicksonWare.
o All downloaded data can be viewed in a graph or table and saved and exported.
o The Touchscreen must be cleared in DicksonWare via USB connection before data can be
logged and downloaded. If the unit is not cleared first, all date/time stamps will be incorrect.
o
•
Alarm Operation
•
Alarm ON: Alarm setting arrows will appear on the graph to indicate min and max settings.
•
Alarm Triggered: Out of range alarm setting arrow will blink, the alarm symbol will display and an audible
alarm will sound.
o To clear alarm press the display.
o If the alarm condition still exists after two minutes or by the next sample (whichever is longer),
the alarm will sound and display again.
o If the display is not pressed after 30 seconds, the alarm will stop sounding but will beep 2x every
5 minutes until the display is pressed
Note: Alarms will not sound when operating under battery power.
Relays
•
FH535 features 2 (1 per channel) SPST 24VDC. 0.5A, NO/NC Relays. Relays do not operate under battery
power. Relay wiring diagram available at dicksondata.com. Pin no. 1 is the lowest pin position. Pin no. 6
is the top pin position.
•
Relay Operation:
o When the unit enters an alarm condition the relays will activate.
o If the user presses the display to clear the alarm, the relays will deactivate. If the alarm condition
still exists after two minutes or by the next sample (whichever is longer), the relays will activate.
o If the display is not pressed the relays will remain active until the readings fall back within the set
range. If the readings move outside the min/max range again, the relays will reactivate
regardless of whether the initial alarm condition has been cleared or not.
Minimum and Maximum Readings
•
Min/Max readings displayed reflects the Min and Max for all samples currently displayed on the graph.
•
When scrolling through logged data or zooming, the Min/Max readings will change to reflect the data
being displayed.
Stop or Wrap When Full
Full
Your Touch Screen logger is set to log continuously (wrap when full). In DicksonWare, under set-up/samples
stop when full can be selected.
Power
The Touch Screen logger operates on a 120V AC adapter. Turning off the power switch also turns off backup
battery power and will cause up to the last 30 minutes of data to be lost. A rechargeable battery provides
backup for up to 12 hours. A UPS is recommended for longer backup life. When operating under backup
power, the unit will continue to log but the display will automatically turn off to conserve power. The Touch
Screen must run for 24 hours before the backup battery is fully charged.
If the backup battery is not charged and the logger looses power, the last 30 minutes of data will be lost.
Turning off the logger while logging will result in non valid data points for the period of time where the logger
was turned off.
Clear Logger
The Touchscreen Logger can be cleared via DicksonWare or by saving a current or new Time Scale or
changing the Date or Time via the Touchscreen Menu.
Probes
•
FT525
o
o
Features a hardwired Thermistor probe.
This probe can not be removed from the logger.
•
•
FT520 & FT530
o Features K-Thermocouple bead wire probes with mini connectors.
o Bead wire probes can operate in conditions from -300 to 500F.
o Probes can be removed and replaced with any K-TC probe with mini connector.
o Dickson sells K-TC probes with stainless steel tips, piercing tips and ones that can operate in
conditions up to 2000F.
Note: Double check the K-TC probe range to ensure it covers the range being recorded.
FH525 & FH535
o Features temperature and humidity probes.
o These probes can be removed from the unit for placement,, but they must not be swapped
with another probe.
o The unit and probe are calibrated together and switching probes will invalidate calibration and
throw off readings.
o The probe must be returned with the unit when returned for calibration and repair.
Warranty: Dickson warrants this line of instruments will be free from defects in material and workmanship under
normal use and service for a period of twelve months after delivery. This warranty does not cover routine
calibration and battery replacement. For Specifications and Technical Support go to www.DicksonData.com or call
800.323.2448.