1
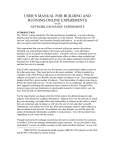
NAPS
Not Another Port Scanner
User’s Manual
About:
NAPS was created by Nick Merizzi, Matt Picheca, Paul Paszynski, and
Tim Tisdall as their final year project in the computer science program
at McMaster University in 2003-2004. W.F.S. Poehlman was the faculty
advisor for the project.
Contents
Quick Reference Guide . . . . . . . . . . . . . . 2
Main Toolbar . . . . . . . . . . . . . . . . . . . . . . . . . . . . . . . . .
Interpretting the Screen . . . . . . . . . . . . . . . . . . . . . . . .
Deleting Nodes . . . . . . . . . . . . . . . . . . . . . . . . . . . . . . .
Adding Nodes . . . . . . . . . . . . . . . . . . . . . . . . . . . . . . . .
2
3
3
3
Requirements and Installation . . . . . . . . . 4
Requirements . . . . . . . . . . . . . . . . . . . . . . . . . . . . . . . . 4
Installation . . . . . . . . . . . . . . . . . . . . . . . . . . . . . . . . . . 4
Program User’s Guide . . . . . . . . . . . . . . . 5
Main Window . . . . . . . . . . . . . . . . . . . . . . . . . . . . . . . . 5
Add Node Window . . . . . . . . . . . . . . . . . . . . . . . . . . . . 6
Delete Node Window . . . . . . . . . . . . . . . . . . . . . . . . . . 7
Menu Items. . . . . . . . . . . . . . . . . . . . . . . . . . . . . . . . . . 8
Node Information Window . . . . . . . . . . . . . . . . . . . . . 10
Setting Preferences . . . . . . . . . . . . . . . . . . . . . . . . . . 11
Ping an Address . . . . . . . . . . . . . . . . . . . . . . . . . . . . . 13
MIB Browser . . . . . . . . . . . . . . . . . . . . . . . . . . . . . . . . 14
Keyboard Shortcut Reference . . . . . . . . 15
1
Adding Nodes
Quick Reference Guide
Clicking on the Add Node button
, will bring up the window shown
on the right. You can enter the IP of a
machine you want to monitor or you
can enter a range of IPs. (ex. 1.2.3.4-6
will add the nodes 1.2.3.4, 1.2.3.5, and
1.2.3.6) If you check off the “priority”
box, by clicking on it, then you will
be notified by email when something important happens to the machines you
entered.
Main Toolbar
Add Node: This button will bring up a
small dialog that will allow you to add nodes
to the window by their IP address.
Delete Node: After clicking this button,
you’ll be shown a small window where you
can delete nodes currently displayed in the
main window.
Polling On/Off: When the button displays
then NAPS is actively getting information from every node added to the window.
If you click on this button it changes to
and then NAPS will no longer be getting
new information. If you click on it again,
then it will return to active polling.
Exit: Exits the
program, but will
prompt you to
save your mapping
if you have not
already done so.
MIB Browser: Opens
the MIB browser window
so you can make SNMP
queries on different
computers.
Save: Save your current mapping. (disabled if there are no
nodes in the winodw)
Help: Brings up the
help window.
Deleting Nodes
Clicking on the Delete Node button
, will bring up the window shown on
the right. You can select the IPs of the
machines you wish to stop monitoring on
the left and then click the
arrow to
move them to the right. When you click
“Delete” then all of the nodes listed on
the right will be removed.
Interpretting the Screen
Node has been added to the screen but no information has
been retrieved yet.
The node is responding to pings, but doesn’t have an SNMP
agent.
The node is responding to both pings and to SNMP requests.
This node is not responding to ping.
2
3
Requirements and Installation
Requirements
NAPS was deisgned entirely in Java and can operate on any machine
running Sun OS, Linux, Windows (2000, NT, or XP), or most flavours of Unix.
Also, in order for the program to work properly the user running the program
must have sufficient access to be able to run the “ping” command. You can test
if you meet this requirement by going to the command line and typing “ping
127.0.0.1”. If the message returned indicates that you don’t have access to ping
then NAPS will not work properly for you. Talk to your system administrator to
gain access to the ping command if you do not already have it.
Installation
If you do not already have the Java Virtual Machine(JVM) then you may
install Java 1.4.2 which is found on the CD (it should be clearly indicated as to
which file that is). Alternatively, you may download the latest version of Java
from http://java.sun.com with your web browser.
As mentioned in the requirements, you must have access to the ping command. If you don’t have access to ping then it’s most likely due to a security
policy in effect on your computer that can only be changed by the system administrator.
The installation of NAPS is fairly simple because the program is packaged
into a JAR file. Simply copy the NAPS directory off of the CD to where you’d
like to run the program. Make sure that after copying the files you change the
permissions on all the files in the directory and the directory itself so that it is not
read-only (ie has write access on). The reason for this is that NAPS will create
log files and save network mappings to that directory.
To run the program in Windows, most systems will be set up after installing the JVM to allow you to double-click on the “naps.jar” file to execute the
program. Alternatively, you can run the program from the command line by first
making the NAPS directory the current directory and typing “java -jar naps.jar”.
If you’re running Sun OS, Linux, or some other Unix similar system, you can
run the program by typing “java -jar naps.jar” at the command line when in the
NAPS directory.
4
Program User’s Guide
Main Window
Thank you for using NAPS. We hope that you find the program easy to use
and useful for monitoring your own computer network. The figure below will
give you a brief general description of the different aspects of the main NAPS
window. The specifics will be covered in subsequent sections with the exception of the toolbar which is covered in the “Quick Reference” section. Also, the
meaning of the machine icons should be mostly self-explanatory, but are also
explained in the “Quick Reference”.
Title Bar: This changes
depending on the operating system you’re using
Main
View: This
is where all
of the nodes
are displayed and
where new
nodes are
added to.
Status Bar: Gives you
information in some
circumstances about the
program’s activities.
Menu Bar: Gives you
access to almost all of
NAPS’ functions
Tool Bar:
Quick way
to access
the main
aspects of
NAPS
Scrollbar: When there
are a lot of nodes in the
window this will become
active.
5
Add Node Window
To monitor a machine
over the network, you first need
to add it to the main window
with the Add Node window.
To bring up this window, you
can either click the Add Node
button (
), press CTRL-A
on the keyboard, or select Add
Node from the Monitoring
menu item.
If you click on the
icon, press
CTRL-D, or select Delete Node under the
Monitoring menu item, you’ll see a window similar to the one in top figure.
After clicking the Add Node button in the
main toolbar you will see the Add Node Window shown here.
Now that you have the
window open, you can begin to
add nodes by entering their IP
addresses. When you’ve entered the IP address that you wish to be added, click
the OK button. Additionally, if you’d like to be notified about events that occur
involving this IP by email and also have the information logged in a special log
file then you can check off the priority box before clicking OK.
As well as simply entering a single IP address in the Add Node window,
you can also enter a range of IP addresses. To enter a range, you specify the
first three bytes of the IP address explicitly and then you may enter a hyphenated number range as the last byte. For example, lets say you’d like to add all
of the computers in your local area network and you know that the computers
range from 192.168.0.100 to 192.168.0.150. To enter all the computers between
those two ranges you would enter 192.168.0.100-150 in the Add Node window.
Please note that the last byte of the IP address is the only one that you’re allowed to specify a range on.
6
Delete Node Window
When you first bring up the Delete
Node window, you’ll see a list of all the
nodes currently added on the left and
another similar field to the right that says
“Empty”. You delete nodes by selecting on
the nodes you wish to delete on the left side
and then clicking the
arrow to move
them into the field titled “Nodes to be
Deleted”. If you accidentally add a node to
the right box that you don’t want to delete,
simply click on it and click on the
button to move it back to the left box. When
you’ve finished moving nodes into their
appropriate boxes (ie the ones you want to
keep are in the left box and the ones you
want to delete are in the right box), click on
Delete to commit your changes.
When selecting items in the boxes,
you can do it in multiple ways. If you’d
like to select multiple items in the list, you
can hold down the CTRL key and click on
each of the items you wish to select. Also,
if you wish to select a range of nodes,
you click on the first node in the range,
hold down Shift, and then click on the last
item in the node. When you use the Shift
method of selection then all nodes between
the two you select will be selected as well.
When you first bring up the Delete
Node info you should see a screen
like this.
You can select multiple IPs by
holding down the CTRL key and
clicking on them.
After selecting the nodes you want
to delete, clicking the right arrow
button moves those addresses to
the right box. In this case, the
two IPs on the left will be deleted
when the Delete button is clicked.
7
Menu Items
Ping Node brings up a dialog to allow you to ping
any IP or hostname address. The address need not
be one currently in the mapping. (see Ping an Address)
Each menu item can be accessed by clicking on them. You can also use the
keyboard by holding down Alt and typing the letter underlined in the name of
the item you wish to select. There are also quick keys defined for some menu
items which are listed just to the right of those items (also see Keyboard Shortcut
Reference).
New Mapping clears all the nodes in the
current window so you can start with a
blank screen
Open Mapping brings up an open file
dialog window so you can select a saved
mapping and load it into the main window.
(see MIB Browser)
Add Node brings up the Add Node dialog to
allow you to add a new node to the mapping
(see Add Node Window)
Delete Node brings up the Delete Node dialog
which allows you to delete any nodes in the
current mapping (see Delete Node Window)
Stop Monitoring this tells NAPS that you want to stop
all monitoring of the nodes. In other words, NAPS
will stop getting SNMP information and stop pinging
nodes and no new information will appear in NAPS.
Save Mapping As... brings up a save
file dialog and allows you to type in a
file name to save this mapping
Save Mapping will save to the current
file, or if there is none then will bring up
a save file dialog so you may type in a file
name. (the current file name is displayed in the title
Status Log brings up a window showing the contents of the status log. This window is updated as
new information is found.
bar in between the square brackets)
Preferences brings up the preferences
window (See “Setting Preferences”)
MIB Browser brings up the MIB browser window
Exit Exits
NAPS
Find node brings up a dialog that will allow
you to search for an IP in the current mapping
and then highlight the node if found.
Network Alert Log similar to the Status Log,
but only gives information on nodes marked as
“priority”
Trap Alert Log lists all the SNMP traps captured
from nodes added to NAPS
Toolbar turns the icon toolbar on/off
Status Bar turns the status bar at the
bottom of the window on/off
Change Look & Feel allows you to
alter the current look of NAPS by selecting an alternate application “skin”
8
Help Index brings up the help window which
contains information on how to use NAPS
About gives information on the creators of
NAPS. To close this window, simply click on it.
9
Node Information Window
Setting Preferences
Set the ping interval in
seconds. (the time to
wait between successive
pollings)
Set the number of Threads
the backend should use
to update the nodes in the
main window.
Who should be notified about important
events? Put their
email address in here.
The Node Information Window is shown in the figure above. Most of the
information and buttons should be self-explanatory. However, the uer should be
aware of the following facts about NAPS:
A node may appear to go up and down if the response time to pinging
varies between less than 1 second and greater than 1 second. This is due to the
fact that the ping gives up waiting for a response after 1 second.
If a machine is not responding to pings then it is automatically
assumed that the machine will also not respond to SNMP requests. While
this is not always the case, it is true in most cases. If you know specifically that
a machine that is shown as “Down” is actually connected and will respond to
SNMP, then you can get the SNMP information through the MIB browser (if you
click on the MIB Browser button then you will see the MIB Browser with this
machine’s address already entered).
10
Who should the
emails sent appear to
be from?
Place an SMTP server
address that’s accessable
from this machine.
11
Ping an Address
These two buttons will
erase all the contents of
their respective files.
How many lines
should be kept in the
log file?
When selecting Ping
a Node from the Tools
menu you will be shown
a dialog box where you
can enter a machine address. Unlike the Add Node window, you can enter either the IP address or the
machine’s Hostname. When you click on the Ping Node: button on the left of
the window, the program will try to ping that machine to see if it’s responding.
The result of the ping will be shown just below the textfield where you entered
the machine’s name (IP or hostname). If you see a
then that machine has
responded to the ping and if you see a
then that means the machine didn’t
respond to the ping.
Please be aware that a machine that doesn’t respond to ping is not necessarily disconnected from the network. There is a possibility that the response
from the ping is taking longer than 1 second which will show falsely as a
because the ping gives up waiting for the response after 1 second. Also, due to network security concerns, some system administrators have set up their machines
to not respond to ping to avoid “denial of service” attacks.
After entering an address and clicking Ping Node:
we get a positive response
12
13
MIB Browser
Keyboard Shortcut Reference
New Mapping
Open Mapping
Save Mapping As...
Save Mapping
Edit User Preferences
Toolbar On/Off
Status Bar On/Off
Ping an address
The MIB Browser window is probably the most complicated to use window in the NAPS program. For most casual users of NAPS you will not need
to use this window, but more advanced users will find it useful to get additional
information the Node Info window doesn’t have. Also, the MIB Browser will
also allow you to set values if you have the authorization (ie. you have set the
“Community” field to a community that has permission to write values on this
particular machine).
MIB browser
Add Node(s)
Delete Node(s)
Delete Node(s)
View Status Log
View Network Alert Log
NOTE: You will do no harm to your network or the
machines on your network if you just use the “Get”
buttons. However, setting values may cause problems
on either particular machines or on the network in general. Essentially, setting values should be left to users
who know what they’re doing.
14
User Help Menu
Additionally, all of the standard shortcuts specified by your operating
system for cuting, copying, and pasting text should work in text fields. Other
shortcuts may work too, but are operating system dependent.
15