1
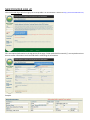
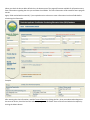
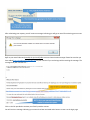
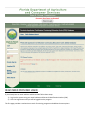
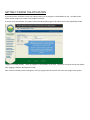
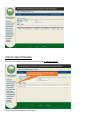
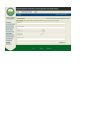
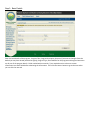
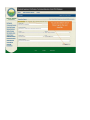
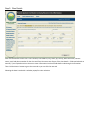
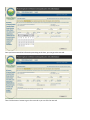
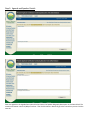
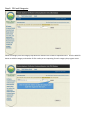
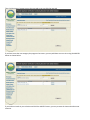
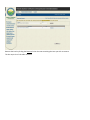
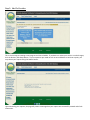
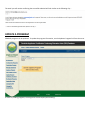
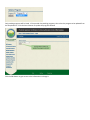
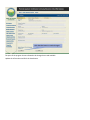
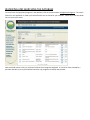
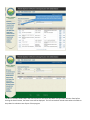
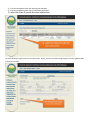
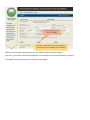
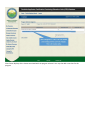
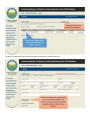
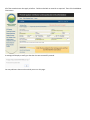
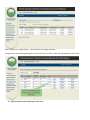
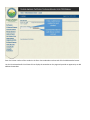
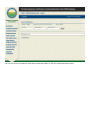
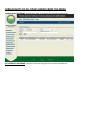
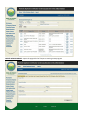
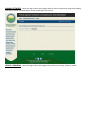
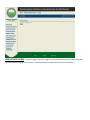
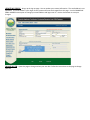
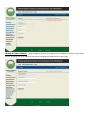
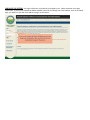
Welcome to the new CEU website users guide.
Please send comments or suggestions to
[email protected]
NEW PROVIDER SIGN UP:
Click the Provider Sign Up link to sign up as a new provider. The CEU Database is located at https://ceu.freshfromflorida.com/
Fill in the required information in the top portion of the page. Fields marked with an asterisk (*) are required entries so
be sure to enter information into those fields before submitting the information.
Example:
When you check the box to add a default class, the bottom part of the page will become available for information entry.
Enter information regarding the class you are about the schedule. This class information will be saved for future program
entries.
Again, fields marked with an asterisk (*) are required entries so be sure to enter information into those fields before
submitting the information.
Example:
After entering the class information, read the Terms of Service by clicking the link. Once you understand and agree to
the terms of service, check the box that indicates you agree to the FDACS Terms of Service and submit the request by
clicking the Submit button.
After submitting your request, you will receive a message indicating you will get an email for activating your account.
Refer to your email inbox and possibly the junk mail folder to access the activation message. Please be sure that you
have added [email protected] to your contacts if you are having trouble receiving the message. The
message body will read like this…..
Click on the link provided to activate your FDACS provider account.
You will receive a message indicating your account has been activated and a button to return to the login page.
REGISTERED PROVIDER LOGIN
If you already have an email address and PIN number follow these steps.
1) Log into the system using your email address and Personal Identification Number (PIN).
2) Click the Login button and you will be logged into the program.
The first page provides a mechanism to search for existing programs and additional menu options.
GETTING TO KNOW THE APPLICATION
As a new provider, the below screen shot indicates there are no programs in the database for me. I can add classes
under another program or create a new program from here.
If you are not a new provider, this page will automatically display programs for which you are the registered provider.
I logged in as a new provider. I have no programs in the database at this time. Therefore, the search results that display
upon logging in indicate “No Programs Found”.
After I have successfully entered a program, all of my programs will be listed for me at the time I login to the system.
CREATE NEW PROGRAM
To create a new program, use the menu option on the left Create New Program.
There are five steps to creating a new program…..
Step 1: Basic Details
Enter the basic details of the program: Program Title, Program Description, Sponsor (if you want to change it from the
default you may have already selected at signup), Program Type, Email address for the program and Program Comments
are all part of the program details. Fields marked with an asterisk (*) are required entries so be sure to enter
information into those fields before submitting the information. Then click the Next>> button to go to the next tab or
you can click the next tab.
Step 2: Class Details
Enter the basic details of the class: Class Location, Class Address, City, State, Zip, County, dates and times, Contact
name, email and phone number for the class and Class Comments are all part of the class details. Fields marked with an
asterisk (*) are required entries so be sure to enter information into those fields before submitting the information.
Then click the Next>> button to go to the next tab or you can click the next tab.
Selecting the date is used with a calendar popup for easier selection.
Once you have entered the information pertaining to the class, you can go to the next tab.
Then click the Next>> button to go to the next tab or you can click the next tab.
Step 3: Agenda and Speaker Details
Enter the agenda in the Agenda Description block and enter the Speaker Biography Description in the lower block. The
maximum character count is 4,000 per text box. Then click the Next>> button to go to the next tab or you can click the
next tab.
Step 4: CEU and Categories
Select the category from the Category drop down list and enter the number of requested CEU’s. Click the Add CEU
button to add the category and number of CEU credits you are requesting for each category the program covers.
Then click the Next>> button to go to the next tab or you can click the next tab.
If you have more than one category the program class covers, you may add them one at a time using the Add CEU
button as shown below.
If you make a mistake in your selection and click the Add CEU button, you may remove the item and make a new
selection.
Remove the item by clicking the Remove link on the row containing the item you wish to remove.
The last step is the Co-Provider selection.
Step 5: Add Co-Provider
This is the last step to creating a new program and class schedule. If you desire to review your entries or make changes,
click the Review / Edit Steps button. If you are positive you made no such errors and desire to continue or quite, you
may submit your request using the Submit button.
Upon submitting your request, the page will present a message that your request was successfully created and a little
information.
The email you will receive confirming the successful submittal will look similar to the following clip…..
UPDATE A PROGRAM
PENDING programs can be updated. To update the program information, use the Update a Program link from the menu.
If I have no pending programs, the Program ID list will display the following:
Only pending programs will be listed. If the provider has pending programs, then select the program to be updated from
the drop down list. Click the Search button to update the program selected.
Click the Edit button to gain access to the information to change it.
The parts of the program that are allowed to be changed are made available.
Update the information and Click the Save button.
REVIEWING AND SEARCHING THE DATABASE
To review a list of all approved programs in the database, click on the menu option All Approved Programs. The search
feature for this application is made up of several fields to use as criteria for your selection. Select any of the drop down
lists to narrow your search.
With each field used as criteria, it will further limit the list of programs displayed. If I search for items created by a
particular provider, then my list would be limited to only programs created by that provider.
The idea is the more fields used in the search criteria or the more drop down lists you make selection from before
clicking the Search button, the fewer items will be displayed. The list retrieved will include items where the fields or
drop down list selections are all part of that program.
MANAGING ATTENDEES
Manage attendees or enter attendees is accomplished by clicking the menu item Manage Attendance link.
You can manage attendance for programs where you are the provider. Select the Program ID from the drop down list
for the program in which you must to enter attendance and click the View Classes button.
Select the Program ID
from the drop down list
for the program in which
you must enter
attendance and click the
View Classes button
The page will display any existing class information related to the program. From this view, you may
1) select the Class ID to edit the class information
2) Add attendees participating in the class
3) Print the attendance sheet after entering the attendees
4) Print the attendance sheet with no information populated.
1) select the Class ID to edit the class information
Use the Edit button to gain access to the information. When you have finished making changes, click the Update button
to save your changes.
When you have finished making changes, click the Update button to save your changes.
From here, you may also View CEU and Categories or View Classes that are associated with this program.
The category and CEU information is not allowed to be changed.
View Classes displays all the classes associated with the program selected. You may also add a new class for this
program.
The option to Add New Class brings up the page that allows you to add a new class.
All of the same business rules apply as before. Fields marked with an asterisk are required. Then click the Add New
Class button.
A message will display to notify you that the class was successfully created.
You may add more than one class while you are on this page.
Before we get lost in adding classes….. We started out to manage attendees…..
Using the menu option Manage Attendees, all of those classes are listed. Select the Add Attendees link this time.
2) Add attendees participating in the class
Enter the license number of the student in the Enter License Number text box and click the Add Attendee button.
Use the View Attendees & Print Sheets link to display the attendees on the page and provide an opportunity to add
additional attendees.
You can also print the attendance sheet without attendees added. It will print a blank attendance sheet.
SCREEN SHOTS OF ALL PAGES LINKED FROM THE MENU
HOME and MY PROGRAMS– by default this page is the same page as the My Programs page.
ALL APPROVED PROGRAMS – displays the list of all programs that are active and approved.
CREATE NEW PROGRAM – opens the page with the 5 Steps to creating a new program
MANAGE ATTENDEES – opens the page to select the program and then classes related to the program for adding
attendees to classes and obtaining the record of attendance (CEU) forms.
UPDATE A PROGRAM – opens the page to select the program that you desire to change, modify or update.
ADD/UPDATE A CLASS – opens the page to select the program ID associated with the class you desire to modify.
The search button brings up a list of classes. You would select Class Details to edit the class information.
MY EXPIRED PROGRAMS – brings up a list of expired programs. These can be used for reference and are not allowed
to be modified. This provider has no expired programs to list.
UPDATE MY PROFILE – brings up the sign up page. You can update your contact information. The email address is not
updatable. The email address is your logon to the system and cannot be changed from this page. Use the CHANGE MY
EMAIL ADDRESS menu option to change your email address and logon user ID. Use the Save button to save your
changes.
CHANGE MY PIN – opens the page to change and set your own PIN. Follow the instructions on the page to change
your PIN.
CHANGE MY EMAIL ADDRESS – opens the page to allow you to change your email address and user Id to log onto the
system. Changing your email address is the same as changing your logon ID on the sign in page.
LOGON TO THE SYSTEM – the logon information is allowed to be changed by you. Please remember your logon
information. If you use the CHANGE MY EMAIL ADDRESS menu link and change your email address, then on the below
page, you MUST use the new email address to logon to the system.