1
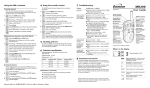
Using the PMR, continued
When the SCAN function is turned on, the handset will
continuously scan through all eight channels until it finds
one on which another user is transmitting.
Press the MENU button TWICE.
1
Press the
scanning.
or
button to start or stop
When the handset detects an active channel, it
will pause on that channel for a few seconds.
3
Press:
the ENTER button to set this as the current
channel;
OR the TALK button to transmit on this
channel.
2
To start the counter, press the
2
Press the MENU button THREE times.
DW appears on the display, as well as the
currently selected channel.
Press the
channel.
or
button to select a second
The display switches backwards and forwards
between the two selected channels. If the
handset detects a signal on either channel, it
will halt and receive it. Dual Watch restarts
when the signal disappears.
3
4
OR press the MONI button to monitor for
weak signals (for 15 seconds) on the channel
currently shown in the display.
Press the ENTER or TALK button to set and
confirm this as the current channel.
Locking the buttons
When the buttons are locked, you can transmit (TALK),
receive or monitor (MONI) the current channel. But you
can’t change the volume (
) or use the MENU button.
To lock the buttons:
◗
Press and hold the ENTER button until
appears on the display..
To unlock the buttons:
◗
Press and hold the ENTER button until
disappears from the display.
button.
The counter starts running. If it reaches 99 it
goes back to 00 and starts again.
3
4
To pause the counter, press the
button.
To restart the counter press the
again;
button
No power
Batteries are low or not fitted correctly –
check, and recharge batteries if necessary.
Weak reception\
no reception\
‘noisy’ reception
Batteries are low or not fitted correctly.
5
Confirm handsets are tuned to the same
channel.
Local conditions are impairing reception move to a different location, away from
obstructions.
Other user may not be transmitting.
When you’ve finished . . .
Other user is too close.
Press the MENU button once to return to
normal operation.
If the handset detects a signal on the current
channel while the seconds counter is running,
it will automatically switch to normal operation
and receive the transmission.
5 Cleaning and care
To clean your MR250, use a soft cloth dampened with
water.
Do not use cleaners or solvents, which may cause
damage not covered by the guarantee.
6 Technical specification
Operating frequency 446.00625 to 446.09375 MHz (eight
channels).
Channel spacing 12.5 KHz.
Output power 0.5 W.
Channel
Frequency (MHz)
Channel
Frequency (MHz)
1
446.00625
5
446.05625
2
446.01875
6
446.06875
3
446.03125
7
446.08125
4
446.04375
8
446.09375
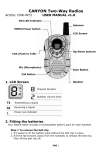
User Guide
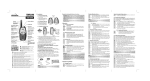
Socket for handsfree kit (headset)*
Display (see below)
Out of range.
Volume level may be set too low. See
Getting Started Section for more
information on adjusting the volume control.
OR, to reset the counter to 00, press the
ENTER button while the display is flashing.
MR250 Plus
Possible cause - solution
Handset is not switched on - check.
00 flashes on the display.
Monitoring two channels at once (Dual Watch)
1
Problem
Press the MENU button FIVE times.
SCAN flashes on the display.
2
7 Troubleshooting
The MR250 seconds counter (stopwatch) can count up to
99 seconds.
Scanning channels
1
4 Using the seconds counter
There’s interference from other users on
the same channel. See section on using
the Personal Mobile Radio for more
information on changing channels.
Cannot change
channels
Handset may have been locked.
In VOX mode, the
handset transmits
all the time
Background noise may be too high
In VOX mode, the
handset doesn’t
transmit
VOX sensitivity may be too low.
The dual charger
doesn’t work
Make sure that the mains power lead is
correctly fitted to the dual charger pod. See
section on Getting ready for use for more
information.
Batteries are low or not fitted correctly.
VOX sensitivity may be too high. See
section on using the Personal Mobile Radio
for more information on VOX mode.
TRANSMITTING
indicator light
ENTER button
Press to switch the
backlight ON and OFF.
Press and hold to lock
and unlock the handset
buttons.
Press to confirm
settings.
TALK button
Press and hold
while you’re
transmitting.
Microphone
MONITOR button
MENU button
Press and hold to
check for signals on the
current channel.
Press to change
channels and to
switch between
modes.
UP and DOWN
buttons
ON/OFF button
Press to change the
speaker volume.
Press after the MENU
button to change
channels.
CALL button
Press to send Ring
tone to other
handsets.
*Hands-free kit not supplied as standard.
What’s on the display
8 Guarantee and service
The Binatone MR250 is fully guaranteed for 12 months
from the date of purchase. The guarantee does not cover
damage by misuse or negligence, or by excessive voltages.
If you think the unit has developed a fault, first check the
troubleshooting guide. If the problem still persists, return
the units complete in the original packaging to the store
where you purchased them. Remember to take your sales
(till) receipt with you.
DW
BUSY
SCAN
VOX
Channel number (1 to 8)
Battery charge level - when this shows
put the handset back on charge.
DW
(low),
Dual Watch - shown when you’re monitoring two
channels at once.
Shown when the buttons are locked.
Declaration of conformity
The Binatone MR250 conforms with the following standards:
EN 300296
EN 60065
EN 301489
DI (Argos) Ver 1, Feb 06
BUSY
Shown when you’re receiving a signal.
SCAN
Shown when the handset is scanning all channels.
VOX
Shown when the handset is in VOX (voice-activated)
mode.
Volume level.
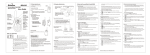
1 Getting ready for use
Charge both handsets for 12 hours before use.
1
4
Charging the handsets’ battery packs
◗
Place the handsets in the charging cradles (the LEDs
come ON when the handsets are properly positioned).
Leave them for 12 hours to charge fully.
Fitting a battery pack in each handset
When the handsets are switched ON, the battery level
(full).
display should show
It’s easier to fit the batteries without the belt clip in place.
◗
IMPORTANT
Whenever the MR250 handsets are not in use, leave them
on the dual charging pod to keep the batteries charged.
Insert your fingernail behind
the tab.
Pull the tab forward (away
from the handset) to release
the belt clip. Then lift the belt
clip off.
2 Getting started
Switching ON and OFF
B
◗
◗
◗
A
Open the locking latch
and slide off the battery
compartment cover.
To insert the battery
pack, insert the lower
edge first (A) . . .
◗
To switch the handset ON, press and hold the
button until the display comes ON.
To switch the handset OFF, press and hold the
button until the display goes blank.
You hear a confirmation tone each time.
◗
Latch
. . .then press the upper
edge into the
compartment (B),
clicking the battery pack
firmly into position.
3 Using the Personal Mobile Radio (PMR)
The talk range depends on environment and terrain. It will
be greatest (up to about 3 km, or 1 ½ miles) in wide open
spaces without obstructions such as buildings. Don’t try to
use two PMR handsets which are less that 1.5 m (5 feet
apart). If you do, you may experience interference.
To switch the backlight ON and OFF:
Briefly press the ENTER button.
Battery life
The MR250 has a built-in Power Saver feature to make the
batteries last longer. But when you’re not using the handset,
it’s best to switch it OFF to save battery power. You’ll also
find that the batteries last longer if you keep the backlight
switched OFF when you don’t need it.
◗
Lay the ribbon across the
top of the battery pack.
◗
Replace the battery
compartment cover,
and firmly close the latch.
Volume control
2
Fitting the (optional) belt clip
To adjust the loudspeaker volume:
◗
Slide the belt clip downwards
until it clicks into position.
◗
or
Your PMR’s have eight channels, numbered 1 to 8.
To communicate with other PMR users within range, you
must all have your handsets tuned to the same channel.
1
Press the MENU button ONCE.
The current channel number flashes on the
display.
2
Press the
or
button to go to the
channel you want.
3
Press the ENTER button to confirm.
Transmitting and receiving
! Note: PMR transmission is ‘one-way-at-a-time’ - while
you are speaking, you cannot receive a transmission.
1
Press and hold the TALK button so that the
TRANSMITTING light comes ON.
2
Speak clearly into the microphone, in a normal tone don’t shout.
3
When you’ve finished speaking, release the TALK
button.
button.
The volume level is shown by the bars in the display.
You can change the volume either while you’re using
your MR250 handset, or while the handset is idle
(switched ON but not in use).
Connecting the dual charger pod to the mains
power supply
◗
Plug the mains power lead into the connector on the
side of the charger pod.
◗
Ensure the switch at the 230 V AC, 50 Hz mains
socket is set to OFF.
◗
Plug the adapter into the mains socket and switch ON
the mains power.
Binatone Help Line • 0845 345 9677 • 9:00 am to 5:00 pm,
Mondays to Fridays
Never use your MR250 outdoors in a thunderstorm.
Do not expose the unit to rain
Before charging, please read the instruction
Do not charge with non-rechargeable batteries. Charge
only with the rechargeable battery pack provided.
Please dispose of old defective batteries in an
environmentally friendly manner
Keep the appliance out of the reach from children
You’ll hear Ring tone for about 3 seconds,
while the TRANSMITTING light is ON.
Any other handset within range and tuned to
the same channel will hear Ring tone, and may
decide to transmit to you.
You can also use Ring tone at the end of a
transmission to signal that you’ve finished
speaking.
VOX (voice-activated transmission) mode
In VOX mode, your handset will transmit whenever it
detects your voice (or other noise) without the TALK button
pressed.
It will transmit for at least 2 seconds even if you stop talking.
You may wish to use VOX mode if you’re using a handsfree kit (see overleaf).
The level of VOX sensitivity is shown by bars on the display.
At the highest level (most bars), the handset will pick up
softer noises (including background noise); at the lowest
level, it will pick up only quite loud noises.
To turn VOX mode ON and OFF:
1
Press the MENU button FOUR times.
VOX flashes on the display, and the current
level of VOX sensitivity is shown.
2
Press the
or
button to set the level of
VOX sensitivity.
If you press the
button repeatedly until the
‘sensitivity’ bars disappear altogether, you turn
VOX mode OFF, and VOX disappears from
the display.
3
Press the ENTER button to confirm the setting.
As long as the handset is in VOX mode, VOX
is shown steadily on the display.
To listen to another handset user:
◗
Safety warnings
3
Press and release the CALL button.
◗
Changing channels
To speak to another handset user:
Press the
You can send Ring tone to other handsets within range and
tuned to the same channel as an alert that you want to
communicate with them.
! Note: Your PMR’s work on the PMR446 frequency
which is an open-license band - always identify
yourself when transmitting, as other people may be
communicating on the same channel.
The backlight for the display
Warning: Do not remove
the sleeve from the battery
pack.
Ring tone
Transmission range
Make sure you are NOT pressing the TALK button.
BUSY is shown on the display when the other person is
speaking. Don’t try to transmit until they have finished.
Monitoring the current channel
Normally, the MR250 will not pick up very weak signals. But
you can monitor the current channel for all weak signals by
turning this function ON.
◗
Press and release the MONI button.
Your handset will pick up any signals on the
current channel, including background noise. It
will carry on monitoring for about 20 seconds,
unless you press and release the MONI button
again to stop it.
Using a hands-free kit (headset) - Optional
You can plug a hands-free kit (not supplied as standard) into
the socket on the top of your MR250 handset. With a handsfree kit, you may wish to transmit in VOX mode; but if you
find that this doesn’t work very well, you can turn the VOX
sensitivity OFF and press the TALK button to transmit, as
normal.
For further details on the optional hands-free kit, please
contact the Binatone Help Line on 0845 345 9677.