1
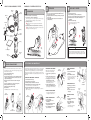
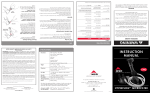
KNOW YOUR MSR ® MINIWORKS ® EX FILTER
MINIWORKS ® EX OPERATING INSTRUCTIONS
FILTER WATER
Inlet Hose
Barb
Inlet Hose
Handle
Inlet Float
Inlet
Funnel
Tube Clip
Inlet Cage
Lower End
Cap O-ring
PREPARE FILTER
Pump
Head
1. Unscrew the Clean Side Cover from the Housing.
2. Connect open end of Inlet Hose to Inlet Hose Barb.
Before first use, pump 1-2 liters of water through filter (1-2 minutes) to purge
residual carbon dust before attaching to a clean water container.
3. Put Inlet Cage under water.
Adjust Inlet Float to keep Inlet Cage between bottom sediments and
water surface.
4. Begin pumping until water enters Pump Head and flows out of Housing.
NOTE: Airspring design provides best performance when air is visible in
Housing. Do not invert filter to purge air out.
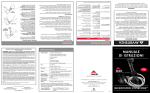
PACK AND STORE FILTER
1. Place a clean container under the filter OR attach an MSR® Dromedary™
Bag onto the bottom of the filter.
2. Begin pumping until water enters Pump Head, fills Housing, and begins to
flow out of filter.
3. Pump the Handle to filter water (about 70 to 80 strokes/minute for
optimal performance).
1.
2.
3.
4.
Remove Inlet Cage from water.
Pump the Handle to purge filter of any remaining water.
Rinse and air dry Ceramic Element completely (3-5 days) before storage.
Attach Clean Side Cover onto the bottom of the filter to prevent
contamination.
5. Wind Inlet Hose around Housing.
Secure Inlet Hose with Tube Clip on Handle.
Place filter inside Storage Sack.
Ceramic
Element
Inlet Foam
Housing
PURGE
1-2 MIN
WARNING
Scrubbing Pad
Always wash and dry filter parts thoroughly before long-term storage
to prevent the growth of mold, mildew, and bacteria. Never use a dishwasher to wash parts because the high heat may damage or melt them.
Clean Side
Cover
Ceramic
Gauge
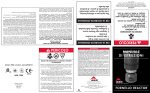
FILTER CLEANING AND MAINTENANCE
STERILIZE CERAMIC ELEMENT
Sterilize the Ceramic Element if the filter has been used for more than seven
consecutive days. Also, sterilize it before or after long-term storage, especially
if Ceramic Element was stored wet.
1. Remove Ceramic Element from Housing.
2. Remove Lower End Cap O-ring.
3. Place Ceramic Element in large pot. Cover the Ceramic Element completely
with water (room temperature) and allow room for the water to reach a
rolling boil without spilling over.
4. Bring water to a boil and allow element to remain in rolling boil for
5 minutes.
5. Turn off stove and allow water to cool before removing element.
6.Air dry Ceramic Element completely (3-5 days).
7. Wash and dry completely all other filter parts.
8. Reassemble filter.
IMPORTANT: Remember to reinstall Lower End Cap O-ring.
The MiniWorks EX requires regular cleaning and maintenance to function properly.
Cleaning and maintenance depends on frequency of use and water quality.The
Ceramic Element will clog gradually during use, especially when filtering from
glacial streams or cloudy water. If necessary, replacement parts can be found in
the MSR Water Filter Maintenance Kit, purchased separately from a local or online
MSR dealer.
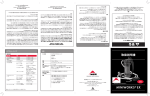
CLEANING THE CERAMIC ELEMENT - AFTER EACH USE
1.
2.
3.
4.
Unscrew Pump Head from Housing.
Unscrew Clean Side Cover from Housing.
Hold Housing and push Ceramic Element out from bottom.
Wet Scrubbing Pad with clean water and gently rub the element.
Use even, uniform strokes to clean around the element.
5. Rinse Ceramic Element with clean water and reassemble filter.
WARNING: Check installation of Lower End Cap O-ring to ensure element is
sealed in the Housing.
REMOVE
CERAMIC ELEMENT
CLEAN
CERAMIC ELEMENT
REMOVE
LOWER END CAP O-RING
NOTE: MSR recommends measuring the
Ceramic Element after each cleaning.
1. Remove Ceramic Gauge from Clean Side
Cover.
2. Remove Ceramic Element from Housing.
(See “Cleaning the Ceramic Element.”)
3. Gently lay gauge on surface of Ceramic
Element and slide along its length.
(DO NOT FORCE gauge over element.
Permanent damage can occur.)
4. Replace Ceramic Element if gauge fits
easily over Ceramic Element at any point.
(See “Replacing the Ceramic Element.”)
Ceramic
Gauge
Lower End
Cap O-ring
1. Unscrew Inlet Hose Barb from the
Pump Head.
2. Rinse Duck Bill and reassemble.
Ensure sequence of Inlet Hose Barb,
Inlet Hose O-ring, Relief Valve
Spring, Duck Bill Washer, and
Duck Bill.
Inlet Hose
Barb
1. Slide Inlet Cage up the Inlet Hose.
2. Remove Inlet Foam from the Inlet
Funnel.
3. Rinse foam in clear water and
reinstall parts.
LUBRICATING THE PISTON
O-RING
CLEAN
UMBRELLA VALVE
1. Pull out Pump Head Pin and Pump
Head Bushing.
2. Remove Handle and Piston.
3. Lubricate Piston O-ring and
reassemble.
Use MSR Silicone Lubricant, lip
balm or petroleum jelly.
1. Unscrew Pump Head.
2. Pinch and pull gently to remove
Umbrella Valve.
3. Rinse Pump Head and Umbrella Valve
thoroughly with clean water.
4. Press Umbrella Valve firmly back into
place and reassemble.
Umbrella
Valve
Duck Bill
Washer
Duck Bill
Relief Valve
Spring
CLEAR RELIEF
VALVE ASSEMBLY
CLEANING THE INLET FOAM
REPLACING THE CERAMIC ELEMENT
CLEANING THE UMBRELLA VALVE
Inlet Hose
O-ring
CLEARING THE RELIEF VALVE
ASSEMBLY
MEASURE
CERAMIC ELEMENT
Follow removal and reinstallation steps
in “Cleaning the Ceramic Element.”
BOIL 5
MINUTES
REMOVE
CERAMIC ELEMENT
MEASURING THE CERAMIC ELEMENT
Pump Head
Bushing
Pump Head
Pin
Piston
O-ring
Piston
LUBRICATE
PISTON O-RING