1
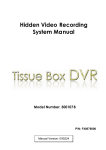
Digital Wireless Series Product User’s Guide Wireless Tissue Box Version: 1.0 131218 1 Thank you for purchasing our Wireless Tissue Box. Please read this manual before installation. For customer support, please contact your dealer, and keep your Invoice for further support. Do not open/modify the device, as it may cause damage to the unit and void the Warranty. For internal repairs, consult your dealer or an Authorized Service Center. Do not use any accessories other than what comes with the unit otherwise, it would void the warranty. Protect from humidity. Do not put it in water and be careful to protect it from rain, sea water, or high humidity environment etc. Protect from high temperatures To avoid damage or mis-operation of the device, only use it in the temperature between 0 ~ +40°C. Do not bring the device suddenly from a hot to a cold place, or vice versa. This may cause damaged to the inside of the unit by creating condensation. EU Environmental Protection The symbol of crossed-out garbage shows that this product should not be treated as household waste, and it falls into the category of electric /electronic equipment for recycling. This electronic device should not be disposed in a regular trash. We strongly advice you to contact related authorization before you dispose this product. -2- Table of contents Package contains......................................................................................................................................4 User’s Interfaces .......................................................................................................................................5 Get unit work quickly.................................................................................................................................6 Software & Hardware Specifications on Mobile Devices ...........................................................................8 How to Charge The Battery .....................................................................................................................8 ASP4 (PC Player) User’s Interface ........................................................................................................9 Remote Viewing Steps for PC...............................................................................................................10 Remote Viewing Steps for Mobile ........................................................................................................13 Technical Specification...........................................................................................................................16 -3- Package contains CW1113 Main Unit x1 Power Adapter x 1 3.7V 4800mA Li-polymer battery x 1 4 User’s Interfaces 5 Get unit work quickly 1. The Power LED (red) will be on when the Transmitter/Receiver is turned on. 2. Below transmitters and receivers are fully inter-operable. 3. How to Pair Up: 3.1 Select a channel on the Receiver (use remoter controller), long press the pairing button till the channel LED (blue) is flashing. 6 3.2 Press the pairing button on the transmitter. 3.3 After pairing is completed and successful, the Channel LED (blue) on Receiver will be flashing rapidly, and the image will show on the Monitor. A Receiver is able to be paired up to 4 different Transmitters, and to receive image from 4 Transmitters simultaneously. 7 Software & Hardware Specifications on Mobile Devices To use the remote viewing on PC, we highly recommend you to have following software and hardware specifications on your PC, Microsoft® Windows XP, or Windows 7 (.NET Framework 3.5 higher) Internet Explorer® 8 or higher. CPU: 2.0GHz or higher (only support x86 and x64) Memory: 1GB or above Display card: Independent display card and support DirectX 9.0 or higher. To use the remote viewing on iPhone / iPad, we highly recommend you to have following software and hardware with your iPhone / iPad, iPhone 3 or higher iPad iOS 4.3 or higher Other remote devices, Android 4.0 or above IE / Chrome are supported How to Charge The Battery Connect the provided power adapter with the cradle, the charging time is around 3 hours and the green LED will be on (Please charge for 10 hours when you charge the battery for the first time). The battery, after fully charged, can last for 6.5 hours at least under continuous recording. However, the battery power will be dramatically reduced when recording with IR LED. Under motion activation or power saving mode, Tissue Box can last for longer. * NOTE: Under low temperature conditions, the battery will have a shorter life than normal. * NOTE: Please use the bundled power adapter only. Damage which is caused by other power adapter will be beyond warranty. * NOTE: For better performance it is recommended to charge the battery once every 3 weeks. * NOTE: please re-charge the battery to full when receiving the wireless Tissue Box. 8 ASP4 (PC Player) User’s Interface System Setting Recording Mode Open file, to search the Network ON / OFF recording files (for remote view) Snapshot, to save JPG CH1 Full screen display picture CH2 Full screen display CH3 Full screen display CH4 Full screen display Quad-View display Manual recording during live view & backup files during playback Backwards Pause Forwards Stop Play 9 Remote Viewing Steps for PC Easy 3 steps to see the Live View remotely: Step 1. Install the bundled software ASP4 on PC, and highly recommend to change the log-in User Name / Password (default User Name & Password: admin / admin ) in “Network Setting”. The “ID” means receiver ID number, it would automatically show on the network setting when you plug-in your USB cable. ** Click OK to complete the setting and protect the data security. 10 Step 2. Finished the network setting, the Remote viewing web link and the surrounding view will display on the PC ASP4 software. ** http://www.ez-see.net/10001901 Server domain name Receiver ID number (8 digit), each Receiver device has its own ID number. User have to key in www.ez-see.net/xxxxxxxx (Receiver ID number) on IE browser and to enter the remote viewing page. 11 Step 3. You could key in the remote viewing web link on PC IE browser (e.g., http://www.ez-see.net/10001901), log-in your account on remote PC IE browser, see the Live View! (*Remark: currently IE is the only PC web browser supported for remote viewing.) PC log-in page: (Remote viewing page) 12 Remote Viewing Steps for Mobile Step1. Search “EZ-SEE” app on APP Store. Step2. Press "add" to create an account as your EZ-SEE ID, 13 Step3. Fill in the ID, User Name and Password (same as the ASP4 network setting) and press "Save" button which on the upper right corner. Step4. You will see your ID number on your mobile (e.g., 10001901). My house 14 Step5. Enjoy your live viewing!! In this page, you could check the Quad-viewing or one channel viewing mode by your desire. On the top of the page, you would see your defined DVR name (same as your DVR name on ASP4 software network setting). (Quad-viewing) 15 Technical Specification Channel Pairing 4 Tx to 1 Rx Operation Frequency Range 2408.625 ~ 2470.5 MHz Channels hopping 24 channels Modulation GFSK, FHSS (digital) Transmission Range 150M (or longer with high gain antenna) Transmitter RF output power 15.5 ~ 18.5 dBm Resolution / Frame Rate 640x480 @ 30fps Reserved PIR motion sensor input (Alarm input) 1 set (Reserved) Antenna connection Fixed Type Antenna gain 1.5 dBi RF Data Rate 3Mbits /Second PCB Dimensions 48 x 48 MM Video Source Input Analog Alarm Input 1 set (reserved for PIR motion sensor input) Power Consumption 12V 270mA (with camera) 12V 120mA (without camera) Power 12V Operating temperature 0°C ~ 40°C (32°F~ 104°F) 16 Thank you for purchasing our Wireless Tissue Box. Please read this manual before installation. For customer support, please contact your dealer, and keep your Invoice for further support. Do not open/modify the device, as it may cause damage to the unit and void the Warranty. For internal repairs, consult your dealer or an Authorized Service Center. Do not use any accessories other than what comes with the unit otherwise, it would void the warranty. Protect from humidity. Do not put it in water and be careful to protect it from sea water or high humidity environment etc. Protect from high temperatures To avoid damage or mis-operation of the device, only use it in the temperature between 0 ~ +40°C. Do not bring the device suddenly from a hot to a cold place, or vice versa. This may cause damaged to the inside of the unit by creating condensation. EU Environmental Protection The symbol of crossed-out garbage shows that this product should not be treated as household waste, and it falls into the category of electric /electronic equipment for recycling. This electronic device should not be disposed in a regular trash. We strongly advice you to contact related authorization before you dispose this product. 17