Download AG60 USER`S MANUAL
Transcript
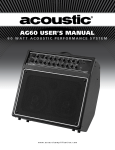
AG60 USER’S MANUAL 6 0 W AT T ACOUSTIC PERFORMANCE SYSTEM www.acousticamplification.com AG60 USER’S MANUAL 6 0 W AT T ACOUSTIC PERFORMANCE SYSTEM IMPORTANT SAFETY INSTRUCTIONS EXPOSURE TO HIGH NOISE LEVELS MAY CAUSE PERMANENT HEARING LOSS. INDIVIDUALS VARY CONSIDERABLY TO NOISE-INDUCED HEARING LOSS BUT NEARLY EVERYONE WILL LOSE SOME HEARING IF EXPOSED TO SUFFICIENTLY INTENSE NOISE OVER TIME. The U.S. Government’s Occupational Safety and Health Administration (OSHA) has specified the following permissible noise level exposures: DURATION PER DAY (HOURS) 8 6 4 3 2 1 1/2hr. or less SOUND LEVEL (dB) 93 95 97 100 103 110 90 This symbol is intended to alert the user to the presence of non-insulated “dangerous voltage” within the products enclosure. This symbol is intended to alert the user to the presence of important operating and maintenance (servicing) instructions in the literature accompanying the unit. Apparatus shall not be exposed to dripping or splashing. Objects filled with liquids, such as vases, shall not be placed on the apparatus. According to OSHA, any exposure in the above permissible limits could result in some hearing loss. Hearing protection must be worn when operating this amplification system in order to prevent permanent hearing loss. 1. Read all safety and operating instructions before using this product. 2. All safety and operating instructions should be kept for future reference. 3. Read and understand all warnings listed on the operating instructions. 4. Follow all operating instructions to operate this product. 5. This product should not be used near water, i.e., bathtub, sink, swimming pool, wet basement, etc. 6. Only use dry cloth to clean this product. 7. Do not block any ventilation openings, it should not be placed flat against a wall or placed in a built-in enclosure that will impede the flow of cooling air. 8. Do not install this product near any heat sources such as radiators, heat registers, stoves or other apparatus (including amplifiers) that produce heat. 9. Do not defeat the safety purpose of the polarized or grounding-type plug. A polarized plug has two blades with one wider than the other. A grounding-type plug has two blades and a third grounding prong. The wide blade or the third prong are provided for your safety. If the provided plug does not fit into your outlet, consult an electrician for replacement of the obsolete outlet. 10. Protect the power cord from being walked on or pinched, particularly at plugs, convenience receptacles, and the point where they exit from the apparatus. Do not break the ground pin of the power supply cord. 11. Only use attachments specified by the manufacturer. 12. Use only with the cart, stand, tripod, bracket, or table specified by the manufacturer or sold with the apparatus. When a cart is used, exercise caution when moving. 13. Unplug this apparatus during lightning storms or when unused for a long period of time. 14. Care should be taken so that objects do not fall and liquids are not spilled into the unit through the ventilation ports or any other openings. 15. Refer all servicing to qualified service personnel. Servicing is required when the apparatus has been damaged in any way. 16. WARNING: To reduce the risk of fire or electric shock, do not expose this apparatus to rain or moisture. 17. When a mains plug or an appliance coupler is used as the disconnect device, the disconnect device shall remain readily operable. 18. An apparatus with CLASS 1 construction shall be connected to a MAINS socket outlet with a protective grounding connection. 3 TABLE OF CONTENTS WARRANTY . . . . . . . . . . . . . . . . . . . . . . . . . . . . . . . . . . . . . . . . . . . . . . . . . . . . .2 IMPORTANT SAFETY INSTRUCTIONS . . . . . . . . . . . . . . . . . . . . . . . . . . . . . . . . .3 WELCOME . . . . . . . . . . . . . . . . . . . . . . . . . . . . . . . . . . . . . . . . . . . . . . . . . . . . . .5 OUR MISSION . . . . . . . . . . . . . . . . . . . . . . . . . . . . . . . . . . . . . . . . . . . . . . . . . . . .5 A WORD ABOUT YOUR NEW AMP . . . . . . . . . . . . . . . . . . . . . . . . . . . . . . . . . . .5 FRONT PANEL . . . . . . . . . . . . . . . . . . . . . . . . . . . . . . . . . . . . . . . . . . . . . . . . . . . .6 BACK PANEL . . . . . . . . . . . . . . . . . . . . . . . . . . . . . . . . . . . . . . . . . . . . . . . . . . . . .7 CABINET FEATURES . . . . . . . . . . . . . . . . . . . . . . . . . . . . . . . . . . . . . . . . . . . . . . .7 SPECIFICATIONS . . . . . . . . . . . . . . . . . . . . . . . . . . . . . . . . . . . . . . . . . . . . . . . . . .8 CARE OF OF Y OU R N TAKING CARE YOUR NEW AMPLIFIER . . . . . . . . . . . . . . . . . . . . . . . . . . . . . .8 4 www.acousticamplification.com FRONT PANEL 1 2 1 2 3 4 5 6 7 8 9 10 11 The AG60 Acoustic Performance system is designed for up to four inputs which can be any combination of microphones, and channel 2 for instruments. The EQ and effects can be tailored for each channel independently. microphone into any input in either channel. acoustic instrument has a preamp, you should set the volume control on your instrument at about half volume. You can then adjust the amplifier volume to your normal playing level and still have room to increase or decrease your volume as needed from the instrument. 3. Low frequency control set to boost (15 dB) or cut (-15 dB) frequencies at 80 Hz. Controls the lowest fundamental frequencies to enhance the warmth and deep, full tones of your acoustic instrument. 4. Midrange frequency control set to boost (15 dB) or cut (-15 dB) frequencies that you can sweep between 500Hz and 1.2kHz. Moving the midrange frequency and either cutting or boosting this frequency will give you maximum control over the body of your tone. This control can also be useful in eliminating acoustic feedback. It also allows you to control the definition and voice of your acoustic instrument. 5. High control set to boost (15 dB) or cut (-15 dB) frequencies at 10 kHz. Increasing this will enhance the clarity and brightness of your acoustic instrument. 6. The Effect level control Is used to determine how much of the selected effect is applied to your music. Each channel has an independent Level control for the effects. 7. The Effect Select control for each channel allows you to select from one of 16 different effects including reverbs, delays, choruses and combinations of the above. The 16 effects are detailed around the face of the knob on the AG60. A unique and useful feature is that a different effect can be selected for Channels 1 and 2. 8. The Master Level controls the overall stage volume of the amplifier. Changing this level control will not affect the line out levels on the back of the amplifier, therefore will not change your signal sent to a live or recording mixing console. play along. This input has a separate level control which allows for fine tuning of the input signal. 10. Power LED. This light will illuminate with a soft blue color when the amp is turned on and ready to play 6 www.acousticamplification.com AG60 USER’S MANUAL 6 0 W AT T ACOUSTIC PERFORMANCE SYSTEM BACK PANEL 1 2 1. The effects loop provides a parallel loop in the signal chain for the use of external effects devices including compressors, equalizers, etc. The Send jack provides a line level signal and may also be used as a line out to another device such as a powered monitor speaker or additional amplifier. jack, both of which may be used simultaneously. The Line Out level control is strictly for level adjustment of the Line Out signal and will not affect the stage volume of the amplifier. Conversely, the “Master Level” control on the front of the amplifier will not affect the Line Out level. The ground lift can be engaged to reduce noise from being induced when the AG60 is plugged into a device on a different power circuit. CABINET FEATURES 4 5 6 3 2 1 1 Heavy-Weight Cloth Grill 4 Rugged & Comfortable Handle 2 Heavy-Duty 8” Coax Studio – Monitor Style Speaker 5 Easy to Read Control Panel 3 Angled Monitor Style Cabinet Projects Sound Upwards 6 Protective, Long-Lasting Covering 7 SPECIFICATIONS Model AG60 Power 60W RMS Equalizer: Two equalization sections, one for each channel featuring – 3-Band EQ with sweepable midrange Low Med High ±15dB@80Hz ±15dB@ Sweepable from 500Hz to 1.2kHz ±15dB@10kHz Channels 2 - each with dual input jacks and volume controls Speaker Twin 8” Coax Studio Monitor Style Dimensions 21.3” x 15” x 20.8” Weight 58 lbs. TAKING CARE OF YOUR NEW AMPLIFIER LOCATION sources, or excessive humidity. POWER SUPPLY period of time. electric heaters or televisions. Also avoid using multi- plug adapters since these can reduce sound quality, cause operation errors, and result in possible damage. HANDLING AND TRANSPORT CLEANING ELECTRICAL INTERFERENCE If this occurs, move the AG60 further away from the affected equipment. SERVICE AND MODIFICATION 8 www.acousticamplification.com






![View User`s Manual [US] - Acoustic Amplification](http://vs1.manualzilla.com/store/data/005805370_1-0fda88921e56c0c9a0d78a1aaa3723de-150x150.png)



![View User`s Manual [US] - Acoustic Amplification](http://vs1.manualzilla.com/store/data/005687953_1-09ed6117760df16c9056fa1c8c49b775-150x150.png)
![View User`s Manual [US] - Acoustic Amplification](http://vs1.manualzilla.com/store/data/005929580_1-14523f44a960f194cc16791ff2ace09d-150x150.png)


![View User`s Manual [US] - Acoustic Amplification](http://vs1.manualzilla.com/store/data/005826575_1-502fc6b7ae7d817a3780b8672067163d-150x150.png)
![View User`s Manual [US] - Acoustic Amplification](http://vs1.manualzilla.com/store/data/005834670_1-839e21e8bc31a6b298042e7e04804c8b-150x150.png)
