1
APP3 short manual 1209
17/12/09
11:08 am
Page 1
Husky HUS-APP3-EL Freezer
Domestic Range
User Guide
To ensure safe operation, please read this instruction manual thoroughly before use.
Thank you for buying this Husky domestic appliance. It has been designed and
manufactured for many years of trouble-free service.
GET TO KNOW YOUR HUSKY APPLIANCE
Operation is very simple, but please take a few minutes to read this booklet. It
contains important safety information and tips to ensure you receive the best
possible service from your new appliance.
1
WARNING: RISK OF ELECTRICAL SHOCK HAZARD
USERS IN EUROPE This unit must be earthed.
If the power cable is damaged, it must be replaced by a qualified
engineer to avoid shock hazard. DO NOT ATTEMPT TO SERVICE THE
ITEM YOURSELF. Ensure that the appliance is properly earthed. Stop
using the appliance immediately if an electric shock is felt when
touching it.
2
DISPOSAL OF OLD APPLIANCES
BE SURE TO MAKE ANY LOCKS UNUSABLE. IF POSSIBLE, REMOVE ANY DOOR(S)
AND DISCARD SEPARATELY.
WARNING – CHEMICAL HAZARD: DO NOT ALLOW CHILDREN TO PLAY WITH THE
OLD APPLIANCE. CONTACT YOUR LOCAL AUTHORITY FOR PROPER DISPOSAL
PROCEDURES.
Before disposing of an old appliance, please make sure it is switched off and safe.
Unplug the appliance and break any locks in order to avoid children becoming
trapped. Please note: the refrigeration system contains gases and refrigerants which
require specialist waste disposal. The valuable materials contained in a freezer can
be recycled.
Contact your local waste disposal depot for proper disposal of an old appliance and
contact your local authority or dealer if you have any questions.
Please ensure the pipework of your freezer is not damaged prior to disposal. You
can contribute to environmental awareness by insisting on an appropriate nonpolluting method of disposal.
DISPOSAL OF PACKAGING
Do NOT allow children to play with the packaging.
Destroy plastic bags safely.
3
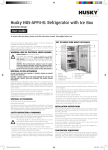
1. Temperature Control Dial
2. Baskets
3. Levelling Feet
Husky Retail Ltd. reserves the right to amend design, features and/or specification at any time.
• Do not damage any parts of the appliance which carry refrigerant by piercing,
perforating, crushing, twisting or scraping. If the refrigerant comes into contact with
the eyes, it may cause serious eye injury.
• Do not obstruct or cover the ventilation aperture.
• Do not allow children to play with the appliance, to sit on it or to hang onto the door.
• This appliance is not intended for used by persons (including children) with reduced
physical, sensory or mental capabilities, or lack of experience and knowledge,
unless they have been given supervision or instruction concerning use of the
appliance by a person responsible for their safety.
The cardboard may be broken or cut into smaller pieces and given to a waste paper
disposal service. All these valuable materials may be taken to a waste collecting
depot and used again after adequate recycling. Consult your local authority for the
name and address of the waste paper disposal service nearest to you.
INSTALLATION INSTRUCTIONS
SAFETY INSTRUCTION & WARNINGS
Leave at least 5cm space all round the unit for ventilation. Choose a well-ventilated
location which is not exposed to direct sunlight, relatively free from dust, humidity,
and sources of heat.
Before switching on your Husky appliance for the first time, read the information in
this user manual carefully. The user manual contains important observations relating
to the assembly, operation and maintenance of the appliance.
Please keep this booklet in a safe place for future reference. If you ever
sell your Husky appliance, give this manual to the new owner.
The manufacturer does not accept responsibility for any damages that
may arise due to non-observation of these instructions.
Ensure your chosen location has a flat and stable surface. The unit may be levelled
by turning either or both of the adjustable feet in the front corners. Check the unit is
level using a spirit level.
Ensure the unit is plugged into its own dedicated power socket. To guard from risk
of overheating, do not use extension leads or socket doublers.
Do not store unstable or inflammable materials such as ether, benzine, liquid
petroleum gas, solvents or glues.
• Do not use damaged appliances. If you are in any doubt, consult an engineer.
To prevent from malfunction or electric shock, do not place the freezer in a position
where it may come into contact with water.
• Connection and installation of your Husky appliance are to be carried out in strict
compliance with the relative instructions in this manual.
TEMPERATURE ADJUSTMENT
• For safety, the appliance must be properly earthed in accordance with
specifications.
Turn the dial using the following as a guide.
• Always remember to unplug the appliance before cleaning. Never unplug your
appliance by pulling on the power cable. Always grip plug firmly and pull straight
out from the socket.
Normal operation
• All electrical repairs must be carried out by qualified engineers. Inadequate repairs
may be dangerous.
Position of Control Dial
NORMAL
Lowest temperature
MAX
Highest temperature
MIN
Off
OFF
APP3 short manual 1209
17/12/09
11:08 am
Page 2
GENERAL NOTES ON FREEZING FOODS
For optimum storage efficiency, maintain a general internal temperature of
-18°C, and do not store foodstuffs for longer than guidance you will find indicated on
the food item packaging.
Foods with high water content, such as vegetables and fruit should not be frozen.
Always try to maintain some space between items, for proper circulation of cold air.
Foods should be kept in storage boxes or wrapped appropriately, to prevent drying
out or exchange of odours.
Always allow items to cool completely before placing into the unit. NEVER place hot
foods or drinks in the freezer.
2. Lift the door off the lower hinge and place it on a padded surface to prevent
scratches.
3. Remove the blanking plug (8) in the upper left of the door and fir it into the
uncovered hole at the right side. Press firmly into place.
4. Remove the two screws (6) which hold the lower hinge (2). Remove the lower
hinge (2) and keep it safely.
5. Remove the foot (4) and fit it to the hole on the right side.
6. Remove the bolt pin (7) from the lower hinge (2). Reverse the direction of the
lower hinge (2) and and fit it to the left side of the frame using the two screws (6).
7. Insert the bolt pin (7) into the lower hinge (2).
Try to wrap items closely extracting as much air as possible.
8. Fit the door securely onto the bolt pin.
Label everything! Many foods look similar when frozen, so by maintaining a
discipline of labelling and dating bags clearly you will find foods faster and in better
condition too.
9. Whilst holding the door in the closed position, secure the upper hinge (5) into its
new position on the top left of the unit using the two screws (1). Adjust the door
until it is square and level, then tighten the screws.
Freezing foods in small amounts will aid in faster freezing, faster defrosting, and will
help you use only the amount you need later, so less wastage.
GENERAL MAINTENANCE
GENERAL PRECAUTIONS & FOOD HYGIENE
Always thaw frozen foods at room temperature. Thawing in warm environments may
encourage bacterial growth. Discard any liquid produced in the thawing process.
Cook food thoroughly and as soon as possible after thawing.
NEVER re-freeze foods after they have defrosted.
ALWAYS check food is thawed and cooked thoroughly. Use a temperature sensor if
necessary. Evidence of ice crystals is an indication of undercooking. This is a bacteria
risk.
NEVER freeze carbonated drinks, or liquids in sealed glass bottles.
NEVER store foods in foil containers if you intend to microwave them straight from
the freezer. Use plastic airtight containers or purpose-made freezer bags. re-seal bags
tightly after removing food to avoid “freezer burn” which dries and spoils the quality
of food.
Before cleaning the appliance, disconnect the mains plug. Wipe interior surfaces with
an appropriate cleanser, then clean off with a soft damp cloth.
Avoid cleansers containing soap powder, abrasive powder, chemicals, thinners,
solvents, alcohol, petroleum or hot water. These may damage the surfaces, plastics,
or general operation of the unit.
If the unit is not to be used for a prolonged period, remove the plug, clean and dry
the compartments thoroughly, then close the doors securely.
Door gaskets attract dirt. Please clean frequently.
TROUBLESHOOTING
The following are NOT malfunctions:
• The sides of the unit will become warm whilst the condenser is working. This will
not affect performance of the unit.
• It takes time for the compartments to become cold whilst the appliance is working.
Larger volumes of food and frequent or prolonged opening of the door may result in
higher energy consumption.
• It is normal for the compressor to become hot as part of its normal operation. Do
not touch.
Do not place heavy, pointed or corrosive items on top of the unit.
If you disconnect the unit, wait ten minutes before replacing the plug.
• The sound of flowing water may be heard. This is the refrigerant circulating
normally and is not a fault.
In the event of a power failure, keep door openings to a minimum to prevent escape
of cold air.
• Condensation may form on the outside of the unit where humidity is exceptionally
high. This is not a fault, simply wipe the surface with a dry cloth.
DEFROSTING
FAULT DIAGNOSIS
Defrosting is manual. When ice builds up, the efficiency is compromised, so try to run
down your stock of frozen food OR transfer it to another freezer. Unplug the freezer,
and leave the door open.
Before calling for service, check the following as you may be able to remedy the
situation yourself.
The ice will melt naturally, but may be helped along by wiping surfaces with a soft
cloth soaked in tepid NOT HOT water. Do not leave the freezer unattended for long
periods. Place an old towel on the floor to catch melt water, and to avoid damage to
floorcoverings and risk of slipping. NEVER use sharp implements to chip ice away.
When clear of frost and ice, wipe all surfaces with a mild general-purpose
disinfectant. Plug the appliance in and select the MAX setting on the control dial
before re-stocking.
CHANGING THE DOOR OPENING
The unit is not working
• Check if there is a general power failure
• Check the power cable for accidental removal
• Check the fuse.
The unit is not freezing sufficiently
• The food may be packed too tightly, preventing cold air from circulating
• Do not place warm or hot items into the unit
• Check the temperature control dials are set correctly
• The door may not be closing properly. Check the hinges, gaskets, and that nothing
is obstructing secure door closure
• The door gasket may be damaged. Check and clean if necessary
• Always maintain good ventilation all around the unit.
Liquid is leaking from the appliance
• Check the temperature control dials are set correctly
• Check items in the freezer are not leaking.
Noisy operation
• Ensure the unit is installed correctly and on a firm surface
• Are any objects vibrating against, or placed too close to, the unit?
The compressor does not stop automatically
• Do not overload the unit
• Do not open the door too frequently or for too long
• Check the temperature control dials are set correctly.
Position of components prior to
reversal of door opening
Position of components after
reversal of door opening
If the above does not provide a solution or answer your query, call our service
centre for advice.
The appliance is supplied with the door hinges on the right. If you wish to change
the opening direction, refer to the illustrations above and follow these instructions:
1. Remove the two screws (1) which hold the upper hinge (5) to the door frame.
Remove the upper hinge (5) and keep it safely.
Husky Retail Ltd. reserves the right to amend design,
features and/or specification at any time.
Husky Retail Ltd., The 4 Degree Centre, Bilton Way, Lutterworth, Leicestershire LE17 4JA, U.K.
Tel: +44 (0)1455 555340 Fax: +44 (0)1455 555376
www.husky-retail.com
HUS-APP3EL 1209