1
4
Your TBUS-4 Enclosure
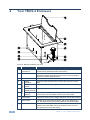
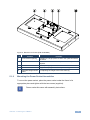
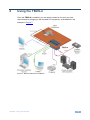
Figure 2: TBUS-4 Enclosure Top View
#
Feature
Black/Brushed Clear
Textured Lid
Function
Includes an opening for cable pass-through; covers the Inner
Frame, leaving the table surface neat and tidy
2
Outer Rim
Fits over the table surface.
A protective rubber guard protects the outer rim during shipping.
Remove it before installing the unit
3
Enclosure
4
5
6
7
4
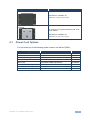
Table Clamping Set
1
Rubber
Protectors
Inserted into the table cut out
Protect the table surface when mounting the unit (one on each
side)
Locking Butterfly Tighten to lock the mounting butterfly screw (one on each side)
Screws
Mounting
Tighten to secure the unit to the table surface (one on each side)
Butterfly Screws
Mounting
Brackets
Fit in the bracket slits after inserting the enclosure into the table –
to secure the unit to the table surface (one on each side)
8
Height Adjustment
Screw holes
The screw holes on each side panel are used for adjusting the
height of the Inner Frame (4 height adjustment screws are included)
9
Bracket Slits
Located on the front and rear panels, and on both sides of the
unit. For attaching the two mounting brackets on opposite sides
10
Tie Holes
Insert the self-locking tie through the holes to fix the pass-through
cables to the inside walls of the unit (8 pairs of holes, 4 for the
front panel and 4 for the rear panel)
TBUS-4 - Your TBUS-4 Enclosure