1
PowerLogic™ ION Setup 3.0
Device Configuration Guide
7EN02-0293-06
01/2014
Safety information
Important information
Read these instructions carefully and look at the equipment to become familiar
with the device before trying to install, operate, service or maintain it. The
following special messages may appear throughout this bulletin or on the
equipment to warn of potential hazards or to call attention to information that
clarifies or simplifies a procedure.
The addition of either symbol to a "Danger" or "Warning" safety
label indicates that an electrical hazard exists which will result in
personal injury if the instructions are not followed.
This is the safety alert symbol. It is used to alert you to potential
personal injury hazards. Obey all safety messages that follow this
symbol to avoid possible injury or death.
DANGER
DANGER indicates an imminently hazardous situation which, if not avoided, will
result in death or serious injury.
WARNING
WARNING indicates a potentially hazardous situation which, if not avoided, can
result in death or serious injury.
CAUTION
CAUTION indicates a potentially hazardous situation which, if not avoided, can result
in minor or moderate injury.
NOTICE
NOTICE is used to address practices not related to physical injury. The safety alert
symbol shall not be used with this signal word.
Please note
Electrical equipment should be installed, operated, serviced and maintained only by
qualified personnel. No responsibility is assumed by Schneider Electric for any
consequences arising out of the use of this material.
A qualified person is one who has skills and knowledge related to the construction,
installation, and operation of electrical equipment and has received safety training to
recognize and avoid the hazards involved.
ION Setup 3.0 Device Configuration Guide
Safety precautions
Safety precautions
Installation, wiring, testing and service must be performed in accordance with all local and
national electrical codes.
DANGER
HAZARD OF ELECTRICAL SHOCK, EXPLOSION OR ARC FLASH
• Apply appropriate personal protective equipment (PPE) and follow safe electrical work
practices. See NFPA 70E in the USA or applicable local standards.
• Electrical equipment must only be installed and serviced by qualified electrical
personnel.
• Turn of all power supplying a device before working on it.
• Always use a properly rated voltage sensing device to confirm that all poer is off.
• Replace all devices, doors and covers before turning on power to this equipment.
• Always use grounded external CTs for current inputs.
Failure to follow these instructions will result in death or serious injury.
WARNING
UNINTENDED EQUIPMENT OPERATION
• Do not use ION Setup software and associated devices for critical control or protection
applications where human or equipment safety relies on the operation of the control
circuit.
• Do not rely solely on device data to determine if your power system is functioning
correctly or meeting all applicable standards and compliances.
• Do not use device control for time-critical functions because delays can occur between
the time a control action is initiated and when that action is applied.
Failure to follow these instructions can result in death or serious injury.
© 2014 Schneider Electric. All rights reserved.
Page 5 of 166
Safety precautions
ION Setup 3.0 Device Configuration Guide
WARNING
INACCURATE DATA RESULTS
• Do not incorrectly configure ION Setup and its associated devices; this can lead to
incorrect reports and/or data results.
• Do not rely solely on reports or data results to determine if ION Setup and its
associated devices are functioning correctly or meeting all applicable standards and
compliances.
• Do not use reports or data results as substitutes for proper workplace practices or
equipment maintenance; they are supplemental only.
Failure to follow these instructions can result in death or serious injury.
NOTICE
LOSS OF DATA
Before changing device configuration values, make sure that all recorded data has been
saved in a secure location.
Failure to follow these instructions can result in loss of data.
NOTICE
LOSS OF CONTROL
Changing scale factors may affect alarm status and/or any recorded data. Before
changing scale factors, disable all affected alarms and ensure that all recorded data has
been saved.
Failure to follow these instructions may result in data loss.
Page 6 of 166
© 2014 Schneider Electric. All rights reserved.
ION Setup 3.0 Device Configuration Guide
Contents
Safety information
3
Safety precautions
5
Chapter 1: Configuring devices
11
Before you begin
Using ION Setup
Identify the firmware version, model, and serial number
Setting up a device
Chapter 2: Acti9 iEM3100 series / iEM3200 series energy meters
11
11
11
11
13
Acti9 iEM3100 series / iEM3200 series energy meter setup
Setting up a network site
Adding the Acti9 iEM3100 series / iEM3200 series energy meter to a site
Acti9 iEM3150 / iEM3155 and iEM3250 / iEM3255 energy meter setup screens
Alarming
Basic Setup
Clock
I/O Configuration
Energy Pulsing
Input Metering
Meter Resets
RS-485 Base Comm
Chapter 3: EM7230 / EM7280 Smart demand controllers
14
14
15
16
16
17
18
18
19
19
20
21
23
EM7230 / EM7280 meter setup
Setting up a network site
Adding the EM7230 / EM7280 to a site
EM7230 / EM7280 setup screens
Basic Setup
Clock
Demand Setup
Front Panel Display
Meter Resets
RS-485 Base Comm
Time of Use
Chapter 4: PM5100 and PM5300 series power meters
24
24
25
26
27
28
28
30
30
31
32
37
PM5100 and PM5300 series meter setup
Using ION Setup
Meter identification
PM5100 and PM5300 series setup screens
Alarming
Basic Setup
Clock
Data Log #1
Demand Setup
© 2014 Schneider Electric. All rights reserved.
38
38
38
38
38
42
43
44
44
Page 7 of 166
ION Setup 3.0 Device Configuration Guide
Device Label
Front Panel Display
I/O Configuration
Energy Pulsing
I/O Setup
Meter Resets
Metering Standards
Multi-Tariff
RS-485 Base Comm
Chapter 5: PM5350 power meter
46
46
47
47
48
49
51
51
52
55
PM5350 Meter setup
Using ION Setup
Meter identification
PM5350 Setup screens
Alarming
Basic Setup
Clock
Demand Setup
Device Label
Front Panel Display
I/O Setup
LED Control
Meter Resets
Metering Standards
RS-485 Base Comm
Chapter 6: PM5350IB / PM5350PB power meters
56
56
56
56
56
59
60
61
62
62
63
64
64
66
66
69
PM5350IB / PM5350PB meter setup
Using ION Setup
Meter identification
PM5350IB / PM5350PB setup screens
Alarming
Basic Setup
Clock
Demand Setup
Device Label
Front Panel Display
I/O Setup
LED Control
Meter Resets
Metering Standards
RS-485 Base Comm
Chapter 7: PM5500 series power and energy meter
70
70
70
70
70
76
77
78
78
78
79
80
81
82
82
85
PM5500 meter setup
Using ION Setup
Setting up a device without a front panel
PM5500 setup screens
Page 8 of 166
86
86
86
86
© 2014 Schneider Electric. All rights reserved.
ION Setup 3.0 Device Configuration Guide
Communications
RS-485 Base Comm
Setup
Basic Setup
Device Label
Clock
Demand Setup
Metering Standards
Multi-Tariff
I/O Configuration
Energy Pulsing
I/O Setup
Input Metering
Alarming
Logging
Data Log #1
Meter initialization / Meter reset
Meter Resets
Chapter 8: PM700 series power meter
86
86
87
87
89
89
90
92
92
93
94
95
95
96
96
96
97
97
101
PM700 series meter setup
Using ION Setup
PM700 series setup screens
Basic setup
Demand
Front panel display
I/O Setup
Onboard Alarms
Serial Comms
Chapter 9: PM800 series power meters
102
102
102
102
103
103
104
104
106
107
PM800 series meter setup
Comm card considerations
Using ION Setup
PM800 series setup screens
Alarm Log
Basic Setup
Billing Log
Clock
Comm - card
Comm - Onboard Serial
Data Log #1, Data Log #2, Data Log #3, Data Log #4
Device Labels
EN50160 Setup
Energy & Demand
Front Panel Display
I/O Setup
Input Metering
© 2014 Schneider Electric. All rights reserved.
108
108
110
110
110
110
111
112
113
113
114
114
114
115
116
116
119
Page 9 of 166
ION Setup 3.0 Device Configuration Guide
Meter Resets
Metering Standards
Onboard Alarms/Events
Phasor Viewer
Reports
Scaling
Shift Energy
Templates
Trending & Forecasting
Waveform Capture
Chapter 10: E5600 Socket-based energy meter
120
120
121
126
127
128
128
129
131
131
133
E5600 meter setup
Meter setup through IR optical port
Meter setup through RS-485
Communications card firmware upgrade
Meter protection
Chapter 11: Branch circuit power meter (BCPM)
134
134
137
142
143
145
Branch circuit power meter device settings
Configuring the Branch circuit power meter
BCPM setup screens
Basic setup
Auxiliary CT sizes
Branch Circuit CT sizes
Breaker sizes
Demand setup
Instantaneous Current Alarms
Latching Current Alarms
Voltage Alarms
Chapter 12: Enercept meter
146
147
148
148
148
148
148
149
149
150
154
155
Enercept meter setup
Using ION Setup
Enercept setup screens
Basic setup
Enercept data screen
Resetting energy and demand values
Chapter 13: ION6200 power and energy meter
156
156
156
156
157
157
159
ION6200 meter setup
ION6200 setup screens
Basic setup
Communications
Demand
Display
Outputs
Scaling
Wiring setup
Page 10 of 166
160
161
161
162
162
162
163
163
164
© 2014 Schneider Electric. All rights reserved.
ION Setup 3.0 Device Configuration Guide
Chapter 1: Configuring devices
Chapter 1: Configuring devices
This document describes how to configure the settings and parameters of various devices
using ION Setup.
Before you begin
Before using ION Setup, make sure that all devices in the system are wired correctly, and
that communications for the devices has been configured. See the device documentation for
more information.
Using ION Setup
Use Network mode in ION Setup to add and configure your devices. See the “Starting,
Logging On and Logging Off” section of the ION Setup online help for more information on the
operation modes, and starting and logging onto ION Setup.
Identify the firmware version, model, and serial number
To view meter identification information, use the device front panel. Refer to the
documentation for the specific device or use the diagnostics tool in ION Setup to identify the
device firmware version, model number, and serial number.
Many devices support downloading firmware over the communications link. To determine if
your device has the latest firmware version installed, search for the latest firmware for the
device at www.schneider-electric.com.
Setting up a device
Setting up the power system
There are several supported power system type configurations available for selection. See
the device documentation for more information.
Changing values
All devices ship with many default values already set up. To change values for a specific
device, follow the instructions in the appropriate following section.
To change values, navigate to the appropriate setup screen and enter new values. New
values are automatically saved when you exit the screen and accept the confirmation
request.
© 2014 Schneider Electric. All rights reserved.
Page 11 of 166
Chapter 1: Configuring devices
ION Setup 3.0 Device Configuration Guide
Note
In this document, “item” refers to a feature such as an alarm and “parameter” refers to an
attribute of an item such as a pickup setpoint.
Page 12 of 166
© 2014 Schneider Electric. All rights reserved.
ION Setup 3.0 Device Configuration Guide
Chapter 2: Acti9 iEM3100 series / iEM3200 series energy meters
Chapter 2: Acti9 iEM3100 series / iEM3200 series
energy meters
The Acti9 iEM3100 series / iEM3200 series energy meters are DIN rail-mounted meters that
offer the measurement capabilities required to monitor electrical distribution panels, including
current, voltage and energy. These meters are embedded in the feeder panels along with the
Acti9 protection and control system. The meters provide the energy consumption data via
pulse output or communication to your facility management system, such as the Building
Management System or Remote Monitoring System. The meters support up to four (4)
different tariffs. The meter data can be used for sub-billing and cost allocation applications
based on tariff schedules, rates, and time-of-day usage from the energy supplier.
The Acti9 iEM3100 series / iEM3200 series energy meters are Acti9 design-compliant and
are compatible with the Acti9 communication system, allowing you to integrate electrical
distribution into your Building Management System. You can configure only the iEM3150 /
iEM3155 and iEM3250 / iEM3255 meters of this series using ION Setup.
For more information and for a description of the features offered with each model, refer to
the meter documentation available from www.schneider-electric.com.
Note
Some setup screens in the following section only apply to specific models of this meter
series.
In this section
Acti9 iEM3100 series / iEM3200 series energy meter setup
14
Setting up a network site
14
Adding the Acti9 iEM3100 series / iEM3200 series energy meter to a site
15
Acti9 iEM3150 / iEM3155 and iEM3250 / iEM3255 energy meter setup screens
16
Alarming
16
Basic Setup
17
Clock
18
I/O Configuration
18
Energy Pulsing
19
Input Metering
19
Meter Resets
20
RS-485 Base Comm
21
© 2014 Schneider Electric. All rights reserved.
Page 13 of 166
Chapter 2: Acti9 iEM3100 series / iEM3200 series energy meters
ION Setup 3.0 Device Configuration Guide
Acti9 iEM3100 series / iEM3200 series energy meter
setup
Before using ION Setup, make sure all the communications settings for the Acti9 iEM3150 /
iEM3155 and iEM3250 / iEM3255 energy meters are configured. For details about setting the
communications parameters, refer to the Acti9 iEM3100 series / iEM3200 series user
manual, available from www.schneider-electric.com.
Setting up a network site
You can communicate with the Acti9 iEM3150 / iEM3155 and iEM3250 / iEM3255 energy
meters using Modbus™ RTU protocol through its RS-485 serial communications port or
through an Ethernet gateway. None of the meters have an onboard Ethernet TCP port.
• Device communications format: Make sure all the devices in the RS-485 loop are set to
the same protocol.
• Device communications settings: Make sure all the devices on the same RS-485 loop are
set to the same baud rate and parity.
• Device address (unit ID) settings: Make sure the device address (unit ID) is unique for
each device in a given RS-485 loop (allowable range = 1 to 247 for Modbus devices).
Ethernet and Modbus gateway communications
A Modbus gateway (for example, an EGX or ION7650) uses Modbus TCP while an Ethernet
gateway uses encapsulated Modbus RTU. In all cases, Modbus RTU is used for RS-485
communications to these meters.
A gateway device, such as an EGX or ION7650, must first be configured to provide
communications access. The gateway uses Modbus TCP/IP protocol to communicate on
the Ethernet port and Modbus RTU on the serial port. Set the gateway device as a Modbus
gateway to allow communication with multiple RS-485 serial devices on the serial port
through the gateway device’s Ethernet port. For RS-485 wiring instructions, refer to the
device documentation.
Using ION Setup
1. Start ION Setup in Network mode. See the “Starting, Logging On and Logging Off” and
"Working in Network mode" sections of the ION Setup online help for more information.
2. Right-click the system icon and select Insert Item. Select Site and click OK. The New
Site dialog appears. Enter a descriptive name for the site (for example, EGX Site 4 Com
1). Select Ethernet, then select the Gateway box. Enter the IP address of the gateway,
then select 502 from the dropdown list for the port and click OK.
Page 14 of 166
© 2014 Schneider Electric. All rights reserved.
ION Setup 3.0 Device Configuration Guide
Chapter 2: Acti9 iEM3100 series / iEM3200 series energy meters
Adding the Acti9 iEM3100 series / iEM3200 series energy meter to
a site
1. Start ION Setup in Network mode. See the “Adding and configuring devices” section of
the ION Setup online help for more information. Right-click the site icon and select Insert
Item.
2. Select Meter and click OK.
The New Device dialog appears.
3. Type a descriptive name for your meter (for example, iEM3255).
4. Select the type of device from the dropdown list (for example, PowerLogic™ iEM3000
series energy meter).
5. Enter the device's address in the Unit ID field.
6. Select the group you want to assign the device to from the dropdown list for Group and
click OK to return to the Network Viewer.
The appropriate template option is determined and appears highlighted on the Display tab
of the Device Properties dialog box when communications has been established with the
device. If another template is highlighted, select the appropriate template for the device
and click OK to return to the Network Viewer.
© 2014 Schneider Electric. All rights reserved.
Page 15 of 166
Chapter 2: Acti9 iEM3100 series / iEM3200 series energy meters
ION Setup 3.0 Device Configuration Guide
Acti9 iEM3150 / iEM3155 and iEM3250 / iEM3255 energy
meter setup screens
The following sections describe the setup screens that are available for Acti9 iEM3150 /
iEM3155 and iEM3250 / iEM3255 energy meters. For more information about the features of
these devices, refer to the Acti9 iEM3100 series / iEM3200 series user manual, available
from www.schneider-electric.com.
Alarming
WARNING
UNINTENDED EQUIPMENT OPERATION
Do not use ION Setup software and associated devices for critical control or protection
applications where human or equipment safety relies on the operation of the control
circuit.
Failure to follow this instructions can result in death or serious injury.
This setup screen allows you to configure the parameters of all alarms for your device. For
complete details about all alarms and available parameters, refer to the Acti9 iEM3100 series
/ iEM3200 series user manual, available from www.schneider-electric.com.
Page 16 of 166
© 2014 Schneider Electric. All rights reserved.
ION Setup 3.0 Device Configuration Guide
Chapter 2: Acti9 iEM3100 series / iEM3200 series energy meters
Note
Only alarms that apply to the selected power system configuration can be enabled.
Assigned channels are channels that are currently in use and are therefore not available
for association.You can click the + next to an assigned channel to view all of its existing
associations. To disassociate, or make an assigned channel available for association,
disconnect its existing associations.
Also, alarms can be associated with multiple channels, and a channel can have multiple
associated alarms.
Standard
The energy meter has one (1) standard over/under alarm.
To configure the standard alarm:
1. Select Standard then click Edit to open the Standard Alarm Setup dialog.
2. Select Over Active Power in the left column to edit its values.
3. Select the Enable checkbox to enable or clear the checkbox to disable the alarm.
4. Enter a value that defines the alarm ON condition in the Setpoint Pickup field.
5. Click Outputs to open the Alarm Association Selection dialog.
6. Click + to show all available choices for the channel.
7. Select the checkbox next to an available channel, then choose an item from the
Assigned Channels column, and click OK.
8. Click OK at the Standard Alarm Setup dialog, then click Send to save your changes to
the device.
Basic Setup
This setup screen allows you to set the values for each of the Basic Setup parameters. For
details about all available setup parameters for Acti9 iEM3100 series / iEM3200 series
devices, refer to the Acti9 iEM3100 series / iEM3200 series user manual.
1. Double-click Basic Setup to open the dialog showing a list of parameters.
2. Select a parameter and click Edit to open its specific setup dialog, and then follow the
steps listed under the relevant parameter sections below.
Parameter
Description
System Type
Select the correct Power System for your installation from the dropdown list then click
Next. Choose System Options from the available dropdown lists, then click Finish.
CT Primary*
Enter the value in amps for the CT primary and click OK. Note that the number of CTs and
VTs that can be configured is based on the power system configuration selected.
CT Secondary*
Select the amperage from the dropdown list for the CT secondary and click OK.
VT Primary*
Enter the value in volts for the VT primary and click OK.
VT Secondary*
Select the appropriate voltage from the dropdown list for the VT secondary and click OK.
VT Connection*
Select the VT connection type from the dropdown list for the VT connection and click OK.
Nominal Frequency
Select the nominal frequency value from the dropdown list and click OK.
* iEM3150 / iEM3155 are direct connect models and therefore no CT/VT information is available for configuration.
© 2014 Schneider Electric. All rights reserved.
Page 17 of 166
Chapter 2: Acti9 iEM3100 series / iEM3200 series energy meters
ION Setup 3.0 Device Configuration Guide
3. Click Send to save your changes to the device.
Clock
The Clock setup screen allows you to set the date and time of the internal clock of a device
and to synchronize the date and time of the devices in your system with your workstation.
Note
If the power to your device is interrupted, you may see a dialog prompting you to reset
the date and time. In the event of power loss, the internal clock data is saved for up to
48 hours.
Device time
The Device time parameter shows the date and time on the device.
1. Select Device time and click Edit to manually change the date and time settings.
The Device time changes to Update to and shows the date and time that will be sent to
the device.
2. Make any changes to the date and time, click OK, then click Send.
Sync to
The Snyc to parameter shows the Clock Sync Type (for example, UTC) and
Synchronization Time.
Note
Select the time sync value based on any requirements of the devices in your system and
the system software for correct operation (for example, select PC Standard Time (No
DST) for ION.)
1. Select Sync to and click Edit.
2. Select the appropriate time type from the dropdown list.
3. Choose a time zone for Time offset from PC, if applicable.
The date and time to be sent to the device are displayed below as Synchronization
Time.
4. Click OK, then click Send.
The Device time is overwritten with the time to be sent to the device. It may take a few
moments for the time synchronization to complete.
I/O Configuration
The Acti9 iEM3155 / iEM3255 energy meters support two (2) digital inputs, and the iEM3150 /
iEM3250 have no digital inputs. Two of the four energy meters have one (1) digital output and
one (1) communication port (Modbus via RS-485). For more information, refer to the Acti9
iEM3100 series / iEM3200 series user manual, available from www.schneider-electric.com.
Page 18 of 166
© 2014 Schneider Electric. All rights reserved.
ION Setup 3.0 Device Configuration Guide
Chapter 2: Acti9 iEM3100 series / iEM3200 series energy meters
WARNING
UNINTENDED EQUIPMENT OPERATION
Do not use ION Setup software and associated devices for critical control or protection
applications where human or equipment safety relies on the operation of the control
circuit.
Failure to follow these instructions can result in death or serious injury.
Energy Pulsing
The Energy Pulsing setup screen allows you to configure the parameters for the pulse
duration and pulse channel. Pulse output for remote transfer is available on the Acti9
iEM3110 / iEM3210 energy meters.
To change the values for the following parameters:
1. Double-click Energy Pulsing.
The Energy Pulsing screen appears.
2. Select a parameter from the list, then click Edit to make any changes to the parameter.
Parameter
Description
Pulse Duration
Select a value from the dropdown list for pulse duration and click OK.
Pulse Channel 1
Select the checkbox next to an available channel in the left column, then choose an assigned
channel from the right column. (If no Assigned Channels appear in the right column, then no
channels are currently available to assign.) Next, select a value from the dropdown list for
parameter and for pulse weight and click OK.
3. After you have configured the parameters, click OK, then click Send to save your
changes to the device.
Input Metering
The digital input ports can be set up to convert incoming pulses from another device into
measured quantities for the multi-tariff function. Before you can associate a digital input to a
channel, first set up the digital input for input metering operation. For descriptions on
metering capabilities and options and for instructions on wiring inputs and outputs for Acti9
iEM3100 series / iEM3200 series devices, refer to the meter user manual.
© 2014 Schneider Electric. All rights reserved.
Page 19 of 166
Chapter 2: Acti9 iEM3100 series / iEM3200 series energy meters
ION Setup 3.0 Device Configuration Guide
To set up the channel:
1. Double-click Input Metering.
The Input Metering screen appears.
2. Select a parameter from the list, such as Channel 01, then click Edit.
The Channel Setup dialog appears.
3. Enter a name, if applicable, in the Label field.
4. Enter a value for Pulse Weight.
5. Select a digital input from the Available Inputs column, then click the
move the item to the Assigned Inputs column.
button to
To unassign an input, select the item from the Assigned Inputs column, then click the
button.
6. Click OK, then click Send.
Note
Usually input metering applications require one input to be set up for Demand Interval
Sync Pulse to allow customers to synchronize their demand intervals to the utility
(typically, the pulse signal is provided by the utility).
Meter Resets
Meter values can be re-initialized through the meter reset parameters. Resets are grouped so
that groups of items can be selected for reset.
Initializing a meter will reset or disable certain parameters. Make sure to read the warning
message that appears showing the parameters that are about to be reset. At the Reset
Confirmation dialog, verify before proceeding that only intended parameters to be reset are
listed.
Page 20 of 166
© 2014 Schneider Electric. All rights reserved.
ION Setup 3.0 Device Configuration Guide
Chapter 2: Acti9 iEM3100 series / iEM3200 series energy meters
WARNING
UNINTENDED EQUIPMENT OPERATION
Do not use ION Setup software and associated devices for critical control or protection
applications where human or equipment safety relies on the operation of the control
circuit.
Failure to follow these instructions can result in death or serious injury.
NOTICE
LOSS OF DATA
Before changing device configuration values, make sure that all recorded data has been
saved in a secure location.
Failure to follow these instructions can result in loss of data.
Available meter resets
Available meter resets for this device include:
• Reset All Energies
• Reset All Input Metering Accumulations
Performing a reset
1. Double-click Meter Resets.
The Meter Resets screen appears.
2. Select the checkbox next to an available choice and then click Reset to reset all items for
that selection. The Reset Confirmation dialog appears.
3. Verify before proceeding that only parameters intended to be reset are listed.
4. Click Proceed to continue or Cancel to cancel the reset.
5. Enter a password and click OK, if applicable.
RS-485 Base Comm
This setup screen allows you to configure the Modbus RS-485 communication port settings
for the Acti9 PM3000 series devices. The RS-485 Base Comm port can be used for Modbus
communications with a monitoring and control system and multiple devices can be linked in
sequence in a system.
© 2014 Schneider Electric. All rights reserved.
Page 21 of 166
Chapter 2: Acti9 iEM3100 series / iEM3200 series energy meters
ION Setup 3.0 Device Configuration Guide
Note
Modbus communications is available only on the Acti9 iEM3150 / iEM3155 and iEM3250
/ iEM3255 model energy meters of this series.
It is recommended that you do not change the communications settings of the device. If
it becomes necessary, use the device display to change the device communications
settings.
The following parameters are available to set:
Parameter
Description
Address
Double-click Address or select and click Edit. Enter a value for the address (unit ID) of the
device and click OK. The address must be unique for each device in a communications loop.
Baud Rate
Select a value from the dropdown list for the meter's baud rate (speed for data transmission)
and click OK. Note that the baud rate must be set to the same value for all devices in a
communications loop.
Parity
Select a value from the dropdown list for the communications port parity setting and click OK.
Note that parity must be set to None for all devices to communicate with ION Setup.
After you have configured all parameters, click Send to save your changes to the device.
Page 22 of 166
© 2014 Schneider Electric. All rights reserved.
ION Setup 3.0 Device Configuration Guide
Chapter 3: EM7230 / EM7280 Smart demand controllers
Chapter 3: EM7230 / EM7280 Smart demand
controllers
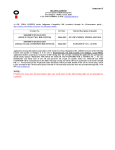
The PowerLogic™ EM7230 / EM7280 Smart demand controllers are energy meters that are
designed to provide comprehensive load management in 3-phase commercial and industrial
applications. Two models are available in the series:
Meter models
Class
Communication
EM7230
EM7280
class 1.0
class 0.5
RS-485
RS-485
For more information and for a description of the features offered with each model, refer to
the meter documentation available from www.schneider-electric.com.
In this section
EM7230 / EM7280 meter setup
24
Setting up a network site
24
Adding the EM7230 / EM7280 to a site
25
EM7230 / EM7280 setup screens
26
Basic Setup
27
Clock
28
Demand Setup
28
Front Panel Display
30
Meter Resets
30
RS-485 Base Comm
31
Time of Use
32
© 2014 Schneider Electric. All rights reserved.
Page 23 of 166
Chapter 3: EM7230 / EM7280 Smart demand controllers
ION Setup 3.0 Device Configuration Guide
EM7230 / EM7280 meter setup
Before using ION Setup, make sure all the communications settings for the EM7230 /
EM7280 energy meters are configured. For details about setting the communications
parameters, refer to the PowerLogic EM7230 / EM7280 Smart Demand Controller Installation
Guide, available from www.schneider-electric.com.
Setting up a network site
You can communicate with the EM7230 / EM7280 energy meters using Modbus RTU
protocol through the meter's RS-485 serial communications port or through an Ethernet
gateway. The meters do not have an onboard Ethernet TCP port.
• Device communications format: Make sure all the devices in the RS-485 loop are set to
the same protocol.
• Device communications settings: Make sure all the devices on the same RS-485 loop are
set to the same baud rate and parity.
• Device address (unit ID) settings: Make sure the device address (unit ID) is unique for
each device in a given RS-485 loop (allowable range = 1 to 247 for Modbus devices).
Ethernet and Modbus gateway communications
A Modbus gateway (for example, an EGX or ION7650) uses Modbus TCP while an Ethernet
gateway uses encapsulated Modbus RTU. In all cases, Modbus RTU is used for RS-485
communications to these meters.
A gateway device, such as an EGX or ION7650, must first be configured to provide
communications access. The gateway uses Modbus TCP/IP protocol to communicate on
the Ethernet port and Modbus RTU on the serial port. Set the gateway device as a Modbus
gateway to allow communication with multiple RS-485 serial devices on the serial port
through the gateway device’s Ethernet port. For RS-485 wiring instructions, refer to the
device documentation.
Using ION Setup
1. Start ION Setup in Network mode. See the “Starting, Logging On and Logging Off” and
"Working in Network mode" sections of the ION Setup online help for more information.
2. Right-click the system icon and select Insert Item. Select Site and click OK. The New
Site dialog appears.
3. Enter a descriptive name for the gateway site (for example, EGX Site 4 Com 1). Select
Ethernet, then select the Gateway box. Enter the IP address of the gateway, then select
502 from the dropdown list for the port and click OK.
Page 24 of 166
© 2014 Schneider Electric. All rights reserved.
ION Setup 3.0 Device Configuration Guide
Chapter 3: EM7230 / EM7280 Smart demand controllers
Adding the EM7230 / EM7280 to a site
1. Start ION Setup in Network mode. See the “Adding and configuring devices” section of
the ION Setup online help for more information. Right-click the site icon and select Insert
Item, or, click Insert > Item from the toolbar.
2. Select Meter and click OK.
The New Device dialog appears.
3. Type a descriptive name for your meter (for example, EM7280).
4. Select the type of device from the dropdown list (for example, PowerLogic EM7000 Series
Energy Meter).
5. Enter the device's address in the Unit ID field.
6. Select the group you want to assign the device to from the Group dropdown list and click
OK to return to the Network Viewer.
ION Setup determines the appropriate template option. This option appears highlighted on
the Display tab of the Device Properties dialog box when communications have been
established with the device. If another template is highlighted (or a different template is
needed), select the appropriate template for the device and click OK to return to the
Network Viewer.
© 2014 Schneider Electric. All rights reserved.
Page 25 of 166
Chapter 3: EM7230 / EM7280 Smart demand controllers
ION Setup 3.0 Device Configuration Guide
EM7230 / EM7280 setup screens
The following sections describe the setup screens that are available for the EM7230 /
EM7280 energy meters. For more information about the features of these devices, refer to
the PowerLogic EM7230 / EM7280 Smart Demand Controller User Guide, available at
www.schneider-electric.com.
WARNING
UNINTENDED EQUIPMENT OPERATION
Do not use ION Setup software and associated devices for critical control or protection
applications where human or equipment safety relies on the operation of the control
circuit.
Failure to follow these instructions can result in death or serious injury.
WARNING
INACCURATE DATA RESULTS
• Do not incorrectly configure ION Setup and its associated devices; this can lead to
incorrect reports and/or data results.
• Do not rely solely on reports or data results to determine if ION Setup and its associated
devices are functioning correctly or meeting all applicable standards and compliances.
• Do not use reports or data results as substitutes for proper workplace practices or
equipment maintenance; they are supplemental only.
Failure to follow these instructions can result in death or serious injury.
Page 26 of 166
© 2014 Schneider Electric. All rights reserved.
ION Setup 3.0 Device Configuration Guide
Chapter 3: EM7230 / EM7280 Smart demand controllers
Basic Setup
This setup screen allows you to set the values for each of the Basic Setup parameters.
1. Double-click Basic Setup to open the dialog showing a list of available parameters.
The Basic Setup screen appears.
2. Select a parameter and click Edit to open the setup dialog for that parameter, and then
follow the steps listed for the relevant parameter below.
Parameter
System Configuration
CT Primary
CT Secondary
PT Primary
PT Secondary
System Frequency
Starting Current
PF Standard
VA Function
Description
Select the correct power system configuration for your installation from the
dropdown list then click Next. Choose system options from the available
dropdown lists, then click Finish.
Enter the value in amps for the CT primary and click OK. Note that the number
of CTs and VTs that can be configured is based on the power system
configuration selected.
Select the amps from the dropdown list for the CT secondary and click OK.
Enter the value in volts for the VT primary and click OK.
Select the appropriate volts from the dropdown list for the PT secondary and
click OK.
Select the appropriate system frequency from the dropdown list and click OK.
Select appropriate starting current from the dropdown list and click OK.
Select the appropriate power factor standard from the dropdown list and click
OK.
Select the appropriate function from the dropdown list and click OK.
3. Click Send to save the changes to the device.
© 2014 Schneider Electric. All rights reserved.
Page 27 of 166
Chapter 3: EM7230 / EM7280 Smart demand controllers
ION Setup 3.0 Device Configuration Guide
Clock
The Clock setup screen allows you to set the date and time of the device's internal clock and
to synchronize the date and time of the devices in your system with your workstation.
Note
If the power to your device is interrupted, you may see a dialog prompting you to reset
the date and time. In the event of power loss, the internal clock data is saved for up to
48 hours.
Double-click Clock to open the dialog. The Clock screen appears showing the available
parameters.
Device time
The Device time parameter allows you to set the date and time on the device.
1. Select Device time and click Edit.
The Device time changes to Update to and the Date/Time Setup dialog appears.
2. Make any changes to the meter's date and time, click OK, then click Send.
The date and time changes are saved to the device.
Sync to
The Snyc to parameter allows you to set the Clock Sync Type (for example, UTC) and
Synchronization Time.
Note
Select the time sync value based on any requirements of the devices in your system and
the system software for correct operation (for example, select PC Standard Time (No
DST) for StruxureWare Power Management.)
3. Select the appropriate clock sync type from the dropdown list.
4. Choose a time value for Time offset from PC, if applicable.
The date and time that will be sent to the device are displayed below as Synchronization
Time.
5. Click OK, then click Send.
The Device time is overwritten with the time sent to the device. It may take a few
moments for the time synchronization to complete.
Demand Setup
The Demand Setup screen allows you to configure the demand and load for this device.
Configuring Demand parameters
1. Double-click Demand Setup to open the dialog.
Page 28 of 166
© 2014 Schneider Electric. All rights reserved.
ION Setup 3.0 Device Configuration Guide
Chapter 3: EM7230 / EM7280 Smart demand controllers
The Demand Setup dialog appears.
Note
ION Setup checks as you enter values for each Demand parameter to determine if the
values are within an acceptable range. If you enter a value that is not within the
acceptable range for that parameter, you must then enter a valid value and click OK to
proceed.
2. Select a Demand parameter and click Edit to open the setup dialog for that parameter.
Follow the steps for the relevant parameter listed below.
Parameter
Description
Demand Period
Type a value in between 1 and 30 minutes and click OK.
Demand Method
Select a value from the dropdown list for Demand Method and click OK.
Demand Control Parameter
Select a value from the dropdown list for the Demand Control Parameter and
click OK.
Predicted Demand Interval
Type a value between 1 and 30 for the Predicted Demand Interval and click OK.
Essential Load %
Type a value for the Essential Load and click OK.
Demand Profile L0
Type a value for the Demand Profile L0 and click OK.
Demand Profile Step
Type a value for the Demand Profile Step and click OK
Demand Upper Limit
Type a value for the Demand Upper Limit and click OK.
Demand Lower Limit
Type a value for the Demand Lower Limit and click OK.
Demand Control
Select a value from the dropdown list for the Demand Control and click OK.
3. Click Send to save the changes to the device.
© 2014 Schneider Electric. All rights reserved.
Page 29 of 166
Chapter 3: EM7230 / EM7280 Smart demand controllers
ION Setup 3.0 Device Configuration Guide
Front Panel Display
To set the values for each of the Front Panel Display parameters:
1. Double-click Front Panel Display to open the dialog.
2. Select a parameter and click Edit.
3. Select or enter the values for the selected parameter and click OK.
4. When you finish making changes to the parameters, click Send to save the changes to
the device.
Contrast
Select a value from the dropdown list: 1 is brightest, and 9 is dimmest.
Backlight Timeout
Enter a backlight timeout value in minutes.
Meter Resets
Meter values can be re-initialized through the meter reset parameters. Resets are grouped so
that either all items listed can be selected for reset (global reset), or individual items or groups
of items can be selected for reset (single reset).
Initializing a meter will reset or disable certain parameters. Make sure to read the message
that appears showing the parameters that are about to be reset. At the Reset Confirmation
dialog, verify before proceeding that only parameters you intend to reset are listed.
Available meter resets
Available meter resets for this device include:
• Reset All Min/Max
• Reset Active Load Timer
• Reset All Demands
• Reset All Peak Demands
• Reset All Energies
• Reset All Energy Pulse Output Channels
• Reset Energy by Phase
• Reset All Digital Output Counters
• Reset All Digital Output On Times
• Reset All Digital Input Counters
Page 30 of 166
© 2014 Schneider Electric. All rights reserved.
ION Setup 3.0 Device Configuration Guide
Chapter 3: EM7230 / EM7280 Smart demand controllers
Performing a meter reset
1. Double-click Meter Resets to open the dialog.
The Meter Resets screen appears.
2. Select the checkboxes next to all items that you want to reset and then click Reset.
The Reset Confirmation dialog appears.
3. Verify before proceeding that only parameters that you intend to reset are listed.
4. Click Proceed to continue or Cancel to cancel the reset.
5. Enter a meter password and click OK, if applicable.
The parameters you selected are now reset in the meter.
RS-485 Base Comm
This setup screen allows you to configure the Modbus RS-485 communication port settings
for the EM7230 / EM7280 energy meters. You can use the RS-485 base comm port for
Modbus communication with a monitoring and control system. Multiple devices can be linked
in sequence in a system.
The following parameters are available for configuration:
Parameter
Description
Address
Double-click Address or select Address and click Edit. Enter a value for the address (unit
ID) of the device and click OK. The address must be unique for each device in a
communications loop.
Baud Rate
Select a value from the dropdown list for the meter's baud rate (speed for data
transmission) and click OK. Note that the baud rate must be set to the same value for all
devices in a communications loop.
Parity
Select a value from the dropdown list for the communications port parity setting and click
OK. Note that parity must be set to None for all devices to communicate with ION Setup.
After you have configured all parameters, click Send to save your changes to the device.
© 2014 Schneider Electric. All rights reserved.
Page 31 of 166
Chapter 3: EM7230 / EM7280 Smart demand controllers
ION Setup 3.0 Device Configuration Guide
Time of Use
The Time of Use setup screen allows you to configure the device's seasonal, weekend and
holiday schedules and their respective tariffs. Time of Use (TOU) allows for energy
consumption data at different time intervals to be stored in separate registers. The Time of
Use parameter relies on the date and time of the meter's internal clock.
Note
You cannot configure Time of Use using the device's front panel. See "Using ION
Setup" on page 24.
Define seasons, weekends, holidays and tariffs
1. Double-click Time of Use to open the dialog.
The Time of Use screen appears showing available parameters.
2. Select the Active Seasons parameter and double-click or click Edit.
The Step 1: Set Season Settings dialog appears.
3. Select the checkbox beside Enable TOU.
4. Type or select a value for the Number of seasons that you want to define. You can define
up to six non-overlapping seasons per year.
Page 32 of 166
© 2014 Schneider Electric. All rights reserved.
ION Setup 3.0 Device Configuration Guide
Chapter 3: EM7230 / EM7280 Smart demand controllers
5. Select a date from the calendar using the dropdown list to set the starting date for Season
1 start.
Repeat this step for each season that you define.
6. Click Weekends beside the current season.
The Season 1 Weekends dialog appears. You can define up to three weekend profiles for
each season.
7. Choose a start day from the dropdown list for each weekend you define. Choose Disable
from the dropdown list for weekend profiles that do not require a start day, then click OK.
You can define the start day for up to three weekends.
8. Repeat the above step for each weekend that you define, then click Next.
The Step 2: Define holidays screen appears.
© 2014 Schneider Electric. All rights reserved.
Page 33 of 166
Chapter 3: EM7230 / EM7280 Smart demand controllers
ION Setup 3.0 Device Configuration Guide
9. To set holiday dates, click Add, select a date from the dropdown calendar, then click OK.
10.Repeat this step to add any other holidays, then click Next.
Note
Holiday dates are not specific to a calendar year and will need to be updated each year if
the date changes.
The Step 3: Define Season 1 Tariff Settings screen appears.
Page 34 of 166
© 2014 Schneider Electric. All rights reserved.
ION Setup 3.0 Device Configuration Guide
Chapter 3: EM7230 / EM7280 Smart demand controllers
11.Select a tab item for weekdays, weekends, or holidays.
12.Choose a value from the dropdown list for Number of active tariffs for that tab item. You
can define up to eight non-overlapping tariff time zones for each day.
The tariffs now appear in the list.
13.Double-click the tariff or select the tariff and click Edit.
The tariff dialog opens.
© 2014 Schneider Electric. All rights reserved.
Page 35 of 166
Chapter 3: EM7230 / EM7280 Smart demand controllers
ION Setup 3.0 Device Configuration Guide
14.Choose values from the dropdown lists for Tariff start time and the Sub-Integrator for
the energy consumed during that period, then type the allowable energy consumption
values for Upper Limit and Lower Limit and click OK.
Note
Sub-integrators are registers in which all of the integrated (energy and time) parameters
(VAh, Wh, VARh, etc.) are accumulated or stored. Sub-integrators are configured to
store the energy consumption at different time intervals that the user defines.
15.Repeat the above steps as necessary to add and configure other tariffs for the weekdays,
weekends and holidays for all seasons, then click Finish and Send.
All changes are now saved to the device.
Note
As you enter values for each tariff, ION Setup checks to determine if the values are
within the allowable range for that tariff. The type of value depends on which power
system you specify in Basic Setup. If you enter a value for Upper Limit or Lower Limit
that is not within the allowable range of values for that tariff, you must then enter valid
values and click OK to proceed.
You will need to reconfigure TOU if your local electricity board changes its TOU tariff
timings and tariff.
Page 36 of 166
© 2014 Schneider Electric. All rights reserved.
ION Setup 3.0 Device Configuration Guide
Chapter 4: PM5100 and PM5300 series power meters
Chapter 4: PM5100 and PM5300 series power
meters
The PowerLogic™ PM5100 and PM5300 series power meters provide measurements,
alarming for key parameters and non-critical breaker status monitoring and control. The
power meter measures currents and voltages and reports real-time RMS (root-meansquared) values for all three phases and neutral. In addition, the power meter calculates
power factor, real power, reactive power, and other power and energy values.
For more information, refer to the following documents, available from www.schneiderelectric.com:
• PowerLogic PM5100 Series Power and Energy Meter User Guide
• PowerLogic PM5300 Series Power and Energy Meter User Guide
• PowerLogic PM5100 Series Installation guide
• PowerLogic PM5300 Series Installation guide
In this section
PM5100 and PM5300 series meter setup
38
Using ION Setup
38
Meter identification
38
PM5100 and PM5300 series setup screens
38
Alarming
38
Basic Setup
42
Clock
43
Data Log #1
44
Demand Setup
44
Device Label
46
Front Panel Display
46
I/O Configuration
47
Energy Pulsing
47
I/O Setup
48
Meter Resets
49
Metering Standards
51
Multi-Tariff
51
RS-485 Base Comm
52
© 2014 Schneider Electric. All rights reserved.
Page 37 of 166
Chapter 4: PM5100 and PM5300 series power meters
ION Setup 3.0 Device Configuration Guide
PM5100 and PM5300 series meter setup
Before using ION Setup, make sure all the communications settings for the meters are
configured. For more information, refer to the meter's installation documentation, available
from www.schneider-electric.com.
Using ION Setup
Use Network mode in ION Setup to add and configure a power meter. See the “Starting,
Logging On and Logging Off” section of the ION Setup online help for more information.
Meter identification
The meters ship with many default values already set up and with the firmware installed.
To view the meter identification information, use the meter's front panel. For more
information, refer to meter's user guide, available from www.schneider-electric.com.
PM5100 and PM5300 series setup screens
The following sections describe the setup screens that are available for the meters. For
information about features, refer to the meter user guides, available from www.schneiderelectric.com.
Note
For each register, such as Alarming or Basic Setup, double-click the setup screen icon
to upload the register and configure the available setup parameters.
Alarming
This screen allows you to configure the parameters for all alarms.
Page 38 of 166
© 2014 Schneider Electric. All rights reserved.
ION Setup 3.0 Device Configuration Guide
Chapter 4: PM5100 and PM5300 series power meters
WARNING
UNINTENDED EQUIPMENT OPERATION
• Do not use ION Setup software and associated devices for critical control or protection
applications where human or equipment safety relies on the operation of the control
circuit.
• Do not rely solely on device data to determine if your power system is functioning
correctly or meeting all applicable standards and compliances.
• Do not use device control for time-critical functions because delays can occur between
the time a control action is initiated and when that action is applied.
Failure to follow these instructions can result in death or serious injury.
Note
Only alarms that apply to the selected power system configuration can be enabled.
The meter has standard, digital and unary alarms available to configure.
Standard
To configure the standard alarms:
1. Double-click Standard or select Standard then click Edit to open the list of available
parameters.
2. Select an alarm in the left column to edit its values.
3. Select the Enable checkbox to enable the selected alarm, or clear the checkbox to
disable the alarm.
Note
After selecting the checkbox for Enable to enable a Standard alarm, you must then enter
valid configuration values before leaving the setup screen. Otherwise, if you click
Cancel, the Alarming screen appears, and any changes you have made to the
Standard alarm settings will revert to their previous values.
Clearing the Enable checkbox to disable the alarm still requires that you enter valid
configuration settings for the disabled alarm before you can continue configuring other
alarms.
4. Select a value from the dropdown list for Priority to distinguish between events that
require immediate action and those that do not require immediate action.
5. Enter a value in the Pickup Limit field. If appropriate, select Lead or Lag from the
dropdown list.
6. Enter a value in the Delay field for the number of seconds that the alarm ON condition
needs to be true before the alarm is activated.
7. Enter a value in the Dropout Limit field. If appropriate, select Lead or Lag from the
dropdown list.
8. In the Delay field, enter a value for the number of seconds that the alarm OFF condition
needs to be true before the alarm is deactivated.
© 2014 Schneider Electric. All rights reserved.
Page 39 of 166
Chapter 4: PM5100 and PM5300 series power meters
ION Setup 3.0 Device Configuration Guide
9. Click Outputs to open the Alarm Association Selection dialog.
10.Select the checkbox next to an available channel listed in Available Channels to
associate the alarm with that channel, then click OK. The column at the right shows any
channels that are already assigned.
Note
Assigned channels are channels that are currently in use and therefore not available for
association.You can click the + next to an assigned channel to view all of its existing
associations. To disassociate, or make an assigned channel available for association,
disconnect its existing associations.
Also, alarms can be associated with multiple channels, and a channel can have multiple
associated alarms.
11.Click Send to save all changes to the meter.
Digital
The PM5300 series meters have four (4) digital alarms for alarming on a digital input status.
By default, the digital alarms are active when the associated digital input is on.
To configure the digital input alarms:
1. Double-click Digital or select Digital then click Edit to open the list of available
parameters.
2. Select an alarm in the left column to edit its values.
3. Select the Enable checkbox to enable the selected alarm, or clear the checkbox to
disable the alarm.
Note
After selecting the checkbox for Enable to enable a Standard alarm, you must then enter
valid configuration values before leaving the setup screen. Otherwise, if you click
Cancel, the Alarming screen appears, and any changes you have made to the
Standard alarm settings will revert to their previous values.
Clearing the Enable checkbox to disable the alarm still requires that you enter valid
configuration settings for the disabled alarm before you can continue configuring other
alarms.
4. Select a value from the dropdown list for Priority to distinguish between events that
require immediate action and those that do not require immediate action.
5. For Setpoint Pickup, select On or Off from the dropdown list for the digital input state that
defines the alarm ON or OFF condition. By default, the alarm is active when the digital
input is ON.
6. Enter a value in seconds in the Delay field for the number of seconds that the alarm
condition needs to be true before the alarm is activated or deactivated.
7. Enter a value in seconds in the Delay field for Setpoint Dropout for the number of
seconds that the alarm OFF condition needs to be true before the alarm is deactivated.
8. Click Outputs to open the Alarm Association Selection dialog.
Page 40 of 166
© 2014 Schneider Electric. All rights reserved.
ION Setup 3.0 Device Configuration Guide
Chapter 4: PM5100 and PM5300 series power meters
9. Select the checkbox next to an available channel listed in Available Channels to
associate the alarm with that channel, then click OK. The column at the right shows any
channels that are already assigned.
Note
Assigned channels are channels that are currently in use and therefore not available for
association.You can click the + next to an assigned channel to view all of its existing
associations. To disassociate, or make an assigned channel available for association,
disconnect its existing associations.
Also, alarms can be associated with multiple channels, and a channel can have multiple
associated alarms.
10.Click Send to save all changes to the meter.
Unary
Unary alarms are alarms that affect only a single element or component. The power meters
have four (4) unary alarms for alarming when one of the following occurs:
• The meter powers up after a control power loss;
• The meter resets for any reason;
• The meter's self-diagnostic feature detects an issue;
• The meter detects a phase rotation that is different than expected.
To configure Unary alarms:
1. Double-click Unary or select Unary then click Edit to open the list of available
parameters.
2. Select an alarm in the left column to edit its values.
3. Select the Enable checkbox to enable the selected alarm, or clear the checkbox to
disable the alarm.
Note
After selecting the checkbox for Enable to enable a Standard alarm, you must then enter
valid configuration values before leaving the setup screen. Otherwise, if you click
Cancel, the Alarming screen appears, and any changes you have made to the
Standard alarm settings will revert to their previous values.
Clearing the Enable checkbox to disable the alarm still requires that you enter valid
configuration settings for the disabled alarm before you can continue configuring other
alarms.
4. Select a value from the dropdown list for Priority to distinguish between events that
require immediate action and those that do not require immediate action.
5. Click Outputs to open the Alarm Association Selection dialog.
6. Select the checkbox next to an channel listed in Available Channels to associate the
alarm with that channel, then click OK. The column at the right shows any channels that
are already assigned.
© 2014 Schneider Electric. All rights reserved.
Page 41 of 166
Chapter 4: PM5100 and PM5300 series power meters
ION Setup 3.0 Device Configuration Guide
Note
Assigned channels are channels that are currently in use and therefore not available for
association.You can click the + next to an assigned channel to view all of its existing
associations. To disassociate, or make an assigned channel available for association,
disconnect its existing associations.
Also, alarms can be associated with multiple channels, and a channel can have multiple
associated alarms.
7. Click Send to save all changes to the meter.
Basic Setup
This screen allows you to define the power system that the meter is monitoring.
To set the values for the Basic Setup parameters:
1. Select a parameter and click Edit to open its specific setup dialog, and then follow the
steps listed under the relevant parameter sections below.
2. When you complete the changes, click Send to save your changes to the meter.
For more information, refer to the meter's user guide, available from www.schneiderelectric.com.
System Type
To configure the power system type:
1. Select the power system configuration from the dropdown list and click Next.
2. Select the number of CTs and VTs and, if appropriate, select which phases they are
connected to, from their respective dropdown lists.
The number of CTs and VTs that can be selected is based on the power system
configuration selected in previous step.
3. Click Finish to return to the Basic Setup screen.
CT Primary
Enter a value in Amps for the CT Primary and click OK.
CT Secondary
Select a value from the dropdown list for the CT Secondary and click OK.
VT Primary
Enter a value in Volts for the VT Primary and click OK.
VT Secondary
Select a value from the dropdown list for the VT Secondary and click OK.
VT Connection
Select a value from the dropdown list for the VT Connection and click OK.
Page 42 of 166
© 2014 Schneider Electric. All rights reserved.
ION Setup 3.0 Device Configuration Guide
Chapter 4: PM5100 and PM5300 series power meters
Nominal Voltage
Enter the normal or designed voltage level in Volts of the electrical service and click OK.
Nominal Current
Enter a value in Amps for the Nominal Current and click OK.
Nominal Frequency
Select the power system's Nominal Frequency from the dropdown list and click OK.
Nominal Power Factor
Enter a value for the expected power factor of the load being monitored and click OK.
Phase Rotation
For 3-phase systems, select the system's phase rotation from the dropdown list and click
OK.
Clock
The Clock setup screen allows you to set the date and time and any necessary time offset of
the internal clock of a device and to synchronize the date and time of the devices in your
system with your workstation.
Note
If the power to your device is interrupted, you may see a dialog prompting you to reset
the date and time. In the event of power loss, the internal clock data is saved for up to
48 hours.
Device time
To change the date and time on a device:
1. Select Device time and click Edit to manually change the date and time settings.
The Device time changes to Update to and shows the date and time that will be sent to
the device.
2. Make any changes to the date and time, click OK, then click Send to save your changes
to the device.
Sync to
To change the Clock Sync Type, Time offset from PC and Synchronization Time:
1. Select Sync to and click Edit.
2. Select the appropriate Clock Sync Type from the dropdown list.
© 2014 Schneider Electric. All rights reserved.
Page 43 of 166
Chapter 4: PM5100 and PM5300 series power meters
ION Setup 3.0 Device Configuration Guide
Note
Select the Clock Sync Type based on any requirements of the devices in your system
and the system software for correct operation (for example, select PC Standard Time
(No DST) for StruxureWare Power Management.)
3. Choose a time zone from the dropdown list for Time offset from PC, if applicable.
The date and time to be sent to the device appear below as Synchronization Time.
4. Click OK, then click Send to save your changes to the meter.
The synchronization time and date overwrite the clock settings on the meter.
Data Log #1
This setup screen allows you to configure the parameters for Data Log #1.
To set the values for the Data Log #1 parameters:
Status
To configure the Status of Data Log #1:
1. Double-click Status or select Status and click Edit.
2. Select a value from the dropdown list for status.
Interval
To configure the Interval of Data Log #1:
1. Double-click Interval or select Interval and click Edit.
2. Select a value in minutes or hours from the dropdown list and click OK.
Channels
To configure the Channels of Data Log #1:
1. Double-click Channels or select Channels and click Edit.
2. Select from the available channels at left then click
column at the right, and click OK.
to move the channels to the
Demand Setup
This setup screen allows you to configure the power and current demand and clock sync
offset for this meter.
To set the values for the Demand Setup parameters:
Power Demand
1. Double-click Power Demand or select Power Demand and click Edit.
2. Choose values from the dropdown lists for Mode and Periods/Sub-Interval (in minutes).
3. Click the button next to Digital Output Association.
4. Select an output to assign from the available channels at the left, then click OK.
Page 44 of 166
© 2014 Schneider Electric. All rights reserved.
ION Setup 3.0 Device Configuration Guide
Chapter 4: PM5100 and PM5300 series power meters
View any channels that are already assigned at the right.
5. Click the button next to Digital Input Association.
6. Select an input to assign from the available channels at the left.
View any channels that are already assigned at the right.
Note
Assigned channels are channels that are currently in use and therefore not available for
association.You can click the + next to an assigned channel to view all of its existing
associations. To disassociate, or make an assigned channel available for association,
disconnect its existing associations.
Channels used for demand cannot be shared with alarms. Channel associations for
demand or alarms are exclusive.
7. Click OK, then click Send to save your changes to the device.
Current Demand
1. Double-click Current Demand or click Current Demand and click Edit.
2. Choose values from the dropdown lists for Mode and Periods/Sub-Interval (in minutes).
3. Click the button next to Digital Output Association.
4. Select an output to assign from the available channels at the left.
View any channels that are already assigned at the right.
Note
The Digital Input Association parameter becomes available to configure only when an
input sync mode is selected for Power Demand or Current Demand.
5. Click the button next to Digital Input Association.
6. Select an input to assign from the available channels at the left.
View any channels that are already assigned at the right.
Note
Assigned channels are channels that are currently in use and therefore not available for
association.You can click the + next to an assigned channel to view all of its existing
associations. To disassociate, or make an assigned channel available for association,
disconnect its existing associations.
Channels used for demand cannot be shared with alarms. Channel associations for
demand or alarms are exclusive.
7. Click OK, then click Send to save your changes to the device.
© 2014 Schneider Electric. All rights reserved.
Page 45 of 166
Chapter 4: PM5100 and PM5300 series power meters
ION Setup 3.0 Device Configuration Guide
Clock Sync Offset
Note
The Clock Sync Offset parameter becomes available to configure only when Clock
Snyc Block or Clock Sync Rolling Block is selected for Power Demand or Current
Demand.
1. Double-click Clock Sync Offset or click Clock Sync Offset and click Edit.
2. Choose a time offset value from the dropdown list, then click OK.
3. Click Send to save your changes to the meter.
Device Label
This setup screen allows you to enter a label for a device.
Meter Identification
To set the values for the Meter Idenfication parameter:
1. Double-click Meter Identification or select Meter Identification and click Edit.
2. Enter text into the field to describe your meter (for example, meter type, location or other
details).
3. Click OK, then click Send to save your changes to the meter.
Front Panel Display
This setup screen changes the appearance or behavior of the meter's front panel screen.
To set the values for the Front Panel Display parameters:
1. Double-click a parameter or select a parameter and click Edit to open its specific setup
dialog.
2. Select or enter the values for the selected parameter and click OK.
3. Click Send to save the changes to the meter.
Contrast
Enter or select a value from the dropdown list to brighten or dim the screen.
Screen Timeout
Enter a value in minutes for how long without user input beofre the meter's display goes dim.
Backlight Timeout
Enter a value in minutes for how long before the backlight turns off after a period of inactivity.
Language
Select a language from the dropdown list for the meter to display (for example, English).
Page 46 of 166
© 2014 Schneider Electric. All rights reserved.
ION Setup 3.0 Device Configuration Guide
Chapter 4: PM5100 and PM5300 series power meters
Date Format
Select a date format from the dropdown list (for example MM/DD/YYYY).
Time Format
Select a value from the dropdown list (for example 24 Hr).
HMI Mode
Select a data format mode from the dropdown list to specify how data is shown on the
meter's display.
Energy Resolution, Current Resolution, Voltage Resolution and Power Resolution
Select a value from the dropdown list for the resolution of the specific parameter.
I/O Configuration
You can set up and configure the inputs and outputs for this device, including energy pulsing,
I/O setup, meter resets, metering standards, multi-tarrif, and RS-485 base comm with the
following screens:
Energy Pulsing
This screen allows you to set the values for the Energy Pulsing parameter.
Front Panel LED
This parameter allows you to configure the set the function of the Alarm and energy pulsing
LED.
To set the LED mode:
1. Double-click Front Panel LED or click Front Panel LED, then click Edit.
The Front Panel LED parameter has three modes: Disabled, Alarm, or Energy.
• Disabled mode turns off the LED.
• Alarm mode configures the LED for alarming application.
• Energy mode configures the LED for energy pulsing application.
2. If you choose Energy, then select a value from the dropdown list for Parameter and click
OK.
3. Enter a value for Pulse Rate and click OK.
4. Click Send to save the change to the meter.
Digital Output D1, D2
To set the Digital Output:
1. Double-click a digital output parameter, or select a digital output parameter, and click Edit
to open a setup dialog.
2. Select Energy from the dropdown list for Control and click OK.
© 2014 Schneider Electric. All rights reserved.
Page 47 of 166
Chapter 4: PM5100 and PM5300 series power meters
ION Setup 3.0 Device Configuration Guide
3. Choose an energy type from the dropdown list for Parameter.
4. Enter a value for Pulse Rate, then click OK.
5. Click Send to save the changes to the meter.
I/O Setup
The PM5300 series meter can accept up to two (2) digital inputs, up to two (2) digital outputs
and two relays. The PM5100 series meter uses its single ouput for energy pulsing. For more
information on I/O descriptions and configuration details, see the user guide for the device,
available from www.schneider-electric.com.
WARNING
UNINTENDED EQUIPMENT OPERATION
• Do not use ION Setup software and associated devices for critical control or protection
applications where human or equipment safety relies on the operation of the control
circuit.
• Do not rely solely on device data to determine if your power system is functioning
correctly or meeting all applicable standards and compliances.
• Do not use device control for time-critical functions because delays can occur between
the time a control action is initiated and when that action is applied.
Failure to follow these instructions can result in death or serious injury.
Status Input S1, S2
1. Double-click a Status Input parameter or select a Status Input parameter and click Edit to
open a setup dialog.
2. If required, enter text into the Label field to update the label that identifies the status input.
Control Mode shows either Normal or Demand Sync based on the existing
associations.
Normal mode indicates that the status input is available for use by alarms.
Demand Sync indicates that the status input is configured to accept a demand sync
pulse from a utility demand meter.
3. Select a time in milliseconds for Debounce.
Any associations for this Status Input appear in the Associations pane.
4. Click OK to save your changes and return to the I/O Setup screen.
5. Click Send to save the changes to the device.
Page 48 of 166
© 2014 Schneider Electric. All rights reserved.
ION Setup 3.0 Device Configuration Guide
Chapter 4: PM5100 and PM5300 series power meters
Note
If a Programming Results dialog appears, you will need to enter valid values for those
parameters listed, then click Send.
Digital Output D1, D2
1. Double-click a Digital Output parameter, or select a Digital Output parameter, and click
Edit to open a setup dialog.
2. If required, enter text into the Label field to update the label that identifies the status input.
3. Control Mode shows Static or other based on the existing associations.
4. Select a value from the dropdown list for Behavior Mode.
5. Enter a value in seconds for On Time.
Any associations for this status input appear in the Associations pane.
6. Click OK to save your changes and return to the I/O Setup screen.
7. When you finish editing the parameters, click Send to save the changes to the device.
Relay R1, R2
1. Double-click a Relay parameter, or select a Relay parameter, and click Edit to open a
setup dialog.
2. If required, enter text into the Label field to update the label that identifies the status input.
Control Mode shows External or other based on the existing associations.
3. Select a value from the dropdown list for Behavior Mode.
4. Enter a value in seconds for On Time.
Any associations for this Relay appear in the Associations pane.
5. Click OK to save your changes and return to the I/O Setup screen.
6. Click Send to save the changes to the device.
Meter Resets
Meter values can be rest or cleared through the meter reset parameters. Resets are grouped
so that either all items listed can be selected for reset (global reset) or individual items or
groups of items can be selected for reset (single reset). Meter initialization clears all counters
and accumulators and prepares the meter for initial service.
Resetting device parameter values may affect alarm status and/or any recorded data. Also,
make sure to read the warning message that appears listing the parameters that are about to
be reset. At the Reset Confirmation dialog, verify before proceeding that only parameters
you intend to reset are listed.
© 2014 Schneider Electric. All rights reserved.
Page 49 of 166
Chapter 4: PM5100 and PM5300 series power meters
ION Setup 3.0 Device Configuration Guide
WARNING
UNINTENDED EQUIPMENT OPERATION
Do not use ION Setup software and associated devices for critical control or protection
applications where human or equipment safety relies on the operation of the control
circuit.
Failure to follow these instructions can result in death or serious injury.
NOTICE
LOSS OF DATA
Before changing device configuration values, make sure that all recorded data has been
saved in a secure location.
Failure to follow these instructions can result in loss of data.
Global reset
Global resets reset the following parameters:
• All min/max values
• Active load timer
• All energies
• All demands
• All alarms and counters
• All I/O counters and timers
To reset all meter parameters:
1. Select the checkbox next to Meter Initialization to select all groups and their respective
items.
2. Click Reset to immediately reinitialize the meter.
Single reset
Single resets reset selected parameters:
• Energy
• Demand
• Alarms
• Data log
• Digital input counters
• Digital output counters
Page 50 of 166
© 2014 Schneider Electric. All rights reserved.
ION Setup 3.0 Device Configuration Guide
Chapter 4: PM5100 and PM5300 series power meters
• Load operation timer
To reset selected meter parameters:
1. Select the checkbox next to individual items, then click Reset. The Reset Confirmation
dialog appears.
2. Verify before proceeding that only parameters intended to be reset are listed.
3. Click Proceed to continue or Cancel to stop the reset. If you are prompted for a device
password, enter that password, then click OK.
4. Click Exit to close the dialog.
Metering Standards
This screen allows you to set parameters to monitor load and demand.
Load Timer Setpoint
1. Double-click on Load Timer Setpoint or select Load Timer Setpoint and click Edit.
2. Enter a value in Amps for Load Time Setpoint and click OK.
For more information, refer to the user guide for the meter, available at www.schneiderelectric.com.
Peak Current Demand
1. Double-click Peak Current Demand or select Peak Current Demand and click Edit.
2. Enter a numeric value for Peak Current Demand and click OK. Enter 0 if you want the
power meter to use metered current peak demand for the calculation. The peak current
demand over the last year calculates Total Demand Distortion (TDD) in Amps.
3. Click Send to save your changes to the device.
Multi-Tariff
The screen allows you to set the parameters for Command mode, Time of Day mode, and
Input mode. Use these modes to determine which tariffs to apply and when.
To set the Tariff Mode parameter:
Tariff Mode
1. Double-click Multi-Tariff to open the list of available parameters.
2. Double-click on Tariff Mode or select Tariff Mode and click Edit.
3. Select a Tariff Mode from the dropdown list.
Command
This mode allows you to use Modbus commands to control which tariff is active.
1. Select Command from the dropdown list and click Finish.
2. Click Send to save your changes to the device.
© 2014 Schneider Electric. All rights reserved.
Page 51 of 166
Chapter 4: PM5100 and PM5300 series power meters
ION Setup 3.0 Device Configuration Guide
Input
This mode allows you to define the active tariff using one or more status inputs.
1. Select Input from the dropdown list and click Next.
2. Choose a value from the dropdown list for Number of Tariffs.
3. Choose a value from the dropdown list for Tariff Associations.
4. View the Existing Associations panel to see current associations.
5. Click Finish then Send to save your changes to the device.
Time of Day
This mode allows you to define times, days and date ranges during which specific tariffs are
active.
1. Select Time of Day from the dropdown list and click Next.
The Set Tariff Options dialog appears.
2. Select the checkbox next to a tarrif, or select a tariff and click Edit.
3. Choose a value from the dropdown list for Type, (such as Everyday, Weekend).
4. Enter values in minutes for Start and End, and indicate AM or PM.
5. Select the checkbox next to Date Range To specify a date range, sand click OK.
6. Click the arrows to enter a date for Start and End.
7. Repeat these steps for all tariffs you need to configure.
8. Click Finish then Send to save your changes to the device.
RS-485 Base Comm
This screen allows you to set the parameters for the Modbus RS-485 Base Comm.
Modifying the following communications parameters may interrupt or stop communications
with the device. Make sure to correctly configure all communications settings for the device
before proceeding.
WARNING
INACCURATE DATA RESULTS
• Do not incorrectly configure ION Setup software and its associated devices; this can
lead to incorrect reports and/or data results.
• Do not rely solely on reports or data results to determine if ION Setup and its associated
devices are functioning correctly or meeting all applicable standards and compliances.
• Do not use reports or data results as substitutes for proper workplace practices or
equipment maintenance; they are supplemental only.
Failure to follow these instructions can result in death or serious injury.
To change the RS-485 Base Comm parameters:
Page 52 of 166
© 2014 Schneider Electric. All rights reserved.
ION Setup 3.0 Device Configuration Guide
Chapter 4: PM5100 and PM5300 series power meters
1. Double-click on RS-485- Base Comm to open the list of available parameters.
2. Double-click a parameter or select a parameter and click Edit.
Protocol
Select a communication protocol from the dropdown list used for the Modbus RS-485
connection and click OK.
Address
Enter a numeric value for the address (unit ID) of the device and click OK.
Baud Rate
Select a value from the dropdown list for the meter's baud rate and click OK.
Parity
Select a value from the dropdown list for the communications port parity setting and click
OK.
Note
Make sure that the Protocol, Baud Rate and Parity settings on your meter are set to the
same values as all other devices on the RS-485 network and that these values also
match any device settings used to communicate with the RS-485 network.
3. Click Send to save your changes to the device.
© 2014 Schneider Electric. All rights reserved.
Page 53 of 166
Chapter 4: PM5100 and PM5300 series power meters
Page 54 of 166
ION Setup 3.0 Device Configuration Guide
© 2014 Schneider Electric. All rights reserved.
ION Setup 3.0 Device Configuration Guide
Chapter 5: PM5350 power meter
Chapter 5: PM5350 power meter
The PowerLogic™ Power Meter PM5350 is a high-performance, multifunction meter
equipped with a back-lit, anti-glare LCD display. The PM5350 meter provides
measurements, alarming for key parameters, and non-critical breaker status monitoring and
control. The power meter measures currents and voltages and reports real time RMS (rootmean-squared) values for all three phases and neutral. In addition, the power meter
calculates power factor, real power, reactive power, and other power and energy values.
For more information, refer to the PowerLogic Power Meter PM5350 User Guide, available
from www.schneider-electric.com.
In this section
PM5350 Meter setup
56
Using ION Setup
56
Meter identification
56
PM5350 Setup screens
56
Alarming
56
Basic Setup
59
Clock
60
Demand Setup
61
Device Label
62
Front Panel Display
62
I/O Setup
63
LED Control
64
Meter Resets
64
Metering Standards
66
RS-485 Base Comm
66
© 2014 Schneider Electric. All rights reserved.
Page 55 of 166
Chapter 5: PM5350 power meter
ION Setup 3.0 Device Configuration Guide
PM5350 Meter setup
Before using ION Setup, make sure all the communications settings for the PM5350 meter
are configured. For more information, refer to "Power Meter Comms Setup" in the
PowerLogic Power Meter PM5350 User Guide.
Using ION Setup
Use Network mode in ION Setup to add and configure the PM5350 power meter. See the
“Starting, Logging On and Logging Off” section of the ION Setup online help for more
information.
Refer to the ION Setup online help for information on adding sites and devices.
Meter identification
The PM5350 device ships with many default values already set up and with the firmware
installed. Note that the firmware for this device cannot be upgraded from the field.
To view meter identification information, use the device front panel. For more information,
refer to "Identifying the Firmware Version, Model, and Serial Number" in the PowerLogic
Power Meter PM5350 User Guide.
PM5350 Setup screens
The following sections describe the setup screens that are available for the PM5350 device.
For information about features, refer to the PowerLogic Power Meter PM5350 User Guide.
Alarming
WARNING
UNINTENDED EQUIPMENT OPERATION
• Do not use ION Setup software and associated devices for critical control or protection
applications where human or equipment safety relies on the operation of the control
circuit.
• Do not rely solely on device data to determine if your power system is functioning
correctly or meeting all applicable standards and compliances.
• Do not use device control for time-critical functions because delays can occur between
the time a control action is initiated and when that action is applied.
Failure to follow these instructions can result in death or serious injury.
This screen allows you to configure the parameters for all alarms for this meter.
Page 56 of 166
© 2014 Schneider Electric. All rights reserved.
ION Setup 3.0 Device Configuration Guide
Chapter 5: PM5350 power meter
Note
Only alarms that apply to the selected power system configuration can be enabled.
Standard
The power meter has 29 standard over/under alarms.
To configure the standard alarms:
1. In the Alarming screen, select Standard then click Edit to open the Standard Alarm
Setup dialog.
2. Select an alarm in the left column to edit its values.
Note
After selecting the checkbox for Enable to enable a Standard alarm that has not yet
been configured, you must enter valid configuration settings before you can continue
performing any other actions, including disabling the alarm.
3. Select the Enable checkbox to enable the selected alarm, or clear the checkbox to
disable the alarm.
4. Set a value for Priority to distinguish between events that require immediate action and
those that do not require action. Select the alarm priority from the values in the dropdown
list.
5. For Setpoint Pickup, enter a value that defines the alarm ON condition.
6. In the Delay field associated with the Setpoint Pickup, enter a value for the number of
seconds that the alarm ON condition needs to be true before the alarm is activated.
7. For Setpoint Dropout, enter a value for the magnitude above (for "Over") or below (for
"Under") that defines the alarm OFF condition.
8. In the Delay field associated with the Setpoint Dropout, enter a value for the number of
seconds that the alarm OFF condition needs to be true before the alarm is deactivated.
9. Click Outputs to open the Alarm Association Selection dialog.
10.Select the checkbox next to an Available Channels, then choose an item from the
Assigned Channels column, and click OK.
Note
Assigned channels are channels that are currently in use and therefore not available for
association.You can click the + next to an assigned channel to view all of its existing
associations. To disassociate, or make an assigned channel available for association,
disconnect its existing associations.
Also, alarms can be associated with multiple channels, and a channel can have multiple
associated alarms.
Digital
The power meter has four (4) digital alarms for alarming on a digital input status. By default,
the digital alarms are active when the associated digital input is on.
© 2014 Schneider Electric. All rights reserved.
Page 57 of 166
Chapter 5: PM5350 power meter
ION Setup 3.0 Device Configuration Guide
To configure the digital input alarms:
1. Select Digital then click Edit to open the Digital Alarm Setup dialog.
2. Select an alarm in the left column to edit its values.
3. Select the Enable checkbox to enable the selected alarm, or clear the checkbox to
disable the alarm.
4. Set a value for Priority to distinguish between events that require immediate action and
those that do not require action. Select the alarm priority from the values in the dropdown
list.
5. For Setpoint Pickup, select the digital input state (on or off) that defines the alarm ON
condition. By default, the alarm is active when the digital input is ON.
6. In the Delay field associated with the setpoint pickup, enter a value for the number of
seconds that the alarm ON condition needs to be true before the alarm is activated.
7. For Setpoint Dropout, in the Delay field associated with the setpoint dropout, enter a
value for the number of seconds that the alarm OFF condition needs to be true before the
alarm is deactivated.
8. Click Outputs to open the Alarm Association Selection dialog.
9. Select the checkbox next to an output in Available Channels, then choose an item from
the Assigned Channels column, and click OK.
Unary
Unary alarms are alarms that affect only a single element or component. The power meter
has four unary alarms for alarming when any of the following occur:
• The meter powers up after a control power loss;
• The meter resets for any reason;
• The meter self-diagnostic feature detects an issue;
• The meter detects a phase rotation different than expected.
To configure unary alarms:
1. Select Unary then click Edit to open the Unary Alarm Setup dialog.
2. Select an alarm in the left column to edit its values.
3. Select the Enable checkbox to enable the selected alarm, or clear the checkbox to
disable the alarm.
4. Set a value for Priority to distinguish between events that require immediate action and
those that do not require action. Select the alarm priority from the values in the dropdown
list.
5. Click Outputs to open the Output Selection.
6. Select the checkbox next to an output in Available Channels, then choose an item from
the Assigned Channels column, and click OK.
Page 58 of 166
© 2014 Schneider Electric. All rights reserved.
ION Setup 3.0 Device Configuration Guide
Chapter 5: PM5350 power meter
Note
Assigned channels are channels that are currently in use and therefore not available for
association.You can click the + next to an assigned channel to view all of its existing
associations. To disassociate, or make an assigned channel available for association,
disconnect its existing associations.
Also, alarms can be associated with multiple channels, and a channel can have multiple
associated alarms.
When you finish configuring alarms and click Send, the configured alarms are saved to
the device. If any of the alarms are invalid, a message will appear identifying the invalid
alarm(s).
Basic Setup
To set the values for each of the Basic Setup parameters:
1. Double-click Basic Setup to open the list of parameters.
2. Select the parameter and click Edit to open its specific setup dialog, and then follow the
steps listed under the relevant parameter sections below.
3. When you complete the changes click Send to save your changes to the device.
For more information, refer to the PowerLogic Power Meter PM5350 User Guide, available
from www.schneider-electric.com.
System Type
To configure the system type:
1. Select the power system configuration from the dropdown list.
2. Click Next, then select the number of CTs and VTs from their respective dropdown lists.
The number of CTs and VTs that can be selected are based on the power system
configuration selected in previous step. For more information, see "Setting Up the Power
System" in the PowerLogic Power Meter PM5350 User Guide.
3. Click Finish to return to the Basic Setup screen.
CT Primary
Enter the value in Amps for the CT primary and click OK. Note that the number of CTs and
VTs that can be configured is based on the power system configuration selected.
CT Secondary
Select the amperage from the dropdown list for the CT secondary and click OK.
VT Primary
Enter the value in Volts for the VT primary and click OK.
VT Secondary
Select the appropriate voltage from the dropdown list for the VT secondary and click OK.
© 2014 Schneider Electric. All rights reserved.
Page 59 of 166
Chapter 5: PM5350 power meter
ION Setup 3.0 Device Configuration Guide
VT Connection
Select the VT connection type from the dropdown list for the VT connection and click OK.
Nominal Voltage
Enter the normal or designed voltage level in Volts of the electrical service and click OK. The
nominal voltage is limited to 2x VT Primary, or 690 V for direct connect.
Nominal Current
Enter the normal or designed current level in Amps and click OK. The nominal current is
limited to 4x CT Primary.
Nominal Frequency
Select a value from the dropdown list for the nominal frequency and click OK.
Nominal Power Factor
Enter the value for the expected power factor of the load being monitored and click OK.
Phase Rotation
Select the phase rotation from the dropdown list for phase rotation and click OK.
Clock
The Clock setup screen allows you to set the date and time of the internal clock of a device
and to synchronize the date and time of the devices in your system with your workstation.
Note
If the power to your device is interrupted, you may see a dialog prompting you to reset
the date and time. In the event of power loss, the internal clock data is saved for up to
48 hours.
Device time
The Device time parameter shows the date and time on the device.
1. Select Device time and click Edit to manually change the date and time settings.
The Device time changes to Update to and shows the date and time that will be sent to
the device.
2. Make any changes to the date and time, click OK, then click Send to save your changes
to the device.
Sync to
The Snyc to parameter shows the Clock Sync Type (for example, UTC) and
Synchronization Time.
Page 60 of 166
© 2014 Schneider Electric. All rights reserved.
ION Setup 3.0 Device Configuration Guide
Chapter 5: PM5350 power meter
Note
Configure time synchronization based on any requirements of the devices in your
system and the system software for correct operation (for example, selecting PC
Standard Time (No DST) for StruxureWare Power Management.)
1. Select Sync to and click Edit.
2. Select the appropriate time type from the dropdown list.
3. Choose a time zone for Time offset from PC, if applicable.
The date and time to be sent to the device are displayed below as Synchronization
Time.
4. Click OK, then click Send to save your changes to the device.
The device time is overwritten with the time to be sent to the device. It may take a few
moments for the time synchronization to complete.
Demand Setup
This setup screen allows you to configure the power and current demand for this device.
Note
Assigned channels are channels that are currently in use and therefore not available for
association.You can click the + next to an assigned channel to view all of its existing
associations. To disassociate, or make an assigned channel available for association,
disconnect its existing associations.
Channels used for demand cannot be shared with alarms. Channel associations for
demand or alarms are exclusive.
Power Demand
1. Select Power Demand and click Edit.
2. Choose values from the dropdown lists for Mode and Periods/Sub-Interval (in minutes).
3. Click Digital Output Association and select the checkbox next to an output in the
Available Channels column.
4. Choose an output to associate from the Assigned Channels column.
5. Click OK, then click Send to save your changes to the device.
Current Demand
1. Select Current Demand and click Edit.
2. Choose values from the dropdown lists for Mode and Periods/Sub-Interval (in minutes).
3. Click Digital Output Association and select the checkbox next to an output in the
Available Channels column.
4. Choose an output to associate from the Assigned Channels column.
5. Click OK, then click Digital Input Association and select the checkbox next to an input
in the Available Channels column.
© 2014 Schneider Electric. All rights reserved.
Page 61 of 166
Chapter 5: PM5350 power meter
ION Setup 3.0 Device Configuration Guide
6. Choose an output to associate from the Assigned Channels column.
7. Click OK, then click Send to save your changes to the device.
Device Label
1. Select the parameter and click Edit.
2. Enter a label description for the meter, click OK, then click Send to save your changes to
the device.
Meter Identification
Enter text into the field to describe your meter (for example, type, location or other device
detail).
Front Panel Display
To set the values for each of the Front Panel Display parameters:
1. Double-click Front Panel Display to open its list of parameters.
2. Select a parameter and click Edit to open its specific setup dialog.
3. Select or enter the values for the selected parameter and click OK.
4. When you finish making changes to the parameters, click Send to save the changes to
the device.
Contrast
Enter a value from 0 (brightest) to 7 (dimmest).
Screen Timeout
Enter a screen timeout value in minutes.
Backlight Timeout
Enter a backlight timeout value in minutes.
Language
Select a language from the dropdown list (for example, English).
Date Format
Select a date format from the dropdown list (for example, MM/DD/YYYY).
Time Format
Select a value from the dropdown list (for example, AM/PM).
HMI mode
Select a value from the dropdown list (for example, IEC) for displaying data on the LCD
display.
Energy Resolution, Current Resolution, Voltage Resolution and Power Resolution
Select the appropriate values for the resolution of the specific parameter.
Page 62 of 166
© 2014 Schneider Electric. All rights reserved.
ION Setup 3.0 Device Configuration Guide
Chapter 5: PM5350 power meter
I/O Setup
WARNING
UNINTENDED EQUIPMENT OPERATION
• Do not use ION Setup software and associated devices for critical control or protection
applications where human or equipment safety relies on the operation of the control
circuit.
• Do not rely solely on device data to determine if your power system is functioning
correctly or meeting all applicable standards and compliances.
• Do not use device control for time-critical functions because delays can occur between
the time a control action is initiated and when that action is applied.
Failure to follow these instructions can result in death or serious injury.
The power meter can accept four (4) digital inputs and two (2) digital mechanical relay
outputs. For more information on I/O descriptions and configuration details, refer to the
PowerLogic Power Meter PM5350 User Guide, available from www.schneider-electric.com.
Double-click I/O Setup to upload the parameters and open the I/O Setup dialog.
Initializing a meter will reset or disable certain parameters. Make sure to read the warning
message that appears listing the parameters that are about to be reset.
Digital Input DI1, DI2, DI3, DI4
1. Select a digital input parameter, and click Edit to open a setup dialog.
2. If required, use the Label field to update the label that identifies the digital input.
3. Make note of the Control Mode based on the existing associations.
Normal mode indicates that the digital input is available for use by alarms.
Demand Sync indicates that the digital input is configured to accept a demand sync
pulse from a utility demand meter.
4. Select a time in milliseconds for Debounce.
Make note of any associations that appear in the Associations window.
5. Click OK to return to the I/O Setup screen.
Digital Output D01 and D02
1. Select a digital output parameter, and click Edit to open a setup dialog.
2. If required, use the Label field to update the label that identifies the digital output.
© 2014 Schneider Electric. All rights reserved.
Page 63 of 166
Chapter 5: PM5350 power meter
ION Setup 3.0 Device Configuration Guide
Note
For Control Mode, the digital output is set based on the associations made with Alarms
or Demand. If the digital output is associated with Alarms, its control mode is Alarm; if
the digital output is associated with demand, the control mode is set to Demand.
Otherwise the control mode is set to External.
3. Select Normal, Timed, or Coil Hold for Behavior Mode.
4. Enter a time value in seconds for On Time.
5. Make note of any associations for this digital output that appear in the Associations
window.
6. Click OK, then click Send to save your changes to the device.
LED Control
This screen allows you to set the values for the LED Mode parameters.
LED Mode
The LED Mode parameter has three modes: Off, Alarm, or Energy.
• Off mode turns off the LED.
• Alarm mode causes the LED to flash when there are any active, high-priority alarms. The
LED continues to blink until the alarm is acknowledged.
• Energy mode causes the LED to flash at a rate proportional to the amount of energy
consumed, and it is used to verify the accuracy of the power meter.
To set the mode:
1. Click LED Mode and then click Edit.
2. Select Off, Alarm, or Energy from the dropdown list and click OK.
3. Click Send to save the change to the device.
Meter Resets
Meter values can be re-initialized through the meter reset parameters. Resets are grouped so
that either all items listed can be selected for reset (global reset), or individual items or groups
of items can be selected for reset (single reset).
Resetting device parameter values may affect alarm status and/or any recorded data. Also,
make sure to read the warning message that appears listing the parameters that are about to
be reset. At the Reset Confirmation dialog, verify before proceeding that only parameters
you intend to reset are listed.
Page 64 of 166
© 2014 Schneider Electric. All rights reserved.
ION Setup 3.0 Device Configuration Guide
Chapter 5: PM5350 power meter
WARNING
UNINTENDED EQUIPMENT OPERATION
Do not use ION Setup software and associated devices for critical control or protection
applications where human or equipment safety relies on the operation of the control
circuit.
Failure to follow these instructions can result in death or serious injury.
NOTICE
LOSS OF DATA
Before changing device configuration values, make sure that all recorded data has been
saved in a secure location.
Failure to follow these instructions can result in loss of data.
Global reset
Global resets will reset the following parameters:
• All energy values
• All demand values
• All min/max values
• All alarm logs and counters
• All I/O counters and timers
To reset all meter parameters:
1. Select the checkbox next to Meter Initialization to select all groups and their respective
items.
2. Click Reset to perform the device re-initialization.
Single reset
Single resets will reset selected parameters:
• Energy
• Demand
• Alarms
• Digital Inputs Counters
• Digital Outputs Counters
• Load Operation Timer
© 2014 Schneider Electric. All rights reserved.
Page 65 of 166
Chapter 5: PM5350 power meter
ION Setup 3.0 Device Configuration Guide
To reset selected meter parameters:
1. Select the checkbox next to individual items, then click Reset. The Reset Confirmation
dialog appears.
2. Verify before proceeding that only parameters intended to be reset are listed.
3. Click Proceed to continue, or Cancel to stop the reset. If you are prompted for a device
password, enter that password, then click OK.
Metering Standards
This screen allows you to set parameters to monitor load and demand.
Load Timer Setpoint
1. Double-click on Metering Standards.
The Metering Standards dialog appears.
2. Choose Load Time Setpoint and click Edit.
3. Enter a value in Amps for Load Time Setpoint , click OK, then click Send.
There are two typical uses for the load timer setpoint:
• Select a relatively low setpoint. The timer increments when the load being metered is
running. This could be useful in recording machine run time for a preventive maintenance
program.
• Select a setpoint that is equal to the rating of the power system conductors. The timer
increments and records conductor activity. This information could be used to help
determine if a circuit has the capacity to add load or whether to move load to another
circuit.
Peak Current Demand
1. Double-click on Metering Standards.
The Metering Standards dialog appears.
2. Choose Peak Current Demand and click Edit.
3. Enter a numeric value for Peak Current Demand and click OK. Enter 0 if you want the
power meter to use metered current peak demand for the calculation. The peak current
demand over the last year calculates Total Demand Distortion (TDD) in Amps.
4. Click Send to save your changes to the device.
RS-485 Base Comm
This screen allows you to set the parameters for the Modbus RS-485 Base Comm.
Page 66 of 166
© 2014 Schneider Electric. All rights reserved.
ION Setup 3.0 Device Configuration Guide
Chapter 5: PM5350 power meter
Note
It is recommended that you do not change the communications settings of the device. If
it becomes necessary, use the front panel to change the communications settings.
Modifying the following communications parameters may interrupt or stop communications
with the device. Make sure to correctly configure all communications settings for the device
before proceeding.
WARNING
INACCURATE DATA RESULTS
• Do not incorrectly configure ION Setup software and its associated devices; this can
lead to incorrect reports and/or data results.
• Do not rely solely on reports or data results to determine if ION Setup and its associated
devices are functioning correctly or meeting all applicable standards and compliances.
• Do not use reports or data results as substitutes for proper workplace practices or
equipment maintenance; they are supplemental only.
Failure to follow these instructions can result in death or serious injury.
1. Double-click on RS-485- Base Comm.
The RS-485- Base Comm dialog appears.
2. Select a parameter, and click Edit.
3. Select or enter your changes to the parameters.
4. Click Send to save your changes to the device.
Protocol
Select a communication protocol from the dropdown list used for the Modbus RS-485
connection and click OK.
Address
Enter a numeric value for the address (unit ID) of the device and click OK.
Baud Rate
Select a value from the dropdown list for the meter's baud rate and click OK.
Parity
Select a value from the dropdown list for the communications port parity setting and click
OK.
Note
Make sure that the parity value selected for the device matches the parity value of the
network that is connected to the device.
© 2014 Schneider Electric. All rights reserved.
Page 67 of 166
Chapter 5: PM5350 power meter
Page 68 of 166
ION Setup 3.0 Device Configuration Guide
© 2014 Schneider Electric. All rights reserved.
ION Setup 3.0 Device Configuration Guide
Chapter 6: PM5350IB / PM5350PB power meters
Chapter 6: PM5350IB / PM5350PB power meters
The PowerLogic™ PM5350IB / PM5350PB power meters are multi-circuit meters designed
to monitor Busway power distribution systems. The PM5350IB / PM5350PB meters provide
measurements, alarming for key parameters, and non-critical breaker status monitoring and
control. The power meters can be installed in different electrical configurations to measure
currents and voltages and reports real time RMS (root-mean-squared) values for all three
phases and neutral. In addition, the power meters calculate power factor, real power,
reactive power, and other power and energy values.
PM5350IB - Equipped with a standard connector for voltage inputs
PM5350PB - Equipped with an external connector for voltage inputs that allows meter to be
connected to higher voltages
For more information, refer to the PowerLogic Power Meter PM5350 User Guide.
In this section
PM5350IB / PM5350PB meter setup
70
Using ION Setup
70
Meter identification
70
PM5350IB / PM5350PB setup screens
70
Alarming
70
Basic Setup
76
Clock
77
Demand Setup
78
Device Label
78
Front Panel Display
78
I/O Setup
79
LED Control
80
Meter Resets
81
Metering Standards
82
RS-485 Base Comm
82
© 2014 Schneider Electric. All rights reserved.
Page 69 of 166
Chapter 6: PM5350IB / PM5350PB power meters
ION Setup 3.0 Device Configuration Guide
PM5350IB / PM5350PB meter setup
Before using ION Setup, make sure all the communications settings for the PM5350IB /
PM5350PB meters are configured. For more information, refer to "Power Meter Comms
Setup" in the PowerLogic Power Meter PM5350 User Guide, available from www.schneiderelectric.com.
Using ION Setup
Use Network mode in ION Setup to add and configure the PM5350IB / PM5350PB power
meters. See the “Starting, Logging On and Logging Off” section of the ION Setup online help
for more information.
Refer to the ION Setup online help for information on adding sites and devices.
Meter identification
The PM5350IB / PM5350PB meters ship with many default values already set up and with
the firmware installed. Note that the firmware for these meters can be upgraded from the field
using the DLF-3000 firmware upgrade utility, available from www.schneider-electric.com.
To view meter identification information, use the device front panel. For more information,
refer to "Identifying the Firmware Version, Model, and Serial Number" in the PowerLogic
Power Meter PM5350 User Guide.
PM5350IB / PM5350PB setup screens
The following sections describe the setup screens that are available for the PM5350IB /
PM5350PB meters. For information about features, refer to the PowerLogic Power Meter
PM5350 User Guide.
Alarming
WARNING
UNINTENDED EQUIPMENT OPERATION
• Do not use ION Setup software and associated devices for critical control or protection
applications where human or equipment safety relies on the operation of the control
circuit.
• Do not rely solely on device data to determine if your power system is functioning
correctly or meeting all applicable standards and compliances.
• Do not use displayed data as a substitute for proper workplace practices or equipment
maintenance.
Failure to follow these instructions can result in death or serious injury.
This screen allows you to configure the parameters for all alarms for this meter.
Page 70 of 166
© 2014 Schneider Electric. All rights reserved.
ION Setup 3.0 Device Configuration Guide
Chapter 6: PM5350IB / PM5350PB power meters
Note
Only alarms that apply to the selected power system configuration can be enabled.
Standard
The power meter has 29 standard over/under alarms.
To configure the standard alarms:
1. In the Alarming screen, select Standard then click Edit to open the Standard Alarm
Setup dialog.
2. Select an alarm in the left column to edit its values.
Note
After selecting or clearing the checkbox for Enable, you must enter valid configuration
values in the Standard Alarm Setup screen before you can continue configuring other
alarms. If you click Cancel, the Alarming screen appears, and any changes you have
made to the Standard alarm settings will revert to their previous values.
3. Select the Enable checkbox to enable the selected alarm, or clear the checkbox to
disable the alarm.
4. Set a value for Priority to distinguish between events that require immediate action and
those that do not require action. Select the alarm priority from the values in the dropdown
list.
5. Enter a value for Pickup Limit that defines the alarm ON condition.
6. Enter a value in the Delay field associated with the Pickup Limit for the number of
seconds that the alarm ON condition needs to be true before the alarm is activated.
7. Enter a value for Dropout Limit that defines the alarm OFF condition.
8. Enter a value in the Delay field associated with the Dropout Limit for the number of
seconds that the alarm OFF condition needs to be true before the alarm is deactivated.
9. Click Outputs to open the Alarm Association Selection dialog.
10.Select the checkbox next to one or more Available Channels, then choose an item from
the Assigned Channels column, and click OK.
© 2014 Schneider Electric. All rights reserved.
Page 71 of 166
Chapter 6: PM5350IB / PM5350PB power meters
ION Setup 3.0 Device Configuration Guide
Note
Assigned channels are channels that are currently in use and therefore not available for
association.You can click the + next to an assigned channel to view all of its existing
associations. To disassociate, or make an assigned channel available for association,
disconnect its existing associations.
Also, alarms can be associated with multiple channels, and a channel can have multiple
associated alarms.
When you finish configuring alarms and click Send, the configured alarms are saved to
the device. If any of the alarms are invalid, a message will appear identifying the invalid
alarm(s).
Digital
The power meter has four (4) digital alarms for alarming on a digital input status. By default,
the digital alarms are active when the associated digital input is on.
To configure the digital input alarms:
1. Select Digital then click Edit to open the Digital Alarm Setup dialog.
2. Select an alarm in the left column to edit its values.
3. Select the Enable checkbox to enable the selected alarm, or clear the checkbox to
disable the alarm.
4. Set a value for Priority to distinguish between events that require immediate action and
those that do not require action. Select the alarm priority from the values in the dropdown
list.
5. Select the digital input state (on or off) for Setpoint Picku that defines the alarm ON
condition. By default, the alarm is active when the digital input is ON.
6. Enter a value for the number of seconds In the Delay field associated with the setpoint
pickup that the alarm ON condition needs to be true before the alarm is activated.
7. Enter a value for Setpoint Dropout in the Delay field associated with the setpoint dropout
for the number of seconds that the alarm OFF condition needs to be true before the alarm
is deactivated.
8. Click Outputs to open the Alarm Association Selection dialog.
9. Select the checkbox next to one or more outputs in Available Channels, then choose an
item from the Assigned Channels column, and click OK.
Page 72 of 166
© 2014 Schneider Electric. All rights reserved.
ION Setup 3.0 Device Configuration Guide
Chapter 6: PM5350IB / PM5350PB power meters
Note
Assigned channels are channels that are currently in use and therefore not available for
association.You can click the + next to an assigned channel to view all of its existing
associations. To disassociate, or make an assigned channel available for association,
disconnect its existing associations.
Also, alarms can be associated with multiple channels, and a channel can have multiple
associated alarms.
Unary
Unary alarms are alarms that affect only a single element or component. The power meter
has four unary alarms for alarming when any of the following occur:
• The meter powers up after a control power loss;
• The meter resets for any reason;
• The meter self-diagnostic feature detects an issue;
• The meter detects a phase rotation different than expected.
To configure unary alarms:
1. Select Unary then click Edit to open the Unary Alarm Setup dialog.
2. Select an alarm in the left column to edit its values.
3. Select the Enable checkbox to enable the selected alarm, or clear the checkbox to
disable the alarm.
4. Set a value for Priority to distinguish between events that require immediate action and
those that do not require action. Select the alarm priority from the values in the dropdown
list.
5. Click Outputs to open the Alarm Association Selection dialog.
6. Select the checkbox next to one or more outputs in Available Channels, then choose an
item from the Assigned Channels column, and click OK.
Note
Assigned channels are channels that are currently in use and therefore not available for
association.You can click the + next to an assigned channel to view all of its existing
associations. To disassociate, or make an assigned channel available for association,
disconnect its existing associations.
Also, alarms can be associated with multiple channels, and a channel can have multiple
associated alarms.
Multi-Circuit Current
The PM5350IB and PM5350PB model meters each have three (3) multi-circuit current alarms
available for alarming on a current input status. By default, the multi-circuit current alarms are
active when the associated current input is on.
© 2014 Schneider Electric. All rights reserved.
Page 73 of 166
Chapter 6: PM5350IB / PM5350PB power meters
ION Setup 3.0 Device Configuration Guide
Note
Multi-circuit current alarms become available only after you select the Multi-Circuit
Current option in Basic Setup.
To configure the multi-circuit current input alarms:
1. Select Multi-Circuit Current then click Edit to open the Multi-Circuit Current Alarm
Setup dialog.
2. Select an alarm in the left column to edit its values.
3. Select the Enable checkbox to enable the selected alarm, or clear the checkbox to
disable the alarm.
4. Set a value for Priority to distinguish between events that require immediate action and
those that do not require action. Select the alarm priority from the values in the dropdown
list.
5. Enter a value in percent for High-High Limit for Pickup and for Dropout.
6. Enter a value in percent for High Limit for Pickup and for Dropout.
7. Enter a value in percent for Low Limit for Pickup and for Dropout.
8. Enter a value in percent for Low-Low Limit for Pickup and for Dropout.
9. Enter a value in Amps for Breaker Rating.
10.Enter a value in seconds for Time Delay.
11.Click Inputs to open the Input Selection dialog.
12.Select from the available digital inputs at the left, click
selected column at the right, then click OK.
to add the input to the
13.Click Outputs to open the Alarm Association Selection dialog.
14.Select the checkbox next to one or more outputs in Available Channels, then choose an
item from the Assigned Channels column, and click OK.
Note
Assigned channels are channels that are currently in use and therefore not available for
association.You can click the + next to an assigned channel to view all of its existing
associations. To disassociate, or make an assigned channel available for association,
disconnect its existing associations.
Also, alarms can be associated with multiple channels, and a channel can have multiple
associated alarms.
Multi-Circuit Power
The PM5350IB and PM5350PB model meters each have six (6) multi-circuit power alarms for
alarming on a power input status. By default, the multi-circuit power alarms are active when
the associated current input is on.
Page 74 of 166
© 2014 Schneider Electric. All rights reserved.
ION Setup 3.0 Device Configuration Guide
Chapter 6: PM5350IB / PM5350PB power meters
Note
Multi-circuit power alarms become available only after you select the Multi-Circuit
Current option in Basic Setup.
To configure the multi-circuit power input alarms:
1. Select Multi-Circuit Power then click Edit to open the Multi-Circuit Power Alarm
Setup dialog.
2. Select an alarm in the left column to edit its values.
Note
After selecting the checkbox for Enable to enable a multi-circuit power alarm, you must
then enter valid configuration values before leaving the Multi-Circut Power Alarm
Setup screen. Or, if you click Cancel, the Alarming screen appears, and any changes
you have made to alarm settings will revert to their previous values.
Clearing the checkbox for Enable to disable the alarm still requires that you enter valid
configuration settings for the disabled alarm before you can continue configuring other
alarms.
3. Select the Enable checkbox to enable the selected alarm, or clear the checkbox to
disable the alarm.
4. Set a value for Priority to distinguish between events that require immediate action and
those that do not require action. Select the alarm priority from the values in the dropdown
list.
5. Enter a value for Pickup Limit that defines the alarm ON condition.
6. Enter a value in the Delay field associated with the Pickup Limit for the number of
seconds that the alarm ON condition needs to be true before the alarm is activated.
7. Enter a value for Dropout Limit that defines the alarm OFF condition.
8. Enter a value in the Delay field associated with the Dropout Limit for the number of
seconds that the alarm OFF condition needs to be true before the alarm is deactivated.
9. Click Outputs to open the Alarm Association Selection dialog.
10.Select the checkbox next to one or more Available Channels, then choose an item from
the Assigned Channels column, and click OK.
Note
Assigned channels are channels that are currently in use and therefore not available for
association.You can click the + next to an assigned channel to view all of its existing
associations. To disassociate, or make an assigned channel available for association,
disconnect its existing associations.
Also, alarms can be associated with multiple channels, and a channel can have multiple
associated alarms.
11.When you complete making changes to the alarms, click Send to save your changes to
the device.
© 2014 Schneider Electric. All rights reserved.
Page 75 of 166
Chapter 6: PM5350IB / PM5350PB power meters
ION Setup 3.0 Device Configuration Guide
Basic Setup
To set the values for each of the Basic Setup parameters:
1. Double-click Basic Setup to open the list of parameters.
2. Select the parameter and click Edit to open its specific setup dialog, and then follow the
steps listed under the relevant parameter sections below.
3. Click Send to save your changes to the device when you finish making changes to the
parameters.
For more information, refer to the PowerLogic Power Meter PM5350 User Guide, available
from www.schneider-electric.com.
System Type
Single-circuit and multi-circuit system types are available. You can select the single-circuit or
the multi-circuit option for both the PM5350IB and PM5350PB model meters. The parameters
that appear and that you can edit depend on the system type you select.
To configure the system type:
1. Select the power system configuration from the dropdown list.
2. Click Next, then select the number of CTs and VTs from their respective dropdown lists.
The number of CTs and VTs that can be selected are based on the power system
configuration selected in the previous step. For more information, see "Setting Up the
Power System" in the PowerLogic Power Meter PM5350 User Guide, available from
www.schneider-electric.com.
3. Click Finish to save your changes and return to the Basic Setup screen.
CT Primary
Enter the value in Amps for the CT primary and click OK. Note that the number of CTs and
VTs that can be configured is based on the power system configuration selected.
CT Secondary
Select the amperage from the dropdown list for the CT secondary and click OK.
VT Primary
Enter the value in Volts for the VT primary and click OK.
VT Secondary
Select the appropriate voltage from the dropdown list for the VT secondary and click OK.
VT Connection
Select the VT connection type from the dropdown list for the VT connection and click OK.
Nominal Voltage
Enter the normal or designed voltage level in Volts of the electrical service and click OK. The
nominal voltage is limited to 2x VT Primary, or 690 V for direct connect.
Page 76 of 166
© 2014 Schneider Electric. All rights reserved.
ION Setup 3.0 Device Configuration Guide
Chapter 6: PM5350IB / PM5350PB power meters
Nominal Current
Enter the normal or designed current level in Amps and click OK. The nominal current is
limited to 4x CT Primary.
Nominal Frequency
Select a value from the dropdown list for the nominal frequency and click OK.
Nominal Power Factor
Enter the value for the expected power factor of the load being monitored and click OK.
Phase Rotation
Select the phase rotation from the dropdown list for phase rotation and click OK.
Clock
The Clock setup screen allows you to set the date and time of the internal clock of a device
and to synchronize the date and time of the devices in your system with your workstation.
Note
If the power to your device is interrupted, you may see a dialog prompting you to reset
the date and time. In the event of power loss, the internal clock data is saved for up to
48 hours.
Device time
The Device time parameter shows the date and time on the device.
1. Select Device time and click Edit to manually change the date and time settings.
The Device time changes to Update to when selected and shows the meter date and
time that are about to be sent to the device.
2. Make any changes to the date and time, click OK, then click Send to save your changes
to the device.
Sync to
The Snyc to parameter shows the Clock Sync Setup screen.
1. Select Sync to and click Edit.
The Clock Sync Setup screen appears.
2. Select the Select the Clock Sync Type from the dropdown list based on any
requirements of the devices in your system and the system software for correct operation.
3. Choose a time zone for Time offset from PC, if appropriate.
The date and time to be sent to the device are displayed below as Synchronization
Time.
4. Click OK, then click Send to save your changes to the device.
© 2014 Schneider Electric. All rights reserved.
Page 77 of 166
Chapter 6: PM5350IB / PM5350PB power meters
ION Setup 3.0 Device Configuration Guide
The device time is overwritten with the time to be sent to the device. It may take a few
moments for the time synchronization to complete.
Demand Setup
This setup screen allows you to configure the power and current demand for this device.
Note
For Power and Current Demand, assigned channels are channels that are currently in
use and therefore not available for association.You can click the + next to an assigned
channel to view all of its existing associations. To disassociate, or make an assigned
channel available for association, disconnect its existing associations.
Channels used for demand cannot be shared with alarms. Channel associations for
demand or alarms are exclusive.
Power Demand
1. Select Power Demand and click Edit.
2. Choose values from the dropdown lists for Mode and Periods/Sub-Interval (in minutes).
3. Click Digital Output Association.
4. Select the checkbox next to one or more Available Channels, then choose an item from
the Assigned Channels column, and click OK.
5. Click OK, then click Send to save your changes to the device.
Current Demand
1. Select Current Demand and click Edit.
2. Choose values from the dropdown lists for Mode and Periods/Sub-Interval (in minutes).
3. Click Digital Output Association.
4. Select the checkbox next to one or more Available Channels, then choose an item from
the Assigned Channels column, and click OK.
5. Click OK, then click Send to save your changes to the device.
Device Label
Select Meter Identification and click Edit. Enter a label description for the meter (for
example, type, location or other device detail, click OK, then click Send to save your
changes to the device.
Front Panel Display
To set the values for each of the Front Panel Display parameters:
1. Double-click Front Panel Display to open its list of parameters.
2. Select a parameter and click Edit to open its specific setup dialog.
3. Select or enter the values for the selected parameter and click OK.
Page 78 of 166
© 2014 Schneider Electric. All rights reserved.
ION Setup 3.0 Device Configuration Guide
Chapter 6: PM5350IB / PM5350PB power meters
4. Click Send to save your changes to the device.
Contrast
Enter a value from 0 (brightest) to 7 (dimmest).
Screen Timeout
Enter a screen timeout value in minutes.
Backlight Timeout
Enter a backlight timeout value in minutes.
Language
Select a language from the dropdown list (for example, English).
Date Format
Select a date format from the dropdown list (for example, MM/DD/YYYY).
Time Format
Select a value from the dropdown list (for example, 24 Hr, AM/PM).
HMI mode
Select a value from the dropdown list for displaying data on the LCD display (for example,
IEC, IEEE).
Energy Resolution, Current Resolution, Voltage Resolution and Power Resolution
Select the appropriate values for the resolution of the specific parameter.
I/O Setup
WARNING
UNINTENDED EQUIPMENT OPERATION
• Do not use ION Setup software and associated devices for critical control or protection
applications where human or equipment safety relies on the operation of the control
circuit.
Failure to follow these instructions can result in death or serious injury.
The power meter can accept up to four (4) digital inputs and two (2) digital mechanical relay
outputs. For more information on I/O descriptions and configuration details, see the
PowerLogic Power Meter PM5350 User Guide, available from www.schneider-electric.com.
Double-click I/O Setup to upload the parameters and open the I/O Setup dialog.
Initializing a meter resets or disables certain parameters. Make sure to read the warning
message that appears listing the parameters that are about to be reset.
© 2014 Schneider Electric. All rights reserved.
Page 79 of 166
Chapter 6: PM5350IB / PM5350PB power meters
ION Setup 3.0 Device Configuration Guide
Digital Input DI1, DI2, DI3, DI4
1. Select a digital input parameter, and click Edit to open a setup dialog.
Any associations appear in the Associations window.
2. If required, use the Label field to update the label that identifies the digital input.
Control Mode will display one of the following based on the existing associations.
• Normal mode indicates that the digital input is available for use by alarms.
• Alarm mode indicates that the digital input is associated with an alarm.
• External mode indicates that the digital input is configured to accept external input.
• Demand Sync indicates that the digital input is configured to accept a demand sync
pulse from a utility demand meter.
3. Select a time in milliseconds from the drowdown list for Debounce.
4. Click OK to return to the I/O Setup screen.
Digital Output D01 and D02
1. Select a digital output parameter, and click Edit to open a setup dialog.
Any associations for this digital output appear in the Associations window.
2. If required, use the Label field to update the label that identifies the digital output.
Note
For Control Mode, the digital output is set based on the associations made with Alarms
or Demand. If the digital output is associated with Alarms, its control mode is Alarm; if
the digital output is associated with demand, the control mode is set to Demand.
Otherwise the control mode is set to External.
3. Select Normal, Timed, or Coil Hold for Behavior Mode.
4. Enter a time value in seconds for On Time.
5. Click OK, then click Send to save your changes to the device.
LED Control
This screen allows you to set the values for the LED Mode parameters.
LED Mode
The LED Mode parameter has three modes: Off, Alarm, or Energy.
• Off mode turns off the LED.
• Alarm mode causes the LED to flash when there are any active, high-priority alarms. The
LED continues to blink until the alarm is acknowledged.
• Energy mode causes the LED to flash at a rate proportional to the amount of energy
consumed, and it is used to verify the accuracy of the power meter.
Page 80 of 166
© 2014 Schneider Electric. All rights reserved.
ION Setup 3.0 Device Configuration Guide
Chapter 6: PM5350IB / PM5350PB power meters
To set the mode:
1. Click LED Mode and then click Edit.
2. Select Off, Alarm, or Energy from the dropdown list and click OK.
3. Click Send to save the change and to update the meter.
Meter Resets
Meter values can be re-initialized through the meter reset parameters. Resets are grouped so
that either all items listed can be selected for reset (global reset) or individual items or groups
of items can be selected for reset (single reset).
Resetting device parameter values may affect alarm status and/or any recorded data. Also,
make sure to read the warning message that appears listing the parameters that are about to
be reset. At the Reset Confirmation dialog, verify before proceeding that only parameters
you intend to reset are listed.
NOTICE
LOSS OF DATA
• Before changing device configuration values, make sure that all recorded data has been
saved in a secure location.
Failure to follow these instructions may result in data loss.
Global reset
Global resets reset the following parameters:
• All energy values
• All demand values
• All min/max values
• All alarm logs and counters
• All I/O counters and timers
To reset all meter parameters:
1. Select the checkbox next to Meter Initialization to select all groups and their respective
items.
2. Click Reset to perform the device re-initialization.
Single reset
Single resets reset selected parameters:
• Energy
• Demand
• Alarms
• Digital Inputs Counters
© 2014 Schneider Electric. All rights reserved.
Page 81 of 166
Chapter 6: PM5350IB / PM5350PB power meters
ION Setup 3.0 Device Configuration Guide
• Digital Outputs Counters
• Load Operation Timer
To reset selected meter parameters:
1. Select the checkbox next to individual items, then click Reset. The Reset Confirmation
dialog appears.
2. Verify before proceeding that only parameters intended to be reset are listed.
3. Click Proceed to continue or Cancel to stop the reset. If you are prompted for a device
password, enter that password, then click OK.
Metering Standards
This screen allows you to set parameters to monitor load and demand.
Load Timer Setpoint
1. Double-click on Metering Standards.
The Metering Standards dialog appears.
2. Choose Load Time Setpoint and click Edit.
3. Enter a value in Amps for Load Time Setpoint and click OK.
4. Click Send to save your changes to the device.
There are two typical uses for the load timer setpoint:
• Select a relatively low setpoint. The timer increments when the load being metered is
running. This could be useful in recording machine run time for a preventive maintenance
program.
• Select a setpoint that is equal to the rating of the power system conductors. The timer
increments and records how long the conductors were overloaded. This could be used to
help determine if a circuit has the capacity to add additional load or if loads need to be
moved to another circuit.
Peak Current Demand
1. Double-click on Metering Standards.
The Metering Standards dialog appears.
2. Choose Peak Current Demand and click Edit.
3. Enter a numeric value for Peak Current Demand and click OK. Enter 0 if you want the
power meter to use metered current peak demand for the calculation. The peak current
demand over the last year calculates Total Demand Distortion (TDD) in Amps.
4. Click Send to save your changes to the device.
RS-485 Base Comm
This screen allows you to set the parameters for the Modbus RS-485 Base Comm.
Page 82 of 166
© 2014 Schneider Electric. All rights reserved.
ION Setup 3.0 Device Configuration Guide
Chapter 6: PM5350IB / PM5350PB power meters
Note
Do not change the communications settings of the channel on which you are actively
communicating.
Modifying the following communications parameters may interrupt or stop communications
with the device. Make sure to correctly configure all communications settings for the device
before proceeding.
WARNING
INACCURATE DATA RESULTS
• Do not incorrectly configure ION Setup software and its associated devices; this can
lead to incorrect reports and/or data results.
• Do not rely solely on reports or data results to determine if ION Setup and its associated
devices are functioning correctly or meeting all applicable standards and compliances.
• Do not use reports or data results as substitutes for proper workplace practices or
equipment maintenance; they are supplemental only.
Failure to follow these instructions can result in death or serious injury.
Protocol
Select a communication protocol from the dropdown list used for the Modbus RS-485
connection and click OK.
Address
Enter a numeric value for the address (unit ID) of the device and click OK.
Baud Rate
Select a value from the dropdown list for the meter's baud rate and click OK.
Parity
Select a value from the dropdown list for the communications port parity setting and click
OK.
Note
Make sure that the parity value selected for the device matches the parity value of the
network that is connected to the device.
To change the RS-485 Base Comm parameters:
1. Double-click on RS-485- Base Comm.
The RS-485- Base Comm dialog appears.
2. Select a parameter, and click Edit.
3. Select or enter your changes to the parameters.
4. Click Send to save your changes to the device.
© 2014 Schneider Electric. All rights reserved.
Page 83 of 166
Chapter 6: PM5350IB / PM5350PB power meters
Page 84 of 166
ION Setup 3.0 Device Configuration Guide
© 2014 Schneider Electric. All rights reserved.
ION Setup 3.0 Device Configuration Guide
Chapter 7: PM5500 series power and energy meter
Chapter 7: PM5500 series power and energy
meter
The PowerLogic™ PM5500 series power and energy meters are high-performance,
multifunction meters. The power meters measure currents and voltages and report real time
RMS (root-mean-squared) values for all three phases and neutral. In addition, the power
meter calculates power factor, real power, reactive power, and other power and energy
values.
For more information, download the installation guide or user guide for your meter from
www.schneider-electric.com:
• PowerLogic PM5500 installation guide
• PowerLogic PM5500 user guide
In this section
PM5500 meter setup
86
Using ION Setup
86
Setting up a device without a front panel
86
PM5500 setup screens
86
Communications
86
RS-485 Base Comm
Setup
86
87
Basic Setup
87
Device Label
89
Clock
89
Demand Setup
90
Metering Standards
92
Multi-Tariff
92
I/O Configuration
93
Energy Pulsing
94
I/O Setup
95
Input Metering
95
Alarming
96
Logging
Data Log #1
Meter initialization / Meter reset
Meter Resets
© 2014 Schneider Electric. All rights reserved.
96
96
97
97
Page 85 of 166
Chapter 7: PM5500 series power and energy meter
ION Setup 3.0 Device Configuration Guide
PM5500 meter setup
Before using ION Setup, make sure all the communications settings for the meter are
configured. For more information, see the meter's user guide.
Using ION Setup
Use Network mode in ION Setup to add and configure the meter. For more information, see
the “Starting, Logging On and Logging Off” section of the ION Setup online help.
Setting up a device without a front panel
Setting up the Ethernet port
1. Disconnect your computer from the network.
2. Using an Ethernet cable, connect one of the meter's Ethernet ports to your computer.
3. Open a web browser and enter 169.254.0.1 in the address box.
4. Log in to the meter webpages using the default login settings:
Username = user1
Password = pass1
5. Navigate to Setup > Ethernet.
6. Modify the Ethernet setup parameters with the settings your system administrator
assigned for the meter, then press Apply.
7. Disconnect the computer from the meter and connect the meter's Ethernet port to the
network.
PM5500 setup screens
The following sections describe the setup screens that are available for the PM5500 meter.
For information about features, see the PowerLogic PM5500 user guide, available from
www.schneider-electric.com.
Note
For each register, such as RS-485 Base Comm or Basic Setup, double-click the setup
screen icon to configure the available setup parameters.
Communications
RS-485 Base Comm
This screen allows you to set the parameters for the Modbus RS-485 Base Comm.
Page 86 of 166
© 2014 Schneider Electric. All rights reserved.
ION Setup 3.0 Device Configuration Guide
Chapter 7: PM5500 series power and energy meter
Modifying the following communications parameters may interrupt or stop communications
with the device. Make sure to correctly configure all communications settings for the device
before proceeding.
WARNING
INACCURATE DATA RESULTS
• Do not incorrectly configure ION Setup software and its associated devices; this can
lead to incorrect reports and/or data results.
• Do not rely solely on reports or data results to determine if ION Setup and its associated
devices are functioning correctly or meeting all applicable standards and compliances.
• Do not use reports or data results as substitutes for proper workplace practices or
equipment maintenance; they are supplemental only.
Failure to follow these instructions can result in death or serious injury.
To change the RS-485 Base Comm parameters:
1. Double-click a parameter or select a parameter and click Edit.
2. Select a value from the dropdown list for each parameter, then click OK.
Protocol
Select a communications protocol from the dropdown list used for the Modbus RS-485
connection and click OK.
Address
Enter a value from 1 to 247 for the device address (unit ID), then click OK.
Baud Rate
Select the baud rate from the dropdown list, then click OK.
Parity
Select the communications port parity from the dropdown list, then click OK.
Note
Make sure that the Protocol, Baud Rate and Parity settings on your meter are set to the
same values as all other devices on the RS-485 network and that these values also
match any device settings used to communicate with the RS-485 network.
3. Click Send to save your changes to the device.
Setup
Basic Setup
This screen allows you to define the power system that the meter is monitoring.
© 2014 Schneider Electric. All rights reserved.
Page 87 of 166
Chapter 7: PM5500 series power and energy meter
ION Setup 3.0 Device Configuration Guide
To set the values for the Basic Setup parameters:
1. Double-click a parameter or select a parameter and click Edit to open its specific setup
dialog, then follow the steps listed under the relevant parameter sections below.
2. Click Send when you complete all of the changes to save your changes to the meter.
For more information, see the meter's user guide, available from www.schneiderelectric.com.
System Type
To configure the System Type:
1. Select the power system configuration from the dropdown list and click Next.
2. Select values from the dropdown lists for Number of CTs and Number of VTs.
The number of CTs and VTs that can be selected is based on the power system
configuration selected in previous step.
3. Click Finish to return to the Basic Setup screen.
CT Primary
Enter a value into the field for the CT primary and click OK.
CT Secondary
Select a value in Amps from the dropdown list for the CT secondary and click OK.
VT Primary
Enter a value into the field for the VT primary and click OK.
VT Secondary
Select the appropriate voltage value from the dropdown list for the VT secondary and click
OK.
VT Connection
Select the VT connection type from the dropdown list for the VT connection and click OK.
Nominal Voltage
Enter a value into the field in Volts for the normal voltage level of the electrical service and
click OK.
Nominal Current
Enter a value into the field in Amps for the normal current level and click OK.
Nominal Frequency
Select a value in Hz from the dropdown list for Nominal Frequency and click OK.
Nominal Power Factor
Enter a value into the field for the expected power factor of the load being monitored and click
OK.
Page 88 of 166
© 2014 Schneider Electric. All rights reserved.
ION Setup 3.0 Device Configuration Guide
Chapter 7: PM5500 series power and energy meter
Phase Rotation
For 3-phase systems, select the system's phase rotation from the dropdown list and click
OK.
Device Label
This setup screen allows you to enter a label for a device.
Meter Identification
To set the values for the Meter Identification parameter:
1. Double-click Meter Identification or select it and click Edit.
2. Enter text into the field to describe your meter (for example, meter type, location or other
details) and click OK.
3. Click Send to save your changes to the device.
Clock
The Clock setup screen allows you to set the date and time of the internal clock of a device
and to synchronize the date and time of the devices in your system with your workstation.
Device time
To change the date and time on a device:
1. Select the checkbox next to Device time and click Edit to manually change the date and
time settings.
The Device time changes to Update to and shows the date and time that will be sent to
the device.
2. Make any changes to the date and time, click OK, then click Send to save your changes
to the device.
Sync to
To change the sync to time for a device:
1. Select Sync to and click Edit.
The Snyc to parameter shows the Clock Sync Type (for example, UTC) and
Synchronization Time.
2. Select the appropriate clock sync type from the dropdown list.
Note
Select the Clock Sync Type based on any requirements of the devices in your system
and the system software for correct operation (for example, select PC Standard Time
(No DST) for StruxureWare Power Management.)
3. Choose a time zone for Time offset from PC, if applicable.
© 2014 Schneider Electric. All rights reserved.
Page 89 of 166
Chapter 7: PM5500 series power and energy meter
ION Setup 3.0 Device Configuration Guide
The date and time to be sent to the device are displayed below as Synchronization
Time.
4. Click OK.
5. Confirm that the checkboxes next to Device time and Sync to are selected, then click
Send to save your changes to the device.
The synchronization time and date overwrite the clock settings on the meter.
Demand Setup
This setup screen allows you to configure the demand for this device.
Double-click Demand Setup to upload the parameters and open the Demand Setup dialog.
Power Demand
To send demand control to a digital output:
1. Double-click Power Demand or select Power Demand and click Edit.
2. Choose values from the dropdown lists for Mode and Periods/Sub-Interval (in minutes).
3. Click the button next to Digital Output Association, select an output to assign from the
available channels at the left, then click OK.
Channels that are already assigned appear on the right pane.
To receive demand control from a digital input:
4. Click the button next to Digital Input Association, select an input to assign from the
available channels at the left, then click OK.
Channels that are already assigned appear on the right pane.
Note
Assigned channels are channels that are currently in use and therefore not available for
association.You can click the + next to an assigned channel to view all of its existing
associations. To disassociate, or make an assigned channel available for association,
disconnect its existing associations.
Channels used for demand cannot be shared with alarms. Channel associations for
demand or alarms are exclusive.
For more information about the different channels and their functions, see the
PowerLogic PM5500 user guide.
5. Click OK, then click Send to save your changes to the device.
Current Demand
To send demand control to a digital output:
1. Double-click Current Demand or select Current Demand and click Edit.
2. Choose values from the dropdown lists for Mode and Periods/Sub-Interval (in minutes).
Page 90 of 166
© 2014 Schneider Electric. All rights reserved.
ION Setup 3.0 Device Configuration Guide
Chapter 7: PM5500 series power and energy meter
3. Click the button next to Digital Output Association, select an output to assign from the
available channels at the left, then click OK.
Channels that are already assigned appear on the right pane.
To receive demand control from a digital input:
4. Click the button next to Digital Input Association, select an input to assign from the
available channels at the left, then click OK.
Channels that are already assigned appear on the right pane.
5. Click Send to save your changes to the device.
Input Demand
1. Double-click Input Demand or select Input Demand and click Edit.
2. Choose values from the dropdown lists for Mode and Periods/Sub-Interval (in minutes).
3. Click the button next to Digital Output Association, select an output to assign from the
available channels at the left, then click OK.
Channels that are already assigned appear on the right pane.
Note
The Digital Input Association parameter becomes available to configure only when
one of the input sync modes is selected for Power Demand or Current Demand.
4. Click the button next to Digital Input Association, select an input to assign from the
available channels at the left, then click OK.
Channels that are already assigned appear on the right pane.
5. Click Send to save your changes to the device.
Note
Assigned channels are channels that are currently in use and therefore not available for
association.You can click the + next to an assigned channel to view all of its existing
associations. To disassociate, or make an assigned channel available for association,
disconnect its existing associations.
Also, alarms can be associated with multiple channels, and a channel can have multiple
associated alarms.
For more information about the different channels and their functions, see the
PowerLogic PM5500 user guide.
6. Click Send to save your changes to the device.
© 2014 Schneider Electric. All rights reserved.
Page 91 of 166
Chapter 7: PM5500 series power and energy meter
ION Setup 3.0 Device Configuration Guide
Clock Sync Offset
Note
The Clock Sync Offset parameter becomes available to configure only when Clock
Snyc Block or Clock Sync Rolling Block is selected for Power Demand, Current
Demand, or Input Demand.
1. Double-click Clock Sync Offset or click Clock Sync Offset and click Edit.
2. Choose a time offset value from the dropdown list, then click OK.
3. Click Send to save your changes to the meter.
Metering Standards
This screen allows you to set parameters to monitor load and demand.
Load Timer Setpoint
1. Double-click Load Time Setpoint or select Load Timer Setpoint and click Edit to open
its list of parameters.
2. Enter a numeric value in Amps for Load Timer Setpoint and click OK.
3. Click Send to save your changes to the meter.
Peak Current Demand
1. Double-click Peak Current Demand or select Peak Current Demand and click Edit.
2. Enter a numeric value in Amps for Peak Current Demand and click OK. Enter 0 if you
want the power meter to use metered peak current demand for the calculation. The peak
current demand over the last year calculates Total Demand Distortion (TDD) in Amps.
3. Click Send to save your changes to the meter.
Multi-Tariff
This setup screen allows you to configure the multi-tariff feature, including tariff mode and
which tariff is active.
Tariff Mode
To set the Tariff Mode parameter:
1. Double-click Multi-Tariff to open the list of available parameters.
2. Double-click Tariff Mode or select Tariff Mode and click Edit.
3. Select a Tariff Mode from the dropdown list.
Command
This mode allows you to use Modbus commands to control which tariff is active.
1. Select Command from the dropdown list and click Finish.
2. Click Send to save your changes to the device.
Page 92 of 166
© 2014 Schneider Electric. All rights reserved.
ION Setup 3.0 Device Configuration Guide
Chapter 7: PM5500 series power and energy meter
Input
This mode allows you to define the active tariff using one or more status inputs.
1. Select Input from the dropdown list and click Next.
2. Choose a value from the dropdown list for Number of Tariffs.
3. Choose a value from the dropdown list for Tariff Associations.
4. View the Existing Associations panel to see current associations.
5. Click Finish then Send to save your changes to the device.
Time of Day
This mode allows you to define times, days and date ranges during which specific tariffs are
active.
1. Select Time of Day from the dropdown list and click Next.
The Set Tariff Options dialog appears.
2. Select the checkbox next to a tariff, or select a tariff and click Edit.
3. Choose a value from the dropdown list for Type (such as Everyday, Weekend).
4. Enter values in minutes for Start and End, and indicate AM or PM.
5. Select the checkbox next to Date Range to specify a date range and click OK.
6. Click the arrows to enter a date for Start and End.
7. Repeat these steps for all tariffs you need to configure.
8. Click Finish then Send to save your changes to the device.
I/O Configuration
You can set up and configure the inputs and outputs for this device, including energy pulsing,
I/O setup, input metering, alarming, logging, and meter resets with the following screens:
© 2014 Schneider Electric. All rights reserved.
Page 93 of 166
Chapter 7: PM5500 series power and energy meter
ION Setup 3.0 Device Configuration Guide
WARNING
UNINTENDED EQUIPMENT OPERATION
• Do not use ION Setup software and associated devices for critical control or protection
applications where human or equipment safety relies on the operation of the control
circuit.
• Do not rely solely on device data to determine if your power system is functioning
correctly or meeting all applicable standards and compliances.
• Do not use device control for time-critical functions because delays can occur between
the time a control action is initiated and when that action is applied.
Failure to follow these instructions can result in death or serious injury.
Energy Pulsing
This setup screen allows you configure the Energy Pulsing parameters for this device.Front
Panel LED
This parameter allows you to configure the set the function of the Alarm and energy pulsing
LED.
To set the LED mode:
1. Double-click Front Panel LED or click Front Panel LED, then click Edit.
The Front Panel LED parameter has three modes: Disabled, Alarm, or Energy.
• Disabled mode turns off the LED.
• Alarm mode configures the LED for alarming application.
• Energy mode configures the LED for energy pulsing application.
2. If you choose Energy, then select a value from the dropdown list for Parameter and click
OK.
3. Enter a value for Pulse Rate and click OK.
4. Click Send to save the change to the meter.
Digital Output D1, D2
To set the Digital Output:
1. Double-click a digital output parameter, or select a digital output parameter, and click Edit
to open a setup dialog.
2. Select Energy from the dropdown list for Control and click OK.
3. Choose an energy type from the dropdown list for Parameter.
4. Enter a value for Pulse Rate, then click OK.
5. Click Send to save the changes to the meter.
Page 94 of 166
© 2014 Schneider Electric. All rights reserved.
ION Setup 3.0 Device Configuration Guide
Chapter 7: PM5500 series power and energy meter
I/O Setup
The power meter can accept four (4) digital inputs and up to two (2) digital mechanical relay
outputs. For more information on I/O descriptions and configuration details, see the user
guide for the meter, available from www.schneider-electric.com.
Digital Input S1, S2, S3, S4
1. Double-click a digital input parameter, or select a digital input parameter and click Edit to
open a setup dialog.
2. Enter text in the Label field to identify the digital input if required.
Control Mode shows either Normal or Demand Sync based on the existing
associations.
Normal mode indicates that the digital input is available for use by alarms.
Demand Sync indicates that the digital input is configured to accept a demand sync
pulse from a utility demand meter.
3. Select a time in milliseconds for Debounce.
Any associations for this digital input appear in the Associations pane.
4. Click OK to return to the I/O Setup screen.
Digital Output D1, D2
1. Select a digital output parameter, and click Edit to open a setup dialog.
2. If required, enter text in the Label field to identify the digital output.
Note
For Control Mode, the digital output is set based on the associations made with Alarms
or Demand. If the digital output is associated with Alarms, its control mode is Alarm; if
the digital output is associated with demand, the control mode is set to Demand.
Otherwise, the control mode is set to External.
3. Select a value from the dropdown list for Behavior Mode.
4. Enter a time value in seconds for On Time.
Any associations for this digital output appear in the Associations window.
5. Click OK, then click Send to save your changes to the meter.
Input Metering
This setup screen allows you to configure the various input channels for this device.
InpMtr Chan 1, InpMtr Chan 2, InpMtr Chan 3, InpMtr Chan 4
To set the values for each of the Input Metering parameters:
1. Double-click a parameter or select a parameter and click Edit to open its specific setup
dialog.
2. Type a name in the field for Label, if required.
© 2014 Schneider Electric. All rights reserved.
Page 95 of 166
Chapter 7: PM5500 series power and energy meter
ION Setup 3.0 Device Configuration Guide
3. Enter a value for Pulse Weight.
4. Select a value from the dropdown list for Mode.
5. Select a value from the Units dropdown list, then select a value for the Rate dropdown
list.
6. If you select a unit type, then select a value from the dropdown list for Rate.
7. Select an available input from Available Inputs at the left, if required, then click
to add the input to the Assigned Inputs for the channel and click OK.
8. Click Send to save the changes to the device.
Alarming
This screen allows you to configure the parameters for all types of alarms for this meter,
including standard, unary, digital, logic and custom.
WARNING
UNINTENDED EQUIPMENT OPERATION
• Do not use ION Setup software and associated devices for critical control or protection
applications where human or equipment safety relies on the operation of the control
circuit.
• Do not rely solely on device data to determine if your power system is functioning
correctly or meeting all applicable standards and compliances.
• Do not use device control for time-critical functions because delays can occur between
the time a control action is initiated and when that action is applied.
Failure to follow these instructions can result in death or serious injury.
Note
Only alarms that apply to the selected power system configuration can be enabled.
For more information
See the alarming chapter in your meter's user guide to learn about the purpose of the different
alarms and details on how to configure them.
Logging
Data Log #1
This setup screen allows you to configure the parameters for Data Log #1.
Status
To set the Status of the Data Log #1:
1. Double-click Status or select Status and click Edit.
2. Select a value from the dropdown list to enable or disable status.
Page 96 of 166
© 2014 Schneider Electric. All rights reserved.
ION Setup 3.0 Device Configuration Guide
Chapter 7: PM5500 series power and energy meter
Interval
To set the Interval of the Data Log #1:
1. Double-click Interval or select Interval and click Edit.
2. Select a value in minutes or hours from the dropdown list to set the interval time and click
OK.
Channels
To set the Channels of the Data Log #1:
1. Double-click Channels or select Channels and click Edit.
2. Select from the available channels at left then click
to move the channels to the
selected column at the right and click OK. Click + to show the list of channels for each
channel type.
Meter initialization / Meter reset
Meter Resets
Meter values can be reset or cleared through the meter reset parameters. Resets are
grouped so that either all items listed can be reset (global reset) or individual items or groups
of items can be reset (single reset).
Resetting device parameter values may affect alarm status and/or any recorded data. Also,
make sure to read the warning message that appears listing the parameters that are about to
be reset. At the Reset Confirmation dialog, verify before proceeding that only parameters
you intend to reset are listed.
WARNING
UNINTENDED EQUIPMENT OPERATION
Do not use ION Setup software and associated devices for critical control or protection
applications where human or equipment safety relies on the operation of the control
circuit.
Failure to follow these instructions can result in death or serious injury.
© 2014 Schneider Electric. All rights reserved.
Page 97 of 166
Chapter 7: PM5500 series power and energy meter
ION Setup 3.0 Device Configuration Guide
NOTICE
LOSS OF DATA
Before changing device configuration values, make sure that all recorded data has been
saved in a secure location.
Failure to follow these instructions can result in loss of data.
Meter initialization
Meter initialization clears all counters and accumulators and prepares the meter for service.
Meter initialization resets the cumulative quantities of the following parameters:
• All energy values
• All demand values
• All active load timers
• All min/max values
• All alarm and counters
• All I/O counters and timers
• All energy pulse output channels
• All digital output counters
• All energy values by phase
• All digital output ontimes
• All digital input counters
• All digital input ontimes
To reset all meter parameters:
1. Select the checkbox next to Meter Initialization to select all groups and their respective
items.
2. Click Reset.
3. Verify before proceeding that only parameters intended to be reset appear on the Reset
Confirmation dialog.
4. Click Proceed to continue, or Cancel to stop the reset. If you are prompted for a device
password, enter that password, then click OK.
The meter will be immediately reinitialized.
5. Click Exit to close the dialog.
Single reset
Single resets reset selected parameters:
• Energy
• Demand
Page 98 of 166
© 2014 Schneider Electric. All rights reserved.
ION Setup 3.0 Device Configuration Guide
Chapter 7: PM5500 series power and energy meter
• Data log
• Digital output counters
• Digital ouput ontimes
• Digital input counters
• Digital input ontimes
To reset an individual item or group of items:
1. Select the checkbox next to an individual item or group, then click Reset. The Reset
Confirmation dialog appears.
2. Verify before proceeding that only parameters intended to be reset appear on the Reset
Confirmation dialog.
3. Click Proceed to continue, or Cancel to stop the reset. If you are prompted for a device
password, enter that password, then click OK.
4. Click Exit to close the dialog.
© 2014 Schneider Electric. All rights reserved.
Page 99 of 166
Chapter 7: PM5500 series power and energy meter
Page 100 of 166
ION Setup 3.0 Device Configuration Guide
© 2014 Schneider Electric. All rights reserved.
ION Setup 3.0 Device Configuration Guide
Chapter 8: PM700 series power meter
Chapter 8: PM700 series power meter
The PowerLogic™ PM700 series power meters are compact, versatile and cost-effective.
They are simple to use and have a bright LCD display for improved visibility in poor lighting
conditions. The meters can be used for stand-alone metering applications, in custom panels,
switchboards, switchgear, gensets, motor control centers, or UPS systems.
Some of the features included are power, demand, energy, power factor, and frequency
measurements. PM700 series meters also have IEC62053-21 Class 1 and IEC62053-22
Class 0.5S (PM750 only) accuracy certification for basic sub-billing and cost allocation.
For more information, refer to the meter documentation available from www.schneiderelectric.com.
In this section
PM700 series meter setup
Using ION Setup
PM700 series setup screens
102
102
102
Basic setup
102
Demand
103
Front panel display
103
I/O Setup
104
Onboard Alarms
104
Serial Comms
106
© 2014 Schneider Electric. All rights reserved.
Page 101 of 166
Chapter 8: PM700 series power meter
ION Setup 3.0 Device Configuration Guide
PM700 series meter setup
Before using ION Setup, make sure all the communications settings for the PM700 series
meter have been configured, as explained in the meter documentation.
Note
The procedures described here apply only to the meter models that are equipped with
communications (that is, the PM710 and PM750 meters, and not the PM700 and
PM700P).
The PM700 series meters use Modbus RTU protocol to communicate through their RS-485
serial communications port.
• Device communications format: Make sure all the devices in the RS-485 loop are set to
the same protocol.
• Device communications settings: Make sure all the devices on the same RS-485 loop are
set to the same baud rate and parity.
• Device address (unit ID) settings: Make sure the device address (unit ID) is unique for
each device in a given RS-485 loop (allowable range = 1 to 247 for Modbus devices).
Using ION Setup
Use Network mode in ION Setup to add and configure the PM700 series meters. See the
“Starting, Logging On and Logging Off” section of the ION Setup Help for more information on
the operation modes, and starting and logging onto ION Setup.
Refer to the ION Setup online help for information on adding sites and meters.
PM700 series setup screens
The following sections describe which setup screens are available on the PM700 series
meter. Some setup parameters apply only to particular models. Refer to your meter
documentation for details on supported features.
Basic setup
System Type
Select the option that describes how your PM700 series meter is wired to the electrical
service. Refer to the PM700 series meter installation guide for details on the different system
types.
PT Ratio
Select the appropriate scale value (multiplier) for the PT Primary. For direct connect, select
“No PTs”.
Page 102 of 166
© 2014 Schneider Electric. All rights reserved.
ION Setup 3.0 Device Configuration Guide
Chapter 8: PM700 series power meter
PT Primary
Enter the value in Volts for the PT Primary.
PT Secondary
Select the value for the PT Secondary.
CT Primary
Enter the value in Amps for the CT Primary.
CT Secondary
Select the value for the CT Secondary.
Service Frequency
Select the system frequency of the electrical service.
Demand
Demand is the average power consumption over a fixed time interval (demand period),
typically 15 minutes.
Demand values are calculated for each sub-interval, then averaged over the number of subintervals that make up the demand period.
Thermal Dmd Period (mins)
Enter the length in minutes of the demand period.
Block Dmd Period (mins)
Enter the length in minutes of each rolling block period (sub-interval).
Block # of Sub-Intervals
Enter the number of sub-intervals used for calculating demand.
Note
Refer to the PM700 series documentation for details on how the meter calculates
demand.
Front panel display
Display Mode
Select IEC or IEEE convention for displaying data on the PM700 series meter’s display
panel.
© 2014 Schneider Electric. All rights reserved.
Page 103 of 166
Chapter 8: PM700 series power meter
ION Setup 3.0 Device Configuration Guide
I/O Setup
Refer to the PM700 series meter documentation for I/O descriptions and configuration
details.
Digital Out KY
• Label: This field identifies the KY digital output.
• Mode: Select the KY digital output mode of operation.
• External Control configures the output to be controlled by a command sent over the
communications link.
• PM Alarm configures the output to be controlled by the power meter in response to a
setpoint controlled alarm condition.
• kWh out pulse sets the meter to generate a fixed-duration pulse output that can be
associated with the kWh consumption. Use the “Pulse Weight” register to enter how
many kWh out of the load are associated with each pulse of the KY digital output. Then
use the “Pulse Duration” box to select the pulse width (in milliseconds) for each kWh
pulse.
Digital In S1 and S2 (PM750 only)
• Label: This field identifies the digital input.
• Mode: Select the operation mode for the SI digital input:
• For simple on/off digital input operation, select Normal.
• Select Demand Interval Sync Pulse if the SI digital input is configured as the demand
sync input.
Onboard Alarms
The Onboard Alarms setup screen allows you to make changes to 15 pre-configured alarms
(13 standard alarms and 2 digital input alarms). Refer to the PM750 Reference Manual for a
listing of these alarms.
Setting a pre-configured standard alarm
1. Select All Alarms, then click Edit.
Page 104 of 166
© 2014 Schneider Electric. All rights reserved.
ION Setup 3.0 Device Configuration Guide
A. Alarm source or input
Chapter 8: PM700 series power meter
B. Condition
C. Multiplier
2. In the Alarm Setup screen, select the standard alarm you want to set.
• Enable: Select this checkbox to enable the alarm
• Label: If required, use this box to rename the selected alarm
• Setpoint Pickup: Enter the magnitude above (for “Over”) or below (for “Under”) that
defines the alarm ON condition, then in the Delay box enter the number of seconds the
alarm ON condition needs to be true before the alarm is activated.
• Setpoint Dropout: Enter the magnitude below (for “Over”) or above (for “Under”) that
defines the alarm OFF condition, then in the Delay box enter the number of seconds the
alarm OFF condition needs to be true before the alarm is deactivated.
Note
Pay special attention to the multipliers for Setpoint Pickup and Setpoint Dropout
settings, and adjust the values if needed.
• Associate Output: Select this checkbox to associate the alarm condition with an
output (for example, the meter’s digital output).
Redefining a pre-configured alarm
You can redefine a pre-configured alarm by changing the alarm condition (“Over” or “Under”)
and/or selecting a different alarm source or input. Make sure you update the Label field as
appropriate.
For example, “Status Input On” can mean the alarm is activated when the digital input is
switched on, while “Status Input Off” can mean the alarm is activated when the digital input
is switched off.
Setting a pre-configured digital input alarm
1. Select All Alarms, then click Edit.
© 2014 Schneider Electric. All rights reserved.
Page 105 of 166
Chapter 8: PM700 series power meter
A. Alarm source or input
ION Setup 3.0 Device Configuration Guide
B.
Condition
2. In the Alarm Setup screen, select the digital input you want to configure for alarming.
• Enable: Select this checkbox to enable the alarm
• Label: If required, use this box to rename the selected alarm
• Associate Output: Select this checkbox to associate the alarm condition with an
output (for example, the meter’s digital output)
Redefining a pre-configured digital input alarm
You can redefine a pre-configured alarm by changing the alarm condition. “Status Input On”
means the alarm is activated when the digital input is switched on, while “Status Input Off”
means the alarm is activated when the digital input is switched off.
Serial Comms
Modbus Address
This displays the Modbus address (unit ID) of the meter.
Baud Rate
This displays the meter’s baud rate setting.
Page 106 of 166
© 2014 Schneider Electric. All rights reserved.
ION Setup 3.0 Device Configuration Guide
Chapter 9: PM800 series power meters
Chapter 9: PM800 series power meters
The PM800 series power meters are IEC 62053-22 Class 0.5S meters that offer many highperformance capabilities needed to meter and monitor an electrical installation in a compact
96 x 96 mm unit. The meter has an easy-to-read display that presents measurements for all
three phases and neutral at the same time, an RS-485 Modbus communication port, one
digital input, one KY-type digital output, total harmonic distortion (THD) metering, and
alarming on critical conditions. Four models offer an incremental choice of custom logging
and power quality analysis capabilities. Models can be expanded with field-installable option
modules that offer a choice of additional digital inputs and outputs, analog inputs and
outputs, and Ethernet port.
For more information, refer to the meter documentation from www.schneider-electric.com.
In this section
PM800 series meter setup
108
Comm card considerations
108
Using ION Setup
110
PM800 series setup screens
110
Alarm Log
110
Basic Setup
110
Billing Log
111
Clock
112
Comm - card
113
Comm - Onboard Serial
113
Data Log #1, Data Log #2, Data Log #3, Data Log #4
114
Device Labels
114
EN50160 Setup
114
Energy & Demand
115
Front Panel Display
116
I/O Setup
116
Input Metering
119
Meter Resets
120
Metering Standards
120
Onboard Alarms/Events
121
Phasor Viewer
126
Reports
127
Scaling
128
Shift Energy
128
Templates
129
Trending & Forecasting
131
Waveform Capture
131
© 2014 Schneider Electric. All rights reserved.
Page 107 of 166
Chapter 9: PM800 series power meters
ION Setup 3.0 Device Configuration Guide
PM800 series meter setup
Before using ION Setup, make sure all the communications settings for the The
PowerLogic™ PM800 series meters have been configured, as explained in the meter
documentation.
The PM800 series meters use Modbus RTU protocol to communicate through its RS-485
serial communications port.
• Device communications format: Make sure all the devices in the RS-485 loop are set to
the same protocol.
• Device communications settings: Make sure all the devices on the same RS-485 loop are
set to the same baud rate and parity.
• Device address (unit ID) settings: Make sure the device address (unit ID) is unique for
each device in a given RS-485 loop (allowable range = 1 to 247 for Modbus devices).
The PM800 series meters can also be equipped with the optional Ethernet Communications
Card, which provides Ethernet communications capability and Ethernet Gateway
functionality to the device. The gateway uses Modbus TCP/IP protocol to communicate on
the Ethernet port and Modbus RTU on the serial port.
Comm card considerations
If your PM800 series meter is equipped with a Ethernet communication card, you can
communicate to the meter directly through its Ethernet port.
Note
Refer to the documentation for instructions on how to set up the device parameters such
as Ethernet and TCP/IP settings.
Adding the PM800 series meter as an Ethernet device
1. Start ION Setup in Network mode. See the “Starting, Logging On and Logging Off” section
of the ION Setup Help for more information on the operation modes, and starting and
logging onto ION Setup. You must add and configure an Ethernet site if there are no
Ethernet sites on your ION Setup network.
2. Right-click the Ethernet site icon and select Insert Item. Select Meter and click OK.
Page 108 of 166
© 2014 Schneider Electric. All rights reserved.
ION Setup 3.0 Device Configuration Guide
Chapter 9: PM800 series power meters
3. Type a descriptive name for your PM800 series meter. Select the type of device. Type the
IP address of the ECC. Select 502 from the dropdown list for the IP Port. Select a group
from the dropdown list for Group. Click OK.
Setting up the as an Ethernet gateway
You can set up the as an Ethernet gateway — this allows you to communicate with RS-485
serial devices on the serial port, through the ’s Ethernet port. Make sure the communications
settings for all devices in the RS-485 loop are set up properly (see "PM800 series meter
setup" on page 108). For RS-485 wiring instructions, refer to the PM800 series meter
documentation.
Each serial device on the RS-485 loop must be added to the ’s device list by using the web
browser to access the webpages. Refer to the documentation for details.
1. Start ION Setup in Network mode. See the “Starting, Logging On and Logging Off” section
of the ION Setup Help for more information on the operation modes, and starting and
logging onto ION Setup.
2. Add a new site. Select Ethernet, then select the Gateway box.
3. In the Gateway Info boxes, enter the IP address of the ECC. Select 502 from the
dropdown list for the IP Port. Click OK.
© 2014 Schneider Electric. All rights reserved.
Page 109 of 166
Chapter 9: PM800 series power meters
ION Setup 3.0 Device Configuration Guide
Note
Set the IP Port to 502 for Modbus TCP communication.
Using ION Setup
Use Network mode in ION Setup to add and configure the PM800 series meter; see the
“Starting, Logging On and Logging Off” section of the ION Setup Help for more information on
the operation modes, and starting and logging onto ION Setup.
Refer to the ION Setup online help for information on adding sites and meters.
PM800 series setup screens
The following sections describe the PM800 series meter setup screens.
Note
Some setup screens apply only to particular models, while other screens apply only to
installed options (such as the “Comm - ” setup screen for meters equipped with the
optional Ethernet communications card). Refer to the meter documentation for details on
supported features.
Alarm Log
Status
Select the appropriate option to enable or disable alarm logging.
Basic Setup
System Type
Select the option that describes how your PM800 series meters are wired to the electrical
service. Refer to meter documentation for details.
Primary Scale Factor
Select the appropriate scale value (multiplier) for the PT primary. Select Direct Connect to
connect directly.
PT Primary
Enter the value in Volts for the PT primary.
PT Secondary
Select the value for the PT secondary.
CT Primary
Enter the value in Amps for the CT primary.
Page 110 of 166
© 2014 Schneider Electric. All rights reserved.
ION Setup 3.0 Device Configuration Guide
Chapter 9: PM800 series power meters
CT Secondary
Select the value for the CT secondary.
Service Frequency
Select the system frequency of the electrical service.
Nominal Voltage
Enter the normal or designed voltage level in Volts of the electrical service.
Nominal Current
Enter the normal or designed current level in Amps of the electrical service.
Billing Log
Status
Select the appropriate option to enable or disable the billing log.
Interval (mins)
Enter how often in minutes the billing quantities are to be logged.
Channels
This allows you to select which parameters to include in the billing log.
1. Select Channels, then click Edit.
2. To add or remove a parameter from the billing log:
• Adding parameters: Under “Available”, click the “+” sign to expand and display the list of
individual parameters. Select a parameter, then click the button to move the parameter
to “Selected”.
• Removing parameters: Under “Selected”, click the parameter you want to remove, then
click the button.
3. Click OK, then click Send to save the changes to the meter. The following prompt
appears:
© 2014 Schneider Electric. All rights reserved.
Page 111 of 166
Chapter 9: PM800 series power meters
ION Setup 3.0 Device Configuration Guide
4. Note that clicking Yes will power-cycle (reset) the device. Click Yes to confirm, or No to
cancel and go back to the previous dialog.
Clock
The Clock setup screen allows you to set the date and time of the internal clock of a device
and to synchronize the date and time of the devices in your system with your workstation.
Note
If the power to your device is interrupted, you may see a dialog prompting you to reset
the date and time. In the event of power loss, the internal clock data is saved for up to
48 hours.
Device time
The Device time parameter shows the date and time on the device.
1. Select Device time and click Edit to manually change the date and time settings.
The Device time changes to Update to and shows the date and time that will be sent to
the device.
2. Make any changes to the date and time, click OK, then click Send.
Sync to
The Snyc to parameter shows the Clock Sync Type (for example, UTC) and
Synchronization Time.
Note
Select the time sync value based on any requirements of the devices in your system and
the system software for correct operation (for example, selecting PC Standard Time (No
DST) for StruxureWare Power Monitoring.)
1. Select Sync to and click Edit.
2. Select the appropriate time type from the dropdown list.
3. Choose a time zone for Time offset from PC, if applicable.
The date and time to be sent to the device are displayed below as Synchronization
Time.
4. Click OK, then click Send.
Page 112 of 166
© 2014 Schneider Electric. All rights reserved.
ION Setup 3.0 Device Configuration Guide
Chapter 9: PM800 series power meters
The Device time will be overwritten with the time to be sent to the device. It may take a few
moments for the time synchronization to complete.
Comm - card
This section applies to meters that are equipped with the optional Ethernet communications
card module. If installed, the settings can be viewed from the following setup registers:
IP Address
This displays the IP address of the .
Subnet Mask
This displays the Ethernet subnet mask setting for the .
Gateway
This displays the Ethernet gateway setting for the .
Com3 Protocol
This displays the protocol used on the ’s serial port.
Com3 Address
This displays the Modbus address of the ’s serial port.
Com3 Baud Rate
This displays the baud rate setting of the ’s serial port.
Com3 Parity
This displays the parity setting of the ’s serial port.
Comm - Onboard Serial
Com1 Protocol
This displays the meter’s serial communications protocol setting (for example, Modbus).
Com1 Address
This displays the Modbus address (unit ID) of the meter.
Com1 Baud Rate
This displays the meter’s baud rate setting.
Com1 Parity
This displays the meter’s communications port parity setting. To communicate with ION
Setup, this must be set to None.
© 2014 Schneider Electric. All rights reserved.
Page 113 of 166
Chapter 9: PM800 series power meters
ION Setup 3.0 Device Configuration Guide
Note
The remote display adapter (RDA) provides an additional serial communications port
(COM2). However, this COM2 port becomes unavailable if you connect an Ethernet
communications card to the meter.
Data Log #1, Data Log #2, Data Log #3, Data Log #4
Status
Select the appropriate option to enable, auto-enable or disable the data log.
Interval
This allows you to set the logging mode and interval for the data log.
1. Select Interval, then click Edit.
2. Use the Mode box to select Only On Event, Continuous, or Start/Stop (refer to the
meter documentation for more information). Enter how often (in minutes or seconds) the
parameters should be recorded in the data log.
3. Click OK.
Channels
This allows you to select which parameters to include in the data log. The setup procedure is
similar to the one described in the "Channels" section under "Billing Log" on page 111.
Device Labels
Select a parameter and click Edit. Enter a label or nameplate description for the meter, click
OK, then click Send.
Device Label
Enter a value for the Device Label.
Device Nameplate
Enter a value for Device Nameplate (for example, Circuit Monitor).
EN50160 Setup
EN50160 Evaluation
Select the appropriate option to enable or disable the EN50160 evaluation feature.
Page 114 of 166
© 2014 Schneider Electric. All rights reserved.
ION Setup 3.0 Device Configuration Guide
Chapter 9: PM800 series power meters
First Day of Week
Select Sunday or Monday to be the first day of the week.
Interruption (% Nominal)
Enter the value that defines what constitutes a voltage interruption, expressed as a
percentage of nominal voltage. For example, if “Interruption (% Nominal)” is set to 1%, a
voltage interruption is recorded if the voltage drops below 99% of its nominal value.
Max Short Interruption (secs)
Enter the longest time duration, in number of seconds, that defines a short interruption. For
example, if “Max Short Interruption (secs)” is set to 270 seconds, a voltage interruption
lasting longer than that time is considered a “long interruption”.
Slow Voltage Variations
Enter the value that defines the allowable range of slow voltage variations, expressed as a
percentage of nominal voltage (typically +/-10% of nominal).
Voltage for 4-Wire Systems
Select whether the voltage for a 4-wire system is expressed as Line-to-Neutral or Line-toLine.
Frequency Configuration
Select “Synchronous” for a system with a synchronous connection to an interconnected
system, or “Unsynchronous” for a system without a synchronous connection to an
interconnected system.
For more information, refer to the meter documentation.
Energy & Demand
Accumulated Energy
Select how accumulated energy values should be stored (absolute or signed).
Power Mode
Select which technique is used to calculate demand power.
Power Interval
Enter the duration in minutes of each demand interval (for calculating demand power).
Power Sub-Interval
Enter the duration in minutes of each sub-interval (for demand power).
Current Mode
Select which technique is used to calculate demand current.
Current Interval
Enter the duration in minutes of each demand interval (for calculating demand current).
© 2014 Schneider Electric. All rights reserved.
Page 115 of 166
Chapter 9: PM800 series power meters
ION Setup 3.0 Device Configuration Guide
Current Sub-Interval
Enter the time period in minutes for each sub-interval (for demand current).
Front Panel Display
Language
Select which language is displayed on the meters' LCD panel.
Date Format
Select your date format (for example, YY/MM/DD).
Time Format
Select your time format (24 hour or 12 hour AM/PM).
Phase Notation
Select your line phase label format (A/B/C/N or 1/2/3/N).
I/O Setup
Refer to the meter documentation for I/O descriptions, wiring and configuration details.
Digital Out KY
• Label: Type a name identifying the KY digital output.
• Mode: Select the KY digital output mode of operation.
• Normal: Use this mode for normal ON/OFF operation of the KY digital output.
• Latched: Use this mode for latching behavior (once ON, stays ON).
• Remotely Controlled: Energize the relay by issuing a command from a remote PC or
programmable controller. The relay remains energized until a command to de-energize
is issued from a remote PC or programmable controller, or until the power meter loses
control power. When control power is restored, the relay will not be re-energized.
• Power Meter Controlled: When an alarm condition assigned to the relay occurs, the
relay is energized. The relay remains energized—even after all alarm conditions
assigned to the relay have dropped out—until a command to de-energize is issued from
a remote PC or programmable controller, until the high priority alarm log is cleared from
the display, or until the power meter loses control power. When control power is
restored, the relay will not be re-energized if the alarm condition is not TRUE.
• For Timed or End of Demand Interval mode, use the “Hold Time” register to enter how
many seconds the KY digital output remains energized.
• For Absolute kWh pulse, Absolute kVARh pulse or kVAh pulse mode, use the
“Pulse Weight” register to enter how many absolute kWh (into and out of the load),
absolute kVARh (into and out of the load) or kVAh are associated with each pulse of the
KY digital output.
Page 116 of 166
© 2014 Schneider Electric. All rights reserved.
ION Setup 3.0 Device Configuration Guide
Chapter 9: PM800 series power meters
• For kWh in pulse or kVARh in pulse mode, use the “Pulse Weight” register to enter
how many kWh or kVARh into the load are associated with each pulse of the KY digital
output.
• For kWh out pulse or kVARh out pulse mode, use the “Pulse Weight” register to
enter how many kWh or kVARh out of the load are associated with each pulse of the KY
digital output.
If set to any of the above pulse modes, the Digital KY Output will pulse based on an
energy-per-pulse value. Refer to the meter documentation for details on determining the
value of the Pulse Weight setting.
• Control: For “Normal”, “Latched” or “Timed” mode of operation, select how the KY digital
output is controlled, that is, either Externally Controlled or controlled by power meter
alarm (PM Alarm).
Note
For detailed descriptions on the different Mode and Control options, refer to “Relay
Output Operating Modes” in the meter documentation.
Digital In SI
• Label: Type a name identifying the SI digital input.
• Mode: Select the operation mode for the SI digital input. For detailed descriptions on the
different modes, refer to the “Digital Inputs” section in the meter documentation.
• Normal: Use this mode for normal ON/OFF operation of the digital input.
• Demand Interval Sync Pulse: Use this mode to configure the SI digital input as the
demand sync input (to receive a demand sync pulse from a utility demand meter, for
example).
• Conditional Energy Control: Use this mode to configure the SI digital input for
conditional energy control.
• Pulse Weight: For “Normal” or “Input Metering” mode of operation, enter the pulse weight
associated with the change of state of the input.
• Units: For “Normal” or “Input Metering” mode of operation, select the unit of measurement
associated with the SI digital input pulse (if applicable).
Optional I/O modules
The following parameters apply to meters equipped with the optional I/O modules. Refer to
the meter documentation to see which inputs and outputs are available for the type of I/O
module(s) installed on your meter.
Relay A-R1, Relay A-R2, Relay B-R1, Relay B-R2
• Label: Type a name identifying the relay output.
• Mode: Select which mode of operation the relay output uses (Normal, Latched, Timed,
or End of Demand Interval).
© 2014 Schneider Electric. All rights reserved.
Page 117 of 166
Chapter 9: PM800 series power meters
ION Setup 3.0 Device Configuration Guide
• Control: For “Normal”, “Latched” or “Timed” mode of operation, select how the relay
output is controlled, that is, either Externally Controlled (Remotely Controlled) or PM
Alarm (Power Meter Controlled).
• Hold Time: For “Timed” and “End of Demand Interval” mode of operation, enter how many
seconds the relay remains energized.
Note
For detailed descriptions on the different modes of operation, see “Relay Output
Operating Modes” in the meter documentation.
Click OK. Configure the other relays as required.
Digital In A-S1, Digital In A-S2 … Digital In A-S6,
Digital In B-S1, Digital In B-S2 … Digital In B-S6
• Label: Type a name identifying the digital input.
• Mode: Select the digital input mode of operation (Normal, Demand Interval Sync Pulse,
Conditional Energy Control, or Input Metering).
• Pulse Weight: For “Normal” or “Input Metering” mode, enter in the “Pulse Weight” box
how many units of a measured or calculated quantity is associated with each pulse.
• Units: For “Normal” or “Input Metering” mode, select the units used for the measured or
calculated quantity (if applicable).
Note
For detailed descriptions on the different modes of operation, refer to “Digital Inputs” in
the PM800 series documentation.
Analog I/O
Refer to the meter documentation for instructions on how to set up the analog inputs
(Analog In A-AI1, Analog In A-AI2, Analog In B-AI1, Analog In B-I2) and analog outputs
(Analog Out A-AO1, Analog Out A-AO2, Analog Out B-AO1, Analog Out B-AO2):
• Analog Inputs
• Label: This name identifies the specific analog input.
• Units: Defines the units of the monitored analog value.
• Scale factor: Defines what multiplier is used on the measured value.
• Report Range Lower Limit: This is the value the power meter reports when the input
reaches (or drops below) the lowest valid reading.
• Report Range Upper Limit: This is the value the power meter reports when the input
reaches (or exceeds) the highest valid reading.
• Analog Outputs
• Label: This name identifies the specific analog output.
• Output register: Defines the power meter register assigned to the analog output.
Page 118 of 166
© 2014 Schneider Electric. All rights reserved.
ION Setup 3.0 Device Configuration Guide
Chapter 9: PM800 series power meters
• Lower Limit: This is the minimum output current that the power meter sends to the
analog output when the register value reaches (or drops below) the lower limit.
• Upper Limit: This is the maximum output current that the power meter sends to the
analog output when the register value reaches (or exceeds) the upper limit.
Digital Output Settings
• KYZ Output Mode: When the OutputMode setup register is set to KYZ, the module
triggers the output hardware port to change state (that is, changes its state from OFF to ON,
or ON to OFF) each time the Kt value is reached.
• Select Transitions from the dropdown list to determine how the changes of state
appears for the output hardware channel.
• Select Pulses from the dropdown list, and choose a value for Pulse width to define the
minimum amount of time that the output pulse must stay ON in order for the output
hardware channel to recognize it as a valid pulse.
Input Metering
Refer to the meter documentation for detailed descriptions on metering capabilities and
options.
Demand Method
Select which method is used for calculating demand.
Demand Interval
Enter the time period for each demand interval, in minutes.
Demand Sub-Interval
Enter the time period for each demand sub-interval, in minutes.
Channel 1, Channel 2 … Channel 5
Before you can associate a digital input to a channel, you need to set up the digital input for
input metering operation. Refer to "I/O Setup" on page 116 for details.
1. From the Input Metering setup screen, select one of the available channels.
2. In the “Label” field, enter a descriptive name for the channel.
3. Select the appropriate units and rate. The units you select must match the units you
selected for the digital input (when you configured it for input metering).
4. In the “Available Inputs” column, select the digital input, then click the button to move it to
the “Assigned Inputs” column.
(To unassign the input, select it from the “Assigned Inputs” column, then click the button.)
© 2014 Schneider Electric. All rights reserved.
Page 119 of 166
Chapter 9: PM800 series power meters
ION Setup 3.0 Device Configuration Guide
Note
Usually input metering applications also require one input to be set up for Demand
Interval Sync Pulse to allow customers to synchronize their demand intervals to the
utility (typically, the pulse signal is provided by the utility). To set up an input for Demand
Interval Sync Pulse, refer to "I/O Setup" on page 116.
Meter Resets
To reset the meter, double-click Meter Init then select Reinitialize. Click OK.
Click Send to initialize the meter. At the prompt, click Yes to proceed, or No to abort the
initialization.
Note
Initializing a meter will reset or disable certain parameters. Make sure to read the
warning message that appears listing the parameters that are about to be reset. At the
Reset Confirmation dialog, verify before proceeding that only parameters intended to
be reset are listed.
WARNING
UNINTENDED EQUIPMENT OPERATION
Do not use ION Setup software and associated devices for critical control or protection
applications where human or equipment safety relies on the operation of the control
action.
Failure to follow these instructions can result in death or serious injury.
NOTICE
LOSS OF DATA
Before changing device configuration values, make sure that all recorded data has been
saved in a secure location.
Failure to follow these instructions can result in loss of data.
Metering Standards
Harmonic Distortion
Select how total harmonic distortion is calculated.
PF Sign Convention
Select which standards convention to use for displaying PF sign.
Page 120 of 166
© 2014 Schneider Electric. All rights reserved.
ION Setup 3.0 Device Configuration Guide
Chapter 9: PM800 series power meters
Voltage Harmonic Method
Select how the magnitude of voltage harmonic is displayed.
Current Harmonic Method
Select how the magnitude of current harmonic is displayed.
Onboard Alarms/Events
Standard
This allows you to configure the standard alarms. Select “Standard” then click Edit.
A
B
C
D
E
F
G
H
I
J
The left column lists the standard alarms. Select an item in this list to edit it.
The two boxes at the top lists the standard alarm condition and measurement that
defines the highlighted item in alarms list. You can use these boxes to change the
condition and measurement for this alarm.
Select the “Enable” box to enable the selected (highlighted) alarm, or clear the box to
disable the alarm.
The “Label” box identifies the name of the standard alarm. Use this box to rename the
alarm as necessary (for example, if you changed the condition or measurement for the
standard alarm).
Enter the setpoint pickup value (absolute or relative, see item G below) and the pickup
delay (in seconds).
Enter the setpoint dropout value (absolute or relative, see item G below) and the
dropout delay (in seconds).
To specify absolute values for the setpoint pickup and dropout limits, clear (uncheck)
the “Relative (% of Avg)” box. To specify setpoint pickup and dropout limits as a
percentage above or below the RMS average value (Avg), select (check) the “Relative
(% of Avg)” box.
Use the “Priority” box to set the alarm priority.
Use the “Data Logs” check boxes to select which onboard data log(s) are used to
record the selected alarm.
Select the “Waveform Capture” box to trigger a waveform capture on alarm, or clear
© 2014 Schneider Electric. All rights reserved.
Page 121 of 166
Chapter 9: PM800 series power meters
K
L
M
ION Setup 3.0 Device Configuration Guide
the box to disable waveform capture on alarm.
If you want to trigger a digital output or relay on an alarm, click the Output button, select
one of the available outputs, then click the button to move it to the “Selected” column.
Click OK.
To create a new alarm, click Add, then specify the alarm condition and measurement,
as described in the previous steps.
Note that there is a limit to the number of alarms you can create. The Add button is
disabled once that limit is reached. In this case, you must delete an existing alarm
before you can create a new one (or you can select an existing alarm and
edit/configure it as necessary).
To delete an alarm, select it from the alarms list, then click Delete.
To save the changes to the meter, click Send. Depending on the type of changes, a meter
reset warning might appear:
Note that clicking Yes will power-cycle (reset) the device. Click Yes to confirm and proceed
with your changes, or No to cancel and go back to the previous dialog.
For more information on configuring the alarms, refer to the PM800 series documentation.
Disturbance
This allows you to configure the disturbance alarms (that is, voltage sags and swells). Select
“Disturbance” then click Edit.
Page 122 of 166
© 2014 Schneider Electric. All rights reserved.
ION Setup 3.0 Device Configuration Guide
A
B
C
D
E
F
G
H
I
J
K
L
M
Chapter 9: PM800 series power meters
The left column lists the disturbance alarms. Select an item in this list to edit it.
The two boxes at the top lists the disturbance alarm condition and measurement that
defines the highlighted item in alarms list. You can use these boxes to change the
condition (sag or swell) and measurement (current or voltage) for a selected alarm.
Select the “Enable” box to enable the selected (highlighted) alarm, or clear the box to
disable the alarm.
The “Label” box identifies the name of the disturbance alarm. Use this box to rename
the alarm as necessary (for example, if you changed the condition/measurement for
the disturbance alarm).
Enter the setpoint pickup value (absolute or relative, see item G below) and the pickup
delay (in number of cycles).
Enter the setpoint dropout value (absolute or relative, see item G below) and the
dropout delay (in number of cycles).
To specify absolute values for the setpoint pickup and dropout limits, clear (uncheck)
the “Relative (% of Avg)” box. To specify setpoint pickup and dropout limits as a
percentage above or below the RMS average value, select (check) the “Relative (% of
Avg)” box.
Use the “Priority” box to set the alarm priority.
Use the “Data Logs” check boxes to select which onboard data log(s) are used to
record the selected alarm.
Select the “Waveform Capture” box to trigger a waveform capture on alarm, or clear
the box if you do not want to trigger a waveform capture on alarm.
If you want to trigger a digital output or relay on an alarm, click the Output button, select
one of the available outputs, then click the button to move it to the “Selected” column.
Click OK.
To create a new alarm, click Add, then specify the alarm condition and measurement,
as described in the previous steps.
Note that there is a limit to the number of alarms you can create. The Add button is
disabled once that limit is reached. In this case, you must delete an existing alarm
before you can create a new one (or you can select an existing alarm and
edit/configure it as necessary).
To delete an alarm, select it from the alarms list, then click Delete.
To save the changes to the meter, click Send. Depending on the type of changes, a meter
reset warning might appear:
Note that clicking Yes will power-cycle (reset) the device. Click Yes to confirm and proceed
with your changes, or No to cancel and go back to the previous dialog.
For more information on configuring the alarms, refer to thePM800 series documentation.
Digital
This allows you to configure the digital input alarms. Select “Digital” then click Edit.
© 2014 Schneider Electric. All rights reserved.
Page 123 of 166
Chapter 9: PM800 series power meters
ION Setup 3.0 Device Configuration Guide
A
The left column lists the digital input alarms. Select an item in this list to edit it.
B
This defines the alarm condition.
• Select “Status Input On” to set the alarm when the digital input
changes from off to on.
• Select “Status Input Off” to set the alarm when the digital input
changes from on to off.
• The “End of incremental energy interval” (End Inc Enr Int), “End of
demand interval” (End Dmd Int) and “Power up/reset” (Pwr Up/Reset)
alarms are unary type alarms because they use internal signals from
the power meter, and cannot be changed through this setup screen.
Refer to the meter documentation for more information.
C
D
E
F
G
H
I
J
K
Depending on the I/O module installed on your meter, this allows you to select one of
the available digital inputs. Note that this is not configurable for unary type alarms —
see item B above.
Select the “Enable” check box to enable the selected (highlighted) alarm, or clear the
box to disable the alarm.
The “Label” box identifies the name of the digital alarm. Type in this box to rename the
alarm as necessary.
Use the “Priority” box to set the priority for the selected alarm.
Use the “Data Logs” check boxes to select which onboard data log(s) are used to
record the selected alarm.
Select the “Waveform Capture” check box to trigger a waveform capture on alarm, or
clear the box to if you do not want to trigger a waveform capture on alarm.
If you want to trigger a digital output or relay on an alarm, click the Output button,
select one of the available outputs, then click the button to move it to the “Selected”
column. Click OK.
To create a new alarm, click Add, then specify the alarm type and select the digital
input, as described in the previous steps.
To delete an alarm, select it from the alarms list, then click Delete.
Click Send to save the changes to the meter. Depending on the type of changes, a meter
reset might occur:
Page 124 of 166
© 2014 Schneider Electric. All rights reserved.
ION Setup 3.0 Device Configuration Guide
Chapter 9: PM800 series power meters
Note that clicking Yes will power-cycle (reset) the device. Click Yes to confirm and proceed
with your changes, or No to cancel and go back to the previous dialog.
For more information on configuring the alarms, refer to thePM800 series documentation.
Boolean
This allows you to configure the Boolean alarms. Select “Boolean” then click Edit.
Note
If you have not set up any Boolean alarms, click Add to create a Boolean alarm.
A
B
D
Select a Boolean alarm to edit it.
Use the “Label” box to rename the selected Boolean alarm (for example “Any
Overcurrent”).
Select the type of logic operation (for example, “Logic OR”) you want to use to test for
the alarm condition.
This box lists the alarm parameters used for the Boolean logic test.
E
Click Edit to add or remove alarm parameters.
C
© 2014 Schneider Electric. All rights reserved.
Page 125 of 166
Chapter 9: PM800 series power meters
ION Setup 3.0 Device Configuration Guide
Select an alarm parameter under “Available”, then click the button to
move it to “Selected”. If you want to remove a parameter, select it under
“Selected”, then click the button.
F
G
H
I
J
K
L
Select the “Enable” check box to enable the selected (highlighted) alarm, or clear the
box to disable the alarm.
Use the “Priority” box to set the priority for the selected alarm.
Use the “Data Logs” check boxes to select which onboard data log(s) are used to
record the selected alarm.
Select the “Waveform Capture” box to trigger a waveform capture on alarm, or clear
the box if you do not want to trigger a waveform capture on alarm.
If you want to trigger a digital output or relay on an alarm, click the Output button,
select one of the available outputs, then click button to move it to “Selected”. Click OK.
To create a new Boolean alarm, click Add, then specify the alarm type and select the
digital input, as described in the previous steps.
To delete an alarm, select it from the alarms list, then click Delete.
Click Send to save the changes to the meter. Depending on the type of changes, a meter
reset might occur:
Note that clicking Yes will power-cycle (reset) the device. Click Yes to confirm and proceed
with your changes, or No to cancel and go back to the previous dialog.
Phasor Viewer
This screen shows the voltage and current readings (inputs magnitude) for the Phasors, and
the values in degrees, relative to V1, for the Phase Angles. You can view and print the
information.
Page 126 of 166
© 2014 Schneider Electric. All rights reserved.
ION Setup 3.0 Device Configuration Guide
Chapter 9: PM800 series power meters
Reports
This screen shows all reports and their respective parameters and values available for a
device as it is currently configured. You can view, print, and save a report file as a record of
the current device configuration.
WARNING
INACCURATE DATA RESULTS
• Do not incorrectly configure ION Setup and its associated devices; this can lead to
incorrect reports and/or data results.
• Do not rely solely on reports or data results to determine if ION Setup and its
associated devices are functioning correctly or meeting all applicable standards and
compliances.
• Do not use reports or data results as substitutes for proper workplace practices or
equipment maintenance; they are supplemental only.
Failure to follow these instructions can result in death or serious injury.
© 2014 Schneider Electric. All rights reserved.
Page 127 of 166
Chapter 9: PM800 series power meters
ION Setup 3.0 Device Configuration Guide
Double-click the Reports module, select a report, and click Display. ION Setup retrieves
and uploads from your meter to the screen the report details. Retrieving the data may take a
few moments or several minutes to complete. All report parameters and values appear.
Select Save As to save the configuration report as a .txt file, or click Print to print it. These
reports are useful for reference when adding or maintaining devices in your system.
Scaling
This screen allows you to set scaling values for the voltage, current, power, neutral voltage,
and neutral current.
NOTICE
LOSS OF CONTROL
Changing scale factors may affect alarm status and/or any recorded data. Before
changing scale factors, disable all affected alarms and ensure that all recorded data has
been saved.
Failure to follow these instructions may result in data loss.
Double-click the Scaling module, select a parameter, and click Edit. Choose a value for the
scale, then click OK. Once you have made changes to the parameters, click Send. If a
warning message appears, click Yes to continue. The Resetting device dialog appears as
the parameter values are sent to the device.
Shift Energy
This allows you to group energy usage and cost according to three different time shifts inside
a 24-hour period (for example, three 8-hour shifts).
First Shift Start, Second Shift Start, Third Shift Start
Use these settings to select what time the first, second or third shift starts.
Cost Scale Factor
Select the multiplier used when calculating energy cost.
Page 128 of 166
© 2014 Schneider Electric. All rights reserved.
ION Setup 3.0 Device Configuration Guide
Chapter 9: PM800 series power meters
First Shift Cost (per kWh), Second Shift Cost (per kWh), Third Shift Cost (per kWh)
Use these settings to enter the cost per kWh for each shift.
Billing Cycle Setup
Select this then click Edit to set up the month, day and time for the billing cycle.
Use the “Month” and “Day” boxes to select meter reading dates. Use the “Time of Day” box
to select the hour the meter reading is performed.
Templates
This screen allows you to store to a file the Modbus configuration data for a device, or to
upload Modbus configuration data from a template to a device. Note that if you load a
template (an .MCF file), the digital outputs for alarms become disassociated for the device
and will need to be manually re-associated.
Save to File
Click Save to File. The Available Modbus Template Options screen appears.
Select the check box next to the available options you want for each module. Then click
Save to save these options to a .MCF file. Note that you can select different options and
save more than one template for a device for different purposes.
© 2014 Schneider Electric. All rights reserved.
Page 129 of 166
Chapter 9: PM800 series power meters
ION Setup 3.0 Device Configuration Guide
WARNING
UNINTENDED EQUIPMENT OPERATION
Do not use ION Setup and associated devices for critical control or protection
applications where human or equipment safety relies on the operation of the control
circuit.
Failure to follow these instructions can result in death or serious injury.
WARNING
INACCURATE DATA RESULTS
Do not incorrectly configure ION Setup and its associated devices; this can lead to
incorrect reports and/or data results.
Failure to follow these instructions can result in death or serious injury.
Load From File
1. Click Load From File to load the configuration data from an existing Modbus template
(.MCF file) into a meter. Navigate to a Modbus template file on your system, double-click
the file, or select the file, and click Open. Click the plus (+) next to items to show all
available options. Select the checkbox next to each option you want and click Load.
The Reset Confirmation screen appears.
2. Carefully review and verify the setup options in the Reset Confirmation screen that you
intend to reset with this action.
3. Click Proceed to begin resetting the specified options on your meter and copy the
template to your device. Click OK if a safety message appears.
Note
The digital outputs for alarms become disassociated for the device and will need to be
manually re-associated.
4. Click Abort to stop the action from continuing. If you want to return the meter to its original
settings, choose Load from File and load the previous template.
Page 130 of 166
© 2014 Schneider Electric. All rights reserved.
ION Setup 3.0 Device Configuration Guide
Chapter 9: PM800 series power meters
Note
Templates are specific to a device type. You cannot load a Modbus template for a
specific device type onto a device of a different type (for example, a CM4 template onto
an PM800 series device).
Trending & Forecasting
Trending and Forecasting allows you to record long-term changes in data. You can then
graph these recorded trends and calculate forecasted values to allow you to better manage
changes in your system. Trend analysis can also be useful for predicting maintenance
needed by showing changes in load and power quality.
Feature Control
Select the appropriate option to enable or disable this feature.
Register Trend Item
Select one of the available quantities you would like to trend, or select “User Defined”.
User Defined Register
Select one of the available items for trending.
User Defined Scaling
Select the appropriate multiplier for the item selected for trending.
User Defined Label
Enter a descriptive name you want for the item selected for trending.
Waveform Capture
Waveform capture is supported on the PM800 series meter. This feature allows you to select
and configure the waveform capture.
Status
Select as appropriate the enable or disable value for this feature.
File Mode
Select which method is used for storing waveforms:
• FIFO (first-in-first-out) mode discards the oldest waveform capture when the waveform
storage is full.
• Fill and Hold mode keeps the oldest waveform capture and does not record new ones
when the waveform storage becomes full.
Channels
This allows you to select which inputs you want to set up for waveform capture. Double-click
Channels, or select Channels, then click Edit.
© 2014 Schneider Electric. All rights reserved.
Page 131 of 166
Chapter 9: PM800 series power meters
ION Setup 3.0 Device Configuration Guide
Depending on your wiring configuration, certain inputs become N/A (not applicable) and are
not available to select.
1. Select the voltage and/or current input channels you want to capture, then click Next.
2. Set the capture options:
• Samples/Cycle
• Duration (cycles)
• Pre-Event Cycles
Max Capture indicates the maximum number of recordings for waveform capture, and is
shown for informational purpose only.
3. Click Finish, then click Send to save your changes to the device.
Page 132 of 166
© 2014 Schneider Electric. All rights reserved.
ION Setup 3.0 Device Configuration Guide
Chapter 10: E5600 Socket-based energy meter
Chapter 10: E5600 Socket-based energy meter
The PowerLogic™ E5600 is a cost-effective S-base socket meter with ANSI C12.20
Class 0.2 accuracy.
In this section
E5600 meter setup
134
Meter setup through IR optical port
134
Meter setup through RS-485
137
Communications card firmware upgrade
142
Meter protection
143
© 2014 Schneider Electric. All rights reserved.
Page 133 of 166
Chapter 10: E5600 Socket-based energy meter
ION Setup 3.0 Device Configuration Guide
E5600 meter setup
The E5600 has two configuration options: via the meter’s IR (infrared) optical port or through
the RS-485 connection.
If you need to change your meter’s default RS-485 settings, you must first connect to your
meter through the IR optical port to configure the meter’s RS-485 communications settings.
Otherwise, your meter can be configured through the RS-485 connection. Refer to "Default
RS-485 settings" on page 141.
Note
Meter password protection can only be implemented through the IR optical port.
Tools required
Before starting to set up your E5600 meter, make sure you have a computer with the latest
version of ION Setup installed. To communicate with your meter through RS-485, you need
to use a Modbus gateway or an RS-232 to RS-485 converter.
To communicate with your meter through the IR optical port, you also need the following:
• ANSI C12.19 type II optical probe (refer to the E5600 Installation and Operation Guide for
the meter’s front optical port specifications)
• Strong magnet (such as a rare-earth or similar permanent magnet)
Meter setup through IR optical port
To communicate with your meter through the IR optical port, you must configure your
computer to use the optical probe. You can then connect the probe to the meter and
communicate using ION Setup.
Computer configuration
This describes how to configure the computer’s communication port for optical probe
communication, and how to identify which port is being used by the optical probe, in order to
communicate with ION Setup.
Before starting ION Setup, connect the meter to your computer using an ANSI C12.19 type II
optical probe. If the Microsoft Windows driver for the USB optical probe is not installed,
Windows detects the optical probe as new hardware and prompts you to search for a
compatible driver. Use the installation disc that came with the optical probe to install the
driver, or download the appropriate driver from the optical probe manufacturer’s website.
Open your computer’s Device Manager to see which serial port number is assigned to the
optical probe:
1. Right-click My Computer and select Manage.
2. Expand System Tools and select Device Manager.
3. Expand Ports.
Page 134 of 166
© 2014 Schneider Electric. All rights reserved.
ION Setup 3.0 Device Configuration Guide
Chapter 10: E5600 Socket-based energy meter
4. Note the optical probe’s serial port number.
5. Close the Computer Management screen.
Meter communication
This describes how to put the meter into diagnostic mode so that it can be configured through
the IR optical port using ION Setup.
1. Put the meter into diagnostic mode.
• To put the meter into diagnostic mode, hold a strong magnet over the meter,
approximately at the 12 o’clock position, to activate the reed switch. When the reed
switch is activated, the meter’s display will show all segments, then a blank screen,
and then will start to display the diagnostic display sequence.
Do not remove the magnet from the meter’s reed switch while communicating through the
meter’s IR port.
© 2014 Schneider Electric. All rights reserved.
Page 135 of 166
Chapter 10: E5600 Socket-based energy meter
ION Setup 3.0 Device Configuration Guide
Note
RS-485 (Modbus) data will not be updated while the meter is communicating via the front
optical port.
2. Start and log on to ION Setup using Single Device Configuration mode. See the “Starting,
Logging On and Logging Off” section of the ION Setup Help for more information on the
operation modes, and starting and logging onto ION Setup.
3. In the Connection Type dialog, select the optical probe’s serial port number (see
"Computer configuration" on page 134).
4. Click OK.
ION Setup attempts to establish a connection (9600 baud, ANSI protocol) to the device. If
communication attempts fail, close ION Setup, check to make sure there is good physical
connection between the computer and the meter and ensure that the magnet is activating
the reed switch. Restart ION Setup and try connecting to the device again.
5. Configure the meter. The setup screens are detailed in the section "Meter setup through
RS-485" on page 137.
Page 136 of 166
© 2014 Schneider Electric. All rights reserved.
ION Setup 3.0 Device Configuration Guide
Chapter 10: E5600 Socket-based energy meter
Meter setup through RS-485
To configure your meter through RS-485, you must add the meter in ION Setup, in Network
Mode. Once the meter has been added, you can configure your meter using the setup
screens.
Adding the E5600 to a site
1. If your meter is connected through the IR optical port, exit ION Setup then remove the
magnet from the meter.
2. Make sure the meter’s RS-485 port is connected to the computer (through an RS-232 to
RS-485 converter or an Ethernet gateway device).
3. Start and log on to ION Setup using Network mode. See the “Starting, Logging On and
Logging Off” section of the ION Setup Help for more information on the operation modes,
and starting and logging onto ION Setup.
4. Create and configure a new site for your meter, or use an existing site if appropriate (that is,
if an existing site already exists and you have wired the E5600 communications port to use
that communications link). Refer to the ION Setup online help for details on adding sites
and meters.
5. Add the meter to the site. For Unit ID, enter the Modbus address you set for the device
(refer to "E5600 Socket-based energy meter" on page 133).
6. Configure the meter’s setup parameters.
Basic setup
Use this screen to configure the meter’s primary and secondary transformer values.
1. Select the PT Multiplier parameter and click Edit.
2. The PT/CT Multiplier Setup screen appears. Enter the PT Multiplier value and click OK.
The PT Multiplier is a positive integer that represents the PT primary to PT secondary
ratio. For example, if PT primary = 480 V and PT secondary = 120 V, then
PT Multiplier = 4.
3. Repeat for the CT Multiplier parameter.
The CT Multiplier is a positive integer that represents the CT primary to CT secondary
ratio. For example, if CT primary = 500 A and CT secondary = 5 A, then CT Multiplier =
100
4. Click Send to save your changes to the meter.
© 2014 Schneider Electric. All rights reserved.
Page 137 of 166
Chapter 10: E5600 Socket-based energy meter
ION Setup 3.0 Device Configuration Guide
Note
The PT and CT multipliers only affect values displayed on the meter’s front panel and
values exported using Modbus protocol. The PT and CT multipliers you configure do not
affect the digital output pulse signal. To change the pulse rate, you must change the Ke
value. See "Energy pulsing" on page 139 for details.
Clock
The front panel of the E5600 displays hours and minutes in 24 hour clock format regardless of
whether your computer displays time in a 12 or 24 hour clock format.
Note
Setting or synchronizing the meter’s time causes the demand interval to be reset, which
creates artificially low real-time demand values. Only set or synchronize the meter’s
time during periods of low demand, or at the beginning of the demand interval.
To manually set the meter’s local time
1. Select the Date/Time parameter and click Edit.
2. Use the Meter Date dropdown button to display the calendar. You can use the left or right
scroll button to change the month. Click the calendar day to set the meter date.
3. Click the hour, minute, second or AM/PM setting, then use the up/down scroll buttons (or
use your computer’s keyboard) to change the value.
The time information is sent to the meter exactly as entered. No corrections (such as
Daylight Savings Time) are applied to the time information, or supported by the meter.
4. Click OK then Send to set the date and time.
To synchronize the meter’s time to the computer’s time
1. Select the Date/Time parameter and click Sync.
2. Click Send. The meter’s time is set to the time on the computer.
Demand
Demand is the average power consumption over a fixed time period (demand period),
typically 15 minutes.
1. Select Interval Length parameter and click Edit.
2. Select either Block Demand or Sliding Window Demand.
• Block Demand: Select the Block Length from the dropdown list.
• Sliding Window Demand: Select the appropriate Period/Sub-Interval from the dropdown
list. For example, if you require a 30 minute interval broken into two periods of 15
minutes each, select “2 x 15 minutes”.
3. Click OK then Send to save your changes to the meter.
Page 138 of 166
© 2014 Schneider Electric. All rights reserved.
ION Setup 3.0 Device Configuration Guide
Chapter 10: E5600 Socket-based energy meter
Device labels
Select Device Identification and click Edit. Type the device label for the E5600 meter in the
“Enter Device Identification” box. The device label can be 1 - 18 ASCII characters.
Click OK then Send to save your changes to the meter.
Energy pulsing
Energy pulsing transitions the digital output KY relay (from low-high, or high-low) each time
the source energy parameter increases by the Ke value. There are two digital outputs on the
E5600.
The digital output pulse rate is not affected by the PT and CT multipliers that you enter on the
Basic Setup screen. To change the pulse rate, you must configure the Ke value as outlined
below.
Note
The meter may not begin energy pulsing for up to 15 minutes after you initially configure
energy pulsing (after receiving the meter from the factory) because of the default
demand interval.
Enable
Use this to enable or disable energy pulsing for that KY relay.
Source
Use this to select the energy measurement for KY relay pulsing.
Ke Value
Use this to set the amount that the source must increase before the digital output transitions.
You must set this to a numeric value between 0.001 and 16 in order to enable energy pulsing
through the digital output.
Note
If Ke is zero (0) the associated KY relay is disabled. You must enter a valid Ke value
(between 0.001 and 16) before you can enable the associated KY relay.
1. Select a parameter (Enable, Source or Ke Value), then click Edit.
2. Modify the parameter by entering the required value or selecting an option from the
dropdown list.
3. Click OK then Send to save your changes to the meter.
Calculating an appropriate Ke value
In order to adjust the digital output pulse rate, you need to determine the appropriate Ke value
using the following formula:
© 2014 Schneider Electric. All rights reserved.
Page 139 of 166
Chapter 10: E5600 Socket-based energy meter
ION Setup 3.0 Device Configuration Guide
Ke=<Primary Energy Value>/(PT * CT), where the primary energy value is the amount of
accumulated energy that you want to trigger a change in the state of the digital output.
For example, if you want the digital output to change state every time 100 kWh is
accumulated, and your PT multiplier is 1 and your CT multiplier is 160, you would enter 0.625
as the Ke value, since 100/(1*160)=0.625.
Front panel display
Configure the following to specify how many data screens are displayed on the front panel,
and the time duration for each displayed screen.
# of Displays
You can configure a maximum of six (6) display screens:
1. Select # of Displays, then click Edit.
2. Use the Display Editor window to edit, add or delete the displayed parameters.
• To edit the displayed parameter, select it, then click Edit. In the Display Screen Setup
window, use the Parameter box to select the quantity you want to display. Use the
Indicator box to assign a three-character label for the displayed parameter.
• To add a new display screen, click New. Set the Parameter and Indicator as described
above.
• To delete a display screen, select it then click Delete.
Page 140 of 166
© 2014 Schneider Electric. All rights reserved.
ION Setup 3.0 Device Configuration Guide
Chapter 10: E5600 Socket-based energy meter
Note
Do not delete the Modbus Unit ID display screen. If you do, you may not be able to
recover the Modbus Unit ID for the device.
3. Click Exit to return to the Front Panel Display setup screen, then click Send to save your
changes to the meter.
Display On Time
You can configure a duration from 1 second to 15 seconds.
1. Select Display On Time, then click Edit.
2. Enter the Display On Time in the space provided and click OK, then click Send to send
your changes to the meter.
Meter resets
Use this setup screen to perform reset functions for the meter.
1. Select a reset parameter then click Edit.
• Peak Demand Reset: clears peak demand values.
• Master Reset: clears all demand and energy values, and clears the load profile.
• Energy Reset: clears all energy accumulated values (total, delivered, received).
2. Use the dropdown box to select “Reset” or “No Reset”, then click OK.
3. Click Send to save your changes to the meter. The parameters for which you selected
Reset are reset immediately. The parameters for which you selected No Reset are not
reset; to reset those parameters, repeat this procedure, setting those parameters to
Reset.
Use this setup screen to configure the E5600 meter’s RS-485 communications settings.
Default RS-485 settings
Parameter
Modbus Address
Baud Rate
Parity
Value
Displayed on meter front panel
9600 bps
No parity or "None"
Note
Changing RS-485 Comm parameters while communicating through the RS-485 port will
cause you to lose communications with your meter.
Modbus Address
Use this to set the device address (unit ID) for the E5600 meter. The allowable Modbus
address range is 1 to 247. Make sure the Modbus address is unique to each device on that
RS-485 loop.
© 2014 Schneider Electric. All rights reserved.
Page 141 of 166
Chapter 10: E5600 Socket-based energy meter
ION Setup 3.0 Device Configuration Guide
Baud Rate
Use this to set the baud rate for RS-485 communications. Make sure all devices connected
on the same RS-485 loop are set to the same baud rate.
Parity
Make sure the communications link (site) and all devices connected to that site are set to the
same parity setting.
1. Select a parameter (Modbus Address, Baud Rate or Parity) and click Edit.
2. A parameter editing screen appears. Enter the appropriate value into the field or select
from the dropdown lists and click OK.
3. Click Send to save your changes to the meter.
Communications card firmware upgrade
Note
You can only upgrade the E5600 communication card’s firmware through the RS-485
port.
1. Before you begin, make sure all necessary information from the E5600 meter has been
recorded, including the password.
2. Save the E5600 firmware upgrade file to your computer desktop or a local folder.
3. Right-click the E5600 meter icon and select Properties.
4. Click the Tools tab, then click Firmware Upgrade.
5. A prompt displays, alerting you that all recorded data for the device will be reset. Click OK
to proceed.
6. Navigate to the location where you saved the firmware upgrade file, select it then click
Open.
7. Enter the ION Setup password to upgrade the firmware.
Upgrade considerations
While your meter’s communication card is undergoing a firmware upgrade, be aware of the
following:
• The meter’s I/O may de-energize or change state.
• Do not have any other communications taking place on your RS-485 network.
• The meter will continue to measure and log data, but it will not update real-time displayed
values until the upgrade is completed.
Page 142 of 166
© 2014 Schneider Electric. All rights reserved.
ION Setup 3.0 Device Configuration Guide
Chapter 10: E5600 Socket-based energy meter
Meter protection
Meter protection can be configured only through the front optical port. See "Meter setup
through IR optical port" on page 134 for connection details. Start ION Setup in Single Device
Configuration mode; see the “Starting, Logging On and Logging Off” section of the ION Setup
Help for more information on the operation modes, and starting and logging onto ION Setup.
Password-protecting the meter
1. Double-click Meter Protection.
2. Select Protection Lockout then click Edit.
3. Type a numeric password in the box, then click Enable.
4. Record the password in a secure place. Make sure you do not lose or forget the password,
as this is the only way to disable protection later.
5. Click Send to save the changes to the meter.
With a password-protected E5600 meter, you can still make changes to these setup screens
through the RS-485 connection (these parameters are not protected from modifications):
• Front Panel Display
• RS-485 Comm
Disabling password protection
When the E5600 meter is password-protected, you must enter the correct password when
you are initially prompted by ION Setup. Otherwise, the protected parameters are displayed
as read-only.
Note
Do not lose or forget your password. If you lose your password and need to modify the
locked parameters, a factory reconfiguration is required, which will reset your meter to
its factory defaults and erase all logged data. For assistance, contact Technical
Support.
© 2014 Schneider Electric. All rights reserved.
Page 143 of 166
Chapter 10: E5600 Socket-based energy meter
Page 144 of 166
ION Setup 3.0 Device Configuration Guide
© 2014 Schneider Electric. All rights reserved.
ION Setup 3.0 Device Configuration Guide
Chapter 11: Branch circuit power meter (BCPM)
Chapter 11: Branch circuit power meter (BCPM)
The PowerLogic™Branch circuit power meter provides a cost effective solution for electrical
load management of power distribution units (PDU) or remote power panels (RPP). The
meter monitors up to 84 branch circuits and the incoming mains. Three feature sets are
available for the Branch circuit power meter:
• Advanced: current, power and energy per circuit and mains
• Intermediate: current per circuit, power and energy on mains only
• Basic: current only per circuit and mains
The Branch circuit power meter is available in two versions: BCPM and BCPMSC.
BCPM (solid core CTs)
The BCPM is suitable for new installations, and features 100 Amp solid core CTs (current
transducers) mounted on a circuit board strip. The 2 CT strip model supports one panel, while
the 4 CT strip model supports two panels. Each panel can monitor 42 branch circuits (84
branch circuits for the 4 CT strip model).
BCPMSC (split core CTs)
The BCPMSC is suitable for retrofit applications, and can monitor up to 84 branch circuits
(42 branch circuits per panel), using 50 Amp or 200 Amp split core CTs (current transducers).
To install the latest firmware for these devices, go to www.schneider-electric.com.
For more information, warnings and safety precautions, refer to the BCPM Installation Guide
or BCPMSC Installation Guide.
In this section
Branch circuit power meter device settings
146
Configuring the Branch circuit power meter
147
BCPM setup screens
148
Basic setup
148
Auxiliary CT sizes
148
Branch Circuit CT sizes
148
Breaker sizes
148
Demand setup
149
Instantaneous Current Alarms
149
Latching Current Alarms
150
Voltage Alarms
154
© 2014 Schneider Electric. All rights reserved.
Page 145 of 166
Chapter 11: Branch circuit power meter (BCPM)
ION Setup 3.0 Device Configuration Guide
Branch circuit power meter device settings
Before using ION Setup, make sure the meter’s communications settings have been
configured, as explained in the BCPM Installation Guide or BCPMSC Installation Guide.
Device communications settings
The Branch circuit power meter uses Modbus RTU protocol to communicate through its RS485 serial communications port. All devices on the same RS-485 loop must be set to the
same baud rate and parity. The recommended setting for direct serial communications is 8N1
(8 data bits, no parity, 1 stop bit).
Device address (Unit ID) settings
The Branch circuit power meter supports two device addresses (one each for Panel 1 and
Panel 2). Panel 1 address is set using the Communications Address DIP switch on the
Branch circuit power meter. Panel 2 address is automatically set to the next higher address
(that is, Panel 1 address + 1).
Each panel in use must therefore be entered as a separate BCPM device in ION Setup.
Panel 1 and Panel 2 for a particular Branch circuit power meter are added as two “meters” in
ION Setup, as follows:
• To set up Panel 1, add a BCPM device in ION Setup and set its Unit ID to match the
Communications Address DIP switch setting on the Branch circuit power meter.
• To set up Panel 2, add another BCPM device in ION Setup and set its Unit ID to the next
higher address (that is, Panel 1 address + 1).
Note
The device address must be unique for each device on the same communications bus.
Device address considerations
Adopting a standard for assigning device addresses for the Branch circuit power meter is
highly recommended. For example, you can implement a device address assignment
convention, such as (2n - 1), that specifically allows only odd numbered addresses for
Panel 1 of the Branch circuit power meter. Using this convention, an even numbered device
address (2n) is always associated with Panel 2 for a particular BCPM. For example, if you
set the Unit ID for Panel 1 to “19”, the Unit ID for Panel 2 is automatically set to “20” (that
is, 19 + 1).
Device naming considerations
Adopting a standard device naming convention for the Branch circuit power meter is highly
recommended so that Panel 1 and Panel 2 for the same BCPM device can be easily
identified.
Page 146 of 166
© 2014 Schneider Electric. All rights reserved.
ION Setup 3.0 Device Configuration Guide
Chapter 11: Branch circuit power meter (BCPM)
Configuring the Branch circuit power meter
This section assumes you have a good working knowledge of ION Setup. Refer to the online
help to learn how to add and configure sites and meters.
Adding the Branch circuit power meter
1. Log on to ION Setup in Network mode. See the “Starting, Logging On and Logging Off”
section of the ION Setup Help for more information on the operation modes, and starting
and logging onto ION Setup.
2. Add the RS-485 gateway site where the Branch circuit power meter is physically
connected (or select the site, if it has already been set up).
3. For Panel 1 of the Branch circuit power meter, add a meter to the site:
• Device Type = BCPM
• Unit ID = Communications Address DIP switch setting
• Name = name associated with Panel 1 of the Branch circuit power meter
4. If Panel 2 of the Branch circuit power meter is used, add another meter:
• Device Type = BCPM
• Unit ID = Panel 1 Unit ID + 1
• Name = name associated with Panel 2 of the Branch circuit power meter
5. Use the setup screens to configure the BCPM device for Panel 1. Repeat for Panel 2, if
applicable.
© 2014 Schneider Electric. All rights reserved.
Page 147 of 166
Chapter 11: Branch circuit power meter (BCPM)
ION Setup 3.0 Device Configuration Guide
BCPM setup screens
The following sections describe what setup screens are available on the BCPM device.
Some setup parameters only apply to particular models/options.
Basic setup
Configuration
Select the option that corresponds to how the CT strips or adapter boards are arranged and
installed inside the panel. Refer to the installation guide for details.
Location
Type a name that identifies each panel and/or describes its physical location.
Auxiliary CT sizes
Auxiliary #1 (Amps) to Auxiliary #4 (Amps)
These define the Auxiliary or “Mains” CT size (typically 200 A). Type the appropriate numeric
value for each auxiliary CT installed in the panel.
Branch Circuit CT sizes
Channel #1 (Amps) to Channel #42 (Amps)
These define the Channel or “Branch” CT size. For the BCPM, this is set to 100 A. For the
BCPMSC, select the appropriate CT size (50 A or 100 A) to match the split core CT installed
on the corresponding channel, or select “Disabled” to turn off (disable) that particular channel.
Breaker sizes
Auxiliary #1 (Amps) to Auxiliary #4 (Amps)
These define the Auxiliary or “Mains” breaker size (typically 225 A). Type the appropriate
numeric value for each auxiliary breaker in the panel. For unused breakers, set the value to
zero ("0") to disable alarms for those channels.
Channel #1 (Amps) to Channel #42 (Amps)
These define the Channel or “Branch” breaker size (typically 20 A). Type the appropriate
numeric value for each channel breaker in the panel. Enter a value of zero (“0”) to disable
alarms for that particular channel (for example, for unused channels, or to temporarily disable
alarms when performing routine maintenance on the breaker circuit).
Page 148 of 166
© 2014 Schneider Electric. All rights reserved.
ION Setup 3.0 Device Configuration Guide
Chapter 11: Branch circuit power meter (BCPM)
Demand setup
Demand is the average power consumption over a fixed time interval (demand period),
typically 15 minutes. Demand values are calculated for each sub-interval, then averaged
over the number of sub-intervals that make up the demand period.
Number of Sub-intervals
Type the number of sub-intervals used for calculating demand (default = 1).
Sub-interval Length (secs)
Type the number of seconds for each sub-interval (default = 900 seconds).
Instantaneous Current Alarms
The instantaneous current alarm setup parameters define the maximum (high alarm) and
minimum (low alarm) limits for all branch and main circuits monitored by the Branch circuit
power meter. Instantaneous current alarms are ON only if the alarm conditions are met.
These alarms are reset automatically (alarm is turned OFF or cleared when circuit current
returns to the normal range).
High Alarm Threshold
Type the instantaneous current value, expressed as a percentage of the breaker size (default
= 60%). When the circuit current exceeds that value, the high current alarm is activated. To
disable this alarm, set value = 0 (zero).
• Example: If the threshold is set to 60%, the high alarm would be activated when
instantaneous current for a 20 A breaker exceeds 12 A (that is, 20 A x 0.60).
Low Alarm Threshold
Type the instantaneous current value, expressed as a percentage of the breaker size (default
= 5%). When the circuit current falls below that value, the low current alarm is activated. To
disable this alarm, set value = 0 (zero).
• Example: If the threshold is set to 5%, the low alarm would be activated when
instantaneous current for a 20 A breaker drops below 1 A (that is, 20 A x 0.05).
Hysteresis
Type the value, expressed as a percentage of the alarm threshold, that defines how much
the circuit current must fall below the High alarm threshold or rise above the Low alarm
threshold to determine the alarm’s “OFF” state (default = 5%). To disable the instantaneous
current alarms, set Hysteresis to zero (0%).
• Example: If hysteresis is set to 5%, the “OFF” state for a high alarm threshold of 12 A
would be at 11.4 A and below (that is, 12 A minus (12 A x 0.05)), while the “OFF” state for
a low alarm threshold of 3 A would be at 3.15 A and above (that is, 3 A plus (3 A x 0.05)).
© 2014 Schneider Electric. All rights reserved.
Page 149 of 166
Chapter 11: Branch circuit power meter (BCPM)
ION Setup 3.0 Device Configuration Guide
Latching Current Alarms
The latching current alarm setup parameters define the alarm delay (timer) and threshold
(limit) for all branch and main circuits monitored by the Branch circuit power meter. Latched
alarms remain ON until the user resets or clears the alarms.
The alarm delay setting defines how many seconds a circuit needs to be in an alarm state
(that is, exceeds the high or High-High alarm threshold, or falls below the Low or Low-Low
alarm threshold) before the alarm is activated. A return to normal (non-alarm) state is
instantaneous, so the alarm delay timer is reset if the current in the circuit returns to normal
state before the timer expires.
The alarm threshold setting defines the limit for a high current or low current alarm state,
expressed as a percentage of the breaker size.
High-High Alarm Delay (s)
Type the number of seconds the current in a circuit needs to be continuously above the
High-High Alarm Threshold before the High-High alarm is activated (default = 10 s).
High Alarm Delay (s)
Type the number of seconds the current in a circuit needs to be continuously above the High
Alarm Threshold before the High alarm is activated (default = 10 s).
Low Alarm Delay (s)
Type the number of seconds the current in a circuit needs to be continuously below the Low
Alarm Threshold before the Low alarm is activated (default = 10 s).
Low-Low Alarm Delay (s)
Type the number of seconds the current in a circuit needs to be continuously below the LowLow Alarm Threshold before the Low-Low alarm is activated (default = 10 s).
Page 150 of 166
© 2014 Schneider Electric. All rights reserved.
ION Setup 3.0 Device Configuration Guide
Chapter 11: Branch circuit power meter (BCPM)
Latching Alarm On Time (s)
Type the number of seconds the current in a circuit needs to stay above the Low-Low alarm
threshold level before the latching alarms are armed/enabled (default = 10 s).
Latching Alarm Off Time (s)
Type the number of seconds the current in a circuit needs to be below the Low-Low Alarm
Threshold level before the latching alarm is deactivated (default = 30 s). After this point, on
this channel, all latching alarms are disabled.
High-High Alarm Threshold (%)
Type the limit for the High-High current alarm state, expressed as a percentage of the
breaker size (default = 70%). For example, the High-High alarm threshold for a 20 A breaker
is 14 A (that is, 20 x 0.70). To disable this alarm (for all channels) set its threshold value to
0%.
High Alarm Threshold (%)
Type the limit for the High current alarm state, expressed as a percentage of the breaker size
(default = 60%). For example, the High alarm threshold for a 20 A breaker is 12 A (that is,
20 x 0.60). To disable this alarm (for all channels) set its threshold value to 0%.
Low Alarm Threshold (%)
Type the limit for the Low current alarm state, expressed as a percentage of the breaker size
(default = 7.5%). For example, the Low alarm threshold for a 20 A breaker is 1.5 A (that is,
20 x 0.075). To disable this alarm (for all channels) set its threshold value to 0%.
Low-Low Alarm Threshold (%)
Type the limit for the Low-Low current alarm state, expressed as a percentage of the breaker
size (default = 2.5%). For example, the Low-Low alarm threshold for a 20 A breaker is 0.5 A
(that is, 20 x 0.025). To disable this alarm (for all channels) set its threshold value to 0%.
© 2014 Schneider Electric. All rights reserved.
Page 151 of 166
Chapter 11: Branch circuit power meter (BCPM)
ION Setup 3.0 Device Configuration Guide
Latching Alarm examples
Example 1
A
B
C
D
E
F
G
I
Page 152 of 166
Current rises above LL (low-low alarm threshold) — this starts the zero current alarm ON timer.
Current drops below LL before the zero current alarm ON time period ends, so alarming is not enabled. The
zero current alarm ON timer is reset.
Current rises above LL — this starts the zero current alarm ON timer.
Current remains above the low-low alarm threshold, beyond the time period specified by the zero current
alarm ON time setting — this enables the latching alarms (all latching alarms are armed).
Current rises above H (high alarm threshold) — this starts the high alarm delay timer.
Current rises above HH (high-high alarm threshold) — this starts the high-high alarm delay timer.
Current drops below HH before the high-high alarm delay period ends, so the high-high alarm delay timer is
reset.
High alarm is latched at the end of the high alarm delay time period.
© 2014 Schneider Electric. All rights reserved.
ION Setup 3.0 Device Configuration Guide
Chapter 11: Branch circuit power meter (BCPM)
Example 2
A
B
C
D
E
F
G
Current rises above LL (low-low alarm threshold) — this starts the zero current alarm ON timer.
Current remains above the low-low alarm threshold, beyond the time period specified by the zero current
alarm ON time setting — this enables the latching alarms (all latching alarms are armed).
Current drops below L (low alarm threshold) — this starts the low alarm delay timer.
Current drops below LL (low-low alarm threshold) — this starts the low-low alarm delay timer and the zero
current alarm delay timer.
Low alarm is latched at the end of the L delay (low alarm delay) time period.
Low-low alarm is latched at the end of the L-L delay (low-low alarm delay) time period.
Current remains below the low-low alarm threshold, beyond the time period specified in the zero current
alarm delay time setting, thus latching the zero current alarm.
© 2014 Schneider Electric. All rights reserved.
Page 153 of 166
Chapter 11: Branch circuit power meter (BCPM)
ION Setup 3.0 Device Configuration Guide
Voltage Alarms
The voltage alarm setup parameters define the alarm delay (timer) and threshold (limit) for
voltage inputs monitored by the BCPM / BCPMSC (if your BCPM / BCPMSC model option
supports this feature).
The alarm delay setting defines how many seconds a voltage input needs to be in an alarm
state (that is, exceeds the over voltage alarm threshold, or falls below the under voltage
alarm threshold) before the alarm is activated. A return to normal (non-alarm) state is
instantaneous, so the alarm delay timer is reset if the voltage returns to normal state before
the timer expires.
The alarm threshold setting defines the limit for a high voltage or low voltage alarm state,
expressed as a percentage of the breaker size. To disable an alarm, set its threshold value to
0 (zero) Volts.
Over Voltage Delay (s)
Type the number of seconds the voltage needs to be continuously above the Over Voltage
Threshold level before the Over Voltage alarm is activated.
Under Voltage Delay (s)
Type the number of seconds the voltage needs to be continuously below the Under Voltage
Threshold level before the Under Voltage alarm is activated.
Over Voltage Threshold (V)
Type the limit for the Over Voltage alarm state, in Volts. To disable this alarm (for all voltage
inputs) set its threshold value to 0 Volts.
Under Voltage Threshold (V)
Type the limit for the Under Voltage alarm state, in Volts. To disable this alarm (for all voltage
inputs) set its threshold value to 0 Volts.
Voltage Alarm Hysteresis (%)
Type the value, expressed as a percentage of the alarm threshold, that defines how much the
voltage must fall below the Over voltage threshold or rise above the Under voltage threshold,
to determine the alarm’s “OFF” state.
• Example: If the Over Voltage Threshold is set to 270 V and the Under Voltage Threshold is
set to 200 V, a 5% hysteresis would result in an over voltage alarm “OFF” state at 256.5 V
and below (that is, 270 V minus (270 V x 0.05)), and an under voltage alarm “OFF” state at
190 V and above (that is, 200 V minus (200 V x 0.05)).
Page 154 of 166
© 2014 Schneider Electric. All rights reserved.
ION Setup 3.0 Device Configuration Guide
Chapter 12: Enercept meter
Chapter 12: Enercept meter
The Enercept meter is a cost-effective solution for standard energy metering applications. It
combines easy-to-install split-core CTs and highly accurate digital metering and
communications electronics in the same package. Its unique design reduces installation
costs by eliminating the need for a separate meter enclosure or to disconnect conductors.
There are two models of the Enercept meter. The Basic model reports power and energy,
while the Enhanced model provides multiple parameters, including power, demand, energy,
amps, volts, power factor, and reactive power.
For more information, refer to the meter documentation available from www.schneiderelectric.com.
In this section
Enercept meter setup
156
Using ION Setup
156
Enercept setup screens
Basic setup
Enercept data screen
Resetting energy and demand values
© 2014 Schneider Electric. All rights reserved.
156
156
157
157
Page 155 of 166
Chapter 12: Enercept meter
ION Setup 3.0 Device Configuration Guide
Enercept meter setup
Before using ION Setup, make sure all the communications settings for the Enercept meter
have been configured, as explained in the meter documentation.
The Enercept meter uses Modbus RTU protocol to communicate through its RS-485 serial
communications port.
• Device communications settings: Make sure all the devices on the same RS-485 loop are
set to the same baud rate and parity. The Enercept operates at 9600 baud and uses 8N1
format (8 data bits, No parity, 1 stop bit).
• Device address (unit ID) settings: Make sure the device address (unit ID) is unique for
each device in a given RS-485 loop (range = 1 to 247 for Modbus devices). If the Enercept
meter is connected on the same RS-485 loop as devices using ION™ protocol, do not use
address 16 (likewise, address 0 or 1 must not be used for the ION protocol devices). Refer
to the Enercept meter documentation for more information.
Using ION Setup
Use Network mode in ION Setup to add and configure the Enercept meter. See the “Starting,
Logging On and Logging Off” section of the ION Setup Help for more information on the
operation modes, and starting and logging onto ION Setup.
Refer to the ION Setup online help for information on adding sites and meters.
Enercept setup screens
Basic setup parameters are available only for the Enhanced model of the Enercept meter.
Enhanced models can be identified by the prefix “E” in the part number, while Basic models
are identified by the prefix “B”.
Basic setup
System Type
Select the option that describes how your Enercept meter is connected to the electrical
service. Refer to the meter documentation for typical installation examples.
Number of Sub-Intervals
Enter the number of sub-intervals used for calculating demand. Demand is the average
power consumption over a fixed time period (demand period), typically 15 minutes. Demand
values are calculated for each sub-interval, then averaged over the number of sub-intervals
that make up the demand period.
Page 156 of 166
© 2014 Schneider Electric. All rights reserved.
ION Setup 3.0 Device Configuration Guide
Chapter 12: Enercept meter
Sub-Interval Length
Select the time duration for each sub-interval (in minutes), or select "Sync to Comm" to start
the demand interval using a command from the monitoring software, such as PowerLogic™
System Manager Software (SMS).
Enercept data screen
ION Setup supports real-time data display for the Enercept meter:
1. While the Enercept meter is selected, click View > Data Screens (or click the
button).
2. Double-click the RealTime icon to display the data from the Enercept.
Resetting energy and demand values
You can reset Demand Period, Peak Demand or kWh by clicking the appropriate button.
Enter the password when prompted (default is “0”).
© 2014 Schneider Electric. All rights reserved.
Page 157 of 166
Chapter 12: Enercept meter
Page 158 of 166
ION Setup 3.0 Device Configuration Guide
© 2014 Schneider Electric. All rights reserved.
ION Setup 3.0 Device Configuration Guide
Chapter 13: ION6200 power and energy meter
Chapter 13: ION6200 power and energy meter
The ION6200 power and energy meter is low-cost, compact and has a big, bright LED
display for increased visibility in poor lighting conditions.
In this section
ION6200 meter setup
160
ION6200 setup screens
161
Basic setup
161
Communications
162
Demand
162
Display
162
Outputs
163
Scaling
163
Wiring setup
164
© 2014 Schneider Electric. All rights reserved.
Page 159 of 166
Chapter 13: ION6200 power and energy meter
ION Setup 3.0 Device Configuration Guide
ION6200 meter setup
Before using ION Setup, make sure all the communications settings for the meter have been
configured, as explained in the ION6200 Installation and Operation Guide.
The ION6200 meter uses either the PML or Modbus RTU protocol to communicate through
its RS-485 serial communications port.
Note
If the ION6200 meter is set to Modbus communications protocol (“MOD”), select the
device type “Modbus RTU Device” when adding it to the ION Setup network. If the
protocol is set to “PML”, select the device type “ION6200”.
You can change the protocol setting using the front panel (or remote) display of the ION6200.
Use Network mode in ION Setup to connect to the ION6200 meter; see the “Starting,
Logging On and Logging Off” section of the ION Setup Help for more information on the
operation modes, and starting and logging onto ION Setup.
Adding the ION6200 as a Modbus device
To add the ION6200 meter as a Modbus RTU device, first use the meter’s front panel or
remote display to set the communications protocol to Modbus. Refer to the ION6200
Installation and Operation Guide for details.
Using ION Setup
1. Add the ION6200 meter to a site (for example, to a Modbus gateway site) and select
“Modbus RTU device” for device type.
2. Click the Display tab, select the appropriate template option for the ION6200, then click
OK.
Page 160 of 166
© 2014 Schneider Electric. All rights reserved.
ION Setup 3.0 Device Configuration Guide
Chapter 13: ION6200 power and energy meter
Adding the ION6200 as an ION device
To add the ION6200 as an ION device, use the meter’s front panel or remote display to set
the communications protocol to ION. Refer to the ION6200 Installation and Operation Guide
for details.
Use ION Setup to add the meter to a site (to an Ethernet gateway site, for example) and
select “ION6200” for device type. Click OK.
ION6200 setup screens
The following sections describe what setup screens are available on the ION6200 meter.
Basic setup
Use the Basic Setup screen to configure the setup register so the meter displays the correct
power monitoring values.
Volts Mode
Select the option that describes how your ION6200 meter is wired to the electrical service.
PT Primary
Enter the value in Volts for the PT (potential transformer) Primary.
PT Secondary
Enter the value in Volts for the PT secondary.
Note
If a PT is not used, enter the system’s nominal voltage for both the PT Primary and PT
Secondary settings (for example, voltage L-L for Direct Delta connection).
CT Primary
Enter the value in Amps for the CT (current transformer) primary.
CT Secondary
Enter the value in Amps for the CT secondary.
© 2014 Schneider Electric. All rights reserved.
Page 161 of 166
Chapter 13: ION6200 power and energy meter
ION Setup 3.0 Device Configuration Guide
Communications
When ION Setup connects to the ION6200, the meter’s communications settings are
displayed on the Communications setup screen.
Note
Altering the settings of a communications channel that is in use can cause a loss of
communications with the meter.
Baud Rate
Displays the meter’s serial communications baud rate setting.
Protocol
Displays the meter’s serial communications protocol setting.
Note
The “Factory” protocol is only used by Technical Support for troubleshooting purposes.
Unit ID
Displays the meter’s unit ID.
RTS Delay
Displays the RTS (ready-to-send) delay setting for the meter’s serial communication.
Demand
Demand is the average power consumption over a fixed time period (demand period), which
is usually fifteen minutes. Demand values are calculated for each sub-interval, then
averaged over the number of sub-intervals that make up the demand period.
Period (mins)
This is the time duration in minutes for each sub-interval.
# of Intervals
This is the number of demand periods (sub-intervals). Enter the number of sub-intervals used
for calculating demand.
Display
Use the Display setup screen to configure how the front panel/remote display behaves.
Scroll Time
Enter the number of seconds until the next set of values is displayed on the front panel. To
disable scrolling, set Scroll Time to 0 (zero).
Page 162 of 166
© 2014 Schneider Electric. All rights reserved.
ION Setup 3.0 Device Configuration Guide
Chapter 13: ION6200 power and energy meter
Refresh Period
Enter the number of seconds until the front panel display refreshes its values.
Outputs
The Kt (pulse weight, or time constant) value defines the amount of energy (for example,
kWh, kVAh, kVARh) represented by each calibration pulse of the meter’s LED or digital
output.
Kt Digital Output 1
This defines the Kt value for digital output #1.
Kt Digital Output 2
This defines the Kt value for digital output #2.
Kt IRDA
This applies only to meters with firmware v207 and earlier versions, and defines the Kt value
for the infrared data port when used for energy pulsing.
Digital Output 1 Mode
For digital output #1, select energy pulsing (kWh, kVAh, kVARh) or external pulsing (Ext).
Digital Output 2 Mode
For digital output #1, select energy pulsing (kWh, kVAh, kVARh) or external pulsing (Ext).
IRDA Mode
Only applies to meters with firmware v207 and earlier. This is used to set the infrared data
port for energy pulsing (kWh, kVAh, kVARh) or external pulsing (Ext).
Scaling
The following Modbus scaling registers should not be changed from their default settings
unless Modbus protocol is being used. Changes to these registers affect only the values
displayed in software (they have no effect on values displayed on the meter's front panel). To
set the scaling, select the appropriate multiplier (“x 0.001”, “x 0.01”, “x 0.1”, “x 1”, “x 10”, “x
100” or “x 1000”).
Modbus Scaling Registers
• Voltage Scale
• Current Scale
• Neutral Scale
• Power Scale
© 2014 Schneider Electric. All rights reserved.
Page 163 of 166
Chapter 13: ION6200 power and energy meter
ION Setup 3.0 Device Configuration Guide
Wiring setup
The following parameters allow you to change the polarity of the individual voltage and
current inputs so that they match how the PTs and CTs are oriented in the electrical system.
Default is set to Normal for all inputs. You can change the setting to Inverted as required:
Wiring Setup Registers
• V1 Polarity
• V2 Polarity
• V3 Polarity
• I1 Polarity
• I2 Polarity
• I3 Polarity
Page 164 of 166
© 2014 Schneider Electric. All rights reserved.
PowerLogic ION Setup 3.0
Device Configuration Guide
ION, ION Enterprise, Modbus, PowerLogic and Schneider Electric are either trademarks or
registered trademarks of Schneider Electric in France, the USA and other countries. Other
trademarks used are the property of their respective owners.
Electrical equipment should be installed, operated, serviced and maintained only by qualified
personnel. No responsibility is assumed by Schneider Electric for any consequences arising out of
Schneider Electric
the use of this material.
35, rue Joseph Monier
CS 30323
F - 92506 Rueil Malmaison Cedex
7EN02-0293-06 01/2014
www.schneider-electric.com
© 2014 Schneider Electric. All Rights Reserved.