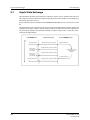
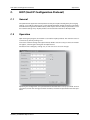
1
INVERTER Plug-in option A8NPRT_2P INSTRUCTION MANUAL PROFINET communication interface Doc.Id. HMSI-27-207 Doc.Rev. 1.00 Connecting DevicesTM +$/067$'&+,&$*2.$5/658+(72.<2%(,-,1*0,/$1208/+286(&29(175<381(&23(1+$*(1 Important User Information This document is intended to provide a good understanding of the functionality offered by the A8NPRT_2P PROFINET Option Board. The document only describes the features that are specific to the option board. For general information regarding the FR-A800 inverter, consult the FR-A800 inverter design guides. The reader of this document is expected to be familiar with high level software design, and communication systems in general. The use of advanced PROFINET-specific functionality may require in-depth knowledge in PROFINET networking internals and/or information from the official PROFINET specifications. In such cases, the people responsible for the implementation of this product should either obtain the PROFINET specification to gain sufficient knowledge or limit their implementation in such a way that this is not necessary. Liability Every care has been taken in the preparation of this manual. Please inform HMS Industrial Networks AB of any inaccuracies or omissions. The data and illustrations found in this document are not binding. We, HMS Industrial Networks AB, reserve the right to modify our products in line with our policy of continuous product development. The information in this document is subject to change without notice and should not be considered as a commitment by HMS Industrial Networks AB. HMS Industrial Networks AB assumes no responsibility for any errors that may appear in this document. There are many applications of this product. Those responsible for the use of this device must ensure that all the necessary steps have been taken to verify that the applications meet all performance and safety requirements including any applicable laws, regulations, codes, and standards. HMS Industrial Networks AB will under no circumstances assume liability or responsibility for any problems that may arise as a result from the use of undocumented features, timing, or functional side effects found outside the documented scope of this product. The effects caused by any direct or indirect use of such aspects of the product are undefined, and may include e.g. compatibility issues and stability issues. The examples and illustrations in this document are included solely for illustrative purposes. Because of the many variables and requirements associated with any particular implementation, HMS Industrial Networks AB cannot assume responsibility for actual use based on these examples and illustrations. Intellectual Property Rights HMS Industrial Networks AB has intellectual property rights relating to technology embodied in the product described in this document. These intellectual property rights may include patents and pending patent applications in the US and other countries. Trademark Acknowledgements Anybus® is a registered trademark of HMS Industrial Networks AB. All other trademarks are the property of their respective holders. A8NPRT_2P PROFINET Option Board I CAUTION • This is a class A product. In a domestic environment this product may cause radio interference in which case the user may be required to take adequate measures. • ESD Note This product contains ESD (Electrostatic Discharge) sensitive parts that may be damaged if ESD control procedures are not followed. Static control precautions are required when handling the product. Failure to observe this may cause damage to the product. A8NPRT_2P PROFINET Option Board Instruction Manual Rev 1.00 Copyright© HMS Industrial Networks AB March 2014 Doc Id HMSI-27-207 II Doc.Id. HMSI-27-207 Doc.Rev. 1.00 Thank you for choosing this Mitsubishi Inverter plug-in option for the Mitsubishi FR-A800 Series Inverter. This Instruction Manual gives handling information and precautions for use of this equipment. Incorrect handling may cause an unexpected failure or damage. In order to ensure optimal performance, please read this manual carefully prior to use of the equipment. Please forward this manual to the end user of the equipment. This section is specifically about safety matters Do not attempt to install, operate, maintain or inspect this product until you have read through this Instruction Manual and any related documents carefully, and can use the equipment correctly. Do not use this product until you have a full working knowledge of the equipment, safety information and instructions. In this Instruction Manual, the safety instruction levels are classified into “WARNING” and “CAUTION” levels. Assumes that incorrect handling may cause hazardous conditions, resultWARNING ing in death or severe injury. Assumes that incorrect handling may cause hazardous conditions, resultCAUTION ing in moderate or slight injury, or may cause physical damage only. Please note that even the CAUTION level may lead to a serious consequence depending on conditions. Please be sure to follow the instructions of both levels as they are critical to personnel safety. SAFETY INSTRUCTIONS Electric Shock Prevention WARNING • Do not open any cover on the inverter while power is on or while the inverter is running, as an electrical shock may result. • Do not operate the inverter with any cover or wiring cover removed, as accidental contact with exposed high-voltage terminals and internal components may occur, resulting in an electrical shock. • If power is off do not remove any cover except when necessary for wiring or periodic inspection. While any cover is removed, accidental contact with exposed high-voltage terminals and internal components may occur, resulting in an electrical shock. • Prior to starting wiring or inspection, confirm that input power to the inverter has been switched off via observation of the inverter’s display panel. Additionally, wait for at least 10 minutes after removal of input power, and then confirm that all residual voltage has been dissipated by using a voltage meter. Internal DC bus capacitors may contain high voltages for several minutes after removal of input power, resulting in a dangerous situation should anything come into contact with them. • All personnel involved in the installation or inspection of this equipment should be fully competent to perform the required work. • Always install plug-in options prior to wiring main power. • Do not touch the plug-in option with wet hands. • Do not subject the cables to scratches, excessive stress, heavy loads or pinching. Injury Prevention CAUTION • To prevent explosions or similar damage, apply only the voltages specified in the instruction manual to each terminal. • To prevent explosions or similar damage, ensure that all cables are properly connected to the correct terminals. • To prevent explosions or similar damage, observe all wiring polarity indicators. • To prevent burns from hot components, do not touch the inverter while power is on, or for some time after power is removed. A8NPRT_2P PROFINET Option Board III Additional Instructions Please note the following points to prevent equipment damage, injury or electrical shock. Transportation and mounting CAUTION • • • • Do not install or operate the plug-in option if it is damaged or has parts missing. Do not stand or rest heavy objects on the equipment. Check that the mounting orientation is correct. Prevent conductive items such as screws and metal fragments, or flammable substances such as oil from entering the inverter. Trial run CAUTION • To prevent unexpected equipment movement, confirm and adjust all required parameters prior to starting operation. Usage WARNING • Do not modify the equipment. • Do not remove any inverter or option parts unless specifically instructed to do so in this manual. CAUTION • Performing a “parameter clear” or “all parameter clear” will reset all inverter parameters to their factory default settings. After performing one of these operations, remember to reenter any custom parameter values prior to starting operation. • To prevent damage from electric discharge, always touch a grounded piece of metal prior to touching any equipment. Maintenance, inspection and parts replacement CAUTION • Do not perform hi-pot tests on the equipment. Disposal CAUTION • Contact the local or state environmental agency in your area for details on the disposal of electrical components and packaging. General instruction For clarity purposes, illustrations in this manual may be drawn with covers or safety guards removed. Ensure all covers and safety guards are properly installed prior to starting operation. IV Doc.Id. HMSI-27-207 Doc.Rev. 1.00 Table of Contents Table of Contents About This Document . . . . . . . . . . . . . . . . . . . . . . . . . . . . . . . . . . . . . . . . . . . 1 Related Documents . . . . . . . . . . . . . . . . . . . . . . . . . . . . . . . . . . . . . . . . . . . . . . . . . . . . . . . . . . . . . . . . . . 1 Download . . . . . . . . . . . . . . . . . . . . . . . . . . . . . . . . . . . . . . . . . . . . . . . . . . . . . . . . . . . . . . . . . . . . . . . . . . . 1 Document History . . . . . . . . . . . . . . . . . . . . . . . . . . . . . . . . . . . . . . . . . . . . . . . . . . . . . . . . . . . . . . . . . . . . 2 Conventions & Terminology . . . . . . . . . . . . . . . . . . . . . . . . . . . . . . . . . . . . . . . . . . . . . . . . . . . . . . . . . . 3 Support . . . . . . . . . . . . . . . . . . . . . . . . . . . . . . . . . . . . . . . . . . . . . . . . . . . . . . . . . . . . . . . . . . . . . . . . . . . . . . 3 1. Pre-Operation Instructions. . . . . . . . . . . . . . . . . . . . . . . . . . . . . . . . . . . . . . . 5 1.1 History . . . . . . . . . . . . . . . . . . . . . . . . . . . . . . . . . . . . . . . . . . . . . . . . . . . . . . . . . . . . . . . . . . . . . . . . . . . . . . . 5 1.2 Product Overview . . . . . . . . . . . . . . . . . . . . . . . . . . . . . . . . . . . . . . . . . . . . . . . . . . . . . . . . . . . . . . . . . . . . 5 1.3 Features. . . . . . . . . . . . . . . . . . . . . . . . . . . . . . . . . . . . . . . . . . . . . . . . . . . . . . . . . . . . . . . . . . . . . . . . . . . . . . 6 1.4 Unpacking and Product Confirmation . . . . . . . . . . . . . . . . . . . . . . . . . . . . . . . . . . . . . . . . . . . . . . . . . 7 1.4.1 Shipment Confirmation. . . . . . . . . . . . . . . . . . . . . . . . . . . . . . . . . . . . . . . . . . . . . . . . . . . . . . . . 7 1.4.2 Component Overview . . . . . . . . . . . . . . . . . . . . . . . . . . . . . . . . . . . . . . . . . . . . . . . . . . . . . . . . . 7 1.5 Environmental Specifications . . . . . . . . . . . . . . . . . . . . . . . . . . . . . . . . . . . . . . . . . . . . . . . . . . . . . . . . . 8 2. Installation . . . . . . . . . . . . . . . . . . . . . . . . . . . . . . . . . . . . . . . . . . . . . . . . . . . . . 9 2.1 Pre-installation Instructions . . . . . . . . . . . . . . . . . . . . . . . . . . . . . . . . . . . . . . . . . . . . . . . . . . . . . . . . . . . 9 2.2 Installation Procedure . . . . . . . . . . . . . . . . . . . . . . . . . . . . . . . . . . . . . . . . . . . . . . . . . . . . . . . . . . . . . . . . 9 2.3 Network Connector (RJ45) . . . . . . . . . . . . . . . . . . . . . . . . . . . . . . . . . . . . . . . . . . . . . . . . . . . . . . . . . . . 12 2.4 LED Indicators . . . . . . . . . . . . . . . . . . . . . . . . . . . . . . . . . . . . . . . . . . . . . . . . . . . . . . . . . . . . . . . . . . . . . . . 13 3. Get Started . . . . . . . . . . . . . . . . . . . . . . . . . . . . . . . . . . . . . . . . . . . . . . . . . . . . 15 3.1 Physical Installation. . . . . . . . . . . . . . . . . . . . . . . . . . . . . . . . . . . . . . . . . . . . . . . . . . . . . . . . . . . . . . . . . . 15 3.2 Download GSD file. . . . . . . . . . . . . . . . . . . . . . . . . . . . . . . . . . . . . . . . . . . . . . . . . . . . . . . . . . . . . . . . . . . 15 3.3 Inverter setup . . . . . . . . . . . . . . . . . . . . . . . . . . . . . . . . . . . . . . . . . . . . . . . . . . . . . . . . . . . . . . . . . . . . . . . 15 3.4 Profinet Controller setup using CCPU. . . . . . . . . . . . . . . . . . . . . . . . . . . . . . . . . . . . . . . . . . . . . . . . . 16 3.5 Preparing the GX Works Project . . . . . . . . . . . . . . . . . . . . . . . . . . . . . . . . . . . . . . . . . . . . . . . . . . . . . . 22 3.6 GX Works Telegram 1 example . . . . . . . . . . . . . . . . . . . . . . . . . . . . . . . . . . . . . . . . . . . . . . . . . . . . . . . 25 3.7 GX Works Telegram 102 example. . . . . . . . . . . . . . . . . . . . . . . . . . . . . . . . . . . . . . . . . . . . . . . . . . . . . 27 3.8 GX Works Acyclic communication example . . . . . . . . . . . . . . . . . . . . . . . . . . . . . . . . . . . . . . . . . . . 30 3.8.1 Reading a parameter (Sequence 1) . . . . . . . . . . . . . . . . . . . . . . . . . . . . . . . . . . . . . . . . . . . . 30 3.8.2 Reading an array of parameters (Sequence 3). . . . . . . . . . . . . . . . . . . . . . . . . . . . . . . . . . 34 3.8.3 Changing parameters (Sequence 2) . . . . . . . . . . . . . . . . . . . . . . . . . . . . . . . . . . . . . . . . . . . 36 3.9 GX Works Network Detect. . . . . . . . . . . . . . . . . . . . . . . . . . . . . . . . . . . . . . . . . . . . . . . . . . . . . . . . . . . . 39 3.10 TIA Portal Telegram 1 example . . . . . . . . . . . . . . . . . . . . . . . . . . . . . . . . . . . . . . . . . . . . . . . . . . . . . . . 40 3.11 TIA Portal Telegram 102 example. . . . . . . . . . . . . . . . . . . . . . . . . . . . . . . . . . . . . . . . . . . . . . . . . . . . . 49 A8NPRT_2P PROFINET Option Board V Table of Contents VI 3.12 TIA Portal Acyclic communication example . . . . . . . . . . . . . . . . . . . . . . . . . . . . . . . . . . . . . . . . . . . 51 3.12.1 Reading a parameter (Sequence 1) . . . . . . . . . . . . . . . . . . . . . . . . . . . . . . . . . . . . . . . . . . . . 51 3.12.2 Changing parameters (Sequence 2) . . . . . . . . . . . . . . . . . . . . . . . . . . . . . . . . . . . . . . . . . . . 58 3.13 SIMATIC STEP7 example . . . . . . . . . . . . . . . . . . . . . . . . . . . . . . . . . . . . . . . . . . . . . . . . . . . . . . . . . . . . . 62 3.13.1 Creating a Configuration . . . . . . . . . . . . . . . . . . . . . . . . . . . . . . . . . . . . . . . . . . . . . . . . . . . . . 62 3.13.2 Download Configuration to the PLC. . . . . . . . . . . . . . . . . . . . . . . . . . . . . . . . . . . . . . . . . . . 67 3.13.3 Run . . . . . . . . . . . . . . . . . . . . . . . . . . . . . . . . . . . . . . . . . . . . . . . . . . . . . . . . . . . . . . . . . . . . . . . . . . 69 3.14 Parameter Settings . . . . . . . . . . . . . . . . . . . . . . . . . . . . . . . . . . . . . . . . . . . . . . . . . . . . . . . . . . . . . . . . . . 70 3.14.1 Parameter Unit . . . . . . . . . . . . . . . . . . . . . . . . . . . . . . . . . . . . . . . . . . . . . . . . . . . . . . . . . . . . . . . 70 4. Inverter Settings . . . . . . . . . . . . . . . . . . . . . . . . . . . . . . . . . . . . . . . . . . . . . . . 71 4.1 Inverter Parameters. . . . . . . . . . . . . . . . . . . . . . . . . . . . . . . . . . . . . . . . . . . . . . . . . . . . . . . . . . . . . . . . . . 71 4.2 Option Board Parameters . . . . . . . . . . . . . . . . . . . . . . . . . . . . . . . . . . . . . . . . . . . . . . . . . . . . . . . . . . . . 72 4.3 Operation Mode Setting . . . . . . . . . . . . . . . . . . . . . . . . . . . . . . . . . . . . . . . . . . . . . . . . . . . . . . . . . . . . . 74 5. Identifying the Option Board. . . . . . . . . . . . . . . . . . . . . . . . . . . . . . . . . . . . 75 5.1 Siemens Primary Setup Tool. . . . . . . . . . . . . . . . . . . . . . . . . . . . . . . . . . . . . . . . . . . . . . . . . . . . . . . . . . 75 5.2 IP Address . . . . . . . . . . . . . . . . . . . . . . . . . . . . . . . . . . . . . . . . . . . . . . . . . . . . . . . . . . . . . . . . . . . . . . . . . . . 75 6. Embedded Web Server . . . . . . . . . . . . . . . . . . . . . . . . . . . . . . . . . . . . . . . . . 77 6.1 Overview . . . . . . . . . . . . . . . . . . . . . . . . . . . . . . . . . . . . . . . . . . . . . . . . . . . . . . . . . . . . . . . . . . . . . . . . . . . . 77 6.2 Authorization. . . . . . . . . . . . . . . . . . . . . . . . . . . . . . . . . . . . . . . . . . . . . . . . . . . . . . . . . . . . . . . . . . . . . . . . 77 6.3 Web Pages . . . . . . . . . . . . . . . . . . . . . . . . . . . . . . . . . . . . . . . . . . . . . . . . . . . . . . . . . . . . . . . . . . . . . . . . . . 78 6.3.1 Network Interface . . . . . . . . . . . . . . . . . . . . . . . . . . . . . . . . . . . . . . . . . . . . . . . . . . . . . . . . . . . . 78 6.3.2 Parameter Data. . . . . . . . . . . . . . . . . . . . . . . . . . . . . . . . . . . . . . . . . . . . . . . . . . . . . . . . . . . . . . . 81 6.3.3 Drive Monitor . . . . . . . . . . . . . . . . . . . . . . . . . . . . . . . . . . . . . . . . . . . . . . . . . . . . . . . . . . . . . . . . 83 7. File System and FTP Server. . . . . . . . . . . . . . . . . . . . . . . . . . . . . . . . . . . . . . 85 7.1 General. . . . . . . . . . . . . . . . . . . . . . . . . . . . . . . . . . . . . . . . . . . . . . . . . . . . . . . . . . . . . . . . . . . . . . . . . . . . . . 85 7.2 FTP Server . . . . . . . . . . . . . . . . . . . . . . . . . . . . . . . . . . . . . . . . . . . . . . . . . . . . . . . . . . . . . . . . . . . . . . . . . . . 85 7.2.1 Initiation . . . . . . . . . . . . . . . . . . . . . . . . . . . . . . . . . . . . . . . . . . . . . . . . . . . . . . . . . . . . . . . . . . . . . 85 7.2.2 User Accounts . . . . . . . . . . . . . . . . . . . . . . . . . . . . . . . . . . . . . . . . . . . . . . . . . . . . . . . . . . . . . . . . 85 8. PROFINET Implementation. . . . . . . . . . . . . . . . . . . . . . . . . . . . . . . . . . . . . . 87 8.1 General. . . . . . . . . . . . . . . . . . . . . . . . . . . . . . . . . . . . . . . . . . . . . . . . . . . . . . . . . . . . . . . . . . . . . . . . . . . . . . 87 8.2 Electronic Data Sheet (GSD) . . . . . . . . . . . . . . . . . . . . . . . . . . . . . . . . . . . . . . . . . . . . . . . . . . . . . . . . . . 87 8.3 Fast Start Up. . . . . . . . . . . . . . . . . . . . . . . . . . . . . . . . . . . . . . . . . . . . . . . . . . . . . . . . . . . . . . . . . . . . . . . . . 87 8.4 DAP . . . . . . . . . . . . . . . . . . . . . . . . . . . . . . . . . . . . . . . . . . . . . . . . . . . . . . . . . . . . . . . . . . . . . . . . . . . . . . . . . 87 8.5 I&M . . . . . . . . . . . . . . . . . . . . . . . . . . . . . . . . . . . . . . . . . . . . . . . . . . . . . . . . . . . . . . . . . . . . . . . . . . . . . . . . . 88 Doc.Id. HMSI-27-207 Doc.Rev. 1.00 Table of Contents 9. Data Exchange . . . . . . . . . . . . . . . . . . . . . . . . . . . . . . . . . . . . . . . . . . . . . . . . . 89 9.1 General Information . . . . . . . . . . . . . . . . . . . . . . . . . . . . . . . . . . . . . . . . . . . . . . . . . . . . . . . . . . . . . . . . . 89 9.2 Inverter parameters (Acyclic Data Exchange) . . . . . . . . . . . . . . . . . . . . . . . . . . . . . . . . . . . . . . . . . 90 9.3 Monitor Data (Acyclic and Cyclic Data Exchange) . . . . . . . . . . . . . . . . . . . . . . . . . . . . . . . . . . . . . 90 9.4 Drive Profile Parameters (Acyclic Data Exchange) . . . . . . . . . . . . . . . . . . . . . . . . . . . . . . . . . . . . . 93 9.4.1 PROFIdrive Parameters . . . . . . . . . . . . . . . . . . . . . . . . . . . . . . . . . . . . . . . . . . . . . . . . . . . . . . . 93 9.4.2 Setpoint- and Actual Value (P915/P916) . . . . . . . . . . . . . . . . . . . . . . . . . . . . . . . . . . . . . . . 94 9.4.3 Signal List (P923) . . . . . . . . . . . . . . . . . . . . . . . . . . . . . . . . . . . . . . . . . . . . . . . . . . . . . . . . . . . . . 94 9.4.4 Drive Reset (P972) . . . . . . . . . . . . . . . . . . . . . . . . . . . . . . . . . . . . . . . . . . . . . . . . . . . . . . . . . . . . 94 9.5 General State Diagram . . . . . . . . . . . . . . . . . . . . . . . . . . . . . . . . . . . . . . . . . . . . . . . . . . . . . . . . . . . . . . . 95 9.6 Process Data (Cyclic Data Exchange). . . . . . . . . . . . . . . . . . . . . . . . . . . . . . . . . . . . . . . . . . . . . . . . . . 96 9.6.1 General . . . . . . . . . . . . . . . . . . . . . . . . . . . . . . . . . . . . . . . . . . . . . . . . . . . . . . . . . . . . . . . . . . . . . . 96 9.6.2 IO Device Structure . . . . . . . . . . . . . . . . . . . . . . . . . . . . . . . . . . . . . . . . . . . . . . . . . . . . . . . . . . . 96 9.6.3 Signals . . . . . . . . . . . . . . . . . . . . . . . . . . . . . . . . . . . . . . . . . . . . . . . . . . . . . . . . . . . . . . . . . . . . . . . 96 9.6.4 Telegram Types . . . . . . . . . . . . . . . . . . . . . . . . . . . . . . . . . . . . . . . . . . . . . . . . . . . . . . . . . . . . . . 98 9.7 Acyclic Data Exchange . . . . . . . . . . . . . . . . . . . . . . . . . . . . . . . . . . . . . . . . . . . . . . . . . . . . . . . . . . . . . .100 9.7.1 Explanation of fields used in requests . . . . . . . . . . . . . . . . . . . . . . . . . . . . . . . . . . . . . . . .101 9.7.2 Data format type table. . . . . . . . . . . . . . . . . . . . . . . . . . . . . . . . . . . . . . . . . . . . . . . . . . . . . . .101 9.7.3 Error table. . . . . . . . . . . . . . . . . . . . . . . . . . . . . . . . . . . . . . . . . . . . . . . . . . . . . . . . . . . . . . . . . . .102 9.7.4 Sequence 1: Request parameter value, single. . . . . . . . . . . . . . . . . . . . . . . . . . . . . . . . .102 9.7.5 Sequence 1: Parameter response positive . . . . . . . . . . . . . . . . . . . . . . . . . . . . . . . . . . . .102 9.7.6 Sequence 1: Parameter response negative . . . . . . . . . . . . . . . . . . . . . . . . . . . . . . . . . . .103 9.7.7 Sequence 2: Change parameter value . . . . . . . . . . . . . . . . . . . . . . . . . . . . . . . . . . . . . . . .103 9.7.8 Sequence 2: Parameter response positive . . . . . . . . . . . . . . . . . . . . . . . . . . . . . . . . . . . .103 9.7.9 Sequence 2: Parameter response negative . . . . . . . . . . . . . . . . . . . . . . . . . . . . . . . . . . .103 9.7.10 Sequence 3: Request parameter value, several array elements . . . . . . . . . . . . . . . .104 9.7.11 Sequence 3: Parameter response positive . . . . . . . . . . . . . . . . . . . . . . . . . . . . . . . . . . . .104 9.7.12 Sequence 3: Parameter response negative . . . . . . . . . . . . . . . . . . . . . . . . . . . . . . . . . . .104 10. Diagnostics . . . . . . . . . . . . . . . . . . . . . . . . . . . . . . . . . . . . . . . . . . . . . . . . . . . 105 A. Translation of Signal Numbers . . . . . . . . . . . . . . . . . . . . . . . . . . . . . . . . . 107 B. Troubleshooting . . . . . . . . . . . . . . . . . . . . . . . . . . . . . . . . . . . . . . . . . . . . . . 109 C. HICP (Host IP Configuration Protocol). . . . . . . . . . . . . . . . . . . . . . . . . . . 111 C.1 General. . . . . . . . . . . . . . . . . . . . . . . . . . . . . . . . . . . . . . . . . . . . . . . . . . . . . . . . . . . . . . . . . . . . . . . . . . . . .111 C.2 Operation . . . . . . . . . . . . . . . . . . . . . . . . . . . . . . . . . . . . . . . . . . . . . . . . . . . . . . . . . . . . . . . . . . . . . . . . . .111 D. Copyright Notices . . . . . . . . . . . . . . . . . . . . . . . . . . . . . . . . . . . . . . . . . . . . . 113 Index . . . . . . . . . . . . . . . . . . . . . . . . . . . . . . . . . . . . . . . . . . . . . . . . . . . . . . . . 115 A8NPRT_2P PROFINET Option Board VII Table of Contents VIII Doc.Id. HMSI-27-207 Doc.Rev. 1.00 About This Document Related Documents About This Document For more information, documentation etc., please visit the Mitsubishi Electric website, see section "Download" below. Related Documents Document Installation guideline of Mitsubishi inverter drive Instruction manual of Mitsubishi inverter drive GX Configurator-PN 1.03 Software Manual: https://eu3a.mitsubishielectric.com/fa/en/ mymitsubishi/download_manager?id=10073 Author ME ME ME Download The following websites are available for downloads: Website https://eu3a.mitsubishielectric.com http://www.meau.com/eprise/main/sites/public/Products/ Variable_Frequency_Drives/A800/default GSD File: https://eu3a.mitsubishielectric.com/fa/en/mymitsubishi/ download_manager?id=10169 (MyMitsubishi Login required) GX Configurator-PN 1.03: https://eu3a.mitsubishielectric.com/fa/en/mymitsubishi/ download_manager?id=10069 (MyMitsubishi Login required) Profinet A800 function blocks: https://eu3a.mitsubishielectric.com/fa/en/mymitsubishi/ download_manager?id=10173 (MyMitsubishi Login required) Sample programs: https://eu3a.mitsubishielectric.com/fa/en/mymitsubishi/ download_manager?id=10171 (MyMitsubishi Login required) A8NPRT_2P PROFINET Option Board Region EU Americas EU EU EU EU 1 Document History About This Document Document History Summary of Recent Changes ( ... 1.00) Change Page(s) Revision List Revision 1.00 2 Date 03/2014 Author(s) Chapter(s) Description Doc.Id. HMSI-27-207 Doc.Rev. 1.00 About This Document Conventions & Terminology Conventions & Terminology The following conventions are used throughout this manual: • Numbered lists provide sequential steps • Bulleted lists provide information, not procedural steps • The term ‘module’ refers to the option board. • Hexadecimal values are written in the format NNNNh, where NNNN is the hexadecimal value. Support MITSUBISHI ELECTRIC EUROPE EUROPE B.V. German Branch Gothaer Straße 8 D-40880 Ratingen Phone: +49 (0) 21 02 / 486-0 Hotline: +49 2102 1805 000-765 /-766 Fax: +49 (0) 21 02 / 4 86-1 12 0 e-mail: [email protected] https://eu3a.mitsubishielectric.com MITSUBISHI ELECTRIC USA AUTOMATION 500 Corporate Woods Parkway Vernon Hills, Illinois 60061 Phone: +1 (0) 847 / 478 21 00 Fax: +1 (0) 847 / 478 03 27 MITSUBISHI ELECTRIC JAPAN CORPORATION Tokyo Bldg. 2-7-3 Marunouchi Chiyoda-Ku Tokyo 100-8310 Phone: +81 (0) 3 / 32 18 31 76 Fax: +81 (0) 3 / 32 18 24 22 Please refer to the drive manual for other region contact addresses. A8NPRT_2P PROFINET Option Board 3 Support 4 About This Document Doc.Id. HMSI-27-207 Doc.Rev. 1.00 Pre-Operation Instructions 1. Pre-Operation Instructions 1.1 History History The FR-A800 series from Mitsubishi Electric (ME), is a family of frequency inverters. The communication modules, option boards, enabling communication on different industrial networks, are developed and produced by HMS Industrial Networks. Examples of applications for the frequency inverters are: 1.2 • Lifting equipment • Warehouse systems • Extruders • Centrifuges Product Overview The A8NPRT_2P PROFINET Option Board for PROFINET allows information to be transferred seamlessly between an FR-A800 inverter and a PROFINET network with minimal configuration requirements. The option board installs directly onto the inverter’s control board, and presents two standard 10BASE-T/100BASE-TX Ethernet ports for connection to the PROFINET network. The interface also hosts an embedded web server, which provides access to inverter information via a standard web browser for remote monitoring, configuration and control. The option board is connected directly to the control board of the inverter and communicates to the inverter via a built-in communication port. Note that when the inverter’s network communication port is used by the A8NPRT_2P PROFINET Option Board, it is unavailable for use by any other network. Before using the interface, please familiarize yourself with the product and be sure to thoroughly read the instructions and precautions contained in this manual. In addition, please make sure that this instruction manual is delivered to the end user of the product, and keep this instruction manual in a safe place for future reference or unit inspection. A8NPRT_2P PROFINET Option Board 5 Features 1.3 Pre-Operation Instructions Features • Two PROFINET ports • PROFINET IO communication • Drive operation according to PROFIdrive V4.1 – Supports Application class 1 functionality 1 6 • Diagnostic support • SNMP agent • FTP server • Web server • Firmware upgrade functionality1 • Supports PROFINET Fast Start Up • 10BASE-T/100BASE-TX full duplex Ethernet interface • Auto negotiation enabled • RT communication • Network loss detection Instructions are included when downloading a new firmware version. Doc.Id. HMSI-27-207 Doc.Rev. 1.00 Pre-Operation Instructions Unpacking and Product Confirmation 1.4 Unpacking and Product Confirmation 1.4.1 Shipment Confirmation Check the enclosed items. Confirm that the correct quantity of each item was received, and that no damage occurred during shipment. 1.4.2 Component Overview Included in the package are the following items. Item PCB board No. of pcs 1 M3 x 6 mm screw 3 Board spacer 2 LED cover 1 PE plate 1 A8NPRT_2P PROFINET Option Board 7 Environmental Specifications 1.5 Pre-Operation Instructions Environmental Specifications Item Operating Temperature Specification Storage Temperature -40º to +65º Celsius 93% non condensing Relative Humidity Vibration Grounding Power Supply Cooling Method Communication Speed -10º to +50º Celsius (ambient of the drive, non-freezing) Max acceleration amplitude: 10 m/s2 at 9 - 200 Hz Max displacement amplitude: 3 mm at 2 - 9 Hz Connected to inverter frame ground through the PE plate / isolated from inverter control power common Supplied from inverter Self cooled 10/100 Mbit The A8NPRT_2P interface is lead-free / RoHS-compliant. 8 Doc.Id. HMSI-27-207 Doc.Rev. 1.00 Installation Pre-installation Instructions 2. Installation 2.1 Pre-installation Instructions WARNING To avoid damage to the inverter or plug-in option board, never install or remove a plug-in option board while the inverter’s input power is on. Make sure that the inverter‘s power is OFF. Physical installation of the option board is a two-step process. First, the board will be mounted onto an available option connector on the inverter’s control board. Second, the board will be connected to the PROFINET network using a network cable. Note: Prior to mounting the option board in the inverter, please write down the MAC address, which is found on a label on the board. 2.2 Installation Procedure 햲 Make sure that power is off. After switching off the power, wait for at least 10 minutes prior to proceeding with the installation. 햳 Remove both lids of the FR-A800. – Unscrew the two screws in the bottom corners of the inverter. – Remove the lid covering the lower front of the inverter. – Unscrew the screw in the bottom right corner of the lid covering the upper front of the inverter. – Remove the lid. A8NPRT_2P PROFINET Option Board 9 Installation Procedure Installation 햴 Put the included board spacers in the holes at the right top and left bottom corners of the PCB. 햵 Position the A8NPRT_2P PROFINET Option Board at the option slot 1 as shown in the image. This is the only position that will allow network connectivity. 3 2 1 햶 Fasten the option board by tightening the included screws at the top left and bottom right corners. The PE plate is attached along with the screw in the bottom right corner. Note: 10 Over-tightening the screws will damage the board. Doc.Id. HMSI-27-207 Doc.Rev. 1.00 Installation Installation Procedure 햷 Fasten the other end of the PE plate with another screw as shown in the picture. 햸 Attach network cable(s) to any of the network connectors on the option board. Note: The shield of the RJ45 connector is not connected directly to PE. As all nodes in a PROFINET network have to share chassis ground connection, the PROFINET cable shield has to be connected to the chassis ground at each node in the network. Chassis ground is available in the PE plate. 햹 To fit the LED cover on the front cover of the drive, do as follows: – Cut the bridges, using nippers, on the upper front cover. A8NPRT_2P PROFINET Option Board 11 Network Connector (RJ45) Installation – Snap the LED cover into the front cover of the drive. 햺 Fasten both front covers, top front cover first. The option board is now mounted and power can be applied. Removal 햲 Remove both lids of the FR-A800. 햳 Remove the network cable(s). 햴 Remove the screws. 햵 Carefully remove the option board by lifting it straight up. 햶 Remove the board spacers. 햷 Replace the lids. 2.3 Network Connector (RJ45) The option board provides connection to PROFINET through two identical network connectors. Pin 1 2 3 4 5 6 7 8 Housing 12 Name TX+ TXRX+ NC NC RXNC NC Shield Description Transmit positive Transmit negative Receive positive Terminated with a 50-75 Ω resistor Receive negative Terminated with a 50-75 Ω resistor 1 8 Filter connection to PE Doc.Id. HMSI-27-207 Doc.Rev. 1.00 Installation 2.4 LED Indicators LED Indicators LED Network status State Off Green Flashing Green Module status Off Green Green, 1 flash Green, 2 flashes Red Red, 1 flash Link (1, 2) Red, 2 flashes Red, 3 flashes Off Green Flickering Error Off Red Red, flashing (2 blinks) Red, flashing (3 blinks) A8NPRT_2P PROFINET Option Board Status Offline: no power or no connection to IO Controller Online (RUN): connection to IO Controller established, IO controller in RUN state. Online (STOP): connection to IO Controller established, IO controller in STOP state Not initialized: no power or setup not finished Operational Diagnostic event(s) present Used by engineering tools to identify the node on the network Exception error: the option board is in the exception state. Configuration error: expected identification differs from real identification. IP Address Error: IP address not set. Station Name not set. No link: no communication present Link: Ethernet link established, no communication present Activity: Ethernet link established, communication present Communication with inverter is working without problems. Error in communication with inverter Invalid process data parameter mapped Too many process data parameters mapped 13 LED Indicators 14 Installation Doc.Id. HMSI-27-207 Doc.Rev. 1.00 Get Started 3. Physical Installation Get Started All example programs described in this chapter are available for download from the MyMitsubishi website, see section “Download” on page 1 for a direct link. 3.1 Physical Installation It is recommended to make a note of the MAC address of the option board, prior to installing the module in the inverter. The MAC address can for example be found on the label located on the option board. The physical installation of the option board is described in “Installation Procedure” on page 9. 3.2 Download GSD file Download the appropriate GSD file from the Mitsubishi Electric website, see section “Download” on page 1 for a direct link. 3.3 Inverter setup This chapter describes the first part of setting up a system using an A800 inverter controlled by Profinet. It assumes that the A8NPRT-2P option card has been installed correctly, and all inverter parameters are set to default values. This setup will be used for all get started example programs. Set parameters 1305–1308 as the IP Address of the option board. For this tutorial use address 192.168.3.17 which corresponds to the following settings: Parameter No. 1305 1306 1307 1308 Value 192 168 3 17 Similarly, set parameters 1309–1312 as the subnet mask 255.255.255.0: Parameter No. 1309 1310 1311 1312 Value 255 255 255 0 Set parameter 1317 to “3” in order to read the settings from the option board parameters. Parameter No. 1317 Value 3 The final step is to change the operation mode of the inverter to network. One way to do this is by leaving the default setting of parameter 79 (0), and setting parameter 340 to 1. After restarting the inverter, it should operate in network mode. For detailed settings, please refer to A800 manual. A8NPRT_2P PROFINET Option Board 15 Profinet Controller setup using CCPU 3.4 Get Started Profinet Controller setup using CCPU This chapter describes setting up a Profinet controller using Q12DCCPU-V for use with the A8NPRT_2P Profinet option card. 햲 For this setup use a Q series PLC with high speed data transfer enabled and a C CPU (Profinet Controller) in a multi CPU setup. Q series PLC with high speed data transfer enabled PROFINET controller First slot for intelligent or I/O module Additional intelligent and I/O modules 16 Doc.Id. HMSI-27-207 Doc.Rev. 1.00 Get Started Profinet Controller setup using CCPU 햳 Run GX Configurator PN 1.03 or newer to setup the Profinet controller. Using an Ethernet cable connect the computer to the Profinet controller (CCPU with Profinet software). Select the Ethernet adapter, and click Detect to search for the Profinet controller. If the controller is not found, check the Ethernet adapter settings to match the settings of the Profinet controller. The default address of the Profinet controller is 192.168.3.3, if the address was changed, and the set address is not recalled, refer to the Profinet controller manual on how to reset to factory settings. 햴 Once the controller is detected, click on the arrows to copy the controller settings. A8NPRT_2P PROFINET Option Board 17 Profinet Controller setup using CCPU Get Started 햵 Finally click on OK to accept the settings. To add the A8NPRT_2P Profinet option card to the device library, right click on the device library, and click add. Follow the instructions on screen to add the GSD File supplied with the A8NPRT_2P Profinet option card. If this is done successfully, the device library should look like on the screenshot below. 18 Doc.Id. HMSI-27-207 Doc.Rev. 1.00 Get Started Profinet Controller setup using CCPU Click on the Network Detection tab, then right click on the Network node and select Online action. A search of available network devices is performed. Once the A8NPRP-2P Option card is found (look at the type column), it is ok to turn off scanning. Apply a Profinet Device Name for the inverter (be sure to check the Permanent Name checkbox) and click Apply Name. After a successful name change, it is ok to close this window. At this point the option card’s Module Status LED should be solid green. A8NPRT_2P PROFINET Option Board 19 Profinet Controller setup using CCPU Get Started In the Network Detection tab right click and select Read Network Configuration from the context menu. A prompt asking to accept the PLC settings may be shown; accept the current settings, as they will be changed later on. This will add all Profinet devices to the network tree. Drag the option card to the configuration window. The device parameters will be added to the configuration. Click on the Module Configuration tab, and add the Telegram 1 (PROFIdrive) telegram to the configured module tab. 20 Doc.Id. HMSI-27-207 Doc.Rev. 1.00 Get Started Profinet Controller setup using CCPU Download the setup to the controller by clicking on File -> Download configuration. As a result a message in the Output message view at the bottom of the window should be shown. Enter File -> PLC Settings to create the necessary parameter updates. Click on Configure to setup the Multiple CPU Settings. In the QCPU setup, click on the PLC Project entry to modify the path to the PLC project. If the PLC project is not yet created, then do this now. The project must be saved with a GX Works 2 1.502 version or newer. After entering this path, click on OK to close the Multiple CPU settings window. The output and input devices in the PLC Settings can be changed as needed. Make sure none of these devices overlap with devices used in the project. Click on Update to update the Actual CPU List. To create a connection with the Q PLC, click on Transfer Setup and follow the instructions on screen. Now click on Update parameters… to update parameters on the QCPU, Profinet Controller and GX Works 2 project. When prompted whether to perform an offline or online and offline update, pick the later. After all three updates finish successfully, the setup of the Profinet controller is complete. A8NPRT_2P PROFINET Option Board 21 Preparing the GX Works Project 3.5 Get Started Preparing the GX Works Project Open the PLC project updated by GX Configurator PN. If the update was successful, the I/O Assignment and Multiple CPU Setting tabs of the PLC Parameter should be setup. A new library should also be available in the User library tab. Click on the lock pad icon to unlock access to the user library. 22 Doc.Id. HMSI-27-207 Doc.Rev. 1.00 Get Started Preparing the GX Works Project Enter the global label definition file and modify the label names to your liking. The labels must also be modified in the function blocks supplied in this library. The recommended way to do this is to select Find/Replace => Replace String from the top menu. Click on Browse to select the locations to search for string occurrences. Be sure to select the imported user library. Click on OK to return to the previous window. In the Find String field enter the current variable name, and in Replace String enter the new variable name. Finally click on All Replace to replace all occurrences in the user library. Repeat this process for each variable. For easier following of the tutorial, it is recommended to follow the naming as on the screenshot below. A8NPRT_2P PROFINET Option Board 23 Preparing the GX Works Project Get Started Do the same for structured data types tSLV17SLOT1_IN and tSLV17SLOT1_OUT. Return to the project tab, and delete the MAIN program file from the Program Setting, and move the MAIN1 program file to Scan Program. Expand the tree node, and edit the Init program. In this ladder program include the initialization procedure for Profinet communication. The ladder program includes auto initialization during PLC startup, as well as on-demand initialization. The base program that will be used for all examples is now ready. 24 Doc.Id. HMSI-27-207 Doc.Rev. 1.00 Get Started 3.6 GX Works Telegram 1 example GX Works Telegram 1 example 햲 Start with the project created in the Preparing the GX Works Project chapter. After powering up the inverter and Profinet controller, connection will be established. Expect to see bit 6 (Switching on inhibited) set in ZSW1. Below is a simplified state diagram, dependent on control word 1 (STW1). General State Diagram Power supply ON S1: Switching ON Inhibited ZSW1 bit 6 = true; 0, 1, 2, „p.e.“ a = false OFF AND No Coast Stop AND No Quick Stop STW1 bit 0 = false AND bit 1 = true AND bit 2 = true Coast Stop OR Quick Stop b STW1 bit1 = false OR bit 2 = false S5: Switching OFF ZSW1 bit 0,1, „p.e.“ = true, bit 2,6 = false S2: Ready for Switching ON ZSW1 bit 0 = true; 1, 2, 6, „p.e.“ = false Coast Stop OR Quick Stop STW1 bit1 = false OR bit 2 = false ON STW1 bit 0 = true Standstill detected OR OFF Disable Operation STW1 bit 0 = false STW1 bit 3 = false Enable Operation STW1 bit 3 = true quick stop Quick Stop STW1 bit 2 = false ramp stop S3: Switched ON ZSW1 bit 0, 1 = true, 2, 6, „p.e.“ = false Coast Stop STW1 bit 1 = false Standstill detected OR Disable Operation STW1 bit 3 = false Coast Stop STW1 bit 1 = false Disable Operation STW1 bit 3 = false ON OFF b Quick Stop STW1 bit 0 = true STW1 bit 0 = false STW1 bit 2 = false S4: Operation ZSW1 bit 0, 1, 2, „p.e.“ = true; 6 = false Control Word 1 (STW1) description State / Bit combination Description Switching On Inhibited Ready To Switch On Switched On Operation Rotation Fault reset A8NPRT_2P PROFINET Option Board Bit 10 Control By PLC 1 - Bit 7 Fault acknowledge 0 =>1 Bit 3 Enable operation 1 1 - Bit 2 No quick stop 0 1 1 1 1 - Bit 1 No coast stop 0 1 1 1 1 - Bit 0 On 1 1 1 - 25 GX Works Telegram 1 example Get Started 햳 It is needed to set both No Coast Stop and No Quick Stop to reset the Switching On Inhibited bit in ZSW1. To do this set bits 1 and 2 in STW1, that is global label A800Out.STW1. Input the following ladder block to allow the inverter to enter “Ready For Switching On” status, after connection is established, and initialization command is given (M0). 햴 This initialization will result in setting bit 0 in ZSW1 (Ready To Switch On). The next step is to switch on the inverter, and start operation. To do this enable bits 0 (ON/Off), 3 (enable operation), and 10 (Control By PLC) of STW1; while leaving bits 1 and 2 enabled. In the same ladder block, set the desired rotation frequency. Assuming the motor is rated for 50 Hz (inverter parameter 3) and a frequency of 10 Hz is the target run frequency (20% of the rated motor speed). The value in Profidrive to allow full power is 16384, so in order to set 20% of the rated motor speed as the run frequency, set value 3277 to the NSOLL_A output (3276,8 round to 3277). Add the following ladder block to enable rotation command after initialization, and giving rotation command (M1). 햵 Finally add the code to stop the drive, when M1 is reset. In a new ladder block, check whether the first 3 bits of ZSW1 are ON. This condition means that the drive is in operation mode. If this condition is met, and M1 is not ON, reset the set point speed to zero, and set STW1 as 6. 햶 Compile, and write the program and parameters to the PLC. After resetting the PLC, and powering up the inverter, turning on bits M0 and M1 will result in running the inverter with a frequency of 10 Hz. 26 Doc.Id. HMSI-27-207 Doc.Rev. 1.00 Get Started 3.7 GX Works Telegram 102 example GX Works Telegram 102 example This example builds upon the GX Works Telegram 1 example. 햲 To use Telegram 102, return to GX Configurator PN and update the configuration. Open the previous configuration and double click on the A800 Inverter Profinet device to bring up the configuration window. Click on the Module Configuration tab, and select Telegram 1 (PROFIdrive). Now click on the red cross to delete this module. 햳 Drag Telegram 102 (Custom) from the Available modules section to the Configured modules section. Now double click on the module to bring up the Module Configuration window. A8NPRT_2P PROFINET Option Board 27 GX Works Telegram 102 example Get Started 햴 The setup of the telegram is done by entering signal/parameter numbers into the right column. It is possible to view all monitor data as input, and some of the profile parameters as input/output. Please keep in mind, that not all parameters can be accessed via cyclic communication. The PROFIdrive parameter numbers (PNUs) available for use are listed in the Data Exchange subchapters 9.1 to 9.4. An example setup is provided below: Slot Output PZD/2 Input PZD/2 Input PZD/3 Input PZD/4 Input PZD/5 28 Description Speed set point Actual speed set point Output frequency Output voltage Actual operation time PNU 14317 14319 9193 9195 9215 Doc.Id. HMSI-27-207 Doc.Rev. 1.00 Get Started GX Works Telegram 102 example 햵 Finally download the configuration to the device, and update the parameters on the PLC, Profinet controller, and GX Works 2 project. Edit the global labels in the new library to your needs (as shown in chapter Preparing the GX Works Project). Change the names of structured data types tSLV17SLOT1_IN and tSLV17SLOT1_OUT: A8NPRT_2P PROFINET Option Board 29 GX Works Acyclic communication example Get Started The PLC program for telegram 102 is the same as for telegram 1. The library programs will have been overwritten, so it is needed to write them again, or import them from the old telegram 1 project. After this, write the program and parameters to the PLC. Start the inverter in the same way as with telegram 1. Below is a screenshot that shows the input/output variables in the process of speeding up to the set frequency. 3.8 GX Works Acyclic communication example This chapter describes using acyclic communication with the A8NPRT-2 Profinet option card using GX Works 2 with a QCPU and Q12DCCPU-V Profinet controller. It contains examples of reading and writing individual parameters, as well as arrays. First perform the inverter setup, and prepare the GX Works project according to chapter Profinet Controller setup using CCPU. The process of acyclic communication parameter read consists of a write request, and a response read. For details please refer to the Acyclic Data Exchange subchapter 9.7. These operations are done using function blocks generated by GX Configurator PN. Although it is possible to perform acyclic communication without this library, it exceeds the scope of this manual. 3.8.1 Reading a parameter (Sequence 1) Creating the request Start by preparing the content for the parameter read request. The data request has the following format: Byte no. 0 1 2 3 4 5 6-7 Description Request ID Request reference No. of parameters DO-ID No. of elements Attribute value Parameter number Value 0x01 0x01-0xFF 0x01 0x01 0x00 0x10 (value attribute) Byte swapped PNU Request reference is any valid number, this value is mirrored back in the response and can be used to distinguish multiple requests. The parameter number needs to be byte swapped (the SWAP instruction can be used to swap the lower and higher byte of a word). 30 Doc.Id. HMSI-27-207 Doc.Rev. 1.00 Get Started GX Works Acyclic communication example In the code below requestParameterNo contains the unswapped parameter number, while requestParameterNoBS contains the byte swapped version. The content of the parameter request(DataToWrite), and the function block that executes the request (Write_Rec_Ex), are shown on the screenshot below: Below is an explanation of the inputs of the function block for this use case: Variable REQ BUFFER_2 ID API SLOTNUMBER SUBSLOTNUMBER INDEX RECORD LENGTH A8NPRT_2P PROFINET Option Board Write_Rec_Ex input description Description Start write record Set to TRUE to use Buffer2 DWord Last octet of the device’s IP address DWord API number Word Slot number target Word Sub-slot number target Word Index of the record block Word First element of write data Int Write data size in byte Type Bool Bool Value FALSE/TRUE FALSE 17 0x3a00 1 1 47 DataToWrite[0] 16 31 GX Works Acyclic communication example Get Started Receiving the response If the request is completed successfully (bit delayRead is ON), perform a response read after a delay of 500ms. Due to the nature of Profidrive acyclic communication, the response may not be immediately available after execution of the request. Waiting a small amount of time significantly increases the chance of receiving a response on the first try. Another solution is to keep executing read requests, until a proper read request is received. It should also be noted, that 240 bytes can always be read. This is the maximum allowed length of a response. In case of a shorter response, only the available data will be read. The inputs for function block Read_Rec_Ex are similar to those of Write_Rec_Ex. The response data is available on output RECORD. The first element of the array that should hold the response should be connected to this output. If the response is received successfully (bit validRead is ON), then it is possible to access the received data from readData. The format of a positive response is as follows: Byte no. 0 1 2 3 4 5 6-7 Description Request ID Request reference No. of parameters DO-ID No. of values Format Parameter value Value 0x01 0x01-0xFF (same as in request) 0x01 0x01 0x01 See data format type table Byte swapped parameter value In case of a negative response, the format is as follows: Byte no. 0 1 2 3 4 5 6-7 32 Description Request ID Request reference No. of parameters DO-ID No. of values Format Error value Value 0x81 0x01-0xFF (same as in request) 0x01 0x01 0x01 0x44 (error) Byte swapped error value (see error table) Doc.Id. HMSI-27-207 Doc.Rev. 1.00 Get Started GX Works Acyclic communication example The request ID can be checked to distinguish a positive/negative response. Extract the parameter/error value from readData, and byte swap it to receive the actual value: Executing example requests After compiling the program, and writing it to the PLC, try a parameter read request. The PROFIdrive parameter numbers (PNUs) available for use are listed in the Data Exchange subchapters 9.1 to 9.4. First, get the inverter running by setting bits M0 and M1. Then read the actual frequency by writing PNU 9193 to requestParameterNo and setting bit requestParameter. The result should be a value of 1000 in parameterValue which corresponds to 10Hz. A8NPRT_2P PROFINET Option Board 33 GX Works Acyclic communication example 3.8.2 Get Started Reading an array of parameters (Sequence 3) Certain parameters are available in the form of an array. It is possible to access individual elements of the array be changing the subindex. It is also possible to retrieve multiple elements of the array by executing sequence 3. This requires only changing byte no. 4 of the request (No. of values) to the amount of array values wanted. The response will contain additional parameter values added to the end of the response data. Creating the request For this example all 5 array elements of PNU 964 (Device identification) will be requested. Modify the parameter request as shown below: 34 Doc.Id. HMSI-27-207 Doc.Rev. 1.00 Get Started GX Works Acyclic communication example Reading the response Modify the code reading the response data, to read all 5 elements, and byte swap each one. An example procedure how to do this is shown below. The byte-swapped elements will be available in the array parameterValue. Executing example request After executing a request, the response data is available in the parameterValue variable. A8NPRT_2P PROFINET Option Board 35 GX Works Acyclic communication example 3.8.3 Get Started Changing parameters (Sequence 2) Creating the request The format of the write request is as follows: Byte no. 0 1 2 3 4 5 6-7 8-9 10 11 Description Request ID Request reference No. of parameters DO-ID No. of elements Attribute value Parameter number Subindex (irrelevant) No. of values Format 12-13 Set value Value 0x02 0x01-0xFF 0x01 0x01 0x00 0x10 (value attribute) Byte swapped PNU 0x00 0x01 0x06 (UINTEGER16 for all inverter parameters) See data format type table Byte swapped set value Modify the ladder block preparing the content of the request. 36 Doc.Id. HMSI-27-207 Doc.Rev. 1.00 Get Started GX Works Acyclic communication example Reading the response A positive response consists of just 4 bytes of data in the following format: Byte no. 0 1 2 3 Description Request ID Request reference No. of parameters DO-ID Value 0x02 0x01-0xFF (same as in request) 0x01 0x01 In case of a negative response, the format is as follows: Byte no. 0 1 2 3 4 5 6-7 Description Request ID Request reference No. of parameters DO-ID No. of values Format Error value Value 0x82 0x01-0xFF (same as in request) 0x01 0x01 0x01 0x44 (error) Byte swapped error value (see error table) Modify the code reading the response data. A successful parameter write is best identified by the request ID. An example procedure how to process the response is shown below. A8NPRT_2P PROFINET Option Board 37 GX Works Acyclic communication example Get Started Executing example requests To perform a parameter write, set the PNU of the parameter that will be changed to requestParameterNo. Assuming this is inverter parameter 15 (Jog frequency), add the offset 5096 and write the result to this variable. Set variable requestParameterValue to the requested value. The value that will be set, will be the output of multiplication of the set value, and the minimum setting increments, as according to the parameter list in the inverter manual. For parameter 15, the minimum setting increment is 0.01Hz. If a jog frequency of 5Hz is to be set, set requestParameterValue to 500. Finally execute the request by setting bit requestParameter to ON. A successful write will result in setting of the parameterWriteSuccess bit. Test receiving a negative response, by trying to write an out of range value. After trying to write 0xFFFF as the value of parameter 15, a negative response is received with error code 0x02 (LOW_OR_HIGH_LIMIT_EXCEEDED), which is the expected behavior. 38 Doc.Id. HMSI-27-207 Doc.Rev. 1.00 Get Started 3.9 GX Works Network Detect GX Works Network Detect The Net_Detect function block provided with the library generated be GX Configurator PN can be used to detect devices on the PROFINET network. In chapter Profinet Controller setup using CCPU, it is only necessary to create a new configuration, download it to the C Controller and update the GX Works 2 Project (there is no need to setup any PROFINET devices). Basing this chapter on the GX Works 2 project created in chapter Preparing the GX Works Project, makes it possible to detect the A8NPRT-2P option card, as well as any other PROFINET IO devices on the network. For this example, extended information about the PROFINET devices will not be requested. Information on how to do this is supplied with the PROFINET controller manual. Create a new ladder block, that will be responsible for creating the network detect request. Compile and download the project to the PLC. Turning on the req bit will trigger the network detect. After the BUSY output turns off, the VALID output variable is ON for one scan, and it is possible to read the state of the network in output STATUS, and an array of detected PROFINET devices in global variable ProfinetDetect (if the naming convention from chapter Preparing the GX Works Project was used). The STATUS word is described below: Value 0 1 4 5 6 Description Status OK Profinet stack not started Reception buffer too small (stack internal error) No more IO-device “Network detection” service never called An example execution result is presented below: A8NPRT_2P PROFINET Option Board 39 TIA Portal Telegram 1 example 3.10 Get Started TIA Portal Telegram 1 example This chapter describes running the inverter through the A8PRT-2P Profinet option card using TIA Portal with telegram 1 communication. 햲 Start with a new project. 햳 Select Add new device from the Project tree section. In the new window select the appropriate PLC model and click OK to add it to the project. Select the power supply from the hardware catalog on the right side of the screen. 40 Doc.Id. HMSI-27-207 Doc.Rev. 1.00 Get Started TIA Portal Telegram 1 example 햴 From the top menu select Options and Install general station description file (GSD). Search for the GSD file supplied with this manual, click Install and follow instructions to add the option card to the hardware library. 햵 After finishing installation and returning to the main window, switch to Network view. A8NPRT_2P PROFINET Option Board 41 TIA Portal Telegram 1 example Get Started 햶 From the hardware catalog on the right side of the screen, expand Other field devices => Profinet IO => Drives => HMS Industrial Networks => A8PRT-2P and add RT to the project by dragging it to an empty space. 햷 Drag a line from the slave connection node to the PLC connection node to make the PROFINET connection. 42 Doc.Id. HMSI-27-207 Doc.Rev. 1.00 Get Started TIA Portal Telegram 1 example The result should look like on the screenshot below: 햸 Double click on A8NPRT-2P from the device overview to bring up the Properties panel. From the hardware catalog expand Telegrams and drag Telegram 1 to the available slot. A8NPRT_2P PROFINET Option Board 43 TIA Portal Telegram 1 example Get Started 햹 Change the I address for Module Access Point to start at 0, and the I and Q address for Standard Telegram 1 to start at 1. The result should look like below: 햺 Double click on the PROFINET device to show the properties tab. Enter the PROFINET interface [X1] node. Scroll down to the Ethernet addresses section. Make sure the appropriate subnet is selected, enter the IP address of the A8NPRT-2P option card (192.168.3.17). In the PROFINET section, enter the device name (a800inverter) and the device number (17). 44 Doc.Id. HMSI-27-207 Doc.Rev. 1.00 Get Started TIA Portal Telegram 1 example 햻 Return to device view, and click on the PLC. In the Properties tab, expand the PROFINET node, and add the IP address of the PROFINET controller. For this example use address 192.168.3.10. 햽 From the project tree select Program blocks and double click on Main to start editing the program. With this setup STW1 is available under QW1, NSOLL_A under QW3, ZSW1 under IW1, and NIST_A under IW3. A8NPRT_2P PROFINET Option Board 45 TIA Portal Telegram 1 example Get Started 햾 After powering up the inverter and PROFINET controller, connection will be established. Expect to see bit 6 (Switching On inhibited) set in ZSW1. Below is a simplified state diagram, dependent on control word 1 (STW1). General State Diagram Power supply ON S1: Switching ON Inhibited ZSW1 bit 6 = true; 0, 1, 2, „p.e.“ a = false OFF AND No Coast Stop AND No Quick Stop STW1 bit 0 = false AND bit 1 = true AND bit 2 = true Coast Stop OR Quick Stop b STW1 bit1 = false OR bit 2 = false S5: Switching OFF ZSW1 bit 0,1, „p.e.“ = true, bit 2,6 = false S2: Ready for Switching ON ZSW1 bit 0 = true; 1, 2, 6, „p.e.“ = false Coast Stop OR Quick Stop STW1 bit1 = false OR bit 2 = false ON STW1 bit 0 = true Standstill detected OR OFF Disable Operation STW1 bit 0 = false STW1 bit 3 = false Enable Operation STW1 bit 3 = true quick stop Quick Stop STW1 bit 2 = false ramp stop S3: Switched ON ZSW1 bit 0, 1 = true, 2, 6, „p.e.“ = false Coast Stop STW1 bit 1 = false Standstill detected OR Disable Operation STW1 bit 3 = false Coast Stop STW1 bit 1 = false Disable Operation STW1 bit 3 = false ON OFF b Quick Stop STW1 bit 0 = true STW1 bit 0 = false STW1 bit 2 = false S4: Operation ZSW1 bit 0, 1, 2, „p.e.“ = true; 6 = false Control Word 1 (STW1) description State / Bit combination Bit 10 Bit 3 Description Switching On Inhibited Ready To Switch On Switched On Operation Rotation Fault reset Bit 7 Fault Control By acknowlPLC edge 1 0 =>1 Bit 2 Bit 1 Bit 0 Enable No quick operation stop No coast stop On 1 1 - 0 1 1 1 1 - 1 1 1 - 0 1 1 1 1 - Both No Coast Stop and No Quick Stop need to be set to reset the Switching On Inhibited bit in ZSW1. To do this, set bits 1 and 2 in STW1, that is bit 1 and 2 in QW1. 46 Doc.Id. HMSI-27-207 Doc.Rev. 1.00 Get Started TIA Portal Telegram 1 example Input the following ladder block to allow the inverter to enter “Ready For Switching On” status, after connection is established, and initialization command is given (M0.0). 햿 This initialization will result in setting bit 0 in ZSW1 (Ready To Switch On). We can now switch on the inverter, and start operation. To do this, enable bits 0 (ON/Off), 3 (enable operation), and 10 (Control By PLC); while leaving bits 1 and 2 enabled. In the same ladder block, set the desired rotation frequency. Assuming the motor is rated for 50 Hz (inverter parameter 3) and a frequency of 10 Hz is the target run frequency (20% of the rated motor speed); the value in Profidrive to allow full power is 16384, so in order to set 20% of the rated motor speed as the run frequency, set value 3277 to the NSOLL_A (QW3) output (3276,8 round to 3277). Add the following ladder block to enable rotation command after initialization, and giving rotation command (M0.1). A8NPRT_2P PROFINET Option Board 47 TIA Portal Telegram 1 example Get Started 헀 Finally, add the code to stop the drive, when M0.1 is reset. In a new ladder block, check whether the first 3 bits of ZSW1 are ON. This condition means that the drive is in operation mode. If this condition is met, and M1 is not ON, reset the set point speed to zero, and set STW1 as 6. 헁 Compile, and write the program and parameters to the PLC. After resetting the PLC, and powering up the inverter, set bits M0.0 and M0.1 to get the inverter up and running. 48 Doc.Id. HMSI-27-207 Doc.Rev. 1.00 Get Started 3.11 TIA Portal Telegram 102 example TIA Portal Telegram 102 example This chapter describes running the inverter through the A8NPRT-2P PROFINET option card using Siemens TIA with telegram 102 (custom) communication. First perform the setup using telegram 1. 햲 Enter the device view of the PROFINET option card and delete Standard Telegram 1 from the device overview. 햳 Now drag Telegram 102 (Custom) from the Hardware Catalog to the empty slot. Change the starting I and Q address of Telegram 102 to 1, and the starting I address of the Module Access Point to 0. A8NPRT_2P PROFINET Option Board 49 TIA Portal Telegram 102 example Get Started 햴 After double clicking on the telegram and selecting Module parameters node from the properties tab, it is possible to setup the input and outputs of the telegram. There are 18 inputs and outputs used in this telegram, one of each is reserved for control/status word (leaving 17 inputs/outputs free for custom setup). The setup of the telegram is done by entering signal/parameter numbers into the right column. All monitor data can be viewed as input, and some of the profile parameters as input/ output. Please keep in mind, that not all parameters can be accessed via cyclic communication. The PROFIdrive parameter numbers (PNUs) available for use are listed in the Data Exchange subchapters 9.1 to 9.4. An example setup is provided below: Slot Output PZD/2 Input PZD/2 Input PZD/3 Input PZD/4 Input PZD/5 Description Speed set point Actual speed set point Output frequency Output voltage Actual operation time PNU 14317 14319 9193 9195 9215 햵 Compile the project and download it to the PLC. The additional monitor data can be viewed in the appropriate IW address. 50 Doc.Id. HMSI-27-207 Doc.Rev. 1.00 Get Started 3.12 TIA Portal Acyclic communication example TIA Portal Acyclic communication example This chapter describes using acyclic communication through the A8NPRT-2P PROFINET option card using TIA Portal. It contains examples of reading and writing individual parameters. First perform the setup using telegram 1. The process of acyclic communication parameter read consists of a write request, and a response read, performed using instructions WRREC and RDREC. 3.12.1 Reading a parameter (Sequence 1) Preparing structure of write request, and read response Start by preparing the structure for the write request. The data request has the following format: Byte no. 0 1 2 3 4 5 6-7 Description Request ID Request reference No. of parameters DO-ID No. of elements Attribute value Parameter number Value 0x01 0x01-0xFF 0x01 0x01 0x00 0x10 (value attribute) Byte swapped PNU Request reference is any valid number, this value is mirrored back in the response and can be used to distinguish multiple requests. Once this request is processed successfully, a read request can be issued. The response of this request will contain the actual parameter value. The format of a positive response is as follows: Byte no. 0 1 2 3 4 5 6-7 Description Request ID Request reference No. of parameters DO-ID No. of values Format Parameter value Value 0x01 0x01-0xFF (same as in request) 0x01 0x01 0x01 See data format type table Byte swapped parameter value In case of a negative response, the format is: Byte no. 0 1 2 3 4 5 6-7 A8NPRT_2P PROFINET Option Board Description Request ID Request reference No. of parameters DO-ID No. of values Format Error value Value 0x81 0x01-0xFF (same as in request) 0x01 0x01 0x01 0x44 (error) Byte swapped error value (see error table) 51 TIA Portal Acyclic communication example Get Started The content of the data request will be contained in a data block structure. Expand the PLC in the project tree and add a new block. 52 Doc.Id. HMSI-27-207 Doc.Rev. 1.00 Get Started TIA Portal Acyclic communication example The data block will be added to the program blocks with the specified name. Add two structures (RequestRecord and ResponseRecord) to the data block. Create the structure of the records according to the specification, like on the screenshot below. Enter the start value for the variables so that the fields don’t need to be initialized in the user program. Creating the request Proceed to create the user program for reading the parameter value. A state machine architecture is used for the process of creating, receiving and processing acyclic communication. The current state of the state machine is held in PLC tag state. A description of each state used in this example is provided below: State 1 2 3 4 5 6 7 10 11 12 A8NPRT_2P PROFINET Option Board Description Send write request, wait for BUSY = 0 Write request sent, read results Write request sent successfully, send read request Wait for BUSY = 0 (Read request) Read request sent, read results Results read Successfully read requested PNU value Write request error Read request error Parameter read error (negative response) 53 TIA Portal Acyclic communication example Get Started Start by adding a new network that will contain the instructions to issue the actual write and read requests. 54 Doc.Id. HMSI-27-207 Doc.Rev. 1.00 Get Started TIA Portal Acyclic communication example It will now be possible to reference the inputs and outputs of the function block instances, making it easier to create the program. Proceed to prepare the sequence. Add a new network in the user program that will start the state machine sequence. Setting ParameterRequest will start the state machine from state 1, initialize all used variables (readStatus, readValue, writeStatus), copy the requested PNU from tag requestedPNU to the data structure, and trigger the write request (by setting the REQ input of the WRREC function block). The BUSY output of WRREC will immediately turn ON. Once it turns OFF, proceed to reading the result of the write request (state 2). Expect to see either output DONE or ERROR of WRREC in an ON state. If DONE is ON, the write request was performed successfully, reset the REQ input, and proceed to creating the read request (state 3). If the ERROR output is ON, check the STATUS output to read the error. If the status is equal to 0xDE80B500, the result is not yet ready. In this case, do nothing and wait for the actual result. In every other case, save the status to tag writeStatus and enter state 10, indicating that a write request error occurred. A8NPRT_2P PROFINET Option Board 55 TIA Portal Acyclic communication example Get Started To initiate the read request, set input REQ of function block RDREC. Enter state 4, and wait for the BUSY output to turn off. Once this condition is met, enter state 5 to check the results of the read request. Expect to see either output DONE or ERROR of RDREC in an ON state. If DONE is ON, the read request was performed successfully, reset the REQ input, enter state 6 to process the response. If the ERROR output is ON, check the STATUS output to read the error. If the status is equal to 0xDF80B500, the result is not yet ready. In this case, do nothing and wait for the actual result. In every other case, save the status to tag readStatus and enter state 11, indicating that a read request error occurred. 56 Doc.Id. HMSI-27-207 Doc.Rev. 1.00 Get Started TIA Portal Acyclic communication example Finally process the received response. Check the ResponseID field of the ResponseRecord. A value of 1 indicates that the request was performed successfully. In this case move the Value field of this structure to the readValue tag. Enter state 7 to indicate a successful parameter read. If the responseID is equal to 0x81, then a negative response was received. Save the error value (also the Value field of the structure) to the errorValue tag. Enter state 12 to signal a negative response. Executing example requests After compiling the program, and writing it to the PLC, it is possible to execute parameter read requests. First, get the inverter running by setting bits M0 and M1. Now read the actual frequency by writing PNU 9193 to requestPNU and setting bit ParameterRequest. The result should be a value of 1000 in readValue, which corresponds to 10Hz. A8NPRT_2P PROFINET Option Board 57 TIA Portal Acyclic communication example Get Started Try testing a negative response by changing the axis number to 0x10. Notice, that after executing the sequence, state 12 is active. An error code of 0x19 (AXIS_DO_NONEXISTENT) is expected. 3.12.2 Changing parameters (Sequence 2) This example will be based off of the previous example (Reading a parameter – Sequence 1), as the changes needed are minimal. Preparing structure of write request, and read response Start by preparing the structure for the write request. The data request has the following format: 58 Byte no. 0 1 2 3 4 5 6-7 8-9 10 11 Description Request ID Request reference No. of parameters DO-ID No. of elements Attribute value Parameter number Subindex (irrelevant) No. of values Format 12-13 Set value Value 0x02 0x01-0xFF 0x01 0x01 0x00 0x10 (value attribute) PNU to modify 0x00 0x01 0x06 (UINTEGER16 for all inverter parameters) See data format type table PNU value to write Doc.Id. HMSI-27-207 Doc.Rev. 1.00 Get Started TIA Portal Acyclic communication example Once this request is processed successfully, a read request can be issued. The response of this request will determine whether the parameter write was successful. The format of a positive response is as follows: Byte no. 0 1 2 3 Description Request ID Request reference No. of parameters DO-ID Value 0x02 0x01-0xFF (same as in request) 0x01 0x01 In case of a negative response, the format is as follows: Byte no. 0 1 2 3 4 5 6-7 Description Request ID Request reference No. of parameters DO-ID No. of values Format Error value Value 0x82 0x01-0xFF (same as in request) 0x01 0x01 0x01 0x44 (error) Error value (see error table) Modify the data structures created in the previous example to account for the changes (note the changes in start value fields): A8NPRT_2P PROFINET Option Board 59 TIA Portal Acyclic communication example Get Started Creating the request Modify the ladder network initiating the sequence, to set the value of field SetValue in the RequestRecord structure. This is the value that will be written to the requested PNU. Modify the network responsible for processing of the read request response. A positive response will have ID 0x02, while a negative response ID 0x82. Finally change the length of the write request to 14 bytes. 60 Doc.Id. HMSI-27-207 Doc.Rev. 1.00 Get Started TIA Portal Acyclic communication example Execu ting example requests To perform a parameter write, set the PNU of the parameter to change in requestedPNU. As an example, to change parameter 15 (Jog frequency), add the offset 5096 and write the result (5111) to variable requestedPNU. The value that will be set, will be the output of multiplication of the set value, and the minimum setting increments, as according to the parameter list in the inverter manual. For parameter 15, the minimum setting increment is 0.01Hz. If a jog frequency of 5Hz is requested, set writeValue to 500. Finally execute the request by setting bit ParameterRequest to ON. A successful write will result in entering state 7. Test receiving a negative response, by trying to write an out of range value. After trying to write 0xFFFF as the value of parameter 15, state 12 will be entered indicating a negative response with error code 0x02 (LOW_OR_HIGH_LIMIT_EXCEEDED) stored in readError tag, which is the expected behavior. A8NPRT_2P PROFINET Option Board 61 SIMATIC STEP7 example 3.13 SIMATIC STEP7 example 3.13.1 Creating a Configuration Get Started This section describes a simple example on how to configure a PROFINET network including an A8NPRT_2P PROFINET Option Board using the SIMATIC STEP7 configuration tool. Please consult the SIMATIC STEP7 instruction manual or online help for further information on how to use the tool. The configuration is created offline and downloaded to the network when it is finished. 햲 Open SIMATIC STEP7. 햳 Select Options - Install GSD. 햴 Browse for the correct GSD-file to use with the option board. Select file and click Install. 62 Doc.Id. HMSI-27-207 Doc.Rev. 1.00 Get Started SIMATIC STEP7 example 햵 Select PLC and drag an instance of the selected PLC into the configuration window. 햶 Locate the option board in the HW catalog (PROFINET IO -> Additional Field Devices -> Drives). A8NPRT_2P PROFINET Option Board 63 SIMATIC STEP7 example Get Started 햷 Drag and drop an instance of the option board to the configuration. 햸 With the option board selected, right click and open Object Properties from the menu in the pop-up window. Select the General tab. Enter Device Name (Station Name) and check “Assign IP address via IO controller”. 64 Doc.Id. HMSI-27-207 Doc.Rev. 1.00 Get Started SIMATIC STEP7 example 햹 Select Parameters tab. Select subnet and enter the IP address of the option board. This address will be assigned to the option board by the PLC when the configuration is downloaded to the network. Click OK. 햺 Select and drag and drop telegram to option board. The telegrams are found in the HW catalog with the option board. A8NPRT_2P PROFINET Option Board 65 SIMATIC STEP7 example Get Started 햻 With the new telegram instance selected, right click and open the Telegram Properties window from the pop-up menu. Enter a name for the telegram and map the cyclic data in the telegram. 햽 Repeat until all devices are entered into the configuration. 66 Doc.Id. HMSI-27-207 Doc.Rev. 1.00 Get Started 3.13.2 SIMATIC STEP7 example Download Configuration to the PLC The configuration of the PROFINET network is built offline. To download the configuration to the PLC that acts as master for the network, follow the steps below: 햲 Connect to network. 햳 Select a node and open the Edit Ethernet Node window. A8NPRT_2P PROFINET Option Board 67 SIMATIC STEP7 example Get Started 햴 Click Browse to start scanning for devices on the network. This will produce a list of available units. 햵 Find the correct unit by the MAC address. Select and confirm using the button “Flash”. 68 Doc.Id. HMSI-27-207 Doc.Rev. 1.00 Get Started SIMATIC STEP7 example 햶 Allocate station name (device name). The PLC will allocate correct IP address at download. Repeat steps 4 and 5 for each unit in the network. 햷 Download configuration to network, either by selecting PLC -> Download... or by clicking on the download symbol. 3.13.3 Run Set the PLC in RUN mode. A8NPRT_2P PROFINET Option Board 69 Parameter Settings 3.14 Get Started Parameter Settings Parameters can be set at run time either using the internal web pages of the option board or the hand-held parameter unit. The values of some of the parameters will not be valid until the inverter has been restarted. The following information can be seen, and in certain cases changed, from the web pages: • IP settings (requires a restart to take effect) • Parameter data, including drive profile parameters • Drive Monitor For more information on what the webpages look like, what information you can find there and what parameters you can change the value of, see “Embedded Web Server” on page 77. 3.14.1 Parameter Unit Parameter data can be seen, and in certain cases changed from the parameter unit. For more information, please consult the manual for the FR-A800 series frequency inverter. 70 Doc.Id. HMSI-27-207 Doc.Rev. 1.00 Inverter Settings 4. Inverter Settings 4.1 Inverter Parameters Inverter Parameters The inverter parameters are critical for overall operation of the end-to-end communication system. Some of these parameters must be set to specific values, and some may have multiple allowable settings depending on the desired operation of the overall application. It is important to understand the manner in which the parameters will impact successful communications with, and control of the inverter. The inverter parameters can be changed either via the handheld parameter unit or via the web pages of the option board. The handheld parameter unit is described in the user manual for the FR-A800 series, and the option board web pages are described in “Web Pages” on page 78. Note: The scaling of the parameter values are different if you use the parameter unit or the option board web pages, for further information see “Parameter Data” on page 81. A8NPRT_2P PROFINET Option Board 71 Option Board Parameters 4.2 Inverter Settings Option Board Parameters The option board parameters are stored in the inverter. At startup they are transferred from the inverter to the option board and can be changed using the parameter unit or the option board web pages. No (dec) 1300 No (hex) 514h Parameter Name. Option parameter 1 1301 515h Option parameter 2 1302 516h Option parameter 3 Network Type1 1303 517h Option parameter 4 Serial number (low word)2 1304 518h Option parameter 5 1305 519h Option parameter 6 1306 1307 1308 1309 51Ah 51Bh 51Ch 51Dh Option parameter 7 Option parameter 8 Option parameter 9 Option parameter 10 1310 1311 1312 1313 51Eh 51Fh 520h 521h Option parameter 11 Option parameter 12 Option parameter 13 Option parameter 14 1314 1315 1316 1317 522h 523h 524h 525h Option parameter 15 Option parameter 16 Option parameter 17 Option parameter 18 Serial number (high word)2 IP address (first byte), see “Parameters 1305 - 1308 (519h - 51Ch, IP Address)” on page 73 IP address (second byte) IP address (third byte) IP address (fourth byte) Subnet mask (first byte), see “Parameters 1309 - 1312 (51Dh - 520h, Subnet Mask)” on page 73 Subnet mask (second byte) Subnet mask (third byte) Subnet mask (fourth byte) Gateway address (first byte), see “Parameters 1313 1316 (521h - 524h, Gateway Address)” on page 73 Gateway address (second byte) Gateway address (third byte) Gateway address (fourth byte) Ethernet Communication Settings, see “Parameter 1317 (525h, Ethernet Communication Settings)” on page 74 Network specific 1 - 26 1318 - 1343 526h - 53Fh Option parameter 19 - 44 Description General settings, see “Parameter 1300 (514h, General Settings)” on page 72 Ethernet Host Settings, see “Parameter 1301 (515h, Ethernet Host Settings)” on page 73 1 During startup the option board will verify the value of this parameter. If it differs from the network type of the option board, the option board will change the parameter value to the actual network type and clear all other parameters. 2 During startup the option board will verify the value of this parameter. If it differs from the serial number of the option board, the option board will change the parameter value to the actual serial number and also set the option board host name to [main-unit-name]-[serial number] The option board and the inverter start up with default standard settings. Any changes of the parameter values during runtime, will not be available until the inverter has been restarted. The application can more often than not be run on standard settings. Parameter 1300 (514h, General Settings) Only read by the option board during startup. Bit 0-3 4 Name (reserved) Clear all Option Parameters 5 - 15 (reserved) 72 Default Description 0 N/A 0 Will clear all option parameters and set the default values when set to 1. Resets itself to False (0) after completion. 0 N/A Doc.Id. HMSI-27-207 Doc.Rev. 1.00 Inverter Settings Option Board Parameters Parameter 1301 (515h, Ethernet Host Settings) Only read by the option board during startup. Note: For these settings to be used, parameter 1317 (525h) has to be set to 1. Bit 0 Default Description 0 0: Enables support for the HICP protocol used by the Anybus IPconfig utility. 1: Disables support for the HICP protocol. 1 Web Server 0 0: Enables the built-in web server. 1: Disables the built-in web server. 1 0 0: Enables access to inverter parameters from the web server. 2 Web ADI access 1: Disables access to inverter parameters from the web servers. 3 FTP server 0 0: Enables the built-in FTP server. 1: Disables the built-in FTP server. 4 Admin mode 0 0: Disables FTP admin mode. 1: Enables FTP admin mode. 5 (reserved) 0 N/A 6 Format file system 0 0: Default 1: Formats the file system. Will reset itself to False (0) after completion. 7-15 (reserved) 0 N/A 1 Name HICP Web server must be enabled. Parameters 1305 - 1308 (519h - 51Ch, IP Address) These four parameters store the IP Address of the option board. Byte order is allocated as in the following example: IP address: 192. 168. 111. 222 Parameter no (hex): 519 51A 51B 51C Parameter no (dec): 1305 1306 1307 1308 Parameters 1309 - 1312 (51Dh - 520h, Subnet Mask) These four parameters store the subnet mask. Byte order is allocated as in the following example: IP address: 255. 255. 255. 0 Parameter no (hex): 51D 51E 51F 520 Parameter no (dec): 1309 1310 1311 1312 Parameters 1313 - 1316 (521h - 524h, Gateway Address) These four parameters store the gateway address of the option board. Byte order is allocated as in the following example: IP address: 192. 168. 111. 1 Parameter no (hex): 521 522 523 524 Parameter no (dec): 1313 1314 1315 1316 A8NPRT_2P PROFINET Option Board 73 Operation Mode Setting Inverter Settings Parameter 1317 (525h, Ethernet Communication Settings) Only read by the option board during startup. Note: If the settings of parameters 1305-1308 are to be used by the option card, this parameter must be set to 1 or 3. If DHCP is enabled, the option card will first try to retrieve the IP address from a DHCP server, and then fall back to the address set in inverter parameters. Bit 0 Name Priority of setting Default Values 0 0: 1: 1 DHCP1 0 2-15 (reserved) 1 4.3 0 0: 1: N/A Description Option board settings are used for network settings. Option board parameters (inverter parameter data) are used for network settings. DHCP is enabled DHCP is disabled The value of this bit is ignored if bit 0 (Priority of setting) of the parameter is set to 0 (default). Operation Mode Setting Please refer to the FR-A800 instruction manual for information. 74 Doc.Id. HMSI-27-207 Doc.Rev. 1.00 Identifying the Option Board 5. Siemens Primary Setup Tool Identifying the Option Board A device on a PROFINET network is primarily defined by its station name (device name). To be able to take advantage of the internal web pages of the option board, the user needs to identify the option board on the network through its IP address. The PROFINET master may assign an IP address to a device, but an IP address can be assigned separately as well. The station (device) name is assigned through the Siemens Primary Setup Tool or the “Edit ethernet node” option in STEP7. 5.1 Siemens Primary Setup Tool The Siemens Primary Setup Tool can be used to find all devices on a PROFINET network. The tool is installed together with STEP7. The same functionality is available when selecting “Edit ethernet node” in STEP7. Locate your device in the MAC address list1. This list is presented by the tool. If you select moduleflash for that device, the module status LED of the device will start flashing. Set a station name for the device. Clicking on the device will show the network settings, including the possibility to assign/change an IP address, for the device. 5.2 IP Address At startup, the master will address the option board using the station name. The option board responds with (among other things) its IP address, if assigned. An IP address can be assigned to the A8NPRT_2P PROFINET Option Board in different ways: • An IP address can be assigned to the option board during configuration • The IP address, subnet mask and gateway address can be assigned using the parameter unit. For more information see “Option Board Parameters” on page 72. • DHCP is disabled by default for the PROFINET option board, but will, if enabled, automatically assign an IP address to the option board. • Once an initial IP address has been assigned to the device and the configuration web page can be accessed, the IP address related parameters can also be modified via the web page. If HICP2 is enabled in option board parameter 515h, the Anybus IPconfig tool3 can be used to find the option board on the network. 1 The MAC address is printed on the option board. 2 For more information see “HICP (Host IP Configuration Protocol)” on page 111. 3 Available for download from www.anybus.com. A8NPRT_2P PROFINET Option Board 75 IP Address 76 Identifying the Option Board Doc.Id. HMSI-27-207 Doc.Rev. 1.00 Embedded Web Server Overview 6. Embedded Web Server 6.1 Overview The interface contains an embedded web server (also known as an HTTP server), which allows users to access the inverter’s internal data with web browsers such as Microsoft Internet Explorer or Mozilla Firefox. In this way, the inverter can be monitored, configured and controlled from across the room or from across the globe. To access an interface’s embedded web server, either use the IPConfig Tool and select the “Open Web Interface” button when the target unit is highlighted, or just directly enter the target unit’s IP address into the address (URL) field of your web browser. The web server supports up to 20 concurrent connections and communicates through port 80. 6.2 Authorization Directories can be protected from web access by placing a file called ‘web_accs.cfg’ in the directory to protect.1 This file shall contain a list of users that are allowed to access the directory and its subdirectories. File Format: Username1:Password1 Username2:Password2 ... UsernameN:PasswordN List of approved users. [AuthName] (message goes here) Optionally, a login message can be specified by including the key [AuthName]. This message will be displayed by the web browser upon accessing the protected directory. The list of approved users can optionally be redirected to one or several other files. Example: In this example, the list of approved users will be loaded from ‘here.cfg’ and ‘too.cfg’. [File path] \i\put\some\over\here.cfg \i\actually\put\some\of\it\here\too.cfg [AuthName] Howdy. Password, please. 1 For more information about the file system, see “File System and FTP Server” on page 85. A8NPRT_2P PROFINET Option Board 77 Web Pages 6.3 Embedded Web Server Web Pages Open a web browser (IE or Firefox e.g.). Enter the IP address for the option board. The window pane below will appear: The index page gives access to the following pages: 6.3.1 • Network interface • Parameter data • Operation panel Network Interface The following information is available on the network interface page: Name Serial# MAC ID Firmware version Uptime CPU load PROFINET station name Description The serial number of the option board. The MAC ID of the option board. The firmware version of the option board. The uptime of the option board. Current CPU load of the option board. The currently set station name of the option board. From this web page you can continue to: 78 • Network configuration • Network statistics Doc.Id. HMSI-27-207 Doc.Rev. 1.00 Embedded Web Server Web Pages Network Configuration Page The network configuration page provides an interface for configuring the network settings. The module needs a reset for the changes to take effect. Available editable settings: Name IP address Subnet mask Gateway DHCP Host name Domain name Description The TCP/IP settings of the module Default values: 0.0.0.0 Valid values: 0.0.0.0 - 255.255.255.255 Enabling or disabling DHCP Default: Disabled IP address or name Max 64 characters Default: [inverter name]-[serial number] e.g. FR-A820-1234ABCD IP address or name Max 48 characters A8NPRT_2P PROFINET Option Board 79 Web Pages Embedded Web Server Ethernet Statistics Page The Ethernet statistics web page contains the following information: 80 Ethernet Link Port 1 Speed Duplex Port 2 Speed Duplex Description The current link speed The current duplex configuration The current link speed The current duplex configuration Interface Counters In Octets In Ucast packets In NUcast packets In Discards In Errors In Unknown Protos Out Octets Out Ucast packets Out NUcast packets Out Discards Out Errors Description Received bytes Received unicast packets Received non-unicast packets (broadcast and multicast) Received packets discarded due to no available memory buffers Received packets discarded due to reception error Received packets with unsupported protocol type Sent bytes Sent unicast packets Sent non-unicast packets (broadcast and multicast) Outgoing packets discarded due to no available memory buffers Transmission errors Doc.Id. HMSI-27-207 Doc.Rev. 1.00 Embedded Web Server 6.3.2 Web Pages Parameter Data In the Parameter Data web page, all the parameters and cyclic monitor data of the inverter can be accessed. The available parameters correspond to parameters with PNU 5096...16388 using the PROFIdrive parameter protocol. A8NPRT_2P PROFINET Option Board 81 Web Pages Embedded Web Server Please note that all values have to be scaled to conform to the values shown in the hand-held parameter unit. The scaling factor is specific to each parameter and listed in the inverter manual. The value shown on the web page has to be multiplied by this scaling factor. The picture below shows the web pages including the scaling factor for each parameter. See “Download” on page 1 for websites where these web pages are available for download. 82 Doc.Id. HMSI-27-207 Doc.Rev. 1.00 Embedded Web Server 6.3.3 Web Pages Drive Monitor This webpage makes it possible to monitor actual values from the device. The Forward (Fwd), Reverse (Rev) and Stop buttons allow the user to start forward rotation or reverse rotation of the drive, as well as to stop the drive. Using the Fwd, Rev or Stop buttons will make a confirmation window appear. Press the OK button to confirm, or the Cancel button to cancel. If the “Disable warning” checkbox is checked, no confirmation window will appear. A8NPRT_2P PROFINET Option Board 83 Web Pages 84 Embedded Web Server Doc.Id. HMSI-27-207 Doc.Rev. 1.00 File System and FTP Server 7. File System and FTP Server 7.1 General General The file system of the option board is used to store files used by the application firmware, e.g. configuration files. Whenever the configuration is completed, it is suggested that a backup copy of the configuration file be downloaded from the unit to a PC. One reason for this is if it becomes necessary to restore a previous configuration at a later time. Another reason is that it may be desirable to use the same configuration for multiple units. A downloaded configuration file can be uploaded again to any compatible unit, allowing the user to easily clone multiple units with the same configuration. Interacting with the file system is performed by use of the File Transfer Protocol (FTP). The builtin FTP server makes it easy to manage the file system using a standard FTP client, interacting with the files in the same manner as though they were traditional files stored on a local or remote PC. Note that certain routers or firewall applications (such as Windows Firewall) can block FTP traffic. If an FTP connection to the option board cannot be established, be sure to check the computer’s firewall settings during troubleshooting, and add an exception to the firewall configuration if necessary. 7.2 FTP Server 7.2.1 Initiation By default, the following port numbers are used for FTP communication: • TCP, port 20 (FTP data port) • TCP, port 21 (FTP command port) The FTP server supports up to 8 concurrent connections. 7.2.2 User Accounts User accounts are stored in the configuration file '\ftp.cfg'. This file holds the usernames, passwords, and home directory for all users. Users are not able to access files outside of their home directory. File Format: User1:Password1:Homedir1 User2:Password2:Homedir2 User3:Password3:Homedir3 Optionally, the UserN:PasswordN-section can be replaced by a path to a file containing a list of users as follows: File Format ('\ftp.cfg'): User1:Password1:Homedir1 User2:Password2:Homedir2 \path\userlistA:HomedirA \path\userlistB:HomedirB A8NPRT_2P PROFINET Option Board 85 FTP Server File System and FTP Server The files containing the user lists shall have the following format: File Format: User1:Password1 User2:Password2 User3:Password3 Notes: • Usernames must not exceed 15 characters in length. • Passwords must not exceed 15 characters in length. • User names and passwords must only contain printable characters in the Lower ASCII characters set (value 32 to 127). Delimiter character ':' must not be used as part of the username or password. Character '\' must not be used as the first character of the user name. • File must be stored using ANSI encoding. • If '\ftp.cfg' is missing or cannot be interpreted, all username/password combinations will be accepted and the home directory will be the FTP root (i.e. '\ftp\'). • The home directory for a user must also exist in the file system if they should be able to log in, just adding the user information to the 'ftp.cfg' file it is not enough. • If 'Admin Mode' has been enabled in the Option Board parameters, all username/password combinations will be accepted and the user will have unrestricted access to the file system (i.e. the home directory will be the system root). • It is strongly recommended to have at least one user with root access ('\') permission. If not, 'Admin Mode' must be enabled each time a system file needs to be altered (including '\ftp.cfg'). 86 Doc.Id. HMSI-27-207 Doc.Rev. 1.00 PROFINET Implementation 8. General PROFINET Implementation The option board implements PROFINET and PROFIdrive according to standard. 8.1 General The A8NPRT_2P PROFINET Option Board complies to PROFINET specification v2.2, conformance class B. Performance: • 100 Mbps, full duplex with auto-negotiation enabled as default • Real Time (RT) communication, 2 ms cycle time Device Model • One IO Device instance • Each IO Device instance includes one or more Application Processes represented by identifiers (API) • API 0 (zero) and API 14848 (PROFIdrive API) are implemented • Each API implements one or more slots • Each Slot implements one or more subslots • Each subslot may implement one or more Channels Slots & Subslots One slot available for a selection of telegram types. Each module contains a MAP (Module Access Point) and a PROFIdrive telegram submodule (standard or device specific). 8.2 Electronic Data Sheet (GSD) A standard GSD file is available for download at the Mitsubishi Electric web site, see section “Download” on page 1. 8.3 Fast Start Up The Fast Start Up function enables PROFINET IO devices, connected to the network, to power up quickly, this is useful in for example robot applications, where rapid retooling is necessary. This function has to be activated when configuring the option board. 8.4 DAP A DAP (Device Access Point) is a module that is representative of the unit. The default DAP is compatible with PROFINET version 2 but there is an alternative DAP supplied for compatibility with older PROFINET versions (V1.5). A8NPRT_2P PROFINET Option Board 87 I&M 8.5 PROFINET Implementation I&M Identification & Maintenance (I&M) provides a standard way of gathering information about an I/ O device. The I&M information can be accessed by the IO Controller by means of acyclic Record Data Read/Write services. The option board provides support for I&M 0-4 data. 88 Doc.Id. HMSI-27-207 Doc.Rev. 1.00 Data Exchange General Information 9. Data Exchange 9.1 General Information Inverter parameters can be accessed acyclically by means of the PROFIdrive Parameter Protocol. The master issues a parameter request to the option board. The option board processes the request. Meanwhile the master repeatedly tries to read the parameter response, but an error message will be returned until the request is fully processed by the module, after which the master can read the response. Translation of signal numbers Signal numbers used in the inverter do not directly translate to signal numbers (PNUs) used on PROFINET. An offset is added to avoid ambiguous numbering on PROFINET, where parameters and monitor data have different PNU numbers. The array below presents a summary of the signal number translation. For a complete presentation of how to translate the signal numbers for the option board drive profile parameters, see “Translation of Signal Numbers” on page 107. Signal No, Inverter Signal Type Parameter Monitor Data Option Board Drive Profile Parameters Offset Hexadecimal Decimal 0h…54Fh 000h … 3FFh 400h … 411h 0 … 1359d 5096d 0d … 1023d 9192d 1024d … 1041d 13288d 412h, 415h … 41Ch2 1042d, 13288d2 1045d … 1052d 15336d2 413h … 414h 41Dh … 431h 1043d … 1044d 13288d 1053d … 1073d 13288d PNU No, Acyclic PROFIdrive Data (Signal No. + Exchange Offset) 5096d … 6455d Yes 9192d … 10215d Yes 14312d … 14329d Yes 14330d, Yes 14333d … 14340d 16378d, Yes 16381d … 16388d 14331d … 14332d Yes 14341d … 14361d Yes Cyclic Data Exchange No Yes Yes/no1 No Yes No Yes/no1 1 Some of these parameters can be mapped for cyclic data exchange, see “Translation of Signal Numbers” on page 107. 2 These parameters can either be accessed (as acyclic data) as an array, with offset 13288d, or can each entry in the array be mapped as a separate parameter with offset 15336d (as acyclic and/or cyclic data). Note: The scaling of the parameter values are different if you use the parameter unit or the option board web pages, for further information, see “Parameter Data” on page 81. A8NPRT_2P PROFINET Option Board 89 Inverter parameters (Acyclic Data Exchange) 9.2 Data Exchange Inverter parameters (Acyclic Data Exchange) Inverter parameters are available only via acyclic communication. They cannot be used in cyclic data exchange, for example it is not possible to map them as parameters for telegram 102. The offset used for inverter parameters is 5096, i.e. inverter parameter no. 1 (maximum frequency) shall be addressed as PNU 5097. An example of reading writing inverter parameters is shown in “Reading a parameter (Sequence 1)” on page 30. All of the inverter parameters are unsigned 16bit integers, with the exception of the following: Parameter 7 8 16 44 110 111 264 265 791 792 All other 9.3 PNU 5103 5104 5112 5140 5206 5207 5360 5361 5887 5888 - Description Acceleration time Deceleration time Jog acceleration/deceleration time Second acceleration/deceleration time Third acceleration/deceleration time Third deceleration time Power-failure deceleration time 1 Power-failure deceleration time 2 Acceleration time in low-speed range Deceleration time in low-speed range All inverter parameters NOT listed in this table Data type Unsigned 32 bit integer Unsigned 16bit integer Monitor Data (Acyclic and Cyclic Data Exchange) This chapter contains a table of monitor data available via both cyclic and acyclic data exchange. The values are available as 16 and 32 bit integers. To calculate the actual monitor data value, the returned integer should be multiplied by the unit specified for that parameter. For example if PNU 9193 (output frequency) is requested and a value of 500 is returned, this means that the output frequency is equal to 5 Hz (500 × 0.01 Hz). 90 Unit Type Access type unsigned unsigned unsigned unsigned unsigned unsigned unsigned unsigned unsigned unsigned unsigned unsigned R R R R R R R R R R R R unsigned R Input terminal status *1 0.01Hz 0.01A/0.1A 0.1V 0.01Hz 1 rpm 0.1% 0.1V 0.1% 0.1% 0.01A/0.1A 0.1V 0.01/ 0.1kWh 0.01/ 0.1kWh - - R Output terminal status *2 - - R PNU No Internal No Description 9193 9194 9195 9197 9198 9199 9200 9201 9202 9203 9204 9205 1 2 3 5 6 7 8 9 10 11 12 13 16 bit Output frequency Output current Output voltage Frequency setting value Motor speed Motor torque Converter output voltage Regenerative brake duty Electric thermal relay function Output current peak value Converter output voltage peak value Input power 9206 14 Output power 9207 15 9208 16 Doc.Id. HMSI-27-207 Doc.Rev. 1.00 Data Exchange Monitor Data (Acyclic and Cyclic Data Exchange) Unit Type Access type Option input terminal status1 *3 0.1% 0.01A/0.1A 1 1h 1 1h 0.1% 1kWh 0.1% 0.1% 0.1kW 1 0.1% 0.1% 0.1% - unsigned unsigned unsigned unsigned unsigned unsigned unsigned unsigned unsigned unsigned unsigend unsigned unsigned unsigned unsigned unsigned unsigned - R R R/W R R R R R R R R R R R R R/W R/W R/W R 59 Option input terminal status2 *3 - - R 9252 60 Option output terminal status *4 - - R 9253 9254 9256 9257 9192 9258 9260 9261 9262 9272 9273 9274 9276 - 9283 9441 61 62 64 65 Motor thermal load factor Transistor thermal load factor PTC thermistor resistance Output power (with regenerative display) Cumulative regenerative power 2nd PID set point 2nd PID measured value 2nd PID deviation Integrated power on time Running time Saving energy monitor Fault code (1) - (8) 0.1% 0.1% ohm unsigned unsigned unsigned R R R R 0.1% 0.1% 0.1% - unsigned unsigned unsigned - R R/W R/W R/W R R R R R/W 0.01Hz 0.01Hz 0.1rpm 0.1% 1 1kWh 0.1/ 0.01kWh 1 signed signed signed signed signed unsigned unsigned R R R R R/W R R signed R PNU No Internal No Description 9209 9210 9211 9212 9214 9215 9216 9217 9224 9225 9226 9227 9238 9242 9243 9244 9245 9246 9250 17 18 19 20 22 23 24 25 32 33 34 35 46 50 51 52 53 54 58 9251 66 68 69 70 80 81 82 84 - 91 249 16 bit Load meter Motor excitation current Position pulse Cumulative energization time Orientation status Actual operation time Motor load factor Cumulative power Torque order Torque current order Motor output Feedback pulse Motor temperature Power saving effect Cumulative saving power PID set point PID measured value PID deviation Run command *5 32 bit 9705 9707 9709 9711 9713 9715 9717 513 515 517 519 521 523 525 Output frequency Setting frequency Motor rotation Load meter Positioning pulse Watt-hour meter(1kWh step) Watt-hour meter(0.1/0.01kWh step) 9719 527 Position error A8NPRT_2P PROFINET Option Board 91 Monitor Data (Acyclic and Cyclic Data Exchange) Data Exchange *1 Input terminal status details (ex. A800) b15 - - - - CS RES STOP MRS JOG RH RM RL RT AU STR b0 STF This data indicates status of main unit input terminal. The number of terminal and names depends on main unit specification. *2 Output terminal status details (ex. A800) b15 - - - - - - - - SO ABC2 ABC1 FU OL IPF SU b0 RUN This data indicates status of main unit output terminal. The number of terminal and names depends on main unit specification. *3 Option input terminal status1,2 (ex. A800 and FR-A8AX) Option input terminal status1 b15 X15 X14 X13 X12 X11 X10 X9 X8 X7 X6 X5 X4 X3 X2 X1 b0 X0 - - - - - - - - - - b0 DY Y2 Y1 b0 DY - - b0 AU Option input terminal status2 b15 - - - - - This data indicates status of FR-A8AX terminal. *4 Option output terminal status (ex. A800 and A8AY/A8AR) b15 - - - - - - RA3 RA2 RA1 Y6 Y5 Y4 Y3 This data indicates status of FR-A8AY(Y0-Y6), FR-A8AR(RA1-RA3) terminal. *5 Run command (ex. A800 and A8AY/A8AR) Users can specify the terminal function using this data. b15 - - - - RES STOP CS JOG MRS RT RH RM RL These bits function is depending on VFD parameter setting. 92 Doc.Id. HMSI-27-207 Doc.Rev. 1.00 Data Exchange 9.4 Drive Profile Parameters (Acyclic Data Exchange) Drive Profile Parameters (Acyclic Data Exchange) Inverter parameters are, when possible, mapped to PROFIdrive parameters. The remaining parameters can be accessed as vendor specific parameters. It is recommended not to use the standard PROFIdrive parameters as vendor specific parameters. 9.4.1 PROFIdrive Parameters The following parameters are implemented in the option board: Parameter Definition P915 Selection switch Setpoint telegram P916 Selection switch Actual value telegram P922 Telegram Selection R/W R R R P923 List of all parame- R ters for signals P924 Status word bit Pulses Enabled Operating mode R Fault message counter Fault numbers R P950 Scaling of fault buffer R P951 Fault number list R P930 P944 P947 A8NPRT_2P PROFINET Option Board R/W R Data Type Array [n] Unsigned16 Array [n] Unsigned16 Value/Description Holds the current configuration of the Setpoint telegram. Holds the current configuration of the Actual value telegram. Unsigned 16 Default value: Standard telegram 1. Reflects the latest accepted configuration data from the master. Array[60000] All parameters that are possible to map to process Unsigned16 data (i.e. is defined as PROFIdrive signals) are listed here; subindex = signal number. If a parameter connected to the specific signal is possible to map, the PNU number is returned. If the parameter is not possible to map, 0 is returned. Array[2] Subindex 0: 2 (Signal number for ZSW1) Unsigned16 Subindex 1: 15 (Bit position) Unsigned16 0001h: Speed control mode Torque control mode 8000h: Vendor specific mode 8001h: Read from the application during initialization. Unsigned16 Incremented by one each time the fault buffer (P947) changes. Array[8] Subindex 0: Active fault situation (if the Unsigned16 drive is in Faulted state). Subindex 1-7 Fault history, where subindex 1 holds the most recent fixed fault situation. Fault number is the corresponding PROFIdrive fault class. Array[2] Subindex 0: 8 8 Unsigned16 Subindex 1: 1 1 Defines the number of fault situations (subindex 0) and the number of fault messages (subindex 1) for each situation that the fault buffer can hold. Array[255] Holds descriptive text for each fault that is supUnsigned16 ported by the option board. Each subindex corresponds to the event code number, which means that the accessible subindices are limited. The fault description is accessed as an additional text array. 93 Drive Profile Parameters (Acyclic Data Exchange) Parameter Definition R/W P964 Device identifica- R tion 9.4.2 P965 Profile number R P967 P968 P972 STW1 ZSW Drive reset R R R/W P980 List of parameters R P61000 Name of station R P61001 P61002 P61003 P61004 IP address MAC address Gateway Subnet mask R R R R Data Exchange Data Type Value/Description Array[5] Manufacturer ID: 010Ch (HMS) Unsigned16 Drive Unit Type: 0 Version (software) xxyy (decimal) Firmware date, year yyyy (decimal) Firmware date, day/ ddmm (decimal) month OctetString Byte 0: 3 (PROFIdrive profile) 2 Byte 1: 41 (Version 4.1) V2 Last control word received from the controller. V2 Current status word from the drive. Unsigned16 1: Power-on reset 2: Prepare power-on reset Array[n] Parameter numbers of all existing parameters are Unsigned16 saved in the subindices (profile parameters and regular drive parameters). The array is assigned in increasing sequence and consecutively. The end of the list of defined parameters is marked by a subindex with the value 0. Octetstring The station name of the device. 240 Octetstring 4 Current IP address Octetstring 6 The MAC address Octetstring4 Current gateway address Octetstring4 Current subnet mask Setpoint- and Actual Value (P915/P916) P915 and P916 reflect the configuration of the PROFINET telegrams that are used for process data. The parameters are read only and consist of arrays, where the number of elements corresponds to the number of words in the IO DATA. Each element holds the PNU (Parameter Number) of the parameter mapped to that particular IO DATA word. The parameters reflect the latest accepted parameterization data. 9.4.3 Signal List (P923) The signal list is not saved. It is created at the time of request only for those elements (subindices) that are requested. The possibility to map vendor specific parameters is examined by asking for the Descriptor attribute of the specific parameter. It is not possible to map other PROFIdrive standard parameters than P967 and P968 (Control and Status words). 9.4.4 Drive Reset (P972) The PROFINET master can send a reset request to the application by writing to this parameter. If the request is rejected an error is returned. Error Code 0 1 7 94 Description Illegal parameter number (Drive reset not supported). Request cannot be executed due to operation status. Request cannot be executed due to operation status. Doc.Id. HMSI-27-207 Doc.Rev. 1.00 Data Exchange 9.5 General State Diagram General State Diagram This general state diagram shows how the inverter behaves based on Control Word 1 (STW1). For detailed state diagrams for various modes, please consult ProfiDrive technical specification manual. General State Diagram Power supply ON S1: Switching ON Inhibited ZSW1 bit 6 = true; 0, 1, 2, „p.e.“ a = false OFF AND No Coast Stop AND No Quick Stop STW1 bit 0 = false AND bit 1 = true AND bit 2 = true Coast Stop OR Quick Stop b STW1 bit 1 = false OR bit 2 = false S2: Ready for Switching ON ZSW1 bit 0 = true; 1, 2, 6, „p.e.“ = false Coast Stop OR Quick Stop STW1 bit1 = false OR bit 2 = false Coast Stop STW1 bit 1 = false ON STW1 bit 0 = true S5: Switching OFF ZSW1 bit 0,1, „p.e.“ = true, bit 2,6 = false Standstill detected OR OFF Disable Operation STW1 bit 0 = false STW1 bit 3 = false S3: Switched ON ZSW1 bit 0, 1 = true, 2, 6, „p.e.“ = false Enable Operation STW1 bit 3 = true Coast Stop STW1 bit 1 = false Disable Operation STW1 bit 3 = false Standstill detected OR Disable Operation STW1 bit 3 = false quick stop Quick Stop STW1 bit 2 = false ramp stop ON OFF b Quick Stop STW1 bit 0 = true STW1 bit 0 = false STW1 bit 2 = false S4: Operation ZSW1 bit 0, 1, 2, „p.e.“ = true; 6 = false A8NPRT_2P PROFINET Option Board 95 Process Data (Cyclic Data Exchange) Data Exchange 9.6 Process Data (Cyclic Data Exchange) 9.6.1 General Drive control is per default performed through the cyclic data exchange channel. DriveControl, Drive-Status, Setpoint and Actual Values are sent as IO DATA telegrams on PROFINET. These telegrams are transformed and mapped to the inverter parameters by the option board. The Process Data map is based entirely on the requirements of PROFIdrive and the end user by means of User Parameterization Data. The active process data is mapped in the configuration tool, where PROFIdrive profile specific signals are specified using signal numbers 1-99 and vendor specific signals are specified using signal numbers 1001… 59999. Note: The parameter numbers are different in the web pages than in the PROFINET configuration. 9.6.2 IO Device Structure The only submodule carrying cyclic process data, is the Telegram Data submodule. Each IO DATA channel is assigned a signal, which in turn is mapped to an inverter parameter/monitor data. 9.6.3 Signals Each IO DATA channel is assigned a signal which is mapped to an inverter parameter. Thus PROFIdrive parameters that are to be exchanged as IO DATA (i.e. Process Data) must be assigned a unique signal number. Signal numbers 1…99 are reserved for standard PROFIdrive signals, while signals 1001 ... 59999 are used for vendor specific signals. The table below shows the implementation of the PROFIdrive signal list. Signal 1 2 5 6 1001…59999 Abbreviation STW1 ZSW1 NSOLL_A NIST_A - PROFIdrive Parameter Control word 1 (P967) Status word 1 (P968) Speed setpoint A Speed actual value A Vendor specific Inverter Parameter DriveControl DriveStatus (not assigned) SetpointSpeed ActualSpeed (not assigned) Mapped to Process Data (if possible) Below is a brief explanation of the format of the used signals. For a detailed explanation, including control and status words specific to various operation modes, please consult ProfiDrive specification manual. 96 Doc.Id. HMSI-27-207 Doc.Rev. 1.00 Data Exchange Process Data (Cyclic Data Exchange) Control Word STW1 Bit 0 1 2 3 4 5 6 7 8 9 10 11-15 Contents ON No Coast Stop No Quick Stop Enable Operation Enable Ramp Generator Unfreeze Ramp Generator Enable Setpoint Fault Acknowledge Jog 1 ON (not used) Jog 2 ON (not used) Control By PLC - Status Word ZSW1 Bit 0 1 2 3 4 5 6 7 8 9 10-14 15 Contents Ready To Switch ON Ready To Operate Operation Enabled Fault Present Coast Stop Not Activated Quick Stop Not Activated Switching On Inhibited Warning Present Speed Error Within Tolerance Control Requested Pulses Enabled Speed setpoint A (NSOLL_A) The output frequency set by NSOLL_A is calculated relative to the rated frequency parameter (inverter parameter no. 3). f = NSOLL_A 0x4000 × fr f: output frequency [Hz] fr : motor rated frequency [Hz] Speed actual value A (NIST_A) Speed actual value A is calculated in the same way as NSOLL_A. A8NPRT_2P PROFINET Option Board 97 Process Data (Cyclic Data Exchange) 9.6.4 Data Exchange Telegram Types The Option Board supports PROFIdrive Standard Telegram 1. If additional parameters are to be mapped to process data, one of the additional product-specific telegrams (100-102) must be used, depending on the size of the data in question. Telegram 1 100 101 102 Description Standard Telegram 1 Telegram 100 (Torque control) Telegram 101 (Position control) Telegram 102 (Custom) Size (words) 2 2 8 in/9 out 20 The user specifies which telegram to use when configuring the option board. Which telegram type is used, can be read using PROFIdrive parameter P922 Note: Only one telegram module can be used at a time. Setpoint Telegram Setpoint telegrams are used for data from the master to the inverter. Depending on control mode, the contents of the telegram may differ, see table below for configuration. Telegram Speed Control (SC) Torque Control (TC) Position Control (PC) Speed Control (SC) Torque Control (TC) Position Control (PC) Position Control (PC) Position Control (PC) Position Control (PC) Position Control (PC) Position Control (PC) Position Control (PC) Position Control (PC) 98 IO DATA (PROFIdrive) Word Signal IO DATA 1 1 (STW1) Octet 0…1 IO DATA 2 5 (NSOLL_A) 14349 9441 9713 2…3 5 (NSOLL_A) 16383 8…9 10…13 SetPointSpeed (0405h) AccelerationDeltaTime (0417h…0418h) 16387 14…17 DecelerationDelta Time (014Bh…041Ch) IO DATA 3 IO DATA 4 IO DATA 5 IO DATA 6 IO DATA 7 IO DATA 8 IO DATA 9 4…7 Read Process Data (Inverter) Process data Parameter DriveControl (0402h) SetPoint Speed (0405h) TargetTorque (0425h) Run command (00F9h) PositionReference (0209h…020Ah) Doc.Id. HMSI-27-207 Doc.Rev. 1.00 Data Exchange Process Data (Cyclic Data Exchange) Actual Value Telegram Actual value telegrams are used for data from the inverter to the master. Depending on control mode, the contents of the telegram may differ, see table below for configuration. Telegram Speed Control (SC) Torque Control (TC) Position Control (PC) Speed Control (SC) Torque Control (TC) Position Control (PC) Position Control (PC) Position Control (PC) Position Control (PC) Position Control (PC) Position Control (PC) Position Control (PC) Position Control (PC) A8NPRT_2P PROFINET Option Board IO DATA (PROFIdrive) Word Signal IO DATA 1 2 (ZSW1) Octet 0…1 IO DATA 2 6 (NIST_A) 14350 9208 9713 2…3 4…7 ActualSpeed (0407h) ActualTorque (0426h) Output terminal (0010h) ActualPosition (0209h…020Ah) 6 (NIST_A) 14250 8…9 10…11 ActualSpeed (0407h) ActualTorque (0426h) (9719) 12…15 PositionError (020Fh…0210h) IO DATA 3 IO DATA 4 IO DATA 5 IO DATA 6 IO DATA 7 IO DATA 8 IO DATA 9 Write Process Data (Inverter) Process data Parameter DriveStatus (0403h…0404h) 99 Acyclic Data Exchange 9.7 Data Exchange Acyclic Data Exchange This subchapter describes some of the basic sequences used in acyclic communication. All available sequences are described in the ProfiDrive Specification manual (chapter 6.2.3.6 Telegram sequences for Parameter Access). Acyclic communication is available via the ProfiDRIVE API (0x3a00), slot no. 1, sub-slot no. 1, index 47. The data flow for acyclic communication always consists of writing of the parameter request, and reading the parameter response. The parameter response read may fail, if the data requested is not yet ready. The option card should be asked for a response again, until it is ready. This is presented on the figure below: Controller / Supervisor (Client) Communication System DU / DO Parameter Manager (Server) Time Line Parameter Request Error because response not yet available Error because response not yet available Parameter Response 100 Write parameter request to PAP Parameter Request Read parameter response from PAP Parameter Processing in the Parameter Manager Read parameter response from PAP Parameter Response Read parameter response from PAP Doc.Id. HMSI-27-207 Doc.Rev. 1.00 Data Exchange 9.7.1 Acyclic Data Exchange Explanation of fields used in requests This table explains the fields used in various sequences. Words sent in requests should have their most significant byte transmitted first (Big endian encoding). This is also the format in which incoming words will be transmitted. 9.7.2 Field Request reference Request ID Data Type Unsigned8 Unsigned8 Response ID Unsigned8 Axis / DO-ID No. of Parameters Attribute Unsigned8 Unsigned8 Unsigned8 No. of elements Parameter number Subindex Format Unsigned8 Unsigned16 Unsigned16 Unsigned8 No. of values Error number Unsigned8 Unsigned16 Values 0x01 – 0xFF 0x01 Request parameter 0x02 Change parameter 0x01 Request parameter (+) 0x02 Change parameter (+) 0x81 Request parameter (-) 0x82 Change parameter (-) 0x01 0x01 – 0x27 Quantity 0x10 Value 0x20 Description 0x30 Text 0x01 – 0xEA Quantity 0x0001 – 0xFFFF 0x0001 – 0xFFFF 0x01 – 0x36 Data types 0x40 – 0x44 Data types 0x00 – 0xEA Quantity 0x0000 – 0x00FF Error numbers Comment See data format type table See error table Data format type table Data type Value BOOLEAN 0x01 INTEGER8 0x02 INTEGER16 0x03 INTEGER32 0x04 UINTEGER8 0x05 UINTEGER16 0x06 UINTEGER32 0x07 VISIBLESTRING 0x09 OCTETSTRING 0x0a ZERO 0x40 ERROR 0x44 N2 0x71 N4 0x72 V2 0x73 A8NPRT_2P PROFINET Option Board 101 Acyclic Data Exchange 9.7.3 9.7.4 Error table Error description Value IMPERMISSIBLE_PARAMETER_NUMBER 0x00 PARAMETER_VALUE_CANNOT_BE_CHANGED 0x01 LOW_OR_HIGH_LIMIT_EXCEEDED 0x02 FAULTY_SUBINDEX 0x03 NO_ARRAY 0x04 INCORRECT_DATA_TYPE 0x05 SETTING_NOT_PERMITTED 0x06 DESCRIPTION_ELEMENT_CANNOT_BE_CHANGED 0x07 NO_DESCRIPTION_DATA_AVAILABLE 0x09 NO_OPERATION_PRIORITY 0x0b NO_TEXT_ARRAY_AVAILABLE 0x0f REQUEST_CANNOT_BE_EXECUTED_BECAUSE_OF_OPERATING_STATE 0x11 VALUE_IMPERMISSIBLE 0x14 RESPONSE_TOO_LONG 0x15 PARAMETER_ADDRESS_IMPERMISSIBLE 0x16 ILLEGAL_FORMAT 0x17 NUMBER_OF_VALUES_ARE_NOT_CONSISTENT 0x18 AXIS_DO_NONEXISTENT 0x19 PARAMETER_TEXT_ELEMENT_CANNOT_BE_CHANGED 0x20 Sequence 1: Request parameter value, single Byte no. 0 1 2 3 4 5 6-7 8-9 9.7.5 Field Request ID Request reference No. of parameters DO-ID No. of elements Attribute value Parameter number Subindex (irrelevant for non-arrays) Sequence 1: Parameter response positive Byte no. 0 1 2 3 4 5 6-7 8-9 102 Data Exchange Field Request ID Request reference No. of parameters DO-ID No. of values Format Parameter value Parameter value (only for 32 bit data) Doc.Id. HMSI-27-207 Doc.Rev. 1.00 Data Exchange 9.7.6 Sequence 1: Parameter response negative Byte no. 0 1 2 3 4 5 6-7 9.7.7 Field Request ID Request reference No. of parameters DO-ID No. of elements Attribute value Parameter number Subindex (irrelevant for non-arrays) No. of values Format Set value Sequence 2: Parameter response positive Byte no. 0 1 2 3 9.7.9 Field Request ID Request reference No. of parameters DO-ID No. of values Format Error value Sequence 2: Change parameter value Byte no. 0 1 2 3 4 5 6-7 8-9 10 11 12-13 9.7.8 Acyclic Data Exchange Field Request ID Request reference No. of parameters DO-ID Sequence 2: Parameter response negative Byte no. 0 1 2 3 4 5 6-7 A8NPRT_2P PROFINET Option Board Field Request ID Request reference No. of parameters DO-ID No. of values Format Error value 103 Acyclic Data Exchange 9.7.10 Sequence 3: Request parameter value, several array elements Byte no. 0 1 2 3 4 5 6-7 8-9 9.7.11 Field Request ID Request reference No. of parameters DO-ID No. of values Format Parameter value 1 Parameter value 2 … Parameter value n Sequence 3: Parameter response negative Byte no. 0 1 2 3 4 5 6-7 104 Field Request ID Request reference No. of parameters DO-ID No. of elements (n) Attribute value Parameter number Subindex Sequence 3: Parameter response positive Byte no. 0 1 2 3 4 5 6-7 8-9 … (4+2n) – (5+2n) 9.7.12 Data Exchange Field Request ID Request reference No. of parameters DO-ID No. of values Format Error value Doc.Id. HMSI-27-207 Doc.Rev. 1.00 Diagnostics 10. Diagnostics Conversion of diagnostic fault codes Inverter Fault Code 10h 11h 12h 20h 21h 22h 30h Inverter Fault Name E.OC1 E.OC2 E.OC3 E.OV1 E.OV2 E.OV3 E.THT 31h 40h E.THM E.FIN 50h 52h 60h 70h 80h 81h 90h 91h A0h A1h A2h A3h B0h E.IPF E.ILF E.OLT E.BE E.GF E.LF E.OHT E.PTC E.OPT E.OP1 E.OP2 E.OP3 E.PE B1h B2h B3h E.PUE E.RET E.PE2 C0h E.CPU C1h C2h C4h C5h C6h C7h C8h C9h D0h D1h D2h D3h D5h D6h D7h D8h E.CTE E.P24 E.CDO E.IOH E.SER E.AIE E.USB E.SAF E.OS E.OSD E.ECT E.OD E.MB1 E.MB2 E.MB3 E.MB4 A8NPRT_2P PROFINET Option Board Inverter Description PROFIdrive Fault OC During Acc Steady spd OC OC During Dec OV During Acc Steady spd OV OV During Dec Inv. Ovrload Motor Overload Motor Overload Motor Overload DC Link Overvoltage DC Link Overvoltage DC Link Overvoltage Overtemperature Electronic Device Motor Ovrload Motor Overload H/Sink O/Temp Overtemperature Electronic Device Inst. Pwr. Loss Mains Supply Input phase loss Mains Supply Stall Prev STP Motor Overload Br. Cct. Fault Brake Resistor Ground Fault Earth/Ground Fault Output phase loss Power Electronics OH Fault Motor Overload PTC Activated External Option fault Engineering Option1 fault Internal Communication Option2 fault Internal Communication Option3 fault Internal Communication Corrupt memory Microcontroller Hardware or Software PU Leave out Internal Communication Retry No Over Technology PR Storage Alarm Microcontroller Hardware or Software CPU Fault Microcontroller Hardware or Software PU Short cct Other 24VDC short cct Other OC Detect level Technology Inrush overheat Mains Supply VFD Comm error Internal Communication Analog in error External USB Comm error Internal Communication Safety cct fault Technology Overspeed Technology Excess spd deviation Technology Enc. Signal loss Feedback Excess pos fault Technology Brake seq fault Other Brake seq fault Other Brake seq fault Other Brake seq fault Other PROFIdrive Fault Code 08 08 08 04 04 04 06 08 06 02 02 08 14 07 05 08 16 18 12 12 12 01 12 17 01 01 19 19 17 02 12 16 12 17 17 17 11 17 19 19 19 19 105 Diagnostics 106 Inverter Fault Code D9h DAh DBh DCh F1h F2h F3h F5h Inverter Fault Name E.MB5 E.MB6 E.MB7 E.EP E.1 E.2 E.3 E.5 Brake seq fault Brake seq fault Brake seq fault Enc. Phase Fault Fault 1 (opt slot 1) Fault 2 (opt slot 2) Fault 3 (opt slot 3) Fault 5 F6h E.6 Fault 6 F7h E.7 Fault 7 FBh FDh 51h E.11 E.13 E.UVT Fault 11 Fault 13 Under Voltage Inverter Description PROFIdrive Fault Other Other Other Feedback Internal Communication Internal Communication Internal Communication Microcontroller Hardware or Software Microcontroller Hardware or Software Microcontroller Hardware or Software Technology Power Electronics Mains Supply PROFIdrive Fault Code 19 19 19 11 12 12 12 01 01 01 17 05 02 Doc.Id. HMSI-27-207 Doc.Rev. 1.00 Translation of Signal Numbers A. Appendix A Translation of Signal Numbers Signal numbers used in the inverter do not directly translate to signal numbers (PNUs) used on PROFINET. An offset is added to avoid ambiguous numbering on PROFINET, where parameters and monitor data have different PNU numbers. Every signal number corresponds to 16 bits. A 32bit parameter e.g., occupies two numbers, but is addressed by the lower number only. Signal No, Inverter PNU No, Acyclic Offset PROFIdrive Data (decimal) (Signal No. Exchange + Offset) 13288 14312 Yes 13288 14314 Yes 13288 14315 Yes 13288 14317 Yes 13288 14318 Yes 13288 14319 Yes 13288 14320 Yes 1 13288 Yes Yes Yes Yes Yes Yes Yes No No 14324 14325 14326 14328 14329 14330 16378 14331 14333 16381 Yes Yes Yes Yes Yes Yes Yes Yes Yes Yes Yes Yes Yes Yes Yes Yes Yes No No No No No No Yes No No Yes No Yes No Yes No Yes No 1 Yes Yes Yes Yes Yes Yes Yes Yes Yes Yes Yes Yes No No No Yes Yes No No No No No No No Name HexadecDecimal imal DriveControlMaskWrite DriveControl DriveStatus SetpointSpeed CommandSpeed ActualSpeed SpeedScaleNumerator SpeedScaleDenominator 400 402 403 405 406 407 408 40A 1024 1026 1027 1029 1030 1031 1032 1034 RatedSpeed PoleCount RatedCurrent RatedVoltage MotorType 40C 40D 40E 410 411 412 1036 1037 1038 1040 1041 1042 AccelerationDeltaSpeed2 413 415 1043 1045 AccelerationDeltaTime2 417 1047 DecelerationDeltaSpeed2 419 1049 DecelerationDeltaTime2 41B 1051 QuickDecelerationDeltaSpeed QuickDecelerationDeltaTime MaxSpeed MinSpeed TargetTorque ActualTorque TorqueSlope TorqueProfileType RatedTorque TorqueScaleNumerator TorqueScaleDenominator DisableOptionCode ShutdownOptionCode 41D 1053 13288 13288 13288 13288 13288 13288 15336 13288 13288 15336 13288 15336 13288 15336 13288 15336 13288 41F 421 423 425 426 427 429 42A 42C 42E 430 431 1055 1057 1059 1061 1062 1063 1065 1066 1068 1070 1072 1073 13288 13288 13288 13288 13288 13288 13288 13288 13288 13288 13288 13288 DriveMode2 SupportedModes 1 2 1 16383 14337 16385 1 16387 14341 14345 14347 14349 14350 14351 14353 14354 14356 1 14360 14361 Cyclic Data Exchange On the network, this inverter parameter is presented as subindex 1 of the preceeding parameter. These parameters can either be accessed (as acyclic data) as an array, with offset 13288d, or can each entry in the array be mapped as a separate parameter with offset 15336d (as acyclic and/or cyclic data). A8NPRT_2P PROFINET Option Board 107 Appendix A 108 Translation of Signal Numbers Doc.Id. HMSI-27-207 Doc.Rev. 1.00 Troubleshooting B. Appendix B Troubleshooting When a fault occurs where the inverter trips itself and the A8NPRT_2P PROFINET Option Board, check the inverter's operation panel and the LED indications on the A8NPRT_2P unit. Consult the checkpoints in the table below to identify the cause, and take appropriate countermeasures. Operation Panel Display on the Drive 0.00E E.OP1 LED indications on Possible Cause A8NPRT_2P Option board No LED lit The option The option board is not board is not working. mounted properly A firmware upgrade procedure was interrupted - Checkpoint/Troubleshooting Check if the option board is mounted properly and in the correct option slot Contact your local Mitsubishi Electric representative for further assistance Reset the inverter Perform all parameter clear to initialize all parameter settings, then powercycle the inverter The option A firmware All LEDs are off during the last 10-15 board is busy upgrade proce- seconds of a firmware upgrade. Foldure is curlow the instructions appended to rently running the firmware upgrade package LEDs lit Please refer to “LED Indicators” on page 13. MS and NS LEDs PROFINET master transitioned to In your application, clear bit 10 flashing green STOP mode while “Control by before transitioning to STOP mode PLC” (STW1 bit 10) was set, caus- or remove the cause that disconing an inverter stop nects the data transmission between the master and the option board MS LED green, Connection PROFINET mas- Verify that the PROFINET master and NS LED off was closed ter or network all network components between while “Control component master and option board are powby PLC” (STW1 was powered ered and fully functioning bit 10) was set, off causing an The network Check if the network cables are coninverter stop cables are not nected properly between all nodes connected of the network properly A8NPRT_2P PROFINET Option Board 109 Appendix B 110 Troubleshooting Doc.Id. HMSI-27-207 Doc.Rev. 1.00 HICP (Host IP Configuration Protocol) C. HICP (Host IP Configuration Protocol) C.1 General Appendix C The option board supports the HICP protocol used by the Anybus IPconfig utility for changing settings, e.g. IP address, Subnet mask , and enable/disable DHCP. Anybus IPconfig can be downloaded free of charge from the HMS website, www.anybus.com. This utility may be used to access the network settings of any Anybus product connected to the network via UDP port 3250. C.2 Operation Upon starting the program, the network is scanned for Anybus products. The network can be rescanned at any time by clicking ‘Scan’. To alter the network settings of the option board, double-click on its entry in the list. A window will appear, containing the settings for the option board. Validate the new settings by clicking ‘Set’, or click ‘Cancel’ to cancel all changes. Optionally, the configuration can be protected from unauthorized access by a password. To enter a password, click on the ‘Change password’ checkbox, and enter the password under ‘New password’. A8NPRT_2P PROFINET Option Board 111 Appendix C 112 HICP (Host IP Configuration Protocol) Doc.Id. HMSI-27-207 Doc.Rev. 1.00 Copyright Notices D. Appendix D Copyright Notices This product includes software developed by Carnegie Mellon, the Massachusetts Institute of Technology, the University of California, and RSA Data Security: ***************************************************************************** Copyright 1986 by Carnegie Mellon. ***************************************************************************** Copyright 1983,1984,1985 by the Massachusetts Institute of Technology ***************************************************************************** Copyright (c) 1988 Stephen Deering. Copyright (c) 1982, 1985, 1986, 1992, 1993 The Regents of the University of California. All rights reserved. This code is derived from software contributed to Berkeley by Stephen Deering of Stanford University. Redistribution and use in source and binary forms, with or without modification, are permitted provided that the following conditions are met: • Redistributions of source code must retain the above copyright notice, this list of conditions and the following disclaimer. • Redistributions in binary form must reproduce the above copyright notice, this list of conditions and the following disclaimer in the documentation and/or other materials provided with the distribution. • Neither the name of the University nor the names of its contributors may be used to endorse or promote products derived from this software without specific prior written permission. THIS SOFTWARE IS PROVIDED BY THE REGENTS AND CONTRIBUTORS ``AS IS'' ANDANY EXPRESS OR IMPLIED WARRANTIES, INCLUDING, BUT NOT LIMITED TO, THE IMPLIED WARRANTIES OF MERCHANTABILITY AND FITNESS FOR A PARTICULAR PURPOSE ARE DISCLAIMED. IN NO EVENT SHALL THE REGENTS OR CONTRIBUTORS BE LIABLE FOR ANY DIRECT, INDIRECT, INCIDENTAL, SPECIAL, EXEMPLARY, OR CONSEQUENTIAL DAMAGES (INCLUDING, BUT NOT LIMITED TO, PROCUREMENT OF SUBSTITUTE GOODS OR SERVICES; LOSS OF USE, DATA, OR PROFITS; OR BUSINESS INTERRUPTION) HOWEVER CAUSED AND ON ANY THEORY OF LIABILITY, WHETHER IN CONTRACT, STRICT LIABILITY, OR TORT (INCLUDING NEGLIGENCE OR OTHERWISE) ARISING IN ANY WAY OUT OF THE USE OF THIS SOFTWARE, EVEN IF ADVISED OF THE POSSIBILITY OF SUCH DAMAGE. ***************************************************************************** Copyright (C) 1990-2, RSA Data Security, Inc. All rights reserved. License to copy and use this software is granted provided that it is identified as the "RSA Data Security, Inc. MD4 Message-Digest Algorithm" in all material mentioning or referencing this software or this function. License is also granted to make and use derivative works provided that such works are identified as "derived from the RSA Data Security, Inc. MD4 Message-Digest Algorithm" in all material mentioning or referencing the derived work. RSA Data Security, Inc. makes no representations concerning either the merchantability of this software or the suitability of this software for any particular purpose. It is provided "as is" without express or implied warranty of any kind. These notices must be retained in any copies of any part of this documentation and/or software. ***************************************************************************** A8NPRT_2P PROFINET Option Board 113 Appendix D Copyright Notices Copyright (C) 1991-2, RSA Data Security, Inc. Created 1991. All rights reserved. License to copy and use this software is granted provided that it is identified as the "RSA Data Security, Inc. MD5 Message-Digest Algorithm" in all material mentioning or referencing this software or this function. License is also granted to make and use derivative works provided that such works are identified as "derived from the RSA Data Security, Inc. MD5 Message-Digest Algorithm" in all material mentioning or referencing the derived work. RSA Data Security, Inc. makes no representations concerning either the merchantability of this software or the suitability of this software for any particular purpose. It is provided "as is" without express or implied warranty of any kind. These notices must be retained in any copies of any part of this documentation and/or software. 114 Doc.Id. HMSI-27-207 Doc.Rev. 1.00 Index Index A M Acyclic Data Exchange . . . . . . . . . . . . . . . . . . . . . . . . . .100 Monitor Data . . . . . . . . . . . . . . . . . . . . . . . . . . . . . . . . . . . . 90 C N Control Word STW1 . . . . . . . . . . . . . . . . . . . . . . . . . . . . . . 97 Network Connector . . . . . . . . . . . . . . . . . . . . . . . . . . . . . . 12 D O Data Exchange . . . . . . . . . . . . . . . . . . . . . . . . . . . . . . . . . . 89 Drive Profile Parameters . . . . . . . . . . . . . . . . . . . . . 89 Monitor Data . . . . . . . . . . . . . . . . . . . . . . . . . . . . . . . . 89 Parameter . . . . . . . . . . . . . . . . . . . . . . . . . . . . . . . . . . 89 Drive Profile Parameters . . . . . . . . . . . . . . . . . . . . . . . . . 93 Drive Reset . . . . . . . . . . . . . . . . . . . . . . . . . . . . . . . . . . . . . . 94 Option Board Parameters . . . . . . . . . . . . . . . . . . . . . . . . 72 P Environment Specifications . . . . . . . . . . . . . . . . . . . . . . . . . . . . . . . . 8 Ethernet Communication Settings (Parameter 1317) . . . 74 Host Settings (Parameter 1301) . . . . . . . . . . . . . . 73 Parameters 1300 (General settings) . . . . . . . . . . . . . . . . . . . . . . 72 1301 (Ethernet Host Settings) . . . . . . . . . . . . . . . . 73 1305 - 1308 (IP Address) . . . . . . . . . . . . . . . . . . . . . 73 1309 - 1312 (Subnet Mask) . . . . . . . . . . . . . . . . . . . 73 1313 - 1316 (Gateway Address) . . . . . . . . . . . . . . 73 1317 (Ethernet Communication Settings) . . . . 74 Process Data . . . . . . . . . . . . . . . . . . . . . . . . . . . . . . . . . . . . . 96 PROFIdrive Parameters . . . . . . . . . . . . . . . . . . . . . . . . . . . 93 Profinet Controller setup . . . . . . . . . . . . . . . . . . . . . . . . . 16 F S FTP Server . . . . . . . . . . . . . . . . . . . . . . . . . . . . . . . . . . . . . . . 85 SIMATIC STEP7 . . . . . . . . . . . . . . . . . . . . . . . . . . . . . . . . . . 62 Specifications Environment . . . . . . . . . . . . . . . . . . . . . . . . . . . . . . . . . 8 Speed actual value A (NIST_A) . . . . . . . . . . . . . . . . . . . . 97 Speed setpoint A (NSOLL_A) . . . . . . . . . . . . . . . . . . . . . 97 Status Word ZSW1 . . . . . . . . . . . . . . . . . . . . . . . . . . . . . . . 97 Subnet Mask (Parameters 1309 - 1312) . . . . . . . . . . . 73 E G Gateway Address (Parameters 1313 - 1316) . . . . . . . 73 General settings (Parameter 1300) . . . . . . . . . . . . . . . 72 General State Diagram . . . . . . . . . . . . . . . . . . . . . . . . . . . 95 GX Works Network Detect . . . . . . . . . . . . . . . . . . . . . . . . . . . . . 39 Telegram 1 . . . . . . . . . . . . . . . . . . . . . . . . . . . . . . . . . . 25 Telegram 102 . . . . . . . . . . . . . . . . . . . . . . . . . . . . . . . 27 I Inverter parameters . . . . . . . . . . . . . . . . . . . . . . . . . . . . . 90 IP Address (Parameters 1305 - 1308) . . . . . . . . . . . . . . 73 T Telegram Types . . . . . . . . . . . . . . . . . . . . . . . . . . . . . . . . . . 98 TIA Portal Acyclic communication . . . . . . . . . . . . . . . . . . . . . . 51 Telegram 1 . . . . . . . . . . . . . . . . . . . . . . . . . . . . . . . . . . 40 Telegram 102 . . . . . . . . . . . . . . . . . . . . . . . . . . . . . . . 49 W L Web Server . . . . . . . . . . . . . . . . . . . . . . . . . . . . . . . . . . . . . . 77 LED Indicators . . . . . . . . . . . . . . . . . . . . . . . . . . . . . . . . . . . 13 Error . . . . . . . . . . . . . . . . . . . . . . . . . . . . . . . . . . . . . . . . 13 Link (1, 2) . . . . . . . . . . . . . . . . . . . . . . . . . . . . . . . . . . . 13 Module status . . . . . . . . . . . . . . . . . . . . . . . . . . . . . . . 13 Network status . . . . . . . . . . . . . . . . . . . . . . . . . . . . . . 13 A8NPRT_2P PROFINET Option Board 115 Index 116 Doc.Id. HMSI-27-207 Doc.Rev. 1.00