1
43-200 Pszczyna, ul. Staromiejska 31b
tel. 032 326 30 70, fax 032 447 73 30
www.gorke.com.pl, e-mail: [email protected]
SPECIFICATION AND USER’s MANUAL
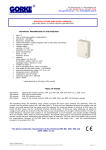
type of the device: ATG CID sender
Version: GM 47
The sender is designed to transmit alarm signals from an object which is
equipped with an alarm control panel to a phone monitoring station
The technical conditions which enable applying the device:
•
•
using an alarm control panel with a phone dialer which allows for
working in one of the following formats: Contact Id or Ademco
Express (DTMF)
and disposing a monitoring station which operates on the basis of
the „municipal” line (PSTN) which allows for receiving these formats
of transmissions. The majority of the monitoring stations presently
used on the market has such possibility, for example: SGMLR2(SUR-GARD), STAM-1 (SATEL), (VISONIC) and other.
CONSTRUCTION AND OPERATING
The ATG-CID sender is an electronic device which serves as an advanced microprocessor controller. The function
of transmitting alarm events is realised on the basis of the main circuit and the reserve circuit. A network of a
mobile phone operator is used as the main circuit. As an optional reserve circuit a wire PSTN analog phone
network is used.
The connection with the GSM network is kept through a professional GSM modem (type: GM47/GR46) produced
by Sony Ericsson, which is installed in the sender.
A unique method of transmission was applied here which had a great effect: information about events is
transmitted in time and amount which result from the alarm control panel's possibilities.
Transmitting the information about events from the alarm control panel works the following way: the sender
simulates the presence of a phone line and creates a transmission channel between the alarm control panel and
a monitoring station.
Applying a reserve circuit helps to protect the connection with the patrolled site in case the connection in the
main channel was lost. Switching between the circuits is realised automatically on the basis of the configuration
of the alarm control panel.
Using the phone line for the monitoring purposes does not exclude using it for other purposes because the
sender will connect the municipal line to the control panel only in emergency situations or if the control panel is
to be configured remotely.
Sending the alarm events by the control panel has the highest priority and in such situations a user, who
connected to the line gets disconnected for the time of transmitting the event.
The basic and unique advantage of the ATG-CID is the fact that in the applied solution the sender does not
generate automatically the confirmation of receiving signals to the alarm control panel but it provides a
transmission channel between the control panel and the receiving devices. Thanks to this solution the
information about events is kept in the alarm control panel until it is really delivered.
The device meets the requirements of the directives EMC 89/ 336/ EEC and
RTTE 1999/ 5/ EC.
Gorke Electronic Sp. z o.o.
SPECIFICATION AND USER’s MANUAL: ATG-CID sender
strona: 1
_______________________ THE SENDER’s FUNCTIONS _______________________
TEST – output 1
You can enter to the sender's memory 1 phone number which will be granted the right to call the TEST function.
You can call from such a number to the GSM sender's number and after the number is recognized as the same
which is in its memory, the connection is rejected. Simultaneously the output 1 is released for about 2 seconds
(shorting to ground). If the TEST output is connected to the appropriate input in the control panel (for example,
silent alarm 24h), the control panel will generate an event which will next cause sending an appropriate
message to the monitoring station – it will enable testing the work of sender and of the control panel.
controlling the output 2
You can program 1 phone number in the sender's memory which will be enabled to control the output 2. You can
call from this number the GSM sender. After the device recognizes the number, the sender accepts the call and
sends an acoustic signal of encouragement (3 short tones) and performs the functions which depend on the
chosen button and the operating mode.
In the configuration program you can choose the operating mode of the WY2 output:
•
•
the monostable: the output is released (shorting to ground) for 2 seconds after each pressing button 1
in the phone
the bistable: the output’s state depends on the digit chosen on the caller’s phone
0 – closing the WY2 output (the transistor does not conduct)
1 – opening the WY2 output (shorting to ground)
2 – checking the state of the output 2
The connection will be finished after the caller disconnects or after 15s from the last pressing of a button.
output GSM supervising (WY3)
The output GSM SUPERVISING is used to inform the alarm control panel whether the GSM sender operates
correctly and is ready to transmit events.
If the connection is lost or there is any other failure of the sender which makes sending signals through GSM
network impossible, the state of this output will be:
•
changed from the state of shorting to ground into the state of high impedance and it will last until the
GSM connection will be restored
Entering the signal from this output on the appropriate line in the alarm control panel enables signalling the
failure of GSM for example, using manipulators.
connecting the municipal line
This function is used in order to enable the access to the control panel through the municipal line when
configuring the alarm control panel remotely.
You can program in the sender’s memory a phone number which will be granted the right to connect the
municipal line to the alarm control panel. When you call the GSM sender from this number the sender will try to
recognize the number and after this operation succeeds, the sender will accept the connection and will send an
acoustic signal of encouragement.
You can choose the following buttons from the keyboard:
5 – connects the municipal line to the alarm control panel for 10 minutes
6 – connects the municipal line to the alarm control panel for 20 minutes
7 – connects the municipal line to the alarm control panel for 30 minutes
The connection will finish after the caller disconnects or after pressing the button 5, 6, or 7 or after 15 seconds if
none of the buttons is pressed.
Disconnecting the municipal line is executed in two ways: either automatically after the chosen time elapses or if
somebody calls the sender from a phone enabled to connect the municipal line during the countdown. Such a
connection will be rejected by the GSM module but the function will be executed, that is, the normal operating
mode will be restored and the municipal line will be disconnected from the alarm control panel.
When the municipal line is connected, two functions are disabled: the function of controlling the WY2 output and
the function of connecting the municipal line. Each call from phones ascribed to these functions is rejected.
input 1
The WE1 input allows for remote checking the state of device which is connected to this input. For example, you
can check the state of arming/disarming of the alarm control panel.
You can enter into the sender’s memory a phone number which will be granted a right to control the output 2
and simultaneously to check the state of input 1. If you call from this number and it is recognized by the sender,
the sender will accept the connection and will send an acoustic signal of encouragement.
You can choose the following numbers from the keyboard:
- 0,1 (check: controlling output 2)
- or 2 – checks the state in input 1
In response to pressing the button 2, the GSM sender sends informing acoustic signals which depend on the
state of the input 1:
- two signals – the output is closed
- three signals – the output is opened
The connection is finished after you disconnect or after 15 seconds from the last pressing a button.
Gorke Electronic Sp. z o.o.
SPECIFICATION AND USER’s MANUAL: ATG-CID sender
strona: 2
auto logging in
The ATG-CID sender tries to connect to the GSM network every several dozen seconds. If during about 5
minutes such connection is not established, the sender will be automatically RESET and the procedure will be
repeated.
The sender’s logging in to the GSM network lasts on average about 30 seconds. If during logging the alarm
control panel “lifts the phone receiver” (the DIALER diode lights), the logging time may be lengthen to 2
minutes.
_____________________ PROGRAMMING THE SENDER _____________________
To configure the sender, use the application which is delivered with the sender and a special connecting cable
which is connected to the junction in the sender and a DB9 plug for the serial port in a computer.
Order of operations during programming:
W connect the KRS-125 cable to a computer
W turn the computer on and launch the configuration program
W enter data into the configuration program
W on the PORT tab choose the appropriate COM port (that the cable is connected to)
W plug the cable’s connector in the appropriate socket of the sender
W connect the sender’s supply from the 12V accumulator
W send the setting to the sender – SEND button
- before the program starts to send the configuration to the sender, it reads the sender’s software version and
shows the number in the left bottom corner of the programming window – for example, “VERSION 4.0”
If the version number is incompatible with the application’s possibilities, a message “COMMUNICATION ERROR”
will appear and in the right bottom corner of the screen you will see the number of device’s version.
- if the communication with the sender is not established, the version number 0.0 will be displayed (in the
bottom left corner of the programming screen)
- try once more to launch the programming – SEND button
- if it fails, check whether:
the cable is connected to the appropriate COM port
the sender is supplied with min. 10,5V
the DIALER diode does not light (the alarm control panel is disconnected from the sender)
W
W
W
W
read the settings to check their correctness – READ button
disconnect the programming cable from the sender
wait until the sender logs into the GSM network (30s up to 2min – check the “AUTO LOGGING IN” point)
send an event to check the device’s operating
If you change the configuration of a sender which is connected to the alarm control panel, do it when the sender
is connected to the accumulator supply and is disconnected from the 230V supply and the cables which connect
the sender with the alarm control panel dialler’s output are disconnected.
It will be impossible to program the sender or read its settings with the dialler’s output remains connected to the
sender, if during the communication with computer the alarm control panel “lifts the phone receiver” which is
signalled by lighting DIALER diode.
To facilitate programming the senders, you can save the present settings configuration on the computer’s disk.
(SETTINGS AND SAVE ON DISK). With next application launch, read the saved settings (SETTINGS AND READ
FROM DISK).
In the fields for entering the phone number you should:
- when entering the cell phone number:
xxxxxxxxx
enter the 9-digit phone number, for example 123456789
- when entering the stationary phone number:
kknnnnnnn
2 digits of the area code and the phone number (up to 15 digits); for example 321234567
Gorke Electronic Sp. z o.o.
SPECIFICATION AND USER’s MANUAL: ATG-CID sender
strona: 3
Description of the signalling diodes.
D1 - LM /green/ - it lights when the municipal line is connected to the sender
D2 - STATUS /blue/ - signals the GSM range and errors
D3 - CONNECTION /red/ - it lights then there is a connection through a GSM network. A short blink confirms
performing the TEST function from a programmed phone
D4 - DIALLER /red/ - it lights when the alarm control panel lifts the receiver
D5 - DATA /red/ - it lights during communication with a modem and during dialling a number
TYPE OF THE STATUS DIODE’S LIGHTING
no light
------------------- ------------- -------------- ------------- - ----------- - ------------ - ---------- - - --------- - - --------- - - -------- - - - ------- - - - ------- - - - -------------------------
MEANING
no range 1
Level of range: 1 line
Level of range: 2-3 lines
Level of range: 4-5 lines
Modem error 2
No SIM card or incorrect PIN code
No operator 4
Blocked SIM card 5
logging t o network
3
- indicates diode’s lighting
1) it can happen when the sender was logged to the GSM network and there was range but then, for example,
the antenna was disconnected /after 5 minutes of no range the sender will be reset/
2) the modem does not respond to the AT commands - /attempts to connect with the modem are undertaken
every 5 second. If it fails, the modem will be reset every 1 minute/
3) this type of error occurs when the SIM card is not inserted into the modem or the PIN number entered in the
configuration program is incompatible with the card’s PIN code. If the error appears, only one attempt is
undertaken to avoid blocking the SIM card /in such case, the modem does not get reset automatically but
immediately after detecting the error it stops operating/
4) no operator /the attempts to log into an operator’s network are undertaken every 5 seconds. If it fails, the
modem will get reset every one minute/
5) blocked card – take the card out and, using a phone and entering the PUK code, unblock it
IMPORTANT! - You must not take out or out in the SIM card when the sender is connected to supply.
Connecting the relays
When connecting the relays to the OC outputs, use protection diodes, connected parallel to the relay coil.
When using the MPU-121 relay modules it is not necessary to use diodes because the module has an inbuilt
protection diode.
Terminal strip description
To the clapms “WE1” and OUTPUT 1, 2, 3 connect according to the description above
Connect the dialler’s output from the alarm control panel to the “C.ALARM” clamps
Connect the subscriber’s phone on the patrolled site to the “TEL” clamps (not to the clamps to the alarm control
panel). Connect the municipal line to the “LINE M.” clamps and it is supposed to be the first device on line in the
given object.
Settings in the alarm control panel
Gorke Electronic Sp. z o.o.
SPECIFICATION AND USER’s MANUAL: ATG-CID sender
strona: 4
To make the sender cooperate properly with the control panel, set the configuration in the alarm control panel
If the municipal line is to be a protection for the GSM connections, program the second monitoring station as a
reserve in the settings of the alarm control panel.
First monitoring station
Number to the station: 11111111 (eight digits 1)
Format of transmission to the monitoring station: Contact ID, Ademco Expres
Way of dialling: tone (DTMF)
Number of repetitions: 8 (at least 5)
Turn the confirmation on KISS OFF*
Turn the supervision of the phone line’s presence on*
Turn the alternate choosing off *
Turn the control of engaged signal off *
Second monitoring station
number to the second station:
2 /pause/ 0 /area code / 1234567 – consistent with the monitoring station number
- if a prefix is necessary (for example 1033), enter it the following way: 2 p p 01033321234567
- if a prefix is not necessary, you should enter: 2 p p 0321234567
format of transmission to the monitoring station: Contact ID, Ademco Expres
way of dialling: tone (DTMF)/impulse
number of repetitions: 8 (at least 5)
Turn the confirmation on KISS OFF*
Turn the supervision of the phone line’s presence on*
Turn the alternate choosing off *
Turn the control of engaged signal off *
* - if this function is available in the alarm control panel
IMPORTANT! - The digit 2 at the beginning of a dialled number informs the sender that the connection is to be
performed through the municipal line. It is necessary to enter two pauses to a correct switching onto the
municipal line.
Programming the SIM card
All the additional services of the SIM card should be disabled; except voice connection with a dialled number of
the monitoring station. For example, the following services should be disabled: waiting calls, voicemail,
information about missed calls and other.
TECHNICAL DATA
Supply:
- nominal: 12 V DC
- allowable: 10,5 – 14,5 V DC
Power consumption:
- average on reception: 100 mA
- average on sending: 200 mA
- maximal: 300 mA
Outputs:
- monostable 2s
no range information, OC/ 50 mA
- mono/bistable
controlled by CLIP, OC/50 mA
- bistable
controlled by DTMF, OC/50 mA
- PSTN
to connect the user’s phone
Inputs:
- PSTN
to connect the municipal line
- dialer
to connect the alarm control panel’s dialer
- universal (0 – 15 V DC)
for example, to control the arming state of the control panel
Average connection time:
- for Contact ID
~6s/ 1 even, ~9s/ 2 events
Gorke Electronic Sp. z o.o.
SPECIFICATION AND USER’s MANUAL: ATG-CID sender
strona: 5