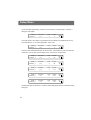
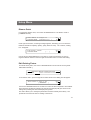
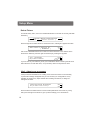
1
GALAXY
User Manual
Contents
GALAXY User Instruction
Introduction ......................................... 1
Safety Rules ....................................................... 1
Notice Information .............................................. 2
Specifications ...................................... 3
Getting Acquainted ............................. 4
Principle Features .............................................. 4
Basic Control Parts ............................................ 5
Setup Menu Field ................................ 7
Internal Library ................................................. 7
Create New Fixture ......................................... 7
Total DMX Channel ................................... 8
LCD Effect Label ....................................... 8
Internal Patch ............................................ 9
Pan/ Tilt Patch ......................................... 10
Hard/ Soft Cross ..................................... 10
Fixture Name ........................................... 11
Reset/ Lamp Values ................................ 12
Dip-Switch Configuration ......................... 12
Control Type ............................................ 13
Dimmer Patch .......................................... 15
Edit Existing Fixture ...................................... 15
Delete Fixture ............................................... 16
Patch ................................................................ 18
MIDI Channel ................................................... 21
Strobe Type ..................................................... 21
Gooseneck Dimmer ........................................ 22
Contents
GALAXY User Instruction
View Free Memory ..................................................... 23
Send Data File ............................................................ 23
Load Data File ............................................................ 25
Update Software ........................................................ 26
Save to Card .......................... .................................... 27
Load from Card .......................................................... 28
Record Functions ...................................... 30
Recording Shows ...................................................... 30
Active Effects ......................................................... 31
Edit Steps .............................................................. 32
Step's Time ............................................................ 33
Recording Chases ..................................................... 34
Recording Scenes ..................................................... 35
Playback Mode ........................................... 36
Playing Scenes/ Chases/ Shows .............................. 36
Multi Playback ............................................................ 37
Strobe Light Programs ............................. 38
Choose Fixtures ........................................ 39
Select a Fixture .......................................................... 39
Group of fixtures .......................................................39
Utility Controls ........................................... 40
Times ........................................................................... 40
Copy ............................................................................ 41
Reset ........................................................................... 41
Lamp ........................................................................... 42
MIDI Implementation .................................. 42
Introduction
Notice Information
Keep dry
This product is not waterproof, and may malfunction if exposed to high levels of
humidity. Rusting of the internal mechanism can cause irreparable damage.
Do not drop
This product may malfunction if subjected to strong shocks or vibration.
Keep away from strong magnetic fields
Do not use or place this device in vicinity of equipment that generates strong
electromagnetic radiation or magnetic fields. Strong static charges or the magnetic
fields produces by equipment such as radio transmitters could interfere with the
display or affect the product's internal circuitry.
Cleaning
Due to fog residue, smoke, and dust cleaning the exterior of the case may become
necessary. Use normal glass cleaner and soft cloth to wipe down the outside casing.
CF cards
Memory card may become hot during use. Observe due caution when removing
memory cards from this device.
Copyright Notice
No part of the manual included with this product may be reproduced, transmitted,
transcribed, stored in a retrieval system, or translated into any language in any form,
by any means, without authorized written permission.
2
Introduction
Welcome!
You made the right decision by choosing this sophisticated and intelligent product.
Every unit has been thoroughly tested and carefully packed before shipment. Unpack the shipping carton carefully, saving the carton and all packing materials for
possible later use.
Check carefully for sure your product is not damaged and all accessories not missing. If your product appears to be damaged or missing, please do use it and contact
your local distributor immediately.
Please read this manual carefully and thoroughly, as it gives important information
regarding safety, use and maintenance. Keep this manual with the unit for possible
future reference.
Safety Rules
To reduce the risk of electrical shock or fire, do not expose this unit to rain or
moisture.
Do not spill water or other liquids into or on to your unit.
Be sure that the local power outlet matches that of the required voltage for
your unit.
Do not attempt to operate this unit if the power cord has been damaged.
Turn off immediately in the event of malfunction.
Should you notice smoke or an unusual smell coming from the equipment,
please discontinue using it and disconnect from the power immediately.
Do not open the unit - there are no user serviceable parts inside.
Do not dismantle or modify the unit, as this voids all warranties.
Do not attempt repairs. Repairs by unqualified people could cause damage
or faulty operation. Contact your local authorized service center.
1
Specification
Model:
GALAXY
Power Requirement:
AC 230V/ AC 120V
Housing:
Sheet metal with epoxy powder finish
LCD:
2x40 characters
DMX Channels
512 max., Configurable for intelligent
fixtures, traditional pars and DMX strobes
Compact Flash Card:
32 MB
DJ Lamp:
USB connector, 5V/1W gooseneck light
Inputs/Outputs
DMX OUT:
3-pin Neutrik chassis connector
MIDI IN/THRU/OUT:
Standard 5-pin DIN connector
RS-232 Port:
DB9 connector
Audio IN:
1/4" unbalanced stereo jack
Audio trigger:
Built-in microphone or line in
Overall Dimensions:
650x400x115mm
Weight:
Approx. 8.3 Kg
Getting acquainted
Principle Features
512 DMX channels (24 channels for pars, 8 channels for strobes
and up to 36 channels per fixture)
20 preset Stro be programs & 48 programmable sc en es
48 fr ee ly programmable shows for the fix tur es , ea ch with a
ma xim um of 48 steps
48 fr ee ly programmable chases for the pa rs, each with a
ma xim um of 48 steps
Int er na l Lib ra ry is edita ble for up to 256 fix tur es
Fr ee ac cess of CF ca rd (32MB) to ex ch ange the data fil es ,
inc lud ing th e lib rary, memory an d se tu p
Th e da ta fil es can be downloa ded or uploa ded to a PC
The software can be updated with new versions
Audio input and bu ilt- in micr op hone for mu sic sy nc . Fu nc tio ns
USB socket fo r DJ lamp(5V, 1W)
Jo ys tic k fo r Pa n/ Tilt adjus tment of fix tures
Blackout & gr and mas te r
Two LCD di sp lay s, 40 x2 characters ea ch & two 4- dig it LED di splay
Fo ur 3- pin female XLR so ck et s for 512 DMX ch an ne ls output
MIDI In / Thru/ Ou t co nnector s
4
Getting acquainted
Basic Control Parts
Fixture
This button allows you to choose fixtures for manual control. Group function is
enabled when the Fixture button is pressed down.
Number Fixtures 1-16
These 16 buttons are used to enable or disable the fixtures in the patch.
Joystick
This joystick is used to control the Pan or Tilt movement of the fixtures.
Pan/Tilt
These two buttons are used to enable or disable the Pan or Tilt control of joystick.
Setup
This button is used to access setup menu.
Record
This button is used to access recording menu.
Cursor Buttons(UP, DOWN, LEFT and RIGHT)
These four buttons are used together for menu settings.
Function Faders (1-6)
These six faders play the same roles as the Cursor buttons do.
Right/Left Arrow Select
These two buttons navigate you through all the dialog boxes appeared in the LCD.
Dimmer Faders (1-12)
These 12 faders, in combination with the Channel button, can be used to control the
24 individual channels of the lightings
5
Getting acquainted
Basic Control Parts
Flash Buttons
These 12 buttons are used to bring an individual channel to full intensity. They also are
used in combination with the Flash Page button, to select the scene or the step number
of the chases or shows. "Latch" can be enabled when the buttons are pressed down for
2 seconds.
Flash Page
In combination with the Flash buttons, this button is used to page through four pages
of 12 scenes, 12 steps of the chases or shows.
Channel button
This button is used to select the channels between two page, the first 1-12 channels,
and the second 13-24 channels.
Dimmer Master Fader
This fader is used to proportionally change the overall intensities of the 24 channels.
Grand Master Fader
This fader is used to proportionally change the overall console output except that
the flash button is enabled.
Preset Faders (1-8)
These 8 faders are used to proportionally change the preset output level.
Blackout
This button is used to enable or disable the overall console output in all instances.
Audio Button
This button is used to enable or disable audio synchronized control of the selected
scenes, chases, shows and the strobe programs..
6
Setup Menu
Switch the power on, this unit will access Fixture mode automatically(The fixture LED
light up). To access Setup menu, simply press the Setup button in Fixture mode.
The Setup LED blinks briefly and the right LCD appears a Setup menu dialog box.
The Setup menu contains 11 options, including Internal Library, Patch, MIDI Channel,
Strobe Type, Gooseneck Dimmer, View Free Memory, Send Data File, Load Data File,
Update Software, Save to Card and Load from Card.
Internal Library
In Setup menu, the flashing the characters in the brackets will remind you to select the
item you want to work on. Use Cursor UP/DOWN buttons or F4 fader to scroll to
[ Internal Library ].
SELECT
CONFIGURATION & SETUP MENU
[ INTERNAL LIBRARY
esc
] ok
Press right arrow Select button to access the menu of Internal Library, the Internal Library
menu consists of three(3) items, including Create New Fixture, Edit Existing Fixture and
Delete Fixture.
Create New Fixture
In Internal Library menu, use Cursor UP/DOWN buttons or F5 fader to scroll to [ CREATE
NEW FIXTURE ].
INTERNAL LIBRARY CONFIGURATION
[ CREATE NEW FIXTURE
Select ITEM
]
The Create New Fixture menu allows you to create any new fixture and its configurations
to add into the library(The library can hold a maximum of 255 types of fixtures). The Create
New Fixture contains options for fixture configurations, including Total DMX Channel, LCD
Effect Label, Internal Patch, Pan/ Tilt Patch, Hard/ Soft Cross, Fixture Name, Reset/ Lamp
Values, Dip-Switch Configuration, Control Type and Dimmer Patch.
7
Setup Menu
Total DMX Channel
In Create New Fixture menu, use Cursor UP/DOWN buttons or F5 fader to scroll to [ TOTAL
DMX CHANNEL]. Pressing right arrow Select button gives access to setting and pressing
left arrow button allows you to go back the previous menu.
Select feature to configure for
esc
FIXTURE NAME - [ TOTAL DMX CHANNEL ] ok
Total channels occupied on dmx
FIXTURE NAME [1 ]
esc
ok
This menu allows you to determine how many channels your new fixture uses. You are
empowered to set a scope ranging between 1 and 36. You can adjust the value in the
bracket using the Cursor UP/DOWN buttons or F5 fader. The choice is confirmed by
pressing the right arrow Select button.
LCD Effect Label
In Create New Fixture menu, use Cursor UP/DOWN buttons or F5 fader to scroll to
[ LCD EFFECT LABEL].
Select feature to configure for
FIXTURE NAME - [ LCD EFFECT LABEL ]
esc
ok
This menu allows you to give a definition list of the commands required by the new
fixture to be written on the LCD. Pressing right arrow Select button gives access to
setting and pressing left arrow button allows you to go back to previous menu. A
dialog box appears in the LCD.
Enter number of lcd pages
FIXTURE NAME [1 ]
esc
ok
The flashing character(s) in the bracket reminds you to make a setting for the number of
pages required to view the fixture's effect on the LCD. The scope ranges between 1 and
5. You can adjust the value using Cursor UP/DOWN buttons or F5 fader.
8
Setup Menu
Confirm your setting by pressing the right arrow button, a dialog box appears in the LCD.
Enter the string for effects
more
P1
Each page contains 6 character strings, and each character string consists of a maximum
of 6 letters. The Cursor UP/DOWN buttons are used to scroll through the set of characters
available, LEFT/RIGHT buttons to pass from letter to letter. To enter a letter one by one,
you can use the F1 fader in combination with the Cursor LEFT/RIGHT so that you can give
new effects. There is a dictionary built into the memory, the faders can be used to scroll
through the letters. In the case:
Enter the string for effects
more
COLOR GOBOS G. ROT PRISM SHUTT DIMMR
P1
Pressing the right arrow Select button gives access to page 2 and the left arrow returns to
the previous menu. Storage is automatic.
Internal Patch
In Create New Fixture menu, use Cursor UP/DOWN buttons or F5 fader to scroll to
[ INTERNAL PATCH].
Select feature to configure for
FIXTURE NAME - [ INTERNAL PATCH
]
esc
ok
Press right arrow button, a warning message appears, reminding you not to reuse
one same DMX channel. "ok" confirms, the effect string created in the LCD Effect
Label will reappear.
COLOR GOBOS G. ROT PRISM SHUTT DIMMR
[ -- ]
------
P1
This menu allows you to assign patching effects to fixture's DMX channels. Use
the Cursor UP/DOWN buttons to set the value, LEFT/RIGHT to pass from effect
to effect. You can also use F1-F6 buttons to set the values.
9
Setup Menu
In the case:
COLOR GOBOS G. ROT PRISM SHUTT DIMMR
[5]
6
7
8
9
10
P1
Pressing the right arrow Select button gives access to page 2 and the left arrow returns to
the previous menu. Storage is automatic.
Pan/ Tilt Patch
In Create New Fixture menu, use Cursor UP/DOWN buttons or F5 fader to scroll to
[ PAN/TILT PATCH].
Select feature to configure for
FIXTURE NAME - [ PAN/TILT PATCH
esc
ok
]
Press right arrow button, a warning message appears, reminding you that every X or Y
channel be unique. "ok" confirms, a dialog box will appear.
X(PAN)
H[ -- ] L --
H --
Y(TILT)
L --
PAN/ TILT
OUTPUT
esc
ok
This menu allows you to assign patching Pan/Tilt function to fixture's DMX channels.
Most fixtures allow both 8 and 16 bit control, some only 8 bit. In 16 bit mode, the Pan
movement requires two channels, so does the Tilt movement. In 8 bit mode, just one
channel is used for Pan or Tilt, so only high position is set. Use the Cursor UP/DOWN
buttons to set the value, LEFT/RIGHT to pass from effect to effect. You can also use
F1-F4 buttons to set the values.
Pressing the right arrow Select button confirms your setting.
Hard/ Soft Patch
In Create New Fixture menu, use Cursor UP/DOWN buttons or F5 fader to scroll to
[ HARD/ SOFT CROSS].
Select feature to configure for
FIXTURE NAME - [ HARD/SOFT CROSS
10
]
esc
ok
Setup Menu
"Ok" confirms, the effect string created in the LCD Effect Label will reappear.
COLOR GOBOS G. ROT PRISM SHUTT DIMMR
[HARD] HARD HARD HARD HARD HARD
P1
This menu is used to set the speed at which the fixture passes from one effect to another.
"Hard" implies the highest speed(fade time disabled), "Soft" refers to the set speed(fade
time enabled). Use the Cursor UP/DOWN buttons to select between hard and soft, LEFT
/RIGHT to pass from effect to effect.
Pressing the right arrow Select button gives access to page 2 and the left arrow returns to
the previous menu. Storage is automatic.
Fixture Name
In Create New Fixture menu, use Cursor UP/DOWN buttons or F5 fader to scroll to
[ FIXTURE NAME].
Select feature to configure for
FIXTURE NAME - [ FIXTURE NAME
]
esc
ok
Pressing right arrow Select button gives access to setting, a dialog box appears.
Enter/ modify the name of the fix.:
FIXTURE NAME
esc
ok
This menu is used to name new fixtures. The Cursor UP/DOWN buttons are used to
scroll through the characters available in the dictionary built in to the memory, LEFT/
RIGHT buttons to pass from letter to letter. You can also use F4 fader to select the
desired characters.
Pressing right arrow Select button confirms your new fixture name.
11
Setup Menu
Reset/ Lamp Values
In Create New Fixture menu, use Cursor UP/DOWN buttons or F5 fader to scroll to
[ RESET/ LAMP VALUES].
Select feature to configure for
esc
FIXTURE NAME - [ RESET/ LAMP VALUES ] ok
Press right arrow button, a warning message appears, reminding you not to reuse
one same DMX channel for different effects. "ok" confirms, a dialog box will appear.
RESET
[ -- ]
OFF
--
ON
--
LAMP OFF
---
ON
--
esc
ok
This menu allows you to obtain Remote Reset and Remote lamp on/off functions if it
has this fixture. These settings will be used for the Reset and Lamp functions. Use the
Cursor UP/DOWN buttons to set the value, LEFT/RIGHT to pass from element to element.
You can also use F1-F6 faders in combination with LEFT/RIGHTto set the values. Reset
and Lamp can use identical or different channels.
In the case:
RESET
[ 12 ]
OFF
0
ON
255
LAMP OFF
---
ON
--
esc
ok
These settings indicate that the Remote Reset channel operates on channel 12.
Press right arrow button to confirm your settings.
Dip-Switch Configuration
In Create New Fixture menu, use Cursor UP/DOWN buttons or F5 fader to scroll to
[ DIP-SWITCH CONFIG.].
Select feature to configure for
FIXTURE NAME - [ DIP-SWITCH CONFIG.
12
]
esc
ok
Setup Menu
"Ok" confirms, a dialog box will appear.
ENTER THE DIP-SWITCH CONFIGURATION esc
n.dip = [ - ]
1st channel = - = ok
This menu is used to select the addressing system that different manufacturers use. Use
the Cursor UP/DOWN buttons to select the value, LEFT /RIGHT to pass from parameter
to parameter.
Press the right arrow button to confirm your setting.
Control Type
In Create New Fixture menu, use Cursor UP/DOWN buttons or F5 fader to scroll to
[ CONTROL TYPE].
Select feature to configure for
FIXTURE NAME - [ CONTROL TYPE
]
esc
ok
"Ok" confirms, the effect string created in the LCD Effect Label will reappear.
COLOR GOBOS G. ROT PRISM SHUTT DIMMR
[ LIN ]
LIN
LIN
LIN
LIN
LIN
P1
This menu allows you to select channel effects control mode. The types of control
available are Linear(LIN) and Tabular(TAB): the former provides proportional control,
the latter enables to recall the preset values quickly. Use the Cursor UP/DOWN buttons
to select between LIN and TAB, LEFT /RIGHT to pass from effect to effect.
In the case:
COLOR GOBOS G. ROT PRISM SHUTT
[ TAB ]
LIN
LIN
LIN
LIN
P1
These settings indicate that tabular control will only be used for the color channel.
13
Setup Menu
To set the table's parameters, press the Function button corresponding to COLOR, a
dialog box will appear.
PAGE_1
EFFECT_1
TOT.Pset
[ 1 ]
Pset
1
VALUE
0
esc
ok
TOT.Pset refers to the number of parameters to be entered in the table(maximum 50),
Pset indicates the no. of current parameter. In the case:
PAGE_1
EFFECT_1
TOT.Pset
[ 6 ]
Pset
1
VALUE
0
esc
ok
Use the Cursor UP/DOWN buttons to set the value, LEFT/RIGHT to pass from element
to element. You can also use the faders of F3, F5 and F6 to set the value.
PAGE_1
EFFECT_1
TOT.Pset
[ 6 ]
Pset
2
VALUE
25
esc
ok
PAGE_1
EFFECT_1
TOT.Pset
[ 6]
Pset
3
VALUE
99
esc
ok
PAGE_1
EFFECT_1
TOT.Pset
[ 6]
Pset
4
VALUE
101
esc
ok
PAGE_1
EFFECT_1
TOT.Pset
[ 6]
Pset
5
VALUE
250
esc
ok
PAGE_1
EFFECT_1
TOT.Pset
[ 6]
Pset
6
VALUE
255
esc
ok
Pressing the right arrow button to confirms these settings and returns to the effect string
dialog box.
14
Setup Menu
Dimmer Patch
In Create New Fixture menu, use Cursor UP/DOWN buttons or F5 fader to scroll to
[ DIMMER PATCH].
Select feature to configure for
FIXTURE NAME - [ DIMMER PATCH
]
esc
ok
Press right arrow button, a warning message appears, reminding you not to reuse the
identical channels occupied by X(Pan), Y(Tilt), Reset or Lamp . "ok" confirms, a dialog
box will appear.
Enter dimmer channel
FIXTURE NAME -
[ -- ]
esc
ok
Use the Cursor UP/DOWN buttons or F5 fader to scroll to the channel you want to
regard as dimmer channel. Press the right arrow Select button to confirm this setting.
Edit Existing Fixture
In Internal Library menu, use Cursor UP/DOWN buttons or F5 fader to scroll to [ EDIT
EXISTING FIXTURE ].
INTERNAL LIBRARY CONFIGURATION
[ EDIT EXISTING FIXTURE
Select ITEM
]
To access this menu, press the right arrow Select button and a dialog box will appear.
Select fixture to config. in libr.
[ BLADE 250
]
esc
ok
Use Cursor UP/DOWN buttons or F4 fader to scroll to the fixture required to be modified.
Once the fixture is selected, pressing the right arrow button(ok) will give access to the
settings and pressing left arrow button(esc) will go back.
This menu allows you to modify the parameters of fixtures already in the library. The
procedure is the same as that for creating a new fixture.
15
Setup Menu
Delete Fixture
In Internal Library menu, use Cursor UP/DOWN buttons or F5 fader to scroll to [ DELETE
FIXTURE ].
INTERNAL LIBRARY CONFIGURATION
[ DELETE FIXTURE
]
Select ITEM
Press the right arrow Select button to access this menu, a dialog box appears as follow:
Select fixture to erase from libr.
[
BLADE 250 ]
esc
ok
Use Cursor UP/DOWN buttons or F4 fader to scroll to the fixture to be deleted. Once
the fixture is selected, press the right arrow button(ok), a dialog box appears.
Ypoc - SELECTED!
Do you want to erase it?
quit
no yes
If you are sure of your selection, press "yes" to delete this fixture. Pressing the left arrow
button allows to re-enter this menu, "no" (F6 button) returns to the previous menu.
Hint! - About error messages
If the procedures hereinbefore for creating a new fixture are carried out successfully,
no particular message will appear and you can continue your configurations. If any
mistakes are made or any steps omitted when creating new fixtures, a dialog box
will appear as follow:
CONFIGURATION MISHMASH!
Do you want to exit or retry?
retry
exit
Press the left arrow Select button to review all the parameters and correct any wrong
data, press the right arrow button to give up all the settings you've done before.
16
Setup Menu
When changes are made to a fixture that already exist in the library, a dialog box like
this will appear.
FIXTURENAME - ALREADY EXIST!
Do you want to replace it?
quit
no yes
Press the right arrow Select button(yes) to confirm the modifications to the existing
fixture, F6 button(no) to return to the previous menu and the left arrow button(quit)
to re-enter parameter modification menu.
The library can contain a maximum of 256 fixtures. When there are 256 fixture in the
library and you try to add new fixtures, a reminder message will appear.
ALL LIBRARY HAVE BEEN USED!
esc
ok
Pressing the right arrow button(ok) switches off the error message.
If you want to delete the fixture that has been patched, a reminder message will appear.
THIS FIXTURE IS CURRENTLY USED IN
PATCH!
esc
ok
Pressing the right arrow button(ok) switches off the error message.
When there is no fixture in the library and you try to delete a fixture , a reminder
message will appear.
NO FIXTURE!
esc
ok
Pressing the right arrow button(ok) switches off the error message.
17
Setup Menu
Patch
In Setup menu, the flashing characters inside the brackets will remind you to select
the item you want to work on. Use Cursor UP/DOWN buttons or F4 fader to scroll to
[ PATCH ].
SELECT
CONFIGURATION & SETUP MENU
[ PATC H
]
esc
ok
Pressing right arrow Select button gives access to this setting, a dialog box appears,
requiring you to select AUTO(ON) or MANUAL(OFF) for patching.
DMX CHANNEL AUTO PATCH
SELECT
[ ON
]
esc
ok
Use the Cursor UP/DOWN or F5 fader to select between Auto Patch(ON) and Manual
Patch(OFF). In Auto Patch mode, DMX channels 1-479 are assigned to the fixtures,
480-503 to the Pars, 504-511 to the Strobes and 512 to the Smoke machine. In Manual
Patch mode, all DMX channels are at your disposal.
Change ON to OFF or OFF to ON, a dialog box will appear.
D M X C H A N N E L A U T O PA T C H - O N
Do you want to change it?
quit
no yes
D M X C H A N N E L A U T O PA T C H - O F F
Do you want to change it?
quit
no yes
or
Press the right arrow Select button(yes) to confirm the change to the patch mode and
access this patching setting, F6 button(no) to return to the previous menu and the
left arrow button(quit) to re-enter parameter modification menu.
This GALAXY has 512 DMX channels for up to 44 units, including 16 fixtures, 24 pars and
4 strobes. To control the 44 units, it is necessary to carry out patching procedure.
18
Setup Menu
Fixture Patch
Use the Cursor UP/DOWN buttons or F5 fader to scroll to [FIXTURE PATCH].
Select
DMX CHANNELAUTO PATCH- ON
[ FIXTURE PATCH
]
esc
ok
Pressing the right arrow button gives access to this setting, a dialog box appears.
TYPE
Fix.
[1]
FROM
TO
1 - - cod - - 10
DEL
We recommend you to use Fixture 1-16 buttons when assigning the fixtures and F2
fader to select the type of fixture available in the library. Pressing the button(F4 button)
corresponding to <DEL> deletes what has been previously set. In Auto Patch mode, the
DMX channels assigned to the fixture will be created automatically. In Manual Patch
mode, use the Cursor buttons to assign the parameters, take care not to overlap the
address patch for the fixtures so that you can escape from mishmash.
Fix.
1
TYPE
BLADE 250
FROM
TO
DEL
1
14
1 - - cod - - 10
In the above case, fixture 1 is a YPOC 250. This YPOC 250 requires 14 DMX channels,
whose starting address is 1.This line at the low right corner indicates dip-switch
configuration has been omitted during fixture setup procedure. If dip-switches are
available for the fixture, ten small squares indicating dip-switches will appear instead
of the line at the low right corner.
Par Patch
Use the Cursor UP/DOWN buttons or F5 fader to scroll to [PAR PATCH].
Select
DMX CHANNELAUTO PATCH- ON
[ PAR PAT CH
]
esc
ok
19
Setup Menu
Pressing the right arrow button gives access to this setting, a dialog box appears.
PAR DMX CHANNEL
FROM [ 480 ] TO 503
esc
ok
In Auto Patch mode, DMX channel 480-503 will be automatically assigned to the pars.
In Manual Patch mode, use the Cursor UP/DOWN buttons or F2 fader to set the value
for the starting channel of the pars, "ok" confirms your setting.
There are always 24 channels for the pars.
Strobe Patch
Use the Cursor UP/DOWN buttons or F5 fader to scroll to [STROBE PATCH].
Select
DMX CHANNELAUTO PATCH- ON
esc
[ STROBE PATCH
] ok
Pressing the right arrow button gives access to this setting, a dialog box appears.
STROBE DMX CHANNEL
FROM [ 504 ] TO 511
esc
ok
In Auto Patch mode, DMX channel 504-511 will be automatically assigned to the pars.
In Manual Patch mode, use the Cursor UP/DOWN buttons or F2 fader to set the value
for the starting channel of the strobes, "ok" confirms your setting.
There are always 8 channels for the strobes, 2 channels per strobe.
Smoke Patch
Use the Cursor UP/DOWN buttons or F5 fader to scroll to [SMOKE PATCH].
Select
20
DMX CHANNELAUTO PATCH- ON
[ SMOKE PATCH
]
esc
ok
Setup Menu
Pressing the right arrow button gives access to this setting, a dialog box appears.
SMOKE DMX CHANNEL
FROM [ 512 ] TO 512
esc
ok
In Auto Patch mode, DMX channel 512 will be automatically assigned to the pars.
In Manual Patch mode, use the Cursor UP/DOWN buttons or F2 fader to select any
channel for the fog machine, "ok" confirms your setting.
MIDI Channel
In Setup menu, the flashing characters inside the brackets will remind you to select
the item you want to work on. Use Cursor UP/DOWN buttons or F4 fader to scroll to
[ MIDI CHANNEL ].
SELECT
CONFIGURATION & SETUP MENU
esc
[ MIDI CHANNEL
] ok
Pressing right arrow Select button gives access to this setting, a dialog box appears.
MIDI CHANNEL
[ 1 ]
esc
ok
Use the Cursor UP/DOWN buttons or F4 fader to set a value between 1 and 16 for
MIDI channel. "Ok" confirms your setting, "esc" (left arrow button) aborts this setting.
Strobe Type
In Setup menu, the flashing characters inside the brackets will remind you to select
the item you want to work on. Use Cursor UP/DOWN buttons or F4 fader to scroll to
[ STROBE TYPE ].
SELECT
CONFIGURATION & SETUP MENU
esc
[ STROBE TYPE
] ok
21
Setup Menu
Pressing right arrow Select button gives access to this setting, a dialog box appears.
[
STROBE TYPE
SPQ-2
]
esc
ok
There are two options for strobe type, including SPQ-2 and BIG FLASH 1500 DMX.
Use the Cursor UP/DOWN buttons or F4 fader to select the strobe type you need. "Ok"
confirms your setting, "esc" (left arrow button) aborts this setting.
To adapt to this controller, you will have to do some extra settings on the strobes. For the
SPQ-2, be sure to select a matching DMX address and switch function dip-switch 1, 2 on
and the other two off. For the other one, be sure that it is in DMX pack mode.
Gooseneck Dimmer
In Setup menu, the flashing characters inside the brackets will remind you to select
the item you want to work on. Use Cursor UP/DOWN buttons or F4 fader to scroll to
[ GOOSENECK DIMMER ].
SELECT
CONFIGURATION & SETUP MENU
esc
[ GOOSENECK NECK
] ok
Pressing right arrow Select button gives access to this setting, a dialog box appears.
GOOSENECK DIMMER
[ 1 ]
esc
ok
Use the Cursor UP/DOWN buttons or F4 fader to set a value between 0 and 16 for
dimming of the USB DJ lamp. 0 will give zero output(off), 16 will give full output
(maximum dimming). "Ok" confirms your setting, "esc" (left arrow button) aborts
this setting.
22
Setup Menu
View Free Memory
In Setup menu, the flashing the characters inside the brackets will remind you to select
the item you want to work on. Use Cursor UP/DOWN buttons or F4 fader to scroll to
[ VIEW FREE MEMORY ].
SELECT
CONFIGURATION & SETUP MENU
esc
[ VIEW FREE MEMOR Y
] ok
Pressing right arrow Select button gives access to this setting, a dialog box appears.
FREE MEMORY: FIXTURE LIB: 122
SHOW: 48 CHASE: 48
SCENE: 48
esc
ok
This menu is used to check how much memory is available for new fixtures and
recording of the scenes, chases and shows. In this case, we can get acquainted
with that there are 122 fixtures available for adding to the library, 48 shows, 48
chases and 48 scenes available for recording. "Ok" or "esc" leaves this menu.
Send Data File
In Setup menu, the flashing the characters inside the brackets will remind you to select
the item you want to work on. Use Cursor UP/DOWN buttons or F4 fader to scroll to
[ SEND DATA FILE ].
SELECT
CONFIGURATION & SETUP MENU
[ SEND DATA FILE
]
esc
ok
Pressing right arrow Select button gives access to this setting, a dialog box appears.
Send data file to PC port
Select
[ LIBRARY
]
esc
ok
23
Setup Menu
This menu allows you to send the library, memory and setup to a PC(personal computer)
as backup via the RS-232 port. Use the Cursor UP/DOWN buttons or F4 fader to select
the item you want to send. Before you can press the right arrow button to commence
sending , be sure that the connection between this unit and the PC has been established
successfully and that Windows configuration has been completed properly. It will take you
about five(5) minutes to send the library file, 12 minutes to send the memory file and some
seconds to send the setup file.
Help - RS-232 connection and Windows Configuration
To connect to a PC, you will need a serial lap link cable available at any computer store.
A standard RS-232 cable will not work. Connect the RS-232 port on GALAXY to one of the
Serial " com" ports on your PC.
You will need a PC running Windows 95/ 98 or higher to connect to GALAXY. Windows
comes with an accessory called Hyper Terminal that can communicate with GALAXY via
one of the "COM" ports on your PC. Determine which of your "COM" ports is available.
COM 1 is generally used for the mouse so it is always advisable to connect your GALAXY
to COM 2 on your PC.
You must first configure Hyper Terminal to work with GALAXY. Start the Hyper Terminal
program by clicking on "Start" in Windows then "Programs" then "Accessories" then
"Hyper Terminal" then "Hypertrm". If for some reasons Hyper Terminal is not installed
on your version of Windows, install it from your Windows CD. Go to the control panel,
select Add/Remove Programs, select Windows Setup, and then select Communication.
Follow the instructions to complete the installation.
Once the Hyper Terminal Program is getting started, you will be asked to choose a name
and an icon. Name it GALAXY then pick any icon then click OK. Go to the next dialog box
"Connect to" and choose "Direct to COM 2" . Ignore the telephone number and other
settings in this box then click OK. In the next dialog box, set bits per second to 38400,
data bits to 8, parity to none, stop bits to 1, flow control to none, then click OK. You will
access Hyper Terminal desktop. Click File menu in the upper left corner of the desktop,
then "Properties", then select the "settings" tab. From the settings tab click "ASCII Setup".
In the next dialog box, leave all settings deselect, then OK. Close Hyper Terminal and you
will be prompted to save this Hyper Terminal setup. Click YES to save it then you will have
a program labeled "GALAXY.ht". You may want to make a shortcut on your desktop if you
plan to use your PC with GALAXY often. From this point on, whenever necessary, you can
just click GALAXY.ht icon to invoke the GALAXY Hyper Terminal configuration quickly.
24
Setup Menu
Once configured, you can use Hyper Terminal to send the GALAXY data file and save it
on your hard disk. Connect to your PC as described hereinbefore. Next call the version
of Hyper Terminal that you created for GALAXY. Click on "Transfer" on the top menu bar
and select "Capture Text". A dialog box will appear allowing you to select a folder and
name for the data file you send. Use a name like "GALAXYlib.txt". Be sure to give a new
file name that is not available in this folder, because the data sent from GALAXY will not
be overwritten the old and instead be added to the existed file. Click "Start" and Hyper
Terminal is now ready to receive the file from GALAXY.
Go to the menu setting on GALAXY, select the item you want to send, press "ok" to start
the transmission from GALAXY, waiting information appears in the LCD.
Send data file to PC port
Select
[ LIBRARY
Sending LIBRARY file to PC port
Please wait ......
]
esc
ok
exit
During the course of transmission, it is always advisable not to discontinue it unless
necessary, as such discontinuity may cause unnecessary trouble. The LCD will give
prompt information when completion. "Ok" or "esc" leaves this menu.
LIBRARY SEND COMPLETED!
esc
ok
After the file has ben sent, you can either close Hyper Terminal or return to the
"capture text" pull down menu and select "stop", the file will automatically be saved.
Load Data File
In Setup menu, the flashing the characters inside the brackets will remind you to select
the item you want to work on. Use Cursor UP/DOWN buttons or F4 fader to scroll to
[ LOAD DATA FILE ].
SELECT
CONFIGURATION & SETUP MENU
esc
[ LOAD DATA FILE
] ok
25
Setup Menu
Pressing right arrow Select button gives access to this setting, a dialog box appears.
Load data file to PC port
Select
[ LIBRARY
]
esc
ok
This menu allows you to download the library, memory and setup from your PC via the
RS-232 port. Use the Cursor UP/DOWN buttons or F4 fader to select the file item you
want . Once the item is selected, press "ok" and a dialog box will appear. This GALAXY is
now ready to receive the file from your PC.
Loading LIBRARY file from PC port
Please wait ......
exit
Next call the version of Hyper Terminal that you created for GALAXY. Click on "Transfer" on
the top menu bar and select "Send Text File". A dialog box will appears allowing you to
select the text file that you made when you make backup copies of your GALAXY. Find the
drive and folder where you created the file if it is not in the current window, select the file
and click on "Open". Hyper Terminal will begin to transmit the file. After the file has been
sent, the prompt information will appear in the LCD.
LIBRARY RECEIVE COMPLETED!
esc
ok
"Ok" or "esc" leaves this menu. If any errors have been detected, error information will
appear in the LCD. Check your connections and try again. It will take you about five(5)
minutes to receive library file from your PC, ten minutes memory file and some seconds
setup file.
Update Software
In Setup menu, the flashing the characters inside the brackets will remind you to select
the item you want to work on. Use Cursor UP/DOWN buttons or F4 fader to scroll to
[ UPDATE SOFTWARE ].
SELECT
26
CONFIGURATION & SETUP MENU
[ UPDATE SOFTWARE
esc
] ok
Setup Menu
Pressing right arrow Select button gives access to this setting, waiting information will
appear in the LCD.
Updating software
Please wait ......
exit
GALAXY is now ready to receive the file from your PC. Next call the version of Hyper
Terminal that you created for GALAXY. Click on "Transfer" on the top menu bar and select
"Send Text File". A dialog box will appear allowing you to select the text file we provided
(We will provide you the higher version software in Text type file). Find the drive and
folder where the file is located, select the file and click on "Open". Hyper Terminal will
begin to transmit the file. It will take about two minutes to transfer the file. After the file
has been sent, GALAXY will reboot its system and get started with its procedures. If any
errors have been detected, GALAXY will give error information. Check your connections
and try again.
Save to Card
In Setup menu, the flashing the characters inside the brackets will remind you to select
the item you want to work on. Use Cursor UP/DOWN buttons or F4 fader to scroll to
[ SAVE TO CARD ].
SELECT
CONFIGURATION & SETUP MENU
[ SAVE TO CARD
]
esc
ok
Pressing right arrow Select button gives access to this setting, a dialog box appears.
Select
SAVE TO CARD MENU
[ 4 ]
Fcc-2lib
esc
ok
This menu allows you to make backup copies of your library, memory and setup using
CF( 32 MB Compact Flash) card. Use the F3 fader to select the sector between 1 and
15 for the CF card, F5 fader to name this sector. The Cursor LEFT/RIGHT buttons can
be used to pass from function to function, UP/DOWN buttons to set the values.
27
Setup Menu
"Ok" confirms to access this setting, a dialog box appears.
Save data from Console to Card
Select
[ LIBRARY
]
esc
ok
Use F4 faderr or Cursor UP/DOWN buttons to select library, memory or setup, "ok"
confirms and the display will prompt you that it is proceeding.
Save LIBRARY from Console to Card
Please wait ......
If The CF card is not inserted or not properly inserted, you will be prompted by this
information in the LCD.
NO CARD!
PLEASE INSERT CARD AND RETRY.
esc
ok
You will be prompted when completion. "Ok" or "esc" returns to previous dialog box.
SAVE LIBRARY COMPLETED!
esc
ok
Load From Card
In Setup menu, the flashing the characters inside the brackets will remind you to select
the item you want to work on. Use Cursor UP/DOWN buttons or F4 fader to scroll to
[ LOAD FROM CARD ].
SELECT
CONFIGURATION & SETUP MENU
esc
[ LOAD FROM CARD
] ok
Pressing right arrow Select button confirms to access this setting, a dialog box appears.
Select
28
LOAD FROM CARD MENU
[ 4 ]
Fcc-2lib
esc
ok
Setup Menu
This menu allows you to restore the library, memory and setup of GALAXY from the
CF card. Use the F3 fader or Cursor UP/DOWN buttons to select the sector from the
CF card, "ok" gives access to this setting, a dialog box will appear in the LCD.
Load data from
Select
Console
[ LIBRARY
]
Card
esc to
ok
Use F4 fader or Cursor UP/DOWN buttons to select library, memory or setup, "ok"
confirms and the display will prompt you that it is proceeding. Be careful the existed
file will be overwritten by the new file from CF card.
Load LIBRARY from Card to Console
Please wait ......
If The CF card is not inserted or not properly inserted, you will be prompted by this
information in the LCD.
NO CARD!
PLEASE INSERT CARD AND RETRY.
esc
ok
The CF card should be first written by your GALAXY before you can load the files. If not
doing so, error message will appear and prompt you using another card.
CARD DATA ERROR! PLEASE INSERT ANOTHER
CARD AND RETRY.
esc
ok
You will be prompted when completion. "Ok" or "esc" returns to previous dialog box.
LOAD LIBRARY COMPLETED!
esc
ok
29
Recording
This section detailed the procedure for creating scenes, chases and shows. You will
learn how to start the recording, how to create or save a show for selected fixtures or
effects, how to create chase and edit steps, etc.
To start recording, simply click the Record button, its LED will blink rapidly, and you will
be asked to select what to record by the prompt in the display. Within this chapter, we
mean the right LCD when referring to the LCD.
Select what you want to record
esc
ok
There are three options you can select to record, including show, chase and scene.
Recording Shows
There are total 48 shows available for the fixtures, each with a maximum of 48 steps.
In Record mode, press "Show", its LED will light up, you are prompted to select the
page and show, the page LED will light indicating the current show page.
Select page and show number
esc
Use the Page and Flash 1-12 buttons to select the show number, a dialog box appears.
SHOW
01
STEPS
[ -- ]
esc
edit
Use the F2 fader or Cursor UP/DOWM buttons to select the step. A maximum of 48 can
be selected. Press the right arrow Select button to access edit menu, a dialog box will
appear.
EDIT MENU
[ ACTIVE EFFECTS ]
esc
ok
Edit menu contains three options, including Active Effects, Edit Steps and Step's time.
30
Recording
Active Effects
In Edit menu, use the F4 fader or Cursor UP/DOWN buttons to select [ACTIVE
EFFECTS].
EDIT MENU
[ ACTIVE EFFECTS ]
esc
ok
Pressing the right arrow button gives access to this setting. If you have not yet assign
a fixture to be subject to the show, you will be required to select active fixtures or effects.
SELECT FIXTURE
Select active fixtures/ef fects
Use the Fixture 1-16 buttons to choose the fixture that has been patched in setup
procedure, its LED blinks briefly indicating it is enabled to be subject to the show.
You may select several fixtures at a time, however, only the latest one, whose LED
blinks, is active for the show(it is different from Group described hereinafter). Use
F 1-6 buttons and Pan, Tilt buttons to enable the effects(corresponding to the DMX
channels you assigned in Internal Patch) display in the LCD, their LEDs will light up.
COLOR GOBOS G.ROT PRISM
Select active fixtures/ef fects
SHUTT
DIMMR
You can select several fixtures at one time to make a group. Up to 6 groups can be
created. Keep pressing the Fixture button, select the group using F 1-6 buttons
corresponding to the group numbers in the display, its LED lights up. Next select
several equal fixtures, their LEDs will blink simultaneously indicating they are in the
identical group and are active for the show.
Select other fixtures to make a group
GPR1 GPR2 GPR3 GPR4 GPR5 GPR6
Always remember the fixture you selected must be the same, or you will be prompted
due to selecting different fixtures.
Different fixture: no effect controls
Select active fixtures/ef fects
Once this procedure is finished, press the left arrow button to return to the Edit menu.
31
Recording
Edit Steps
In Edit menu, use the F4 fader or Cursor UP/DOWN buttons to scroll to [EDIT
STEPS].
EDIT MENU
[ EDIT STEPS ]
esc
ok
Pressing the right arrow button gives access to this setting. You will be required to
select a fixture when no fixture is selected. Use the Fixture 1-16 buttons to select
the fixture, remember that the latest one is only active for this setting. Group function
is as well available for this setting.
COLOR GOBOS G.ROT
0
120
0
PRISM
0
SHUTT
DIMMR
0
255
0
999
Use the Faders 1-6 and joystick(Pan and Tilt LEDs light up) to set the values, you can
also use the Cursor buttons for your setting when any of the Function 1-6 buttons is
enabled.
A dialog box appears when the Store button is pressed. Keep pressing the Store button,
select the target step using the Page and Flash 1-12 buttons to store the new step.
Select destination step
Pressing down the Step button allows you to direct call or edit steps, a dialog box
prompt you to select the step you want to edit.
Select step to edit
Us Page and Flash 1-12 buttons to modify this step and then store it to replace the old
one or as a new step. When this procedure is finished, press the left arrow button to
return to the Edit menu.
32
Recording
Step's Time
In Edit menu, use the F4 fader or Cursor UP/DOWN buttons to scroll to [STEP'S
TIME].
EDIT MENU
[ STEP'S TIME ]
esc
ok
Pressing the right arrow button gives access to this setting, a dialog box appears.
SHOW
- 1 -
STEP
[ 2 ]
CROSS%
50
TIME
2S
ok
This function allows you to set the duration time(Time) and running time(Cross%)
for each step in a Show. Use the Faders 2-4 or Cursor buttons to set the value.
Step indicates the current step number, which ranges between 1 and 48. Time
ranges between 0 and 1 minute and 39.9 seconds. Cross ranges between 0 and 100%.
You can set several fixtures at one time with the same parameters using Group of
Steps. Keep pressing the Step button, select several steps(indicated by the LEDs)
using Page and Flash 1-12 buttons.
SHOW
- 1 -
STEP
[ GR ]
CROSS%
TIME
***
******
ok
Set the values as the way described hereinbefore. "Ok" confirms and returns to
the Edit menu.
When you have finished recording, press the left arrow button to leave this menu, you
will be prompted to press enter to store what you have record.
Show 01 will be updated!
Press ENTER to store
quit
<ESC>
Press the ENTER button, all the changes to this show will be stored into the memory.
Pressing the F6 button corresponding to <ESC> on the display will abort this recording,
the left arrow button(quit) will re-enter this menu.
33
Recording
Recording Chases
There are total 48 chase available for the pars. In Record mode, press "Chase",
its LED will light up, you are prompted to select the page and chase, the page
LED will light indicating the current chase page.
Select page and chase number
esc
A dialog box will appear when you select a chase using the Page and Flash 1-12
buttons. "Esc" will leave this menu.
CHASE
- 1 -
STEP
[ 5 ]
CROSS%
50
TIME
2S
esc
ok
This menu allows you to set the step length, set a common Cross% and Time for the
chase, and edit the steps as well. Use the F 2, F4 and F 5 faders or Cursor buttons
to set the values for Step(0-48), Cross%(0-100%) and Time(0 to 1 minute and 39.9
seconds).
Next, you can edit the steps from step 1. Use the Channel and Flash 1-12 faders to
create a step(scene), press the Store button to add the step into the current chase.
Proceed in the same way until all steps required have been stored.
Pressing down the Step button allows you to quick access the step. Keep pressing the
Step button, use the Page and Flash 1-12 buttons to select the step to be edited.
Once the chase has been completed, press "ok" to confirm your changes to the chase
and return to the menu.
Now you can choose to continue recording chase or press "esc' to leave this menu.
34
Recording
Recording Scenes
A dialog box will appear when you select a scene using the Page and Flash 1-12
buttons. "Esc" will leave this menu.
SCENE
- 1 -
[
TIME
3S ]
esc
ok
This menu allows you to create scenes of lighting and set the time it takes for each
scene to fade in. You can set the time, that ranges between 0 and 1 minute and 39.9
seconds, using the F 2 fader or Cursor UP/DOWN buttons.
Use the Channel button and Flash 1-12 faders to create a scene of lighting. Next
press the Store button to store this scene into memory. "Ok" confirms the changes to
the scene and returns to the menu.
Proceed in the same way for each scene required.
Once the scenes have been completed, simply press "esc" to leave this menu.
35
Playback Mode
This section outlines how to choose, play and pause the scenes, chases and shows
you have created in previous chapter.
A scene is a recording of selected channel levels of lighting, a chase is a sequence of
steps(scenes), providing some changes at a preprogrammed speed for traditional pars,
and a show is a sequence of scenes for the effects control of the intelligent fixtures.
Within this chapter, we refer to the left LCD, which gives real-time display of the current
playback state, when the LCD is mentioned.
The following options are available in the LCD:
Option
Meaning
En
Abbreviation for enter
Ch
Abbreviation for choose
Go & 01-48
Playback & step 01-48
Pu & 01-48
Pause & step 01-48
SH & 01-48
CA & 01-48
Abbreviation for show 01-48
Abbreviation for chase 01-48
SC & 01-48
Abbreviation for scene 01-48
Playing Scenes/Chases/Shows
Press the Choose button to call choose mode, "Ch" appears in the bottom row of the
display. Use the Go/Pause buttons to scroll to the scene, chase or show. Next press
the Choose button to call enter mode, "En" indicates this selection.
In Enter mode, pressing the Go button allows you to play it back, and the Pause
button to pause its playing.
36
Playback Mode
Multi Playback
There are 32 preset available for 4 pages, each per 8 presets. Such an arrangement
of preset is a great convenience that allows you to play multiple presets. You can call
and play Up to 4 scenes, 4 chases and 4 shows at one time.
When several shows are selected, LTP (Latest Take Precedence) is used to control
the fixtures if there is some overlap.
SH01
En01
CA48
Ch01
SC01 SC48 SH20
Go01 Go48 Pu01
SH48
Pu48
CA37 CA48
Ch01 En01
37
Strobe Light Programs
There are total 20 programs you can use to control up to 4 strobe lights. The Menu
button can be used to scroll through the Program, Speed and Dimmer menu settings.
In Program menu, use the UP/DOWN buttons to select any one of the 20 programs. In
Speed menu, use the UP/DOWN buttons to set the value for the speed at which the
chase of the programs will run. A value of 01 will give you the slowest speed and 99 will
give the fastest speed. In Dimmer menu, use the UP/DOWN buttons to change the light
intensity. A value 01 gives the lowest output and 99 gives full intensity.
The Full On button is used to bring the overall output to full intensity. This function is
enabled when the Full On button is pressed down, and disabled when set free.
Pressing the Stand By button gives access to Stand By mode. A second pressing
will leave this function.
When both Full On and Stand By are enabled, Full On takes priority of Stand By.
38
Choose Fixtures
This GALAXY can control 16 fixtures you have assigned in Fixture Patch menu. The fixture
will have access to direct control of fixture channels, and as well respond to the shows,
which gives us great flexibility.
Select a Fixture
In Fixture mode(fixture LED lights up), select the button(from fixtures 1 to 16)
corresponding to the fixture you have assigned in fixture patch menu, the top right
LCD will indicate the effects it contains and the values. If no fixture type has been
assigned to a fixture number, it cannot be selected.
Use the F 1-6 faders to set the values for the effects. The two Select buttons(right and
left arrow) allow to scroll the pages of the fixture's effects in group of 6 at a time. When
Pan and Tilt are lit, the joystick can be used to control the X(Pan) and Y(Tilt) movements.
Pressing one of the F 1-6 buttons allows you to use the Cursor buttons for the settings of
the effects according to the setting in Control type menu.
COLOR GOBOS G.ROT
0
120
0
PRISM
SHUTT
DIMMR
0
0
255
0
999
Group of Fixtures
Group of fixtures is enabled when the Fixture button is pressed down. You can select
several fixtures at one time to make a group. Up to 6 groups can be created. a dialog
box will appear when the Fixture button is pressed down.
Select other fixtures to make a group
GPR1 GPR2 GPR3 GPR4 GPR5 GPR6
39
Choose Fixtures
Press one of the F 1-6 buttons corresponding to the group numbers in the display to
select the group number when the Fixture button is pressed down. Next select several
equal fixtures, their LEDs will blink simultaneously indicating they are in the identical
group.
In Fixture mode, to recall a existed group, simply press the F button corresponding to the
group required.
To remove the fixtures from a group, you can press the Fixture 1-16 buttons required to
extinguish the LEDs when the group is active.
Utility Controls
Times
This function allows you to multiply the fade-in and fade-out speed set in Recording.
As a result, you can enhance or attenuate the speed for the presets being played.
In Fixture mode, a dialog box will appear and the Times LED will flicker briefly when
the Times button is pressed.
SELECT SHOW
*01*
SPEED%
[ 25 ]
esc
ok
In this operating mode, select Show, Chase or Scene mode using the Show, Chase
or Scene button. As is explained hereinbefore, you can play 4 shows, 4 chase and 4
scenes at a time. The one with two star characters is ready to be set. Use the Cursor
LEFT/RIGHT buttons to pass from element to element, then use the F 5 fader or Cursor
UP/DOWN buttons to set the value for the current element. The speed multiplying factor
ranges between 25% and 400%. "Ok" confirms this setting and leaves this menu, and
"esc" leaves with the settings unchanged.
In this mode, you can direct access a certain step of the chase or show using the Flash
1-12 buttons in combination with the Flash Page button.
40
Utility Controls
Copy
Pressing the Copy button gives access to Copy function, its LED flickers briefly and
a dialog box appears in the right LCD.
COPY OBJECT
Show
FROM
[1]
TO
2
esc
ok
The Show, Chase or Scene button can result in copying show, chase or scene. Use the
F 3, 4 faders or the Cursor buttons to select the source and target elements. Press"ok",
a warning message will appear in the LCD.
Show 02 will be updated!
Press ENTER to store
quit
<ESC>
Press the ENTER button to confirm this copy and save it into the memory. Pressing
the F6 button corresponding to <ESC> on the display will leave this setting unchanged,
the left arrow button(quit) will re-enter this menu.
Reset
This function allows you to carry out Reset function using this GALAXY instead of your
fixtures. Pressing the Reset button gives access to the Reset function, its LED flickers
briefly and a dialog box appears.
PUSH FIXTURE'S KEYS TO SEND RESET
esc
ok
Press the Fixture 1-16 buttons, the reset function on the selected fixture will be carried
out. Before you can carry out this function, you must give a Reset/Lamp setting in the
fixture library.
41
Utility Controls
Lamp
This function allows to switch on or off the lamp on the fixture. Pressing the Lamp
button gives access to the Lamp function, its LED flickers briefly and a dialog box
appears.
SWITCH LAMPS BY HOLDING DOWN KEYS
esc
ok
To switch on or off the lamp, you will have to press down the Fixture 1-16 buttons for
several seconds. Its LED lights up indicating the lamp is lit, its LED goes out indicating
the lamp is off. Before you can carry out this function, you must give a Reset/Lamp setting
in the fixture library.
MIDI Implementation
To activate MIDI operation, you must first select a MIDI channel identical to that of the
MIDI keyboard or sequencer.
The GALAXY will send and receive MIDI program changes according to the following table:
42
NOTE
FUNCTION
0-47(00H-2FH)
SHOW 01-48
48-95(30H-5FH)
CHASE 01-48
96-115(60H-73H)
SCENE 01-20
116-125(74H-7DH)
STROBE PROGRAM 01-10
126(7EH)
SMOKE
127(7FH)
BLACKOUT
Equipson, S.A.
www.equipson.es
[email protected]