1
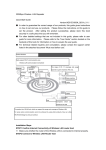
Getting Started with
Goldenseal MultiUser
@ 2003-2005 Turtle Creek Software
Programming by: Dennis Kolva, Casey McDermott, Mindfire Solutions
Manual written by: R. C. Baga, Dennis Kolva
Testing and Proofing by: Sarita Appavu, Gor Rivenshield
This manual should not be ue used while you are operating a motor vehicle or heavy
machinery.
About This Manual
Thank you for purchasing Goldenseal Multi-User.
This start up manual shows you how to get started with the multi-user
features.
This manual is a supplement to the Getting Started With Goldenseal
Estimating and Getting Started with Goldenseal Accounting manuals. Refer
to them for installation instructions and general program features.
Goldenseal MultiUser Manual
Page 3
Lesson One: Multi-User Setup
In this lesson you will learn how to set up a Goldenseal server.
About Client-Server Software
The multi-user version of Goldenseal is a client-server program.
Starting a Server File
If you already have a single-user Goldenseal file and want to use it as a
multi-user server, follow these steps:
1. Open the Goldenseal file.
2. Choose Preferences from the Options menu, and choose Network from
the submenu.
The server is one computer that contains your company file on its hard
drive. You’ll open the company file on the server almost exactly the same as
you would if you were using the single-user version.
Every other computer is a client. Working on a client computer looks the
same as working on the single-user version, but no company data is stored
on the client machine. Clients get information from the server, and save
changes back to the server.
You need to have a separate copy of the Goldenseal program on every
computer in your network. The different copies of Goldenseal will talk to
each other over the network, and share info from our company file.
HINT: You can use the same Goldenseal CD to install the program on
every computer on your network, whether it is the server or a client.
Choosing a Server Computer
Before you start using Goldenseal multi-user, decide which computer you
want to use as a server. You can put the server on either a Macintosh or a
Windows machine.
If you have only a few computers, the Goldenseal server can be on a
machine that is actively used by someone.
If you have many users, it’s better to put the Goldenseal server on a
computer that only runs Goldenseal.
NOTE: When someone is actively using the server computer, clients may
experience delays when the server is busy.
3. Click on the File User Type popup field, and choose Server.
4. Click OK.
5.. Click on the File menu and choose Quit (Macintosh) or Exit
(Windows). The next time you open the file, it will run as a server.
If you are just starting with Goldenseal, create a company file as described
near the end of the Getting Started with Goldenseal Estimating manual.
Then follow the steps above.
HINT: For more about the Goldenseal company file, see Lesson One in
Getting Started with Goldenseal Estimating.
For more about using the Goldenseal server, see Lesson 2 in this manual.
Installing Goldenseal onto the Server Machine
To install Goldenseal onto the server machine, follow the installation
instructions from the beginning of the Getting Started manual (orange
cover).
Page 4
Goldenseal MultiUser Manual
Goldenseal MultiUser Manual
Page 5
Installing Goldenseal onto Client Computers
To run Goldenseal on client computers, install the Goldenseal application
on each client machine. To do that, follow the installation instructions from
the beginning of the Getting Started with Goldenseal manual. Clients can be
either Macintosh or Windows computers, or some of each.
NOTE: You do not need to install the company file onto the client
machine, since clients use the company file from the server.
For more about using Goldenseal as a client, see Lesson 3 in this manual.
Setting up Your Network
You’ll need a physical network to connect client computers to the computer
which is running the Goldenseal server file. You can use any of the
following:
Local Area Network (LAN)
A Local Area Network (LAN) uses copper wires to connect each of
your computers. Most people use Ethernet, which is a very fast and fairly
inexpensive network. You’ll need an Ethernet hub or router, and an Ethernet
cable that runs from each computer to the hub or router.
HINT: An Ethernet router is more reliable than a hub, since it manages
IP addresses and reduces packet collisions.
Wireless Network
You can use a wireless network such as WiFi to connect your computers.
Wireless networks usually require a base station, and a wireless card in
each computer. They are slower and more expensive than Ethernet, but
much more convenient. Most wireless networks use the 802.11b or 802.11g
standards (the g standard is newer, faster and more reliable).
Direct Dial-Up Connection
You can have your server answer the phone with its modem connection so
you can make a connection over phone lines (see Lesson 3).
NOTE: Goldenseal uses dial-up to connect directly from a Goldenseal
client to your Goldenseal server. It does not use your dial-up connection
to the Internet.
Page 6
Goldenseal MultiUser Manual
Because most phone lines only offer a two-way connection, the server can
only connect to one dial-up client at a time.
A modem is much slower than a LAN or wireless network, so it works best
if you only need it to occasionally to access information from the server.
Internet Connection
If you have a cable modem, DSL line or other fast internet connection for all
of your computers, you can connect your server to the Internet, and then
connect each client to the server through a Virtual Private Network (VPN)
that runs over the Internet (see Lesson 6).
NOTE: A VPN requires a static IP address for your server computer.
Setting up TCP/IP
Goldenseal uses TCP/IP protocols to connect each client and server to your
network.
Each computer on a local network needs to have a different TCP/IP
address. The address number must be within the number range that is used
for local networks.
NOTE: Most local area networks (LAN) use TCP/IP addresses that
range from 192.168.10.2 to 192.168.10.254, with a subnet mask of
255.255.255.0. To be on the same subnet, the first three numbers in the
IP address must be the same, and the final number must be different.
To set the TCP/IP address on the Macintosh, follow these steps:
1. Open the TCP/IP Control Panel (Mac OS 9) or the Networking icon in
System Preferences (Mac OS X).
2. Enter your connection method.
3. Enter a TCP address and subnet mask.
4. Click OK.
To set the TCP/IP address on Windows, follow these steps:
1. Open the Network Connections Control Panel.
2. Double-click on Local Area Connection.
3. Select Internet Protocol (TCP/IP), then click the Properties button.
4. Turn on the Use the following IP Address button, and type in an IP
address and subnet mask.
5. Click OK, then click OK again to leave the Control Panel.
Goldenseal MultiUser Manual
Page 7
Lesson Two: The Goldenseal Server
A Goldenseal server file is the “master copy” which contains all of your
company data.
You can access that data directly from the server, just as you’d do with the
single-user version of Goldenseal. You can also access that data from any
of the clients that connect to the server.
To set up Goldenseal so you can do data entry on the server, follow these
steps:
1. Choose Preferences from the Options menu, and choose Network from
the submenu.
2. Turn on the Allow Data Entry in Server checkbox.
3. Click OK.
Using a Dedicated Server
Starting a Server Session
Open a Goldenseal server file exactly the same as a single-user Goldenseal
file.
To open a server file on the Macintosh, follow these steps:
1. Double-click on your hard drive’s icon, and locate the company file.
2. Double-click on its icon.
To open a server file in Windows, follow these steps:
1. Locate the file icon on the Desktop.
2. Double-click on it.
If you don’t have an icon on the Windows desktop, follow these steps:
1. Click the Start button.
2. Choose Programs from the menu that shows above the button.
3. Choose Goldenseal from the menu that shows at the right.
HINT: If you don’t see a Goldenseal menu item, you first need to run
the installer (see page 5).
4. Choose Goldenseal from the menu that shows at the right.
5. You’ll be asked to choose a file to open. Locate your company file,
and double-click on it.
Working on a Server Machine
If you have only a small number of computers, one person can work directly
on the server machine.
Some operations on the server machine may run a little slower when clients
are performing a lengthy operation. If you perform a lengthy operation on
the server, it will slow down the access that all clients have to the file.
Page 8
Goldenseal MultiUser Manual
If you have an extra computer, install the Goldenseal server file on it, and
have all users sign onto it as a client.
A dedicated server is generally faster and more reliable, since it does not
need to display windows and respond to user actions.
When you use a dedicated server, you can turn off alert messages, so
Goldenseal will not show messages that require user action. To do so,
follow these steps:
1. Choose Preferences from the Options menu, and choose Network from
the submenu.
2. Turn off the Allow Data Entry in Server checkbox.
3. Click OK.
Backing Up your Company File
Everyone in your company will use the company file on the server’s hard
drive. Because all your data is in one place, it is very important to back it
up frequently! We suggest that you make a daily backup.
Setting Sleep Mode on the Server
The server machine may go into ‘sleep’ mode to conserve energy. When a
client needs something from the server, there will be a delay while the server
machine wakes from sleep mode. If you want faster access, you may want
to turn off ‘sleep’ on your server.
To turn off sleep mode on a Macintosh, follow these steps:
1. Choose Control Panels from the Apple menu, and open the Energy
Saver control panel.
2. Set the system sleep to Never (different Macintosh System versions
may have a different Energy Saver setup).
Goldenseal MultiUser Manual
Page 9
Ending a Server Session
When you are finished with the Goldenseal server, click on the File menu
and choose Quit (Macintosh) or Exit (Windows).
If clients are still connected to the server, you’ll need to wait until they
disconnect.
Using a Server Off-line
3 Close the Control Panel window.
To turn off sleep mode on a Windows machine, follow these steps:
1. Click the Start button, choose Settings from the menu, and choose
Control Panel from the submenu.
2. Double-click on the Display icon.
3. Click the Screen Saver tab.
4. Click the Power button.
5. Set the hard disk and system sleep options to Never.
6. Click OK.
If you want to work on the server file and not allow client access, follow
these steps:
1. Open the file.
2. Choose Preferences from the Options menu, and choose Network from
the submenu.
Server Setup
If your server has a larger screen than the clients, you may need to resize
and move windows to the upper left, so they will open up in a convenient
location on the clients (Goldenseal remembers the window location).
If you use custom fonts on the server file, make sure that the same fonts are
installed on the clients. Otherwise they may not be able to properly display
text that uses the custom font.
Goldenseal remembers the records that are found, so you might want to use
the Find All command on each of your record windows, so Goldenseal
opens to showing all records on the clients.
Page 10
Goldenseal MultiUser Manual
3. Choose Single User from the File User Type popup, then click OK.
4. Quit or Exit from Goldenseal.
5. Open the file again. You’ll be able to work on it, but clients will not be
able to sign onto the file.
6. To go back online, choose Preferences from the Options menu, and
choose Network from the submenu, and change the File User Type
back to Server.
Goldenseal MultiUser Manual
Page 11
Lesson Three: Local Clients
Goldenseal lets you connect to the server file from another computer
(known as a client).
A client gets its data from the server. If a client changes a record, the change
is saved on the server machine. Several clients can use the same server at
the same time.
In this lesson you will learn how to connect as a client over a local area
network (LAN).
4. You’ll see a list of Goldenseal server files that are currently open on
your local network. Choose a server, then click OK.
NOTE: If you don’t see a server file, make sure that a server file is
open, and make sure the client and server computers are both
connected to your network (see Lesson One).
5. If you are using passwords, Goldenseal will ask you for a user name
and password.
6. Goldenseal will sign you on as a client. You’ll be able to see and
change records based on your password access level, the same as if
you were using the single-user version of Goldenseal.
Using Multiple Clients
Signing On as a Client
To open Goldenseal as a client, follow these steps:
1. Double-click on the Goldenseal application (the picture of a tree).
2. You’ll see the standard file open dialog. Click the Server button, or
click Cancel and then choose Open as Client from the File menu.
Goldenseal allows more than one client to connect to the server at the same
time. The maximum number of clients that can connect at the same time
depends on the version of Goldenseal that you purchased (the program is
available with 2, 5, 10 and 20 user versions).
There are a few special conditions that occur with multiple clients:
Record Locking
Only one user can work on a record at one time.
If you open a record that is already being used by another client,
Goldenseal will warn you of that fact. You’ll be able to view the record, but
you won’t be able to change it.
3. Goldenseal will ask you how you’d like to connect. Choose Local
Network, then click OK.
Busy Server
If one user is doing a lengthy action (e.g. writing payroll or generating a
report), other users may experience delays when accessing the server. They
will see a ‘waiting’ progress indicator until the other action is completed.
If the server allows data entry and it is showing a modal dialog or error
message, clients will have no access until the modal window is closed.
Appointment Reminders
If you enter a user into the User To Remind field of an appointment, you’ll
only get those reminders if you sign on with that user name.
If there is no User to Remind, then every client who is signed on at the time
of the reminder will be reminded.
Page 12
Goldenseal MultiUser Manual
Goldenseal MultiUser Manual
Page 13
Setting Client Fonts
Goldenseal allows each client to set the fonts that they’ll see for screen
viewing and printing. That way you can use the fonts that are installed on
each client machine, even if they are different than the ones on the server.
To set the fonts for a client, follow these steps:
1. Make sure you have the server running, and sign on as a client.
2. Choose Preferences from the Options menu, and choose Network from
the submenu.
3. Click on the Client Screen Font field, and choose the font you’d like to
use for data entry screens.
4. Click on the Client Print Font field, and choose the font you’d like to
use for printed forms and reports.
Lesson Four: Sharing Macs & Windows
Goldenseal allows you to mix Macintosh and Windows machines on your
network. It doesn’t matter what type of machine you use for a server. It
also doesn’t matter what type of machines you use as clients.
Goldenseal files are ‘binary compatible’ between Macintosh and Windows.
That means that you can move a file from a Macintosh machine to a
Windows machine (or vice-versa), and still open it.
There are a few quirks that you’ll need to consider when using both Macs
and Windows on a network:
Icons and Graphics
Custom Fonts
Goldenseal lets you use custom fonts for any fields in data entry screens,
printed forms and reports.
Because we use QuickTime for the Windows version, Windows machines
can show graphics or account icons created on the Macintosh, but
Macintosh machines can’t show most types of graphics created in
Windows.
If all of your computers use the same fonts, custom fonts will work OK on
all of your clients.
If you’ll be working cross-platform, create your logo and other graphics on
the Macintosh.
If your computers use different fonts or if you mix Macintosh and Windows
machines, it’s better not to use custom fonts, since they may not draw
correctly on machines that don’t have that font installed.
Server Hints
If you use a client after the server has been idle for a while, you may need to
wait a few seconds for the server computer to ‘wake’ out of energy-saving
mode.
Ending a Client Session
When you are finished using Goldenseal as a client, click on the File menu
and choose Quit (Macintosh) or Exit (Windows).
If someone quits from the server, all connected clients will receive a warning
that the server is about to close. Please finish any work and close your
client session as soon as you can.
Page 14
Goldenseal MultiUser Manual
Speed
There is a very slight speed penalty when you are a client that is a different
platfom from the server, since Goldenseal needs to swap some of the bits
and bytes in each record to account for the way data is stored in Macs and
Windows. You may not even notice the difference.
Database Report
The Database Report shows the raw data in your company file. If you are
viewing a record that is currently stored on the other platform, some data
in the record may appear to be reversed.
Text
Some less common text characters are different between Mac and
Windows— including “curly quotes” and accented characters. Avoid their
use if you’ll be using Goldenseal on both Macs and Windows machines.
Goldenseal MultiUser Manual
Page 15
Swapping Files from Mac to Windows
3. Click the Add button.
If you have a Goldenseal file that you created on the Macintosh, and want
to use it on a Windows machine, follow these steps:
1. On the Macintosh, rename the file so it has .glds at the end of the file
name. If the file name contains a period elsewhere in the name, remove
it.
2. Move the file from the Mac to the Windows machine. You can use a
Windows-formatted zip disk or floppy disk, or you can burn a CD or
DVD in Windows format. If you have a cross-platform file-sharing
utility, you can also use that to move the file over the network.
3. The Windows version of Goldenseal will be able to open the Mac file.
Swapping Files from Windows to Mac
To set up a Macintosh so it will automatically read Goldenseal files from
Windows, follow these steps:
1. Choose Control Panels from the Apple menu, and open the File
Exchange control panel.
4. Type in .glds as a file extension.
5. In the list of applications, locate the Goldenseal application on your
hard drive. It’s the picture of a tree. You may need to click the Select
button to locate it.
6. Click the Add button.
7. Goldenseal for Macintosh will now properly open Goldenseal files
from Windows.
To move a file from a Windows machine to a Macintosh, you can use a
Windows-formatted zip disk or floppy disk, or burn a CD or DVD. If you
have a cross-platform file-sharing utility, you can also use that to move the
file over the network.
2. You’ll see a list of Windows file extensions, and the Macintosh
programs that open them.
Page 16
Goldenseal MultiUser Manual
Goldenseal MultiUser Manual
Page 17
Lesson Five: Dial-up Connections
Goldenseal lets you ‘call in’ from a remote location.
In this Lesson you will learn how to connect over phone lines.
Setting up Phone Lines
You will usually need a dedicated phone line if you plan to frequently
connect to Goldenseal over phone lines. The server computer needs to
answer the phone, so the line won’t work very well for business calls!
If you only dial-in occasionally or use an automatic fax/modem switcher,
you may be able to temporarily use a fax or voice line for Goldenseal.
Setting Up the Dial-In Server
To use a dial-up connection, you’ll need to install the Goldenseal server file
on a computer that has a modem. The modem needs to be connected to a
phone line as described above.
To receive incoming calls on a Macintosh, follow these steps:
1. Choose Control Panels from the Apple menu, and open the Remote
Access control panel.
2. Choose Answering from the RemoteAccess menu.
3. Turn on the Answer Calls checkbox.
4. Turn on Allow TCP/IP Clients to connect using PPP.
5. If you dial in with a client computer that is set up for your local
network, turn on the Allow Clients to use their Own IP Address
checkbox. Otherwise turn it off, and enter a default client IP address.
Enter a number between 192.168.10.1 and 192.168.10.255 that is
different from the address for the other computers on the network.
6. Click OK.
To receive incoming calls on a Windows machine, follow these steps:
1. Click the Start button, and choose Settings from the menu.
2. Choose Control Panel from the submenu.
3. Double-click on the Network and Dialup Connections icon.
4. Double-click on the Make New Connection icon. This will open the
Network Connection Wizard.
5. Select Accept Incoming Connections, then click Next.
6. Choose the modem you’ll use to accept incoming connections, then
click Next.
7. Finish the wizard setup. It will create a connection icon.
Setting Up the Client Computer
To dial-in from a different location, you’ll need a computer that has a
modem. The modem needs to be connected to a phone line.
To make outgoing calls on a Windows machine, follow these steps:
1. Click the Start button, and choose Setup from the menu.
2. Choose Control Panels from the submenu.
3. Double-click on the Network Connections icon.
4. Double-click on the Make New Connection icon. This will open the
Network Connection Wizard.
5. Select Dial-Up to Private Network, then click Next.
6. Enter the phone number to connect to.
Page 18
Goldenseal MultiUser Manual
Goldenseal MultiUser Manual
Page 19
Signing On as a Client
To open as a client with a dial-up connnection, follow these steps:
1. Double-click on the Goldenseal application icon (the picture of a tree).
2. You’ll see the standard file open dialog. Click the Server button on the
right.
Lesson Six: Using a VPN
If you have users at several different locations and have a fast Internet
connection at each location, you can connect everyone with a Virtual
Private Network (VPN).
A VPN acts like a Local Area Network (LAN), but it runs over the public
Internet instead of over a local Ethernet or wireless connection.
HINT: If your locations are fairly close together, you may be able to use
a wireless network or a networking bridge to connect the locations using
a simple LAN. You might want to talk to a local networking expert for
suggestions, since networking technology is changing rapidly.
3. Goldenseal will ask you how you’d like to connect. Choose Dial-Up,
then click OK.
Setting Up a VPN
You'‘ll use a firewall to set up a VPN.
Use the firewall that is included in Mac OS X or Windows XP or purchase
firewall software (which usually will have additional security features). T
he firewall will manage incoming Internet connections and make sure that
hackers won’t get access to your computers.
WARNING: Having an open Internet connection makes you extremely
vulnerable to attack via the Internet. You should become educated
about Internet security before you set up a VPN on your own, or you
should hire an expert who will set up a secure network for you.
To use a VPN you need a static IP address— which is only available for
some types of Internet connections. The IP address is how Goldenseal
clients will locate your server computer from ‘out there’ on the Internet.
4. You’ll see a list of servers that are currently running on your local
network. Choose a server, then click OK.
5. Goldenseal will sign you on as a client.
Set up the firewall connection to accept traffic on the port used by
Goldenseal (see the next section).
Setting the Port ID for a VPN
All networking software runs over a network port, which can have any
number between 1 and about 32,000.
Goldenseal starts out using Port #18259, which can also be identified with
the letters GS (using the ASCII numbers for those characters).
If you run Goldenseal over a LAN, you do not need to change the port ID.
Page 20
Goldenseal MultiUser Manual
Goldenseal MultiUser Manual
Page 21
If you run Goldenseal over a VPN, then you should change the port ID, so
someone else who has Goldenseal won't be able to sign onto your network if
they know your server's IP address.
HINT: You can also limit access to your company file with Passwords.
Changing the port ID just gives you an additional level of protection.
Choosing a Port ID
The easiest way to set a Port ID is to use a two-letter code. You can use
either upper case or lower case letters (aa, aA, Aa and AA will each give
you a different port ID). You can also use numbers or punctuation.
HINT: Try to pick letters that you can remember, but that outsiders
can't guess easily from what they know about your company.
Changing the Port on the Server
To change the Port ID on your server machine, follow these steps:
1. Open the Goldenseal file.
2. Choose Preferences from the Options menu, and choose Network from
the submenu.
3. Turn on the Change Network Port checkbox.
4. Type in a port number or a two-letter port name.
5. Click OK.
Page 22
Goldenseal MultiUser Manual
Signing on to a VPN from a Client
To sign onto Goldenseal from a client at a different location, follow these
steps
1. Sign the client computer onto your VPN using your firewall software.
2. Double-click on the Goldenseal application (the picture of a tree).
3. You’ll see the standard file open dialog. Click the Server button, or
click Cancel and then choose Open as Client from the File menu.
4. If you are using a different port, turn on the Change Network Port
checkbox, and type in a port number or port text.
5. Click OK.
6. You'll see a list of servers. Choose your Goldenseal server, and click
OK.
7. Goldenseal will connect you to the server file, and you can use
Goldenseal just like you were on the local network.
Goldenseal MultiUser Manual
Page 23