Download Instruction Manual - Delta Instrument LLC
Transcript
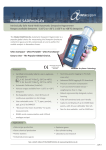
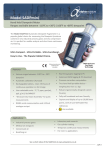
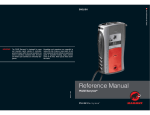
Model SADPmini
Instruction Manual
Alpha Moisture Systems
Alpha House
96 City Road
Bradford
BD8 8ES
England
Tel: +44 1274 733100
Fax: +44 1274 733200
Email: [email protected]
Web: www.amsystems.co.uk
Page ii
Instruction Manual
For the
SADPmini Automatic Dewpoint Hygrometer
1226 SADPmini User Manual.doc
Issue 13.1
12/03/14
Page iii
Table of Contents
1
2
3
GENERAL INFORMATION ................................................................................................................ 1
FEATURES ....................................................................................................................................... 1
SAFETY INFORMATION ................................................................................................................... 2
3.1
3.2
WARNING ............................................................................................................................................. 2
BATTERY .............................................................................................................................................. 2
3.2.1
3.2.2
4
INSTALLING THE AIR/GAS SAMPLING SYSTEM .............................................................................. 3
4.1
4.2
5
6
PIPING INSTALLATION SCHEMATIC ....................................................................................................... 4
PIPING SCHEMATIC COMPONENT INDEX ............................................................................................... 4
PURGING THE SAMPLE CONNECTION .............................................................................................. 5
USING THE SADPMINI TO TAKE A MOISTURE READING ................................................................ 5
6.1
7
Lithium-Ion ..................................................................................................................................................... 2
Initial Charging................................................................................................................................................ 2
TAKING A MEASUREMENT.................................................................................................................... 6
SAMPLING INFORMATION ............................................................................................................... 6
7.1
7.2
7.3
7.4
7.5
7.6
SAMPLE PIPE ........................................................................................................................................ 7
GASSES TO AVOID ................................................................................................................................ 7
SAMPLE CONDITIONING ........................................................................................................................ 7
PRESSURE AND FLOW CONTROL............................................................................................................ 7
PARTICULATE CONTAMINATION ........................................................................................................... 8
LIQUID CONTAMINATION ...................................................................................................................... 8
8 SADPMINI INITIAL CONFIGURATION ............................................................................................. 8
9 THE NORMAL DISPLAY SCREEN ..................................................................................................... 9
10 SADPMINI OPERATING PRINCIPLES ................................................................................................ 9
10.1
10.2
10.3
10.4
NAVIGATING THROUGH MENUS ........................................................................................................... 9
ENTERING NUMERICAL DATA .............................................................................................................. 9
ENTERING ALPHANUMERICAL DATA.................................................................................................. 10
SECURITY PROTECTION SCREENS ....................................................................................................... 10
11 OPERATING THE SADPMINI ......................................................................................................... 10
11.1
THE SETUP MENU .............................................................................................................................. 10
11.1.1
11.1.2
11.1.3
11.1.4
11.1.5
11.1.6
11.1.7
11.1.8
11.1.9
11.1.10
11.1.11
11.2
Select Units ................................................................................................................................................... 10
Pressure Calc ................................................................................................................................................. 11
4-20mA Output (4-20mA and Full Logging SADPminis only) .................................................................... 11
AutoCal ......................................................................................................................................................... 12
SPC (Single point Calibration) ...................................................................................................................... 13
Security ......................................................................................................................................................... 15
Time and Date ............................................................................................................................................... 16
Set Clock ....................................................................................................................................................... 16
Information .................................................................................................................................................... 16
Temperature ............................................................................................................................................. 17
Exit ........................................................................................................................................................... 17
THE LOGGING MENU .......................................................................................................................... 17
11.2.1
11.2.2
11.2.3
11.2.4
11.2.5
11.2.6
11.2.7
11.2.8
11.2.9
11.2.10
11.2.11
Internal Logging ............................................................................................................................................ 17
Review Data .................................................................................................................................................. 18
PC Comms..................................................................................................................................................... 19
Delete Data .................................................................................................................................................... 19
Create TAG ................................................................................................................................................... 19
Edit TAG ....................................................................................................................................................... 20
Delete TAG ................................................................................................................................................... 20
Printer LOG ................................................................................................................................................... 20
Unit Address .................................................................................................................................................. 21
Free Space ................................................................................................................................................ 21
Exit ........................................................................................................................................................... 21
12 PRESSURE CORRECTION ............................................................................................................... 21
Page iv
13 BATTERY CURRENT STATUS ........................................................................................................ 22
14 PERFORMING AN AUTOCAL ......................................................................................................... 22
14.1
14.2
AMBIENT CONDITIONS ........................................................................................................................ 22
REFERENCE GAS ................................................................................................................................. 23
15 SADPMINI 4-20MA ...................................................................................................................... 23
15.1
15.2
SADPMINI 4-20MA CIRCUIT .............................................................................................................. 23
CALCULATING MAXIMUM OUTPUT LOAD (REXT) ............................................................................... 24
16 RS485 COMMUNICATIONS ........................................................................................................... 24
17 SADPMINI LOGGING SOFTWARE CABLES AND INTERFACES ....................................................... 25
17.1
17.2
18
19
20
21
22
23
24
RS232 TO RS485 CABLES & INTERFACE............................................................................................ 25
USB TO RS485 CABLES & INTERFACE ............................................................................................... 26
TECHNICAL DETAILS OF THE RS485\4-20MA CONNECTER (CON066) ....................................... 27
SADPMINI PROTOCOL .................................................................................................................. 28
INSTRUCTIONS FOR REPLACING DESICCANT IN THE SADPMINI .................................................. 29
APPENDIX A – SADPMINI SETUP MENU MAP ............................................................................. 30
APPENDIX B – SADPMINI LOGGING MENU MAP ......................................................................... 31
APPENDIX C – TROUBLE SHOOTING ............................................................................................. 32
APPENDIX D – SADPMINI SPECIFICATION ................................................................................... 33
Page v
1 General Information
•
•
The SADPmini is a battery powered portable instrument. It is a fully self-contained
unit incorporating the moisture sensor, signal conditioning circuitry, memory
management, graphics display, membrane keyboard, Real Time Clock, onboard
battery and charger circuit.
The SADPmini operation is controlled by a user-friendly software interface
incorporating multiple menus, hot key combinations, information displays and control
functions.
2 Features
Basic SADPmini
•
•
•
•
•
•
•
•
•
•
•
•
•
128 x 64 dot backlight LCD graphical display.
Tactile membrane keypad, coupled with an easy to operate user interface.
Operates from an internal rechargeable Lithium Ion battery.
Battery life in excess of 250 hours* continuous use, from fully charged.
Full charge time approximately 6 hours. Only use the Charger supplied with
SADPmini
7 selectable moisture units (ºC, ºF, ppm(V), ppm(W), ppb, g/m3 and lb/MMSCF).
Pressure compensated moisture readings in 4 selectable units of pressure (psig, barg,
kg/cm2g and Kpag).
Battery life Indicator.
Built in Automatic Calibration (AutoCal).
Built in Single Point Calibration (SPC).
On board Real Time Clock.
User settable security access.
Sample gas flow temperature indication.
4-20mA Option (all the Basic SADPmini features plus)
•
4-20mA Loop Powered output.
Full Logging Option (all the 4-20mA option features plus)
•
•
•
•
•
•
•
•
Stores up to 16000 data points.
20 definable alphanumeric TAG references, including 1 preset.
Up to 20 blocks of data stored under each TAG reference.
Review stored data in tabular and graphical form.
RS485 Serial Communication to dedicated PC software.
Download stored data in CSV format.
Real Time logging to connected PCs.
Thermal printer driver facility.
Page 1 of 33
3 Safety Information
Read the safety information below, before installation.
3.1 Warning
The SADPmini is not Intrinsically Safe. Therefore, it should not be used in hazardous
areas.
The maximum pressure to which the telescopic measuring head is exposed
must not be more than
0.3barg, 4.35psig, 30kpag or 0.3kg/cm2g
Exposing the measuring head to higher pressures may damage the
instrument and result in injury to the operator or other personnel in the area
3.2 Battery
3.2.1 Lithium-Ion
The SADPmini contains a Lithium-Ion battery which, to conform to current legislation
should always be partially discharged before shipping.
3.2.2 Initial Charging
•
•
•
It is recommended that the SADPmini be put on charge overnight when first received.
Only use the Charger supplied with SADPmini
To attain maximum battery life the SADPmini should always be re-charged at room
temperature.
The battery life (hours of use from a fully charged cell) will reduce when used in cold
conditions. * 250 hours is quoted as the expected battery life when used at room
temperature.
Note: The 4-20mA output should not be operated while the instrument is charging.
Page 2 of 33
4 Installing the Air/Gas Sampling System
The piping installation schematic diagram (see section 4.1) shows all components, which
could be used in a dry gas measurement application although not all the items shown will
be required for every installation.
Care should be taken to ensure that the sample presented to the SADPmini is not
contaminated with any component that will damage, contaminate or affect the
SADPmini in a way that will impair the unit’s accuracy.
It is strongly recommended that the sample should not contain particulate matter, oil,
hydrocarbon or any other condensate. If these components contaminate the sample
system and/or the measuring sensor, the SADPmini response time will be lengthened,
although the sensor calibration will not be effected.
The sample must not contain Ammonia, Chlorine, Ozone or any wet acid vapours
or liquid as these will permanently damage the SADPmini sensor and impair
calibration accuracy.
The flow rate, although not critical to the sensor measurement, should be low enough to
avoid abrasion to the sensor surface without being so low as to extend the SADPmini
response time to an unacceptable level. In general, a flow rate of between 5 and 8
litres/min at NTP will give the right balance.
The sensor used in the SADPmini is a variable capacitor, which is directly affected by
changes in partial pressure of water vapour, and these changes, that are proportional to
the dew/frost point temperature, are displayed on the instrument indicator.
Page 3 of 33
4.1 Piping installation Schematic
4
5
7
9
8
2
3
6
1
Main
Process
Line
Notes
a.
b.
The sample point should be on the upper surface of the horizontal pipe, or from a
vertical section of pipe, wherever possible.
The sample tube should run upwards from the sample point. If this is not possible,
then an inspection port or drain tap should be installed at the lowest point in the
sample system.
4.2 Piping Schematic Component Index
1. Sample Isolation Valve - This is a recommended item as it allows access to the
sample system without interrupting the main process line.
2. Sample Tube – This should be stainless steel for dry air or gas applications but copper
or carbon steel can be used where wetter gases are to be measured. If any section of
the sample tube must be flexible then PTFE should be used. In most cases, 3mm OD
(1/8”) is sufficient as it provides good system response time with minimum flow.
6mm OD (1/4”) tube can be used where pressure drops across the 3mm tube are too
high
3. Filter Unit – A filter unit is recommended when the samples are likely to contain
particulate matter. If the air/gas sample contains heavy hydrocarbon condensate, the
Page 4 of 33
4.
5.
6.
7.
8.
9.
filter must be of the coalescing type with a drain. The filter unit should be positioned
as close to the sample point as practical.
Pressure Reduction Valve or Pressure Regulator – the sample is measured at
atmospheric pressure requiring that valve 4 is fitted to the system.
Flow Control Valve
Sample Connection
SADPmini.
Flow Indicator – The recommended sample flow is 5 to 20 L/M.
Sample Exhaust – The exhaust is vented to atmosphere or returned to an atmospheric
pressure line.
5 Purging the sample connection
Refer to the sample system schematic in section 4.1.
It is advisable to carry out an initial purge of the sample loop, before connecting the
SADPmini, in order to avoid the possibility of sensor damage on start-up.
Open the sample isolation valve (1) slowly, until there is a small flow of air/gas at
atmospheric pressure from the pressure reduction valve (4) into SADPmini line. Allow
the air/gas to exhaust through the sample connection (9).
The SADPmini is not flow sensitive however the sample flow needs to be enough to
purge the sensor head effectively, so anything less than 1 litre/min would mean that the
instrument would take too long to settle to a stable reading. The flow should also not be
so high that the gas velocity could physically damage the sensor or cause backpressure in
the sensor head, so should not exceed about 20 litres/min.
Allow this purge to continue for 2 minutes to remove any residual moisture from the
sample pipe work and components. Check that no liquid or particulate contamination,
which could damage the sensor, is passing through the sample pipe. Directing the sample
onto a piece of white paper (such as a filter paper) will make it easier to see any dust or
oil mist in the sample.
6 Using the SADPmini to take a Moisture Reading
Refer to the sample system schematic in section 4.1.
The first purpose of the SADPmini is to provide a rapid, easy and reliable means of
carrying out moisture content measurements, of gases. To ensure rapid response the
sensor is kept dry by surrounding the sensor with desiccant in the head assembly when it
is not in use.
The SADPmini can display moisture readings in any one of six Engineering Units and
can also display pressure compensated readings. The SADPmini should be setup as
required (See The Setup Menu section) before progressing to take sample readings
Page 5 of 33
6.1 Taking a Measurement
After purging the system to be monitored fit the SADPmini sample pipe to the sample
connection (6). Allow the gas to purge for a further 2 minutes with the head down.
SADPmini
Head Lowered
SADPmini
Head Raised
Restrict the outlet of the SADPmini (7) by placing a finger over the sample exhaust (9),
so that the pressure of the sample lifts the telescopic head. As soon as the head is fully
extended remove the finger, to prevent pressure build up. Pull gently on the head to make
sure it is fully extended. If there is not enough pressure to lift the head assembly, assist it
by pulling it up; do this very slowly so that ambient air is not drawn in through the outlet.
It may help to turn the head to break the “sticktion” be sure to turn clockwise, so as not
to loosen the locking ring.
The sensor will respond to the moisture level present in the sampled gas. The displayed
moisture value will continue to change until the sensor reaches equilibrium; at which
point the displayed value is representative of the moisture level in the sampled gas.
When the test is finished push down the telescopic head fully and carefully, turn off the
sample flow and disconnect the sample pipe. With the head in the down position the
desiccant will dry the sensor, ready for the next test.
NOTE - It is important that the head assembly is either fully up, or fully down to keep the
desiccant isolated from ambient air, so avoiding wetting it. When the SADPmini is not in use
it should be stored with the head in the down position.
7
Sampling Information
Refer to the sample system schematic in section 4.1.
The SADPmini sensor will respond to the water vapour pressure of a gas in contact
with it. It is important to ensure that the gas passing through the sensor head is the same
as the gas being sampled.
Page 6 of 33
7.1 Sample Pipe
The SADPmini is supplied with 2 connections: a “fir tree” on one side and a Swagelok®
compression fitting for 1/4 in, 1/8 in, or 6mm OD pipe (as specified on your order) on the
other. Either can be used as the inlet connection (6).
PTFE and stainless steel are recommended materials for sample pipes. Some specialist
flexible tubing may be suitable as sample pipe, but common flexible tubing, such as
pvc, nylon, polythene or rubber, should not be used, as they are permeable, and water
vapour from the atmosphere will diffuse through them into the sample gas.
A 2m PTFE sample pipe is supplied for use with the “fir tree” connection. The first
time this is used it is advisable to warm the end that will go over the “fir tree” for a few
seconds with a heat source to soften it slightly, which helps to get a gas tight seal.
7.2 Gasses to avoid
The moisture sensors are suitable for many different industrial and research
applications. Most gases can be checked for their moisture content with no need for the
calibration to be altered when changing between different gases, as the sensor operates
only with reference to the water vapour content. There are, however, some gases that
must be avoided, as they are not compatible with the material of construction of the
sensor. Ammonia (NH3), Ozone(O3) and chlorine (Cl) must be avoided at all times,
even in small quantities. Hydrogen chloride (HCl) also attacks the sensors very
quickly. Some, less aggressive, acidic gases, such as sulphur dioxide (SO2), can be
monitored, as long as the moisture content is low, generally less than 100ppm(v). If in
doubt, please ask your supplier.
Sulphur hexaflouride (SF6) has no effect on the sensor. If the gas has been exposed to
arcing, however, it is possible that various acidic species will have been formed that
will corrode the sensor. When testing SF6 that may have been arced, therefore, an
acidity test should be carried out first; if the gas proves to be acidic then the moisture
test should not be carried out.
7.3 Sample conditioning
The main principle when considering the presentation of the gas sample to a portable
dewpoint meter is to keep the sample system as simple as possible and of minimum
swept volume, so that it has the least possible influence on the gas sample.
7.4 Pressure and flow control
In most cases the gas to be sampled will be at a positive pressure, which will need to be
reduced to atmospheric pressure. At low pressures, up to around 10 barg, this can be
done by including a simple needle valve (5) to control the flow and thereby, the
pressure dropping across it. Ideally this would be the isolation valve (1) on the sample
Page 7 of 33
point, thus keeping the number of joints and glands, which are points of potential
moisture ingress, to a minimum.
At higher pressures it is advisable to reduce the pressure across a pressure regulator (4).
Any regulator used should be stainless steel and of a low swept volume. Typical
laboratory or welding type regulators are not suitable because they have elastomeric
diaphragms, which are permeable to water vapour, and the high swept volume will be
slow to purge.
7.5 Particulate contamination
If the sample gas is likely to contain particulate material this should be kept away from
the sensor by including a small in-line particle filter (3) in the sample system.
If the surface of the sensor becomes partly coated with particles it will not affect the
calibration of the sensor, but will restrict the movement of water molecules across the
surface, so increasing the time it takes for the sensor to come to equilibrium with the
water vapour concentration around it. If the solid material is hygroscopic, such as
desiccant dust, whenever there is a change in the moisture concentration in the sample
this material must come to equilibrium with the moisture content before the sensor can
respond to the change, which will cause delays in obtaining accurate results.
7.6 Liquid contamination
If the sample gas may contain liquid contamination, such as oil mist, this should be kept
away from the sensor by including a coalescing filter.
If the surface of the sensor becomes partly coated with liquid, again it will not affect the
calibration of the sensor. It will restrict the movement of water molecules across the
surface, so increasing the time it takes for the sensor to come to equilibrium with the
water vapour concentration around it. If the liquid is hygroscopic, such as glycol, the
buffering effect described for desiccant dust may be so great that the sensor becomes
too slow to use.
8 SADPmini Initial Configuration
Each SADPmini is set up prior to despatch to the end users specification. The following
values will be preset: • The specified sensor type is pre-selected.
• The calibration data will be set to values that are applicable to the specified
installed sensor.
• The AutoCal value is set to match the installed sensor.
• The clock will be set to the correct date and time GMT.
• Moisture units set to oC Dewpoint.
• Pressure units set to barg, pressure value set to 0.
• Security codes are set to 1000.
• No Single point calibrations.
Page 8 of 33
9 The Normal Display screen
When the SADPmini is ON, it displays the moisture level of the gas that the sensor is
exposed too. When the head is lowered, the sensor is no longer exposed to the gas and is
dried down by the desiccant in the head.
Moisture Reading
Moisture Units
Pressure Value and units
-27.4
9144
ºC Dewpoint
@ 1.0barg
ppm[V]
Examples of the Main Display Screen
The Display always shows the current moisture level that the internal sensor is
exposed too. The current engineering units are clearly indicated on the display as well
as any pressure compensation performed.
10 SADPmini operating principles
Two distinct and separate menus control the SADPmini. Each of these menus is
described in a separate section below:
10.1 Navigating through Menus
The SADPmini is predominantly menu driven. To navigate around the menus use the
‘’ and ‘’ keys to move the cursor bar (negative image) through the options
available within the menu and use the ‘↵’ key to select the option required. The ‘’
key has no function within menu screens.
10.2 Entering Numerical Data
The basic principle used to enter numerical values is described here.
The display will indicate a number in a format appropriate to the required input, the
first character of which will be displayed as a negative image to indicate it is active.
Use the ‘’ and ‘’ keys to select the required number between 0 and 9 then press the
‘’ key to select and proceed to the next character. Continue this process until all
characters are entered. Pressing the ‘↵’ key, at any point, enters the numerical value
currently displayed.
Page 9 of 33
•
•
•
•
Notes
Where control values are entered (such as 4-20mA) the currently set value is displayed when
first entering the screen. This allows the user to simply press the ‘↵’ key and leave the screen
without altering any information. Useful when entering a function by accident.
The decimal point (dp) will always appear in the correct location.
On some screens when using ºC or ºF the first digit is the negative sign selector. This is either
ON or OFF.
Pressing the ‘’ key when the last character is active will make the first character active.
10.3 Entering Alphanumerical Data
(Full Logging SADPmini only)
Some functions such as the “Create TAG” allow the user to enter a combination of
letters and numbers. The principle for entering data is the same as that for entering
numerical data (10.2 above) except that the ‘’ and ‘’ keys scroll through the 26
letters of the alphabet as well as the 10 numerical characters.
Note – There is a dual speed function when entering alphanumerical data. When either the
‘’ or ‘’ key is pressed and held, the speed of scroll will increase.
10.4 Security Protection Screens
Several of the SADPmini functions can be protected with security codes. These are the
main ‘Setup Menu’, the ‘AutoCal’ function, and the ‘SPC’ (Single Point Calibration)
function. Each of these functions can be protected with an independently activated user
defined 4-digit security code. Once activated, a screen requesting the correct code will be
displayed when the associated function is selected. Failure to enter the correct code will
prevent access to the function. Default setting 1000
11 Operating the SADPmini
11.1 The Setup Menu
(See Appendix A - SADPmini Setup Menu Map)
The setup menu it activated by pressing the ‘’ and ‘↵’ keys simultaneously. From
this menu, the user has the choice of several options detailed below:
11.1.1 Select Units
Description – This sub-menu has eight options allowing the user to select any one of
seven Moisture Engineering Units and to exit the menu.
Note: - 1) Once an engineering unit is selected, the SADPmini will only display and accept
inputs in that chosen unit. This means that 4-20mA settings (where fitted), offsets
and SPCs are all performed in the chosen units.
2) The 4-20mA range settings are reset to full span whenever the moisture units are
altered.
Operation – In the ‘Setup Menu’ move the cursor bar to highlight the ‘Select Units’
option and press the ‘↵’ key. The ‘Primary Units’ sub-menu is displayed. Run
through the options until the required engineering unit is highlighted; confirm the
Page 10 of 33
selection by pressing the ‘↵’ key. The SADPmini automatically reverts to the ‘Exit’
option in the ‘Setup Menu’.
Note: The PPB Moisture Engineering Units has an upper display limit of 10000 PPB, Change
units to PPM above this moisture level.
11.1.2 Pressure Calc
Description – This sub-menu has five options allowing the user to select any one of
four Pressure Engineering Units and to exit the menu. This function then allows the
SADPmini to display Dewpoint ºC and ºF at pressure. When this function is selected,
the main display screen will display the pressure at which the Dewpoint reading is
calculated.
Operation – In the ‘Setup Menu’ select the ‘Pressure Calc’ option. In the ‘Pressure
Units’ sub-menu run through the options until the required engineering unit is
highlighted; confirm the selection by pressing the ‘↵’ key. The SADPmini then
requires that a numerical pressure value be entered in the selected units. The display
format relates to the pressure units chosen. Once a pressure value is entered, the
SADPmini automatically reverts to the ‘Exit’ option in the ‘Setup Menu’.
Note: See ‘SADPmini Specification’ for detailed information on Pressure Engineering Units.
Warning: This function is purely an internal calculation and DOES
NOT allow an elevated pressure to be applied to the measuring head.
11.1.3 4-20mA Output (4-20mA and Full Logging SADPminis only)
Description – The 4-20 option allows the user to set the range over which the 4-20mA
output will span. The default setting is for the output range to cover the full operating
range of the sensor type fitted in the SADPmini e.g. for a ‘B’ type sensor output 4mA
equals –80°C and 20mA equals 20°C. However, it is possible to set a more focused
range, such as 4mA equals -60°C and 20mA equals –20°C.
Operation – In the ‘Setup Menu’ select the ‘4-20mA Output’ option. The SADPmini
requires that a value be entered for the 4mA lower limit. The current value is
displayed, in the active moisture-engineering units. Once the new value is entered, the
SADPmini requires that another value be entered for the 20mA upper limit. Once that
new value is entered, the SADPmini automatically reverts to the ‘Exit’ option in the
‘Setup Menu’.
Note – 1) The only way to leave this menu without altering any values is to press the ‘↵’ key
twice, accepting the current values for both the upper and lower settings.
2) The 4-20mA range settings are reset to full span whenever the moisture units are
altered.
3) The 4-20mA output should not be operated while the instrument is charging.
Page 11 of 33
11.1.4 AutoCal
Description – AutoCal allows the user of the SADPmini to ensure accuracy between
laboratory calibrations by checking the span of the instrument and correcting for any
deviation.
ACAL adjusts slope of curve.
New settings stored in SADPmini.
Inst Reading
100%
The AutoCal facility uses the fact that each sensor is designed and manufactured to give no
further increase in response when it reaches its maximum moisture level. For example an
SADPmini with a full-scale value of -20°C dewpoint will read -20°C dewpoint when
exposed to a gas with this moisture concentration, and will continue to read -20°C
dewpoint as the moisture concentration rises above -20°C dewpoint. The SADPmini can,
therefore, be adjusted to read -20°C dewpoint on any gas with a moisture concentration
wetter than -20°C dewpoint, ambient air for instance, thus setting the span to match the
original calibration.
AutoCal should be operated periodically, every 2 to 3 months, say, or can be used to
verify operation of the SADPmini if confirmation of an unexpected result is required.
Operation – of SADPmini units with full scale values of -20°C or 0°C dewpoint
1. Select AutoCal from the Set-up Menu
2. Follow the on-screen instructions, i.e.:
i)
Extend the desiccant head and press the ‘↵’ key.
ii)
The SADPmini will display a moving bar until it assesses that the
sensor has stabilised. (Up to 10 mins.)
iii)
The SADPmini will now display the full-scale value of the unit, either
-20°C or 0°C. If the unit is being checked against a known moisture
level such as from a moisture generator the scroll and ▲ and ▼ keys
can be used to enter the known moisture level, otherwise leave it set at
the full-scale value and press the ‘↵’ key.
iv)
The SADPmini will display a moving bar whilst the calibration data is
modified. (Up to 5 mins.)
v)
Close the desiccant head when instructed to do so and press the ‘↵’
key.
vi)
The SADPmini will return to the Set-up Menu with the “EXIT” option
highlighted. Pressing ‘↵’ key again will return the instrument to
operational mode.
Note - Avoid carrying out the AutoCal procedure on a SADPmini with a full scale value of
0°C dewpoint on days when the ambient dewpoint may to be below this value, for
example a dry day when the ambient temperature is below around 12°C.
Page 12 of 33
Operation – of SADPmini units with full scale values of +20°C dewpoint
i)
ii)
iii)
vii)
iv)
viii)
ix)
The ambient dewpoint should be determined using reference standard,
such as a chilled mirror hygrometer or a psychrometer, unless the
instrument is being checked against a known calibration standard, from a
moisture generator.
Extend the desiccant head and press the ‘↵’ key.
The SADPmini will display a moving bar until it assesses that the sensor
has stabilised. (Up to 10 mins.)
The SADPmini will now display the full-scale value, 20°C dewpoint.
Whether the instrument is being checked against the measured ambient
level or against a known calibration standard, from a moisture generator,
for example, the scroll and ▲ and ▼ keys are used to set the value
accordingly. (If a different value has been entered in this way previously
the SADPmini will display that value, rather than 20°C dewpoint.) Press
the ‘↵’ key when done.
The SADPmini will display a moving bar whilst the calibration data is
modified. (Up to 5 mins.)
Close the desiccant head when instructed to do so and press the ‘↵’ key.
The SADPmini will return to the Set-up Menu with “EXIT” highlighted.
Pressing ‘↵’ key again will return the instrument to operational mode.
.
Note – 1) Pressing the scroll key during the AutoCal ABORTS the process. The AutoCal
value present at the start of the aborted AutoCal process is reinserted. The instrument
is OUT OF CALIBRATED.
2) If the Instrument fails to AutoCal (excessive sensor degradation) a message to this
effect will be displayed on the LCD screen until acknowledged by the user.
3) In both cases the instrument will be OUT OF CALIBRATION until a successful
AutoCal is performed. This will mean replacing the sensor in some cases.
4) The entered AutoCal Value must not be pressure compensated (see 11.1.2).
11.1.5 SPC (Single point Calibration)
Description – The SPC facility allows users of the SADPmini to check the reading of the
instrument against a “standard reference gas” or instrument, such as a chilled mirror unit,
at a particular value that may be considered to be critical, and make any adjustment
necessary to give agreement with that “standard reference.”
C
-48.0 –46.0
D
SPC adjusts 1 point on the curve
leaving upper and lower limits as
set. Note the Upper limit is the
AutoCal Point.
Inst Reading
Page 13 of 33
Rather than making the adjustment to the
span of the instrument, as with AutoCal,
the SPC adjustment is made by
introducing a two-part straight-line
response curve with a break point at the
set point, or “standard reference.”
SPC Procedure firmware 6.06 or later
1. An AutoCal must be carried out before performing an SPC.
2. Measure the value of the reference gas with the SADPmini in the normal way and
note the indicated value and the stated value of the “standard reference.” [For
example, the SADPmini reads -70°C dewpoint, and the “standard reference gas”
is certified by the gas supplier as being -69°C dewpoint]. The instrument can now
be removed from the gas sample, to conserve the reference gas.
3. Select ‘SPC’ from the Set-up Menu and Press the ‘↵’ key.
i.)
On the warning screen press the ‘↵’ key to continue (pressing Scroll key
will abort the procedure and go back to the Set-up Menu).
ii.)
Enter the password (if required) and press the ‘↵’ key.
iii.)
Highlight the ‘ENTER NEW SPC’ option to add a SPC to the SADPmini
and Press the ‘↵’ key.
iv.)
The display asks for the “SPC POINT,” enter the value measured for the
reference gas (i.e. -70°C in the above example) using the Scroll and▲ and
▼ keys and press the ‘↵’ key.
v.)
The display asks for the “SPC VALUE,” enter the stated value for the
reference gas (i.e. the value that you want the SADPmini to read at this
point, -69°C in the above example) using the Scroll and▲ and ▼ keys and
press the ‘↵’ key.
vi.)
The SADPmini will revert to the Set-up Menu with EXIT highlighted,
pressing the ‘↵’ key will return the instrument to the operating mode and
all readings taken will be modified in line with the offset introduced in the
above procedure.
Note- The integrity of the calibration will now be dependant on the integrity of the
reference standard against which the adjustment has been made. To restore the factory
calibration, and thus the traceability stated in the Certificate of Calibration, the SPC
adjustment must be removed.
4. To remove an SPC from the SADPmini follow the above procedure to step iii.)
Then select the ‘REMOVE SPC’ option and Press the ‘↵’ key. The SADPmini
will revert to the Set-up Menu with the SPC removed.
SPC Procedure firmware 6.05 or earlier
1. An AutoCal must be carried out before performing an SPC.
2. For SADPmini’s with firmware versions 6.05 and earlier the SPC procedure can
only be carried out with the instrument set to read in °C dewpoint. [The firmware
version can be read in the “INFORMATION” section of the Set Up Menu.]
Page 14 of 33
3. Measure the value of the reference gas with the SADPmini in the normal way and
note the indicated value and the stated value of the “standard reference.” [For
example, the SADPmini reads -70°C dewpoint, and the “standard reference gas”
is certified by the gas supplier as being -69°C dewpoint. If the value for the
“standard reference gas” is stated in other units, such as ppm(v), it must be
converted to °C dewpoint; a Moisture Calculator is available on www.dewpoint.com that can be used to do this]. The instrument can now be removed from
the gas sample, to conserve the reference gas.
4. Select SPC from the Set-up Menu and press the ‘↵’ key.
i.)
On the warning screen press the ‘↵’ key to continue (pressing Scroll key
will abort the procedure and go back to the Set-up Menu).
ii.)
Enter the password (if required) and press the ‘↵’ key.
iii.)
The display asks for the “SPC POINT,” enter the value measured for the
reference gas (i.e. -70°C in the above example) using the Scroll and▲ and
▼ keys and press the ‘↵’ key.
iv.)
The display asks for the “SPC VALUE,” enter the stated value for the
reference gas (i.e. the value that you want the SADPmini to read at this
point, -69°C in the above example) using the Scroll and▲ and ▼ keys and
press the ‘↵’ key.
v.)
The SADPmini will revert to the Set-up Menu with EXIT highlighted,
pressing the ‘↵’ key will return the instrument to the operating mode and
all readings taken will be modified in line with the offset introduced in the
above procedure.
Note- The integrity of the calibration will now be dependant on the integrity of the
reference standard against which the adjustment has been made. To restore the factory
calibration, and thus the traceability stated in the Certificate of Calibration, the SPC
adjustment must be removed.
5. To remove a SPC from the SADPmini, select °C dewpoint units and carry out the
SPC procedure above and enter the SADPmini lower limit values for both the
SPC Point and Value.
11.1.6 Security
Description – This sub-menu allows the user to alter any of the three user defined 4digit security codes see 8.4 above.
Operation – In the ‘Setup Menu’ select the ‘Security’ option. In the ‘Select Code’
sub-menu run through the options until the required code is highlighted; confirm the
selection by pressing the ‘↵’ key. The user is then requested to enter the current (old)
security code. If the correct code is entered, the user is then requested to enter the new
security code. Failure to enter the correct code will drop the user back into the ‘Setup
Menu’. The default value for all security codes is ‘1000’
Note: ‘0000’ is a special code that deactivates the security code for the selected functions.
Where ‘0000’ is used, the security code screen will be bypassed.
Page 15 of 33
11.1.7 Time and Date
Description – This function allows the user to view the set ‘Time’ and ‘Date’ without
having to enter the Set Clock function (see section 11.1.8).
Operation – In the ‘Setup Menu’ select the ‘Time and Date’ option.
11.1.8 Set Clock
Description – The Clock option allows the user to set the SADPmini internal Real
Time Clock.
Operation – In the ‘Setup Menu’ select the ‘Set Clock’ option. The user is prompted
to enter the Date in the DD/MM/YY format followed by the time in the HH:MM:SS
in 24-hour format.
Note: Although the seconds digits are displayed they are not selectable
11.1.9 Information
Description – The Information menu displays all of the SADPmini current settings.
Operation – In the ‘Setup Menu’ select the ‘Information’ option. The ‘Information’
sub-menu allows the user to run through the displayed data using the ‘’ and ‘’
keys. The menu can be exited by pressing the ‘↵’ key at any location or by scrolling
to the Exit option.
Note: There are no selectable operations from this menu; it is purely for information purposes.
Displayed Information
VerNo
5.11
Serial
500101
Read L
-80.0
Read H
20.0
ACAL
10.0
SPC Pt
20.0
SPC Va
20.0
Units
ºC
P Unit
barg
Press
00.0
Sensor
B
4mA
-80.0
20mA
20.0
Epot
384
Exit
Description
Software Version Number
Unit Serial Number
Lower Limit
Higher Limit
AutoCal Value
Single Point Calibration Action Point.
Single Point Calibration Offset Value.
Currently Set Engineering Units
Currently Set Pressure Units
Currently Set Pressure Value in Current Units
Type of Sensor fitted to SADPmini
Low mA output in Currently Set Engineering Units.
High mA output in Currently Set Engineering Units.
Position of the electronic AutoCal potentiometer
Exit option
Page 16 of 33
11.1.10Temperature
Description – This function allows the user to see the current temperature within the
SADPmini head in both ºC and ºF.
Operation – In the ‘Setup Menu’ select the ‘Temperature’ option.
11.1.11Exit
Description – The Exit option allows the user to return to the normal display.
Operation – In the ‘Setup Menu’ select the ‘Exit’ option.
11.2 The Logging Menu
(See Appendix B - SADPmini Logging Menu Map. Full Logging SADPminis only)
The Logging menu it activated by pressing the ‘’ and ‘’ keys simultaneously.
From this menu, the user has the choice of several options detailed below:
11.2.1 Internal Logging
Description – This function allows the user to store data to the unit’s internal
memory, from where it can be exported or reviewed. There are 20 available TAG
references, each of which can store up to 20 data blocks (a file where data points or
measurements are stored). This means that a maximum of 400 separate data blocks
can be stored. The SADPmini has a capacity of 16000+ individual data points.
Note: If the number of data points in a single block exceeds 12800 only the first 12800 will be
downloaded from the SADPmini to a PC. It is therefore recommended that a sample rate be
chosen that over the logging period will result in less than 12800 readings being taken
Operation – In the ‘Logging Menu’ select the ‘Internal LOG’ option. The user is then
presented with the ‘Select Log TAG’ menu showing available TAG references for
data storage. (See Create, Edit & Delete TAG options for more information).
Highlight the required TAG reference and press the ‘↵’ key to select.
Note: TAG1 is the default TAG reference and cannot be deleted. If no other, TAG references
have been created, the ‘Select Log TAG’ menu does not appear and the unit will automatically
select to log data to TAG1. Also ‘EMPTY’ means the TAG reference has not been defined
using ‘Create TAG’ and as such is not useable.
Each TAG can store up to 20 separate data files called data blocks which can hold up
to 12800 downloadable measurements.
Once the required TAG reference is selected, the user is required to enter an interval
between readings in minutes. The default setting is 0.1 minutes or 6 seconds. As the
interval is changed, the SADPmini displays the length of time that the unit could
successfully log data for in terms of memory space.
Note: this forecast is not an indication of battery life; long tests should be performed on
external power.
Page 17 of 33
Pressing the ‘↵’ key starts the logging process and brings up the ‘Internal LOG’
display screen, which indicates the current moisture value, the number of data points
read and the TAG reference where the data is stored. Pressing the ‘’ key at any
point will stop logging.
Note: A minimum of 4 stored data readings is required for the data to be reviewed by the
SADPmini.
11.2.2 Review Data
Description – This function allows the user to review data stored in the unit’s internal
memory in both tabular and graphical format.
Operation – In the ‘Logging Menu’ select the ‘Review DATA’ option. The user is
then presented with the ‘Review TAGs’ menu showing all current TAG references.
Highlight the required TAG reference and press the ‘↵’ key to move to the block
selection screen.
The selection screen shows the TAG reference, block number plus the date & time
when data was stored. The SADPmini by default displays the most current data block
first and subsequently runs through the remaining blocks in chronological order.
Pressing the ‘’ key displays the next block of information.
Pressing the ‘↵’ key displays the select block and the associated data in graphical
format.
Note: ‘EMPTY’ means the TAG reference has not been defined using ‘Create TAG’.
The graphical displayed shows the stored data vs number of readings
TAG Reference
Block Number.
1
Default TAG
Cursor.
Moisture curve
Moisture value @ cursor
position.
Number of Data Points
0
-35.7
Page 18 of 33
20
Pressing the ‘’ and ‘’ keys moves the cursor along the X-axis of the graph. The
Moisture value printed in the middle of the X-axis changes to indicate the value at the
point where the cursor crosses the moisture curve.
Pressing the ‘’ key changes the format of the displayed from tabular to graphical
and visa versa.
The tabular display shows the TAG reference, block number, moisture units and 6
moisture readings. The ‘’ and ‘’ keys allow the user to scroll in both directions
through the stored data values.
Pressing the ‘↵’ key from either display format returns the user to the ‘Logging
Menu’.
11.2.3 PC Comms
Description – This function is selected by the user to download store data or to Realtime log data, to a connected PC.
Operation – In the ‘Logging Menu’ select the ‘PC COMMS’ option. Ensure the
SADPmini is connected to the PC using the cable supplied. Start the PC software (See
SADPmini Logger software user guide) and press the ‘↵’ key twice.
Note: Pressing the ‘’ key terminates communications with the PC and returns the display to
the ‘Logging Menu’
11.2.4 Delete Data
Description – This function allows the user to completely delete all data stored on the
SADPmini. Once deleted the data is not recoverable.
Operation – In the ‘Logging Menu’ select the ‘Delete DATA’ option. The unit
displays a warning and allows the user to return to the ‘Logging Menu’ without
deleting the data by pressing the ‘↵’ key. Pressing the ‘’ key deletes all the data
irretrievably.
11.2.5 Create TAG
Description – This function allows the user to define 19 bespoke references of up to
11 characters in length. TAG1 is predefined and cannot be created.
Operation – In the ‘Logging Menu’ select the ‘Create TAG’ option. The ‘Enter
TAGS’ screen then allows the user to create a TAG reference by pressing the ‘’
key or return to the ‘Logging Menu’ by pressing the ‘↵’ key.
The ‘Create TAG’ screen enables the user to produce an 11-character reference using
an alphanumeric editor. The ‘’ and ‘’ keys allow the user to scroll through the
Page 19 of 33
full alphanumeric character set in both directions. The ‘’ key moves on to the
next character.
Note: When the 11th character is highlighted the ‘’ key moves the cursor to the 1st
character..
Pressing the ‘↵’ key saves the TAG reference and returns the user to the ‘Enter
TAGS’ screen so another TAG can be created.
11.2.6 Edit TAG
Description – This function allows the user to edit any of the 20 TAG references.
TAG1 is predefined as Default TAG but can be edited.
Operation – In the ‘Logging Menu’ select the ‘Edit TAG’ option. The user is then
presented with the ‘Edit TAG’ menu showing all current TAG references. Highlight
the required TAG reference and press the ‘↵’ key to move to the ‘Edit TAG’ screen.
The bottom item on the menu is an ‘EXIT’ function that returns the user to the
‘Logging Menu’.
The ‘Edit TAG’ screen operates in exactly the same way as the ‘Create TAG’ screen.
(See 11.2.5).
11.2.7 Delete TAG
Description – This function allows the user to delete any of the 19 TAG references
produced using the ‘Create TAG’ function.
Operation – In the ‘Logging Menu’ select the ‘Delete TAG’ option. The user is then
presented with the ‘Delete TAG’ menu showing all current TAG references. Highlight
the required TAG reference and press the ‘↵’ key to move to the ‘Delete TAG’
screen. The bottom item on the menu is an ‘EXIT’ function that returns the user to the
‘Logging Menu’.
The ‘Delete TAG’ screen allows the user to delete the TAG reference by pressing the
‘↵’ key or return to the ‘Logging Menu’ without deleting the TAG reference by
pressing the ‘’ key.
Note: When a TAG reference is deleted all the associated data blocks are also lost.
When a TAG reference is deleted, its slot is filled with the word EMPTY. TAG1
cannot be removed, when deleted it is renamed back to the predefined reference of
‘Default TAG’.
11.2.8 Printer LOG
Description – This function allows the user to real-time log the moisture value seen
by the SADPmini to any ASCII thermal printer via the RS485 ‘D’type connector
Page 20 of 33
communications port. The SADPmini outputs ASCII strings unsolicited without the
need for handshaking at the interval selected.
Operation – In the ‘Logging Menu’ select the ‘Printer LOG’ option.
The user is required to enter a value for the interval between readings in minutes. The
default setting is 0.1 minutes or 6 seconds. Pressing the ‘↵’ key starts, the logging
process and brings up the ‘External LOG’ display screen, which indicates the current
moisture value.
Pressing the ‘’ key at any point will stop logging.
Note: By default the SADPmini will output a moisture value in the current units every 6
seconds.
11.2.9 Unit Address
Description – It is possible to communicate with up to 32 SADPmini units via the
RS485. However, for this to operate correctly each unit must have a different address.
The default address setting for the SADPmini is 1.
Operation – In the ‘Logging Menu’ select the ‘Unit Address’ option. The user is then
required to enter the required address using the standard numerical editor format.
Pressing the ‘↵’ key confirms the new address.
11.2.10Free Space
Description – This routine allows the user to see how much space is available in the
SADPmini memory, in terms of logged readings.
Operation – In the ‘Logging Menu’ select the ‘Space Free’ option. The screen
automatically reverts to the ‘Logging Menu’ after 3 seconds.
11.2.11Exit
Description – The Exit option allows the user to return to the normal display.
Operation – In the ‘Logging Menu’ select the ‘Exit’ option.
12 Pressure Correction
When a line pressure is entered (see 11.1.2) and ºC or ºF have been selected the
displayed moisture value is pressure corrected. The fact that pressure correction is active
is indicated by the phrase “@ 10 barg” (or some variation) been displayed.
Pressure corrected values are also used in the External Log and Internal Log screens
when ºC or ºF are the selected units.
Page 21 of 33
Warning: This function is purely an internal calculation and DOES
NOT allow an elevated pressure to be applied to the measuring head.
13 Battery Current Status
Only use the Charger supplied with SADPmini
The battery Icon in the bottom left-hand corner of the display indicates the status of the
battery.
The internal battery is a 3.6V, 2.3Ah Lithium-Ion rechargeable cell. The Icon indicates the
battery voltage as follows: -
OFF
Less than 3.3V dc
3.3 to 3.38V dc
3.38 to 3.46V dc
3.46 to 3.54V dc
3.54 to 3.62V dc
Greater than 3.62V dc
The Icon fills from the left when the external power supply is connected. This indicates that
the battery is receiving a charging current and should be fully charged within 6 hours.
Note: It is recommended that the unit be charged overnight when first received to ensure the battery is
fully charged.
Note: The 4-20mA output should not be operated while the instrument is charging.
14 Performing an AutoCal
Before an AutoCal can be performed successfully, the user must have a reference moisture
reading. This reading is entered into the SADPmini in the AutoCal process as the AutoCal
value. The AutoCal routine can be performed using a known reference gas or under ambient
conditions.
Note: The AutoCal process will automatically correct any SPCs (see section 11.2.5) already in the
SADPmini.
14.1 Ambient conditions
Pump the SADPmini head up and down a few times to ensure that the air surrounding the
sensor in the SADPmini head is representative of the ambient moisture value. Leave the head
Page 22 of 33
out and allow the sensor to stabilise. Start the AutoCal routine and enter the ambient moisture
value into the SADPmini when asked to enter the AutoCal Value.
14.2 Reference gas
Connect the SADPmini to a reference gas, raise the SADPmini head and ensure that a flow of
5 to 8 L/M is obtained. Allow the sensor to stabilise so that the gas surrounding the sensor in
the SADPmini head is representative of the reference gas moisture value. Start the AutoCal
routine and enter the reference gas moisture value into the SADPmini when asked to enter the
AutoCal Value.
15 SADPmini 4-20mA
Note: The 4-20mA output should not be operated while the instrument is charging.
The 4-20mA signal gained from the SADPmini is loop powered only. The connections are: 4-20mA output
Loop Power input
1
CON066
3
2
6
7
CON066 connector Pin 5
CON066 connector Pin 9
4
8
Viewed from solder bucket side
Loop Return
+ve Loop Supply
5
9
Note: See section 16 for details of CON066 assembly
15.1 SADPmini 4-20mA Circuit
+ve Loop Supply (pin 9)
V V EXT
10Ω
ZVP4424A
R EXT
0.6V
85Ω
Loop Return (pin 5)
Page 23 of 33
15.2 Calculating Maximum Output Load (REXT)
REXT = (VEXT – 0.6) - 105
0.02
Examples
VEXT = 5V : REXT = 115Ω
VEXT = 12V : REXT = 465Ω
VEXT = 15V : REXT = 615Ω
VEXT = 24V : REXT = 1065Ω
VEXT = 28V : REXT = 1265Ω
16 RS485 Communications
The RS485 Half Duplex communications signal is driven by a MAX3471 interface chip. The
SADPmini connections are: RS485 (B)
RS485 (A)
GND
Connector Pin 7
Connector Pin 1
Connector Pin 8
1
CON066
3
2
6
7
4
8
Viewed from solder bucket side
RS485 (A)
RS485 (B)
GND
5
9
Page 24 of 33
17 SADPmini Logging Software Cables and Interfaces
There are 2 types of interface that can be used with the SADPmini and SADPmini Logging
software.
17.1 RS232 to RS485 Cables & Interface
Recommended for Windows XP, Vista and Windows 7
The Interface unit INT007 has two 9-way ‘D’ type connectors. The connector marked
with a ‘B’ connects to a PC or Laptop serial Port using a 2.0m serial cable (Part No:
CAB029). The connector marked with a ‘S’ connects to the SADPmini using a 1m
special cable (Part No: CAB032).
The INT007 has a facility to connect a +12v DC power supply (2.5mm plug with
positive tip). This supply is only required when the PC or Laptop connected to the
SADPmini is not able to supply 100mA. Generally, PC’s do not require this power
supply. Laptops may require the supply for distances above 15m RS232 side and 275m
RS485 side.
B
CAB032
CAB029
Mini
INT007
S
PC
Page 25 of 33
17.2 USB to RS485 Cables & Interface
Recommended for Windows XP, Vista and Windows 7.
The Interface unit INT008 has a 9-way ‘D’ type connector and a USB connector. The
USB connects to a PC or Laptop USB Port using a 1.8m USB cable (Part No:
CAB031). The ‘D’ type connects to the SADPmini using a 1m special cable (Part No:
CAB033).
Note: The drivers for the USB Interface are supplied on the included CD. When Windows asks for the
drivers simply insert the CD and navigate to it.
USB Cable
CAB031
CAB033
Mini
INT008
U
Page 26 of 33
18 Technical Details of the RS485\4-20mA Connecter (CON066)
The CON066 connecter can be wired as a 4-20mA connector or as a dedicated RS485
connecter. The CON066 is a kit of parts consisting of 2 half shells (1), 2 locating screws
(2), 2 fixing screws (3), a ‘D’ type connecter and 4 assorted size clamps (4).
To assemble the CON066 follow the sequence below using the diagram for reference:1. Solder wires to the correct bucket pins of the ‘D’ connecter – see appropriate
section for pinouts,16.1 for “4-20mA” and 16.2 for “RS485”.
2. Select the appropriate clamps (4) for the cable being used.
3. Insert 1 half of the clamp (4) in the bottom half shell (1).
4. Place the ‘D’ connecter in the bottom half shell (1), ensuring the bottom edge
of the connecter is situated in the slot.
5. Pass the cable over the half clamp (4). Connect the top half of the clamp.
6. Insert the 2 locating screws (2) ensuring the screw threads protrude through
the ‘D’ connecter.
7. Offer up the top half shell.
8. Secure using the 2 fixing screws (3).
25
14,6
31
1
3
4
2
Note: This connecter is not used in conjunction with the SADPmini logging software. See section 17.0
for cables used with the SADPmini logging software
Page 27 of 33
19 SADPmini Protocol
Contact your supplier for the “SADPmini Protocol Manual”.
Page 28 of 33
20 Instructions for Replacing Desiccant in the SADPmini
1. Fully extend the Desiccant head (1) of the SADPmini.
2. Unscrew the Retaining Collar (2), turning it counter clockwise (anti-clockwise),
which will unfasten the desiccant filled head from the main body of the SADPmini.
3. Gently pull out the Desiccant Head from the main body of SADPmini.
4. Remove the Desiccant Head Base “O” Ring (3) and keep in safe place.
5. Holding the Desiccant Head with the Desiccant Base Assembly (4) on top, fully
unscrew the Desiccant Head Base Assembly turning it counter clockwise (anticlockwise). The Desiccant Head base may require slight loosening by placing in a soft
jaw vice before this step is carried out. Do not fully unscrew with Head Base at the
bottom, as this will spill desiccant on floor. ONLY USE SOFT JAWS. DO NOT
USE TOOLS OR VICE WITH HARD JAWS.
6. Dispose of used desiccant and re-fill with new up to a level of 3mm (5) from the
bottom of the screw thread.
7. Gently insert the Desiccant Head Base Assembly in the desiccant and tighten. USE
SOFT JAWS - DO NOT USE TOOLS OR VICE WITH HARD JAWS.
8. Fit Desiccant Head Base “O” Ring (3)
9. Insert Desiccant Head in the main SADPmini body and tightly screw in the Retaining
Collar.
Page 29 of 33
21 Appendix A – SADPmini Setup Menu Map
*
ENTER CODE
1000
SETUP MENU
SELECT UNITS
PRESSURE CALC
4-20mA OUTPUT
AUTO-CAL
SPC
SECURITY
SELECT UNITS
PRIMARY UNITS
ºC
ºF
ppm[V]
ppm[W]
ppb
g/m3
PRESSURE CALC
PRESSURE UNITS
SET PRESSURE
000.0
psig
barg
kg/cm2
kPag
EXIT
barg
4-20mA OUTPUT
Edit 4mA Value
Edit 20mA Value
-80.0
20.0
ºC
ºC
AUTO-CAL
*
AutoCal Value
ACAL CODE
Extend
Desiccant
Head
1000
Please Wait
10.0
ºC
Close
Desiccant
Head
Abort
SPC
SPC Feature
Allows Single
Pt. Calibration
Against a
Reference Gas
*
SPC POINT
SPC CODE
1000
SPC VALUE
-020.0
-025.6
ºC
ºC
Abort
Continue
Security
SELECT CODE
SYSTEM
AUTO-CAL
SPC
SENSOR DATA
EXIT
ENTER OLD CODE
ENTER NEW CODE
1000
1000
TIME AND DATE
TIME AND DATE
29 / 10 / 03
15 : 14 : 39
SET CLOCK
SET CLOCK DATE
04 : 07 : 00
SET CLOCK DATE
13 : 58 : 00
INFORMATION
INFORMATION
Ver
Serial
L Rng
H Rng
ACAL
SPC Pt
1.01
10101
-80.0
20.0
0.00
0.00
TEMPERATURE
*
These screens can be disabled by setting the security codes to 0000
TEMPERATURE
27.1ºC
80.7ºF
EXIT
Page 30 of 33
22 Appendix B – SADPmini Logging Menu Map
LOGGING MENU
Internal LOG
Review DATA
Export DATA
Delete DATA
Create TAG
Edit TAG
Internal LOG
*
EXIT
Select Log Tag
1
2
3
4
5
6
TAG 1
OZZY
EMPTY
EMPTY
EMPTY
EMPTY
LOGGING DATA
Interval [Mins]
Logs Free 16000
TAG1
0001.0
[1]
-11.7 ºC
Using Block 19
LOGGING
STOPPED
DATA PTS: 32
To Stop
Review DATA
*
EXIT
Review Tags
1
2
3
4
5
6
Tag OZZY
TAG 1
OZZY
EMPTY
EMPTY
EMPTY
EMPTY
1
Tag OZZY
1
29/06/03
12:45:56
View:
Next:
0
-55.5
57
Tag OZZY
ºC
1 -47.6
2 -48.8
3 -49.7
4 -50.2
5 -51.1
6 -52.2
1
PC COMMS
Comms Mode
Activated
Comms Mode
De-Activated
To Exit
Delete DATA
Warning Data
for all TAG
Settings Will
Be Erased
Erase :
Abort :
DATA
DELETED
Create TAG
Enter TAGS
Create Tag [2]
Create
OZZY
Quit
Edit TAG
Edit Tags
EXIT
1
2
3
4
5
6
TAG 1
OZZY
EMPTY
EMPTY
EMPTY
EMPTY
Edit Tag [2]
OZZY
Delete TAG
Delete Tag
EXIT
1
2
3
4
5
6
TAG 1
OZZY
EMPTY
EMPTY
EMPTY
EMPTY
Delete Tag [2]
YES :
NO :
Printer LOG
Interval [Mins]
0001.0
Printer Log
LOGGING
STOPPED
-11.7 ºC
PTS: 32
To Stop
Unit Address
Unit Address
01
Space Free
Space Free
16000 logs
These screens are not displayed until TAGS have been created.
*
EXIT
Page 31 of 33
23 Appendix C – Trouble Shooting
Fault
Unit does not turn on.
Screen remains blank.
Back light off
“
Unit refuses to turn on.
Screen remains blank
although the backlight
may be on.
Logging Menu Does not
Work
“
4-20mA output does not
work
Unit does not read the
Upper Limit when head
open
AutoCal Failure
Unit always reads Lower
Limit
Unit will not dry down to
Lower Limit
“
Battery has short life
between charges
Unit does not respond to
key presses.
“
Explanation
Required Action
Notes
Battery low level
Connect the battery charger
unit for a minimum of 6
hours charging.
Battery dead
Replace battery
µProcessor locked
up
Press the reset switch under
the port cover. Situated
behind the pinhole.
Connecting the external
battery charger will not
allow the unit to turn on, as
the charger unit is not a PSU
and the battery level will
need to rise before the unit
will turn ON.
Order BAT005 from
supplier
It may be necessary to press
the I/O key whist pressing
the reset switch.
Not a Logging
version see Type
Label
No communication
with PC
Not a 4.20mA
version see Type
Label
Unit needs AutoCal
N/A
Sensor sensitivity
too low
Sensor cable broken
Repeat AutoCal
Sieve Wet
‘O’ Ring Failure
Battery reaching
end of life
µProcessor Locked
Up
Keypad damaged
See Logging Software
trouble shooting section.
N/A
Upgrade unit to Logging
version if required. Contact
Alpha
Upgrade unit to 4-20mA
version if required. Contact
Alpha
Perform AutoCal as per
manual.
If AutoCal Fails contact
supplier to replace sensor.
Repair Cable
Perform service on unit
using Service Kit.
Perform service on unit
using Service Kit.
Replace battery
Press the reset switch under
the port cover. Situated
behind the pinhole.
Check function of keypad
electrically
Service kit available from
supplier
Service kit available from
supplier
Order BAT005 from
supplier
Contact Supplier
If “Required Action” does not correct the fault then contact your supplier.
Page 32 of 33
24 Appendix D – SADPmini Specification
Unit Details
Dewpoint Ranges:
Accuracy:
Resolution:
–80ºC DP to -20ºC DP
–80ºC DP to 0ºC DP
–80ºC DP to +20ºC DP
–110ºC DP to -20ºC DP
–100ºC DP to 0ºC DP
± 2ºC DP over full range
12-bits
4-20mA loop powered:
< ± 0.25% full range error
Type:
Blue 128 x 64 Dot LCD Graphics display with LED backlight.
Output
Display
Keyboard:
Type:
5-key metal dome tactile membrane keyboard
Sensor
Operating Principle:
Ultra High Capacitance AL2O3 Sensor
Temperature
Operating Temperature:
Storage Temperature:
-10ºC to +50ºC
-20ºC to +60ºC
Serial Communications (logging version)
Type:
Data Format:
Baud Rate:
No of Addresses:
RS485
1 Start bit, 1 Stop bit, No Parity and No hardware handshaking
9600
32
Power Supply
Supply Voltage:
Output:
100-240VAC, 50-60Hz, 400mA
6VDC, 15W
Battery
Cell:
Charging:
Capacity
Enviromental
Approvals:
EMC:
3.6V Li-Ion 2.3Ah capacity
Full Charge in 6 hours.
Only use the Charger supplied with SADPmini
Minimum of 250hrs* on full charged battery
CE
Certified to BS EN 61000:2001
Physical
Weight:
Dimension (W,H,D)
‘*’
1.1kg (2.4lbs)
97 x 112 x 202mm ( 3.82” x 4.41” x 7.95”)
Battery capacity is quoted at room temperature. The battery capacity will degrade as the
ambient working temperature falls.
Page 33 of 33


