1
SOLAR PUMP USER’S MANUAL
AquaJet Solar Pump
SKU: AquaJet-Pro-PUMP69
1. OVERVIEW
1) The brushless water pump is designed for outdoor or indoor fountain use, and is powered by DC power supply
such as solar module, rechargeable battery or AC/DC adapter etc.
2) While using solar power, the solar module needs to be placed in the sunlight facing
the sun, and the performance of the pump depends on the sunlight intensity and the
angle of incident light.
3) The pump introduces the latest DC brushless motor technology, it has long service
life.
4) The pump has built-in function of dry-run protection. Two sensor points are provided
on the side of the housing for this. The pump works if these points are under water.
If a point projects out of the water, the pump does not work.
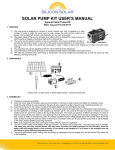
2. COMPONENTS
1) Pump
2)Nozzle (Optional)
3)Floating disk (Optional)
3. ASSEMBLING
1) Connect the pump to the related DC
power supply.
2) For the application of producing
waterfall feature in small garden water
decorations, fit the pump outlet to the
water inlet of the decoration.
3) For the application of creating a small
spraying up fountain, just fix the pump
at the base of a basin or small shallow
pond etc.
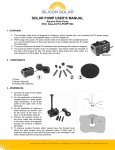
4) Connect the fountain nozzles to the
pump outlet tube according to the above photo; the attached nozzles can
produce 4 different jet shapes.
5) To produce excellent fountain effect, please leave the fountain head above the
water surface using the extension tubes. If these 4pcs of extension tubes are
all used and the pump head is still immerged in the water, please uplift the
pump body somehow.
6) It can easily create a floating fountain by the optional floating disk according to the above photo.
7) Make sure to place the pump fully underwater when the pump operates.
Innovative Solar Solutions | 2917 State Hwy 7, Bainbridge, N.Y. 13733 | Ph: 800.786.0329 | www.SiliconSolar.com
4. CAUTIONS
1)Any altering of the product itself or changing of the components voids warranty.
2)Do not connect the pump to any AC voltage power directly; It’s ONLY for DC voltage power.
3)Operate the pump in freshwater only (never above 40℃), especially keep it away from flammable liquids.
4)The most remarkable feature of the pump is dry-run protection. The pump will automatically stop when it is out of
water.
5. CLEANING AND MAINTENANCE
If the pump starts losing power or stops working after operating for a certain time, please clean the pump following the steps
below (See the above figures for demonstration):
1)
2)
3)
4)
5)
6)
7)
Disconnect the pump.
Press on the bottom of the filter housing and meanwhile move the filter housing apart form the pump.
Turn the impeller cover together with flow valve clockwise to the end and then carefully pull the impeller cover together with
flow valve apart from the pump.
Remove the impeller wheel from the pump.
Wash every part to clean the debris.
Assemble the pump in reverse sequence.
Connect the pump.
*Be careful, never drop down the ceramic axis while cleaning the impeller, it breaks easily.
6. FUNCTIONALITY PROBLEMS
Pump does not operate, please check the below possible failures:
1) No connection to the power supply.
2) Impeller is blocked—to clean the pump, remove the front plate and the impeller, and use a brush or water to
remove any debris.
3) To be sure the pump is fully submerged in water.
*Pump does operate but there is no water running through the tubes: Clear the tube and the filter to make
sure the tube is through completely.
7. TECHNICAL DATA AND PUMP CURVE
Operating voltage
Maximum pump head
Maximum flow rate
Dimensions
Net weight
Cable length
DC 6V-9V
0.7m@6V; 1.25m@9V
240L/H@6V; 330L/H@9V
6.8 x 1.9 x 1.9 inches
2@9V210L/H@9V210L/H
0.55 lb
@9V
16.5 feet
Innovative Solar Solutions | 2917 State Hwy 7, Bainbridge, N.Y. 13733 | Ph: 800.786.0329 | www.SiliconSolar.com
8. Pump Assembly with Different Solar Modules
Please Note: performance curves and data will vary due to solar panel not being same as unit tested under
our QTC (quality test conditions). This pump is designed for solar panel output in range of 6-9V @ 3-500ma.
Warranty on pump for non-Silicon Solar Modules is only 1 Year.
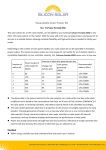
Solar Panel with Junction/Terminal Box on back
1. Find spade terminal adapter
2. Connect spade terminal adapter to pump male connector
3. Connect spade terminals to Junction/Terminal Box (Size may vary)
Solar Panel Wires Only
1. Cut spade terminal adapter.
2. Splice/Strip Wires
3. Twist wires to same color or same polarities + and –
Innovative Solar Solutions | 2917 State Hwy 7, Bainbridge, N.Y. 13733 | Ph: 800.786.0329 | www.SiliconSolar.com






![Manuel d`utilisation [256 Ko]](http://vs1.manualzilla.com/store/data/006381655_1-ed5c1b1bfe571c0ab9069e6cfb5d2469-150x150.png)