Download Guide, ZSC-1 READ FIRST BEFORE INSTALLING
Transcript
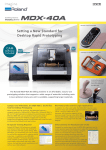
3D Scanning Sensor Unit
ZSC-1
Important Information
Before you install the ZSC-1, be sure to carry out
this operation.
The modeling machine requires an upgrade in order to use the ZSC-1. Incompatible versions cannot
use the ZSC-1.
Please be very sure to carry out this operation to determine whether your modeling machine is
compatible with the ZSC-1.
Important
➢ Carry out this operation before you install the ZSC-1.
➢ Be sure never to switch off the power while the upgrade is in progress. Doing so may cause
breakdown or malfunction, and must never be done.
➢ If more than one modeling machine is connected to the computer, disconnect all machines except the one to be upgraded.
Step 1: Checking the Current Version
➊ Install the Windows-based driver for the modeling machine and make the connection using a USB
cable.
For more information, refer to the documentation included with the modeling machine. If the connection is already made, go on to procedure 2 below.
➋ ➀ Insert the CD-ROM (Roland Software Package) included with the ZSC-1 into the computer's
CD-ROM drive.
➁ After a short wait, the setup menu appears. When it does, click
to close it.
➌ ➀ From the [Start] menu, display [My Computer]. Alternatively, open [My Computer] from the
desktop.
➁ Right-click the icon for the CD-ROM drive, then click [Open].
➂ Open the [Updater] folder, then double-click the [UpdateZSC1] file. ([UpdateZSC1.exe] file)
➍
➀ Switch on the modeling machine's main
power.
➁ Press the sub power button.
➎
Click [OK].
➏
➀ Select the modeling machine's model name.
➁ Click [OK].
If this window displays, upgrading is necessary.
Go on to Step 2.
If this window appears, upgrading is not necessary.
Click [OK] to end the operation.
2
Step 2: Upgrading
➊
➀ Switch off the main power.
➁ Hold down the TOOL-UP and TOOLDOWN buttons at the same time and switch
on the main power.
The SCANNING light begins to flash.
➋
Click [OK].
➌
Click [OK].
➍
Flashing
Steadily lit
➎
Wait until the SCANNING light stops flashing
and remains steadily lit (approximately 30 seconds to one minute).
<Important>
While this is in progress, never switch off
the power or shut down the computer.
➀ Click [Close].
➁ Switch off the main power.
This completes the upgrade. Follow the instructions in the "ZSC-1 User's Manual" to install the ZSC-1.
3
What to Do If...
The SCANNING light doesn't stop flashing.
Wait for two or three minutes. If the flashing still doesn't stop, the model name selected in procedure 6 of
"Step 1: Checking the Current Version" is incorrect. Switch off the main power and redo the operation from
the beginning.
After upgrading, none of the buttons respond.
Make sure the SCANNING light has stopped flashing and remains steadily lit, then switch off the main
power.
The SCANNING light is flashing very rapidly (ten times per second).
The upgrade failed for some reason. Refer to the following section ("The message 'Cannot communicate
with present scanner' is displayed.") and redo the upgrade operation.
The message "Cannot communicate with present scanner" is displayed.
➢Press the sub power button to start the modeling machine. Detection does not occur when only the
main power is switched on.
➢The Windows-based driver is not installed, or the USB cable is not connected.
➢If the upgrade fails, this error message is displayed without exception, and it may become impossible to
redo the upgrade operation. If this happens, carry out the upgrade in what is known as the "forced-write
mode." Note, however, that this method does not allow you to check the current version, and should
never be used except in the case of a failed upgrade.
➀ Switch off the main power.
➁ Run the "UpdateZSC1" ("UpdateZSC1.exe") program.
➂ Hold down the TOOL-UP and TOOL-DOWN buttons at the same time and switch on the main power.
➃ Click [OK], then follow the on-screen instructions to carry out the procedure.
4


