1
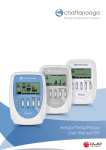
WIRELESS PROFESSIONAL
EN
1 I N T R O D U C T I O N 2
2 W A R N I N G S 2
2.1 COUNTRAINDICATIONS
2
2.2 SAFETY MEASURES
3
3 P R E S E N T A T I O N 6
3.1 EQUIPMENT AND ACCESSORIES
6
3.2 GUARANTEE
6
3.3 MAINTENANCE
7
3.4 STORAGE AND TRANSPORT CONDITIONS
7
3.5 CONDITIONS OF USE
7
3.6 DISPOSAL
7
3.7 STANDARDS
8
3.8 PATENTS
8
3.9 STANDARDISED SYMBOLS 9
3.10 TECHNICAL CHARACTERISTICS
10
4 Q U I C K S T A R T 11
4.1 DESCRIPTION OF THE DEVICE
11
4.2 EXAMPLE OF AN ELECTROSTIMULATION SESSION
13
5 H O W I T W O R K S 15
5.1 SELECTING A PROGRAMME
15
5.1.1 PROGRAMME OPTIONS
16
5.2 CONNECTING MODULES TO THE ELECTRODES
20
5.3 STARTING THE SESSION
21
5.4 RECHARGE
25
5.5 PROBLEMS AND SOLUTIONS
28
6 EMC TABLES (electromagnetic compatibility)31
7 P ractical G uide 35
7.1 Fundamental principles
35
7.2 Practical rules
56
7.3 Neurostimulation programmes
59
7.4 Specific indications
112
1
1 INTRODUCTION
Please read this manual carefully and section 2 in particular before using your Wireless
Professional device. The Wireless Professional is a stimulator designed for use by health
professionals to ensure electric muscular stimulation treatments.
2 WARNINGS
2 . 1 CO U N T R A I N D I C AT I O N S
• Cardiac stimulator (pacemaker)
• Epilepsy
• Pregnancy (do not use on abdominal region)
• Serious arterial circulation problems in lower limbs
• Abdominal or inguinal hernia
• Do not use chest stimulation on patients with cardiac arrhythmia
Osteosynthesi s E q u i pm e n t
The presence of osteosynthesis equipment (metallic equipment in contact with the bone: pins,
screws, plates, prostheses, etc.) is not a contraindication. The electrical currents of the Wireless
Professional are specially designed to have no harmful effect on osteosynthesis equipment.
2
WIRELESS PROFESSIONAL
EN
2.2 SAFETY MEASURES
•Do not open or modify the product.
•Do not apply stimulation near the area of an implant, such as cochlear implants, pacemakers,
skeletal anchorage or electric implants.
•Do not apply stimulation close to metal. Remove jewellery, piercings, belt buckles or any other
metallic product or device in the area of stimulation.
•If the person is pregnant or menstruating do not place electrodes directly on the uterus or
connect pairs of electrodes on either side of the abdomen.
•Do not use the Wireless Professional in water or in a humid atmosphere (sauna,
hydrotherapy, etc.).
•Be careful if the patient has sensitivity problems or is not able to communicate that he or she
feels discomfort, however light.
•Do not use the Wireless Professional in oxygen-rich environments.
•Never begin an initial stimulation session on a person who is standing. The first five minutes
of stimulation must always be performed on a person who is sitting or lying down. In rare
instances, people of a nervous disposition may experience a vasovagal reaction. This is of
psychological origin and is connected with a fear of the muscle stimulation as well as surprise
at seeing one of their muscles contract without having intentionally contracted it themselves.
A vasovagal reaction causes heart to slow down and blood pressure to drop, which produces
a feeling weakness and a tendency towards fainting. If this does occur, all that is required is
to stop the stimulation and for the person to lie down with the legs raised until the feeling of
weakness disappears (5 to 10 minutes).
•Never allow muscular contraction during a stimulation session to result in movement. You
should always stimulate isometrically; this means that the extremities of the limb in which
a muscle is being stimulated must be firmly fixed, so as to prevent any movement that results
from contraction.
•Do not use the Wireless Professional if you are connected to a high-frequency surgical
instrument as this could cause skin irritation or burns under the electrodes.
•Do not use the Wireless Professional within one metre of short wave or microwave devices as
this could alter the currents generated by the stimulator. If you are in any doubt as to the
use of the stimulator in close proximity to another medical device, seek advice from the
manufacturer of the latter or from your doctor.
•Do not use the Wireless Professional in areas where unprotected devices are used to emit
electromagnetic radiation. Portable communications equipment can interfere with electrical
medical equipment.
3
• Exercise caution when using electrotherapy while the patient is connected to monitoring
equipment with electrodes attached to the body. Stimulation could disrupt the signals sent to
the monitoring equipment.
•Do not disconnect any module that is switched on during the stimulation session. They must
be switched off first.
•Always use the AC adaptor provided by the manufacturer to recharge the unit.
•Never use the Wireless Professional or the AC adaptor if it is damaged or open. There is a risk
of electric shock.
•Disconnect the AC adaptor immediately if there is abnormal heating or smell, or if smoke
comes from the AC adaptor or the device.
•Do not place the docking station in a confined space (carrying case, drawer etc.) when
charging the device. There is a risk of electrocution.
•Keep the Wireless Professional and its accessories out of reach of children.
•Do not allow any foreign bodies (soil, water, metal etc.) to penetrate the device or
the AC adaptor.
•Sudden temperature changes can cause condensation to build up inside the stimulator. Only
use the device once it has reached ambient temperature.
•Do not use the stimulator while driving or operating machinery.
•Do not apply stimulation during sleep.
•Do not use the stimulator at altitudes of over 3,000 metres.
•When the remote control is not connected to a docking station, the USB connector can only
be used to connect to a computer.
4
WIRELESS PROFESSIONAL
EN
N ev er apply the e le ct r od e s
• Near the head.
•On the front and sides of the neck.
•Counter-laterally, i.e. do not use two poles connected to the same channel on opposite sides
of the body.
•On or near skin lesions of any kind (wounds, swelling, burns, irritation, eczema, cancerous
lesion, etc).
P recauti ons whe n u s i n g e le ctr od e s a n d m ot o r p o int p e n
• Only use electrodes and motor point pen supplied by the manufacturer. Other electrodes and
motor point pens may have electrical properties that are unsuitable for or may damage the
Wireless Professional. Always exercise extreme caution with current densities greater
than 2 mA/cm².
•Always turn off the stimulator before moving or removing any electrodes during a session.
•Do not place the electrodes or pen in water.
•Do not apply solvents of any kind to the electrodes or pen.
•Do not try to place electrodes on a body part not directly visible without assistance.
•For best results, wash and clean the skin of any oil and dry it before attaching the electrodes.
•Attach the electrodes in such a way that their entire surface is in contact with the skin.
•For obvious reasons of hygiene, each patient must have his/her own set of electrodes. Do not
use the same electrodes on different patients.
•Never use a set of adhesive electrodes for more than 15 sessions as the quality of the contact
between the electrode and the skin, which is essential for the patient’s comfort and the
effectiveness of the stimulation, gradually deteriorates.
• Some patients with very sensitive skin may experience redness under the electrodes after a
session. Generally, this redness is completely harmless and usually disappears after 10 to 20
minutes. Never start another stimulation session in the same area, however, if the redness is
still visible.
•For information on use and storage please consult the instructions found on the
electrodes packaging.
•Before each use clean and disinfect the motor point pen tip that is in contact with the skin.
5
3 PRESENTATION
3.1 EQUIPMENT AND ACCESSORIES
Yo ur ki t contai ns
1 remote control (65220XX)
4 stimulation modules (984350)
1 docking station (6831XX)
1 AC adaptor (6490XX)
1 USB cable (601163)
2 bags of small electrodes (5x5 cm 1 snap connection) (42204)
2 bags of large electrodes (5x10 cm 2 snap connections) (42203)
2 bags of large electrodes (5x10 cm 1 snap connection) (42223)
1 user manual and practical guide (45281XX)
1 bottle of gel (602047)
1 motor point pen (980020)
1 carrying case (680041)
1 lanyard (1494)
1 protection sleeve (5529024)
3.2 GUARANTEE
This guarantee is valid only if it is accompanied by proof of purchase. Your statutory rights are
not affected by this guarantee.
Your Wireless Professional stimulator is guaranteed for a period of 2 years from the date of
purchase. The guarantee covers the remote control, the modules, the docking station and the
AC adaptor (hardware and labour), but not the batteries, electrodes or the motor point pen.
All defects resulting from poor quality material or workmanship are covered. This guarantee
does not cover damage resulting from impact, accidents, misuse, inadequate protection against
moisture, immersion in water or repairs made by unauthorized personnel.
6
WIRELESS PROFESSIONAL
EN
3.3 MAINTENANCE
Clean using a soft cloth, and an alcohol-based, solvent-free cleaning product. Use only a
minimum amount of liquid when cleaning the device. Never dismantle the remote control,
the modules, the docking station or the AC adapter as they contain high-voltage parts with
a risk of electric shock. This may only be done by persons or repair services authorised by
the manufacturer. Your Wireless Professional does not require calibration. If your stimulator
contains parts that seem worn or defective, please stop using it and contact the customer
service centre that has been stipulated and authorised by the manufacturer regarding
an upgrade.
3 .4 S T O R A G E A N D T R A N S P O RT C O N D I T I O N S
The device must be stored and transported in accordance with the following conditions:
Temperature: -20° C to 45° C
Maximum relative humidity: 75%
Atmospheric pressure 700 hPa to 1,060 hPa
Do not store the modules and remote control for a long time with empty batteries.
3.5 CONDITIONS OF USE
Temperature: 0° C to 40° C
Relative humidity: 30% to 75%
Atmospheric pressure: 700 hPa to 1,060 hPa
Do not use in areas where there is a risk of explosion.
3.6 DISPOSAL
Every product bearing the WEEE mark (a crossed-out rubbish bin) must be separated from
household waste and sent to special collection facilities for recycling and recovery.
7
3 . 7 S TA N D A R D S
To guarantee your safety, the Wireless Professional has been designed, manufactured, and
distributed in compliance with the requirements of European Directive 93/42/EEC, as amended,
on medical devices.
The Wireless Professional also complies with the IEC 60601-1 standard on general safety
requirements for electro-medical devices, the IEC 60601-1-2 standard on electromagnetic
compatibility, and the IEC 60601-2-10 standard on particular safety requirements for nerve and
muscle stimulators.
Current international standards require that a warning be given concerning the application of
electrodes to the thorax (increased risk of cardiac fibrillation).
The Wireless Professional also complies with Directive 2002/96/EC on waste electrical and
electronic equipment (WEEE).
3 .8 PAT E N T S
The Wireless Professional incorporates several innovations with patents pending or
already issued.
8
WIRELESS PROFESSIONAL
EN
3 .9 S TA N D A R D I S E D S Y M B O L S
Caution:
Read the user manual or operating instructions
The Wireless Professional is a class II device with internal electric power
and type BF applied parts.
20xx
20xx
20xx
Name and address of manufacturer and manufacturing date.
20xx
20xx
20xx
20xx
20xx
This device must be separated from household waste and sent to special
collection facilities for recycling and recovery.
20xx
20xx
The On/Off button is a multi-function button.
Non-ionising radiation
LATEX
FREE
LATEX
FREE
REF
Keep away from sunlight
REF
LATEX
LATEX
FREE
LATEX
FREE
FREE
LATEX
REF
FREE
LATEX
REF
LATEX
LATEX
FREE
REF
FREE
FREE
LATEX
REF
FREE
Keep dry
Latex Free
REF
REF
REF
REF
Reference Number
9
3.10 TECHNICAL CHARACTERISTICS
A General i nforma ti on
Remote control battery: Lithium polymer (LiPo) rechargeable 3.7[V] / ≥ 1500[mAh].
Module battery: Lithium polymer (LiPo) rechargeable 3.7[V] / ≥ 450[mAh].
AC Adaptor: Only 5 [V] / 3.5 [A] adapters with the reference number 6490xx can be used to
recharge the Wireless Professional.
B Neuro-sti mulati on
All electrical specifications are given for an impedance of 500-1,000 ohms per channel.
Outputs: four independent and individually adjustable channels that are electrically isolated
from each other.
Pulse shape: constant rectangular current with pulse compensation to eliminate any direct
current component to prevent residual polarisation at skin level.
Maximum pulse intensity: 120 mA.
Pulse intensity increments: manual adjustment of stimulation intensity from 0 to 999 (energy) in
minimum increments of 0.25 mA.
Pulse width: 30 to 400 μs.
Maximum electrical charge per pulse: 96 micro coulombs (2 × 48 μC, compensated).
Standard pulse ramp-up time: 3 μs (20 %-80 % of maximum current).
Pulse frequency: 1 to 150 Hz.
C R F data
Transmission and reception frequency: 2.4 [GHz] ISM (2.4-2.4835GHz)
The characteristics of the modulation type and frequency: GFSK, +/-320 [kHz] deviation
Effective transmission power: 4.4 [dBm]
The Wireless Professional may be affected by other devices even if they are compliant with
CISPR EMISSION requirements.
D In formati on on e le ct r om a g n e t i c com pa ti b i l it y ( EM C )
The Wireless Professional is designed to be used in typical environments that have been
approved in accordance with the EMC safety standard EN 60601-1-2.
This device complies with the CISPR standard, indicating that radio frequency (RF) emissions are
not likely to cause interference with electronic equipment installed nearby (radios, computers,
telephones, etc.).
The Wireless Professional is designed to withstand foreseeable disturbances from electrostatic
discharge, magnetic fields from the mains power supply or RF transmitters.
Nevertheless, it is not possible to ensure that the stimulator will not be affected by powerful RF
(radio frequency) fields from other sources.
For more detailed information concerning electromagnetic emissions and immunity, refer to the
EMC tables.
10
WIRELESS PROFESSIONAL
EN
4 Q U I C K S TA RT
It is strongly advised to carefully read the contraindications and safety measures described
earlier in this manual before using your device.
4.1 DESCRIPTION OF THE DEVICE
REMOTE CONT R OL
A On/Off button (press briefly to switch on, press and hold for more than 2 seconds
to switch off, while browsing the lists press
briefly to return to the main menu)
A
B 4 multifunction buttons:
• Functions related to icons are located on
the screen (e.g.: info, main menu, placement
of electrodes, etc.)
B
• Selection of stimulation channel to increase
or decrease the energy level of stimulation
C
C Navigation pad
D
D Validation or pause button during
stimulation
E
E Port for the USB cable or the docking
station connector
11
MODULE
A module is composed of two pods.
A On/Off button (press briefly to
switch on, press for 1 second to
switch off, during stimulation press
to pause)
• Flashing green LED: ready
• Flashing yellow LED:
stimulation on
A
C
B
B Groove to wind up the cable
C Pod containing battery
DOCKI N G STAT ION
A Removable tablet
B Connector to charge the remote control
C Docking bay to position the
modules to be recharged
D Port for the AC adapter and
for the USB cable connected to
the front of the docking station
A
C
E Storage bin
D
B
E
12
WIRELESS PROFESSIONAL
EN
4 . 2 E X A M P L E O F A N E L E C T R O S T I M U L AT I O N S E S S I O N
1. Turn on your remote control.
2.Select a programme category then a programme and confirm by pressing the centre button.
3. Stick the electrodes on the patient and connect the modules.
4.Turn on the modules, being careful to respect the order of activation of the modules, the
turning-on order corresponds to the channel numbering. Validate everything by pressing the
START button.
5. If the mi-SCAN function is activated, a short sequence of measures is performed. Throughout
the duration of the test, it is important to stay still and be perfectly relaxed. When the test is
complete, the programme can begin.
13
6. Start the stimulation by increasing the energies of the channels. To pause the device, press
the centre button.
7. At the end of the programme press the centre button to return to the main menu or press the On/Off button to turn off the device.
For more details refer to the “How it works” section.
14
WIRELESS PROFESSIONAL
EN
5 HOW IT WORKS
5.1 SELECTING A PROGRAMME
Upon activation the screen displays a list that gives you access to the categories of
programmes, device settings or your favourite programmes. To select an item, use the
navigation pad (up/down) and confirm your choice with the centre button.
N.B.: Once you have created your list of favourite programmes, it will be displayed first after
switching on the remote control.
When the choice of programme category has been made, you can access the programmes
themselves. To select an item, use the navigation pad (up/down) and confirm your choice with
the centre button.
A
A Name of the programme category
B Additional programme information
B
C Visualisation of programme options
D Back to main menu
C
E Adding programme to Favourites list
F Selection of programme level
G Configuration of programme options
15
D
E
F
G
Additional information about the programme is available using the navigation pad (left/right).
A
B
A Placement of electrodes applicable
C
to the programme
B Programme parameters
C Programme explanation
5.1.1 PROGRAMME OPTIONS
For most programmes, options can be enabled or disabled. To select an item, use the navigation
pad (up/down) and display the different choices using the central button.
A Validation of choices
A
The options described below are not available for all programmes.
16
WIRELESS PROFESSIONAL
EN
Selecti on of the b od y a r e a
mi-SCAN (automatic): Just before starting a session of neuro-muscular
electrostimulation, mi-SCAN analyses the characteristics of excitability in the
muscle subjected to stimulation. mi-SCAN detects the chronaxy of the muscle in approximately 10 seconds and allows the stimulator to adjust the width
(duration) of the pulse to the measured chronaxy value. Using a width (duration) of the pulse
corresponding to the chronaxy of the stimulated muscle allows the use of the minimum power
to obtain the same muscle response. As soon as the mi-SCAN function is activated each active
channel performs the chronaxy measurement.
Manual: If the manual mode is activated, the user must manually select the
area to be treated. An average chronaxy value is used based on the area
selected by the user. This choice is made after selecting the desired programme.
E nergy managem e n t
mi-RANGE: This function indicates the minimum energy threshold for
programmes whose effectiveness requires obtaining vigorous muscular
twitches. The mi-RANGE function is therefore only available for programmes
using low stimulation frequencies (below 10 Hz).
For programmes that allow the mi-RANGE function, the stimulator first prompts you to
increase the energy level: A beep will accompany the flashing “+” symbols. When a muscle
pumping is first detected, the “+” symbols stop flashing. You are at the minimum energy level to
provide therapeutic results.
If you set the stimulation energy below the ideal range of treatment, the stimulator prompts
you to raise them again by continuously flashing + signs.
Where possible, the mi-RANGE function is automatically activated.
mi-TENS: The mi-TENS function can significantly reduce the appearance of
unwanted muscular contractions, thus providing maximum comfort
and efficiency.
Short tests are performed regularly throughout the duration of the
programme. A testing phase takes place systematically after each increase in stimulation
intensity. In order to allow its smooth progress it is essential to remain perfectly still during this
time. According to the test results recorded by the device, the level of stimulation intensities
may be slightly decreased automatically.
The mi-TENS function can be deactivated.
17
Tr iggeri ng of contr a ct i on
mi-ACTION (voluntary): This is a way of working in which voluntary
contraction triggers an electrical stimulation. Contraction by electrostimulation
is perfectly controlled by voluntary triggering of muscle contraction.
From the perspective of maximum efficiency, the mi-ACTION working mode requires good
muscular qualities. Underperforming muscles may, in some cases, impede the onset of
electrically induced contraction.
Programmes used in the mi-ACTION mode have undeniable advantages:
• They require active participation and encourage the patient to engage fully in his or her treatment.
• They give the patient the free choice of triggering a contraction, making the practice of
electrostimulation more comfortable.
• They ensure even more effective work as they combine voluntary exercises and
electrostimulation that together allow for greater recruitment of muscle fibres.
• They promote the restoration of the body map and motor relearning in patients with impaired
neuromuscular control.
• They allow the stimulation of stabilising muscles to be integrated during an overall functional
movement.
The mi-ACTION mode is active during muscle work sequences (it is not operational during
sequences of warm-up and relaxation).
The first muscle contraction of the work sequence starts automatically. At the end of the first
contraction an active rest phase begins, characterised by muscular twitches. The voluntary
triggering of a new contraction is only possible after a minimum rest period, which varies
depending on the programme. As soon as the voluntary triggering of a contraction is possible,
the remote control emits a beep to inform the user.
18
WIRELESS PROFESSIONAL
EN
Once the user hears the first sound signal composed of a beep, the triggering of voluntary
contraction is possible. If no voluntary contraction has occurred after a certain period of time,
the unit will automatically pause.
To function properly, the mi-ACTION needs a good muscular twitches during the active rest
phase. If the twitches are not significant enough, the unit beeps and a + sign appears on
channels: you must increase the stimulation energy to get good shaking.
Similarly, in order to make these twitches possible, it is imperative that the muscles are properly
relaxed during the resting phase. Care should be taken at the end of each contraction phase to
get back into a position allowing the best muscle relaxation.
Trigger ON (Manual triggering - Automatic stop): It is an operating mode in which the contraction from electrostimulation is triggered by the user by
pressing any button on any channel (multifunction buttons) on the remote
control. Contraction will stop automatically at the end of the time set
by the programme.
The Trigger ON mode is active during muscle work sequences (it is not operational during
sequences of warm-up and relaxation).
Synchroni sati on s i g n a l
Synchronisation signal: This function allows you to notify the user by means of a sound signal of the beginning of a muscle contraction.
Before each contraction by electrostimulation the remote control emits beeps.
This function is only available for programmes inducing powerful muscular contractions and is
functional only during the muscular work sequence (contraction - active rest).
19
5.2 CONNECTING MODULES TO THE ELECTRODES
Once the electrodes are stuck to the skin of the patient, fix the pods by sliding them onto the
electrode snap until it clicks into place. To remove the module from the electrode simply make
the opposite movement.
Pulling the pods without respecting their pulling direction can damage the attachment system.
N.B.: The insertion direction is recognisable by the marking, the On/Off button on the main pod
and a small vertical line on the hull of the other pod.
20
WIRELESS PROFESSIONAL
EN
5 . 3 S TA RT I N G T H E S E S S I O N
Before starti ng t h e s ti m u la ti on s e s s i on
Lock functi on
Lock function, if enabled, allows you to lock the device in a certain configuration before giving
it to the patient. When the function is active the patient can perform only the basic operations:
increase or decrease the intensity, pause the device but he or she cannot exit the programme
or turn off the device.
A Deactivation of the Lock function
B Activation of the Lock function
A
B
To enter the code you just need to press a combination
of any four buttons.
To deactivate the Lock during treatment, pause the device and then hold down the On/Off
button on the remote control until the display prompts you to insert your key combination
to unlock the programme. If you forget the code just put the remote control on the charging
station to unlock.
N.B.: The Lock function can be activated (i.e. offered at the beginning of each session) or
disabled in the Settings menu of the device.
21
Swi tchi ng on the m od u le s
Before starting the stimulation you need to turn on the modules one after the other by pressing
their button On/Off. For each module detected by the remote control, the device will prompt
you to switch on another up to a maximum of 4 modules. If you want to use a limited number
of modules for your session, simply press the START button after the detection of the number of
modules you want.
Be careful to respect the order of activation of the modules, the activation order corresponds to the channel numbering.
The screen below shows an overview of all available options and functions. The availability of
these options or functions is related to the programmes.
A Total programme time
B Module activation indication
C Module battery level
D Back to previous menu
E Skip function allows you to jump
programme sequences (not available
for all programmes) or
Programme time increase function
(not available for all programmes)
F +TENS function, see
explanation below
A
J
B
I
C
H
G Session start
H Programme architecture
•
3-sequence programme: Warm-up, Work, Relaxation
• Programme with 1 continuous
sequence
I Active option in the programme
J Programme name
22
D
E
F
G
WIRELESS PROFESSIONAL
EN
+ TENS function: In many clinical situations, a painful syndrome affects regions near the muscle
group to be stimulated. This pain may prevent the patient from working with the required high
stimulation energy. To overcome this problem the +TENS function allows you to combine a
TENS programme with a selected basic programme.
To activate this function, simply press the +TENS button and the last activated channel will
be switched to TENS and the word TENS will appear next to the relevant channel. To activate
other channels in TENS simply re-press the +TENS button.
N.B.: The first channel cannot be switched to TENS under any circumstances.
Depending on the programmes or placement of electrodes the number of TENS channels
available may vary.
Start of sti mula ti on s e s s i on : Mi -s ca n me a s u r e m e nt
This function adjusts the electrostimulation session to the physiology of each patient. Just
before starting the work session, mi-SCAN tests the muscle group and automatically adjusts
the settings of the stimulator to the excitability of this area of the body. This is a truly
personalised measurement. Therefore in order to ensure optimum efficiency and comfort of the
session it is strongly advisable to perform the mi-SCAN measurement before each session.
This function is implemented at the beginning of the programme by a short sequence in which
measurements are made. Throughout the duration of the test, it is important to stay still and
be perfectly relaxed. When the test is complete, the programme can begin.
Duri ng the sti m u la t i on s e s s i on
Stimulation always starts at 0. Use the navigation pad (up-down) to increase or decrease the
stimulation energy on selected channels. Adjusting energy is always carried out on
active channels.
To adjust energy individually per channel only keep active the channel on which you want to
act and deactivate the other channels by pressing the corresponding buttons.
23
A Total remaining programme time
B Energy level bar graph
C Energy level
D Dark background = active channel
A
Bright background = inactive channel
G
E Indication relating to the channel
in question.
TENS: channel providing a
TENS current
I-II: channel group
F
B
C
F Number of contractions remaining / D
E
total number of contractions
G Indicator of programme execution
P ause mode
By pressing the central button or the On/Off button on one of the modules during stimulation,
the device pauses.
A Maximum energy level achieved by the channel during contraction phases
B Back to previous menu
A
C Skip function allows you to skip
programme sequences (not available for
all programmes)
D Resumes the stimulation session
B
24
C
D
WIRELESS PROFESSIONAL
EN
E nd of sessi on
At the end of the session, a screen appears with this view. To turn the unit off simply press the
On/Off button on the remote control for more than 2 seconds. This will switch off all modules.
A Average energy level of all the
channels used during the
contraction phase
B Maximum energy level achieved
by the channel during
contraction phases
A
C Back to main menu (HOME).
For programs using the mi-range
feature the percentage of time
spent above the minimum
threshold is displayed.
B
C
5.4 R E C H A RG E
B atter y level
The module battery level appears when you turn it on just before starting the stimulation
session. The battery level of the remote control is always visible in the upper right corner. Small
green indicators show how many modules are turned on and recognised by the remote control.
B
A Module battery level
A
B Remote control battery level
C Number of modules switched on and
C
recognised by the remote control
25
Co nnect the dock i n g s t a ti on
Connect the AC adapter supplied with your device to the removable tablet of the docking
station and plug it into a power socket. Also connect the docking station’s USB cable to the
removable tablet.
It is highly recommended to fully charge the batteries of the remote control and modules
before first use to improve their performance and life span.
A Rear view of the docking station
B Connector for the AC adapter
C Connector for the USB cable
A
C
B
Chargi ng the rem ot e con tr ol a n d mod u le s
At the end of your stimulation session it is strongly recommended to store the remote control
and the modules in the docking station to recharge the units.
26
WIRELESS PROFESSIONAL
EN
Place the modules into the slots provided for this purpose. To do this place the pod without
the On / Off button in the location indicated with the dotted line. Do the same for the other
modules. Once the modules are placed for charging, their battery level is shown by the blue
LEDs of the docking station.
A
A First LED blinking = low battery
Second LED blinking = battery level average, a session can be performed
Third LED blinking = good battery level
All LEDs are lit and not blinking any more = battery completely full
27
5.5 PROBLEMS AND SOLUTIONS
Electrode fai lure
The remote control shows the symbol of an electrode
and a disconnected module for the channel in question
(in this case channel 1).
•Check that the electrodes are properly connected to
the module.
•Check if the electrodes are outdated, worn and/or the
contact is poor: try with new electrodes.
M odule out of ran g e
The remote control shows the out of range symbol on
the channel where the problem was detected (in this case
channel 1):
• Check that the module and the remote control are less
than 2 metres away.
•Ensure you are not in an isolated place, without any
obstacles that may deflect the signals from the
remote control.
•Ensure you are in a place that allows the signal from the
remote control to be reflected.
•Check the module is switched on.
The module i s di s ch a r g e d
During the stimulation a module may turn out to be
discharged. In this case, a discharged battery symbol
appears on the channel where the problem was detected
(in this case, channel 4):
•Stop the stimulation and recharge the
discharged module.
28
WIRELESS PROFESSIONAL
EN
Behavi our of the mod u le le d
The LED blinks alternately green and red: the module is out of range or is not recognised by the
remote control.
•Check the remote control is properly turned on.
•Check that the module and the remote control are less than 2 metres away.
•Try restarting the module.
•Place the module and the remote control on the same docking station in order to pair them.
The LED is constantly red:
•Check the module is charged.
•Try restarting the module.
• If despite this the LED is still red, contact the customer services that have been stipulated and
approved by the manufacturer.
Behavi our of the d ock i n g s t a ti on le d s
The docking station’s central LED is red:
•Ensure that the modules are properly placed in their housing.
•Ensure the charging contacts are clean.
•Remove all modules.
•Remove the remote control.
•Disconnect the USB cable.
•Ensure the correct AC adapter is used.
•Disconnect and reconnect the docking station and check the lighting sequence of the docking
station upon activation.
•If despite this the LED is still red, contact the customer services that have been stipulated and
approved by the manufacturer.
29
Stim ulati on does n ot pr od u ce t h e n or ma l s e n s a t io n
• Check that all settings are correct and check the correct positioning of the electrodes.
•Modify the positioning of the electrodes.
Stim ulati on causes d i s com f or t
•The electrodes lose their adhesive power and no longer have adequate contact with the skin.
•The electrodes are worn and must be replaced.
•Modify the positioning of the electrodes.
The devi ce i s not wor k i n g
•Ensure the remote control and the module are charged. When the batteries are very
discharged, charging for a few minutes may be required before the unit turns on.
•Try to restart the remote control and modules.
•Place the module and the remote control on the same docking station in order to pair them.
•If, despite this, the device is still not working, contact the customer services that have been
stipulated and approved by the manufacturer.
30
WIRELESS PROFESSIONAL
EN
6 EMC TABLES (electromagnetic compatibility)
The Wireless Professional needs special EMC precautions and must be installed and started
according to the EMC information supplied in this manual.
All RF wireless transmission systems can affect the Wireless Professional.
The use of accessories, sensors and cables other than those recommended by the manufacturer
may result in stronger emissions or reduce the immunity of the Wireless Professional.
The Wireless Professional should not be used beside or stacked on top of any other equipment.
If you must use it side by side or on top of another system, you should check that the Wireless
Professional works properly in the chosen configuration
RECOMMENDATIONS AND DECLARATION BY THE
MANUFACTURER CONCERNING ELECTROMAGNETIC EMISSIONS
The Wireless Professional is intended for use in the electromagnetic environment specified below.
The customer or user of the Wireless Professional should ensure that it is used in this environment
Emissions test
Compliance
Electromagnetic environment - Guide
The Wireless Professional uses RF energy only for its internal
RF emissions
CISPR 11
operation. Consequently, its RF emissions are unlikely
Group 1
to interfere with any adjacent electrical device (radios,
computers, telephones etc.).
RF emissions
CISPR 11
Harmonic emissions
IEC 61000-3-2
Voltage fluctuations/ emission
oscillations IEC 61000-3-3
Class B
Wireless Professional is suitable for use in any establishment,
other than a private dwelling or a place connected directly
Class A
to the low voltage mains supply which powers residential
buildings.
Not applicable
31
RECOMMENDATIONS AND DECLARATION BY THE MANUFACTURER CONCERNING
ELECTROMAGNETIC IMMUNITY
Wireless Professional is designed for use in the electromagnetic environment stipulated below. The buyer or user of the
Wireless Professional must ensure it is used in this recommended environment.
Immunity test
Test level IEC 60601
Observance level
Electromagnetic environment Recommendations
Floors must be wood, concrete or
Electrostatic discharge
(DES)
CEI 61000-4-2
±6 kV at the contact
±6 kV at the contact
±8 kV in air
±8 kV in air
ceramic tile.
If floors are covered with synthetic
material the relative humidity must
be maintained at a minimum of 30%.
Fast transient electrical
bursts
CEI 61000-4-4
Shock waves
CEI 61000-4-5
±2 kV for power
supply lines
±1 kV for
Not applicable
The quality of the electrical power
Battery-powered
supply should be that of a typical
device
input/output lines
±1 kV differential
Not applicable
mode
Battery-powered
±2 kV joint mode
device
commercial or hospital environment.
The quality of the power supply
should be that of a typical
commercial or hospital environment.
<5 % VT
(dips >95 % de UT)
for 0.5 cycle
Voltage dips, short
interruptions and
voltage variations on
power supply lines
CEI 61000-4-11
The quality of the power supply
<40 % VT
(dips >60 % de UT)
for 5 cycles
<70 % VT
should be that of a typical
Not applicable
Battery-powered
device
(dips >30 % de UT)
commercial or hospital environment.
If the Wireless Professional user
requires continuous operation during
mains power cuts, it is recommend
for 25 cycles
that the Wireless Professional is
<5 % VT
powered by a UPS or a battery.
(dips >95 % de UT)
for 5 seconds
Magnetic fields at the mains
Magnetic field at grid
frequency (50/60 Hz)
frequency should be at a level
3 A/m
characteristic of a typical location
CEI 61000-4-8
in a typical commercial or hospital
environment.
NOTE :VT is the AC supply voltage before application of the test level.
32
WIRELESS PROFESSIONAL
EN
RECOMMENDATIONS AND DECLARATION BY THE MANUFACTURER
CONCERNING ELECTROMAGNETIC IMMUNITY
Wireless Professional is designed for use in the electromagnetic environment stipulated below. The buyer or user of the
Wireless Professional must ensure it is used in this recommended environment.
Immunity
Test level
Observance
test
IEC 60601
level
Electromagnetic environment - recommendations
Portable and mobile RF communication devices must only be
used relative to the Wireless Professional and its wiring at a
distance which is not less than the spacing recommended and
calculated using the appropriate equation for the transmitter’s
frequency.
Recommended spacing
Conducted
d = 1.2 √P
RF IEC
3 Vrms
61000-4-6
150 kHz to 80
d = 1.2 √P 80 MHz to 800 MHz
20xx
MHz
3 Vrms
Radiated RF
3 V/m
3 V/m
IEC
80 MHz to
61000-4-3
2.5 GHz
d = 2.3 √P 800 MHz to 2.5 GHz
where P is the maximum output power of the transmitter in
watts (W) set by the manufacturer’s specifications and where d
is the recommended spacing in metres (m).
The field intensity of RF fixed transmitters, as determined by
an electromagnetic survey a must be less than the observance
level to be found in each frequency rangeb.
Interference may occur close to any appliance identified by the
following symbol:
NOTE 1 At 80 MHz and at 800 MHz ,the high frequency amplitude is applied
NOTE 2 These guidelines may not be appropriate for some situations. Electromagnetic wave propagation
is modified by absorption and reflection due to buildings, objects and persons.
a The field intensity from fixed transmitters, such as radio telephone base stations (cellular/wireless) and a mobile
radio, amateur radios, AM and FM radio transmissions and TV transmissions cannot be predicted with any accuracy.
It may therefore be necessary to consider an analysis of the electromagnetic environment of the site to calculate the
electromagnetic environment coming from fixed RF transmitters. If the field intensity measured in the environment
where the Wireless Professional is located exceeds the appropriate RF observance level above, the Wireless Professional
should be monitored to ensure it is operating properly. In the event of abnormal operation, new measures may then be
LATEX
FREE
imposed, such as realignment or movement of the Wireless Professional.
b Above the frequency amplitude from 150 kHz to 80 MHz, the field intensity must be < 3 V/m.
REF
33
RECOMMENDED SPACING BETWEEN A PORTABLE AND MOBILE COMMUNICATION DEVICE
AND THE WIRELESS PROFESSIONAL
The Wireless Professional is designed for use in an electromagnetic environment in which radiated RF waves are
controlled. The buyer or user of the Wireless Professional can contribute to preventing electromagnetic interference
by maintaining a minimum distance between portable and mobile RF communication devices (transmitters) and the
Wireless Professional according to the table of recommendations below and according to the maximum output power
of the telecommunication device.
Spacing according to the frequency of the transmitter m
Maximum transmitter
From 150 kHz
From 80 kHz
From 800 MHz
to 80 MHz
to 800 MHz
to 2.5 GHz
d = 1.2 √P
d = 1.2 √P
d = 2.3 √P
0.01
0.12
0.12
0.23
0.1
0.38
0.38
0.73
1
1.2
1.2
2.3
10
3.8
3.8
7.3
100
12
12
23
output power W
In the case of transmitters whose maximum output power is not shown in the table above, the recommended spacing
of d in metres (m) can be calculated using the appropriate equation for the transmitter frequency, where P is the
maximum output power of the transmitter in watts (W) as set by the transmitter manufacturer
NOTE 1 At 80 MHz and at 800 MHz ,the spacing for high frequency amplitude is applied.
NOTE 2 These guidelines may not be appropriate for some situations. Electromagnetic wave propagation is modified by
absorption and reflection due to buildings, objects and persons.
34
WIRELESS PROFESSIONAL
EN
7 P ractical G uide
7 . 1 F undamental principles
Introducti on
In recent years, significant progress has been made in field of electrotherapy of which users are
still largely unaware. Changes and improvements in electrotherapy are so numerous that this
discipline appears to be a new concept that can only be applied correctly and effectively using
sophisticated, high-tech equipment. The aim of these articles is to develop this new concept
for potential users and provide anyone already working with this equipment with explanations
and data that will allow them, based on current knowledge and scientific work carried out, to
optimise the use of their stimulators.
A: The fundamental law of electrostimulation
Electrostimulation is a technique which involves producing action potentials in the excitable
cells (nerve and muscle) using an electric current.
Nerve cell membranes have a resting potential with an average value of -70mV, as the internal
face of the membrane has negative polarity compared to the external face. To excite the
membrane of the nervous fibre, i.e. causing an action potential to appear at its surface, the
resting potential simply has to be reduced to a certain threshold value, which is -50 mV on
average (Fig. 1). Once this threshold value has been reached, the membrane changes from a
state of rest to a state of activity. An action potential appears, which then moves along the
nerve fibre. The nerve impulse either goes towards the muscles to instruct them to contract or
returns from the surrounding areas towards the brain to relay information regarding
the senses.
Electrostimulating the nerve fibre essentially involves reducing the membrane’s resting
potential to the threshold value by applying an electric current to the skin. The first question
is, of course, which stimulating current to choose. Which type of current will we use? A single
current must obviously be used, one which can reduce the resting potential to the threshold
value but keep the patient as comfortable as possible. In other words, the electrical parameters
of this current must be kept to a minimum, and its stimulation energy and duration must be as
low as possible.
35
Fig. 1
+40
+30
+20
+10
0
-10
-20
-30
-40
-50
-60
-70
-80
-90
Action potential
0
Threshold
Rest potential
We will therefore need to understand the fundamental law that it must observe in order
to find the optimum qualities of this current. This first chapter aims to provide a reminder
and explanation of this law. This is followed by a second chapter which, on the basis of this
fundamental law and ideas surrounding it, determines the qualities of the optimum current.
At the turn of the last century, well-known physiologists such as Weiss, Hoorweg, Du Bois
Reymond and Lapicque managed to discover the fundamental law of electrostimulation and its
mathematical expression.
Based on Hoorweg’s work, Weiss (a Parisian doctor and physiologist) emphasised the
importance of the quantity of electrical charges created by the stimulation current. His
experiments led to the fundamental observation that to achieve stimulation, it is not the type
of current that is significant, but the quantity of current in a specified period of time. In other
words, if the stimulation threshold values are given as a quantity of electricity (in electrical
charges) that must be created to achieve these, the values are similar even if the electrical pulse
with the same overall duration is a different shape.
As a reminder:
the quantity of electrical charges (𝑄) supplied by an electric current with intensity (𝐼)
in a given time (𝑡) is the product of the intensity multiplied by the time.
𝑄 = 𝐼 𝑥 𝑡
36
WIRELESS PROFESSIONAL
EN
Since the quantity of electrical charges provided by the stimulation current is the fundamental
factor, Weiss studied the way in which the necessary quantity of charges is modified in order
to achieve the threshold (i.e. to cause stimulation) based on the duration of the current being
applied. He performed a series of measures to determine the relationship between the quantity
of current and the duration of the pulse for durations ranging from 0.23 to 3 ms.
From his experiments, Weiss found that there is a linear relationship between the quantity of
charges required to reach the stimulation threshold and the duration of the pulse (Fig. 2).
Fig. 2
Quantity
of current
required to
reach the
stimulation
threshold
Duration of the pulse
Linear relationship between the duration of the electrical pulse and the amount of
electricity applied to reach the stimulation threshold:
𝑄 = 𝑞 + 𝑖𝑡
Weiss therefore discovered the mathematical relationship that links the pulse duration with the
amount of electricity required to produce the stimulation.
Understandably, he called this relationship the “fundamental formula”:
37
𝑄 = 𝑞 + 𝑖𝑡
𝑄 = the amount of current required to reach the threshold. This is also the quantity of
electrical charges provided by the stimulation current, as the 𝑄 value is given by the
product (𝐼 𝑥 𝑡) of the stimulation current intensity multiplied
by its application time.
𝑡 = length of time that the current is applied, which is known as the pulse duration.
𝑖 = a coefficient determined by experiment, with the same
quantity as an electric current (intensity).
𝑞 = a coefficient determined by experiment, with the same dimensions as a quantity
of electrical charges; 𝑞 corresponds to the intersection of the straight line with the
y-axis and may be calculated as the 𝑄 value when 𝑡 is equal to zero.
Lapicque, an electrophysiologist who is more widely known than Weiss, did not actually
discover a new law of electrostimulation but he performed a number of experiments which
confirmed the fundamental formula. He defined it differently to mathematically deduce
coefficients called the rheobase and chronaxy, which he gave physiological meaning.
Lapicque developed the “fundamental formula” as follows:
Q = q + it
or Q = It
I : stimulation current intensity
t : pulse duration
therefore It = q + it
by dividing the two by 𝑡, Lapicque obtained
𝐼= 𝑞/𝑡 + 𝑖
which is the relationship between the intensity of the current and the time period in
which it must be applied to achieve stimulation (Fig. 3).
38
WIRELESS PROFESSIONAL
EN
Fig. 3
Intensity-duration curve
Rheobase
Chronaxy
Hyperbolic relationship between the current intensity and pulse duration
demonstrated by Lapicque and given by the formula 𝐼= 𝑞/𝑡 + 𝑖 , derived from Weiss’
fundamental formula.
Lapicque’s development also shows that, even when the length of time that the current is
applied is infinite, (𝑡 = ∞), the current must have a minimum intensity known as the rheobase
(𝑅ℎ) in order to produce stimulation.
if 𝑡 = ∞ therefore 𝑞/𝑡 = 0
in this case 𝐼 is the rheobase (𝑅ℎ)
and 𝑅ℎ = 𝑖
The rheobase, which is the minimum intensity that must be achieved in order to produce
stimulation even if the pulse duration is very long, actually corresponds to the coefficient 𝑖 of
the Weiss formula which has dimensions of electrical intensity.
Lapicque gave the name chronaxy to the minimum length of time in which a current with
double the intensity of the rheobase must be applied in order achieve stimulation. In fact, he
realised that the chronaxy is a time constant which characterises the excitability of tissue and
that its value is the ratio 𝑞/𝑖.
39
This means that:
since 𝑅ℎ = 𝑖 when 𝐼 = 2 𝑅ℎ
therefore 𝐼 = 2 𝑖
and 𝑡 is the chronaxy (𝑡 𝑐ℎ)
when 𝐼 = 2 𝑅ℎ
therefore from the equation 𝐼 = 𝑞/𝑡 + 𝑖
the result is 2𝑖 = 𝑞/𝑡𝑐ℎ + 𝑖
therefore 𝑖 = 𝑞/𝑡𝑐ℎ → 𝑡𝑐ℎ = 𝑞/𝑖
We can note that the chronaxy can be calculated mathematically from Weiss’ fundamental
formula as shown in Figure 4.
Fig. 4
The chronaxy corresponds to the time value when 𝑄 = 0
i.e. 𝑄 = 𝑞 + 𝑖𝑡 if 𝑄 = 0 therefore 𝑞 + 𝑖𝑡 = 0 therefore 𝑖𝑡 = 𝑞 and 𝑡 = 𝑞/𝑖
B: Summary
Electrical stimulation, i.e. reducing resting potential to the stimulation threshold using an
electric current, is a phenomenon that fulfils a fundamental physiological law.
This shows us that:
40
WIRELESS PROFESSIONAL
EN
1 The factor determining stimulation is the quantity of electrical
charges created by the current.
Stimulation must be considered in terms of the amount of current, which is the
product (𝐼 𝑥 𝑡) of the intensity (𝐼) times the duration of the pulse (𝑡).
2 This amount of current fulfils a fundamental formula:
𝑄 = 𝑞 + 𝑖𝑡
where 𝑄 is a linear function of time.
Lapicque expresses this formula in another way by the “intensity - pulse duration”
ratio: 𝐼 = 𝑞/𝑡 + 𝑖 and he deduced that
a) the rheobase (𝑅ℎ): minimum intensity that must be reached in order to produce
stimulation using an infinite pulse duration
𝑅ℎ = 𝑖
b) the chronaxy (𝑡𝑐ℎ): minimum time in which a current with double the intensity of
that of the rheobase must be applied in order to produce stimulation
𝑡𝑐ℎ = 𝑞/𝑖
R eferences
• Physiologie Volume II Le Système nerveux et Muscle Charles Kayser, ed. Flammarion
• Lapicque, L: Définition expérimentale de l’excitabilité Soc. Biologie 77 (1909), 280-283
• Lapicque, L: La Chronaxie et ses applications physiologiques Hermann & Cie, Paris, 1938
• Weiss, G: Sur la possibilité de rendre comparable entre eux les appareils servant à l’excitation électrique
Arch. itali. Biol. 35 (1901), 413-446
• Irnich, W: The chronaxy time and its practical importance Pace 3 (1980), 292-301
• Cours de Physiologie Humaine Volume I Prof. Colin F. Université Libre de Bruxelles
• Traité de Physiologie Médicale Arthur C. Guyton, ed. Doin
• Physiologie Humaine Philippe Meyer 2nd edition Flammarion Médecine Science
41
Opti mum current
A: Introduction
The reminders and ideas developed in the previous chapter, “The fundamental law of
electrostimulation”, must be read before starting this chapter, which describes the qualities of
the optimum electrostimulation current.
The optimum current can be defined as being able to reduce the resting potential to the
stimulation threshold value under Weiss’ law, while also keeping the patient as comfortable
as possible. The second requirement is met by minimising the electrical parameters of the
stimulation current, i.e. by using a minimum amount of electrical intensity (𝐼), a pulse duration
(𝑡) and electrical energy (𝑊).
Having set out the conditions, we will now determine the qualities of the current that fulfils
these conditions.
B: Characteristics of the optimal current
1 Electrical stimulation wave produced by the current generator
We can already state that pulses of current, i.e. produced by a current generator, must be used
for the following reasons:
• The first point shown by Weiss is the importance of the quantity of electrical charges
provided by the stimulation current; however, the quantity of charges can only be controlled
by a current generator.
• Only a current generator can ensure stable and reproducible conditions, given the variations
in skin resistance.
• If a certain electrical pulse shape is required, only a current generator can maintain a constant
current wave shape as it passes through the skin and tissue.
2 Type of establishment of the electrical stimulation wave
According to Weiss’ law 𝑄 = 𝑖𝑡 + 𝑞
therefore 𝐼 𝑡 = 𝑖𝑡 + 𝑞
therefore (𝐼 − 𝑖) 𝑡 = 𝑞
with 𝑖 = rheobase
𝑖 is a current which resists the stimulation current 𝐼
42
WIRELESS PROFESSIONAL
EN
If the stimulation current 𝐼 has a value lower than 𝑖 (i.e. the rheobase), it cannot be used
because it cannot change the resting potential by accumulating electrical charges in the
excitable membrane (Fig. 1).
Fig. 1
Analysis of the different ways to establish the stimulation current
Rheobase
The pulse times t1, t2 and t3 cannot be used since during these periods 𝐼 < 𝑖.
Only one way of establishing the electrical stimulation wave is effective immediately, which
is vertical (Fig. 2). In this case, there is no delay in its efficacy and the duration of the electrical
wave is further reduced by it.
Fig. 2
The stimulation current established vertically with
a value higher than 𝑖, the rheobase, instantaneously
produces an accumulation of charges modifying the
resting potential.
43
3 Shape of the electrical stimulation wave
When the stimulation current has vertically reached an intensity higher than the rheobase, how
should it develop in order to offer maximum comfort?
With minimum intensity, it must provide in time 𝑡 the quantity of electrical charges 𝑄 = 𝑖𝑡 + 𝑞 required to trigger the action potential.
Since 𝑄 = 𝐼.𝑡., it is clear that the rectangle is the wave shape capable of providing the quantity
of charges 𝑄 with minimum intensity 𝐼 (Fig. 3).
Comparison of different electrical pulse shapes of equal duration, established
vertically and providing the same quantity of electrical charges, which correspond
graphically to identical areas.
In order to create the same quantity of charges with pulses with shapes other than rectangular,
higher intensities must be used , which are as a result even less comfortable for the patient.
4 Duration of rectangular electrical pulse
First of all, it must be specified that this is in a specific pulse duration phase. Weiss’ law is used
for stimulation pulse durations close to the excitation constants 𝑘.
In the case of motor neurons, this means a time period ranging from 100 to
3000 microseconds.
k = Chronaxy / In2 = Chronaxy / 0,693
44
WIRELESS PROFESSIONAL
EN
The third electrical factor, which should be minimised in order to produce the most comfortable
possible stimulation, is electrical energy 𝑊.
We know that electrical energy is given by the formula 𝑊 = 𝐼2 . 𝑡 . 𝑅 where:
𝐼 : is the current intensity
𝑡 : its pulse duration
𝑅 : skin resistance
The Weiss or Lapicque relationship states
𝐼 = 𝑞/𝑡 + 𝑖
and we can replace I by its value in the energy equation.
We get 𝑊 = (𝑞/𝑡 + 𝑖) 𝑡.𝑅.
by developing: 𝑊 = (𝑞2/𝑡2+ 2 𝑖 𝑞/𝑡 + 𝑖2) 𝑡.𝑅. = (𝑞2/𝑡+ 2 𝑞 𝑖 + 𝑖2 𝑡) 𝑅.
When 𝑡 → 0, 𝑊 → ∞
When 𝑡 → ∞, 𝑊 → ∞
The shape of this curve is given in Figure 4.
Fig. 4
Relationship between energy and
the pulse duration
W minimum
Variations in electrical energy depending
on skin resistance
𝑊 =(𝑞2/𝑡+ 2 𝑞𝑖 + 𝑖2𝑡)𝑅𝑛
where 𝑅1 › 𝑅2 › 𝑅3
45
The electrical energy passing through the skin and tissue is minimal for duration of
the stimulation current, i.e. for a pulse duration, which is found by calculating the
derivative of the energy curve at the minimum energy point (Fig. 6).
Fig. 6
W minimum
The derivative of 𝑊 = (𝑞2/𝑡+ 2 𝑞 𝑖 + 𝑖2 𝑡) 𝑅 is 𝑑𝑤/𝑑𝑡 = ( − 𝑞2 𝑡2 + 𝑖2 ) 𝑅
The derivative is the slope of the tangent at any point of a curve.
As at the minimum energy point, this slope is at zero since it is parallel to the abscissa,
we can therefore state that:
for 𝑊 𝑚𝑖𝑛𝑖𝑚𝑢𝑚 𝑑𝑤/𝑑𝑡 = ( − 𝑞2 𝑡2 + 𝑖2 ) 𝑅= 0 therefore 𝑞2 𝑡2 𝑅 = 𝑖2 𝑅 − 𝑡2 = 𝑞2/𝑖2− 𝑡 = 𝑞/𝑖
As we have seen above, 𝑅 does not influence the determination of the pulse duration
corresponding to the minimum energy.
The electrical energy passing through the skin and tissue is therefore minimum when
the rectangular pulse duration is equal to 𝑞/𝑖, which is in fact, as we have seen in the
article on the fundamental law of electrostimulation, the chronaxy value.
Furthermore, this is why, at the start of the century, pioneers in electrophysiology
chose the chronaxy as the value that characterises tissue excitability that is
independent from variations in skin resistance.
To reduce electrical energy to its minimum, the rectangular pulse duration will
therefore have to equal the chronaxy of the nerve structure that needs to be excited.
46
WIRELESS PROFESSIONAL
EN
5 Compensation for the rectangular pulse
Every time stimulation needs to be produced, a rectangular pulse current is sent out, which
has the same duration as the chronaxy of the nerve structure that needs to be stimulated.
Repetition of stimulation is obtained by repeating the electrical impulse.
Whether this is with analgesic or motor stimulation electrotherapy, the stimulations
correspond to a series of stimulations set by streams of pulses.
Repeating the pulses if they are not compensated for will result in polarisation, because the
electrical mean is not zero (Fig. 7).
Fig. 7
Non-compensated series of pulses.
The electrical mean is not zero, which causes polarisation.
Electrical
Mean
≠0
The polarised current equates to a continuous current with a value equal to the mean
intensity. Applying this kind of polarised current to the skin has the same disadvantages as a
galvanic current, i.e. risk of skin burns in all cases, and sometimes ionisation if there is metal
osteosynthetic material.
To resolve the issue of polarisation, the positive wave must be compensated for by a negative
wave with the same quantity of electrical charge, i.e. the same area on the graph (Fig. 8). The
electrical mean is therefore zero, the current is completely compensated for and the risks of
polarisation are eliminated.
47
Fig. 8
Compensated rectangular pulse;
S1 = S2, therefore the electrical
mean is zero.
Electrical mean = 0
C: Summary
The pulse current that is able to produce excitation (action potential) and also offer the patient
the maximum amount of comfort can be called the optimum current. This pulse must have the
following characteristics:
1. Constant pulses of current, i.e. produced by a constant current generator.
2. Vertical establishment in order to be effective immediately and to reduce the
application time of the current.
3. Rectangular shape in order to apply the lowest possible electrical intensity.
4. Pulse duration that is equal to the chronaxy of the nerve structure requiring
stimulation is order to minimise electrical energy.
5. Compensated pulse with an electrical mean of zero in order to prevent side effects
linked to polarisation.
48
WIRELESS PROFESSIONAL
EN
B asi c concepts of e xci ta t i on e le ct r oph ys i olo g y
A: Introduction
Passing an electrical current through an excitable living tissue results in a change to the resting
potential (𝑉𝑜).
The changed resting potential is called the local potential (𝑉).
If the variation in the local potential is sufficiently intense and in the right direction, a state of
instability is reached and excitation, i.e. the action potential, occurs. The value that the local
potential 𝑉 must reach so that action potential appears is called the excitation threshold (𝑆𝑜).
The local potential 𝑉, caused by electrical charges provided by the current passing through
the excitable tissue (comparable to a neuron) returns to its initial value 𝑉𝑜 when the current is
stopped. Returning to the resting conditions does not occur instantly but gradually, in the same
way as discharging a capacitor. The mathematical law for the return of 𝑉 to its initial rest
value is:
-dV/dt=(V-Vo)/k (1)
Where k has time dimensions and is the excitation time constant. The excitation time constant
characterises the tendency of the local potential to return to its initial value at a particular
speed when the neuron is no longer subjected to the current.
While the current is being passed, the local potential 𝑉 does not increase instantly but
exponentially, in the same way as the charge of a capacitor, with 𝑘 as the time constant. This
constant therefore defines the tendency of the neuron to oppose or resist the variation in
potential caused by electrical charges provided by the stimulation current, which is identical to
the charge of a capacitor.
It must be stated that 𝑘 does not depend on the shape and qualities of the stimulation current;
it is a feature of the neuron itself, which expresses the time factor of its tendency to return the
membrane potential to the resting value.
The critical value that the local potential 𝑉 must reach to trigger excitation, i.e. the excitation
threshold So, is only a constant value if the pulse duration is extremely short. If, however, the
current lasts longer, the threshold increases (𝑆). This phenomenon is demonstrated by the wellknown fact that a current which increases slowly must reach a higher value in order to produce
stimulation than a current which increases quickly.
The increase in the excitation threshold is known as accommodation. Accommodation is an
increase in the threshold (𝑆) which is the result of the change in the local potential caused by
the electrical charges provided by the current passing through the neuron.
49
The increase in the threshold does not occur instantly but gradually and at a particular speed. A
second time factor (𝜆) is therefore involved in the process of electrical excitation, which defines
the rate at which the threshold changes (𝑆).
When the local potential 𝑉 is returned to its resting potential 𝑉𝑜, 𝑆 returns exponentially to its
initial value. So with 𝜆 as the time constant according the mathematical law:
ds/dt= (S - So)/λ (2)
This equation is for S what equation (1) is for 𝑉, with 𝜆 replacing 𝑘.
The electrical charges provided by the current passing through the neuron change the
membrane potential. They produce a local potential 𝑉 and this causes the threshold 𝑆 to
increase. Excitation occurs if a sufficient quantity of electrical charges is provided to allow the
local potential to catch up with the threshold value, i.e. when 𝑉 = 𝑆 (Fig. 1).
Fig. 1
Resting State
Stimulation current is passed
through V and S increase
Excitation state action potential
ØV = V-Vo = Vm ax (1-e-t/k)
The excitation process is therefore determined by two time constants:
𝑘 the excitation constant
𝜆 the accommodation constant
50
WIRELESS PROFESSIONAL
EN
These are independent from each other. This means that, to a large extent, 𝜆 can be modified
by experiment separately to 𝑘, by changing the ionic concentration of Calcium (Ca). These two
constants have values that are very different to each other, but 𝜆 is always much larger (100 to
200 times) than 𝑘. In the case of human motor neurons, approximate values of 300 μs can be
retained for 𝑘 and 50 ms for 𝜆.
This means that 𝑘 must be lower than 𝜆 for the excitation process to occur. The local potential
(V) can therefore increase more quickly than the threshold S and catch up with it. If k were
greater than 𝜆, the threshold would increase more quickly than the local potential, which
would never catch up with the threshold.
B: Study of the excitation process using a constant current
For the sake of simplicity, at this stage we will only study the excitation process produced by
a constant current. The same study can be carried out using exponential, sinusoidal, linear,
progressive, or any other type of current, as the results are similar.
For example, let us use the values:
𝑘 = 1 ms.
𝜆 = 50 ms.
The issue in the excitation process is whether V will catch up with S or will S have
time to escape.
The local potential V starts at Vo and increases exponentially according to the relationship to a
final value depending on the intensity of the current.
ØV = V-Vo = V m ax (1-e-t/k)
The threshold 𝑆 starts from 𝑆𝑜 and increases according to a more complicated curve, which
can only be shown in part, and up to a value depending on the final stable value of 𝑉, if
excitation has not occurred in the meantime. In Figure 2a, the intensity of the current is set at
a value (we will take as 1), which, without accommodation, would allow 𝑉 to reach 𝑆𝑜 and to
trigger excitation. In fact 𝑉 reaches the value 𝑆𝑜 but in the meantime the threshold increased,
therefore 𝑉 = 𝑆𝑜 < 𝑆 and excitation cannot occur. To allow 𝑉 to reach the value 𝑆, the current
must be 8% more intense.
This is shown in Figure 2b, where the threshold has just been reached in 4 ms (indicated by the
arrow), that is the principal useful time. In Figure 2c, a stronger current with a value of 1.2 is
applied and 𝑉 passes the threshold after 1.85 ms. In Figure 2d, an even stronger current (value =
2) is applied and 𝑉 = 𝑆 after 0.7 ms.
51
Fig. 2
Cathode
We can therefore see the intensity-duration relationship appear, which gives the time at which
V passes S for different current intensities. The useful times are even shorter when the current is
more intense (Fig. 3).
Fig. 3
With lo = rheobase and
k = excitation constant
Chronaxy
52
WIRELESS PROFESSIONAL
EN
This relationship applies to currents that are very short compared to the accommodation constant.
Accommodation can be disregarded and excitation appears when V = So. This is why, in the
intensity-duration relationship, only the excitation constant k occurs, as the duration of currents
used have values close to k (from 0.2 ms to 3 ms).
If the durations of current applied were longer, the threshold would increase and excitation would
only occur if V became equal to S. In these cases, the intensity-duration relationship must be
reconsidered as the rheobase does not keep the value 𝐼𝑜; instead, it increases to a value 𝐼 1 > 𝐼𝑜
determined by the excitation and accommodation constants. The actual rheobase 𝐼𝑜 is linked to the
observed rheobase I1 by the relationship:
C: Excitation by a current with any shape
It is possible to determine the equation for the local
potential V and to calculate its value at any given
point in time with any given shape of current. An
equation can also be determined for the development
of the threshold. These equations required a solid
understanding of mathematics and come under
the field of specialist electrophysiology. This is why
we believe there is no purpose in expanding these
is the
chronaxy
(tch) when
therefore
variation of V and 𝑆, it is possible to study the excitation
2 - 2etch/k = 1
process with any given shape of current and for any
given duration.
2etch/k = 1
etch/k = 1/2
D: Chronaxy - excitation constant relationship
As the chronaxy is a value that characterises tissue
e1/tchk = 1/2
excitability, it is worth determining the relationship
etch/k = 2
which links it to the other factor that characterises
stimulation current which has an intensity double that
of the rheobase, i.e. 2 Io. It is therefore very easy to
find the relationship between the chronaxy and the
excitation constant based on the formula giving the
intensity-duration relationship.
53
2l0 = l0/1 - etch/k
2 (1 - etch/k) = 1
noted that using these equations, which give the
The chronaxy is the useful time corresponding to a
1 = 2l0
2l0 = (1 - etch/k) = l0
equations as part of this work. However, it can be
excitation: k.
1 = l0/1-e-t/e
therefore
1n2 = tch/k
tch = (1n2)k
This means that the chronaxy =
0.693
E: Hydraulic model of excitation
It is possible to set up a hydraulic model that corresponds exactly to excitation. This model allows
a better understanding of excitation and may be used to represent the development of the local
potential and the threshold under the effect of currents with variable durations and shapes
Water flows from tank A towards tank B by means of pump P, the stimulator (current generator).
The flow of water corresponds to the intensity of the stimulation current and the water moved
from A to B to the quantity of electrical charges. The water level in tank B reaches a certain level
representing the value of the membrane potential
(Vo at rest and V local potential).
The stimulation threshold is given by a point D on float C. Stimulation occurs when level V in the
tank B reaches point D by submerging the float.
When pump P injects liquid from A to B therefore increasing level V, part of the liquid goes back
to A through tap K representing the excitation constant k. In the tank B, float C is linked to piston
E that works by means of the level of liquid in tank F. This is linked to B by tap L representing the
accommodation constant λ.
TWO EXAMPLES
A - Currents of long duration and low intensity
In order that level V reaches threshold D, a certain volume of water is necessary (likened to a
certain quantity of electrical charges). If this water is supplied slowly by the pump (current of
long duration and low intensity), some of the water has time to go through L and raise piston E
therefore increasing the threshold level (accommodation). The quantity of liquid (the current) will
therefore have to be greater because level V has to reach point D higher up. Moreover, a large
amount of liquid returns from B to A through tap K. It is easy to understand that all these extra
quantities that P has to transport indicate that we have an unfavourable stimulation current.
54
WIRELESS PROFESSIONAL
EN
B - Currents of short duration and higher intensity
The durations intended here are close to the excitation constant value k.
In this case, as the flow is high, the pump action is short. As almost no liquid has gone through
L, the float does not rise and accommodation is therefore negligible. Nevertheless, a certain
quantity of water returns through K and has to be compensated for by P.
The Weiss law applies to these kinds of current (please refer to the fundamental
law of electrostimulation).
Q = q + it or I t = q + it
Q is the total quantity of liquid provided by P with
I = intensity of the stimulation current
t = pulse duration
q is the volume of liquid separating Vo from So i.e. the quantity of charges that
would have to be provided if there were no leak K. In other words, if the membrane
potential varied instantaneously and not exponentially in
accordance with a time constant K.
it the quantity of liquid that returns from B to A through tap K.
Fig. 4
55
7 . 2 P ractical rules
The principles of use set out in this section are the general rules for neurostimulation programmes.
In all cases, the information and instructions for use in this practical guide should be read carefully.
Positioning of the electrodes
Compliance with the specified positioning of the electrodes is advised. Illustrations of the electrodes
positions are available directly in the remote control or in the chapter, “Specific indications”.
A stimulation module consists of two poles:
• A positive pole (+) = the pod with an illuminated button
• A negative pole (-) = the other pod of the module
A separate electrode must be connected to each of the two pods.
Depending on the characteristics of the current used for each programme, the electrode connected
to the positive pole (pod with illuminated button) may benefit from a “prime” location that is likely
to increase the efficacy of the treatment.
This is the case particularly for muscular electrostimulation programmes requiring strong muscular
contractions, for which it is recommended that the electrode with positive polarity is placed on the
motor point of the muscle.
The choice of electrode size (large or small) and the correct positioning of the electrodes on the
muscle group that needs to be stimulated are determining factors and are essential for stimulation
to be effective. As a result, always use the size of the electrodes shown on the images. Unless
advised otherwise by a doctor, always follow the positions specified on the images.
Body position
To determine the stimulation position to be used based on the position of the electrodes and
the programme chosen, please refer to the images of where the electrodes are positioned.
56
WIRELESS PROFESSIONAL
EN
B
A Body position
B Positioning of the electrodes
A
The position of the person to be stimulated depends on the muscle group that requires
stimulation and on the programme chosen.
For programmes requiring muscle contractions (tetanic contractions), working the muscle
isometrically is always recommended to prevent cramps and muscle soreness after the session.
For example, when the quadriceps are stimulated, the patient will be placed in a seated
position with the ankles fixed with straps to prevent the knees extending. For other types of
programmes (for example, analgesic programmes), which do not cause muscle contractions,
position the patient as comfortably as possible.
Stimulation energy settings
For programmes which cause muscle contractions, it is important to use the maximum
stimulation energies, i.e. always at the limit of what the patient is able to tolerate. This means
that, in a stimulated muscle, the number of fibres working depends on the stimulation energies.
The maximum stimulation energies must therefore be used in order to engage as many
fibres as possible. Below a significant stimulation energy, the number of fibres engaged in the
stimulated muscle is too low to considerably improve the quality of the muscles.
The maximum energy will not be reached during the first session but after at least 3 sessions,
during which the energy to produce strong muscle contractions will be increased gradually so
that the patient becomes accustomed to electrostimulation. After the warm-up, which should
produce clear muscle twitching, the stimulation energies must be increased progressively
contraction by contraction throughout the work sequence. The energies used should also be
increased session by session.
57
For TENS treatments, stimulation is only sensory. The intensity must therefore be increased
until the patient has a pins and needles sensation (tingling) that is not considered painful.
For neuromuscular electrostimulation programmes which do not cause tetanic muscle
contractions (frequencies < 10Hz), the energies must be increased gradually until muscle
twitching is produced that can be clearly seen or felt.
Progression through the different levels
Generally speaking, it is not advisable to progress through the levels too quickly and to aim
to reach the maximum level too quickly. The different levels correspond to progression in
rehabilitation using electrostimulation.
Furthermore and without exception, level 1 is the starting point and should be used until the
therapeutic targets have been reached. One of these targets is for the patient to be able to
tolerate a significant amount of stimulation energy.
Stimulation energies should therefore be given priority in order to have a many fibres working
as possible before changing the level.
58
WIRELESS PROFESSIONAL
EN
7 . 3 N eurostimulation programmes
REHABILITATION I
VASCULAR
Treatment of disuse atrophy
61
Heavy legs
Reinforcement
62
Venous insufficiency
71/72
Prevention of disuse atrophy
63
Arterial insufficiency
73
Muscle lesion
64
Cramp prevention
74
Motor point
65
Capillarisation
75
PAIN RELIEF I
70
CONDITIONING I
TENS (Gate control) 100Hz
65
Resistance
76
Frequency-modulated TENS
65
Strength
76
Pulse width modulated TENS
66
Active recovery
77
Endorphinic
67
Burst
68
Burst TENS alternated
68
Decontracturing
69
59
Speci f i c programm e s
REHABILITATION II
NEUROLOGICAL REHABILITATION
Hip prosthesis
78
Hemiplegic foot
99
Patellofemoral syndrome
79
Spasticity
100
ACL
80
Hemiplegic shoulder
101
Rotator cuff
81
Slow start neuro rehabilitation
102
Lumbar stabilisation
82
Cardiac rehabilitation
83
Toning
103
Agonist antagonist
(Atrophy and Reinforcement)
84
Firming
103
Atrophy (modulated frequency)
85
Shaping
104
Reinforcement
(modulated frequency)
Elasticity
104
86
Calorilysis
105
Programmes for haemophiliacs
(Atrophy and Reinforcement)
87
Adipostress
105
AESTHETIC
CONDITIONING II
PAIN RELIEF II
TENS (Gate control) 80Hz
88
Knee pain
88
Trapezius muscle pain
89
Shoulder pain
89
Fracture pain
90
Cervical pain
91
Thoracic back pain
92
Low back pain
93
Lumbosciatica
94
Lumbago
95
Epicondylitis
96
Torticollis
97
Arthralgia
98
60
Potentiation
106
Endurance
106
Explosive strength
107
Plyometry
107
Hypertrophy
108
Muscle building
108
Low back reinforcement
109
Core stabilisation
109
Recovery plus
110
Toning massage
110
Relaxing massage
111
Anti-stress massage
111
WIRELESS PROFESSIONAL
EN
R E H A B I L I TAT I O N I
TREATMENT OF DISUSE ATROPHY
A muscle that is normally innervated, after a period of immobilisation or diminished movement,
When?
rapidly decreases in volume. This decrease depends on the degree and duration of the functional
deficit. Slow fibres (type I) in particular are affected by disuse atrophy.
Why?
To reactivate the trophicity of the muscle fibres altered during disuse atrophy.
To reverse muscle wastage.
By using frequencies creating a tetanic contraction in type I fibres to impose a significant
How?
workload on the atrophied muscle, so that it recovers volume. Recovery therefore takes place far
more quickly than by simply using muscle activities.
To make it as comfortable as possible for the patient, use pulse widths equivalent to the
Pulse width
chronaxies of the motor nerves of the muscles being stimulated. The mi-SCAN function (activated
by default) can be used to determine the pulse widths suitable for the patient's muscles.
Electrodes
Electrodes positioned depending on the muscle to be stimulated, in accordance with
the instructions.
Use the maximum stimulation energies. The first and second sessions help the patient become
Intensity
accustomed to the method by gradually increasing the stimulation energy every 3 or 4
contractions. In the following sessions, it is important to support the patient's progress by setting
targets which go beyond the energy levels reached in the previous session.
Yes.
- A minimum of 1 channel with muscular work imposed by the Disuse atrophy programme.
- A maximum of 3 channels with the TENS programme.
• Electrodes positioned on the painful area.
• Sufficient stimulation energy to produce a clear tingling sensation.
+TENS Option
Once the +TENS combination has been activated, the message “TENS” appears on the screen with
respect to the channel or channels where the treatment is active. The mi functions – apart from
the mi-SCAN – are also no longer accessible.
Take care to properly observe the correct order for switching on the modules, the order of
switching on that corresponds to the numbering of the channels.
61
REINFORCEMENT
For use either on previously atrophied muscles which have regained their volume as a result of
When?
electrostimulation through disuse atrophy treatment programmes, or as a first-line on nonatrophied muscles which have lost their strength and speed of contraction.
Why?
How?
To restore the strength of the contraction in the case of muscle insufficiency without pronounced
disuse atrophy or after restoration of muscle volume.
By using frequencies creating a tetanic contraction in the quick fibres (type IIb), which are the
strength and speed fibres.
To make it as comfortable as possible for the patient, use pulse widths equivalent to the
Pulse width
chronaxies of the motor nerves of the muscles being stimulated. The mi-SCAN function (activated
by default) can be used to determine the pulse widths suitable for the patient's muscles.
Electrodes
Electrodes positioned depending on the muscle to be stimulated, in accordance with the
instructions.
Use the maximum stimulation energies. The first and second sessions help the patient become
Intensity
accustomed to the method by gradually increasing the stimulation energy every 3 or 4
contractions. In the following sessions, it is important to support the patient's progress by setting
targets which go beyond the energy levels reached in the previous session.
Yes.
- A minimum of 1 channel with muscular work imposed by the Reinforcement programme.
- A maximum of 3 channels with the TENS programme.
• Electrodes positioned on the painful area.
• Sufficient stimulation energy to produce a clear tingling sensation.
+TENS Option
Once the +TENS combination has been activated, the message “TENS” appears on the screen with
respect to the channel or channels where the treatment is active. The mi functions – apart from
the mi-SCAN – are also no longer accessible.
Take care to properly observe the correct order for switching on the modules, the order of
switching on that corresponds to the numbering of the channels.
62
WIRELESS PROFESSIONAL
EN
PREVENTION OF DISUSE ATROPHY
After an operation or a bone fracture, a limb or a section of a limb is immobilised, the muscles
When?
of this part of the body are affected very quickly by disuse atrophy. This rapid decrease in muscle
volume is mainly due to reflex inhibition and a total absence of muscle activity. It is also important
to note that disuse atrophy tends to disproportionally affect type I fibres more than type II.
Why?
To compensate for total or partial inactivity of the muscle following an osteoarticular injury.
In order to prevent disuse atrophy, electrostimulation has to compensate for the total inactivity
of the muscle by reproducing a series of contractions similar to the different ways in which the
How?
muscle functions when it is working normally. The main treatment phases are carried out with
conventional operational frequencies for slow fibres to compensate for their tendency towards
disuse atrophy.
To make it as comfortable as possible for the patient, use pulse widths equivalent to the
Pulse width
chronaxies of the motor nerves of the muscles being stimulated. The mi-SCAN function (activated
by default) can be used to determine the pulse widths suitable for the patient's muscles.
Electrodes
Electrodes positioned depending on the muscle to be stimulated, in accordance with
the instructions.
Use the maximum stimulation energies. The first and second sessions help the patient become
Intensity
accustomed to the method by gradually increasing the stimulation energy every 3 or 4
contractions. In the following sessions, it is important to support the patient's progress by setting
targets which go beyond the energy levels reached in the previous session.
Yes.
- A minimum of 1 channel with muscular work imposed by the Prevention of disuse
atrophy programme.
- A maximum of 3 channels with the TENS programme.
• Electrodes positioned on the painful area.
+TENS Option
• Sufficient stimulation energy to produce a clear tingling sensation.
Once the +TENS combination has been activated, the message “TENS” appears on the screen with
respect to the channel or channels where the treatment is active. The mi functions – apart from
the mi-SCAN – are also no longer accessible.
Take care to properly observe the correct order for switching on the modules, the order of
switching on that corresponds to the numbering of the channels.
63
MUSCLE LESION
It is well known that early but well-controlled muscle work has a positive impact on the scarring
When?
process of the muscle fibres and the connective supporting tissues. The Muscle Lesion programme
can be used as soon as the scar begins to form and is considered satisfactory, but as a general rule
not until the 10th day after the initial lesion.
Why?
To direct and speed up the scarring process and prevent disuse atrophy. To enable the patient to
return to sport more quickly.
The muscle lesion programme is designed to cause extremely gradual muscle contractions using
How?
a rate of tensioning 4 times longer than for standard programmes. This aims to reduce the risk of
adverse secondary ruptures.
To make it as comfortable as possible for the patient, use pulse widths equivalent to the
Pulse width
chronaxies of the motor nerves of the muscles being stimulated. The mi-SCAN function (activated
by default) can be used to determine the pulse widths suitable for the patient's muscles.
Electrodes
Electrodes positioned depending on the muscle to be stimulated, in accordance with
the instructions.
Early use of this programme after a muscle lesion requires extremely gradual adjustment of the
Intensity
stimulation energies. It is necessary to be particularly careful during the first sessions and to always
stay below the pain threshold.
Yes.
- A minimum of 1 channel with muscular work imposed by the Muscle lesion programme.
- A maximum of 3 channels with the TENS programme.
• Electrodes positioned on the painful area.
• Sufficient stimulation energy to produce a clear tingling sensation.
+TENS Option
Once the +TENS combination has been activated, the message “TENS” appears on the screen with
respect to the channel or channels where the treatment is active. The mi functions – apart from
the mi-SCAN – are also no longer accessible.
Take care to properly observe the correct order for switching on the modules, the order of
switching on that corresponds to the numbering of the channels.
64
WIRELESS PROFESSIONAL
EN
MOTOR POINT
It is advisable to use this programme before all initial muscle electrostimulation sessions in order
When?
to precisely locate the motor points for each person. Locating the motor points is recommended
especially for long muscles, such as those in the lower limbs (quadriceps, etc.).
Why?
How?
In order to guarantee optimum effectiveness of the programmes.
A motor point pen must be used to locate the motor points. See the example on the section on
specific indications.
PA I N R E L I E F I
100 HZ TENS OR FREQUENCY-MODULATED TENS
Gate control, which is activated during TENS stimulation, is particularly effective for the relief of
When?
localised pain of non-muscular origin. It is particularly effective for relieving neuropathic pain and
inflammatory conditions. The sessions may be repeated at will and without restriction, depending
upon the intensity of the pain.
Pain relief is now a priority in therapy which must be provided by all healthcare professionals. As
Why?
TENS treatment is generally palliative, it improves the patient's comfort and helps the therapist to
start the process.
The principle is to cause a significant influx of tactile sensitivity in order to restrict the entry of pain
impulses upon their return to the posterior horn of the spinal cord. We must therefore stimulate
How?
the sensitivity fibres on the skin of the painful area. To do this, it is necessary to use a frequency
that is the same as the operational frequencies for the tactile sensitivity nerve fibres, i.e. from 50
to 150 Hz.
Use very short pulse widths corresponding to the chronaxies of the tactile sensitivity fibres, i.e. 30,
Pulse width
50 or 70 μs, depending on whether the patient is very sensitive, normal, or not very sensitive (level
1, 2 or 3 respectively).
Electrodes
As a general rule, the electrodes are placed on or near the painful area. The electrodes may also be
placed at the nerve trunks depending on the conditions being treated.
The intensity must be increased gradually until the patient perceives a tingling sensation that
is pronounced without being painful. Acclimatisation is normal if a non-modulated TENS
Intensity
programme is used. In this case, it is advisable to slightly increase the stimulation energies on
a regular basis so that the patient continues to feel a tingling sensation. The mi-TENS function
prevents any kind of muscle contraction. If the sensor detects a muscle response, the stimulator
automatically reduces the stimulation energy in order to stop the muscle response.
+TENS Option
No.
65
PULSE WIDTH MODULATED TENS
Gate control, which is activated during TENS stimulation, is particularly effective for the relief of
When?
localised pain of non-muscular origin. It is particularly effective for relieving neuropathic pain and
inflammatory conditions. The sessions may be repeated at will depending upon the intensity of
the pain.
Pain relief is now a priority in therapy which must be provided by all healthcare professionals. As
Why?
TENS treatment is generally palliative, it improves the patient's comfort and helps the therapist to
start the process.
The principle is to cause a significant influx of tactile sensitivity in order to restrict the entry of pain
impulses upon their return to the posterior horn of the spinal cord. We must therefore stimulate
How?
the sensitivity fibres on the skin of the painful area. To do this, it is necessary to use a frequency
that is the same as the operational frequencies for the tactile sensitivity nerve fibres, i.e. from 50
to 150 Hz.
Pulse width
Electrodes
Intensity
+TENS Option
The pulse width varies continuously with this programme. This avoids habituation by using a
system of stimulation that is perceived as more pleasant by some patients.
As a general rule, the electrodes are placed on or near the painful area. The electrodes may also be
placed at the nerve trunks depending on the conditions being treated.
The intensity must be increased gradually until the patient perceives a tingling sensation that is
pronounced without being painful.
No.
66
WIRELESS PROFESSIONAL
EN
ENDORPHINIC
An increase in the tension of the contractured muscle fibres and the crushing of the capillary
When?
network resulting from this causes a decrease in the blood flow and a gradual accumulation of
acid metabolites and free radicals. Without treatment, there is a risk that the contracture will
become chronic and genuine atrophy of the capillary network may gradually occur.
Why?
To relieve chronic muscle pain.
Studying publications about reducing pain by increasing endorphin production shows that the
pulses have to be large enough to excite type Aδ nerve fibres as well as type Aα, which is shown
by the production of muscle twitches. The effects of endorphinic stimulation are described
How?
for frequencies between 2 and 8 Hz. In addition to the general effect of increasing endorphin
production in the hypothalamus, which elevates the pain perception threshold, there is a very
significant localised effect. The 5 muscle twitches induced every second by stimulation produce
very significant hyperaemia, which drains the acid metabolites and free radicals that had
accumulated in the chronically contractured muscle areas.
Endorphinic stimulation is primarily aimed at the sensitive Aδ nerve fibres which are best
Pulse width
stimulated with pulse width of 200µs. However the vascular effect is secondary to the coactivation of the motor units, which have a slightly higher chronaxy that is measured at the start
of the session using the mi-SCAN function activated by default.
Electrodes must be placed after a thorough palpatory examination to locate the most painful
Electrodes
point, where a small electrode preferably connected to the positive pole of the module (pod with
an illuminated button) will be placed. The other electrode is placed at the end of muscle or muscle
group being stimulated.
An essential factor in the therapeutic efficacy is to cause visible muscle twitching, which may, in
Intensity
certain cases, require higher stimulation energies to be used. The mi-RANGE function (activated
by default) can be used to determine the minimum level of energy required to produce an
appropriate muscle response.
Yes.
- A minimum of 1 channel with muscular work imposed by the Endorphinic programme.
- A maximum of 3 channels with the TENS programme.
• Electrodes positioned on the painful area.
• Sufficient stimulation energy to produce a clear tingling sensation.
+TENS Option
Once the +TENS combination has been activated, the message “TENS” appears on the screen with
respect to the channel or channels where the treatment is active. In addition, the mi functions –
apart from mi-SCAN and mi-RANGE – are no longer accessible.
Take care to properly observe the correct order for switching on the modules, the order of
switching on that corresponds to the numbering of the channels.
67
BURST
The Burst programme is an type of endorphinic programme, which has a less pronounced vascular
When?
effect than endorphinic. It may be used in the same way to relieve pain following a chronic
contracture.
Why?
To relieve chronic muscle pain.
The Burst mode involves replacing the emission of an isolated electric pulse by an emission of a
How?
very short burst of 8 pulses. In this way, the Burst programme emits 2 burst per second, which can
produce the same endorphinic results as for a standard frequency of 2 Hz.
Pulse width
The pulse width for the programme is 180 μs.
Electrodes must be placed after a thorough palpatory examination to locate the most painful
Electrodes
point, where a small electrode preferably connected to the positive pole of the module (pod with
an illuminated button) will be placed. The other electrode is placed at the end of muscle or muscle
group being stimulated.
Intensity
+TENS Option
An essential factor in the therapeutic efficacy is to cause visible muscle twitching, which may, in
certain cases, require higher stimulation energies to be used.
No.
BURST TENS ALTERNATED
Described by Han, modulated stimulation Burst TENS successively activates (every 3 seconds) the
When?
Gate control mechanism and releases endogenous opioid substances. This is a therapeutic option,
which may be worth considering for poorly classified pain with multiple causes.
Why?
To improve the patient's comfort and to enable the therapist to start the process more easily.
Burst-modulated TENS is based on the Gate control theory (TENS effect) and on the release of
How?
morphine-like substances produced by the body, endorphins (Endorphinic effect). The stimulation
frequencies vary every 3 seconds, producing a combined stimulation of 80 Hz and 2 Hz.
Pulse width
The pulse width for the programme is 180 μs.
Electrodes
As a general rule, the electrodes are placed on or near the painful area.
The stimulation should produce a sharp but pleasant tingling sensation and visible muscle
Intensity
twitches. Please note: This programme has two distinct energy levels. First adjust the intensity
level for 80 Hz (TENS) until a tingling sensation is felt, then repeat the procedure for 2 Hz
(endorphinic) in order to produce visible muscle twitches.
+TENS Option
No.
68
WIRELESS PROFESSIONAL
EN
DECONTRACTURING
This type of treatment is indicated to relieve pain following acute muscle contractures (torticollis,
When?
lumbago, etc.). It will also reduce muscle tension in the contracted muscles to facilitate manual
handling techniques.
Why?
How?
To decrease muscle tension.
Current experiments show that muscles twitches caused by a very low frequency of 1 Hz can
effectively remove contractures or decrease resting muscle tension of the stimulated muscle.
To make it as comfortable as possible for the patient, use pulse widths equivalent to the
Pulse width
chronaxies of the motor nerves of the muscles being stimulated. The mi-SCAN function (activated
by default) can be used to determine the pulse widths suitable for the patient's muscles.
Electrodes must be placed after a thorough palpatory examination to locate the most painful
point, where a small electrode preferably connected to the positive pole of the module (pod with
Electrodes
an illuminated button) will be placed. The other electrode is placed at the end of muscle or muscle
group being stimulated. If a contracture affects all the muscle fibres, the electrodes suitable for
neuromuscular stimulation can also be applied (please refer to the positions recommended for the
muscle being stimulated).
An essential factor in the therapeutic efficacy is to cause visible muscle twitching, which may, in
Intensity
certain cases, require higher stimulation energies to be used. The mi-RANGE function (activated
by default) can be used to determine the minimum level of energy required to produce an
appropriate muscle response.
Yes.
- A minimum of 1 channel with muscular work imposed by the Decontracturing programme.
- A maximum of 3 channels with the TENS programme.
• Electrodes positioned on the painful area.
• Sufficient stimulation energy to produce a clear tingling sensation.
+TENS Option
Once the +TENS combination has been activated, the message “TENS” appears on the screen with
respect to the channel or channels where the treatment is active. In addition, the mi functions –
apart from mi-SCAN and mi-RANGE – are no longer accessible.
Take care to properly observe the correct order for switching on the modules, the order of
switching on that corresponds to the numbering of the channels.
69
VAS CUL A R
HEAVY LEGS
The problem of "heavy legs" occurs when venous blood return sometimes does not take place, but
does not cause any damage to the body. Heat, certain stages of the menstrual cycle, prolonged
When?
standing and long continuous periods sitting down may cause swelling (stasis oedema) with a
considerable feeling of heaviness in the lower limbs. A certain degree of muscle tension is often
associated with this, and female patients can experience cramps in their calves.
Why?
To accelerate venous blood return, re-oxygenate the tissues and produce a relaxing effect.
During the treatment session, we move progressively and automatically through a series of clearly
How?
defined frequencies, requiring a large increase in the flow to allow acceleration of the venous
blood return (7 Hz), produce an analgesic effect by increasing the production of endorphins (5 Hz)
and end by relaxing the muscles (3 Hz), while keeping the blood flow noticeably high.
To make it as comfortable as possible for the patient, use pulse widths equivalent to the
Pulse width
chronaxies of the motor nerves of the calf muscles.The mi-SCAN function (activated by default)
can be used to determine the pulse widths suitable for the patient's muscles.
Electrodes
A large electrode is placed transversely under the popliteal fossa and two small electrodes are
positioned on the contour of the gastrocnemius muscles.
An essential factor in the effectiveness of electrotherapy is the ability to cause visible muscle
Intensity
twitches. The mi-RANGE function (activated by default) can be used to determine the minimum
level of energy required to produce an appropriate muscle response.
+TENS Option
No.
70
WIRELESS PROFESSIONAL
EN
VENOUS INSUFFICIENCY 1
When?
In the event of venous insufficiency without oedema.
To increase the general blood flow so as to improve the circulation of the interstitial fluid and
Why?
increase oxygenation of the tissues and the intima of the veins. To drain the veins as much as
possible in order to combat stasis.
How?
Send pulses so as to cause short tetanic contractions (to drain the deep veins), separated by long
periods to increase the flow.
To make it as comfortable as possible for the patient, use pulse widths equivalent to the
Pulse width
chronaxies of the motor nerves of the muscles being stimulated. The mi-SCAN function (activated
by default) can be used to determine the pulse widths suitable for the patient's muscles.
Electrodes
Intensity
+TENS Option
Electrodes positioned according to the specific indication.
Adjust the stimulation energy so as to produce appropriate muscle responses both in the tetanic
contraction phase and in the phase to increase blood flow.
No.
71
VENOUS INSUFFICIENCY 2
When?
In the event of venous insufficiency with oedema.
Why?
To encourage drainage of the deep veins and of the oedema.
How?
Encourage venous blood return using a sequenced stimulation starting in the leg muscles and
continuing to the thigh muscles, supporting the distal tetanic contraction to prevent regurgitation.
To make it as comfortable as possible for the patient, use pulse widths equivalent to the
Pulse width
chronaxies of the motor nerves of the muscles being stimulated. The mi-SCAN function (activated
by default) can be used to determine the pulse widths suitable for the patient's muscles.
Electrodes
Electrodes positioned according to the specific indication.
Adjust the stimulation energy in order to produce pronounced but comfortable muscle
Intensity
contractions. The stimulation energies must be greater on channels 1 and 2 than on channels 3
and 4.
+TENS Option
Note
No.
Take care to properly observe the correct order for switching on the modules, the order of
switching on that corresponds to the numbering of the channels.
72
WIRELESS PROFESSIONAL
EN
ARTERIAL INSUFFICIENCY 1
Arterial insufficiency in the lower limbs is conventionally divided into four clinical stages. These four
stages (I, II, III, IV) depend on the approximate severity of the loss of blood flow and the
When?
tissue-related consequences. The arterial insufficiency 1 programme is to be used to treat Stage
II. In Stage II, arterial occlusion is responsible for pain that occurs on exertion and is relieved by
resting: this is known as intermittent claudication.
Why?
To improve the absorption of oxygen by the muscles, increase tolerance on exertion and walking
distance.
To avoid further reducing the supply of oxygen to the muscle fibres, the contractions remain
How?
infra-tetanising (9 Hz) and are separated by long periods of active rest (3 Hz) in order to avoid
muscular fatigue.
To make it as comfortable as possible for the patient, use pulse widths equivalent to the
Pulse width
chronaxies of the motor nerves of the muscles being stimulated. The mi-SCAN function (activated
by default) can be used to determine the pulse widths suitable for the patient's muscles.
Electrodes
Intensity
+TENS Option
Electrodes positioned according to the specific indication.
Stimulation energies must be increased as high as possible whilst still remaining comfortable for
the patient.
No.
ARTERIAL INSUFFICIENCY 2
Arterial insufficiency in the lower limbs is conventionally divided into four clinical stages. These four
When?
stages (I, II, III, IV) depend on the approximate severity of the loss of blood flow and the tissuerelated consequences. The Arterial insufficiency 2 programme is used to treat Stage III. At Stage III
the severity of the arterial occlusion causes constant pain which occurs even at rest.
Why?
To improve oxygen uptake by the muscles, to reduce muscular pain at rest and partially restore
muscular tolerance to exertion.
To avoid further reducing the supply of oxygen to the muscle fibres, the contractions remain
How?
infra-tetanising (7 Hz) and are separated by long periods of active rest (2 Hz) in order to avoid
muscular fatigue.
To make it as comfortable as possible for the patient, use pulse widths equivalent to the
Pulse width
chronaxies of the motor nerves of the muscles being stimulated. The mi-SCAN function (activated
by default) can be used to determine the pulse widths suitable for the patient's muscles.
Electrodes
Intensity
+TENS Option
Electrodes positioned according to the specific indication.
Stimulation energies must be increased as high as possible whilst still remaining comfortable for
the patient.
No.
73
CRAMP PREVENTION
For people suffering from cramps which may appear spontaneously at rest during the night or
When?
following prolonged muscular effort. These cramps can be partially due to an imbalance in the
flow of blood through the muscles.
Why?
To improve the circulatory system to prevent the occurrence of cramps.
This programme consists of two different phases: an 8 Hz sequence to improve blood flow and
How?
develop blood capillaries. A 3 Hz sequence to relax muscular tonus and increase the well-being of
the patient.
To make it as comfortable as possible for the patient, use pulse widths equivalent to the
Pulse width
chronaxies of the motor nerves of the muscles being stimulated. The mi-SCAN function (activated
by default) can be used to determine the pulse widths suitable for the patient's muscles.
Electrodes
Electrodes positioned depending on the muscle to be stimulated, in accordance with the
instructions.
An essential factor in the effectiveness of electrotherapy is the ability to cause visible muscle
Intensity
twitches. The mi-RANGE function (activated by default) can be used to determine the minimum
level of energy required to produce an appropriate muscle response.
+TENS Option
No.
74
WIRELESS PROFESSIONAL
EN
CAPILLARISATION
The 8 Hz frequency produces the greatest increase in blood flow in young patients who are in a
good state of physical health. Use of the Capillarisation programme must therefore be restricted
to sport rehabilitation and will be proposed in situations where a hyperaemia is desired e.g. to
When?
accelerate the scarring process. The Capillarisation programme can also be used for non-injured
athletes as part of their physical preparation to achieve a variety of ends:
• To supplement endurance training
• To optimise the overcompensation phase prior to an endurance or resistance competition.
• Supplementary use of the Hypertrophy programme
Why?
To induce the greatest circulatory activation in patients who are athletes. To increase the capillary
network and make the muscle fibres more resistant to fatigue.
When using low stimulation frequencies of 8 Hz, the increase in blood flow is greatest in young
How?
people who are in good physical condition. However a frequency of 8 Hz may cause early muscle
fatigue and a depletion in the muscular response in patients with underperforming muscles.
To make it as comfortable as possible for the patient, use pulse widths equivalent to the
Pulse width
chronaxies of the motor nerves of the muscles being stimulated. The mi-SCAN function (activated
by default) can be used to determine the pulse widths suitable for the patient's muscles.
Electrodes
Electrodes positioned depending on the muscle to be stimulated, in accordance with the
instructions.
An essential factor in the effectiveness of electrotherapy is the ability to cause visible muscle
Intensity
twitches. The mi-RANGE function (activated by default) can be used to determine the minimum
level of energy required to produce an appropriate muscle response.
+TENS Option
No.
75
CON DITION IN G I
RESISTANCE
For athletes wishing to increase their ability to sustain intense and prolonged exertion, or to
Indication
develop their ability to maintain or repeat a muscular activity carried out at a high percentage of
the maximum strength.
Effects
Increased anaerobic (lactic) capacity in the muscles. Increased strength endurance.
To make it as comfortable as possible for the patient, use pulse widths equivalent to the
Pulse width
chronaxies of the motor nerves of the muscles being stimulated. The mi-SCAN function (activated
by default) can be used to determine the pulse widths suitable for the patient's muscles.
Electrodes
Electrodes positioned depending on the muscle to be stimulated, in accordance with the
instructions.
The maximum tolerable stimulation energy, which is one of the key factors determining the
Intensity
effectiveness of the treatment. The higher the stimulation energy, the higher the number of
muscle fibres (motor units) being used.
+TENS Option
No.
STRENGTH
Indication
For athletes practising a discipline which requires strength and speed.
Effects
An increase in maximum strength and muscle contraction speed.
To make it as comfortable as possible for the patient, use pulse widths equivalent to the
Pulse width
chronaxies of the motor nerves of the muscles being stimulated. The mi-SCAN function (activated
by default) can be used to determine the pulse widths suitable for the patient's muscles.
Electrodes
Electrodes positioned depending on the muscle to be stimulated, in accordance with the
instructions.
The maximum tolerable stimulation energy, which is one of the key factors determining the
Intensity
effectiveness of the treatment. The higher the stimulation energy, the higher the number of
muscle fibres (motor units) being used.
+TENS Option
No.
76
WIRELESS PROFESSIONAL
EN
ACTIVE RECOVERY
Indication
Effects
To facilitate and accelerate muscle recuperation after intense exertion. Use this programme during
the three hours which follow a period of intense training or a competition.
Strong increase in blood flow, accelerated elimination of waste products from muscle contraction
and a relaxing endorphinic effect.
To make it as comfortable as possible for the patient, use pulse widths equivalent to the
Pulse width
chronaxies of the motor nerves of the muscles being stimulated. The mi-SCAN function (activated
by default) can be used to determine the pulse widths suitable for the patient's muscles.
Precision in positioning the electrodes is less significant than for programmes aiming to develop
Electrodes
muscle quality. The electrodes can be placed in an alternative way, reducing the number of
electrodes needed and stimulating more muscles during a session.
An essential factor in the effectiveness of electrotherapy is the ability to cause visible muscle
Intensity
twitches. The mi-RANGE function (activated by default) can be used to determine the minimum
level of energy required to produce an appropriate muscle response.
+TENS Option
No.
77
REHA B ILI TATI ON II
HIP PROSTHESIS
When?
Why?
Except where there are complications, as soon as possible following the surgical implantation of a
total hip replacement.
To restore the muscular qualities of the gluteus medius and gluteus maximus muscles, to recover
stability when standing on one foot and to prevent limping.
The three levels of the programme correspond to the Disuse atrophy (level 1 and 2) and
How?
Reinforcement (level 1) programmes for which the low frequencies have been removed so as not
to cause vibration in the prosthesis.
To make it as comfortable as possible for the patient, use pulse widths equivalent to the
Pulse width
chronaxies of the motor nerves of the gluteal muscles. The mi-SCAN function (activated by
default) can be used to determine the pulse widths suitable for the patient's muscles.
Electrodes
Electrodes positioned on the gluteal muscles must correspond to the specific indication.
The maximum tolerable stimulation energy, which is one of the key factors determining the
Intensity
effectiveness of the treatment. The higher the stimulation energy, the higher the number of
muscle fibres (motor units) being used. Progressively increase the level of energy during the course
of a treatment session.
Yes.
- A minimum of 1 channel with muscular work imposed by the Hip prosthesis programme.
- A maximum of 3 channels with the TENS programme.
• Electrodes positioned on the painful area.
• Sufficient stimulation energy to produce a clear tingling sensation.
+TENS Option
Once the +TENS combination has been activated, the message “TENS” appears on the screen with
respect to the channel or channels where the treatment is active. The mi functions – apart from
the mi-SCAN – are also no longer accessible.
Take care to properly observe the correct order for switching on the modules, the order of
switching on that corresponds to the numbering of the channels.
78
WIRELESS PROFESSIONAL
EN
PATELLOFEMORAL SYNDROME
When?
Why?
In conjunction with the rehabilitation of centred (post-traumatic chondropathy) or decentred
(external subluxation of the patella) patellofemoral syndromes.
To restore the trophicity of muscle fibres altered during the muscle disuse atrophy process and to
develop the active stability of the knee.
Depending upon the diagnosis, stimulation will either involve all of the heads of the quadriceps
muscle or it will be limited solely to the vastus medialis. The three levels of the programme
How?
correspond to the Disuse atrophy (level 1 and 2) programmes and the Reinforcement (level 1)
programmes respectively, for which the low frequencies have been removed so as not to cause
micro-trauma in the patella.
To make it as comfortable as possible for the patient, use pulse widths equivalent to the
Pulse width
chronaxies of the motor nerves of the quadriceps muscles. The mi-SCAN function (activated by
default) can be used to determine the pulse widths suitable for the patient's muscles.
Electrodes
Electrodes positioned on the quadriceps or only on the vastus medialis in accordance with the
specific indication.
The maximum tolerable stimulation energy, which is one of the key factors determining the
Intensity
effectiveness of the treatment. The higher the stimulation energy, the higher the number of
muscle fibres (motor units) being used. Progressively increase the level of energy during the course
of a treatment session.
Yes.
- A minimum of 1 channel with muscular work imposed by the Patellofemoral
syndrome programme.
- A maximum of 3 channels with the TENS programme.
• Electrodes positioned on the painful area.
+TENS Option
• Sufficient stimulation energy to produce a clear tingling sensation.
Once the +TENS combination has been activated, the message “TENS” appears on the screen with
respect to the channel or channels where the treatment is active. The mi functions – apart from
the mi-SCAN – are also no longer accessible.
Take care to properly observe the correct order for switching on the modules, the order of
switching on that corresponds to the numbering of the channels.
79
ACL
When?
Why?
As a supplement to rehabilitation of a ligamentoplasty of the anterior cruciate ligament of the
knee. The programme can be used early as it does not put any stress on the tendon graft.
To restore the muscular qualities of the quadriceps and the hamstrings and recover a stable knee
to allow the safe resumption of active sport.
The ACL programme is specifically designed for the rehabilitation of ligamentoplasties. It allows
intensive use of the quadriceps while protecting the tendon graft during the first few post-
How?
operative weeks due to co-activation of the hamstring muscles. Stimulation starts with the
hamstrings (channels 1 and 2). While they are contracted, stimulation continues on the quadriceps
(channels 3 and 4), thus preventing any risk of anterior draw movement.
To make it as comfortable as possible for the patient, use pulse widths equivalent to the
Pulse width
chronaxies of the motor nerves of the quadriceps and hamstring muscles. The mi-SCAN function
(activated by default) can be used to determine the pulse widths suitable for the patient's muscles.
Electrodes
Electrodes positioned on the gluteal muscles must correspond to the specific indication.
The maximum tolerable stimulation energy on the 4 channels, which is one of the key factors
Intensity
determining the effectiveness of the treatment. The higher the stimulation energy, the higher the
number of muscle fibres (motor units) being used. Progressively increase the level of energy during
the course of a treatment session.
+TENS Option
No.
Take care to properly observe the correct order for switching on the modules, the order of
Note
switching on that corresponds to the numbering of the channels. This programme only works
with 4 modules switched on.
80
WIRELESS PROFESSIONAL
EN
ROTATOR CUFFS
When?
Why?
In addition to the rehabilitation of rotator cuff tendinopathies, after sedation of acute pain and
manual correction of joint misalignment.
To develop the active stability of the shoulder by restoring the functional attributes of the muscles
supporting the glenohumeral joint.
Selective stimulation of the infraspinatus and supraspinatus muscles using parameters adapted
How?
to their postural function (type I fibres). Combination with a TENS programme for a combined
analgesic effect.
To make it as comfortable as possible for the patient, use pulse widths equivalent to the
Pulse width
chronaxies of the motor nerves of the infraspinatus and supraspinatus muscles. The mi-SCAN
function (activated by default) can be used to determine the pulse widths suitable for the
patient's muscles.
Electrodes
Electrodes positioned according to the specific indication.
The maximum tolerable stimulation energy, which is one of the key factors determining the
Intensity
effectiveness of the treatment. The higher the stimulation energy, the higher the number of
muscle fibres (motor units) being used. Progressively increase the level of energy during the course
of a treatment session.
Yes.
- A minimum of 1 channel with muscular work imposed by the Rotator cuff programme.
- A maximum of 3 channels with the TENS programme.
• Electrodes positioned on the painful area.
• Sufficient stimulation energy to produce a clear tingling sensation.
+TENS Option
Once the +TENS combination has been activated, the message “TENS” appears on the screen with
respect to the channel or channels where the treatment is active. The mi functions – apart from
the mi-SCAN – are also no longer accessible.
Take care to properly observe the correct order for switching on the modules, the order of
switching on that corresponds to the numbering of the channels.
81
LUMBAR STABILISATION
After an episode of low back pain, once the pain has been relieved. Muscular work by
When?
electrostimulation has the advantage of being carried out isometrically with very little stress on
the vertebral structures and discs.
Why?
How?
To develop the support qualities of the abdominal and lumbar muscles and to restore awareness
of postural control.
By simultaneously stimulating the abdominal and lumbar muscle groups, using parameters
adapted to restoring the qualities of type I muscle fibres used in postural control.
To make it as comfortable as possible for the patient, use pulse widths equivalent to the
Pulse width
chronaxies of the motor nerves of the abdominal and lumbar muscles. The mi-SCAN function
(activated by default) can be used to determine the pulse widths suitable for the patient's muscles.
Electrodes
Electrodes positioned jointly on the abdominal and lumbar muscles in accordance with the
specific indication.
The maximum tolerable stimulation energy, which is one of the key factors determining the
Intensity
effectiveness of the treatment. The higher the stimulation energy, the higher the number of
muscle fibres (motor units) being used. Progressively increase the level of energy during the course
of a treatment session.
+TENS Option
No.
82
WIRELESS PROFESSIONAL
EN
CARDIAC REHABILITATION
When?
In addition to the aerobic exercises suggested during cardiac rehabilitation.
Heart failure limits the capacity for exertion linked, in part, to changes in the peripheral muscles.
Why?
Electrostimulation allows muscle qualities to be improved, in particular aerobic capacity, which
contributes to improving tolerance of exertion and the quality of life in patients suffering from
severe cardiac failure.
The work regime imposed by the cardiac rehabilitation programme uses the oxidative metabolism
How?
through contractions which are of low power but very long and repeated over a long period
(1 hour).
To make it as comfortable as possible for the patient, use pulse widths equivalent to the
Pulse width
chronaxies of the motor nerves of the muscles being stimulated. The mi-SCAN function (activated
by default) can be used to determine the pulse widths suitable for the patient's muscles.
Electrodes
The quadriceps muscles are a priority because of their volume and their functional importance.
Electrodes must be positioned according to the specific indication.
The maximum tolerable stimulation energy, which is one of the key factors determining the
Intensity
effectiveness of the treatment. The higher the stimulation energy, the higher the number of
muscle fibres (motor units) being used. Progressively increase the level of energy during the course
of a treatment session.
+TENS Option
No.
83
Agonist - Antagonist
ATROPHY / REINFORCEMENT
The alternate stimulation of the two antagonistic muscle groups has the advantage of allowing
When?
the active mobilisation of a joint while inducing muscle work which is beneficial to functional
recuperation.
To combine muscle work aimed at successively restoring the two types of muscle fibres (disuse
Why?
atrophy, then reinforcement) to give mobility across the full range of movement of the joint. This
type of use is particularly interesting for combating adhesion.
There are four different programmes:
- Atrophy 1/1 and Reinforcement 1/1. These programmes produce identical length contractions
How?
for the agonist and the antagonist.
- Atrophy 2/1 and Reinforcement 2/1. These programmes produce contractions for the agonist
which are twice as long as for the antagonist.
To make it as comfortable as possible for the patient, use pulse widths equivalent to the
Pulse width
chronaxies of the motor nerves of the muscles being stimulated. The mi-SCAN function (activated
by default) can be used to determine the pulse widths suitable for the patient's muscles.
Electrodes
Intensity
+TENS Option
Electrodes positioned depending on the muscle to be stimulated, in accordance with
the instructions.
The stimulation energies must be adjusted successively for each muscle group to obtain joint
mobility in the desired range.
No.
For 2-channel configuration, channels 1 and 2 alternate.
Take care to properly position module 1 on the agonist and module 2 on the antagonist. This
programme only works with 2 modules switched on.
Note
For 4-channel configuration, channels 1+2 alternate with channels 3+4.
Take care to properly position modules 1 and 2 on the agonist and modules 3 and 4 on the
antagonist. This programme only works with 4 modules switched on.
Take care to properly observe the correct order for switching on the modules, the order of
switching on that corresponds to the numbering of the channels.
84
WIRELESS PROFESSIONAL
EN
ATROPHY (MODULATED FREQUENCY)
When?
Why?
How?
Use on weakened muscles following immobilisation or restricted activity.
The programme imposes a work regime adapted to the physiology of the type I fibres where the
qualities have been altered during muscle disuse atrophy.
Progressive incrementation of the frequency (25-40Hz) at the beginning of each contraction may
improve the comfort of the stimulation in hypersensitive patients.
To make it as comfortable as possible for the patient, use pulse widths equivalent to the
Pulse width
chronaxies of the motor nerves of the muscles being stimulated. The mi-SCAN function (activated
by default) can be used to determine the pulse widths suitable for the patient's muscles.
Electrodes
Electrodes positioned depending on the muscle to be stimulated, in accordance with
the instructions.
The maximum tolerable stimulation energy, which is one of the key factors determining the
Intensity
effectiveness of the treatment. The higher the stimulation energy, the higher the number of
muscle fibres (motor units) being used. Progressively increase the level of energy during the course
of a treatment session.
Yes.
- A minimum of 1 channel with muscular work imposed by the Atrophy programme.
- A maximum of 3 channels with the TENS programme.
• Electrodes positioned on the painful area.
• Sufficient stimulation energy to produce a clear tingling sensation.
+TENS Option
Once the +TENS combination has been activated, the message “TENS” appears on the screen with
respect to the channel or channels where the treatment is active. The mi functions – apart from
the mi-SCAN – are also no longer accessible.
Take care to properly observe the correct order for switching on the modules, the order of
switching on that corresponds to the numbering of the channels.
85
REINFORCEMENT (MODULATED FREQUENCY)
For use either on previously atrophied muscles which have regained their volume as a result of
When?
electrostimulation with disuse atrophy treatment programmes, or as a first-line treatment on
non-atrophied muscles which have lost their strength and speed of contraction.
The programme imposes a work regime adapted to the physiology of the type II fibres to restore
Why?
contraction strength in the case of muscular insufficiency without marked disuse atrophy or
following recovery of muscle volume.
How?
Progressive incrementation of the frequency (35-60 Hz) at the beginning of each contraction may
improve the comfort of the stimulation in hypersensitive patients.
To make it as comfortable as possible for the patient, use pulse widths equivalent to the
Pulse width
chronaxies of the motor nerves of the muscles being stimulated. The mi-SCAN function (activated
by default) can be used to determine the pulse widths suitable for the patient's muscles.
Electrodes
Electrodes positioned depending on the muscle to be stimulated, in accordance with
the instructions.
The maximum tolerable stimulation energy, which is one of the key factors determining the
Intensity
effectiveness of the treatment. The higher the stimulation energy, the higher the number of
muscle fibres (motor units) being used. Progressively increase the level of energy during the course
of a treatment session.
Yes.
- A minimum of 1 channel with muscular work imposed by the Reinforcement programme.
- A maximum of 3 channels with the TENS programme.
• Electrodes positioned on the painful area.
• Sufficient stimulation energy to produce a clear tingling sensation.
+TENS Option
Once the +TENS combination has been activated, the message “TENS” appears on the screen with
respect to the channel or channels where the treatment is active. The mi functions – apart from
the mi-SCAN – are also no longer accessible.
Take care to properly observe the correct order for switching on the modules, the order of
switching on that corresponds to the numbering of the channels.
86
WIRELESS PROFESSIONAL
EN
Programmes for haemophiliacs
ATROPHY / REINFORCEMENT
When?
To prevent disuse atrophy or restore muscular qualities in haemophilia patients suffering from
arthropathy.
Repeated episodes of haemarthrosis (intra-articular bleeding) may lead to actual cases of
Why?
arthropathy which cripple haemophiliacs especially as they are usually accompanied by a loss of
joint stability. Specific programmes for haemophiliacs aim to improve the active joint stability by
restoring the qualities specific to each type of muscle fibre.
The characteristic of the programmes for haemophiliacs is to induce muscular contractions
How?
very gradually to avoid any risk of causing microlesions in the muscle fibres and/or supporting
connective tissue and secondary bleeds.
To make it as comfortable as possible for the patient, use pulse widths equivalent to the
Pulse width
chronaxies of the motor nerves of the muscles being stimulated. The mi-SCAN function (activated
by default) can be used to determine the pulse widths suitable for the patient's muscles.
Electrodes
Electrodes positioned depending on the muscle to be stimulated, in accordance with the
instructions.
The maximum tolerable stimulation energy, which is one of the key factors determining the
Intensity
effectiveness of the treatment. The higher the stimulation energy, the higher the number of
muscle fibres (motor units) being used. Very gradually increase the level of energy during the
course of a treatment session.
Yes.
- A minimum of 1 channel with muscular work imposed by the Atrophy or
Reinforcement programme.
- A maximum of 3 channels with the TENS programme.
• Electrodes positioned on the painful area.
+TENS Option
• Sufficient stimulation energy to produce a clear tingling sensation.
Once the +TENS combination has been activated, the message “TENS” appears on the screen with
respect to the channel or channels where the treatment is active. The mi functions – apart from
the mi-SCAN – are also no longer accessible.
Take care to properly observe the correct order for switching on the modules, the order of
switching on that corresponds to the numbering of the channels.
87
PA I N R E L I E F I I
TENS 80 HZ
Gate control, which is activated during TENS stimulation, is particularly effective for the relief of
When?
localised pain of non-muscular origin. It is particularly effective for relieving neuropathic pain and
inflammatory conditions. The sessions may be repeated at will and without restriction, depending
upon the intensity of the pain.
Without side effects, TENS Gate control effectively relieves pain and improves the patient's level of
Why?
comfort. The sedation period that results from the stimulation allows the vicious, self-perpetuating
cycle of pain to be broken.
The principle involves causing high levels of sensitivity impulses in order to limit the input of
How?
pain impulses when they return to the posterior horn of the spinal cord. Apart from the 80 Hz
frequency, this programme specifically tries to stimulate other sensory fibres (pressure, vibration)
in addition to stimulation of the Aβ fibres (tactile sensitivity).
Pulse width
The pulse width for the programme is 180 μs.
Electrodes
The electrodes are usually placed in such a way as to cover or surround the painful area.
Intensity
+TENS Option
The intensity must be increased gradually until the patient feels a tingling sensation that is
pronounced without being painful.
No.
KNEE PAIN
When?
Why?
How?
Pulse width
Electrodes
Intensity
+TENS Option
To relieve knee-joint pain, irrespective of its cause (gonarthrosis, rheumatoid polyarthritis,
chondromalacia, etc.)
For the relief of pain.
Using the Gate control principle. This involves causing high levels of sensitivity impulses in order to
limit the input of pain impulses when they return to the posterior horn of the spinal cord.
The pulse width varies continuously with this programme. This avoids habituation by using a
system of stimulation that is perceived as more pleasant by some patients.
Depending upon the pain, four large electrodes placed around the patella produce a significant
analgesic effect on all knee pain.
The intensity must be increased gradually until the patient feels a tingling sensation that is
pronounced without being painful.
No.
88
WIRELESS PROFESSIONAL
EN
TRAPEZIUS MUSCLE PAIN
As with all muscular pains, pain in the trapezius muscles can best be relieved by endorphin
When?
stimulation. However, TENS stimulation may be preferable for the first sessions if there is acute
pain in an area of inflammation.
Why?
How?
Pulse width
Electrodes
Intensity
+TENS Option
For the relief of pain.
Using the Gate control principle. This involves causing high levels of sensitivity impulses in order to
limit the input of pain impulses when they return to the posterior horn of the spinal cord.
The pulse width varies continuously with this programme. This avoids habituation by using a
system of stimulation that is perceived as more pleasant by some patients.
The electrodes must be placed on the painful area, preferably on the points of sensitivity.
The intensity must be increased gradually until the patient feels a tingling sensation that is
pronounced without being painful.
No.
SHOULDER PAIN
When?
Why?
How?
Pulse width
Electrodes
Intensity
+TENS Option
To relieve shoulder pain following a mechanical conflict, an inflammatory disorder, shoulder
surgery, or inflammatory tendinopathy.
For the relief of pain.
Using the Gate control principle. This involves causing high levels of sensitivity impulses in order to
limit the input of pain impulses when they return to the posterior horn of the spinal cord.
The pulse width varies continuously with this programme. This avoids habituation by using a
system of stimulation that is perceived as more pleasant by some patients.
The electrodes must be positioned where the pain is located. Four large electrodes surrounding
the joint produce a significant analgesic effect on all shoulder pain.
The intensity must be increased gradually until the patient feels a tingling sensation that is
pronounced without being painful.
No.
89
FRACTURE PAIN
In addition to other analgesic treatments during the first few days after a simple immobilisation or
When?
osteosynthetic surgery on a fracture. Extended use for rib fractures where strict immobilisation is
not possible, resulting in severe pain over several weeks.
Why?
How?
Pulse width
For the relief of pain.
Using the Gate control principle. This involves causing high levels of sensitivity impulses in order to
limit the input of pain impulses when they return to the posterior horn of the spinal cord.
The pulse width for the programme is 170 μs.
Depending on the means of restraint and/or the size of the dressing used, access to the painful
Electrodes
area may be awkward. It is important to surround the painful area as much as possible. Another
possible strategy is to directly stimulate the large nerve trunks superior to the point of pain.
The intensity must be increased gradually until the patient feels a tingling sensation that is
Intensity
pronounced without being painful. If the nerve trunks are stimulated, the stimulation should cause
the tingling to radiate into the painful area.
+TENS Option
No.
90
WIRELESS PROFESSIONAL
EN
CERVICAL PAIN
When?
Why?
Neck pain most often results from chronic contractures of the levator scapulae muscle and/or the
upper trapezius and is due, for example, to non-ergonomic work posture.
For pain relief and relaxation of muscle contractures.
Endorphin stimulation aids pain relief by increasing production of endogenous opioids . The
How?
associated vascular effect results in effective drainage of acidic metabolites and enables the
elimination of muscular acidosis.
Endorphin stimulation first targets the sensitive Aδ nerve fibres, which are best stimulated with a
Pulse width
larger pulse of 200µs. However the vascular effect is secondary to the co-activation of the motor
units, which have a slightly higher chronaxy that is measured at the start of the session using the
mi-SCAN function activated by default.
Electrodes
Electrodes positioned according to the specific indication.
An essential factor in the effectiveness of electrotherapy is the ability to cause visible muscle
Intensity
twitches. The mi-RANGE function (activated by default) can be used to determine the minimum
level of energy required to produce an appropriate muscle response.
Yes.
- A minimum of 1 channel with muscular work imposed by the Cervical pain programme.
- A maximum of 3 channels with the TENS programme.
• Electrodes positioned on the painful area.
• Sufficient stimulation energy to produce a clear tingling sensation.
+TENS Option
Once the +TENS combination has been activated, the message “TENS” appears on the screen with
respect to the channel or channels where the treatment is active. The mi functions – apart from
mi-SCAN and mi-RANGE - are also no longer accessible.
Take care to properly observe the correct order for switching on the modules, the order of
switching on that corresponds to the numbering of the channels.
91
THORACIC BACK PAIN
Thoracic back pain is most commonly a result of chronic contractures of the paravertebral back
When?
muscles (erector spinae) and is, for example, due to spinal osteoarthritis or postures where the
spinal muscles remain tense for long periods of time.
Why?
For pain relief and relaxation of muscle contractures.
Endorphin stimulation aids pain relief by increasing production of endogenous opioids. The
How?
associated vascular effect results in effective drainage of acidic metabolites and enables the
elimination of muscular acidosis.
Endorphin stimulation first targets the sensitive Aδ nerve fibres, which are best stimulated with a
Pulse width
larger pulse of 200µs. However the vascular effect is secondary to the co-activation of the motor
units, which have a slightly higher chronaxy that is measured at the start of the session using the
mi-SCAN function activated by default.
Electrodes
Electrodes positioned according to the specific indication.
An essential factor in the therapeutic efficacy is to cause visible muscle twitching, which may, in
Intensity
certain cases, require higher stimulation energies to be used. The mi-RANGE function (activated
by default) can be used to determine the minimum level of energy required to produce an
appropriate muscle response.
Yes.
- A minimum of 1 channel with muscular work imposed by the Thoracic back pain programme.
- A maximum of 3 channels with the TENS programme.
• Electrodes positioned on the painful area.
• Sufficient stimulation energy to produce a clear tingling sensation.
+TENS Option
Once the +TENS combination has been activated, the message “TENS” appears on the screen with
respect to the channel or channels where the treatment is active. In addition the mi functions –
apart from mi-SCAN and mi-RANGE - are no longer accessible.
Take care to properly observe the correct order for switching on the modules, the order of
switching on that corresponds to the numbering of the channels.
92
WIRELESS PROFESSIONAL
EN
LOW BACK PAIN
Low back pain most frequently results from chronic contractures of the paravertebral lumber
When?
muscles. It may be caused by a mechanical conflict, vertebral osteoarthritis, disc space narrowing,
etc.
Why?
For pain relief and relaxation of muscle contractures.
Endorphin stimulation aids pain relief by increasing production of endogenous opioids. The
How?
associated vascular effect results in effective drainage of acidic metabolites and enables the
elimination of muscular acidosis. TENS Gate control, applied using the third channel, improves
comfort during endorphin stimulation.
Endorphinic stimulation is primarily aimed at the sensitive Aδ nerve fibres which are best
stimulated with pulse width of 200µs. However the vascular effect is secondary to the co-
Pulse width
activation of the motor units which have a slightly higher chronaxy and which is measured at
the start of the session using the mi-SCAN function that is activated by default. Channels 3 and 4
provide Gate control stimulation and use a larger pulse adapted to the chronaxy of the Aβ fibres.
Electrodes
Electrodes positioned according to the specific indication. Combining 2 stimulation currents
(Endorphin and TENS Gate control) requires care to switch on the modules in the correct order.
The intensity must first be set on channels 3 and 4, which deliver the TENS programme according
to the usual TENS rules (tingling). It will be gradually increased on channels 1 or 2 until visible
Intensity
or palpable muscle twitches are produced. The mi-RANGE function (activated by default) can
be used to determine the minimum level of energy required to produce an appropriate muscle
response.
Yes, forced.
- A minimum of 2 channels with muscular work imposed by the Low back pain programme.
- 2 channels with the TENS programme.
• Electrodes positioned on the painful area.
• Sufficient stimulation energy to produce a clear tingling sensation.
+TENS Option
Once the +TENS combination has been activated, the message “TENS” appears on the screen with
respect to the channel or channels where the treatment is active. In addition the mi functions –
apart from mi-SCAN and mi-RANGE - are no longer accessible.
Take care to properly observe the correct order for switching on the modules, the order of
switching on that corresponds to the numbering of the channels.
93
LUMBOSCIATICA
Patients with lumbosciatica have lumbar pain which is most commonly caused by chronic
When?
contractures of the paravertebral lumbar muscles. In addition, involvement of the spinal nerve root
leads to irradiation of pain over a shorter or longer distance along the sciatic nerve and in some
cases, along one or the other of its branches (common peroneal or tibial).
Why?
How?
For pain relief and relaxation of muscle contractures in the lumbar area and to relieve neurogenic
sciatic pain.
The release of endorphins and the elimination of acidic toxins allow lumbar pain to be treated
effectively. The TENS Gate control effect works more specifically on sciatic nerve neuralgia.
Endorphinic stimulation is primarily aimed at the sensitive Aδ nerve fibres which are best
stimulated with pulse width of 200µs. However the vascular effect is secondary to the co-
Pulse width
activation of the motor units, which have a slightly higher chronaxy that is measured at the start
of the session using the mi-SCAN function activated by default. Channels 2, 3 and 4 provide Gate
control stimulation and use a larger pulse adapted to the chronaxy of the Aβ fibres.
Electrodes
Electrodes positioned according to the specific indication. Combining 2 stimulation currents
(Endorphin and TENS Gate control) requires care to switch on the modules in the correct order.
The intensity must first be set on channels 2, 3 and 4, which deliver the TENS programme
according to the usual TENS rules (tingling). It will be gradually increased on channel 1 until visible
Intensity
or palpable muscle twitches are produced. The mi-RANGE function (activated by default) can
be used to determine the minimum level of energy required to produce an appropriate muscle
response.
Yes, forced.
- A minimum of 1 channel with muscular work imposed by the Lumbosciatica programme.
- 3 channels with the TENS programme.
• Electrodes positioned on the painful area.
• Sufficient stimulation energy to produce a clear tingling sensation.
+TENS Option
Once the +TENS combination has been activated, the message “TENS” appears on the screen with
respect to the channel or channels where the treatment is active. The mi functions – apart from
mi-SCAN and mi-RANGE – are also no longer accessible.
Take care to properly observe the correct order for switching on the modules, the order of
switching on that corresponds to the numbering of the channels.
94
WIRELESS PROFESSIONAL
EN
LUMBAGO
This type of treatment is indicated to relieve pain following acute muscle contractures in the low
When?
back region. It will also reduce tension in the contracted muscles to facilitate manual handling
techniques.
Why?
How?
To reduce muscular tension and to provide a relaxing effect.
Highly individualised muscular twitching that is induced by a very low frequency (1 Hz) has a
relaxing effect.
To make it as comfortable as possible for the patient, use pulse widths equivalent to the
Pulse width
chronaxies of the motor nerves of the muscles in the lumbar region. The mi-SCAN function
(activated by default) can be used to determine the pulse widths suitable for the patient's muscles.
A small electrode, preferably connected to the positive pole of the module (pod with an
Electrodes
illuminated button) is placed on the most painful area of the paravertebral muscles which can
be detected by palpation. The other electrode is placed on the same muscles 2 or 3 finger widths
away from the first one.
An essential factor in the therapeutic efficacy is to cause visible muscle twitching, which may, in
Intensity
certain cases, require higher stimulation energies to be used. The mi-RANGE function (activated
by default) can be used to determine the minimum level of energy required to produce an
appropriate muscle response.
Yes.
- A minimum of 1 channel with muscular work imposed by the Lumbago programme.
- A maximum of 3 channels with the TENS programme.
• Electrodes positioned on the painful area.
• Sufficient stimulation energy to produce a clear tingling sensation.
+TENS Option
Once the +TENS combination has been activated, the message “TENS” appears on the screen with
respect to the channel or channels where the treatment is active. The mi functions – apart from
mi-SCAN and mi-RANGE – are also no longer accessible.
Take care to properly observe the correct order for switching on the modules, the order of
switching on that corresponds to the numbering of the channels.
95
EPICONDYLITIS
Epicondylitis is manifested by acute pain located at the point of insertion of the extensor muscles
for the wrist and fingers onto the lateral epicondyle. The Epicondylitis programme is used during
When?
the acute and inflammatory phase of the complaint. It can also be used for localised pain at the
medial epicondyle which results from functional overwork of the flexor muscles (epicondylitis or
medial epicondylitis)
Why?
To relieve pain during the acute and inflammatory phase of the complaint.
Using the Gate control principle. This involves causing high levels of tactile sensitivity impulses in
How?
order to limit the input of pain impulses when they return to the posterior horn of the spinal cord.
For this programme, the frequency is modulated (50-150 Hz) to avoid habituation.
Pulse width
Electrodes
This programme uses very short duration impulses (50 µs) suitable for the higher level of
excitability of the sensitive Aβ fibres.
Due to the small extent of the painful area, 2 small electrodes are usually sufficient to cover the
whole of the desired area.
The intensity must be increased gradually until the patient feels a tingling sensation that is
Intensity
pronounced without being painful. The mi-TENS function prevents any kind of muscle contraction.
If the sensor detects a muscle response, the stimulator automatically reduces the stimulation
energy in order to stop the muscle response.
+TENS Option
No.
96
WIRELESS PROFESSIONAL
EN
TORTICOLLIS
This type of treatment is indicated to relieve pain following acute muscle contractures in the neck
When?
region. It will also reduce tension in the contracted muscles to facilitate manual
handling techniques.
Why?
How?
To reduce muscular tension and to provide a relaxing effect.
Highly individualised muscular twitching that is induced by a very low frequency (1 Hz) has a
relaxing effect.
To make it as comfortable as possible for the patient, use pulse widths equivalent to the
Pulse width
chronaxies of the motor nerves of the muscles in the neck region. The mi-SCAN function
(activated by default) can be used to determine the pulse widths suitable for the patient's muscles.
A small electrode, preferably connected to the positive pole of the module (pod with an
Electrodes
illuminated button) is placed on the most painful area which can be detected by palpation. A
second electrode is placed on the paravertebral neck muscles.
An essential factor in the therapeutic efficacy is to cause visible muscle twitching, which may, in
Intensity
certain cases, require higher stimulation energies to be used. The mi-RANGE function (activated
by default) can be used to determine the minimum level of energy required to produce an
appropriate muscle response.
Yes.
- A minimum of 1 channel with muscular work imposed by the Torticollis programme.
- A maximum of 3 channels with the TENS programme.
• Electrodes positioned on the painful area.
• Sufficient stimulation energy to produce a clear tingling sensation.
+TENS Option
Once the +TENS combination has been activated, the message “TENS” appears on the screen with
respect to the channel or channels where the treatment is active. The mi functions – apart from
mi-SCAN and mi-RANGE – are also no longer accessible.
Take care to properly observe the correct order for switching on the modules, the order of
switching on that corresponds to the numbering of the channels.
97
ARTHRALGIA
When?
Why?
Various factors such as obesity, age, trauma, poor posture, etc. are detrimental to the joints.
These detrimental factors may cause the joints to deteriorate and to become inflamed and painful.
To relieve acute and chronic joint pain.
The principle is to cause a significant influx of tactile sensitivity in order to restrict the entry of
How?
pain impulses upon their return to the posterior horn of the spinal cord. For this programme, the
frequency is modulated (50-150 Hz) to avoid habituation.
Pulse width
Electrodes
This programme uses very short duration impulses (50 µs) suitable for the higher level of
excitability of the sensitive Aβ fibres.
The electrodes are usually placed in such a way as to cover or surround the painful area.
The intensity must be increased gradually until the patient feels a tingling sensation that is
Intensity
pronounced without being painful. The mi-TENS function prevents any kind of muscle contraction.
If the sensor detects a muscle response, the stimulator automatically reduces the stimulation
energy in order to stop the muscle response.
+TENS Option
No.
98
WIRELESS PROFESSIONAL
EN
N eurological rehabilitation
HEMIPLEGIC FOOT
One of the problems faced by hemiplegics is the greater or lesser degree of difficulty in raising the
toe of the foot. Consequently, this produces steppage during the swing phase of the gait.
This programme is not recommended if:
When?
a) stimulation of the levator muscles in the foot causes a spasm in the muscles of the lower limb
due to reflex.
b) the spasticity of the triceps surae is high. In such cases use a preparation programme which
inhibits the tone.
Why?
How?
To prevent foot drop during the swing phase of the gait.
By manually triggering an electrically induced tetanic contraction in the levator muscles of the foot
that is synchronised with the gait phase where the foot is lifted off the ground.
To make it as comfortable as possible for the patient, use pulse widths equivalent to the
Pulse width
chronaxies of the motor nerves for the levator muscles of the foot (tibialis anterior). The mi-SCAN
function (activated by default) can be used to determine the pulse widths suitable for the
patient's muscles.
Electrodes
Intensity
+TENS Option
Electrodes positioned on the levator muscles of the foot corresponding to the specific indication.
In this case, use an intensity that is sufficient to provide a degree of contraction that can cause
dorsiflexion of the ankle during the swing phase of the gait.
No.
99
SPASTICITY
Spastic hypertonia develops in the different types of lesions of the central nervous system
When?
pathways. Since it is no longer under the control of the higher nervous centres, the myotatic reflex
becomes hyperactive and hypertension develops predominantly in the anti-gravity muscles. Over
time, spasticity may lead to muscle contractures and a decreased range of movement.
Why?
To reduce spasticity by inhibiting the motor neurons of the spastic muscle through reciprocal
inhibition reflex.
Stimulating the antagonistic muscle to the spastic muscle by reciprocal inhibitory reflex. This
How?
programme has a very gradual rate of tensioning and does not use low frequencies in order to
avoid triggering the myotatic reflex (monosynaptic stretch reflex) of the spastic muscle.
To make it as comfortable as possible for the patient, use pulse widths equivalent to the
Pulse width
chronaxies of the motor nerves of the muscles being stimulated. The mi-SCAN function (activated
by default) can be used to determine the pulse widths suitable for the patient's muscles.
Electrodes
Place the electrodes over the muscle that is antagonistic to the spastic muscle in accordance with
the instructions.
Use the necessary energy to produce a contraction that is capable of causing movement across
Intensity
the whole of its range. Care must always be taken to ensure that the stimulation does not spread
as far as the spastic muscle.
Yes.
- A minimum of 1 channel with muscular work imposed by the Spasticity programme.
- A maximum of 3 channels with the TENS programme.
• Electrodes positioned on the painful area.
• Sufficient stimulation energy to produce a clear tingling sensation.
+TENS Option
Once the +TENS combination has been activated, the message “TENS” appears on the screen with
respect to the channel or channels where the treatment is active. The mi functions – apart from
the mi-SCAN – are also no longer accessible.
Take care to properly observe the correct order for switching on the modules, the order of
switching on that corresponds to the numbering of the channels.
100
WIRELESS PROFESSIONAL
EN
HEMIPLEGIC SHOULDER
The shortage of suspensory muscles in the humeral head combined with spasticity of the
When?
pectoralis major can often be a cause of a lower subluxation of the shoulder in hemiplegic
patients. This is always painful and often develops into a complex regional pain syndrome.
Why?
To reduce shoulder pain and to treat or prevent subluxations of the shoulder.
Stimulating the deltoid and the supraspinatus facilitates a reduction of spasticity in the pectoralis
How?
major by reciprocal inhibition reflex. This programme has a very gradual rate of tensioning and
does not use low frequencies in order to avoid myotatic reflex stretching (monosynaptic stretch
reflex) of the spastic muscle.
To make it as comfortable as possible for the patient, use pulse widths equivalent to the
Pulse width
chronaxies of the motor nerves of the muscles being stimulated. The mi-SCAN function (activated
by default) can be used to determine the pulse widths suitable for the patient's muscles.
Electrodes
Electrodes positioned according to the specific indication.
Use the necessary energy to effect strong contractions of the deltoid and the supraspinatus to
Intensity
elevate the shoulder stump whilst ensuring that this electrically induced activation does not spread
to the adductor and depressor muscles of the shoulder.
Yes, forced.
- 2 channels with muscular work imposed by the Hemiplegic shoulder programme.
- 2 channels with the TENS programme.
• Electrodes positioned on the painful area.
• Sufficient stimulation energy to produce a clear tingling sensation.
+TENS Option
Once the +TENS combination has been activated, the message “TENS” appears on the screen with
respect to the channel or channels where the treatment is active. The mi functions – apart from
the mi-SCAN – are also no longer accessible.
Take care to properly observe the correct order for switching on the modules, the order of
switching on that corresponds to the numbering of the channels.
101
SLOW START NEURO REHABILITATION
Electrostimulation is an excellent complement to traditional kinesiotherapy for many central
When?
neurological diseases such as hemiplegia. Treatment must be used in conjunction with passive
mobilisation but should also preferably be combined with active movement as soon as the
patient's recovery permits.
Why?
How?
To help facilitate motor control and motor relearning.
The programme has a very gradual rate of tensioning followed by a long period of rest.
Mobilisation must be synchronised with the contraction induced by the stimulation.
To make it as comfortable as possible for the patient, use pulse widths equivalent to the
Pulse width
chronaxies of the motor nerves of the muscles being stimulated. The mi-SCAN function (activated
by default) can be used to determine the pulse widths suitable for the patient's muscles.
Electrodes
Electrodes positioned depending on the muscle to be stimulated, in accordance with the
instructions.
The maximum tolerable stimulation energy, which is one of the key factors determining the
Intensity
effectiveness of the treatment. The higher the stimulation energy, the higher the number of
muscle fibres (motor units) being used. Progressively increase the level of energy during the course
of a treatment session.
Yes.
- A minimum of 1 channel with muscular work imposed by the Neuro rehabilitation programme.
- A maximum of 3 channels with the TENS programme.
• Electrodes positioned on the painful area.
• Sufficient stimulation energy to produce a clear tingling sensation.
+TENS Option
Once the +TENS combination has been activated, the message “TENS” appears on the screen with
respect to the channel or channels where the treatment is active. The mi functions – apart from
the mi-SCAN – are also no longer accessible.
Take care to properly observe the correct order for switching on the modules, the order of
switching on that corresponds to the numbering of the channels.
102
WIRELESS PROFESSIONAL
EN
A esthetic
TONING
Use initially to tone and prepare the muscles prior to more intensive firming work. The muscle
Indication
stress produced is of a low intensity, making it particularly suitable for less active people learning
the technique.
Effects
Toning the muscles.
To make it as comfortable as possible for the patient, use pulse widths equivalent to the
Pulse width
chronaxies of the motor nerves of the muscles being stimulated. The mi-SCAN function (activated
by default) can be used to determine the pulse widths suitable for the patient's muscles.
Electrodes
Electrodes positioned depending on the muscle to be stimulated, in accordance with
the instructions.
The maximum tolerable stimulation energy, which is one of the key factors determining the
Intensity
effectiveness of the treatment. The higher the stimulation energy, the higher the number of
muscle fibres (motor units) being used.
+TENS Option
No.
FIRMING
Indication
Effects
For use as a primary treatment for muscle toning. The firming programmes produce moderately
intense exercise and aim to increase the tension in the muscle fibres.
To regain muscle firmness and restore the support function of the muscles.
To make it as comfortable as possible for the patient, use pulse widths equivalent to the
Pulse width
chronaxies of the motor nerves of the muscles being stimulated. The mi-SCAN function (activated
by default) can be used to determine the pulse widths suitable for the
patient's muscles.
Electrodes
Electrodes positioned depending on the muscle to be stimulated, in accordance with
the instructions.
The maximum tolerable stimulation energy, which is one of the key factors determining the
Intensity
effectiveness of the treatment. The higher the stimulation energy, the higher the number of
muscle fibres (motor units) being used.
+TENS Option
No.
103
SHAPING
Indication
To be used when the firming phase is complete.
Effects
To define and sculpt the body when the muscles are already firm.
To make it as comfortable as possible for the patient, use pulse widths equivalent to the
Pulse width
chronaxies of the motor nerves of the muscles being stimulated. The mi-SCAN function (activated
by default) can be used to determine the pulse widths suitable for the patient's muscles.
Electrodes
Electrodes positioned depending on the muscle to be stimulated, in accordance with
the instructions.
The maximum tolerable stimulation energy, which is one of the key factors determining the
Intensity
effectiveness of the treatment. The higher the stimulation energy, the higher the number of
muscle fibres (motor units) being used.
+TENS Option
No.
ELASTICITY
Indication
To be used in addition to the firming and shaping programmes.
Effects
To improve circulation and elasticity of the skin.
To make it as comfortable as possible for the patient, use pulse widths equivalent to the
Pulse width
chronaxies of the motor nerves of the muscles being stimulated. The mi-SCAN function (activated
by default) can be used to determine the pulse widths suitable for the patient's muscles.
Electrodes
Electrodes positioned depending on the muscle to be stimulated, in accordance with
the instructions.
An essential factor in the effectiveness of electrotherapy is the ability to cause visible muscle
Intensity
twitches. The mi-RANGE function (activated by default) can be used to determine the minimum
level of energy required to produce an appropriate muscle response.
+TENS Option
No.
104
WIRELESS PROFESSIONAL
EN
CALORILYSIS
Indication
To be used in conjunction with a low calorie diet to increase the calorie deficit.
Effects
To increase calorie expenditure.
To make it as comfortable as possible for the patient, use pulse widths equivalent to the
Pulse width
chronaxies of the motor nerves of the muscles being stimulated. The mi-SCAN function (activated
by default) can be used to determine the pulse widths suitable for the patient's muscles.
Electrodes
Electrodes positioned depending on the muscle to be stimulated, in accordance with
the instructions.
The maximum tolerable stimulation energy, which is one of the key factors determining the
Intensity
effectiveness of the treatment. The higher the stimulation energy, the higher the number of
muscle fibres (motor units) being used.
+TENS Option
No.
ADIPOSTRESS
Indication
To be used as an adjuvant to other anti-cellulite treatments.
Effects
To create electric stress and vasodilatation in fat cell masses and areas of cellulite.
To make it as comfortable as possible for the patient, use pulse widths equivalent to the
Pulse width
chronaxies of the motor nerves of the muscles being stimulated. The mi-SCAN function (activated
by default) can be used to determine the pulse widths suitable for the
patient's muscles.
Electrodes
Intensity
+TENS Option
Electrodes positioned to cover areas with cellulite.
The maximum tolerable stimulation energy, which is one of the key factors determining the
effectiveness of the treatment.
No.
105
CO N DITION IN G I I
POTENTIATION
Indication
Effects
For optimal muscle preparation immediately before a competition. The session should be carried
out 10 minutes prior to the start.
To increase the speed of contraction and increase power. Reduces nervous control to attain or
maintain a specified level of exertion.
To make it as comfortable as possible for the patient, use pulse widths equivalent to the
Pulse width
chronaxies of the motor nerves of the muscles being stimulated. The mi-SCAN function (activated
by default) can be used to determine the pulse widths suitable for the patient's muscles.
Electrodes
Electrodes positioned depending on the muscle to be stimulated, in accordance with
the instructions.
The maximum tolerable stimulation energy, which is one of the key factors determining the
Intensity
effectiveness of the treatment. The higher the stimulation energy, the higher the number of
muscle fibres (motor units) being used.
+TENS Option
No.
ENDURANCE
Indication
Effects
For athletes who wish to improve their performance during long sporting trials/disciplines.
To improve the oxidative capacity of the stimulated muscles and to aid in developing the athlete's
aerobic performance.
To make it as comfortable as possible for the patient, use pulse widths equivalent to the
Pulse width
chronaxies of the motor nerves of the muscles being stimulated. The mi-SCAN function (activated
by default) can be used to determine the pulse widths suitable for the
patient's muscles.
Electrodes
Electrodes positioned depending on the muscle to be stimulated, in accordance with
the instructions.
The maximum tolerable stimulation energy, which is one of the key factors determining the
Intensity
effectiveness of the treatment. The higher the stimulation energy, the higher the number of
muscle fibres (motor units) being used.
+TENS Option
No.
106
WIRELESS PROFESSIONAL
EN
EXPLOSIVE STRENGTH
Indication
Effects
For athletes who practise a discipline where explosive strength is a significant performance factor.
To increase the maximum capacity for instantaneous power.
To increase the speed at which the maximum power is attained and to improve the effectiveness
of explosive actions such as jumping, sprinting etc.
To make it as comfortable as possible for the patient, use pulse widths equivalent to the
Pulse width
chronaxies of the motor nerves of the muscles being stimulated. The mi-SCAN function (activated
by default) can be used to determine the pulse widths suitable for the patient's muscles.
Electrodes
Electrodes positioned depending on the muscle to be stimulated, in accordance with
the instructions.
The maximum tolerable stimulation energy, which is one of the key factors determining the
Intensity
effectiveness of the treatment. The higher the stimulation energy, the higher the number of
muscle fibres (motor units) being used.
+TENS Option
No.
PLYOMETRY
Indication
Effects
To develop muscular explosive power by imposing a stress similar to that induced by voluntary
plyometry exercises while reducing stress on joints and tendons.
Increase the speed of contraction and the capacity to perform actions at maximum strength
(jump, bound, shoot, etc.).
To make it as comfortable as possible for the patient, use pulse widths equivalent to the
Pulse width
chronaxies of the motor nerves of the muscles being stimulated. The mi-SCAN function (activated
by default) can be used to determine the pulse widths suitable for the patient's muscles.
Electrodes
Electrodes positioned depending on the muscle to be stimulated, in accordance with
the instructions.
The maximum tolerable stimulation energy, which is one of the key factors determining the
Intensity
effectiveness of the treatment. The higher the stimulation energy, the higher the number of
muscle fibres (motor units) being used.
+TENS Option
No.
107
HYPERTROPHY
Indication
Effects
For body-building enthusiasts and athletes wishing to increase their muscle mass. Possibility of
combining this programme with voluntary training.
Increase the volume of stimulated muscles and improve muscular resistance.
To make it as comfortable as possible for the patient, use pulse widths equivalent to the
Pulse width
chronaxies of the motor nerves of the muscles being stimulated. The mi-SCAN function (activated
by default) can be used to determine the pulse widths suitable for the patient's muscles.
Electrodes
Electrodes positioned depending on the muscle to be stimulated, in accordance with
the instructions.
The maximum tolerable stimulation energy, which is one of the key factors determining the
Intensity
effectiveness of the treatment. The higher the stimulation energy, the higher the number of
muscle fibres (motor units) being used.
+TENS Option
No.
MUSCLE BUILDING
Indication
Effects
For those who wish to improve overall muscle quality in balance with a discrete effect on
increasing muscular volume.
To improve muscular trophicity, and increase the tone and volume of the muscles in a
balanced way.
To make it as comfortable as possible for the patient, use pulse widths equivalent to the
Pulse width
chronaxies of the motor nerves of the muscles being stimulated. The mi-SCAN function (activated
by default) can be used to determine the pulse widths suitable for the patient's muscles.
Electrodes
Electrodes positioned depending on the muscle to be stimulated, in accordance with
the instructions.
The maximum tolerable stimulation energy, which is one of the key factors determining the
Intensity
effectiveness of the treatment. The higher the stimulation energy, the higher the number of
muscle fibres (motor units) being used.
+TENS Option
No.
108
WIRELESS PROFESSIONAL
EN
LOW BACK REINFORCEMENT
Indication
The low back muscles play an important role in protecting the lumbar region. Some sporting
activities, such as rowing, require specific work from the low back muscles.
Improve the active stability and contraction qualities of the lumbar region. This programme
Effects
enables these muscles to be worked in an intense and isolated manner in order to maintain and
improve the strength of the low back muscles.
To make it as comfortable as possible for the patient, use pulse widths equivalent to the
Pulse width
chronaxies of the motor nerves of the muscles in the lumbar region. The mi-SCAN function
(activated by default) can be used to determine the pulse widths suitable for the patient's muscles.
Electrodes
Place the electrodes on the paravertebral muscles of the low back area.
The maximum tolerable stimulation energy, which is one of the key factors determining the
Intensity
effectiveness of the treatment. The higher the stimulation energy, the higher the number of
muscle fibres (motor units) being used.
+TENS Option
No.
CORE STABILISATION
The abdominal muscles and the muscles in the low back area are very important for all sporting
Indication
activities. Good neuromuscular control and stabilisation of the trunk are essential for the optimal
positioning of the lumbar spine and to ensure the effective transmission of strength in any
complex movement.
Effects
Increase postural control of the trunk muscles. May be combined with or supplement active
dynamic exercises.
To make it as comfortable as possible for the patient, use pulse widths equivalent to the
Pulse width
chronaxies of the motor nerves of the muscles being stimulated. The mi-SCAN function (activated
by default) can be used to determine the pulse widths suitable for the patient's muscles.
Electrodes
Place the electrodes on the paravertebral muscles of the low back region and on the
abdominal muscles.
The maximum tolerable stimulation energy, which is one of the key factors determining the
Intensity
effectiveness of the treatment. The higher the stimulation energy, the higher the number of
muscle fibres (motor units) being used.
+TENS Option
No.
109
RECOVERY PLUS
Indication
To promote muscle recuperation following an exhausting exertion that caused cramps or is likely
to induce them when the activity is stopped.
To increase blood flow to drain away toxins that have accumulated in the muscles. To relieve and/
Effects
or prevent aching pains. To promote muscle relaxation. To accelerate restoration of the muscular
qualities following a workout or competition.
To make it as comfortable as possible for the patient, use pulse widths equivalent to the
Pulse width
chronaxies of the motor nerves of the muscles being stimulated. The mi-SCAN function (activated
by default) can be used to determine the pulse widths suitable for the patient's muscles.
Precision in positioning the electrodes is less significant than for programmes aiming to develop
Electrodes
muscle quality. The electrodes can be placed in an alternative way, reducing the number of
electrodes needed and stimulating more muscles during a session.
An essential factor in the effectiveness of electrotherapy is the ability to cause visible muscle
Intensity
twitches. The mi-RANGE function (activated by default) can be used to determine the minimum
level of energy required to produce an appropriate muscle response.
+TENS Option
No.
TONING MASSAGE
Indication
Effects
Specific massage programme that includes some short muscle contractions. This programme can
supplement traditional heating or even replace it if traditional heating is difficult to use.
Activates circulation and revives of the contractile properties of the muscles.
To make it as comfortable as possible for the patient, use pulse widths equivalent to the
Pulse width
chronaxies of the motor nerves of the muscles being stimulated. The mi-SCAN function (activated
by default) can be used to determine the pulse widths suitable for the patient's muscles.
Electrodes
Electrodes positioned depending on the muscle to be stimulated, in accordance with
the instructions.
Gradually increase the stimulation energy until there is clear visible muscle twitching. During the
Intensity
tetanic contraction phases, ensure that the energy stimulation is sufficient to impose significant
muscle contractions.
+TENS Option
No.
110
WIRELESS PROFESSIONAL
EN
RELAXING MASSAGE
Indication
Effects
To eliminate uncomfortable or painful sensations resulting from an exaggerated increase in
muscle tone.
To allow a decrease in muscle tension. To drain away the toxins responsible for the increase in
muscle tone. The programme produces a sense of well being and relaxation.
To make it as comfortable as possible for the patient, use pulse widths equivalent to the
Pulse width
chronaxies of the motor nerves of the muscles being stimulated. The mi-SCAN function (activated
by default) can be used to determine the pulse widths suitable for the patient's muscles.
Precision in positioning the electrodes is less significant than for programmes aiming to develop
Electrodes
muscle quality. The electrodes can be placed in an alternative way, reducing the number of
electrodes needed and stimulating more muscles during a session.
An essential factor in the effectiveness of electrotherapy is the ability to cause visible muscle
Intensity
twitches. The mi-RANGE function (activated by default) can be used to determine the minimum
level of energy required to produce an appropriate muscle response.
+TENS Option
No.
ANTI-STRESS MASSAGE
This programme can be used for relaxation and well-being after physical activity or a stressful
Indication
situation. It provides very effective muscle relaxation through comfortable stimulation of the
muscles, which aids circulation and helps the muscles relax.
Effects
Increases vascularisation of the tissues, reduces muscle tension.
To make it as comfortable as possible for the patient, use pulse widths equivalent to the
Pulse width
chronaxies of the motor nerves of the muscles being stimulated. The mi-SCAN function (activated
by default) can be used to determine the pulse widths suitable for the patient's muscles.
Precision in positioning the electrodes is less significant than for programmes aiming to develop
Electrodes
muscle quality. The electrodes can be placed in an alternative way, reducing the number of
electrodes needed and stimulating more muscles during a session.
An essential factor in the effectiveness of electrotherapy is the ability to cause visible muscle
Intensity
twitches. The mi-RANGE function (activated by default) can be used to determine the minimum
level of energy required to produce an appropriate muscle response.
+TENS Option
No.
111
7 . 4 S pecific indications
Disuse atrophy rehabilitation
(standard protocol)
113
Rehabilitation of the peroneus
muscles following an
ankle sprain
116
Rehabilitation of
low back muscles
119
Treatment of
patellofemoral syndrome
1. Lateral tracking
2. Post-traumatic condition
122
ACL ligamentoplasty
128
Rehabilitation of the gluteal
muscles following total hip
replacement
131
Rehabilitation of the shoulder
1. Rotator cuff tendinopathy
2. Shoulder instability
3. Adhesive capsulitis
133
Cardiac rehabilitation
142
Locating a motor point
144
Reflex sympathetic dystrophy
(or Complex regional pain
syndrome)
147
112
Endorphinic treatment of
Rachialgia and Radiculalgia
1. Endorphinic treatment of
neck pain
2. Endorphinic treatment of
thoracic back pain
3. Endorphinic treatment of
low back pain
4. Treatment of lumbosciatic
pain
152
Hemiplegia - Spasticity
1. Dorsiflexion of the
hemiplegic foot
2.Spasticity
3. The hemiplegic hand
4. The hemiplegic shoulder
164
Treatment of venous
insufficiency
1. Venous insufficiency
without oedema
2. Venous insufficiency
with oedema
176
Treatment of arterial
insufficiency in the lower limbs
1. Stage II arterial insufficiency
2. Stage III arterial insufficiency
181
WIRELESS PROFESSIONAL
EN
Di suse atrophy r e h a b i li ta t i on ( s ta n d a r d pr o t o c o l )
Example: disuse atrophy of the quadriceps
Traumas of the locomotive system can be extremely diverse (fractures, sprains, dislocations,
etc.) and have varied functional repercussions.
Despite immense progress in orthopaedic medicine, it is still common practice to have a period
of immobilisation of the area concerned, which can be total or partial. The result is always a
significant reduction, in the normal activity of the muscles in the traumatised region. The rapid
disuse atrophy which occurs (reduction in the muscle volume and the muscle tissue’s ability to
contract) can sometimes compromise the functional future of the patient.
The physiological mechanisms involved in the alteration of the different muscle fibres under
such circumstances are well-known, and therefore extremely specific treatments can be
proposed, which can produce optimum benefits on their own.
This standard protocol is recommended for the majority of cases of functional disuse atrophy.
However, this protocol can be adapted depending on the pathology, the treatment objectives
and the speed of the patient’s recovery.
METHOD
1 - Protocol:
• Disuse atrophy Level 1: Weeks 1 - 2
During the first two weeks of treatment, the following 3 objectives must be worked
towards and achieved:
- Eliminate muscle wastage.
- Familiarise the patient with the NMES technique so that the patient can work with high
levels of stimulation energy.
- Obtain the first signs of regain of trophicity (slight increase in volume, improvement in tone).
• Disuse atrophy Level 2: Weeks 3 - 6
The objective is the restoration of near-normal muscle volume.
• Reinforcement Level 1: Weeks 7 - 8
The objective is to develop the maximum strength the muscle or muscle group can produce.
113
2 - Treatment frequency:
One to two sessions every day (if two sessions are carried out every day, enough time must be
given to rest between the two sessions).
Minimum: three sessions per week.
3 - Electrode position:
During neurostimulation for motor stimulation purposes, the general rule is to position a small
electrode on the motor point of the muscle and the other electrode at one end of the
same muscle.
For optimum effectiveness, the positive pole of the module (pod with an illuminated button)
should preferably be positioned on the motor point.
The precise location of the motor point(s) is easy to ascertain by following the instructions for
the indication “Locating a motor point” in this manual. This step ensures that the electrodes will
be positioned to provide optimum comfort to the patient and optimum effectiveness of
the therapy.
4 - Patient position:
The stimulation of a muscle when it is at its maximum inner range is uncomfortable and quickly
becomes painful due to the sensation of cramp that results from this position. Consequently,
this position must be avoided and the patient should be placed in a position in which the
stimulated muscle is in a mid-range position. The end of the stimulated limb must be securely
tied down so that the electrically induced contraction does not cause any movement. The
stimulation will therefore be carried out using isometric contractions.
114
WIRELESS PROFESSIONAL
EN
5 - Stimulation energy:
In NMES, the stimulation energy is directly responsible for spatial recruitment: the higher the
stimulation energy, the higher the percentage of motor units recruited and the greater the
impact of the progress.
The general rule is to always try to increase the energy to the maximum level tolerated by the
patient. The therapist plays a fundamental role by encouraging and reassuring the patient, who
can then tolerate levels of energy that produce powerful contractions. The levels of energy
reached must increase throughout the session, and also from session to session, because the
patients quickly get used to the technique.
When the patient has difficulty in reaching satisfactory levels of stimulation energy, it can be
useful to ask the patient to add voluntary co-contractions, which improves mediocre spatial
recruitment and also makes the stimulation more comfortable. The levels of energy can then
be gradually increased over time.
For this, the mi-ACTION is a useful tool, because it requires the patient to contract his/her
muscle voluntarily to initiate and/or accompany the electrically induced contraction depending
on the given set-point.
115
Re habi li tati on of t h e pe r on e u s m u s cle s f ollow in g a n a nk l e s p r a in
The purpose of the peroneus muscles is to maintain the stability of the talocrural joint and
prevent the ankle from rotating inwards. Following a sprain, due to the functional disability,
reflex inhibition phenomena and immobilisation, these muscles can undergo partial disuse
atrophy, a loss of proprioceptive reflexes and a considerable loss of strength. Rehabilitation
following such an accident must therefore focus essentially on the peroneus muscles in order to
prevent recurrences.
To fulfil their function optimally, the peroneus muscles must effectively put up resistance to brief
and powerful stresses. They must therefore be capable of responding with a powerful, short
contraction at that very moment when the stress being applied to the foot risks making the
ankle tilt inwards. There are therefore two main aspects of the rehabilitation of these muscles:
1 - The proprioceptive reflex:
Allows the peroneus muscles to sense the lower limb position relative to neighbouring parts
and to contract at the right moment with an appropriate strength effort. This aspect of
rehabilitation consists of properly performing exercises on classic “balance boards”, such as
Freeman boards, a sufficient number of times (number of sessions).
2 - Muscle reinforcement:
Allows the peroneus muscles to contract with enough strength to oppose the stress applied to
the ankle joint. This aspect of rehabilitation consists of producing peroneus muscle contractions
using electro-stimulation and using programmes designed for developing explosive force. Only
this method is really capable of developing the strength of these muscles effectively, given the
impossibility of feasibly being able to carry out active methods with this level of load!
116
WIRELESS PROFESSIONAL
EN
METHOD
1 - Protocol:
Treatment at an early stage:
• Reinforcement Level 1: Weeks 1 - 2
• Reinforcement Level 2: Weeks 3 - 4
Treatment at a late stage:
• Disuse atrophy Level 2: Weeks 1 - 2
• Reinforcement Level 1: Weeks 3 - 4
• Reinforcement Level 2: Weeks 5 - 6
If the patient is experiencing associated pain symptoms, TENS stimulation can be performed in
addition on the other channels.
In this case, the specific practical rules for TENS (electrode placement, regulation of intensity)
should be followed for each channel used for this purpose.
2 - Treatment frequency:
Three sessions per week. After the proprioceptive session, or alternating one day on,
one day off.
3 - Electrode position:
A single channel is enough for the stimulation of the peroneus muscles. A small electrode is
placed under the head of the fibula, at the passage of the Common Peroneal nerve. The large
electrode is placed mid-way up the external lateral side of the leg.
For optimum effectiveness, the positive pole of the module (pod with an illuminated button)
should preferably be positioned on the motor point.
117
4 - Patient position:
First of all, the patient is seated on the rehabilitation table, barefoot and without touching
the floor.
In this position, the therapist gradually increases the stimulation energy until a motor response
is manifested by an eversion of the foot.
As soon as this response is obtained (most often after 2 or 3 contractions), the barefoot patient
is put into standing position. This position is particularly useful because it requires an associated
proprioceptive effort, which can be of increasing difficulty (two feet, one foot, balance
board, etc.)
5 - Stimulation energy:
In NMES, the stimulation energy is directly responsible for spatial recruitment: the higher the
stimulation energy, the higher the percentage of motor units recruited and the greater the
impact of the progress.
The general rule is to always try to increase the energy to the maximum level tolerated by the
patient. The therapist plays a fundamental role by encouraging and reassuring the patient, who
can then tolerate levels of energy that produce powerful contractions. The levels of energy
reached must increase throughout the session, and also from session to session, because the
patients quickly get used to the technique.
118
WIRELESS PROFESSIONAL
EN
R ehabi li tati on o f low b a ck mu s cle s
Muscular insufficiency of the muscles that provide stability of the lumbar region is often the
cause of common low back pain or identified as a contributing factor, which increases the risk
of recurrence.
The particular benefit of electrostimulation is three-fold:
• It enables treatment to be started at an early stage because, unlike voluntary exercises, the
stress applied to the stabilising muscles in the lumbar region through electrostimulation is
initially carried out in isometric mode, which considerably reduces the mechanical stresses
exerted on the vertebral and periarticular structures.
• It enables an appropriate work regime to be created to restore the quality of the postural
muscles, i.e. the muscles that are essentially made up of type I, high-endurance fibres.
• It promotes motor re-learning and postural control by combining synchronised, electrically
induced contractions of the abdominal and lumbar muscles with voluntary
proprioception exercises.
METHOD
1 - Protocol:
• Lumbar stabilisation Level 1: Weeks 1 - 2
• Lumbar stabilisation Level 2: Weeks 3 - 4
2 - Treatment frequency:
Three to five sessions a week for four weeks.
3 - Electrode position:
Two channels are needed for the stimulation of the abdominal muscles:
Four large electrodes are positioned on the abdomen, one above, one below and one either
side of the belly button.
For optimum effectiveness, the positive pole of the module (pod with an illuminated button)
should preferably be positioned on the upper electrode.
119
Two further channels are needed for the simultaneous stimulation of the lumbar muscles:
Two channels are used, one for the right side and the other for the left side. Two small
electrodes are placed on the muscle body at the level of the lowest lumbar vertebrae at one
finger’s breadth distance from the spinous processes on both sides. Two small electrodes are
placed 2 finger’s breadths above the body of the paravertebral muscles.
For optimum effectiveness, the positive poles of each module (pod with an illuminated button)
should preferably be positioned on the lower electrodes.
4 - Patient position:
For the first two weeks:
The patient is seated on a firm seat, with the forearms resting on armrests and a straight back,
without leaning against the back of the chair.
For the following two weeks:
The patient is seated on a balance ball, feet resting on the ground, pelvis width apart.
120
WIRELESS PROFESSIONAL
EN
5 - Associated exercises:
For the first two weeks:
On each contraction induced by the stimulation, the patient must:
-Breathe out slowly
-Pull in the stomach
-Elongate the body along its axis
The patient then returns to the starting position during the rest phase and slowly breathes in.
For the following two weeks:
The basis of the exercises stays the same: combine an electrically-induced contraction with
breathing out, pulling in the stomach and elongating the body.
Depending on the patient’s progress, the following can gradually be added to the exercises:
-Additional movement of an upper limb: lifting up an arm
-Additional movement of a lower limb: taking one foot off the floor
-Quick movements of two upper limbs: throwing and catching a ball
-etc.
6 - Stimulation energy:
In NMES, the stimulation energy is directly responsible for spatial recruitment: the higher the
stimulation energy, the higher the percentage of motor units recruited and the greater the
impact of the progress.
The general rule is to always try to increase the energy to the maximum level tolerated by the
patient. The therapist plays a fundamental role by encouraging and reassuring the patient, who
can then tolerate levels of energy that produce powerful contractions. The levels of energy
reached must increase throughout the session, and also from session to session, because the
patients quickly get used to the technique.
121
Tr eatment of pate llof e m or a l s yn d r om e
A distinction must be made between two types of patellofemoral syndrome:
1. With patellar mal tracking, which means the patella is not running centrally in the trochlear
groove, commonly being pulled laterally.
2. Without patellar mal tracking, i.e. with a centred patellofemoral syndrome, as in posttraumatic chondropathy.
The proposed protocols are based mostly on the studies carried out by Dr. Gobelet (University
Hospital of Lausanne, Switzerland, Physical Medicine Department) and by Dr. Drhezen (College
of Physiotherapy, Liège, Belgium).
1) Lateral tracking
An essential cause of the mal tracking, of the patella is determined by an imbalance between
the different heads of the quadriceps muscle. A particularly significant weakness of the vastus
medialis in comparison with the vastus lateralis creates a lateral displacement of the patella
with hyperpressure between the lateral condyle and the adjacent retropatella surface.
Specific reinforcement of the vastus medialis is the ideal way to treat this pathology. It can be
enhanced effectively with electrostimulation.
122
WIRELESS PROFESSIONAL
EN
METHOD
1 - Protocol:
• Patellofemoral syndrome Level 2: Weeks 1 - 2
• Patellofemoral syndrome Level 3: Weeks 3 - 4
If the patient is experiencing associated pain symptoms, TENS stimulation can be performed in
addition on the other channels.
In this case, the specific practical rules for TENS (electrode placement, regulation of intensity)
should be followed for each channel used for this purpose.
2 - Treatment frequency:
Three sessions per week.
3 - Electrode position:
Only one channel is used. Place a small electrode on the distal motor point of the vastus
medialis, which innervates the oblique fibres. A second electrode is placed at the upper end
of the vastus medialis at around mid-thigh level. For optimum effectiveness, the positive pole
of the module (pod with an illuminated button) should preferably be positioned on the lower
electrode corresponding to the distal motor point of the vastus medialis.
This placement of electrodes makes it possible to focus contraction of the vastus medialis,
which cannot be achieved during voluntary exercises.
123
4 - Patient position:
The focused contraction of the vastus medialis moves the patella upward and inward, thus
re-centring the kneecap and reducing the joint stresses in the lateral compartment of the knee.
This makes it possible to place the patient in a sitting position with the knee bent at 60 – 90° in
order to apply high stimulation energies to the vastus medialis. During stimulation, the patient’s
ankle will be tied firmly to the chair or the medical table on which he/she is seated. In case
the patient finds this position painful, the first sessions will be carried out with the knee in full
extension. After this, we will try to gradually put the knee in a flexed position.
5 - Stimulation energy:
In NMES, the stimulation energy is directly responsible for spatial recruitment: the higher the
stimulation energy, the higher the percentage of motor units recruited and the greater the
impact of the progress.
The general rule is to always try to increase the energy to the maximum level tolerated by the
patient. The therapist plays a fundamental role by encouraging and reassuring the patient, who
can then tolerate levels of energy that produce powerful contractions. The levels of energy
reached must increase throughout the session, and also from session to session, because the
patients quickly get used to the technique.
With this programme, the stimulation starts directly with a tetanic contraction, because the
warm-up phase has been eliminated so as not to produce muscle twitches that are likely to
cause unwanted microtraumas to the kneecap.
124
WIRELESS PROFESSIONAL
EN
2) Post-traumatic condition
Repeated traumas to the knee joint, like those caused by the practice of certain sports, may
entail cartilaginous lesions of the kneecap. These lesions can lead to pain of varying intensity
and the occurrence of reflex inhibition, which in turn can result in disuse atrophy of the entire
quadriceps. The resulting insufficiency of the quadriceps negatively affects the active stability of
the joint and increases pain.
This vicious circle can be interrupted through electrostimulation of the quadriceps using the
Patellofemoral syndrome programme, the parameters of which are specially adapted to avoid
any unwanted effects on the kneecap.
However, for irreversible cartilaginous lesions, it is always recommended that the benefits
obtained should be maintained through maintenance treatments.
The protocol detailed below is also suitable for the rehabilitation of patello femoral athroposies.
METHOD
1 - Protocol:
• Patellofemoral syndrome Level 1: Week 1
• Patellofemoral syndrome Level 2: Weeks 2 - 3
• Patellofemoral syndrome Level 3: Week 4 then maintenance
If the patient is experiencing associated pain symptoms, TENS stimulation can be performed in
addition on the fourth channel.
In this case, the specific practical rules for TENS (electrode placement, regulation of intensity)
should be followed for this channel.
2 - Treatment frequency:
Five sessions per week during the first four weeks, then one session per week to maintain the
results after week four.
125
3 - Electrode position:
In this programme, 3 stimulation channels are used for the quadriceps. This is because of the
need to work with the knee extended in order not to cause excessive pressure on the posterior
side of the patella.
Indeed, this position places the quadriceps in inner range, which is not generally favourable to
electrostimulation techniques, since, in this position, the patient very often feels the contraction
as being uncomfortable and even painful (cramp sensation). The use of high stimulation
energies that ensure significant spatial recruitment can be difficult to achieve in some patients.
The third stimulation channel overcomes this disadvantage by optimising spatial recruitment
and therefore the effectiveness of the treatment. Three small electrodes are placed respectively
on the motor points of the vastus medialis, the vastus lateralis and the rectus femoris. A large,
two-way electrode is placed at the top of the thigh and a further small electrode is positioned
just above.
For optimum effectiveness, the positive pole of the module (pod with an illuminated button)
should preferably be positioned on the motor point.
4 - Patient position:
For this indication, it is recommended to carry out the session with the patient’s knee extended.
126
WIRELESS PROFESSIONAL
EN
5 - Stimulation energy:
In NMES, the stimulation energy is directly responsible for spatial recruitment: the higher the
stimulation energy, the higher the percentage of motor units recruited and the greater the
impact of the progress.
The general rule is to always try to increase the energy to the maximum level tolerated by the
patient. The therapist plays a fundamental role by encouraging and reassuring the patient, who
can then tolerate levels of energy that produce powerful contractions. The levels of energy
reached must increase throughout the session, and also from session to session, because the
patients quickly get used to the technique.
With this programme, the stimulation starts directly with a tetanic contraction, because the
warm-up phase has been eliminated so as not to produce muscle twitches that are likely to
cause unwanted microtraumas to the kneecap.
127
ACL li gamentopla s ty
Ruptures of the Anterior Cruciate Ligament (ACL) of the knee are among the most common
accidents in sports trauma. Reconstructive surgery of the ACL has been subject to continuous
developments in recent decades, with considerable progress, in particular owing to the use of
arthroscopic techniques.
Associated with the improvement in the rehabilitation treatment of injured athletes, the return
time to athletic activity continues to decrease significantly, and today is practically half what it
was around ten years ago.
The return to athletic activity requires both satisfactory solidity of the tendon graft, which must
be capable of supporting significant mechanical stresses, and, more importantly, good active
joint stability.
This active joint stability requires muscles capable of opposing sometimes phenomenal stresses
in the shortest time periods possible, by activating the proprioceptive reflex.
One of the potential consequences of the operative procedure is significant disuse atrophy
of the quadriceps muscles, the treatment of which is one of the primary objectives of the
rehabilitation therapist.
However, during the first 3 - 4 months of quadriceps rehabilitation, there must be no open
kinetic chain exercises due to the anterior drawer component of the tibia, which can endanger
the tendon graft during the avascularisation phase.
The method described in this chapter is intended to describe an NMES protocol suitable for this
particular problem of ACL ligamentoplasty, avoiding any risk of a secondary lesion to tissue.
This safety is ensured by using specific ACL programmes that consist of appropriate sequential
stimulation of the quadriceps and hamstrings.
N.B.: This particular stimulation mode does not allow for work in mi-ACTION.
For ligamentoplasty using the patellar tendon as the graft, the NMES can be started promptly.
When using doubled semitendinosus and gracilis tendons for ligamentoplasty, NMES must not
be used before the standard healing period of these tendons.
128
WIRELESS PROFESSIONAL
EN
METHOD
1 - Protocol:
• ACL Weeks 1 - 16
During the first two weeks of treatment, the following 3 objectives must be worked towards
and achieved:
- Eliminate muscle wastage.
- Familiarise the patient with the NMES technique so that the patient can work with high
levels of stimulation energy.
- Obtain the first signs of regaining trophicity (slight increase in volume, improvement in
tone, etc.).
During the following weeks, the objective is the restoration of near-normal muscle volume.
When open kinetic chain exercises are permitted, which is normally at the end of the fourth
month after the operation, NMES of the quadriceps can be continued using the Reinforcement
programmes Level 1 then 2.
2 - Treatment frequency:
One to two sessions every day (if two sessions are carried out every day, enough time must be
given to rest between the two sessions).
Minimum: three sessions per week.
3 - Electrode position:
The stimulation sequence means that the order of channel numbers must be complied with, as
the stimulation of the hamstrings must start before that of the quadriceps. Channels 1 and 2 are
used to stimulate the hamstrings, and channels 3 and 4 are used to stimulate the quadriceps.
For this program, it is therefore particularly important to follow the order of channel numbers
below:
1. Start the 2 modules connected to the hamstrings
2. Start the 2 modules connected to quadriceps.
For each muscle group, it is recommended that the small electrodes be placed precisely on the
motor points, as shown in the illustration, or better yet, that the motor points be found using
the instructions for the indication “Locating a motor point” in this manual.
For optimum effectiveness, the positive pole of the module (pod with an illuminated button)
should preferably be positioned on the motor point.
129
4 - Patient position:
The very first sessions, the primary objective of which is to eliminate muscle wastage, can be
performed with the lower limb extended, with a small cushion placed under the popliteal fossa.
For the subsequent sessions, the patient will be placed in a sitting position with the knee bent
at a comfortable angle. After satisfactory recovery of joint mobility, the knee is ideally bent
between 60 and 90°.
5 - Stimulation energy:
As always in NMES, the objective of the rehabilitation therapist is to motivate the patient to
tolerate the highest possible stimulation energy level. With the ACL programmes, and taking
into account the particular sequential stimulation mode, it is not possible to adjust the energy
levels of channels 3 and 4 without having previously increased levels on channels 1 and 2. This is
an additional safety feature that prevents contraction of the quadriceps if it is not preceded by
contraction of the hamstrings.
As usual, a patient who tries to work with the maximum energies he/she is capable of
tolerating will reach higher energy levels for channels 3 and 4 (quadriceps) than for channels 1
and 2 (hamstrings).
130
WIRELESS PROFESSIONAL
EN
Rehab i li tati on of th e g lu t e a l mu s cle s f ollow ing t o t a l hip r e p l a c e m e n t
Orthopaedic surgery to the hip and, in particular, the fitting of a prosthesis, results in disuse
atrophy of the gluteus muscles with loss of strength in the active stability of the hip when
standing on one foot and walking.
In addition to active physiotherapy exercises, neuromuscular electrical stimulation of the
gluteus maximus and medius is a technique particularly indicated for the effective treatment of
weakness in these muscles.
It is recommended to start treatment as soon as possible after the operation. The very low
frequency sequences such as the warm-up, active rest between tetanic contractions and
final recovery phase at the end of the treatment sequences generate individualized muscle
twitches producing vibration in the prosthetic material. The three levels of the Hip prosthesis
programme correspond respectively to the programmes: Disuse atrophy, Level 1, Disuse
atrophy, Level 2 and Reinforcement, Level 1 from which the very low frequencies are removed.
The three levels of the Hip prosthesis programme therefore induce only tetanic contraction
phases separated by complete rest phases.
METHOD
1 - Protocol:
• Hip prosthesis Level 1: Week 1
• Hip prosthesis Level 2: Weeks 2 - 3
• Hip prosthesis Level 3: Week 4
If the patient is experiencing associated pain symptoms, TENS stimulation can be performed in
addition on the other channels.
In this case, the specific practical rules for TENS (electrode placement, regulation of intensity)
should be followed for each channel used for this purpose.
2 - Treatment frequency:
Once daily, 5 days per week, for 4 weeks.
131
3 - Electrode position:
Two channels are used, one for stimulation of the gluteus maximus and the other for the
gluteus medius. A small electrode is placed at the intersection of the orthogonal axes dividing
the buttock into four quadrants with the same area (motor point of the gluteus maximus).
A second small electrode is placed above and outside of the upper external quadrant of the
buttock on the gluteus medius at the point where it passes over the gluteus maximus.
For optimum effectiveness, the positive pole of the module (pod with an illuminated button)
should preferably be positioned on the motor point.
The other module pods are connected to the two outputs of one large electrode positioned
diagonally in the lower-lateral quadrant of the buttock, taking care to avoid placing this
electrode on a scarred/wounded area.
4 - Patient position:
If the patient’s condition allows, the patient is placed in a standing position, which requires him/
her to exert additional effort that is beneficial for proprioceptive control. If this is not possible, all
or part of the session can be conducted in a side lying or prone position.
5 - Stimulation energy:
In NMES, the stimulation energy is directly responsible for spatial recruitment: the higher the
stimulation energy, the higher the percentage of motor units recruited and the greater the
impact of the progress.
The general rule is to always try to increase the energy to the maximum level tolerated by the
patient. The therapist plays a fundamental role by encouraging and reassuring the patient, who
can then tolerate levels of energy that produce powerful contractions. The levels of energy
reached must increase throughout the session, and also from session to session, because the
patients quickly get used to the technique.
With this programme, the stimulation starts directly with a tetanic contraction, because the
warm-up phase has been eliminated so as not to produce muscle twitches that are likely to
cause unwanted vibrations on the prosthesis.
132
WIRELESS PROFESSIONAL
EN
Rehab i li tati on of t h e s h ou ld e r
The “specific properties” of the shoulder joint are complex and particularly demanding at a
functional level. The shoulder must be capable of providing significant mobility of the upper limb
whilst providing a stable base. The limited congruence of the joint surfaces (the humeral head
within the glenoid cavity), although partially compensated by the labrum, exposes the joint
to misalignment that the passive capsular/ligament elements cannot control. Neuromuscular
control must constantly compensate for the deficiencies in passive stability by maintaining
coordinated forces capable of opposing the unstable component resulting from intrinsic
forces (contraction of muscles generating translational forces: pectoralis major, biceps brachii,
coracobrachialis, triceps brachii (caput longum), or extrinsic forces (fall, contact, etc.).
Owing to the numerous advances in the fields of biomechanics, physiology and
physiopathology, the therapeutic approach to shoulder pathologies has evolved considerably in
recent years.
In this chapter, we will discuss three pathological conditions of the shoulder for which
neuromuscular electrostimulation is a preferred treatment among the established rehabilitation
techniques.
These three conditions are:
• 1 Rotator cuff tendinopathy
• 2 Shoulder instability
• 3 Adhesive capsulitis
The protocols proposed have been developed on the basis of the following publications:
Flatow EL, Soslowsky LJ, Ateshian GA,
Harryman DT, Sidles JA, Clark JM,
Matsen F, Lippit S, Iserin A
Pawluk RJ, Bigliani LU, Mow VC
McQuade KJ, Gibbs TD, Matsen FA
Mécanismes patho-anatomiques
Shoulder joint anatomy and the effect
Translation of the humeral head on
de l’instabilité gléno-humérale
of subluxations and size mismatch on
the glenoid with passive glenohumeral
[‘Pathoanatomical mechanisms of
patterns of glenohumeral contact.
motion
glenohumeral instability’]
Orthop Trans 15: 803; 1991
J Bone Joint Surg 72A: 1334; 1990
‘Expansion scientifique française’, Paris,
Gibb TD, Sidles JA, Harryman DT,
Howell SM, Galinat BJ
[Teaching book of the French Society of
McQuade KJ, Matsen FA
The glenoid-labral socket. A constrained
Orthopaedic Surgery], pp 7 – 13
The effect of capsular venting on
articular surface
glenohumeral laxity
Clin Orthop 243: 122; 1989
Cahier d’enseignement de la SOFCOT
Clin Orthop 268: 120 – 6; 1991
Itoi E, Motzkin NE, Morrey BF, An KN
Bulk effect of rotator cuff on inferior
glenohumeral stability as function of
scapular inclination angle: a
cadaver study
Tohoku J Exp Med 171 (4): 267 – 76; 1993
133
1) Rotator cuff tendinopathy
The anatomical location of the rotator cuff exposes it in particular to significant stress and
rotator cuff tendinopathy therefore constitutes a real public health problem. A study conducted
in the United Kingdom in 1986 showed that 20% of the population has consulted a doctor
for shoulder problems. The pathogenesis of these cases of tendinopathy is associated with
multiple factors: intrinsic factors (vascularisation deficiency, structural abnormality of collagen
fibres, etc.) or extrinsic factors (excessive mechanical stress, kinematic defects, etc.), sometimes
combined, these can be considered as causes of tendon dysfunctions. Kinematic defects
appear to play an important role, and most often involve limitations in range of motion, pain
phenomena and functional constraint. The limitations in range of motion observed in specific
tests involve flexion (elevation) and/or abduction. A limitation in flexion shows anterosuperior
misalignment, while a limitation in abduction shows misalignment in medial rotation spin.
Recovery of range of motion is obtained after correction of the joint misalignment, which must
be performed using appropriate techniques. Neuromuscular control work must be focused on
the coordination muscles, the muscles depressing the humeral head and the lateral rotators.
The priority given for many years to the latissimus dorsi and pectoralis major muscles is
strongly disputed today due to the medial rotation component of these muscles. In fact, the
only muscles enabling these mechanical requirements to be satisfied are the supraspinous and
infraspinous muscles, which neuromotor rehabilitation, including electrostimulation, will focus
on as a primary objective.
METHOD
1 - Protocol:
• Phase 1: TENS (and Decontracture if required)
• Phase 2: Rotator cuff Level 1 + TENS (in case of persistent pain)
• Phase 3: Rotator cuff Level 2 + (mi-ACTION mode)
134
WIRELESS PROFESSIONAL
EN
2 - Treatment frequency:
• Phase 1: One to several consecutive TENS sessions for the first to third initial treatments,
before performing the manual joint realignment techniques. In case of hypertonicity of the
pectoralis major muscle, a session can be carried out using the Decontracture programme on
the pectoralis major muscle to reduce excessive muscular tension that could impede the
medial spin correction techniques.
• Phase 2: Three to five sessions per week until the pain disappears
• Phase 3: Three to five sessions per week until the end of treatment
When the patient has recovered good motor control of the stabilizing muscles, it is beneficial
to perform the last sessions of the treatment in mi-ACTION mode. When this function is active,
the initiation of the electrically induced contraction requires voluntary contraction on the part
of the patient. For this exercise, it is recommended that the pod with the illuminated button be
positioned on the electrode placed on the infraspinous muscle and to ask the patient to perform
a voluntary isometric contraction of his/her lateral rotators.
3 - Electrode position:
• Phase 1: Four large electrodes are placed in such a way as to cover the whole shoulder as well
as possible.
• Phase 2: A small electrode is placed on the fleshiest part of the infraspinous fossa and the
other small electrode is positioned on the external part of the supraspinous fossa but not over
rear deltoid as this results in unwanted shoulder extension.
For optimum effectiveness, the positive pole of the module (pod with an illuminated button)
should preferably be positioned on the infraspinous muscle.
If the patient is still experiencing pain, TENS can be combined using the other channels.
The specific placement of electrodes for TENS used for phase 1 will be applied to
channels 2 and 3.
135
In case of
persistant
pain
and
• Phase 3: Continuation of the stimulation of the supraspinous and infraspinous muscles. The
electrodes are positioned in the same way as for phase 2
4 - Patient position:
The patient is seated with the arm against his/her body, the forearm and the hand resting on an
armrest, the upper limb is placed in the reference position with neutral rotation. In phases 2 and 3,
and on the condition that the position remains painless, the arm can gradually be placed in slight
abduction, not exceeding 30°.
5 - Stimulation energy:
• Phase 1: The stimulation energy must be gradually increased to obtain a clear tingling sensation.
• Phase 2 and 3: The stimulation energy must be gradually increased to the patient’s maximum
sub-painful threshold for the stimulation of the infraspinous and supraspinatus muscles
(channel 1) and until they experience a tingling sensation for the channels using TENS (phase 2
in case of associated pain).
136
WIRELESS PROFESSIONAL
EN
2) Shoulder instabilities
Shoulder instabilities are one of the most common pathologies, and their treatment remains a
difficult challenge.
Trauma, repeated microtraumas or a constitutional laxity can compromise the stability of the
shoulder either by injuring the passive structures (distension or tear of the inferior glenohumeral
ligament, detachment of the labrum, progressive stretching of the capsule, etc.) or by disturbing
the motor systems, causing a reduction in the coordination component resulting from the
action of the scapular and scapulohumeral muscles.
The supra- and infraspinous muscles are the main coordination muscles of the glenohumeral
joint; however, their efficacy is reinforced by the tone and muscle mass of the deltoid.
Unlike in the rehabilitation of rotator cuff tendinopathy, in which the work of the deltoid must
be prescribed due to the subacromial interference, combined muscular electrostimulation of the
deltoid and the supra- and infraspinous muscles is beneficial in this case because it allows for
the stabilising musculature of the shoulder to be optimised.
METHOD
1 - Protocol:
• Phase 1: Disuse atrophy Level 1 until full, painless mobility is obtained
• Phase 2: Disuse atrophy Level 2 until there is no pain during physical examination
• Phase 3: Disuse atrophy Level 2 (+ mi-ACTION mode). Stimulation of of the infra- and
supraspinous muscles combined with voluntary proprioception exercises until the recovery of
strength and endurance corresponding to functional requirements.
137
2 - Treatment frequency:
Three to five sessions per week.
3 - Electrode position:
• Phases 1 and 2: Three channels for stimulation of the deltoid and the spinal muscles.
For the deltoid: one small electrode is placed on the anterior bundle of the deltoid and
another small electrode is placed on the middle bundle. A large two-way electrode is placed
on the shoulder above the acromion.
For optimum effectiveness, the positive poles of the modules (pods with an illuminated
button) should preferably be positioned on the small electrodes.
For the spinal muscles: a small electrode is placed on the fleshiest part of the infraspinous
fossa connected to the positive pole. A small electrode is positioned at the external part of the
supraspinous fossa connected to the negative pole but not over the rear deltoid.
For optimum effectiveness, the positive pole of the module (pod with an illuminated button) should preferably be positioned on the infraspinous muscle.
138
WIRELESS PROFESSIONAL
EN
• Phase 3: A small electrode is placed on the fleshiest part of the infraspinous fossa and the
other small electrode is positioned on the external part of the supraspinous fossa.
For optimum effectiveness, the positive pole of the module (pod with an illuminated button)
should preferably be positioned on the infraspinous muscle.
4 - Patient position:
• Phases 1 and 2: The first stimulation sessions are conducted on a patient seated, with the
upper limb in the reference position, the forearm resting on an armrest. In subsequent
sessions, the arm will gradually be placed in increasing abduction to 60°. The patient’s
position during stimulation should prevent any stress on the scar tissue and should always
remain painless.
• Phase 3: The stimulation of the infra- and supraspinous muscles can be performed
simultaneously with active work, such as, for example, proprioception exercises. The patient
can be placed in the push-up position, with the hands resting on a trampoline. In this
position, he/she is asked to bounce in time with the phase of electrically induced contraction
of the spinal muscles. This exercise is always performed after warm-up and will first be
performed with two-handed support, then one-handed support.
The mi-ACTION function can be used to greatly facilitate the combination of voluntary
exercises with the stimulation.
5 - Stimulation energy:
The stimulation energy must be gradually increased to the maximum of the patient’s subpainful threshold.
139
3) Adhesive capsulitis
The SECEC (European Society for Surgery of the Shoulder and the Elbow) gives the following
clinical definition for retractile capsulitis: limited active and passive mobility, by a minimum of
30%, in the 3 planes, for more than 3 months.
This limitation results from the thickening (inspissation) and fibrosis of the joint capsule with
recess disappearance, which translates into a loss of active and passive shoulder mobility.
This affliction is idiopathic in a third of cases, but in the other two thirds there is a prior
shoulder pathology that can be of a highly variable nature (shoulder trauma, shoulder surgery,
hemiplegia, subacromioncoracoid impingement, etc.). The diabetic population is particularly
at risk, with 20% of this population presenting capsulitis at some stage. Note that the initial
development is a reflex sympathetic dystrophy (even if this does not exactly conform with
a strict definition of the term, since it essentially affects the limb extremities); this reflex
sympathetic dystrophy then regresses as the capsule fibrosis and the joint ankylosis develop.
Clinically, we see the development of a first entirely painful acute phase, then the shoulder
gradually loses mobility as the pain recedes; then, the shoulder is just stiff and painless. At
this point there is a loss of active and passive mobility affecting especially the abduction and
external rotation of the shoulder (external rotation is reduced to at least 50% compared to the
healthy side).
There is spontaneous evolution towards recovery for a period of time that varies from 3 months
to 2 years, depending essentially on the quality of the rehabilitation treatment used.
The objectives of rehabilitation are first to relieve pain in the acute phase, and then to restore
the biomechanical and neuromuscular qualities of the shoulder.
METHOD
1 - Protocol:
• Phase 1 (Acute phase): TENS
The criterion for moving from phase 1 to phase 2 is achieving a shoulder that is not painful
at rest. Clinical examination often exposes a set of symptoms similar to those of rotator cuff
tendinopathy, for which the same therapeutic approach can be used. This clinical
presentation is the result of the compensatory mechanisms established during the
acute phase.
• Phase 2: Disuse atrophy Level 1, then Disuse atrophy Level 2.
140
WIRELESS PROFESSIONAL
EN
2 - Treatment frequency:
Three to five sessions per week.
3 - Electrode position:
• Phase 1: Four large electrodes are placed
in such a way as to cover the whole shoulder
as well as possible.
• Phase 2: One stimulation channel for the
infraspinous and supraspinous muscles.
One small electrode is placed on the fleshiest
part of the infraspinous fossa. The other small
electrode is positioned on the external part
of the supraspinous fossa. For optimum
effectiveness, the positive pole of the module
(pod with an illuminated button) should
preferably be positioned on the infraspinous muscle.
4 - Patient position:
• Phase 1: The patient is placed in the most comfortable position for him or her.
• Phase 2: The patient is seated with the arm against his/her body, the forearm and the hand
resting on an armrest, the upper limb is placed in the reference position with neutral rotation.
In phase 2, and on the condition that the position remains painless, the arm can gradually be
placed in slight abduction, not exceeding 30°.
5 - Stimulation energy:
• Phase 1: The stimulation energy must be gradually increased to obtain a clear
tingling sensation.
• Phase 2: The stimulation energy must be gradually increased to the maximum threshold the
patient can tolerate.
141
Cardi ac Rehabi li at i on
Chronic heart failure causes functional impairment associated with the intricate
physiopathological mechanisms involved between the cardiac dysfunction and the peripheral
changes associated with a deconditioning syndrome.
The skeletal muscle abnormalities are morphological and functional. They include a reduction
in muscle mass, a reduction in slow-twitch type 1 fibres and a reduction in capillary density.
Metabolically, the muscle changes are characterised by a reduction in the density of the
mitochondria and a reduction in the mitochondrial oxidative capacity.
Appropriate physical exercise, which improves one’s capacity for exertion, is known to be one of
the essential components in the treatment of chronic heart failure.
However, some patients are excluded from the cardiac rehabilitation programmes due to the
severity of their cardiac condition or due to co-morbidities limiting the practice of physical
exercise. It is because of this that neuromuscular electrostimulation has been proposed as an
alternative or complementary treatment to physical exercise for heart failure, as it enables
muscular performance and capacity for exertion to be improved.
The protocols proposed have been developed on the basis of the following publications:
Karavidas A, Arapi SM, Pyrgakis V, Adamopoulos S.
Maillefert JF, Eicher JC, Walker P et al.
Functional electrical stimulation of lower limbs in patients with
Effects of low-frequency electrical stimulation of quadriceps
chronic heart failure.
and calf muscles in patients with chronic heart failure.
Heart Fail Rev. 2010 Nov;15(6):563-79. Review
J Cardiopulm Rehabil 1998;18(4): 277-282
Banerjee P, Clark A, Witte K, Crowe L, Caulfield B.
Deley G, Kervio G, Verges B et al.
Electrical stimulation of unloaded muscles causes
Comparison of low-frequency electrical myostimulation and
cardiovascular exercise by increasing oxygen demand. Eur J
conventional aerobic exercise training in patients with chronic
Cardiovasc Prev
heart failure.
Rehabil 2005 ; 12: 503-508
Eur J Cardiovasc Prev Rehabil 2005 ;12(3): 226-233
Quittan M, Wiesinger G, Sturm B, et al.
Improvement of thigh muscles by neuromuscular electrical
stimulation in patients with refractory heart failure.
Am J Phys Med Rehabil 2001;80(3): 206-214
142
WIRELESS PROFESSIONAL
EN
METHOD
1 - Protocol:
Cardiac rehabilitation
2 - Treatment frequency:
Three to six sessions a week for four to eight weeks.
3 - Electrode position:
The quadriceps are the priority muscles due to their
functional importance and their high volume of
muscle mass.
Two channels are needed per thigh for
quadriceps stimulation.
Two small electrodes are placed on the motor points
of the vastus medialis and the vastus lateralis.
Two large electrodes are positioned at the top of the thigh.
For optimum effectiveness, the positive pole of the module (pod with an illuminated button)
should preferably be positioned on the motor point.
4 - Patient position:
The patient should preferably be placed in a sitting position with his/her knees bent at
approximately 90°, the ankles must be restrained to avoid the knees from being extended,
which can induce contractions. If the patient is not able to stay seated, the session can be
carried out in a lying position, taking care to place a large cushion under the popliteal fossae so
that the knees are flexed.
5 - Stimulation energy:
In NMES, the stimulation energy is directly responsible for spatial recruitment: the higher the
stimulation energy, the higher the percentage of motor units recruited and the greater the
impact of the progress.
The general rule is to always try to increase the energy to the maximum level tolerated by the
patient. The therapist plays a fundamental role by encouraging and reassuring the patient, who
can then tolerate levels of energy that produce powerful contractions. The levels of energy
reached must increase throughout the session, and also from session to session, because the
patients quickly get used to the technique.
143
Lo cati ng a motor poi n t
(e.g.: locating the motor point of the vastus medialis of the quadriceps)
Muscular electrostimulation programmes are programmes which subject the muscles to
work. The progress achieved depends on the kind of work to which the muscles are subjected,
that is to say the programme chosen. The electrical pulses generated by these programmes
are transmitted to the muscles (via the motor nerve) through self-adhesive electrodes. The
positioning of the electrodes is one of the determining factors in ensuring a comfortable
electrostimulation session.
It is therefore essential to devote special care to this aspect. The correct placement of the
electrodes and the use of significant energy allow a large number of muscle fibres to work.
The greater the energy, the greater the spatial recruitment, that is to say the number of fibres
working, and therefore the greater the number of fibres that make progress.
One stimulation channel is a module consisting of two pods:
• A positive pole (+) = the pod with an illuminated button
• A negative pole (-) = the other pod of the module
The positive electrode is the one connected to the positive pod (with an illuminated button). It
must be attached at the motor point of the muscle. The motor point is a point where the motor
nerve enters the muscle,, which is an extremely localised area where the motor nerve is at its
most excitable. Although the location of the various motor points is now well known, there
may nevertheless be variations of up to several centimetres between different individuals.
The Motor point programme, combined with the use of the motor point pen delivered with
your equipment, allows the user to determine with great accuracy the exact location of the
motor points for each individual and thus ensure the greatest effectiveness of the programmes.
It is advisable to use this programme before any initial muscular electrostimulation session.
Once located, the motor points can be easily identified using a skin-marker pencil or in any
other way, thus avoiding the need to repeat this process before each session.
Recommended programme: Motor point
144
WIRELESS PROFESSIONAL
EN
INSTRUCTIONS
1.Apply a large electrode at the top of the thigh.
2.Connect the negative pod of the module (pod without illuminated button) to the output of
the large electrode located towards the inner surface of the thigh.
3.Spread a thin but even layer of conductive gel over the inner surface of the thigh in the
position indicated for the positive electrode position, spreading the gel a few extra centimetres
in all directions.
4.Connect the positive pod of the module (pod with illuminated button) to the tip of the motor
point pen and bring the tip of the pen in contact with the conductive gel.
Before each use of the motor point pen, clean and disinfect the tip of the pen that comes into contact with the skin.
5.Switch on the remote control, select the Motor point programme, then switch on the module
and start the programme.
6.Very gradually increase the energy of channel 1, until a value between 5 and 25 is reached,
while continuously moving the pen tip over the gel layer, but without ever losing contact with
the gel, to avoid triggering an electrode fault message.
7.As soon as you observe a muscle response in form of twitching, you have located the vastus
medialis motor point. Visually locate this motor point and apply a small electrode that should
be centred over the motor point.
145
8.Remove the pen from the positive pod and connect the positive pod to the small electrode,
which should be correctly centred over the motor point of the vastus medialis.
If, while you are doing this, the pen loses contact with the skin coated in gel (even
if this is just for a fraction of a second), the stimulation will be interrupted and the
equipment will signal an electrode fault. In such a case, ignore the message, put the
tip of the pen back in contact with the skin and gradually increase the energy while moving the
pen over the gel layer.
146
WIRELESS PROFESSIONAL
EN
Reflex sympath e ti c d ys t r oph y (or Com ple x r e g io n a l p a in s y nd r o m e )
Reflex sympathetic dystrophy (RSD) is a disease that physiotherapists frequently see and which
they must be able to diagnose and treat at an early stage.
The protocols proposed have been developed on the basis of the following publications:
Abram S, Asiddao C, Reynolds A,
Increased Skin Temperature during Transcutaneous Electrical Stimulation.
Anesthesia and Analgesia 59: 22 - 25, 1980
Owens S, Atkinson R, Lees DE,
Thermographic Evidence of Reduced Sympathetic Tone with Transcutaneous Nerve Stimulation.
Anesthesiology 50: 62 - 65, 1979
Richlin D, Carron H, Rowlingson J, al.
Reflex sympathetic dystrophy: Successful treatment by transcutaneous nerve stimulation.
The Journal of Pediatrics 93:84 - 86, 1978
Abram S,
Increased Sympathetic Tone Associated with Transcutaneous Electrical Stimulation.
Anesthesiology 45: 575 - 577, 1976
Meyer GA, Fields HL,
Causalgia treated by selective large fibre stimulation of peripheral nerve.
Brain 9: 163 - 168, 1972
147
1) Diagnostic definition
RSD is a complication which most often occurs following a trauma. In most cases, this trauma is to
the bone or joints of the limbs. The type of trauma is generally a fracture or operation, but may also
involve dislocations, wounds, burns, phlebitis, infections, etc.
RSD does not start immediately after the trauma or the operation, but appears some time later.
In general, it starts when physiotherapy begins. This is why the role of the physiotherapist is
vital. The main sign of RSD is pain. The pain is most often located at the end of the traumatised
limb. It is described by the patient as a burning pain. The intensity of the pain is high and often
disproportionate to the initial trauma. It increases with stress and activity and decreases when the
patient is calm and resting. Mobilisation and massage accentuate it; simply touching the skin may
be very painful.
Depending on the stage of development, other signs may appear:
- The skin becomes cold with sweating, oedema and cyanosis developing in the more
advanced stages.
- The muscles in the affected area become atrophied.
- The underlying bone develops osteoporosis (Sudeck’s atrophy).
The precise mechanism of development of RSD is not yet exactly known. However, it is well
established that the sympathetic nervous system plays a major role. Indeed, vasomotor disorders
associated with hyperactivity of the orthosympathetic system innervating the region concerned
have been observed.
2) Treatment
There are two aspects to the treatment of RSD: the relief of pain and the reduction in the activity of
the orthosympathetic system.
However, mobilisations, massages and all techniques likely to cause or accentuate the pain must be
ruled out, as they could potentially aggravate the RSD.
Few therapeutic methods meet these criteria, which makes transcutaneous electrical nerve
stimulation (TENS) the first treatment of choice available to physiotherapists for treating RSD.
However, it is essential here to limit the stimulation to the myelinated nerve fibres of the tactile
sensory system only, the type Aß fibres, as these are the only fibres which have an inhibiting effect
on the orthosympathetic system. This is not the case for the other nerve fibres (Aδ, B, C), as these
activate this orthosympathetic nervous system.
This selective targeting of the Aβ fibres, which are the most excitable nerve fibres (tactile sensory
system), is possible if very short pulse widths (≤ 50 µs) are used, i.e. the TENS programme.
148
WIRELESS PROFESSIONAL
EN
METHOD
1 - Protocol:
TENS 1: for very sensitive or hyperalgesic patients
TENS 2: for all other patients
2 - Treatment frequency:
A minimum of 20 to 40 minutes of treatment every day.
3 - Electrode position:
Use three channels, and therefore three modules.
Two channels are used with four large electrodes to cover the painful area.
The third channel uses small electrodes to excite the nerve path(s) supplying the extremity of
the limb concerned.
Upper limb:
Distal RSD of the upper limb:
Four large electrodes are used to cover the palms and backs of the hand and fingers.
Two small electrodes a finger’s width apart are placed as high as possible on the inner side of
the arm; the upper electrode is thus positioned at the level of the brachial wall of the axilla.
149
RSD of the shoulder:
Four large electrodes are used to cover the whole shoulder.
A small electrode is placed at the level of the supraclavicular cavity, and another small electrode
is positioned on the bony protrusion of the acromion.
Lower limb:
Distal RSD of the lower limb:
Four large electrodes are used to surround the ankle and foot.
A small electrode is placed in the middle of the Popliteal fossa; another small electrode is placed
similarly one finger’s breadth above.
150
WIRELESS PROFESSIONAL
EN
RSD of the knee:
Four large electrodes are used to cover the knee and surround the kneecap.
A small electrode is placed at the level of the inguinal fossa just beside the femoral artery, and
another small electrode is placed similarly one finger’s breadth above it.
4 - Patient position:
The most comfortable position for the patient.
To improve the irradiation of the tingling sensation caused by neural stimulation, it is
recommended to exert a slight pressure on the small electrodes placed on the nerve being
targeted (bag of sand weighing 1 or 2 kg, cushion placed between the chest and arm, etc.)
5 - Stimulation energy:
The stimulation energy must first be adjusted on the third channel (module started in third
position), which stimulates the target nerve at the axilla, supraclavicular, popliteal or inguinal
regions. The energy level is gradually increased until the patient feels paresthesia (tingling) at
the end of the limb being treated.
Then, the energy level is adjusted on the other two channels (modules started in first and
second position) so that the patient feels an increase in the tingling sensation.
During the session, because of the habituation phenomenon, the sensation of paresthesia will
gradually be reduced and even disappear. It is then recommended that the energy be increased
slightly to maintain the sensation, but without causing muscle contractions.
The mi-TENS function eliminates this possibility by automatically reducing the stimulation
energy to below the motor excitation threshold.
151
E ndorphi ni c treat me n t of R a ch i a lg i a a n d R a d ic u l a l g ia
This chapter deals with the analgesic treatment of spinal pain (Rachialgia) and nerve root pain
(Radiculalgia). The practical methods of treatment described in this chapter are based on the
following reference publications:
Hollt V., Przewlocki R., Herz A.
Wang H.H., Chang Y.H., Liu D.M., Ho Y.J.
Radioimmunoassay of beta-endorphin basal and stimulated
A clinical study on physiological response in electroacupuncture
levels in extracted rat plasma.
analgesia and meperidine analgesia for colonoscopy.
Naunyn Schmiedebergs Arch Pharmacol
Am J Chin Med 1997; 25 (1): 13 - 20
1978; 303 (2): 171 - 174
Chen B.Y., Yu J.
Viru A., Tendzegolskis Z.
Relationship between blood radioimmunoreactive
Plasma endorphin species during dynamic exercise in humans.
beta-endorphin and hand skin temperature during the
Clin Physiol 1995; 15 (1): 73 - 79
electroacupuncture induction of ovulation.
Acupunct Electrother Res 199: 16 (1 - 2): 1 - 5
Pierce E.F., Eastman N.W., Tripathi H.T.,
Olson K.G., Dewey W.L.
Boureau F., Luu M. , Willer J.C.
Plasma beta-endorphin immunoreactivity: response to
Electroacupuncture in the treatment of pain using peripheral
resistance exercise.
electrostimulation.
J Sports Sci 1993; 11 (6): 499 - 452
J Belge Med Phys Rehabil 1980; 3 (3):
220 - 230
Dzampaeva E.T.
Hearing loss correction by endogenous opioid stimulation.
Wu G.C., Zhu J., Cao X.
Vestn Otorinolaringol 1998; (3): 13 - 16
Involvement of opioid peptides of the preoptic area during
electroacupuncture analgesia.
Ulett G.A., Han S., Han J.S.
Acupunct Electrother Res 1995; 20 (1): 1 - 6
Electroacupuncture: mechanisms and clinical application.
Biol Psychiatry 1998; 44 (2): 129 - 138
152
WIRELESS PROFESSIONAL
EN
Spinal pain is an extremely common painful state that can result from a wide variety of
anatomical lesions and various physiopathological mechanisms.
Whatever the triggering factors, the quasi-systematic occurrence of contracture of the
paravertebral muscles is often directly responsible for spinal pain.
The increase in the tension of the contractured muscle fibres and the crushing of the capillary
network resulting from this causes a decrease in the blood flow and a gradual accumulation
of acid metabolites and free radicals. This muscular “acidosis“ is directly responsible for the
pain, which in turn sustain and reinforce the degree of contracture. If left untreated, there is
a risk that the contracture will become chronic and real atrophy of the capillary network will
gradually develop; the aerobic metabolism of the muscle fibres deteriorates, giving way to
glycolytic metabolism, which gradually becomes predominant.
This mechanism of chronic contracture is summarised in the following diagram:
Muscle contracture
=
Increased muscle activity
+
Reduced blood flow
Accumulation of acid
Pain
metabolites
In addition to the general effect of increasing endorphin production (which raises the pain
perception threshold), stimulation with an endorphinic programme produces marked local
hyperaemia and allows drainage of acid metabolites and free radicals. The major analgesic
effect obtained in this way during each session should not, however, lead to premature
termination of treatment. Indeed, in order to restore the atrophic capillary network, the
treatment must be continued for a minimum of ten sessions or so.
153
1) Endorphinic treatment of cervical pain
Chronic contractures of the levator scapulae and/or superior trapezius are often responsible for
the painful symptoms in patients with neck pain. The use of endorphinic treatment on these
contractured muscles is thus the treatment of choice for this condition.
However, it must be ensured that the stimulation energy levels are sufficient to obtain clearly visible
muscle twitches (leading to a marked hyperaemic effect) so that the acid metabolites swamping
the capillary bed of the contractured muscle can be drained away.
This treatment should be continued for at least ten sessions in order to restore the capillary
network, which is usually atrophic in chronically contractured muscles.
METHOD
1 - Protocol:
Cervical pain: 10 to 12 weeks.
2 - Treatment frequency:
Three to five sessions per week for two to three weeks (10 to 12 sessions in total).
Each session should last at least 20 minutes. Ideally, it may be beneficial to carry out two successive
stimulation sessions with the Neck pain programme, ensuring a ten-minute rest period is taken
between the two sessions to allow the stimulated muscles to recover.
154
WIRELESS PROFESSIONAL
EN
3 - Electrode position:
Depending on the location of the pain (unilateral or bilateral), one or two stimulation channels
are used:
A small electrode is placed on the most painful point that can be found by palpation. In most
cases this point of maximum contracture is found in the levator scapulae or superior trapezius.
In the case of bilateral pain, another small electrode is likewise placed on the most painful
point. For optimum effectiveness, the positive pole of each module (pod with an illuminated
button) should preferably be positioned on the painful area.
One or two small electrodes are placed on the cervical paravertebral muscles at C3 - C4 level.
4 - Patient position:
The patient is placed in the position most comfortable for him/her: prone position or seated
facing a medical table with a chest support.
5 - Stimulation energy:
The energy must be increased gradually until it causes clearly visible muscle twitches, which are
required to induce hyperaemia.
The mi-RANGE function makes it possible to work with certainty within a therapeutically
effective range. The stimulator prompts you to firstly increase the level of energy: a beep
sound accompanies the flashing “+” symbols. When it detects that the muscles have started to
pump, the “+” symbols will stop flashing. You are at the minimum level of energy that provides
therapeutic results. If the stimulation is well tolerated by the patient, it is advised to increase
the energy level slightly.
At the end of the treatment or during a break, a statistic showing the percentage of time spent
in the effective range will appear on the screen.
155
2) Endorphinic treatment of thoracic back pain
Whatever the trigger, chronic contractures of the dorsal paravertebral muscles (erector spinae) are
responsible for the pain that incapacitates patients suffering from thoracic back pain.
Provided that sufficient stimulation energy is used to obtain clear muscle twitches, the dorsalgia
treatment - thanks to the remarkable hyperaemia it causes - will be particularly effective for
draining the metabolic acids that have built up in the contractured muscle. A significant analgesic
effect will therefore usually be observed in the first treatment sessions.
This treatment should however be continued for at least ten sessions in order to restore the capillary
network, which is usually atrophied in chronically contractured muscles.
METHOD
1 - Protocol:
Thoracic back pain : 10 to 12 sessions.
2 - Treatment frequency:
Three to five sessions per week for two to three weeks (10 to 12 sessions in total).
A session should last at least 20 minutes. Ideally, it may be beneficial to carry out two successive
stimulation sessions within the Thoracic back pain programme, ensuring however a ten-minute rest
period between the two sessions to allow the stimulated muscles to recover.
156
WIRELESS PROFESSIONAL
EN
3 - Electrode position:
The points of maximum contraction are usually bilateral but not always symmetrical; therefore,
two stimulation channels are used.
Two small electrodes are placed on the most painful points, which can be easily located by
palpatory examination of the painful area. For optimum effectiveness, the positive pole of each
module (pod with an illuminated button) should preferably be positioned on the painful area.
Two other electrodes, also small ones, are placed on the top of the erector spinae muscles, a
few centimetres above or below the electrodes placed on the painful points, depending on
whether the pain radiates towards the neck or the lumbar region.
4 - Patient position:
The patient is placed in a position he/she finds the most comfortable: in the prone or side lying
position, or seated.
5 - Stimulation energy:
The energy must be increased gradually until it causes clearly visible muscle twitches, which are
required to induce hyperaemia.
The mi-RANGE function makes it possible to work with certainty within a therapeutically
effective range. The stimulator prompts you to firstly increase the level of energy: a beep
sound accompanies the flashing “+” symbols. When it detects that the muscles have started to
pump, the “+” symbols will stop flashing. You are at the minimum level of energy that provides
therapeutic results. If the stimulation is well tolerated by the patient, it is advised to increase
the energy level slightly.
At the end of the treatment or during a break, a statistic showing the percentage of time spent
in the effective range will appear on the screen.
157
3) Endorphinic treatment of low back pain
Chronically contractured lumbar paravertebral muscles are often the source of pain felt by patients
with lumbago. Although a physiotherapist must naturally find the cause of the pain and treat it
accordingly, treatment of these chronic contractions using the Low back pain programme brings
about fast, significant pain relief. In the lumbar region, the stimulation currents required to obtain
visible (or at least palpable) muscle twitches are generally high and can be difficult to tolerate by
some patients. This is why it is generally recommended to combine TENS treatment with the Low
back pain programme to make treatment more comfortable for the patient.
This treatment should be continued for at least ten sessions in order to restore the capillary
network, which is usually atrophic in chronically contractured muscles.
METHOD
1 - Protocol:
Low back pain + TENS : 10 to 12 sessions
The Low back pain programme is designed to provide endorphinic stimulation on the first two
channels (modules started in the first and second position) and TENS stimulation on the other two
channels (module started in the third position for this indication).
2 - Treatment frequency:
Three to five sessions per week for two to three weeks (10 to 12 sessions in total).
A session should last at least 20 minutes. Ideally, it may be beneficial to carry out two successive
stimulation sessions within the Low back pain programme, ensuring a ten-minute rest period is
taken between the two sessions to allow the stimulated muscles to recover.
158
WIRELESS PROFESSIONAL
EN
3 - Electrode position:
Three stimulation modules are used, ensuring they are switched on in the correct order, as
this determines the order in which the channels deliver stimulation. In the Low back pain
programme, endorphinic stimulation is always used on channels 1 and 2, while the TENS
stimulation is provided on channels 3 and 4.
• For endorphinic treatment:
-Two small electrodes are placed on the most painful points, which can be easily located by
palpitating the lumbar paravertebral muscles. For optimum effectiveness, the positive pole of
each module (pod with an illuminated button) should preferably be positioned on the
painful area.
-Two large electrodes with two outputs are placed a finger-width outside the small electrodes
and are attached to the negative poles of the two previous modules.
• For the TENS treatment : The free outputs of the two large electrodes are used to connect
the third module.
159
4 - Patient position:
The patient is placed in the position he/she finds the most comfortable: in the side lying or
prone position, taking care to use a cushion or a specially designed table to prevent lordosis.
5 - Stimulation energy:
The energy must firstly be adjusted on the third channel (TENS). The energy is gradually
increased until the patient feels a strong tingling sensation in the lumbar region.
The energy is then adjusted on channels 1 and 2 (endorphinic). The energy is gradually increased
in order to cause muscle twitches, visible if possibly (or at least palpable).
If the patient finds it hard to tolerate the energy increase, due to the discomfort it can cause,
it is recommended to temporarily stop increasing the energy on the first two channels. The
energy is then increased again on the third channel (TENS) in order to increase the feeling of
paresthesia in the lumbar region.
After a minute or two, the energy can be increased again on the first two stimulation channels
so that the muscle twitches can be seen.
It is essential to increase the energy on channels 1 and 2 sufficiently to cause visible (or at
least palpable) muscle twitches. In fact, these muscle twitches are directly responsible for the
significant hyperaemia effect and therefore guarantee the effectiveness of the treatment.
N.B.: When TENS is used in combination with an endorphinic programme (such as the Low
back pain programme in this case) the mi-TENS function is inactive.
160
WIRELESS PROFESSIONAL
EN
4) Treatment of lumbosciatic pain
Patients suffering from lumbosciatic pain most often present lumbar pain that commonly originates
from chronic contractures of the lumbar paravertebral muscles. In addition, involvement of the
spinal nerve root leads to irradiation of pain over a shorter or longer distance along the sciatic nerve
and in some cases, along one or the other of its branches (common peroneal or tibial).
The combination of the Lumbosciatica programme and the TENS programme is the preferred
treatment, as it produces - through its endorphinic effect (Lumbosciatic programme) – a significant
analgesic effect on chronic contractures of the lumbar region and – through the TENS programme
– reduces the medullar input of the nociceptive impulse (Gate control) due to painful irradiation of
the sciatic nerve.
Combining endorphinic stimulation with TENS stimulation is entirely appropriate here as on one
hand, it treats low back pain caused by chronic contractures of the muscles in that area, and on the
other hand, relieves neurogenic pain of the sciatic nerve, for which TENS is the treatment of choice.
METHOD
1 - Protocol:
Lumbosciatica : 10 to 12 sessions.
The Lumbosciatica programme is designed to provide endorphinic stimulation on the first channel
(module started in the first position) and TENS stimulation on the other three channels (module
started in the second position for this indication).
2 - Treatment frequency:
Three to five sessions per week for two to three weeks (10 to 12 sessions in total).
A session should last at least 20 minutes. Ideally, it may be beneficial to carry out two successive
stimulation sessions within the Lumbosciatica programme, ensuring a ten-minute rest period is
taken between the two sessions to allow the stimulated muscles to recover.
161
3 - Electrode position:
Two stimulation modules are used, ensuring they are switched on in the correct order, as
this determines the order in which the channels deliver stimulation. With the Lumbosciatica
programme, the endorphinic stimulation is always provided on channel 1, whereas the TENS
stimulation is delivered by channels 2, 3 and 4.
• For endorphinic treatment:
-A small electrode is placed on the top of the root of the sciatic nerve, which is painful to
palpate. For optimum effectiveness, the positive pole of the module (pod with an illuminated
button) should preferably be positioned on this painful area.
-Another small electrode is placed two finger-widths above the previous electrode and is
attached to the negative pole of the same module.
• For TENS treatment:
-Two large electrodes are placed on the path of the sciatic nerve: one on the lower part of the
buttock and the other on the posterior thigh. The second module is connected to
these large, single-output electrodes.
Note: the 3rd and/or 4th channel (TENS) can be used in two situations:
-In the event of more extensive irradiation in the common peroneal or tibial nerves. Two large
electrodes are therefore placed longitudinally on the calf (tibial) or laterally
(common peroneal) on the lower leg and are connected by a module.
-If the patient does not like endorphinic stimulation in the lumbar region two large electrodes
are placed to the lumbar region and are connected by a module.
162
WIRELESS PROFESSIONAL
EN
4 - Patient position:
The patient is placed in the position he/she finds the most comfortable: in the prone position
(with a cushion or on a specially designed table to prevent lordosis) or in the side lying position.
5 - Stimulation energy
The energy is gradually increased on the second channel (TENS), in order to cause a distinctive
tingling sensation along the painful irradiation of the sciatic nerve.
The gradual energy increase on the first channel must be sufficient to obtain visible (or at least
palpable) muscle twitches of the muscles of the lumbar region, which cause hyperaemia.
N.B.: When TENS is used in combination with an endorphinic programme (such as the
Lumbosciaticaprogramme in this case), the mi-TENS function is inactive.
163
H e mi plegi a - Spa s ti ci t y
This chapter examines the treatment of problems specific to the hemiplegic patient, including
spasticity, which is found not only in hemiplegic patients but also in most disorders of the
central nervous system (tetraplegia, paraplegia, multiple sclerosis, etc.). The practical methods of
treatment described in this chapter are based on the following reference publications:
Wal J.B.
Modulation of Spasticity: Prolonged Suppression of a Spinal
Waters R., McNeal D., Perry J.
Reflex by Electrical Stimulation.
Experimental Correction of Foot Drop by Electrical Stimulation
Science 216: 203 - 204, 1982
of the Peroneal Nerve.
J Bone Joint Surg (Am) 57: 1047 - 54, 1975
Baker L.L., Yeh C., Wilson D., Waters R.L.
Electrical Stimulation of Wrist and Fingers for Hemiplegic
Liberson WT, Holmquest HJ, Scot D
Patients.
Functional Electrotherapy: Stimulation of the Peroneal Nerve
Physical Therapy 59: 1495 - 1499, 1979
Synchronized with the Swing Phase of the Gait Hemiplegic
Patient.
Alfieri V.
Arch Phys Med Rehabil 42: 101 - 105, 1961
Electrical Treatment of Spasticity.
Scand. J Rehab Med 14: 177 - 182, 1982
Levin MG, Knott M, Kabat H
Relaxation of Spasticity by Electrical Stimulation of Antagonist
Carnstan B., Larsson L., Prevec T.
Muscles.
Improvement of Gait Following Electrical Stimulation.
Arch Phys Med 33: 668 - 673, 1952
Scand J Rehab Med 9: 7 - 13, 1977
The treatments discussed in this chapter are applicable through the programmes in the
Neurological Rehabilitation category and some of these programmes require each contraction
to be manually triggered. All programmes used reduce spasticity as long as they are applied
correctly to the muscles antagonistic to the spastic muscles. Some of these programmes are
intended solely for the treatment of spasticity, while others are intended to treat situations or
complications specific to the hemiplegic patient, namely: functional neuromuscular electrical
stimulation of the foot and subluxation of the shoulder.
164
WIRELESS PROFESSIONAL
EN
1) Dorsiflexion of the hemiplegic foot
One of the problems in hemiplegic patients is the greater or lesser degree of difficulty that they
encounter when raising the foot voluntarily, or even the total inability to do so. For this reason, the
foot drops when walking during heel strike.
Neuromuscular electrical stimulation (NMES) in the area of the flexor muscles of the foot (tibialis
anterior, extensors of the toe) allows for dorsiflexion to be achieved. This NMES is functional (FES)
if the dorsiflexion achieved is synchronised with the gait so as to stop the foot from dropping when
lifted from the ground.
The aim of FES is to teach the hemiplegic patient to walk again by creating a functional gait pattern
that the patient is then able to reproduce more easily.
However, this method of gait rehabilitation using FES is not suitable for all hemiplegic patients. Two
types of case must be considered:
1 - If the stimulation of the muscles lifting the foot produces a spasm reflex in the muscles of the
lower limb, this technique should no longer be used (this phenomenon is rare in hemiplegics but
more common in paraplegics).
2 - If the spasticity of the soleus muscle is considerable, to the point where satisfactory dorsiflexion
cannot be achieved, programmes for the treatment of spasticity in the lower limb must be used
initially, before resuming work on the gait with FES when spasticity of the triceps surae has been
sufficiently reduced.
METHOD
USE CHANNEL 1 (other channels are inactive for this programme)
1 - Protocol:
The hemiplegic foot
2 - Treatment frequency:
Minimum of three sessions per week. The length of treatment varies greatly depending on progress.
165
3 - Electrode position:
A single module is sufficient to stimulate the levator muscles of the foot. A small electrode is
placed on the motor point of the tibialis anterior. For optimum effectiveness, the positive pole
of the module (pod with an illuminated button) should preferably be positioned on the lower
electrode. which corresponds to the motor point of the tibialis anterior.
4 - Stimulation energy:
Use the energy necessary to achieve slight dorsiflexion that is enough to prevent the foot from
dropping while walking. In this application, there is nothing to be gained from producing a more
powerful contraction that might diffuse into the antagonists.
Activate the contraction by pressing any key on any channel. As this contraction phase is very
short, rapidly increase the energy of channel 1 until satisfactory dorsiflexion is achieved.
2) Spasticity
A - Reminder
Spasticity or spastic hypertonia is a term which describes the condition of paretic or paralysed
muscles showing different symptoms to varying degrees, including in particular, an increase in
muscle tonus mainly in the antigravity muscles , hyperreflexia, and clonus.
During passive stretching of a spastic muscle, there is resistance at the beginning of the movement,
which then diminishes in the course of extension. The more rapid the passive stretching movement,
the stronger this resistance. If passive stretching is very rapid and is maintained, clonus may occur,
i.e. a contractile oscillation of 5 to 7 Hz, which persists for 40 to 60 cycles for as long as the stretching
is maintained.
166
WIRELESS PROFESSIONAL
EN
Spasticity is caused by a lesion in the central nervous system which affects the tractus pyramidalis
(cerebral-spinal tract). This interruption in central control releases the activity of the myotatic
stretch reflex, which becomes hyperactive. As this stretch reflex is responsible for muscular tonus,
hypertonia develops affecting mainly the antigravity muscles (extensions of the lower limbs and
flexors of the upper limbs), since these contain more neuromuscular spindles than their antagonist
muscles.
In time, spasticity leads to the shortening of muscle-tendon structures and a reduction in the range
of articular movement, which can lead to stiffening and misalignment of the joints.
B - Use of neuromuscular electrical stimulation (NMES)
Starting in the neuromuscular bundles are afferent proprioceptive nerve fibres, which are directly
associated with the α motor neurons of the same muscle and which are indirectly associated (via
interneurons) with the α motor neurons of the antagonist muscle. Stretching a muscle therefore
stimulates the afferent proprioceptive nerve fibres of the neuromuscular bundles and they
monosynaptically activate the α motor neurons of the muscle being stretched (myotatic stretch
reflex) and inhibit, via an interneuron, the α motor neurons of the antagonist muscle (reciprocal
inhibition reflex).
NMES of a muscle excites not only the α motor neurons of that muscle but also, and even more
readily, the afferent proprioceptive nerve fibres which are contained in the neuromuscular bundle of
the muscle and which have a lower stimulation threshold. Stimulating these activates the α motor
neurons of this muscle and also inhibits the α motor neurons of the antagonist muscle (reciprocal
inhibition reflex). It is this last action that NMES uses in the treatment of spasticity: NMES of a
muscle antagonist to a spastic muscle makes it possible to reduce the spasticity by inhibiting the α
motor neurons of the spastic muscle via the reciprocal inhibition reflex.
This phenomenon of inhibiting α motor neurons through NMES of the antagonist muscle is clearly
demonstrated by electromyography. In fact, Hoffmann’s reflex in a muscle, produced by a stimulus,
is reduced in amplitude when the motor nerve of the antagonist muscle is stimulated.
NMES is an effective technique in the treatment of spasticity, not only because it reduces
hypertonia, but also because it allows strengthening of the antagonist muscle as well preventive
or curative stretching of the retraction of the spastic muscles; this is much more effective than the
conventional passive methods.
167
However, care must be taken in the treatment of spasticity to ensure that NMES is used correctly to
achieve a positive effect. It is particularly necessary to avoid stimulating spastic muscle by diffusion,
which can occur when the electrical energy is too high. It is also necessary that the antagonist
muscle is tensed extremely gradually to avoid over-stretching the spastic muscle and thereby
increasing its spasticity. This is achieved through the gradual rate of contraction specific to the
Spasticity programme. Another particularity of this programme is the absence of all low frequencies,
which can also increase spasticity by generating repeated micro-stretches of the spastic muscle.
Spasticity mainly affects the antigravity muscles of the lower limbs and the flexor muscles of the
upper limbs, but out of these muscles, the ones most affected and the severity of spasticity vary
greatly depending on the type of disorder of the cerebro-spinal tract (hemiplegia, tetraplegia,
paraplegia or multiple sclerosis). Moreover, for the same type of disorder of the cerebro-spinal tract,
the severity of spasticity and the muscles in which it is most apparent varies from one patient to
another. For these reasons, each case has to be considered individually. It is therefore the task of the
therapist to carry out an accurate clinical evaluation of each patient in order to select the muscles
on which the treatment is to be concentrated.
In general, spasticity mainly affects the following muscles:
• In the lower limbs:
- triceps surae
- quadriceps
- adductors
- gluteus maximus
• In the shoulder:
- pectoralis major
- latissimus dorsi
• In the upper limbs:
- biceps brachii
- flexors of the fingers and wrist
In the treatment of spasticity, NMES is applied to one or more of the following muscles, depending
on the patient: tibialis anterior, extensor of the toes, lateral peroneal, hamstrings, tensor fascia lata,
deltoid, supraspinatus, triceps brachii, extensors of the fingers and wrist.
168
WIRELESS PROFESSIONAL
EN
METHOD
1 - Protocol:
Spasticity: length of treatment to be adjusted depending on progress.
If the patient is experiencing associated pain symptoms, TENS stimulation can be performed in
addition on the other channels.
In this case, the specific practical rules for TENS (electrode placement, regulation of intensity) should
be followed for each channel used for this purpose.
2 - Treatment frequency:
One or two 20 to 30-minute sessions per day.
3 - Electrode position:
Place the electrodes on the muscle antagonist to the spastic muscle to be treated. The stimulation
does not act on the spastic muscle, but on its antagonist.
4 - Patient position:
The patient and body part being treated are positioned in such a way as to achieve the maximum
range of motion. In fact, unlike the conventional rules for using NMES, it is worthwhile for these
treatments to allow for isotonic contraction of the antagonist muscle, causing movement to the
maximum range of motion, thus causing maximum stretching of the spastic muscle.
• Lower limb:
leg: patient seated
thigh: prone position
• Pelvic girdle:
supine position
• Shoulder girdle:
patient seated, arm abducted at 30° to the body, elbow resting on an armrest
• Upper limb:
patient seated
triceps: elbow in supination;
Extensors of the fingers and wrist: wrist in pronation
169
5 - Stimulation energy:
Always work with an energy that is too low to produce muscle fibre stimulation in the spastic
muscles.
The stimulation energy must however be adjusted manually so that the isotonic contraction of the
antagonist muscle causes movement to the maximum range of motion, thus creating maximum
stretch of the spastic muscle.
This action cannot be carried out if the agonist-antagonist imbalance is too great; this occurs when
spasticity of a muscle exceeds the contraction strength of its atrophied antagonist. Stimulation
then only allows for more or less reduced movement or even no movement at all. However, the
treatment should be carried out even in this situation, because stimulation, even subliminal, has a
beneficial effect on the reduction of spasticity.
6 - Manual activation of stimulation:
When the mi-SCAN is activated by default, the stimulation session starts automatically with a
measurement of the chronaxy. This is a short test lasting around ten seconds, which allows the
optimum duration of the stimulation pulse to be adjusted, ensuring maximum comfort. The energy
should then be gradually increased to cause the first contraction of the antagonist muscle.
Each contraction is followed by a five-second rest period. Once this rest period has finished, press
any button on any channel to trigger the next contraction. By doing so, each contraction is triggered
and therefore controlled by a manual action. This technique provides a clear psychological benefit
for the patient, who can trigger contractions with his/her good hand, and it also makes it possible to
work synchronously with the associated movements.
The manual trigger of the contraction (function activated by default) can be replaced by an
automatic trigger. In this case, the programme options must be modified.
7 - Associated actions:
• Passive mobilisation :
When the severity of spasticity causes a marked imbalance between the spastic muscle and its
antagonist, and there is a risk of joint stiffness, the therapist can complete the movement induced
by stimulation using passive mobilisation or gravity assisted posture.
170
WIRELESS PROFESSIONAL
EN
3) The hemiplegic hand
In hemiplegic patients, the hand and wrist show paresis, or even paralysis with more or less
pronounced spasticity of the flexor muscles and atrophy of the extensors. This highly debilitating
situation can develop into retraction, stiffening and misalignment if regular treatment is not
initiated.
This specific indication is an example of using the Spasticity programme for the area most
commonly affected by debilitating spasticity.
METHOD
1 - Protocol:
Spasticity
If the patient is experiencing associated pain symptoms, TENS stimulation can be performed in
addition on the other channels.
In this case, the specific practical rules for TENS (electrode placement, regulation of intensity) should
be followed for each channel used for this purpose.
2 - Treatment frequency:
One to two 20-minute sessions per day.
3 - Electrode position:
A single module is sufficient to stimulate the
extensor muscles of the fingers and the wrist.
A small electrode is placed on the fleshy part of
the epicondylar muscles approximately two
finger-widths below the epicondyle. The second
electrode, also small, is placed on the dorsal aspect
of the forearm, where the lower and
middle thirds meet.
The position of these electrodes must be adjusted so as to firstly obtain extension of the fingers,
and then extension of the wrist. Extension of the wrist alone with flexion of the proximal and distal
interphalangeal joints will not produce optimum results.
Extension of the interphalangeal joints is therefore the first objective.
171
4 - Patient position:
The patients is seated beside a table. The elbow and forearm rest on the table, the shoulder is in a
functional position, with the elbow bent and the hand in pronation.
5 - Stimulation energy:
Always work with an energy that is too low to produce diffusion of stimulation to the flexors of the
fingers and wrist.
Ideally, the stimulation energy should be adjusted so that the contraction of the extensors extends
the fingers and wrist to the maximum range of movement.
The complete movement cannot be carried out if the spasticity of the flexor muscles exceeds the
contraction strength of the atrophied extensors. Stimulation will only cause reduced movement,
or even no movement at all in extreme cases. Treatment with NMES should be carried out even
in these situation, because even subliminal stimulation has a beneficial effect on the reduction of
spasticity. To complete the extension, passive stretching is also necessary. Combined treatment of
stimulation and passive motion is therefore given.
6 - Manual activation of stimulation
When the mi-SCAN is activated by default, the stimulation session starts automatically with a
measurement of the chronaxy. This is a short test lasting around ten seconds, which allows the
optimum duration of the stimulation pulse to be adjusted, ensuring maximum comfort. The energy
should then be gradually increased to cause the first contraction of the antagonist muscle.
Each contraction is followed by a five-second rest period. Once this rest period has finished, press
any button on any channel to trigger the next contraction. By doing so, each contraction is triggered
and therefore controlled by a manual action. This technique provides a clear psychological benefit
for the patient, who can trigger contractions with his/her good hand, and it also makes it possible to
work synchronously with the associated movements.
The manual trigger of the contraction (function activated by default) can be replaced by an
automatic trigger. In this case, the programme options must be modified.
7 - Associated actions:
• Passive mobilisation:
When contraction of the extensors is insufficient to mobilise the fingers and wrist to their
maximum range, the movement should be completed by passive extension. The electrically-induced
contraction is allowed to develop until the maximum extension it can produce is achieved. The
movement is then completed by applying gentle and gradual pressure.
172
WIRELESS PROFESSIONAL
EN
4) The hemiplegic shoulder
A - Reminder
One of the specific problems commonly encountered in hemiplegic patients is subluxation of the
paretic or paralysed shoulder. Atrophy with loss of strength which affects the abductor muscles of
the arms (deltoid and supraspinatus muscles) results in an inability to provide satisfactory support
for the head of the humerus. In addition, more or less pronounced spasticity of the depressor
muscles of the shoulder (pectoralis major and latissimus dorsi) causes a downward pull on the head
of the humerus, which adds to the pull caused by the weight of the limb. This situation commonly
leads to the displacement of the head of the humerus from the glenoid cavity. Radiologically, it is
clear that the axis of the anatomical neck of the humerus no longer passes through the centre of
the glenoid cavity. This is inferior subluxation.
This subluxated shoulder can often cause pain. The pain can remain localised around the shoulder,
but can also radiate into the upper limb towards the hand through stretching of branches
of the brachial plexus. Vasomotor and trophic disorders of the hand, such as those seen in
algoneurodystrophy (complex regional pain syndrome) may be combined, resulting in classic
shoulder-hand syndrome.
B - Use of neuromuscular electrical stimulation (NMES)
NMES of the abductor muscles of the arm (deltoid and supraspinatus) may be used to prevent
or treat atrophy and reduce spasticity in the latissimus dorsi and pectoralis major muscles. This
technique is indicated in the prevent or treatment of subluxation of the shoulder in hemiplegic
patients. Radiological investigations show evidence of re-centring of the humeral head in relation
to the glenoid cavity.
Moreover, pain in the shoulder and upper limb often associated with subluxation is effectively
reduced by this type of treatment. However, in the event of pain radiating in the upper limb, the
analgesic action can be supported by using TENS (Gate control), which is programmed on the third
and fourth channel.
In shoulder-hand syndrome, in addition to shoulder pain, which is itself a secondary problem
associated with hemiplegia, complex regional pain syndrome (CRPS) can occur, which affects the
hand. In this situation, CRPS should be treated using the programmes and method described in this
chapter, which deal with this disorder (algoneurodystrophy).
173
METHOD
1 - Protocol:
The hemiplegic shoulder
2 - Treatment frequency:
One 25-minute session per day, five days per week, for 4 weeks.
Regular treatment carried out in one single session per week may then be necessary in the absence
of significant recovery or the persistence of considerable spasticity of the pectoralis major muscle.
3 - Electrode position:
Two channels are used to stimulate the abductor muscles of the arm. One channel for the deltoid
and the other for the supraspinatus. A small electrode is placed on the lateral aspect of the shoulder,
in the middle of the deltoid muscle; another small electrode is placed on the outer part of the
supraspinatous fossa.
For optimum effectiveness, the positive pole of the module (pod with an illuminated button) should
preferably be positioned on the small electrodes which correspond to motor points. The other pods
are connected to the two outputs of a large electrode placed on the acromion like an epaulette.
If there is painful irradiation towards the hand and forearm, TENS stimulation is available on
channels 3 and 4. The order the modules are switched on determines the order in which the
channels provide stimulation. You must therefore be careful when doing this.
For TENS, two large electrodes are used for each module, positioned to cover or follow the painful
area or irradiation.
174
WIRELESS PROFESSIONAL
EN
4 - Patient position:
The patient is seated beside a table, with his/her elbow and forearm resting on a cushion on the
table.
5 - Stimulation energy:
The energy is gradually increased for each contraction until the maximum tolerable energy level is
reached. The therapist plays a fundamental role in encouraging and reassuring the patient, who can
then tolerate levels of energy that produce powerful contractions. If the TENS programme is used
on channels 3 and 4, the energy will be adjusted on these channels so that the patient clearly feels
moving tingling. However, care must be taken to ensure that the energy is low enough to avoid any
muscle contraction.
175
Tr eatment of v enou s i n s u f f i ci e n cy
Unlike occasionally experiencing heavy legs, venous insufficiency is a result of organic damage to
the vein walls which clinically manifests as large or small varicose veins. These are the result of a
permanent dilation, secondary to the hyperpressure and stasis of the venous blood, to which is
added progressive hypoxia of the intima (inner layer of the wall).
The deficiency of the valves of the deep veins and the perforating veins is behind this process. Their
role in preventing the regurgitation of venous blood is no longer guaranteed. Hydrostatic pressure
is accentuated and muscle contractions are no longer sufficient to evacuate the venous blood.
The blood stagnates and causes hyperpressure in the superficial veins until varicose distensions are
produced.
Stasis oedema is often associated with venous insufficiency, but not always. Moreover, this oedema
may be present or absent in the same patient, depending on the time of day and how much time
the patient has spent standing up.
We must therefore distinguish between:
1. Venous insufficiency without oedema.
2. Venous insufficiency with oedema.
The implications for the type of the electrostimulation programme are different depending on
whether there is or is not an oedema associated with varicose veins.
1) Venous insufficiency without oedema
On one hand, electrical stimulation must allow for an increase in the general blood flow (arterial
as well as venous) so as to improve the circulation of the interstitial fluid and increase oxygenation
of the tissues and the intima of the veins. On the other hand, it is necessary to drain the veins as
much as possible to combat stasis. The increase in arterial flow (and therefore capillary flow, and
therefore venous flow) is achieved by means of the optimum low frequency for increase of flow, i.e.
8 Hz. The deep veins are drained by being compressed, which is caused by tetanic contractions of
the leg muscles. The programme therefore consists of short tetanic contractions of the leg muscles,
separated by long active pauses to increase the flow.
176
WIRELESS PROFESSIONAL
EN
METHOD
1 - Protocol:
Venous insufficiency 1
2 - Treatment frequency:
3 to 6 sessions per week for approximately 6 weeks to treat the acute episode.
It is then recommended to keep up treatment with a few weekly sessions.
3 - Electrode position:
Two channels are required for each leg.
A small electrode is placed just under the head of the fibula on the common peroneal nerve, and
another small electrode in the upper part of the popliteal fossa over the tibial nerve. For optimum
effectiveness, the positive pole of the module (pod with an illuminated button) should preferably be
positioned on these two small electrodes.
The two other pods are connected to the two outputs of a large electrode placed on the upper part
of the calf, just below the popliteal fossa.
4 - Patient position:
The patient must be in a supine position with his/her legs inclined so that gravity encourages
venous return.
5 - Stimulation energy:
For the draining stage (contraction): the energy must be gradually increased until a significant and
balanced contraction is being caused for all stimulated muscles.
For the activation stage of blood circulation: the energy must be increased until clearly visible
muscle twitches are obtained.
177
2) Venous insufficiency with oedema
The presence of oedema, particularly when it does not go upon wakening, completely changes the
electrical stimulation programme. Oedema is caused by blood plasma leaking through the venous
membranes, due to hyperpressure in the distal veins. In this case, it is not possible to use the low
arterial flow increase frequencies because they reduce peripheral vascular resistance, increase the
perfusion pressure of the capillaries and risk aggravating the oedema. On the other hand, tetanic
contractions encourage drainage of the deep veins and drainage of the oedema, provided they
are carried out in a certain order and under certain conditions. The most effective way consists of
producing an initial ejection effect in the leg and then in the thigh, without relaxing the compression
of the deep veins in the leg. In this way, the venous blood is pushed in the first stage towards the
thigh by a contraction of the leg muscles. Then, in the second stage, the contraction of the thigh
muscles eject the blood upwards, provided however that the leg muscles remain contracted to
prevent regurgitation.
METHOD
1 - Protocol:
Venous insufficiency 2
2 - Treatment frequency:
3 to 6 sessions per week for approximately 6 weeks to treat the acute episode.
It is then recommended to keep up treatment with a few weekly sessions.
178
WIRELESS PROFESSIONAL
EN
3 - Electrode position:
It is necessary to work in staggered contractions mode. This means that only channels 1 and
2 start to produce a tetanic contraction, while channels 3 and 4 are at rest. After 3 seconds of
tetanic contraction via channels 1 and 2, the contraction starts only on channels 3 and 4, while the
contraction induced by channels 1 and 2 continues. After 3 seconds of simultaneous contraction on
the four channels, there is a complete rest phase of 20 seconds on the four channels.
The order in which the channels provide stimulation depends on the order in which the different
modules are switched on. For this program, it is therefore particularly important to follow the order
of channel numbers below:
1. Start the 2 modules connected to the calves.
2. Start the 2 modules connected to the thigh.
• For the calf (channels 1 and 2):
A small electrode is placed just under the head of the fibula on the common peroneal nerve, and
another small electrode in the upper part of the popliteal fossa over the tibial nerve. For optimum
effectiveness, the positive pole of the module (pod with an illuminated button) should preferably be
positioned on these two small electrodes.
The two other pods are connected to the two outputs of a large electrode placed on the upper part
of the calf, just below the popliteal fossa.
179
• For the thigh (channels 3 and 4):
-For the quadriceps (channel 3): a large electrode is placed diagonally on the lower third of the
quadriceps, a second large electrode is placed at the top of the thigh.
For optimum effectiveness, the positive pole of the module (pod with an illuminated button)
should preferably be positioned on the large lower electrode.
-For the hamstrings (channel 4): a large electrode is placed diagonally on the lower third of the
hamstrings, a second large electrode is placed diagonally on the upper third of these muscles.
For optimum effectiveness, the positive pole of the module (pod with an illuminated button)
should preferably be positioned on the large lower electrode.
4 - Patient position:
The patient must be in a supine position with his/her legs inclined so that gravity encourages
venous return.
5 - Stimulation energy:
Adjust the stimulation energy to obtain significant contractions for the 4 channels and if possible, at
a higher level on channels 1 and 2 than on channels 3 and 4.
180
WIRELESS PROFESSIONAL
EN
Treatment of ar t e r i a l i n s u f f i ci e n cy i n t h e low e r l im b s
We will limit this chapter to insufficiency of the arteries in the lower limbs. High blood
pressure, smoking, cholesterol and diabetes are among the main causes of progressive
deterioration of the arterial walls (arteriosclerosis). This presents as narrowing of the arteries
with, consequently, a reduction in the blood flow in the tissues downstream of the narrowed
arteries. The less well irrigated tissues suffer and become hypoxic, all the more so because the
width of the arteries has shrunk and more intense activity requires more oxygen.
Arterial insufficiency in the lower limbs is conventionally divided into four clinical stages. These
four stages (I, II, III, IV) depend on the approximate severity of the loss of blood flow and the
tissue-related consequences.
Stage I is asymptomatic. In a clinical examination, an arterial murmur can be heard, which is
evidence of narrowing, although the patient has no complaint.
In Stage II, the reduction in the flow causes pain in the legs when walking. At rest, the flow is
sufficient, but it cannot meet tissue requirements during physical activity: the patient suffers
from “intermittent claudication” (IC). This means that pain occurs after walking a certain
distance (the shorter the distance, the more severe the condition); in the end, this pain makes
the patient stop: then, after a recovery period, the pain lessons and the person can resume
walking until the cycle starts again.
Stage III is characterised by constant pain, including when at rest. Blood flow is so reduced that
the tissues constantly suffer from hypoxia with a continual presence of acid metabolites.
Stage IV corresponds to suffering that is so advanced that tissue necrosis with gangrene
occurs. This is then called critical ischaemia, a condition which often leads to amputation.
Only Stages II and III can benefit from treatment by electrostimulation. Stage IV is an
emergency situation and requires surgical treatment. Stage I is asymptomatic and the patient
has no complaint.
181
1) Stage II arterial insufficiency
With intermittent claudication (Stage II), the muscle fibres suffer from an oxygen shortage
during physical activity. The narrowed arteries cannot meet the fibres’ need for oxygen, which
increases with walking. With a chronic reduction in blood flow and a lack of oxygen, the
capillary network degenerates and the fibres lose their oxidative power. They use the little
oxygen that they still receive increasingly badly. Therefore, the problem becomes twofold: very
little oxygen provided and poor use of what oxygen there is. Low frequency stimulation can
act on the fibres’ capacity to use oxygen. Considerable studies have shown that low frequency
stimulation leads to an improvement in the oxidative capacity of the stimulated muscle
(increase in the number and size of mitochondria, increase in oxidative enzymatic activity).
Electrostimulation therefore improves the tolerance of muscle fibres to physical activity in the
case of arterial insufficiency and thus increases the walking range of patients suffering from
intermittent claudication.
METHOD
1 - Protocol:
Arterial insufficiency 1
2 - Treatment frequency:
5 sessions per week for 12 weeks to treat the acute episode.
It is then recommended to keep up treatment with a few weekly sessions.
182
WIRELESS PROFESSIONAL
EN
3 - Electrode position:
Two stimulation modules are required for each leg.
A small electrode is placed just under the head of the fibula on the common peroneal nerve,
and another small electrode in the upper part of the popliteal fossa at the nerve trunk of
the tibial nerve. For optimum effectiveness, the positive pole of the module (pod with an
illuminated button) should preferably be positioned on these two small electrodes.
The two other pods are connected to the two outputs of a large electrode placed on the upper
part of the calf, just below the popliteal fossa.
4 - Patient position:
Place the patient in a comfortable position.
5 - Stimulation energy:
Adjust the stimulation energy to the maximum level the patient can tolerate, to recruit as many
fibres as possible.
183
2) Stage III arterial insufficiency
The same benefit can be obtained using low frequency electrostimulation in Stage III arterial
insufficiency. In this case, because of the more severe obstruction of the arterial width and the
more serious deterioration of the muscle qualities, stimulation frequencies lower than those
used for intermittent claudication must be used.
To carry out a Stage III arterial insufficiency session, we will proceed in the same way as in stage
II, but using a programme adapted to more severe deterioration of the arterial capital.
METHOD
1 - Protocol:
Arterial insufficiency 2
The protocol is absolutely identical, apart from the patient position.
4 - Patient position:
The difficulty with which the arterial blood is transported to the distal extremities makes it
preferable to position the patient in such a way that gravity aids the arterial circulation. The patient
is therefore placed on a comfortable seat in such a way that does not compress the posterior
arterial trunks.
184
DJO GLOBAL
AUSTRALIA:
BENELUX:
CANADA:
DJO Australia
DJO Benelux
DJO Canada
PO Box 2057
Welvaartstraat 8
6485 Kennedy Road
Normanhurst
2200 Herentals
Mississauga
NSW 2076
BELGIUM
Ontario
AUSTRALIA
T: Belgium 0800 18 246
L5T 2W4
T: +1300 66 77 30
T: Netherlands 0800 0229442
CANADA
F: +1300 66 77 40
T: Luxemburg 8002 27 42
T: +1 1866 866 5031
E: [email protected]
E: [email protected]
F: +1 1866 866 5032
E: [email protected]
CHINA:
DENMARK, FINLAND,
FRANCE:
DJO China
NORWAY & SWEDEN:
DJO France S.A.S.
A312 SOHO ZhongShan Plaza
DJO Nordic AB
Centre Européen de Fret
1055 W. ZhongShan Road
Murmansgatan 126
64990 Mouguerre
Shanghai, 200051
21225 Malmö
FRANCE
CHINA
SWEDEN
T: +33 (0)5 59 52 86 90
T: (8621) 6031 9989
T: Sweden 040 39 40 00
F: +33 (0)5 59 52 86 91
F: (8621) 6031 9709
T: Norway 8006 1052
E: [email protected]
E: [email protected]
T: Finland 0800 114 582
T: Denmark +46 40 39 40 00
E: [email protected]
GERMANY:
ITALY:
SPAIN:
DJO Deutschland
DJO Italia Srl
DJO Ibérica
ORMED GmbH
Via Leonardo Da Vinci 97
Carretera de Cornellá 144, 1º 4ª
Merzhauser Str. 112
Trezzano Sul Naviglio
Esplugues de Llobregat
D-79100 Freiburg
20090 Milano
08950 Barcelona
GERMANY
ITALY
SPAIN
T: +49 761 4566-01
T: +39 02 484 63386
T: +34 943 638 167
F: +49 761 456655-01
F: +39 02 484 09217
F: +34 943 638 174
E: [email protected]
E: [email protected]
E: [email protected]
SWITZERLAND:
UK & IRELAND:
UNITED STATES:
Compex Médical SA
DJO UK Ltd
DJO Global, Inc
Ch. du Dévent
1a Guildford Business Park
1430 Decision Street
ZI Larges Pièces A
Guildford
Vista
1024 Ecublens
Surrey
CA 92081-8553
Switzerland
GU2 8XG
U.S.A.
T: +41 (0) 21 695 2360
UNITED KINGDOM
T: +1 800 336 6569
F: +41 (0) 21 695 2361
T: +44 (0)1483 459 659
F: +1 800 936 6569
E: [email protected]
F: +44 (0)1483 459 470
E: [email protected]
ASIA-PACIFIC:
EUROPE, MIDDLE EAST & AFRICA:
LATIN AMERICA:
DJO Asia-Pacific Limited
DJO Benelux
DJO Global, Inc
Unit 1905, 19/F, Tower II
Welvaartstraat 8
1430 Decision Street
Grand Central Plaza
2200 Herentals
Vista
138 Shatin Rural Committee Road
BELGIUM
CA 92081-8553
Shatin
T: +32 (0) 14248350
U.S.A.
HONG KONG
F: +32 (0) 14248358
T: +1 800 336 6569
T: +852 3105 2237
E: [email protected]
F: +1 800 936 6569
F: +852 3105 1444
E: [email protected]
E: [email protected]
© 2013 DJO - 4528163-EN - Rev A
DJO GLOBAL, EXPORT CENTERS