1
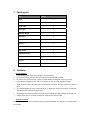
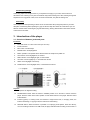
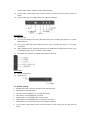
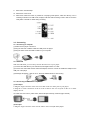
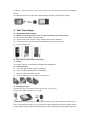
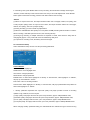
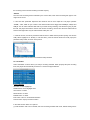
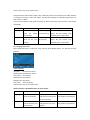
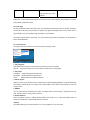
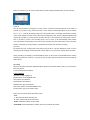
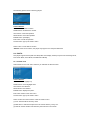
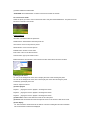
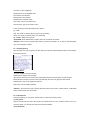
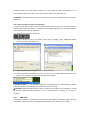
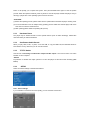
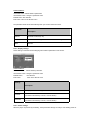
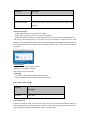
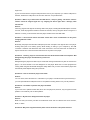
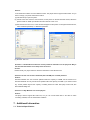
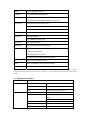
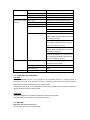
End-User License Agreement This End User License Agreement is a legal agreement between you and us for the unit application/driver software program and associated documentations. ACKNOWLEDGMENT BY INSTALLING THE SOFTWARE, COPYING OR OTHERWISE USING THE PROGRAM, YOU ACKNOWLEDGE AND AGREE THAT YOU HAVE READ THIS AGREEMENT, UNDERSTAND IT, AND AGREE TO BE BOUND BY ITS TERMS AND CONDITIONS.IF YOU DO NOT AGREE TO THE TERMS OF THIS LICENSE AGREEMENT, DO NOT INSTALL THE SOFTWARE AND/OR DO NOT USE THE PROGRAM. LICENSE RESTRICTIONS a) Except for the licenses expressly granted to you in this Agreement, no other licenses are implied. b) You may not modify, translate, reverse engineer, decompile, disassemble (except to the extent that this restriction is expressly prohibited by law) or create derivative works based upon the Program or copy the Program, except as expressly permitted herein. You agree that you shall only use the Program in a manner that complies with all applicable laws in the jurisdictions in which you use the Program, including, but not limited to, applicable restrictions concerning copyright and other intellectual property rights. c) Updated versions of the Program can be downloaded from our website. d) We are not obligated to provide support services for the Program. TERM AND TERMINATION a) The license is effective when you accept this Agreement, and remains effective until terminated by either party terminate this license without any notice or delay, by destroying or permanently erase the Program and all copies thereof. b) If you use, copy, modify, or transfer the Program, or any copy, in whole or part, except as expressly provided for in this license, your license will be automatically terminated. c) When the license is terminated, you must destroy or permanently erase the Program and all copies thereof. OWNERSHIP RIGHTS All title and intellectual property rights in and to the Program and any copies thereof are owned by us or its suppliers. All title and intellectual property rights in and to the content which may be accessed through use of the Program is the property of the respective content owner and may be protected by applicable copyright or other intellectual property laws and treaties. This license grants you no rights to use such content. GENERAL TERMS Any changes from the terms and conditions of this Agreement made in other manner will be not effective. If any part of this Agreement shall be held invalid, illegal, or unenforceable, the validity, legality, and enforceability of the remainder of the Agreement shall not in any way be affected or impaired thereby. This Agreement is the complete and exclusive statement of the agreement between you and us, which supersedes all proposals or prior agreements, oral or written, and all other communications between you and us, relating to the subject matter of this Agreement. Table of Contents 1. Packing list 2. Cautions 3. Introduction of the player 3.1. Overview of buttons, jacks and ports 3.2. Remote control 3.3. Connecting 4. First Time Usage 4.1. Preparation before usage 4.2. Turning on/ Shutting down the player, Power Save, Changing the language 5. Function Description 5.1. Main menu 5.2. TV-RECORD 5.3. VIDEO 5.4. MUSIC 5.5. RECORDER 5.6. PHOTO 5.7. E-BOOK 5.8. GAME 5.9. BROWSER 5.10. USB 5.11. USB-OTG 5.12. Firmware update 5.13. Hardware Reset 5.14. One Button Audio Record 5.15. TFT/TV Switch 5.16. SETUP 6. Troubleshooting 7. Additional Information 7.1. Technical Specification 7.2. Supported file formats 7.3. Copyrights and Trademarks 7.4. Warranty Dear Customer, Thank you very much for choosing this exciting Portable Multimedia Center of our company. It will give you much excitement and enjoyment, for example, Music (MP3/WMA), Video (MPEG1/2/4), Photo, E-book, Game and etc. You may enjoy them without computer. Of course, you may also use it as a TV-Recorder as well as a portable hard disc. We believe the player will bring much happy time to you. This manual will explain all functions of this player to you. Remember, you may use the player to… Enjoy Movies —support MPEG1/2 /4, DIVX, XVID, AVI video files, can store up to 25 movies. Record Video files— support AVI files, record programs from TV, DVD player and DV and saved as MPEG4 files. Recording time lasts for up to 18 hours. Listen to Music — support MP3, WMA music files, can store up to 6,000 MP3 songs View Photos—support JPEG files, can store up to 20,000 JPG photos. Record Audio files—support WAV format. Recording time lasts for up to 170 hours. Save your data—as a Portable Hard Disc with USB 2.0 port. You also have the USB-OTG which helps you directly backup and store your photos from digital Camera, U disc. (*Data above are base on using 20GB hard disk, 750MB per movie, 300KB/S for video recording, 3.5MB per song, 1.0MB per photo and 32KB/S for audio recording.) We hope this player can bring you a lasting enjoyment. Please check our website for technical support and latest firmware to upgrade. Thank you again for purchasing our product. Disclaimer: This document may describe features that are not currently implemented or available for the player. Please visit our website for more information about the latest software and updates available for the player. Specifications are subject to change without notification. Errors and omissions accepted. Images and illustrations may not always match contents. 1. Packing list Item Number Player 1 A/V OUT Cable 1 A/V IN Cable 1 USB Cable 1 USB OTG adapter 1 AC Adapter 1 Remote Control 1 Earphone 1 USB Driver CD 1 User Manual 1 Quick Start Guide 1 Carry bag 1 QC pass 1 Warranty card 1 2. Cautions General cautions Do not put the player under direct sunlight or any heat source. Do not put the player beside metal (coins, hair pin, etc) or flammable material. Be careful not to drop the player, or else you might damage the hard disk or the LCD screen. Do not bring the player into mist, dust or coal smoke, or else you might damage the player. Avoid hitting the player with hard object, avoid shaking the player, and stay away from magnetic field. Do not disassemble the player, repair the player or change the design of the player, any damage done will not be included in the repair policy. Please tightly plug in the AC adaptor to the player before plugging in the AC adaptor to the wall jack. Use the proper way to connect the USB cable, earphone and A/V Out cable. Backup your data This player has a hard disk. You should back up the hard disk regularly. Our company is not responsible for lost data. Avoid hearing damager Avoid using earphones at high volume. If you experience a ringing in your ears, reduce volume or discontinue use. Listening to very loud sound levels may lead to hearing loss. Also, listening through the earphones for a long period of time, even at normal sound levels, may lead to hearing loss. Road safety Use of earphones while operating a vehicle is not recommended. Stop using this product if you find it disruptive or distracting while operating any type of vehicle. Keep the volume at a level where you can still hear outside traffic and emergency signals while driving. Driving while unable to hear these sounds could cause an accident. 3. Introduction of the player 3.1. Overview of buttons, jacks and ports Front View 1. TFT-LCD screen: 3.5″TFT-LCD screen (16.7M color) 2. Infrared receiver 3. ESC button: cancel/escape 4. ENTER button: enter/play/pause 5. Built-in speaker: The speaker will be effective when the earphone is pulled out. 6. LEFT button: moves highlight left, or Rewind. 7. RIGHT button: moves highlight right, or Fast forward. 8. UP button: moves highlight up, or increases the volume. 9. Slider: moves highlight continuously 10. DOWN button: moves highlight down, or decreases the volume. Top View 11. Microphone for digital recording 12. POWER/HOLD switch: Hold the switch in POWER position for 2 seconds to switch on/off the player. Push the switch to the HOLD position to lock all the buttons on the player. Remote control is still effective. 13. Indicator (green): In working mode, the indicator is bright all the time; in charging mode, the indicator is flashing; in copying mode, the indicator is also flashing. 14. RECORD button: When the button is pressed in non-playing mode (Music, Video and Photo), non-TV recording mode and non-USB mode, the player will start audio recording. Press to start TV record in ready state. It will take no effect during recording. 15. TFT/TV button: Video output button. Press this button to switch among A/V OUT and the LCD screen. 16. TOOLS button: pop-up corresponding menu in different interfaces Left Side View 17. Earphone jack 18. A/V OUT jack: attach the A/V OUT cable here when you’re connecting the player to TV or other display devices. 19. A/V IN jack: attach the A/V IN cable here when you’re connecting the player to TV or other components. 20. USB 2.0/USB-OTG port: attach the small end of the USB cable or USB-OTG here when you’re connecting the player to your computer or other devices. 21. DC IN jack: Only attached AC adapter of the player can be used. Bottom View 22. Strap attachment hole 23. Expansion port 3.2. Remote control 1. POWER OFF button: Hold for 2 seconds to shut down the player. 2. ENTER button: enter/play/pause 3. UP button: moves highlight up, or increases the volume. 4. LEFT button: moves highlight left, or Rewind. 5. RIGHT button: moves highlight right, or Fast forward. 6. DOWN button: moves highlight down, or decreases the volume. 7. TOOLS button: pop-up corresponding menu in different interfaces. 8. TFT/TV button: Video output button. Press this button to switch among A/V OUT and the LCD screen. 9. ESC button: cancel/escape 10. Mute button: mute on/off 11. REC button: When the button is pressed in non-playing mode (Music, Video and Photo), non-TV recording mode and non-USB mode, the player will start audio recording. Press to start TV record in ready state. It will take no effect during recording. 3.3. Connecting 3.3.1 Connecting to computer (1) Make sure the player is turned on. (2) Plug the mini end of USB2.0 cable into USB port of the player. (3) Plug the other end of the USB2.0 cable into your computer. 3.3.2 USB-OTG With the USB-OTG, you can easily connect other devices to your player. (1) Connect the USB cable to your USB device, like digital camera or U disk. (2) Connect the USB cable and the USB-OTG adapter, and then connect the USB-OTG adaptor to the USB port of the player. (3) Message will appear—“Start to copy?” Press the ENTER button to start copying. 3.3.3 Connecting to audio/video components (1) A/V output a. Plug the single connector of the A/V OUT cable to the A/V OUT jack of your player. b. Plug the 3 colour connectors of the A/V OUT cable to the A/V IN jacks of the TV or other display devices. A/V cable connector colour: yellow-video, white-audio (left channel), red-audio (right channel) (2) A/V input a. Plug the single connector of the A/V IN cable to the A/V IN jack of the player. b. Plug the 3 colour connectors of the A/V IN cable to the A/V OUT jacks of the TV or other display devices. A/V cable connector colour: yellow-video, white-audio (left channel), red-audio (right channel) 4. First Time Usage 4.1. Preparation before usage 4.1.1 Remote control preparation and how to replace the battery of the remote control (1) Please take out the plastic film before usage. (2) Open the back cover of remote control, and take out the Lithium cell battery. (3) Put the new Lithium cell battery (Lithium Cell CR2025) into the remote control. (4) Cover the back cover. 4.1.2 Install and charge the battery of the player (1) Battery Li-ion battery, Capacity: 3.7V/2400mAh, detachable and rechargeable. (2) Install the battery a) Turn off the player. (When using the AC adaptor) b) Open the battery box and take out the old battery. c) Insert the battery into the box properly. d) Cover the battery box. You can turn on the player now. 4.1.3 Charging the player (1) Insert the plug of AC adaptor into the DC IN jack of your player. (2) Insert the adaptor into the AC power plug. It takes 3.5 hours to fully charge the battery. Before the first usage, please charge the battery over 4.5 hours to fully activate the battery. You may operate the player while its battery is being charged. Please use the specified charger which is packed with the player. Any other adapter may damage the player. The green indicator will start flashing when the battery is being charged. It will be off when the battery is fully charged (when the player is OFF). ▲NOTE: The wrong installation of the battery or short circuit of the battery may damage the player, and sometimes may hurt the user. Please only use the original battery from the manufacturer. Do not use any other model battery in this player. 4.2. Turning on/ Shutting down the player, Power Save, Changing the language 4.2.1 Turning on the player Push the POWER/HOLD switch to POWER position for 2 seconds, and then the indicator will turn green. Please wait about 10 seconds for the player to boot up completely and enter into the main menu. If the player shuts down automatically after several seconds, please check whether the player is out of battery. 4.2.2 Shutting down the player When the player is in operating mode, push POWER/HOLD switch to POWER position for 2 seconds, and then the player will be shut down. 4.2.3 Power Save (1) Power off: In Power menu [SETUP – Power: Power Save] there is a Power off parameter. You can set the time to 3 minutes. Thus, if the player is idle for 3 minutes in standby mode, it will shut off automatically. This setting can be changed among “3 minutes”, “5 minutes”, “10 minutes” and “never”. (2) Backlight off: In Power menu [SETUP – Power: Power Save] there is a backlight off parameter. You can set up the time so that the player’s backlight automatically shuts off to save power when no buttons are pressed during the time. The time can be set to 30, 60, 90 seconds or to never. When the backlight is off, press any button to activate the screen again. If the player is in HOLD mode, please unlock it first. 4.2.4 Changing the language This player supports multi-language. In Display menu [SETUP – Display] there is the Language parameter. You can change the language to Chinese or English. The system language of the player will change into the new language at once. 5. Function Description 5.1. Main menu After the system boots up, you’ll see the main menu with nine icons on the screen. The VIDEO icon is highlighted by default. The name of any function will be displayed when its icon is highlighted. You are sure to enjoy these fresh dynamic icons, as the picture shows. Control buttons: UP button: moves highlight up. DOWN button: moves highlight down. LEFT button: moves highlight left. RIGHT button: moves highlight right. ENTER button: confirms to enter the selected function. ESC button: Non-effective TOOLS button: Non-effective 5.2. TV-RECORD This player supports TV recording function, by which you can easily record programs from TV, DVD player or DV. The program will be recorded as AVI video files. As for the connection between the player and other devices like TV, DVD, please refer to 3.3.3-(2) A/V input. This function supports D1 resolution (720×576,25fps), and there are four qualities (high/middle/low/compact quality) for recording. Also, you can set up the time to start the recording. Select TV RECORD and press ENTER button to enter the TV RECORD menu. Start TV Record: start to record video files Parameters Setup: set up parameters of the recording. Scheduler: set up the time recording. Play: play the recorded files. Control buttons: UP button: moves highlight up. DOWN button: moves highlight down. LEFT button: Non-effective RIGHT button: Non-effective ENTER button: enter the selected function. ESC button: return to main menu. TOOLS button: Non-effective 5.2.1. Start TV Record After selecting “Start TV Record”, this player will be in video preview mode. It will auto-check the video signal is PAL system or NTSC system, and you will see the recording state is “Ready” after initializing. Control buttons: UP button: increases the volume. DOWN button: decreases the volume. LEFT button: Non-effective RIGHT button: Non-effective ENTER button: start recording. ESC button: return to TV record menu. TOOLS button: Non-effective Beside the above control buttons, there are other adjustments you can make in the TOOLS menu. (1) Brightness: adjust the brightness of the screen; (2) Color saturation: adjust the color saturation of the screen; (3) Hue: adjust the hue of the screen; (4) Contrast: adjust the contrast of the screen; (5) Default: set the screen to the original settings. In adjusting mode, press LEFT/RIGHT button to adjust values of parameters. Press the ENTER button to confirm the adjustment. Press ESC button to cancel. In “Ready” state, press the Enter button to start video recording. After recording finishes, the recording file will be saved in “TV record” directory. In manual recording mode, recording file name will be collected by start-recording time, such as “TV [YY] [MM] [DD] _ [HH] [MM]_[XXX] .avi”. [YY][MM][DD]_ [HH] [MM] describes the year, month, day, hour and minute of the start-recording time. [XXX] shows the serial number of the current recording file. The serial number starts from 001, and the player will create a new recording file while its size reaches the specified size in the “Parameters Setup”. In this case, the time in the file name will not be changed but plus one in the serial number. If the recording file size was set as 1GB and start recording at 19:32 June 1, 2006, the first file will be “TV060601_1932_001.avi”. When the file size is approaching 1GB, the player will change the file name to “TV060601_1932_002.avi” and go on recording. In “Recording” state, press ENTER button to stop recording. And information message will change to “Paused”, the time will stop. Press TOOLS button now and you can make adjustments. Press ENTER button again to restart the recording, press the ESC button will end the recording. ▲NOTE: (1) When TV output is set to PAL, the output resolution will be 720 x 576 (high, medium, low quality), 352 x 288 (compact quality). When TV output is set to NTSC, the output resolution will be 720 x 480 (high, medium, low quality), 352 x 240 (compact quality) (2) During recording you cannot make any adjustments. (3) When the available hard disk capacity is too low (below 100MB) recording will not be able to continue. When recording, if hard disk space becomes 0, the recording will stop. (4) During long recording, if multiple video files are required to create, there will be a delay time for changing file (approx. 3 sec). Video will not be recorded during delay time. (5) In preview or recording mode, the battery will not be charged. 5.2.2. Parameters Setup Select “Parameters setup” function can setup recording parameters. Control Buttons: UP button: moves highlight up DOWN button: moves highlight down LEFT button: changes parameter RIGHT button: changes parameter ENTER button: no effect when highlight is on “Quality” or “File size limit”; when highlight is on “Default”, will pop-up “Set all default?” window. ESC button: return to recoding interface TOOLS button: When highlight is on “Quality” or “File size limit”, will pop-up Parameters Setup INFO. No effect when highlight is on “default”. 1. “Quality” parameter represents the output file quality. This player provides 4 levels of recording qualities—high, medium, low and compact. (1) High quality: This player will record D1 (720 x 576) resolution, approx. 4Mbps MPEG4 video; (2) Medium quality: This player will record D1 (720 x 576) resolution, approx. 2Mbps MPEG4 video; (3) Low quality: This player will record D1 (720 x 576) resolution, approx. 1Mbps MPEG4 video. (4) Compact quality: This player will record D1 (720 x 576) resolution, approx. 800kbps MPEG4 video. When changing “Quality” parameter setting, the “estimated left time” will also change, it shows how long the recording can be with the remaining hard disk capacity. ▲NOTE: The size of the recording video is affected by the source video, when actual recording this approx. time might not be correct. 2. “File size limit” parameter represents the maximum size of each output file. This player provides “650MB”, “1GB”, “2GB” for you to select. This means the file will not bigger than 650MByte, 1GByte and 2GByte. You can select a file size that best fit your need. During recording, if the file size is going to pass the limit, this player will create a new file and continue recording, the new file’s file name will be almost same as the original file. Only the serial number will be plus one. 3. “Default” function, the above parameters will be reset to default values (medium quality, max file size 1GB). When highlight is on “Quality” or “File size limit”, press the TOOLS button and it will pop-up the parameter setup INFO, as shown in the picture: Press ESC button now can return to Parameters setup interface 5.2.3. Scheduler Select “Scheduler” function will let you setup a recording schedule. When properly setup the recording timer, the player will automatically record the TV show at the appointed time. Control Buttons: UP button: moves highlight up DOWN button: moves highlight down LEFT button: no effect RIGHT button: no effect ENTER button: no effect ESC button: return to TV RECORD interface TOOLS button: Pop-up the TOOLS menu In the TOOLS menu there are 3 options: (1) Add schedule: add a new schedule, and enter recording schedule edit mode; default starting time is the current time; default file name uses current time as file name. (2) Delete schedule: delete the selected schedule (3) Modify schedule: edit the selected schedule In Scheduler interface, you can setup 6 different schedules. Each schedule will display as “YY/MM/DD HH:MM-HH:MM file name” format. They represent year, month, date, starting time, ending time and preset file name. Schedule can be set to a maximum of 24 hours recording. If the ending time is before or the same as the starting time, this player will not stop the recording until the ending time in the following day. For example, the starting time is June 1st 19:32, ending time is 01:15, this player will start the recording at June 1st 19:32 and stop at June 2nd 01:15. In Scheduler interface, serial number will be added to the preset file name, like “_[XXX].avi”. After select “add schedule” or “modify schedule”, the player will enter modify mode. In modify mode, press the LEFT/RIGHT button to select the option to edit, press UP/DOWN button to change parameter; if highlight is on preset file name, press UP/DOWN button will enter virtual keyboard interface for you to edit the file name. Virtual Keyboard, as shown in the picture: Control Buttons: UP button: moves cursor up DOWN button: moves cursor down LEFT button: moves cursor to the left RIGHT button: moves cursor to the right ENTER button: type out the selected letter ESC button: escape the virtual keyboard interface TOOLS button: non-effective Some special key usage Delete a letter: move the cursor to “Backspace” key, press the ENTER button will delete the last letter. Change the letter on the keyboard: move the cursor to “Ctrl”, “123” or “Shift”. “123” will change the keyboard from English letters to numbers; “Shift” will switch the letters between upper case and lower case; after pressing the “Ctrl” key, all other key will become no effect. When the cursor holds the “Backspace” key, letters of the file name will be deleted one by one continuously. When editing file name, you can use “<”, “>”, “:”, “/”, “\”, “|”, “?”, “*”, ENTER key, Ctrl key. If other wrong keys are chosen, you will be prompted that it is invalid. When editing file name, the maximum length is 13 letters. Press ESC button to cancel current edit. When editing is finished, press the ENTER button to save the changes. Please note, the recording time cannot be before the current time or a month after, and cannot have any conflict with other schedule. When it is the starting time and the player is turned on, the player will escape the current operation and start the recording; if the player is turned off, the player will turn on itself and start recording. ▲NOTE: (1) When the player acts as a USB device and is connected to the computer or a USB device is connected to this player, the player will ignore the schedule. (2) When using scheduler, make sure the A/V cable is properly connected, the TV is on at the scheduled time and the AC adaptor is connected to the player, then you can use the scheduler to record TV without any problems. When the recording finishes, this player will shut down according to the time you set for power off, which can be setup at “Power” in “Setup” interface. Please properly set the Power off time to increase this player’s lifespan. 5.2.4. Play When the recording is finish, the record file will be saved in “hd/TVrecord” folder. Select “Play” and it will display all the files in “hd/TVrecord” folder. You can select a file to start the playback. Control Buttons: UP button: move highlight up DOWN button: move highlight down LEFT button: non-effective RIGHT button: non- effective ENTER button: play the video ESC button: escape to the TV RECORD interface TOOLS button: pop-up the TOOLS menu There are 2 options in the TOOLS menu: (1) Name ascend: sorted by the file name by ascending order (2) Delete: delete the selected file or file folder ▲CAUTION: All the deleted files or folders cannot be recovered. Be careful! When the recording file is cut due to file size limit, the files will be played in order until the ending file. For example: In 2006, June 1st 19:32, “TV060601_1932_001.avi”, “TV060601_1932_002.avi”, “TV060601_1932_003.avi” and “TV060601_1932_004.avi” has been created. When playback “TV060601_1932_001.avi” file, this player will keep on playing until “TV060601_1932_004.avi” finish. 5.3. VIDEO The player supports AVI, VOB, MPEG, and DAT files. Select VIDEO in main menu and press ENTER. Then you will enter the VIDEO function. Control Buttons: UP button: moves highlight up. DOWN button: moves highlight down. LEFT button: Non-effective RIGHT button: Non-effective ENTER button: Play ESC button: return to the main menu TOOLS button: pop-up the TOOLS menu There are two other functions added in the TOOLS Menu as below: Name ascend: The video files will be sorted by name in ascending order. Delete: By selecting “Delete” icon in the TOOLS menu, the system will show “Delete the file?” Choose “YES” to delete the selected file or folder and choose “NO” to cancel the operation. ▲CAUTION: All the deleted files or folders cannot be recovered. Be careful! 5.3.1. Playing video files Press the ENTER button when the video file is highlighted and the file will be played. (1)Playing AVI format files: Control Buttons: UP button: increases the volume. DOWN button: decreases the volume. LEFT button: Press the button shortly to fast reverse the video for three minutes; Hold the button to fast reverse at the speed you have selected.(See 5.3.2-1 for speed setting) RIGHT button: Press the button shortly to fast forward the video for three minutes; Hold the button to fast forward at the speed you have selected. (See 5.3.2-1 for speed setting) ENTER button: pause/play ESC button: exit from play screen (2)Playing VOB, MPG, DAT files: Control Buttons: UP button: increases the volume. DOWN button: decreases the volume. LEFT button: Press the button shortly to fast reverse the video; Hold the button to fast reverse at the speed you have selected. (See 5.3.2-1 for speed setting) RIGHT button: Press the button shortly to fast forward the video; Hold the button to fast forward at the speed you have selected. (See 5.3.2-1 for speed setting) ENTER button: pause/play ESC button: exit from play screen 5.3.2. Tools Menu The player offers six functions in the TOOLS menu (in playing mode). 1. Search (1) Time search: You can play the video file from any time you like. Select “Time search” and then pop-up a time selecting window. Control buttons: UP button: increases the value of parameter. DOWN button: decreases the value of parameter. LEFT button: moves highlight left. RIGHT button: moves highlight right. ENTER button: play the video file from the time you selected ESC button: cancel the operation TOOLS button: Non-effective ▲NOTE: If the selected time exceeds the play time, the system will do nothing and by default the player will cancel the operation. (2) Double speed: double the speed. (3) Fourfold speed: fourfold the speed. (4) Eightfold speed: eightfold the speed. 2. Repeat Repeat playing the whole video file. 3. A-B When you need to repeat playing a specific part of a video file, press TOOLS button at the beginning of the specific part of the video and select “A/B-A” in the TOOLS menu. The video will continue playing. Press TOOLS button again at the end of the specific part of the video. Select “A/B-B” in the TOOLS menu, then the part you choose will be repeated. If you want to exit from A/B playing mode, press TOOLS button and select “Cancel A/B” in the TOOLS menu. 4. Set Book-mark While playing a video file, press TOOLS button and choose “Set bookmark”. It will put a bookmark there. Next time when you play this video file again, three options will be presented: Resume: Start playing from the book-marked position. Ignore: Keep the bookmark but start from the very beginning. Clear: Clear the bookmark from this file and start playing from the very beginning。 ▲NOTE: Setting a new bookmark will erase the old one automatically. 5. Volume Balance Press LEFT/RIGHT button to adjust the volume from 0 to 10. Press the ENTER button to confirm, and press ESC button to cancel the operation. 6. Zoom You can adjust the video window size. Control buttons UP button: increases the window’s height. DOWN button: decreases the window’s height. LEFT button: decreases the window’s width. RIGHT button: increases the window’s width. ENTER button: pause/play ESC button: Exit ▲NOTE: Holding down the direction button can adjust the window size continuously. The window size will return to default size after switching back to LCD screen of the player via TFT/TV button. ▲CAUTION: The above function supports AVI, VOB, MPG, DAT files. Among them, the VOB, MPG, DAT files have no “Time search” function. 5.3.3. Subtitle The player supports SRT format subtitle. a) Download video files and the corresponding SRT files. b) Put the SRT file in the same directory of the corresponding video file. c) Make sure the SRT subtitle file has the same file name as the video file. 5.4. MUSIC Select the MUSIC function, and the player will enter the MUSIC menu. Control buttons: UP button: moves highlight up. DOWN button: moves highlight down. LEFT button: Non-effective RIGHT button: Non-effective ENTER button: enters the selected function. ESC button: return to the main menu TOOLS button: pop-up the TOOLS menu Except the above control buttons, there is also a “Refresh” function in the TOOLS menu. Select “Refresh” to refresh the contents in “Artist” and “Album”, and this will accelerate the responding speed when you enter “Artist” or “Album”. You can choose between “Play single” and “Play all”. Both of them have 3 play modes (i.e. Off, Repeat, and Shuffle). Off Play single Repeat to playlist Repeat the current the current song Return when Shuffle playing Return to player will play another song randomly in the current folder. song finishes. Play all When finishing one song the playlist when the last song Repeat playing all the songs When finishing one song the player will play another song randomly in the current folder. finishes. 5.4.1. Playing music files Press UP/DOWN button to select the song, and then press ENTER button. You will enter the play interface. Control Buttons: UP button: increases the volume. DOWN button: decreases the volume. LEFT button: Non-effective RIGHT button: Non-effective ENTER button: play/pause ESC button: exit from playing TOOLS button: pop-up the TOOLS menu Relation between LEFT/RIGHT button and play modes Play single Off Repeat Shuffle LEFT/ RIGHT button: LEFT/ RIGHT button: LEFT/ RIGHT button: return to the playlist play the current song from play another song randomly its very beginning Play all LEFT button: LEFT button: LEFT/ RIGHT button: play the previous song play previous song in the play another song randomly RIGHT button: playlist play the next song RIGHT button: play the next song in the playlist Beside the control buttons listed above, the TOOLS menu in this interface also provides 5 functions which will be mentioned in 5.4.3. 5.4.2. ID3 Tags ID3 tags contain information about the song. The information includes the name of the artist, the album, and the title of the song. If these data are present, this player will display them on the screen when it plays the file. If not, then this player will only display “no information”. The player supports ID3V1 and ID3V2. If a song contains both kinds of information, the information in ID3V2 will be displayed. 5.4.3. TOOLS menu The player offers five functions in the TOOLS menu (in playing mode). 1. Play single/all: Play single: Play the song you have selected, and then return to the playlist. Play all: Play all the songs in the current folder and then return to the playlist. 2. Play mode (1) Repeat: Repeat playing the selected song. (2) Shuffle: Shuffle (Random) song selection (3) Off: Neither repeat nor shuffle is selected 3. Add to playlist Add the current song or all the songs in current folder to playlist1/playlist2/playlist3. If the selected folder still contains another folder, only songs in the current folder can be added. Each playlist can have 50 songs at most. 4. EQ&3D You can select the sound effect that you like. This player offers 9 sound effects— Default, Rock, Pop, Jazz, Classical, Dance, Heavy, Disco, and Soft. 5. Volume Balance: Press LEFT/RIGHT button to adjust volume balance from level 0 to 10. Press the ENTER button to confirm the adjustment and press ESC button to cancel it. ▲NOTE: The default setting of the volume balance is 5. You may adjust it to your own habit. 5.4.4. All Songs If you select the “ALL” icon in Music menu, all the files and folders under the Music folder will be displayed on the screen. Control Buttons: UP button: moves highlight up. DOWN button: moves highlight down. LEFT button: Non-effective RIGHT button: Non-effective ENTER button: play the music file ESC button: return to the MUSIC menu TOOLS button: pop-up the TOOLS menu You can also use the TOOLS button to show the following three functions: (1) Name ascend: All the songs will be sorted by name. (2) Add to playlist: You can select the playlist which you want to add the songs into. (3) Delete: delete the chosen songs or files ▲NOTE: The deleted file or folder can’t be recovered. Be careful! 5.4.5. Playlist Select PLAYLIST in the MUSIC interface and press ENTER button. Then you will enter the PLAYLIST interface. Control buttons: UP button: moves highlight up. DOWN button: move highlight down. LEFT button: Non-effective RIGHT button: Non-effective ENTER button: enter the selected playlist ESC button: return to the MUSIC interface TOOLS button: pop-up the TOOLS menu The TOOLS menu also offers “Erase” function. This player offers three default playlists (playlist1, playlist2, playlist3). Each playlist can save 50 songs. Select a playlist and press the ENTER button, and then the songs in the playlist will be displayed on the screen. You may select any one of them and press the ENTER button; this player will play the song then. Press the TOOLS button to choose “Erase” function: (1) In PLAYLIST interface, choose the “Erase” function and erase all the songs in a playlist. (2) When browsing a single playlist, choose “Erase” function and erase the selected song. ▲NOTE: This “Erase” function just erases the songs from the selected playlist. The original music files will still be kept on the hard disk. 5.4.6. Artist Select ARTIST and press ENTER button. Then you will enter the ARTIST interface. Control Buttons: UP button: moves highlight up. DOWN button: moves highlight down. LEFT button: Non-effective RIGHT button: Non-effective ENTER button: enter the “ARTIST” folder ESC button: return to the MUSIC menu TOOLS button: pop-up the TOOLS menu You can also select the “Add to playlist” function in the TOOLS menu and all the songs of the selected artist will be added into the selected playlist. In this interface, all the songs are sorted by artists. Those songs without information of artist are displayed under the “Other” menu. 5.4.7. Album It is similar with ARTIST. Please refer to the chapter of Artist listed above. 5.4.8. Lyric Display This player supports synchronous subtitle display in LRC format. The LRC file and the music file are required to be under the same directory. In addition, the LRC file and the music file of a same song must have the same file name. For example, the corresponding LRC file of hello.mp3 is hello.lrc. 5.5. RECORDER This player uses WAV file format as the recording format. Control buttons: UP button: moves highlight up. DOWN button: moves highlight down. LEFT button: Non-effective RIGHT button: Non-effective ENTER button: enter the selected function. ESC button: Return to the main menu. TOOLS button: Non-effective 5.5.1. Record Select “Record” to display the “audio input way” interface. There are 2 ways for you to choose. Select either of them and press ENTER button to start recording. (1) Mic in: You can use the built-in microphone to record voice or sound and saved as WAV file in the folder of recorder. If you want to stop, press ESC button to exit, and the recording file will be saved in recorder x(x=1, 2, 3, 4….).wav file. Generally, it adds one to the last file name. For example, the last file is recorder 3.wav so the next file is recorder 4.wav. When the recording time is over 2 hours, it will automatically build another file (recorder (x-1).wav) with the recording data of 0-2 hour saved in recorder (x).wav, and 2-4 hour in recorder (x-1).wav. If the recording time is over 4 hours, it will automatically build recorder (x-2).wav with the recording data of 4-6 hour saved in recorder (X-2).wav and the data of 6-8 hour will be saved in recorder(x-3).wav. By analogy, it will do like this until the user ends the recording. (2) Line in: Its interface and way of saving files is the same as that of Mic in. The only difference is that in Line in recording mode, the player records the audio via A/V cable. So no sound from outside will be recorded. During recording, the capacity of hard disk will be shown on the screen. Press ENTER button and the recording will pause or continue. If you want to stop recording, press ESC button and the recording file will be saved. 5.5.2. Play When the recording is finished, all the files will be saved in the recorder folder. There you can choose the files to be played. In the recording file list interface, Control Buttons: UP button: moves highlight up. DOWN button: moves highlight down. LEFT button: Non-effective RIGHT button: Non-effective ENTER button: play the audio file. ESC button: Return to the RECORDER menu. TOOLS button: pop-up the TOOLS menu There are two functions under the TOOLS menu. Sort: A, Size- the files will be sorted by size B, name- the files will be sorted by name Delete: delete the selected song or folder. ▲CAUTION: All the deleted files or folders cannot be recovered. Be careful! The following picture shows a file being played: Control Buttons: UP button: increases the volume. DOWN button: decreases the volume. LEFT button: cancel the operation RIGHT button: cancel the operation ENTER button: pause/play ESC button: cancel the operation TOOLS button: pop-up the TOOLS menu There is also a “Time search“ function. ▲NOTE: At the current version, the player only supports non-compress WAV files 5.6. PHOTO This player supports JPEG (JPG and JPEG) files and 4 display modes (Five-plus-one Previewing Mode, Full- screen Mode, Zoom Mode, and Slide Show Mode). 5.6.1. PHOTO menu Select PHOTO in the main menu and then you will enter the PHOTO menu. Control Buttons: UP button: moves highlight up. DOWN button: moves highlight down. LEFT button: Non-effective RIGHT button: Non-effective ENTER button: displays the photo. ESC button: Return to the main menu. TOOLS button: pop-up the TOOLS menu There are also four other functions under the TOOLS menu: (1) Sort: The files will be sorted by name. (2) Slide show: It will show the pictures in the current directory one by one. (3) Interval: Set the duration time that each picture shows on the screen. (4) Delete: delete the selected file. ▲CAUTION: All the deleted files or folders cannot be recovered. Be careful! 5.6.2. Full-screen mode Select the photo you want to view in the PHOTO menu and press the ENTER button. The photo then will be shown in the full-screen mode. Control buttons: UP button: Clockwise rotate the picture 90°. DOWN button: Anticlockwise rotate the picture 90°. LEFT button: moves to the previous picture. RIGHT button: move to the next picture. ENTER button: enter the zoom mode ESC button: return to the PHOTO menu TOOLS button: pop-up the TOOLS menu Beside the above control buttons, the TOOLS menu also offers seven functions as follow: (1)Background music: On: turn on the background music, then it will play the music when showing the photo Off: turn off the background music, then it will not play the music when showing the photo Pause/Play: pause/play the music Volume: adjust the volume. (2) Select playlist: Playlist 1: playing the music in playlist 1 as background music. Playlist 2: playing the music in playlist 2 as background music. Playlist 3: playing the music in playlist 3 as background music. (3) Slide show: switch to the slide show mode to show the photo. (4) Interval: Set the duration time that each picture shows on the screen in slide show mode. (5) Info display: On: The information will be shown at the bottom of screen including file name and resolution. Off: the information would not be displayed Auto: the information would be displayed and then vanish after 2 seconds if there is no action. (6)Five plus one: switch to five plus one mode to show the photo (7)Delete: delete the photo being displayed. ▲CAUTION: All the deleted files or folders cannot be recovered. Be careful! 5.6.3. Five plus one previewing mode Under the full-screen mode, press the TOOLS button and choose the “five plus one mode”. Press the ENTER button to enter five plus one mode. In this mode, the chosen photo and the related four photos will be showed on the top of the screen. The selected photo will be surrounded by a red frame and a larger version will appear on the bottom of the screen. Control Buttons: UP button: moves to the last photo. DOWN button: moves to the next photo. LEFT button: moves to the last photo. RIGHT button: moves to the next photo. ENTER button: Non-effective ESC button: return to the photo main menu TOOLS button: pop-up the TOOLS menu It also offers six functions in TOOLS menu: (1)Background music: On: turn on the background music, then it will play the music when showing the photo Off: turn off the background music, then it will not play the music when showing the photo Pause: pause the music Volume: adjust the volume (2) Select playlist: Playlist 1: playing the music in playlist 1. Playlist 2: playing the music in playlist 2. Playlist 2: playing the music in playlist 3. (3) Slide show: switch to the slide show mode to show the photo. (4) Interval time: Set the duration time that each picture shows on the screen in slide show mode. (5) Show one: switch to the single photo mode to show the photo. (6) Delete: delete the photo being displayed. ▲CAUTION: All the deleted files or folders cannot be recovered. Be careful! 5.6.4. Zoom mode Control Buttons: UP button: move up DOWN button: move down LEFT button: move left. RIGHT button: move right. ENTER button: switch between the original size and the zoomed size ESC button: return to full screen mode. TOOLS button: Non-effective ▲CAUTION: The photo, whose length and width are lower than or equal with 320 pixels length or 240 pixels width, cannot be zoomed. 5.6.5. Slide show mode In the full-screen mode or five plus one mode, press the TOOLS button and select the slide show option. You will enter the slide show mode. In this mode, the player will automatically refresh all the photos in current folder. Control Buttons: UP button: Non-effective DOWN button: Non-effective LEFT button: Non-effective RIGHT button: Non-effective ENTER button: pause/play ESC button: return to the previous mode TOOLS button: Non-effective ▲NOTE: (1) You can set the interval time of the slide show, in the full-screen mode, five plus one mode, or the PHOTO menu. (2) The background music will not change when you change from slide show mode to another mode. 5.7. E-BOOK Select E-BOOK to enter E-BOOK interface as the following picture shows: Control buttons: UP button: moves highlight up. DOWN button: moves highlight down. LEFT button: Non-effective RIGHT button: Non-effective ENTER button: read the e-book ESC button: return to the main menu TOOLS button: pop-up the TOOLS menu In this mode it also offers the following two options: (1) Sort Size: sort the file or folder by physics space, sort ascending Name: sort the file or folder by name, sort ascending (2) Delete: delete the chosen file ▲CAUTION: All the deleted files or folders cannot be recovered. Be careful! ▲NOTE: The E-book only supports files written in Chinese or English now, so files in other languages may not be displayed correctly. 5.7.1. Reading E-book Now the player can only recognize TXT files. Select an E-book and press ENTER button to start reading, as the picture shows: Control buttons: UP button: displays the previous page DOWN button: displays the next page LEFT button: Enter the auto-show mode, automatically show the previous page one after another. RIGHT button: Enter the auto-show mode, automatically show the next page one after another. ENTER button: pop-up the page jump interface ESC button: exit the reading interface ▲NOTE: In the Auto-show mode, pressing direction buttons, Enter button, TOOLS button, or RECORD button will cancel the Auto-show mode. 5.7.2. TOOLS menu During the reading, you may press TOOLS button to select the TOOLS function. (1) Auto speed Select the interval time for auto-show mode. The speed levels are: slow, medium and fast. Once you choose a speed, you will enter the auto-show mode immediately. (2) Set bookmark If you are reading an e-book and would like to place a bookmark there, which can let you continue reading it from this point in the future, you can simply select the “Set bookmark” function on the TOOLS menu, and it will set a bookmark in the current page. Next time, when you read this E-book file, it will present three options as the following: Resume: Start reading from the bookmarked position. Ignore: Keep the bookmark but start from the very beginning. Clear: Clear the bookmark from this file and start reading from the very beginning. ▲NOTE: You can only set one bookmark per file. Setting a new bookmark will replace the old one. (3) Background This player offers three backgrounds: classic, dream, and modern. (4) Page search You can start to read the e-book from the selected page. Control Buttons: UP button: increases the value of parameter. DOWN button: decreases the value of parameter. LEFT button: move highlight left RIGHT button: move highlight right ENTER button: switch to the page you have selected ESC button: cancel the operation 5.8. GAME Select GAME in the main menu and press ENTER button. Then you will enter the GAME interface, as the picture shows. This player provides you with three games—Greedy Snake, Box man, and Tank. 5.8.1. Greedy Snake After entering the Greedy Snake, you may select the level of this game, as the picture shows. When you begin to play, the game interface is as the picture shows. At the right side of the screen are relevant information, including current stage, max score and your score. In the game, the snake is hungry and looking for beans to feed his stomach. Whenever a bean is consumed by the snake, his body will grow. The snake will be dead if he hits the wall. The number of beans eaten is shown in score. If the snake is moving to left/right, you may make the snake to go up or down only. If the snake is going up/down, you may make the snake to go left or right only. After eating up all the beans, you will go to the next stage. There are 5 different maps for different stages, and the difficulty is increased as the stage goes up. The highest score will be automatically recorded as the game is over. Control Buttons: UP button: moves up. DOWN button: moves down. LEFT button: moves left. RIGHT button: moves right. ENTER button: Pause/Continue. ESC button: pop-up “Quit this Game?” 5.8.2. Box Man Target of Box man is to push all the boxes to the destination which is marked with a dot. You can use direction buttons to push the boxes. The box will turn red after covering a dot. The box cannot be pulled, and you may push one box at a time. Two boxes together cannot be pushed. When you finish one level, you will automatically go to the next one. Control Buttons: UP button: moves up. DOWN button: moves down. LEFT button: moves left. RIGHT button: moves right. ENTER button: Return to the last step. ESC button: Exit game. During the game, press TOOLS button and you can have following functions to choose. (1) Undo Return to the last step before you push the box. You can return to the very beginning of this level. (2) Reset Return to the very beginning of the level. (3) Level Choose a map. Use direction buttons to select the levels. The default level is the next level of the current one. Press the ENTER button to choose the map, and ESC button to return to the game. (4) Exit Game Exit the Game. 5.8.3. Tank In this game, when your tank annihilates all the enemy tanks, you can go to next stage; when your tank is annihilated by enemy tanks, the game is over. Prize will appear during the game, and both your tank and the enemy tanks can obtain the prize. Control buttons: UP button: moves up. DOWN button: moves down. LEFT button: moves left. RIGHT button: moves right. ENTER button: fires cannon. ESC button: pop-up “Quit this Game?” ▲NOTE: Holding a direction button will make your tank go to that direction non-stop. During the game, press TOOLS button and you can have following functions to choose. (1) Reset Return to the original interface of the game. (2) Level Choose a map. Use direction buttons to select the levels. The default level is the next level of the current one. Press the ENTER button to choose the map, and ESC button to return to the game. (3) Exit Game Pop-up “Quit this Game?” 5.9. BROWSER Select BROWSER in the main menu and press ENTER button. Then you will enter the BROWSER interface, as the picture shows. . The BROWSER shows all the contents in the player. The Music folder, Video folder, Photo folder, E-book folder and Recorder folder are system folders and should not be deleted. These five folders contain corresponding files of Music, Video, Photo, E-book, Recorder functions. If any of these folders is deleted or folder name is changed, the system will set up a new corresponding folder. The contents of a renamed folder will not be shown in the corresponding function. ▲NOTE: (1) This player supports FAT32 format ONLY. (2) When using a high capacity hard disk, an organized folder structure can improve the player performance. (3) In Music, Video, Photo, E-book, and Record functions, only supported format will be display. 5.9.1. Browsing the folder structure Use the following buttons to browse all the content in the hard disk. Control buttons: UP button: moves highlight up. DOWN button: moves highlight down. LEFT button: Non-effective RIGHT button: Non-effective ENTER button: opens the highlighted folder (directory) or plays the highlighted file. ESC button: Return to the parent menu or the main menu. TOOLS button: pop-up the TOOLS menu. This player has five functions under the TOOLS menu for regular operation. (1) CCP (Copy/Cut/Paste) In the Browser interface, the player can copy or move files from one location to another. Copy: a) Select the file or folder which needs to be copied. b) Press TOOLS button and select “Copy” c) Select the destination folder. d) Press TOOLS button and select “Paste”. Cut: a) Select the file or folder which needs to be copied. b) Press TOOLS button and select “Cut” c) Select the destination folder. d) Press TOOLS button and select “Paste”. ▲NOTE: 1. It will take longer time when the file size is larger than 100M. Please be patient during the copy operation. We suggest you use the computer to do this kind of operation. 2. Before selecting “Paste”, you must select the file or folder that is copied or cut. The file or the folder can only be pasted once. To paste again, please reselect the file or folder. 3. When “Copy” and “Cut” functions are selected continuously, this player will select the last operation as the default one. (2) Create folder Create a new folder in the current directory. The default folder name is “new folder1”, “new folder2” and so on. (50 folders can be created following this naming system.) (3) Delete Delete the file permanently from the player. ▲CAUTION: All the delete operations are not reversible. Be careful! (4) Sort Files will be sorted by the file name. (5) Send to Send the files to the corresponding folders. Details as follow: 1 If the video files are not in the video folder, cut and paste the files to the video folder. 2 If the music files are not in the music folder, cut and paste the files to the music folder. 3 If the photo files are not in the photo folder, cut and paste the files to the photo folder. 4 If the e-book files are not in the e-book folder, cut and paste the files to the e-book folder. ▲NOTE: Subtitle files (*.srt), and lyric files (*.irc) are regarded as text files. Select “Send to” function will move them to the E-BOOK menu. Follow these operation steps: (1) Select the file to move. (2) Press the TOOLS button and select “Send to”. Then the file will be moved to the corresponding file folder. 5.10. USB 5.10.1. Connecting the Player to Computer Please refer to 2.3 for the steps of connecting the player to a computer. After the connection, the player will automatically enter the USB interface. When the player connected with your computer, different operating systems will have different responses. Windows ™ ME, 2000, XP After the connection, the player will be recognized as a Mass Storage Device and will appear as a new drive within a few seconds. Same as Windows Explorer, you can drag/drop files to/from the hard disk of the player through the method of cut, paste, copy and delete. If your computer cannot automatically recognize the player, please refer to the Troubleshooting section in this manual. Windows® 98SE You need to install the USB driver first. Please refer to the instructions in the supplied driver CD. After the computer restarts, you can use windows explorer to cut, copy, delete and paste to put the files in or out from the player. Please note there is also a user manual included in the USB driver CD. ▲CAUTION: If the player shuts down when connected to the computer, catalog destruction or data loss might occur. 5.10.2. Disconnecting the Player from Computer To disconnect the player safely, click on the system tray remove icon (green arrow as shown below) and follow the instructions. Wait until your computer shows a message saying that you can safely unplug the device, and then disconnect the USB cable. (1) The remove icon is on the system tray. (2) Click on the icon to pop-up the “Safely remove device” message, select “USB Mass Storage Device”, and click on the “Stop” icon. (3) “Stop a hardware device” dialogue, and click on the “OK” icon. (4) There will be a message indicating that it is now safe to remove USB Mass Storage Device. After that you can go ahead and unplug the USB cable from the player. In Windows® 98SE, you can unplug the USB cable immediately after the data transferring finishes (when the indicator stops flashing). None of the above steps is necessary. ▲CAUTION: Please follow the instructions when you disconnect your player to the computer. Do not pull out the USB cable during data transferring, or it may cause data loss or freezing of your player or computer. 5.11. USB-OTG Please refer to 3.3.2 for the procedure of connecting the USB cable to the USB OTG cable. The player will enter the USB transfer interface automatically and prompt you the “Start to copy?” window. Press ENTER button to start copying. When the copying process starts, it will prompt that it is copying in the USB mode. The indicator will start flashing, which indicates the player is copying all the contents in the USB device to the hard disk with file named as dsk0000x (x:0,1,2…….). When the copying process is finished, the player will prompt you: “Copy finished! Pull out USB device”. Please unplug the USB OTG cable first and then the USB device. After that, it will return to main menu with the BROWSER function highlighted. Press the ENTER button to display the copied files. If an error occurs during the copying process, the player will prompt you: “Copying error! Pull out USB device”. You may disconnect the USB device and try again later. ▲CAUTIONS: (1) The system format of the player and the device must be FAT32, which is the format Windows adopt. (2) Do not unplug the USB cable during the copying process, or copying error will occur. (3) Make sure the battery is full or connect the player to the AC adapter before copying, or it will cause hard disc damage or data loss. (4) USB-OTG can only support those devices compatible with USB MASS STORAGE protocol. 5.12. Firmware update Update the firmware will provide you with more functions and a more stable and reliable products. There are two ways to update the firmware: (1) BROWSER Interface Connect your player to your computer, and then copy the latest update file (xxx.bin) to the root directory of the player. If there is already an older version of the update file in your player, the system will ask if you want to overwrite it. After copying the update file, disconnect the player from computer. Then enter the browser interface. Select the update file and press ENTER button to update. The whole process will take about 2 minutes. (2) SETUP Interface Connect your player to your computer, copy and change the update file (xxx.bin) into “update.bin” and then disconnect the player from computer. Enter SETUP interface, select “System” and press ENTER button. It will prompt you to update the system. Then press ENTER button again to start the update process. When the update is finished, press any button to shut off the player. Restart the player and you will enjoy a player with a new operating system and new functions. ▲CAUTION: (1) Before the updating process, please make sure the update file that matches the player is being used. (2) It is recommended to use AC adapter during updating process. Make sure that the player will not be shut down to avoid the unwanted error. (3) After updating please delete the updating file (xxx.bin). 5.13. Hardware Reset The player may be locked because of some special reasons (such as static discharge). Please take down the battery to reset the hardware. 5.14. One Button Audio Record When you play video, music, or photo, or use the USB, or copy via USB-OTG, the RECORD button is Non-effective. At any other time you can use this function. 5.15. TFT/TV Switch See 3.3.3 for “Connecting to audio/video components-A/V output”. The TFT/TV button can switch between TV and computer. ▲NOTE: Pay attention to whether the output systems of TV and the player are the same when switching. (See 5.16.5) 5.16. SETUP There are various settings in the SETUP interface. 5.16.1. Sound settings If you would like to customize the sound quality, you can enter the Sound menu. Control buttons: UP/DOWN button: selects different parameters. LEFT/RIGHT button: changes a parameter value. ENTER button: Non-effective ESC button: return to the SETUP menu The parameter will be saved automatically when you exit from the Sound menu. Parameter Description Volume 18 levels of volume (0~18) Balance 10 levels. Favor the right or left channel of the Stereo signal. Mute ON/OFF 5.16.2. Display settings These settings control the interface language and relevant parameters of the screen. Control buttons: UP/DOWN button: selects different parameter. LEFT/RIGHT button: changes a parameter value. ENTER button: Non-effective ESC button: return to the SETUP menu Settings Description Language Contrast Saturation The player can be set to English or Chinese. 30 levels. The contrast levels for the built-in LCD screen. (Increase or decrease by one unit, i.e. three levels.) 30 levels. The saturation levels for the built-in LCD screen. (Increase or decrease by one unit, i.e. three levels.) 5.16.3. Power settings When the player is powered by the battery, these parameter settings can help to save battery power for longer usage. Control buttons: UP/DOWN button: selects different parameter. LEFT/RIGHT button: changes a parameter value. ENTER button: Non-effective ESC button: return to the SETUP menu Parameter Description Power off 3,5,10 minutes and Never. The time of user inactivity (no buttons pressed) before the player shuts off. These settings will take no effect if it is playing files. Backlight off 30, 60, 90 seconds and Never. The time of user inactivity (no buttons pressed) before the player turns off the screen to conserve power. These setting will no effect while it playing video/audio files Battery alarm 1%, 5%, 10%. The battery restriction to shut off the player. HDD work mode Standby/Non Standby. The hardware working mode when playing the video files. 5.16.4. System settings The System settings allow you to look at Hard Disk information, system version number, and to update the firmware. Control buttons: UP/DOWN button: selects different parameter. LEFT/RIGHT button: changes parameter value. ENTER button: Non-effective ESC button: Return to the SETUP menu. Parameter Description Firmware Update To update the player to a new version of the Operating System. Hard Disk Information To display the partition and amount of free and used space in the hard disk. Partition Instructions: (1)The default partition is one FAT32 format partition (2)This player can support up to four FAT32 format partitions. (3)After the partition is finished, a message will appear in SETUP menu .The message includes the total capacity and the free capacity. If you want to know more information or want to switch to other partitions, press DOWN button so the “More” icon will be highlighted. Press ENTER button and there will be the following frame as the picture shows. The partition number with “*” shows the current partition information. Control buttons: UP/DOWN button: selects different partition. ENTER button: changes the partition. ESC button: exit from the function ▲CAUTION: (1)Format or partition the hard disk will cause data loss. (2)After the partition please restart the player to avoid error. 5.16.5. Video output settings Parameter Description TV System NTSC, PAL. . 5.16.6. Real Clock In Real Clock interface, there are four sections—Year, Month, Time and the table of date and week. The time display adopts 24-hour time format and covers hour, minute and second. Each section has a frame. When a section is selected, its frame will turn green, with others white. The interface has two modes: Display mode and Modify mode. (1) Display mode: In this mode, the time will be updated and display the current time. Control buttons: UP/DOWN/LEFT/RIGHT button: moves highlight to select section. ENTER button: enters the selected section for modifying, i.e. Modify mode. ESC button: Exit from Real Clock. (2) Modify mode: In this mode, the time will be paused. Control buttons: UP/DOWN/LEFT/RIGHT button: modifies the current content. ENTER button: saves the current modification and changes to Display mode. ESC button: cancels current modification, return to original value, and changes to Display mode. ▲NOTE: (1) The year range is from 2001 to 2037. (2) The month range is from 1 to 12. (3) The date range depends on the year and month. (4) The hour range is from 00 to 23. (5) The minute range is from 00 to 59. (6) The second cannot be adjusted. (7) The year and month adjustment may cause changes in the relation between the date and week. 5.16.7. Default settings Change the sound, display, power settings and the setting in the TOOLS menu to the original factory settings. 6. Troubleshooting Question 1.My computer does not recognize my player. Answer: (1) Make sure the player is on. If the player is off the computer will not be able to find the player. (2) Make sure the player is connected to the computer. (Refer to 3.3.1 for connecting the player to the computer) (3) When using Windows 98SE, install the USB driver first. After installation, restart the computer. Then reconnect the player to the computer. (4) If you installed the Windows 98SE driver over your Windows® XP, 2000, or ME edition, problems might occur. (5) It is not recommend to using the USB ports in the front of your computer, try to use the USB ports in the back, because the USB ports in the front are often from non-powered hubs. Question 2. When I try to disconnect the USB device, I keep on getting “The device ‘Generic volume’ cannot be stopped right now. Try stopping the device again later.” message, what should I do? Answer: Close any program that might be accessing data on the player, including Windows® Explorer. If it does not work, close all programs and wait for another 20 seconds, then try the green arrow icon again. If it still does not work, you should shut down the player and disconnect the USB cable. Question 3. I find new file names and folder names that I never created before or they have strange gibberish names. Answer: Most likely, the player’s file allocation table (FAT) has been corrupted. This might be due to the player shutting down (due to low battery power) while reading or writing to your computer by the USB connection. Windows and Macintosh often write extra files to the hard disk such as finder.def or System volume info. These are normal and will not do any harm to the player. Question 4. I used my player to transfer files back and forth between different computers. Will defragmenting the player hard disk do any harm to it? Answer: Defragmenting the player hard disk may be useful after having transferred many files to and from the player. It is never harmful to use the defragment on the player. Make sure no other programs are running while using the Windows® defragment utility. Make sure you have connected the player with the external power adapter during this procedure. Question 5. I want to format the player’s hard disk. Answer: You can do this, but it will erase ALL of the data on your player. Sometimes this may be necessary if your FAT (File Allocation Table) becomes so corrupted that nothing seems to fix your file problems. Question 6. I would like to partition the player hard disk. Answer: If you know how to partition a hard disk, this is OK. The player will, however, only recognize a FAT32 partition. Thus it will only use a FAT32 partition. Question 7. My files have disappeared from the player. Answer: Make sure that you browse your files via the Browser mode and not a filtered view such as Photo, Music, or Video. Question 8. Why some supported format photo cannot be shown in the photo function? Answer: In the JPEG format there are some different modes. The player doesn’t support all the modes. So you have to change your photo format first as follow: (1)Use Photoshop to open the photo. (2) Choose ”File” then “save as” from the menu, as the picture on the left hand side shows, select the picture format as JPEG, input the file name and click the “save” icon. (3)After click on the “save” icon, a new window will appear as the picture on the right hand side shows, select “Baseline (standard)” or “Baseline optimized”. (4) Click the “OK” icon. Question 9. I divided the hard disk into several partitions and didn’t turn the player off. Why is the hard disk information in the Setup menu incorrect? Answer: Please restart your player and then check the information in the SETUP menu. Question 10. How can I format a hard disk (above 40 GB) into a FAT32 partition? Answer: Windows 2000/XP can view a FAT32 partition within the capacity of 128GB, but the format tool in Windows 2000/XP can only format FAT32 partition within the capacity of 32GB. If you need to format any FAT32 partition beyond the capacity of 32GB, please use other third party format tools, like NortonPartitionMagic 8.0. Question 11. Why MP4 files can not be played? Answer: The player doesn’t support MP4 files now, but you can convert MP4 files to AVI files via video converting software, such as Ulead Video ToolBox2. 7. Additional Information 7.1. Technical Specification Product Portable Multimedia Center Hard Disk 1.8” (20GB,30GB,40GB,60GB,etc) Display 3.5”LCD Screen Video Resolution:320RGB(H)X240(V)Pixel 16.7M Color Audio Output Stereo Earphone:16Ω 10mW+10mW Built-in Speaker: 8Ω 0.5W Line Out: 1KΩ 0-3V Video Output Composite Video Output: PAL, NTSC Audio Input Built-in Microphone Line In (Maximum voltage: 2V) Video Input Composite Video Input USB Interface MINI USB 2.0 and USB-OTG supported Power Built-in Battery: Removable and Rechargeable Lithium-Ion Battery Capacity: 3.7V/2400mAh Fully Recharge Time 3.5 hours AC Adaptor: Input:90-256V 50HZ Output:5V 2A Size Approx.131mm x 79mm x 22 mm Weight Approx. 250g(Battery and Hard Drive included) Tempeture Range Running:5℃-35℃ Storage:-20℃-45℃ 1 Gigabyte(GB) means 109 = 1,000,000,000 bytes using powers of 10. Computer operating systems, however, calculate storage capacity using powers of 2 for the definition of 1 GB = 230 = 1,073,741,824 bytes and therefore show less storage capacity. 7.2. Supported file formats File Description Audio playback File format MP3, WMA Bit rate 32Kbps~320Kbps Tag ID3 V1, ID3 V2 2.0, ID3 V2 3.0 File format .AVI, Video format MPEG-4 ASP@ L5 without QPEL and Video playback .MPG , .VOB, .DAT GMC MPEG-2 MP@ML,MPEG-1 Audio format MP3 stereo;AC3;PCM;ADPCM Audio bit rate 32Kbps-192Kbps Video resolution Up to 720*576(PAL) Video frame rate Up to 25fps(PAL),30fps(NTSC) subtitle Support SRT format File type JPG,JPEG (interlaced only) resolution Up to 3100*2100 Line-in Audio, Video Input signal Multiple video signal and stereo sound recording Codec format Audio: ADPCM Video: MPEG4-SP@L3 Save file format AVI Video compress resolution Auto detect video system Photo PAL: up to 720 x 576 @25fps NTSC: up to 720 x 480 @30fps Recording quality High (resolution: 720 x 480 or 720 x 576, 4Mbps) 20GB hard disk space can record up to approx. 9 hours; Medium (resolution: 720 x 480 or 720 x 576, 2Mbps) 20GB hard disk space can record up to approx. 18 hours; Low (resolution: 720 x 480 or 720 x 576, 1Mbps) 20GB hard disk space can record up to approx. 30 hours; Compact (resolution: 720 x 480 or 720 x 576, 800Kbps) 20GB hard disk space can record up to approx. 36 hours; Audio recording Input signal The signal received by the mic will recorded as stereo signal E-book sampling information 16 bit ,8KHz Save file format WAV File type TXT 7.3. Copyrights and Trademarks Copyrights All rights reserved. No part of this manual may be reproduced, stored in a retrieval system, or transmitted in any form or by any means, electronic, mechanical, photocopying, recording or otherwise, without the prior written permission from the copyright holder. According to copyright law, no recorded data may be used for purposes other than personal enjoyment without permission from the copyright holder. Trademarks Microsoft and Windows are registered trademarks of Microsoft Corporation. All other trademarks are property of their respective holders. 7.4. Warranty What your warranty does not cover: -Acts of nature, such as fire, static discharge,. -Damage from unauthorized repair, alteration or accident. -Damage from misuse or neglect. -A unit that has been modified or incorporated into other products or is used for institutional or other commercial purposes. -Battery. -Loss of customer’s software, firmware, information, or memory data. -Improper handling or installation.