1
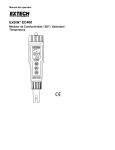
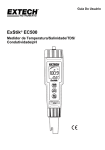
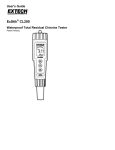
User Guide ExStik®II EC400 Conductivity / TDS / Salinity / Temperature Meter Introduction ® Congratulations on your purchase of the ExStik II EC400 Conductivity/Total Dissolved Solids (TDS) / Salinity / Temperature meter. With the EC400’s dynamic cell-constant technology it is possible to measure a wide range of Conductivity, TDS, and Salinity with the same electrode. Careful use and maintenance will provide years of reliable service. Powering the ExStik®II ® The ExStik II uses four (4) CR2032 Lithium Ion Batteries (included). If the batteries are weak, the ® ‘BAT’ indicator appears on the LCD. Press the ON/OFF key to turn the ExStik II on or off. The auto ® power off feature shuts the ExStik II off automatically after 10 minutes of inactivity to preserve battery life. Getting Started ® Remove the cap from the bottom of the ExStik II to expose the conductivity electrode. Before the first use or after storage, rinse the electrode in deionized water and dry. For best results, calibrate for conductivity with a standard in the expected range of the sample. For maximum accuracy calibrate from low conductivity value standards to high value standards. Store dry. 2 EC400-en-GB_V2.6 11/14 Meter Description Front Panel Description 1 1. Battery compartment 2. LCD Display 3. MODE/HOLD button (change mode, Hold and store data) 2 4. CAL/RECALL button (calibrate, change temperature units, recall data) 5. ON/OFF button 6. Electrode Collar 3 4 5 7. Electrode 6 7 LCD Display 1. Bargraph display 2. Measurement units 3. Main display 4. Range calibration and low battery indicators 5. Temperature display 6. Reading Hold Indicator 3 EC400-en-GB_V2.6 11/14 Measurement Procedure Sample Preparation: 1. For Conductivity, TDS or Salinity place the test sample in a sample cup with enough depth (2.5cm minimum) to cover the electrode. Stir the solution to remove any air bubbles. Measurement: 8888 1. Press the ON button. ( and then “SELF CAL” will appear in the display during the turn-on diagnostics) 2. Depress and hold the MODE/HOLD key to scroll to the desired measurement mode. 3. Insert the electrode into the sample making sure that the electrodes are completely submersed. 4. Slowly stir the solution with the electrode to remove air bubbles. 5. The meter will auto-range to the proper range and then display the reading. 4 EC400-en-GB_V2.6 11/14 Changing Measurement Function The meter can be set to measure Conductivity, TDS or Salinity. To change the mode: 1. Press and Hold the MODE/HOLD button for 2 seconds and the display will begin to scroll through the units. µS (Conductivity); ppm (TDS); mg/l (TDS); ppm S (Salinity); Note: The “HOLD” function cannot be on when changing the measurement function. If “HOLD” is displayed in the lower left corner of the display, briefly press the MODE/HOLD button to turn it off. 2. When the desired units are displayed, release the MODE/HOLD button. TDS Compensation Ratio The TDS value is determined by multiplying a conductivity reading by a known ratio factor. The meter allows for selecting a conversion ratio in the range of 0.4 to 1.0. The ratio varies with the application, but is typically set between 0.5 and 0.7. Note: The stored ratio will briefly appear in the lower temperature display when the meter is first turned on, or when changing measurement function to TDS. Note: In the Salinity mode the ratio is 0.4 to 0.6 automatic. To change the ratio, while in the TDS measurement mode (ppm or mg/l): 1. Press and release the CAL/RECALL button twice in succession. The stored ratio will appear in the display. 2. Press the MODE/HOLD button to increase the ratio value in steps of 0.1. 3. When the desired ratio is displayed, press and release the CAL/RECALL button to store the value and return to the normal mode. 4. If no buttons are pressed for 5 seconds, the meter returns to measure mode. Storing Readings 1. Press the MODE/HOLD button to store a reading. The storage location number will be displayed on the lower display, while the main display shows the stored reading. The meter will enter the HOLD mode and the “HOLD” indicator will appear. 2. Press the MODE/HOLD button again to exit the HOLD mode and return to normal operation. 3. If more than 25 readings are stored, previously stored readings (starting with number 1) will be overwritten. 5 EC400-en-GB_V2.6 11/14 Recalling Stored Readings 1. Press the CAL/RECALL button and then press the MODE/HOLD button. A location number (1 through 25) will briefly appear and then the value stored in that location will appear. The displayed units will flash, indicating that the storage recall mode is active. 19.5 °C 2. The last stored reading will be displayed first. Pressing and releasing the MODE/HOLD button will scroll through the stored readings one at a time. The location number is displayed first, followed by the reading stored in that location. 3. To exit the storage mode, press the CAL/RECALL button and the meter will return to normal operation, after displaying “End”. Clear Stored Memory With the unit on, press and hold ON/OFF for 4 seconds. “clr” will be briefly displayed when the memory is cleared. Changing Temperature Units o o To change the displayed temperature units ( C or F): 1. With the unit OFF, press and hold down the CAL/RECALL button. 2. With the CAL/RECALL button depressed momentarily press the ON/OFF button. When “SELF CAL” appears in the display release the CAL/RECALL button. The unit will power on with temperature displayed in the new units. Data Hold Mode Press the MODE/HOLD button to hold (freeze) a reading in the display. The meter will enter the HOLD mode and the “HOLD” indicator will appear. Note: This also stores the reading. Press the MODE/HOLD button again to return to normal operation. Auto Power OFF The auto power off feature automatically shuts the meter off after 10 minutes of button inactivity. Auto Power OFF Disengage Feature To disable the Auto Power Off feature: 1. Turn the unit on 2. Press CAL/RECALL once (Quickly) 3. Immediately and simultaneously press the MODE/HOLD and ON/OFF buttons for approximately 2 seconds, until “oFF” is briefly displayed To disengage this feature, turn the unit off with the ON/OFF button. The next time the unit is powered up, Auto Power OFF mode will be engaged again. Low Battery Indication When the batteries become weak the “BAT” icon will appear in the display. Refer to the Maintenance section for battery replacement information. 6 EC400-en-GB_V2.6 11/14 Measurement and Display Considerations If the unit appears to be locked (display frozen). It is possible that the Data Hold mode has been inadvertently accessed by pressing the MODE/HOLD button. (“HOLD” will be displayed in the bottom left of the LCD.) Simply press the MODE button again or turn the meter off and then on. For maximum accuracy, allow sufficient time for the temperature of the probe to reach the temperature of the sample before calibrating. This will be indicated by a stable temperature reading on the display. Calibration - Conductivity Meter accuracy verification should be performed on a periodic basis. Once per month is the recommended cycle for normal use. If calibration is required, a conductivity standardizing solution must be obtained. The meter can be calibrated in any or all of the three ranges. Standardizing solutions of 84µS/cm, 1413µS/cm or 12.88mS/cm (12,880µS/cm) are used for the automatic calibration recognition procedure. No other calibration values are permitted. Calibration is always done in conductivity mode. Since salinity and TDS values are calculated from conductivity values, this procedure also calibrates the salinity and TDS ranges. 1. Fill a sample cup with the standardizing solution. 2. Turn the meter ON and insert the electrode into the solution. Tap or move the electrode in the sample to dislodge any air bubbles. 3. Press and hold the CAL/RECALL button (approximately 2 seconds) until “CAL” appears in the lower (temp) display. The main display will start flashing. 4. The meter will automatically recognize and calibrate to the standardizing solution. The display will briefly indicate “SA”, “End” and then return to the measurement mode after a calibration. Note: The “SA” will not appear if the calibration fails. 5. The “range calibrated” symbol will appear in the display for each range that is calibrated during that power on cycle. Low range, 84µS/cm Medium range, 1413µS/cm High range, 12.88mS/cm (12,880µS/cm) Note: Each time the calibration mode is entered all calibration symbols on the display are cleared, but only the calibration data for the currently calibrated range is replaced. The other two ranges keep the existing calibration data, just the symbols are removed. Calibration of all three ranges must be performed during one power on period for all three range calibration symbols to appear. Note: The meter allows for a 1, 2 or 3 point calibration. If calibration is done for more than one point the lowest value standard should be done first to obtain the best accuracy. 7 EC400-en-GB_V2.6 11/14 Considerations and Techniques Do not touch the inner surfaces of the conductivity electrodes. Touching the surface of the platinized electodes may damage and reduce the life of the probe. Store the electrode dry, in the storage cap. Always rinse the electrode in de-ionized water between measurements to avoid cross contamination of the sample. Double rinsing is recommended when high accuracy is required. Operational Matrix Function / Resulting Action On/Off Calibration Store Reading Hold Release Power Status Mode Setting Required Key Press Sequence On or Off On Any Momentary press of the ON/OFF key Conductivity Press & hold CAL/RECALL key for 2 seconds, until it enters CAL function Momentary press of the MODE/HOLD key On On Any measure mode While In Hold Mode Any measure mode Enter Memory Retrieval Scroll Stored Readings On On Memory Recall Exit Memory Retrieval Clear Stored Memory Change Measurement Mode Enter Cond/TDS Ratio Change Cond/TDS Ratio Exit Cond/TDS Ratio Change Temperature Units On Memory Recall Any Measure Mode Any Override Auto Power Off Default Reset On On On TDS (ppm or mg/l) On TDS ratio On TDS ratio Off n/a (off mode) On Any measure mode OFF Momentary press of the MODE/HOLD key Momentary press of the CAL/RECALL key followed by a momentary press of the MODE/HOLD key (Within 4 seconds) Momentary press of the MODE/HOLD key (Displays “last in first out”) Momentary press of the CAL/RECALL key Press and hold the ON/OFF key for 4 seconds, until “clr” is displayed. Press and hold the MODE/HOLD key for at least 2 seconds (the modes will scroll by until the key is released) Press and release the CAL/RECALL key twice in quick succession Momentary press of the MODE/HOLD key (each key press increases the ratio by 0.1, the value cycles from 0.4 - 1.0) Momentary press of the CAL/RECALL key Press and hold the CAL/RECALL key then momentarily press the On/Off key. Release the CAL/RECALL key after the "SELF CAL" lights Momentarily press the Cal Key then simultaneously press and hold the ON/OFF & MODE/HOLD key for approximately 2 seconds, until “oFF” is displayed Simultaneously press ON/OFF, CAL/RECALL and MODE/HOLD momentarily. “dFLt” will be displayed. n/a 8 EC400-en-GB_V2.6 11/14 Specifications Display 2000 count LCD with Bargraph Conductivity ranges 0 to 199.9µS/cm 200 to 1999µS/cm 2.00 to 19.99mS/cm TDS ranges 0 to 99.9ppm or mg/L (Variable ratio) 100 to 999ppm or mg/L 1.00 to 9.99ppt or g/L Salinity range 0 to 99.9ppm 100 to 999ppm 1.00 to 9.99ppt TDS Ratio 0.4 to 1.0 adjustable Salinity Ratio 0.4 to 0.6 automatic Conductivity ATC 2.0% per C Temperature Range 0.0°C to 65.0 C (32.0°F to 149°F) Temperature Resolution 0.1 up to 99.9, 1 >100 Temperature Accuracy ±1°C; 1.8°F (from 0 to 50°C; 32 to 122°F) o o ±3°C; 5.4°F (from 50 to 65°C; 122 to 149°F) o o Conductivity ATC Range 0.0°C to 60.0 C (32.0°F to 140 F) Accuracy Conductivity: ±2% full scale TDS: ±2% full scale Salinity: ±2% full scale Measurement Storage 25 tagged (numbered) readings Low battery indication ‘BAT’ appears on the LCD Power Four (4) CR2032 Lithium Ion Batteries Auto power off After 10 minutes (override available) Operating conditions -5°C to 50 C (23°F to 122 F) Dimensions 40 x 187 x 40 mm (1.6 x 7.4 x 1.6”) Weight 87 g (3.1 oz) o o 9 EC400-en-GB_V2.6 11/14 Maintenance Battery Replacement 1. Twist off the battery compartment cap. 2. Holding the battery housing in place with a finger, pull out the battery carrier using the two small tabs. Replace the four (4) CR2032 batteries observing polarity. Replace the battery compartment cap 3. 4. You, as the end user, are legally bound (EU Battery ordinance) to return all used batteries, disposal in the household garbage is prohibited! You can hand over your used batteries / accumulators at collection points in your community or wherever batteries / accumulators are sold! Disposal: Follow the valid legal stipulations in respect of the disposal of the device at the end of its lifecycle Electrode Replacement 1. To remove an electrode, unscrew and completely remove the electrode collar (turn the collar counter-clockwise to remove). 2. Gently rock the electrode from side to side, pulling it downwards, until it disconnects from the meter. 3. To attach an electrode, carefully plug the electrode into the meter socket (note that the electrode connector is keyed, ensuring proper connection). 4. Tighten the electrode collar firmly enough to make a good seal (a rubber gasket seals the electrode with the meter). 10 EC400-en-GB_V2.6 11/14 Cleaning Recommendations When cleaning the probe, take care not to scratch or damage the platinized electrode surfaces. Contaminant Cleaning Solution Instructions Water soluble substances Deionized water Soak or scrub gently with a soft brush. Rinse thoroughly with DI water, and dry Grease & Oil Warm water and household detergent Soak or scrub with a soft brush, maximum of 10 minutes. Rinse thoroughly with DI water, and dry Heavy grease & Oil Alcohol Maximum of 5 minute soak, scrub with a soft brush. Rinse thoroughly with DI water, and dry Lime and hydroxide coatings 10% acetic acid Soak until coating dissolved, maximum of 5 minutes. . Rinse thoroughly with DI water, and dry. Problem Possible Cause Action Reading is frozen Unit is in “HOLD” mode Press MODE/HOLD key to exit “HOLD” mode “BAT” message Batteries are low Replace batteries Unit will not calibrate in conductivity mode Contaminated conductivity standards Use fresh standards Unit will not calibrate in conductivity mode Dirty probe Clean conductivity probe (See cleaning instructions) Unit will not calibrate in conductivity mode Damaged conductivity probe Replace electrode Unit will not calibrate in conductivity mode Trapped air bubbles Tap or stir to release air bubbles Unit will not turn on Batteries are low or dead Replace batteries Unit will not turn on Batteries installed with incorrect polarity Replace batteries, observe polarity Unit will not respond to any key presses Internal fault Perform hard reboot: Remove batteries, hold ON/OFF switch down for 5 seconds, replace batteries Troubleshooting Copyright © 2014 FLIR Systems, Inc. All rights reserved including the right of reproduction in whole or in part in any form ISO‐9001 Certified www.extech.com 11 EC400-en-GB_V2.6 11/14