1
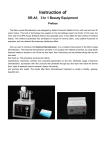
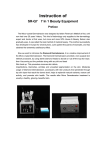
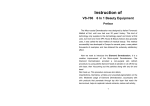
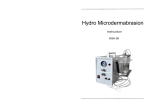
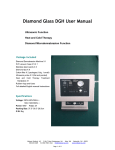
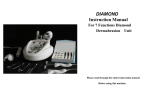
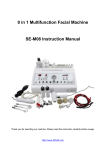
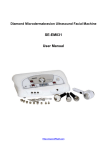
SR-NF905 5in Diamond Microdermabrasion Dermabrasion
Photon Scrub
User manual
5 functions
Micro Dermabrasion
Coil&Hot Treatment
Ultrasonic
Photon
Skin Scrubber
Function&Operation
Contents/function&treatment/①②③④⑤
1. Finish all accessories connection before plug the power cord.
Do not plug the accessory power wires to the sockets when the machine powers are on.
2. Be sure the main power swith on the top of the face panel is on. --set the "time"
Diamond: press ON (diamond on/off) to start --adjust the intensity knob for the suction you
want--press OFF(diamond on/off) after use.
Cold &Hot: turn on the panel power "HOT &COLD"--press the power button on the hot&cold
hammer -- turn off both power buttons after use.
Ultrasonic&Skin Scrubber: set TIMER and adjust the INTENSITY --press scrubber START/STOP to
stop after use.
-- Ultrasonic &Skin scrubber can not work at the same time, (press ULT. or SCR. for exchange.)
-- OUTPUTS "BA": to control the 2 probes of ultrasonic
The ultrasound flat probe&pointed probe can not work at the same time.(Choose B or A for exchange
for the output)
Caution: please do not turn on usage with long time, better use scrubber within 15-30 minutes per
time. Then stop the scrubber for 20 minutes before the next scrubber operation. Long time operation
will burn be scrubber Grey box and destroy the control board of the whole machine.
3. Photon be sure the main power switch on the top of the face panel is on. Refer to
contents/function&treatment ⑤ power cord, then disconnect and clean accessories.
① Diamond Microderbrasion
Function
The Diamond Microdermabrasion provided a non-surgical skin refinish procedure, by using sterile
diamond heads to abrade or rub off the top skin layer, then Vacuuming out the particles along with
any dirt and dead skin back up. This procedure removes skin debris, imperfection, blemishes,
wrinkles and unwanted Micordermabrashion, accompany with skin products that penetrate
through top skin layer that reach the dermis level, helps to replenish natural nutrients, restore cell
activity, and promote skin health. The results after Diamond Microdermabrasion treatment is
usually a healthy, glowing, beautiful skin.
Accessories
PVC hose
Rubber rings
& Fuses
Big cotton
filter
Small cotton
filter
Color Box
Preparation before treatment
1. A consultation included the examination of the skin, a plan for treatment.
2. Operation should wear vinyl gloves and a facemask.
3. On oily or acne skin, a steamer may be used prior to the cleanser.
4. Cleansing the skin with cleaning gel or water, then wipe off with cotton pad. Allow the skin to dry.
Operation instruction
1. Connect all accessories to the machine.
⑴Unscrew the vacuum connector, make sure a big cotton filter is in the center & a large black ring is
around connection head.
⑵Screw down the connector after check. Then attach the PVC hose to the connector.
⑶Place the other end of PVC hose in the end of wand.
⑷Place a small cotton filter on the head of wand.(a small black ring is around the head)
⑸Screw the diamond tip into the wand.
2. Put the plug into the power socket and turn in the power button. Turn the intensity knob to left side.
3. Adjust the vacuum intensity slowly from minimum to maximum, the vacuum meter will show the
date of pressure. For commonly use, do not set the intensity to maximum unless necessary.
Recommended Vacuum intensity in treatment area
Treatment area
Normal skin (inHg)
Sensitive skin(inHg)
Face
12-22
8-12
Forehead
12-22
10-12
Chest
15-20
15-18
Nose
10-15
10-14
Neck
18-18
10-15
Near Eye Area
8-12
8-10
Frequency
Total Visits
4. treatment schedule table
Treatment
Face Peeling
6-10
3-5
Fine Lines
7-13
6-8
Neck
12-14
3-5
Acne Scar
7-12
8-10
Hyperpigmentation
7-12
8-10
5. Place the diamond had on skin surface(start from forehead), proceed with a slow sliding motion. Do
not leave the diamond tip at on spot for too long, doing so will cause harm to skin.
6. Gently stetch the skin with thumb and finger and glide the hand-piece 2 to 3 times over the area
being treated. Then cross again in different directions to prevent streaking lines as in the reference
picture. Brush stock or polishing motions may be used in different sites.
7. After treatment, brush off all remaining dead skin with a soft brush and rinse with damp sponges
or damp cool towel.
8. Allow skin to dry then apply desired skin product.
9. To clean the diamond head, use toothbrush or cotton swab damped with a little alcohol to wipe off
the dirty impurity, and then use UV light or high temperature for sterilization.
DIAGAM OF SUGGESTED MOVEMENTS
AND AREAS FOR DERMABRASION
Diagram of Diamond Dermabrasion Tips & Wands Set
2 stainless steel wands which are used with 9 interchangeable diamond tips.
1
Body, Especially for acne, knee, elbow areas
and striae of pregnancy.
2
Face. For the large blemishes.
3
For Scars, fine lines and imperfections.
4
Used on the eyes and both sides of nose. For
wrinkles, oil tablets, blackheads and acne.
5
After the D tips peeling procedure, use this
smooth tip to vacuum/clear away the dead
abraded skin.
1. Clean diamond tips with alcohol, then sterilize them with UV light or high temperature.
2. Replace the big cotton filter inside the vacuum connector after every five to six treatment.
3. Replace the small cotton filter on the wand head after every treatment.
Safety Warming
Never operate this equipment on a person that suffer form the following:
A. Heart disease
B. Sensitive skin
C. Damaged skin
D. Inflamed skin
E. Inflected skin
Do not use on the following areas:
1. Sensitive skin
2. Skin rash
3. Damaged, inflamed, or infected skin
4. Surgical scar that is less than 12 months old
5. Swollen skin
6. The probes should not point directly towards the eyeball
7. Do not use on the genitals
②Cold&Hot
Function
The cold treatment is specially designed to calm down the skin after diamond microdermabrasion
or chemical peel. The skin is sensitive after peeling treatment, so the cold treatment procures is
necessary. The hot treatment is designed for the acceleration of product absorption.
Operation instruction
1. Connect the cold and hot hammer to the "cold&hot" socket.
2. Set microdermabrasion/ultrasound timer then press the "hot&cold" hammer button. You
will hear the fan turn on.
3. To start the cold function press the button on the "hot&cold" head piece down(-). The
metal on the cold hammer side will get very cold.
4. To start the hot function press the button on the "hot&cold" hand piece up(o). You will
only hear the fan speed up. The other side of the hammer will get hot, but not extremely hot.
5. Wait 2-3 minutes foe the hammer to get cold or hot before starting treatment.
6. The treatment should be approximately 5-10 minutes. Do not stay in one area of the skin
too long this will avoid any damage to skin from the "hot&cold" head.
7. Press the "hot&cold" button on panel again to turn off.
8. Clean head before an d after every treatment, wiping with alcohol a disinfection wipe.
③Ultrasonic
Operation instruction
1. Connect the face/eye electronic into the ultrasonic electrode outlet.
2. Set the ultrasound timer
3. Press the intensity level button"up" or"down" for intensity desired.
for facial work, low to mid intensity is recommended(0-4). For body work, mid to maximum intensity
is recommended (5-9)
4. Press pulse or continuous wave indicator light.
5. Press the button start or stop.
Safety warming
1. Do not treat eyelid directly. Treat just below the eyebrow and brow bone.
2. Never stop the electrode on the skin in one spot.
3. Always keeps the electrode moving across the skin.
4. Never point the electrode towards chest area.
5. Clean lightly the popping head with cotton. Do not rinse it with water, be careful not to drop or
crash.
6. Pregnant, patient with disease of blood vessel, heart, skin, bleeding&trauma are prohibited to use
ultrasonic.
④Skin Scrubber
Operation
Please do not turn on usage with long time, better use scrubber within 15-30 minutes per time. Then
stop the scrubber for 20 minutes before the next scrubber operation. Long time operation will burn
the scrubber gray box and destroy the control board of the whole machine.
1. Make sure the main power button are on.
2. Press the skin scrubber timer button, then set the skin scrubber intensity using the "up"or"down"
buttons. Always consider the clients comfort level. You can increase the intensity when needed.
3. Press the skin scrubber"on/off"button. You will hear the scrubber start to "tick"
4. Choose pulse or continuous current according to your needs. You will hear different between pulse
and continuous current.
⑤Photon
Operation
1. It is not recommended to put the probes on a same position for long time. Probes may move on the
skin in regular line or circle.
2. Chose the proper spectrum reaching different depth on skin.
NOTE:
1. Before use, choose color according to the skin status.
2. The unsuitable setting may cause rubefaction on sensitive skin. When this occur, can use the cold
side of cold&hot hammer to cool down the area. The rubefaction will disappear in 24 hours.
Photon function can be combined with "micro electric current", which will make the phnton function
more effective.
3. The micro current should be MIN at the beginning, then adjust it strong according to customer's
needs.
Ps: the long stick is use for electric conduction, when we do the ultrasonic and the skin scrubber, we
need to connect this to transfer the microcurrent, so the head can work well.