1
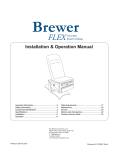
Dynamic Saddle Stool
Model 135DSS Series Stool User Manual
Important Information.............................................2
Safety Information..................................................2
Specifications.........................................................3
Component Identification.......................................4
Unpacking Instructions...........................................4
Assembly Instructions............................................5
Recommended Usage...........................................6
Stool Adjustments..................................................9
Maintenance...........................................................9
Cleaning...............................................................10
Troubleshooting.................................................... 11
Service Parts........................................................12
Limited Warranty..................................................12
The Brewer Company, LLC
N88 W13901 Main Street, Suite 100
Menomonee Falls, WI 53051
P 1.888.Brewer.1
F 262.251.2332
www.brewercompany.com
© August 2014
Document # 3102642 RevA
IMPORTANT INFORMATION
General
The Brewer 135DSS stool combines Brewer’s clinically researched ergonomic seating with Salli ® technology to help prevent back
pain by inducing natural posture and strengthening back and body core muscles while you work. Because of the nature of this
stool, we recommend that you begin using this stool no more than four hours a day for the first two weeks.
Intended Users
•
•
•
•
The 135DSS stool is for professional use only. This product is not intended for use by untrained personnel.
Only adults should use the stool.
Individuals with poor balance, muscle control or other impairments should not use the stool.
Individuals using medications or drugs that can interfere with balance or judgement should not use the stool until
cleared by their physician.
Service
Model number
Description
If you require assistance with the assembly or operation
of your Brewer stool, call Brewer Customer Service at
888-Brewer-1. Our trained staff will attempt to assist you
in correcting the problem directly over the phone. If service
is required, please contact your local equipment dealer.
Please have the following information from the product
label located under the seat before calling Brewer or your
distributor with questions regarding your unit.
Manufacture date
Brewer XXXXXXX
STOOL, XXXXXXX
XXXXXX-XXXXXXXXXX
XXXXXXX
Order number
Day-Month-Year
Upholstery code
Upholstery color
Important: please note prior to use of the Model 135DSS Series Stool.
•
Some muscle soreness when adapting to this style of
stool is normal.
•
Severe pelvic, extremity, back or other kinds of pain is
not normal. See a physician before further use of the
stool.
•
Work surfaces must be adjusted to the optimal stool
height. Use only with work surfaces that can be
adjusted as described later in these instructions.
•
Use of the stool should be stopped if males
experience discomfort or numbness in the pelvic
area.
SAFETY INFORMATION
Failure to follow instructions with these symbols
could result in serious personal injury and/or
damage to the unit.
Safety Information
The primary concern of The Brewer Company is that the
stool is operated and maintained with the safety of the
patient and health care staff in mind. To ensure safe and
reliable operation:
DANGER
Indicates a hazardous situation that, if not avoided,
will result in death or serious injury.
• Read and understand all instructions in this manual
WARNING
before attempting to assemble or operate the unit.
Indicates a hazardous situation that, if not avoided,
could result in death or serious injury.
• Ensure that appropriate personnel are informed on
the manual contents. This is the responsibility of the
purchaser.
CAUTION
Indicates a hazardous situation that, if not avoided,
could result in minor or moderate injury.
• Ensure that this manual is located near the stool.
© August 2014
2
Document #3102642 RevA
SAFETY INFORMATION (Continued)
WARNING
WARNING
FALL HAZARD!
FALL HAZARD!
• Kneeling on the
135DSS stool can
cause instability
resulting in serious
injury.
• Standing on the
135DSS stool can
cause instability
resulting in serious
injury.
• Do not kneel on stool.
• Do not stand on stool.
WARNING
FALL HAZARD!
• Horseplay or
speeding on the
135DSS stool could
create a fall hazard
causing serious injury.
• Not intended for use
by children.
CAUTION
FALL and STRAIN HAZARD!
Model Number
Failure to use the appropriate 135DSS stool as
indicated in the chart at the right can cause:
135DSS-L
•
135DSS
•
Stool to roll away when sitting on or standing
up from the stool (fall hazard).
Muscle strains from not being able to attain the
correct sitting position.
135DSS-H
User Height
< 5’ 3”
5’ 3” - 5’ 11”
> 5’ 11”
SPECIFICATIONS
Height Range (Assembled)
Base Diameter
Shipping Weight
Weight Capacity
135DSS-L
18 3/4”- 23 1/4”
23”
27.8 lbs.
250 lbs
135DSS
22 1/2” - 29 3/4”
23”
28.4 lbs.
250 lbs
24” - 33 3/4”
23”
29 lbs.
250 lbs
Model Number
135DSS-H
© August 2014
3
Document #3102642 RevA
135DSS COMPONENTS
The Brewer 135DSS utilizes a split seat design with 360o movement that improves circulation, offers superior back support and cooling comfort.
Note: Make sure that the following components are included and that the stool operates properly before discarding
packaging materials.
•
Seat Assembly - Upholstered Seat with Control Plate (with Height Adjustment Lever and Quick Start Tag)
•
Pneumatic Cylinder
•
Caster Base
•
Casters (Qty. 5)
•
Adjustment Wrench.
•
User Manual
Control Plate
with Adjusting Nut
Seat
Adjustment
Wrench
Height
Adjustment
Lever
Using the 135DSS
Dynamic Saddle
Stool
the 135DSS
the
stool from
approach the
1. Always
to one side.
back and stand
back of the
leg over the
2. Swing other seated.
stool and be
are
lever until feet
3. Lift the adjustment the floor.
touching
flat, but just
at
downward
should angle
o
stool is now
4. Knees
135 . The
approximately
height.
ergonomic
at your proper
so the user’s
work surface
position,
5. Adjust
in a horizontal
forearms are
at a maximum
downward
or sloping
o
o
of 3 -4 .
Sitting on
Stool
Front
o
135
3o - 4
Max
o
Pneumatic Cylinder
Notice
discomfort
expect some
posture.
Stool should
to this new
to the 135DSS
gets used
New users
as the body
first few days
within the
www.brewercom
pany.com
1.888.273.9371
Quick Start Tag
Caster Base
Casters (5)
Stool Front
UNPACKING INSTRUCTIONS
NOTICE
To avoid damaging the stool’s upholstery, do not use a knife or other sharp object to open the package. Also,
to avoid damaging the stool do not use height adjustment lever for lifting.
© August 2014
4
Document #3102642 RevA
ASSEMBLY INSTRUCTIONS
Stool assembly:
1. Insert the (5) Casters into the Caster Base (figure 1).
Fig. 1
2. Set Caster Base on floor (figure 2).
Fig. 2
3. Insert wide end of Cylinder into hole on Caster Base (figure 3).
Fig. 3
Press Down
3X
4. Place Seat with Control Plate on top of Cylinder and press down
firmly several times to secure components (figure 4). Packaging
may be discarded once confirmed that all components have been
assembled into a properly functioning stool.
Fig. 4
CAUTION
© August 2014
•
Stool is not yet ready to be sat upon.
•
Read “Recommended Usage” section prior to
attempting to sit on stool.
•
Failure to understand proper sitting technique
can lead to personal injury.
5
Document #3102642 RevA
RECOMMENDED USAGE
Proper Sitting Technique for the 135DSS Stool:
1. Before sitting on the stool, push down on seat with upper
body weight while raising seat adjustment lever. Release
lever when seat will lower no further (figure 5).
2. Always approach the stool from the back and stand to
one side (figure 6).
3. Shift weight to the leg matching the side of the stool
where standing (figure 6). For example: if standing to the
left of stool, shift weight to the left leg. If standing to the
right of the stool, shift weight to the right leg.
Front
Fig. 5
4. Swing other leg over the back of the stool and be seated
(figure 6). Sitting on the chair this way helps to prevent
accidents, and will put user into the correct ergonomic
position.
WARNING
FALL HAZARD!
When swinging your leg over the stool make sure
the stool has not rolled away before sitting.
Fig. 6
5. Raise the seat to a height where feet are just touching
the floor (figures 7 & 8).
6. Lift the adjustment lever and slowly lower seat until
knees are at a 135o angle and feet remain flat on the
floor (figure 9). The stool is now at the proper ergonomic
height. Once proper height adjustment is achieved for a
particular user, further adjustment is not necessary.
Note: if stool cannot be lowered enough to place
feet flat on the floor another model may be
needed - see recommended height chart under the
“SPECIFICATIONS” section.
Fig. 7
Fig. 8
7. Adjust work surface so the user’s forearms are in a
horizontal position, or sloping downward at a maximum
of 3o-4o (figure 10).
135o
NOTICE
New users might experience some discomfort within
the first few days of use as the body gets used to this
improved ergonomic posture.
3o - 4o
Max
Fig. 9
CAUTION
•
•
Continued severe muscle soreness may be a sign
of serious medical condition.
Consult your doctor if muscle soreness continues
after two weeks of using the 135DSS Stool.
© August 2014
6
Fig. 10
Document #3102642 RevA
RECOMMENDED USAGE (continued)
Standing up from the 135DSS Stool
To rise from the 135DSS Stool, move one foot slightly under
the stool. Shift weight to that foot. Rise up from the stool
while lifting other foot and swinging it forward. Stepping
forward in this manner ensures that the stool will remain in
place (figure 11).
WARNING
FALL HAZARD!
Exiting the 135DSS
Stool by rising forward
with both feet in contact
with the stool can cause
the stool to tip forward
causing personal injury.
Fig. 11
Desired Direction
Moving on the 135DSS Stool
To move sideways on the 135DSS Stool, push with one foot
while pulling with the other (figure 12).
Pull
Push
Fig. 12
De
e
sir
d
D
io
ct
i re
n
Pu
sh
To move forward on the 135DSS Stool, turn shoulder
to the desired direction of movement and push with
one foot while pulling with the other (figure 13).
Pu
© August 2014
7
ll
Fig. 13
Document #3102642 RevA
STOOL ADJUSTMENTS
Correct Sitting Position and Height
The optimal sitting position is where user’s knees are at a
135o downward angle and feet are almost under the hips
(figure 14). Sitting this way allows normal pelvic positioning
allowing the lower back to form a natural curve, and the
shoulder-neck area to remain erect and straight. Legs should
be relaxed and feet should rest on the floor without having
a “hanging” feeling. Note: the average user will sit higher on
the 135DSS Stool than on standard stools.
Correct Working Height
135o
Fig. 14
3o - 4o
Max
Optimal positioning is with arms parallel to the work surface.
A maximum angle of 3o-4o of downward slope as shown in
figure 15 is acceptable.
Fig. 15
Dynamic Movement
The 135DSS model is equipped with a 360o
Dynamic Movement feature that allows for
rotational motion of the saddle. This motion
can be adjusted to the user’s preference;
from firm (little or no motion) figure 16
to relaxed (increased motion) figures 17
and 18. Several adjustments over time
may be required to achieve the user’s
preferred range of motion. See the next
section Dynamic Movement Adjustments
for making adjustments to the Dynamic
Movement feature.
Fig. 16
Fig. 17
© August 2014
8
Fig. 18
Document #3102642 RevA
STOOL ADJUSTMENTS
Dynamic Movement Adjustments
Adjustment Nut
To increase Dynamic Movement range of
motion:
1. Locate the adjustment nut opening at
the rear of the stool (figure 19).
2. Insert the wrench, sent along with the
stool, through opening under seat, and
onto adjustment nut (figure 20). Note:
Nut Cover is removed in illustration for
clarity.
Fig. 19
Fig. 20
Increase
Dynamic Movement
(CCW)
3. Hold the seat to keep it from turning
as adjustments are made. Turn nut
counterclockwise to increase Dynamic
Movement. Turn nut clockwise to
decrease Dynamic Movement (figure
21). Note: after a certain point no
further increase in Dynamic Movement
will be achieved. Do not continue to turn
nut in the counterclockwise direction.
Note: if resistance when loosening
the nut is no longer felt, nut is too
loose. Turn nut in other direction until
resistance is felt.
Decrease
Dynamic Movement
(CW)
Fig. 21
4. The nut turns in small increments. To
continue turning, remove wrench and
flip it over (figure 22). Reinsert wrench
onto nut and turn another increment.
5. Repetitively sit on stool to test seat for
desired Dynamic Movement. Repeat
steps 2-4 until desired Dynamic
Movement is achieved. Note: keep
special wrench for future adjustments.
© August 2014
Fig. 22
9
Document #3102642 RevA
MAINTENANCE
WARNING
FALL HAZARD!
Seat Screws (4)
Failure to perform periodic inspections of
the stool could result in personal injury.
Seat Screws
Periodically check seat screws (figure 23) for
tightness. Tighten with 6mm Allen wrench if
loose.
Fig. 23
Dynamic Movement Adjustment Nut
Periodically check Dynamic Adjustment Nut (figure 24)
for looseness. Using special wrench supplied move nut
in the “counterclockwise” direction until wrench stops,
and then back. If little or no resistance is felt, turn the
nut in the “clockwise” direction until resistance is felt.
See “Dynamic Movement Adjustments” if a more
detailed explanation is needed.
Dynamic Movement
Adjustment Nut
Fig. 24
Casters
Inspect casters for cracked, chipped, loose or missing wheels. Casters should roll freely, Note: optional non-pressure
locking casters must have weight applied to roll. Replace if damaged.
Caster Base
Inspect caster base for cracks or other damage. Replace if damaged.
Cylinder
Cylinder defects are indicated by; the seat rising on its own, drifting downward, or failure to raise or lower with height
adjustment lever. See “TROUBLESHOOTING” section for diagnosis.
Seat
Inspect seat unit for cracks or damaged height adjustment lever. Replace if damaged. See “TROUBLESHOOTING”
section for diagnosis. What may appear to be damage may be a needed adjustment.
See “SERVICE PARTS” section for part numbers.
CLEANING
Please see the Brewer Cleaning Guidelines in the “Resources” area of www.brewercompany.com.
© August 2014
10
Document #3102642 RevA
TROUBLESHOOTING
Observation
Seat drifts down while seated, or
drifts up on it’s own with no one
seated.
Possible cause
Seat is too loose.
Upholstery is damaged
Sit on stool. Wiggle height
adjustment lever. Is lever
loose? Note: some lever
looseness is desirable.
Yes - replace cylinder.
No - replace seat assembly.
Weight not being removed
from seat during raising.
Place feet on floor and remove
some body weight as height
adjustment lever is pulled up.
Does seat raise?
Yes - normal operation.
No - go to next “Possible
Cause”.
Defective cylinder or
seat.
Sit on stool. Pull up slowly on
height adjustment lever. Lever
action should change from
loose to firm, but continue to
move against activation button on cylinder as it is pulled.
Is this the action the lever
makes?
Yes -replace cylinder.
No - replace seat assembly.
Defective cylinder or seat.
While sitting on stool, pull up
slowly on height adjustment
lever. Lever action should
change from loose to firm,
but continue to move against
activation button on cylinder as
it is pulled. Is this the action the
lever makes?
Yes -replace cylinder.
No - replace seat assembly.
Dynamic Movement adjustment nut turned too far in
the “Increased” direction.
Step off of stool. Grasp stool
seat and wiggle it side-to-side
to check for looseness.
If loose turn the Dynamic
Movement adjustment nut in
the “clockwise” direction to remove looseness (figs. 19-22)
Seat is damaged.
Tighten Dynamic Adjustment
nut until all “play” is removed.
Grasp seat and wiggle it sideto-side to check for broken seat
components.
Replace seat if components
are broken.
Seat screws loose.
Check the (4) seat screws with
a 6mm Allen wrench.
Tighten seat screws if loose.
(fig. 23)
--------------
Casters not rolling.
Optional non-pressure
locking casters operate
only when weight is
applied to stool.
Casters leaving marks on floor.
Build up of floor wax, dirt,
soap residue and other
debris on treads of casters.
Casters don’t roll smoothly.
-------------
Replace seat/substrate.
Sit on stool and move stool
around to test. Does stool roll
normally?
Yes - no movement with
weight off of stool is normal
operation.
No - replace defective
casters.
Inspect casters for build up.
Use stiff bristled brush with
mild soap to remove build up.
Inspect casters for damage.
Replace casters.
Dirt, soap or wax build-up
on casters.
Damaged casters.
© August 2014
Corrective Action
Defective cylinder or
seat/control plate.
Seat will not raise.
Seat will not lower
Test
11
Document #3102642 RevA
SERVICE PARTS
Aluminum Base (without casters)..........................3102643
Caster - Standard (set of 5)...................................3102280
Caster - Non-Pressure Locking (set of 5)..............3102670
Seat Assembly.......................................................3102671
Cylinder - (135DSS-L) height 18 3/4” - 23 1/4”......3102667
Cylinder - (135DSS) height 22 1/2” - 29 3/4”.....2102536
Cylinder - (135DSS-H) height 24” - 33 3/4”...........3102668
Wrench..................................................................3102674
LIMITED WARRANTY
Warranty: Brewer shall manufacture the Products in accordance with the requirements of all applicable law, including without
limitations, the regulations promulgated by and for the Federal Food and Drug Administration and industry standards. Brewer
warrants its Products to be free from defects in parts and workmanship under normal use and service for a period detailed in the
table below from the date of delivery to original end user. Brewer will not be responsible for any Product failure due to abuse,
modification or improper use, or for any use which exceeds the published capacity of the Product.
Do not discard parts before contacting Brewer for warranty service, as Brewer may require the customer to send in defective
parts for examination to determine the applicability of these warranty provisions. If this occurs, the customer will be invoiced
against a new purchase order for the replacement part. If the part is found to our satisfaction to have been defective under the
terms of the warranty, the customer will be credited the amount of the replacement part and outbound shipping costs. If the part
is found not to be defective under the terms of this warranty, the customer is liable for the cost of the replacement part, shipping,
and/or any repair costs.
Product
Warranty Registration Required
Warranty Period
135DSS
No
5 years
Freight Claims: Upon receipt, merchandise should be carefully examined to ascertain that proper amount has been received
in good condition – once the delivery receipt is signed free and clear, no freight claims can be made. Any claim for shortage or
damage must be made with delivering carrier within five (5) days from receipt of goods. Brewer does not assume any responsibility for loss or damage in transit, and compensation for such loss must be obtained from the freight carrier.
© August 2014
12
Document #3102642 RevA