Download AEC101 Manual CH 2.book
Transcript
AEC101
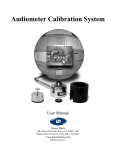
IEC318 Artificial Ear Coupler
User Manual
Larson Davis
1681 West 820 North, Provo, UT 84601-1341
Phone: (801) 375-0177, FAX: (801) 375-0182
www.larsondavis.com
IAEC101.01 Rev. A
AEC101 User Manual
Trademarks
PC is a trademark and IBM is a registered trademark of International Business Machines Corporation.
Intel is a registered trademark of Intel Corporation. Windows 95, Windows 98, and Windows NT are
registered trademarks of Microsoft Corporation.
Other product and company names may be mentioned in this manual which are trademarks of their
respective owners.
Disclaimer
Even though Larson Davis has reviewed thiedocumentation, Larson Davis makes no warranty or representation, either expressed or implied, with respect to this documentation, its quality, performance,
merchantability, or fitness for a particular purpose. This documentation is subject to change without
notice, and should not be construed as a commitment or representation by Larson Davis.
Support Policy
Please retain the serial number, and purchase date of your AEC101. You may be asked to provide this
information when contacting Larson Davis for service or technical support.
Warranty
Larson Davis warrants this product to be free from defects in material and workmanship for two years
from the date of original purchase.
During the first year of warranty period, Larson Davis will repair or, at its option, replace any defective component(s) without charge for parts or labor if the unit is returned, freight prepaid, to an authorized service center. The product will be returned freight prepaid.
During the second year warranty period, there will be no charge for replacement parts provided the
product is returned to a Larson Davis repair facility.
Product defects caused by misuse, accidents, or user modification are not covered by this warranty.
The warranties described above are exclusive and in lieu of all other warranties whether statutory,
express or implied including, but not limited to, any implied warranty of merchantability or fitness for
a particular purpose and all warranties arising from the course of dealing or usage or trade. The
buyer’s sole and exclusive remedy is for repair or replacement of the non-conforming product or part
thereof, or refund of the purchase price, but in no event shall Larson Davis, its contractors and suppliers be liable for any special, indirect, incidental, or consequential damages, whether the claims are
based in contract, in tort (including negligence), or otherwise with respect to or arising out of the product furnished hereunder. Representation and warranties made by any person, including authorized
dealers, representatives and employees of Larson Davis which alter or are in addition to the terms of
this warranty shall not be binding upon Larson Davis unless in writing and signed by one of its officers.
ii
AEC101 User Manual
Calibration and Certification Services
Larson Davis offers NIST traceable calibration services compliant with ISO 10012. Remember that
your microphone and preamplifier are an important part of your acoustic measurement system, and it
is important that your system is properly calibrated by people who understand the complexities of
these components. Larson Davis encourages you to return your system to the factory for calibration
each year thus validating the accuracy and quality of your measurement with a factory calibration certificate. Please refer to the Larson Davis price list for details of cost or contact the factory or your Larson Davis Representative for details.
In many cases, engineering improvements and firmware upgrades are included with calibration at no
additional cost. As an additional incentive to take advantage of our calibration services, Larson Davis
will extend the labor warranty by another year following a paid calibration certification.
iii
AEC101 User Manual
iv
AEC101 USER MANUAL
Table of Contents
Chapter 1
Introduction
1-1
The AEC101 IEC 318 Artificial Ear Coupler.........................................................1-1
Construction............................................................................................................1-2
Standards.................................................................................................................1-2
About this manual ...................................................................................................1-3
Measurements .........................................................................................................1-3
Audiometer Calibration......................................................................................1-3
Earphone Frequency Response Production Testing...........................................1-4
Chapter 2
AEC101 IEC 318 Coupler Initial Inspection and Assembly
2-1
AEC101 IEC 318 Coupler SPL Calibration ...........................................................2-4
Chapter 3
Testing Transducers with the AEC101
3-1
Audiometer Transducer Test Configurations .........................................................3-1
Testing Supra-Aural Earphones with the AEC101.................................................3-2
Testing Circumaural Earphones with the AEC101.................................................3-4
Environmental conditions ..................................................................................3-4
Test Configurations............................................................................................3-4
Appendix A AEC101 Specifications .............................................................. AA-1
Standards.............................................................................................................AA-1
Physical ...............................................................................................................AA-2
Appendix B AEC101 Verification or Calibration .........................................AB-1
Safety Precautions............................................................................................... AB-1
Equipment & Materials....................................................................................... AB-1
Verification ......................................................................................................... AB-2
Tuning ................................................................................................................. AB-4
i
AEC101 USER MANUAL
ii
C H A PT E R
1
Introduction
The AEC101 IEC 318 Artificial Ear Coupler
Thank you for choosing the Larson Davis AEC101 IEC 318
Artificial Ear Coupler. The AEC101coupler is an ear simulator covering the frequency band from 20 to 10000 Hz, which
has been designed for the calibration of supra-aural earphones used in audiometry and telephonometry applied to
the ear without acoustical leakage. The AEC101 allows
accurate and repeatable measurements within its frequency
response.
This coupler is part of the Larson Davis family of products
for audiometer calibration and electro-acoustic test. With the
other components of LD audiometer calibration systems, it
provides a durable means of calibrating and testing many
types of electro-acoustic transducers. It may also be used for
production testing where correlation between the coupler
and real ear response is not a requisite.
August 26, 1999
Introduction
1-1
Construction
The AEC101 is composed of three cavities coupled by precise acoustical volumes. The main cavity includes a 1/2"
microphone (LD 2559, not included) which is connected to
the preamplifier inserted in the base of the coupler via a
teflon insulator with gold plated contacts and stainless steel
spring-loaded pin. Major mechanical parts are made of nonmagnetic stainless steel for hardness, finish and long lasting
quality. The base has a non-skid rubber bottom and a vibration isolation pad is provided with the system.
In use, a supra-aural earphone is securely contained by an
earphone retainer ring made of durable black anodized aluminum. Clamping force is supplied by a stainless steelweight (4.5 N) lowered in the retainer ring. This approach
adapts to different earphones and avoids having to adjust
complex spring loaded mechanisms.
The AEC101 also includes two adapter plates and a heftier
flexible bag weight (9.5N) required for circumaural earphone testing.
Standards
The AEC101 was designed to achieve the characteristics
defined in International Electrotechnical Commission IEC
60318-1:1998 Ear simulator for the calibration of supraaural earphones. The AEC101 coupler also meets the
requirements of the American National Standard ANSI
S3.7-1995 Methods for Coupler Calibration of Earphones
(section 5.4). It is used with the Larson Davis 2559 precision
1/2" random incidence microphone and a measuring system,
typically the PRM902 preamplifier and System 824 realtime analyzer/sound level meter.
With the help of adapter plates described in IEC 60318-3 An
interim acoustic coupler for the calibration of audiometric
earphones in the extended high-frequency range, and in
ANSI S3.7-1995 Methods for Coupler Calibration of Earphones (Annex C), the AEC101 may also serve to calibrate
1-2
AEC101 User Manual
August 26, 1999
specific high acoustic damping earphones in the range from
8 kHz up to 16 kHz.
About this manual
This manual describes the care and usage of your AEC101
IEC 318 Artificial Ear Coupler and accessories. The following subjects will be covered:
Chapter 1 - Introduction: overview of AEC101 properties
and standards
Chapter 2 - Initial Inspection, Assembly and Calibration:
initial familiarization with the AEC101 components, assembly to a typical measurement system (System824) and calibration
Chapter 3 - Testing Transducers with the AEC101: setup and
procedures for the test and calibration of earphones
Appendix A - Calibration Method: description of the procedure used to calibrate and verify the AEC101 stability
Appendix B - Specifications
Measurements
The Larson Davis AEC101 IEC 318 Artificial Ear Coupler
may be used for a number of precision electro-acoustic test
applications, such as audiometer calibration and earphone
frequency response production testing.
Audiometer Calibration
The accuracy of an individual's hearing evaluation is
extremely important for clinical, legal, as well as personal
reasons. The audiometers used to quantify hearing loss are
complex instruments. They include signal generation, presentation and electro-acoustic components which must be
verified periodically to ensure accuracy and repeatability.
August 26, 1999
Introduction
1-3
Audiometers are often located in test areas which must also
be tested for ambient noise, and it is preferable not to
remove them from their installation. Therefore, portable calibration systems are indicated.
The Larson Davis AEC101 IEC 318 Artificial Ear Coupler
is ideal for a lightweight portable calibration system. It may
be added to the LD SYS008 and SYS009 audiometer calibration systems, which include a precision sound level meter
(System824) and software (AUDit™) to perform exhaustive
calibration according to the American National Standards
Institute ANSI S3.7-1995 Methods for Coupler Calibration
of Earphones and S3.6-1996 Specification for Audiometers.
Earphone Frequency Response Production Testing
As is the case with other artificial ear couplers, the AEC101
approximates the average human ear only for a limited frequency range and with certain earphones. The measured
responses may be significantly different from one earphone
type to another. However, an exact correlation is not always
required for production testing. It is possible to use the
AEC101 as part of an accurate system for production testing
of earphones or other electro-acoustic transducers. Such a
system may consist of the following components:
•
Test earphone and adapter to AEC101
•
Larson Davis Model AEC101 coupler
•
Larson Davis Model 2559 1/2" microphone
•
Cable from earphone connector to BNC output of source
•
Larson Davis Model SRC20 synthesized signal source
•
Precision amplifier (if required)
•
Precision sound level meter such as Larson Davis Model
824-Lite or 824 with frequency analysis capability.
Frequency response, level linearity and harmonic distortion
can be measured using the signal generation capability of the
SRC20, the coupler and precision sound level meter.
1-4
AEC101 User Manual
August 26, 1999
C H A PT E R
2
AEC101 IEC 318 Coupler
Initial Inspection and Assembly
The AEC101 IEC 318 Coupler is available in a variety of
configurations. You may have purchased the coupler alone,
with various accessories, or within a complete audiometer
test system. In this chapter, the initial inspection of the
AEC101 will be covered. You will also assemble an
AEC101 and connect it to a measurement system, in this
case the System 824 precision real-time sound level meter/
analyzer. For this you will need:
Part Number
Description
AUDit™
AUDit™ software running on a PC
CBL006 serial cable
Serial cable 8 pin mini DIN to DB-9
824
System824 precision sound level meter (SLM)
EXA010
10 foot extension cable with 7 pin LEMO connectors
2559
1/2" precision air condenser random incidence microphone
PRM902
1/2" diameter low noise microphone preamplifier
CAL250
Precision SPL calibrator with 114 dB SPL output at 250 Hz with 1
to 1/2" calibrator opening adaptor
The following are AEC101 components:
Artificial ear base including base, contacts, insulator and pad
IEC 318 coupler
MAEC101.06
IEC 318 Type 1 adaptor
MAEC101.07
IEC 318 Type 2 adaptor
MAEC101.08
IEC 318 conical ring
MAE100.6
Earphone retainer ring
MAEC100.7
Mass handle
SAEC100.01
Weight assembly
ACC001
Vibration isolation pad
WARNING!
September 8, 1999
Before continuing, ensure that the 824 SLM is turned off.
Sensitive circuitry may be adversely affected by transients
during assembly if the 824 is on. The 824 should remain off
until the system is fully assembled.
AEC101 IEC 318 Coupler Initial Inspection and Assembly
2-1
The AEC101 artificial ear is a versatile coupler and allows
measurement of a variety of earphones with its provided
accessories. Read the following instructions to unpack,
inspect and assemble the coupler for the first time.
Step 1
Place the cushioned vibration isolation pad on a
table or other such stable surface near the audiometer system.
Step 2
Visually inspect the coupler for gouges, scratches
and dents which may affect the measurement,
especially around the sharp lip which will be in
contact with the test earphone. Verify that the
small tube in the capillary leak hole is present with
no other obstructions (figure 2-1).
Leak Hole
Figure 2-1 AEC101 with coupler, leak hole
Step 3
2-2
Check the threaded hole on the weight assembly
(SAEC100.01) for obstructions, and screw in the
mass handle (MAEC100.7). The handle should
screw in securely.
AEC101 User Manual
September 8, 1999
Step 4
If installed, remove the coupler from the artificial
ear base by gently unscrewing it counterclockwise.
Step 5
Inspect the spring-loaded contact at the center of
the base visually. It should extend approximately 5
mm above the threaded ridge. The teflon insulator
around it should be free of dust and other particles.
Please do not handle the contact and protect it by
keeping the coupler on whenever a microphone is
not installed.
Step 6
Working over the cushioned pad (ACC001),
install the 1/2" microphone (LD Model 2559 or
equivalent) on the center of the artificial ear base.
The microphone should install easily: screw it finger tight (figure 2-2).
Figure 2-2 Microphone installed on AEC101
Step 7
September 8, 1999
Insert the 1/2" microphone preamplifier (LD
Model PRM902 or equivalent) gently in the side
port until its threads contact those of the base. The
preamplifier should install easily: screw it finger
tight (figure 2-3).
AEC101 IEC 318 Coupler Initial Inspection and Assembly
2-3
NOTE: When removing the preamplifier,
unscrew it by holding on its body, not the
connector sleeve
.
Figure 2-3 Preamp being installed in the AEC101
Step 8
Connect the instrument cable to the preamplifier.
The coupler is now ready for level calibration.
AEC101 IEC 318 Coupler SPL Calibration
NOTE: You will need to install the
adapter (ADP019) into the CAL250 in
order to calibrate 1/2 inch microphones.
ADP019
2-4
Level calibration is performed with the Larson Davis Model
CAL250 precision calibrator. It offers a level of 114 dB with
an accuracy of +/-0.2 dB at 250Hz. You will have to insert
the provided 1" to 1/2" adaptor in the top of the calibrator.
To calibrate the measurement system and artificial ear, follow the procedure below.
Step 1
Assemble the coupler as described in the Initial
Inspection and Assembly section above. The coupler base should rest on the isolation pad and
ambient noise and vibration should be minimized.
AEC101 User Manual
September 8, 1999
NOTE: Do not remove the microphone
grid cap.
Step 2
Place the calibrator opening on the microphone
and seat it fully (figure 4-4).
Figure 2-4 Installing the CAL250 on AEC101
Step 3
Activate the calibrator as prompted by the software and verify the stability of the indication on
the measurement system (figure 4-5). Do not hold
the calibrator during calibration. Its tone will last
about one minute (depending on the battery) and
will turn off automatically.
Figure 2-5 CAL250 being activated on AEC101
September 8, 1999
AEC101 IEC 318 Coupler Initial Inspection and Assembly
2-5
2-6
AEC101 User Manual
September 8, 1999
C H A PT E R
3
Testing Transducers with the
AEC101
This chapter covers test configurations for the audiometer
transducers which can calibrated with the LD AEC101
Please contact Larson Davis if you have any system assembly questions not covered in this manual.
Audiometer Transducer Test Configurations
The table below lists some typical audiometer transducers,
many of which are covered in specifications such as American National Standards Institute Specifications for Audiometers, S3.6-1996. These test setups are covered in greater
detail in subsequent sections.
Transducer Type
Example
Suggested Setup
Comments
Supra-aural earphone
Telephonics TDH-39,
49, 50
AEC100 NBS 9-A coupler or AEC101 IEC 318
artificial ear
Use 4-5 N weight. Test
up to 8000 Hz.
Circumaural earphone
Sennheiser HDA200
AEC101 IEC 318 artificial ear with
MAEC101.06 Type 1
adaptor plate
Use 9-10N weight.
Extended frequency tests
up to 16000 Hz may be
performed.
Circumaural earphone
Koss HV/1A
AEC101 IEC 318 artificial ear with
MAEC101.07 Type 2
adaptor plate
Use 9-10N weight.
Extended frequency tests
up to 16000 Hz may be
performed.
September 8, 1999
Testing Transducers with the AEC101
3-1
Testing Supra-Aural Earphones with the AEC101
The following steps are suggested for audiometer calibration
with the AEC101.
Step 1
Assemble the coupler as described in the Initial
Assembly Chapter. The coupler base should rest
on the isolation pad and ambient noise and vibration should be minimized.
Step 2
Perform a calibration of the system as described in
the Calibration Chapter above.
Step 3
As desired, apply sealant on the lower portion of
the microphone to prevent air leakage from the
coupler through paths other than the capillary leak
hole. Screw the coupler over the base (figure 3-1)
until finger tight. The sealant should not affect the
volume of the cavity or occlude the leak hole.
Figure 3-1 Coupler being installed on AEC101
Step 4
Place the black conical ring (figure 3-2) on the top
of the coupler.
Black Ring installed
Figure 3-2 Black Conical ring installed on AEC101
3-2
AEC101 User Manual
September 8, 1999
Step 5
For headphones with a very stiff ear cap, apply a
thin (less than 1mm) film of sealant or rubber
sheet on the contact area between coupler and earphone.
Step 6
Center the test earphone on the coupler. Lower the
black retainer ring over the earphone, holding the
earphone cable in line with the notch (figure 3-3).
Figure 3-3 Retainer ring being installed on AEC101
Step 7
Lower the mass by its handle to the top of the earphone (figure 3-3).
Figure 3-4 Mass being lowered onto headphone.
The coupler and earphone are now ready for measurement.
Set tone type, level and presentation and make the reading
on the measurement system.
September 8, 1999
Testing Transducers with the AEC101
3-3
Testing Circumaural Earphones with the AEC101
Circumaural earphones are available for audiometers using
extended high-frequencies, from 8000 to 16000 Hz. These
earphones typically rest against the head with little or no
contact with the pinna (external ear). Their speaker (or
driver) is coupled to the ear with a relatively large volume of
air under the ear cap.
Interim RETSPLs for two circumaural earphones are listed
in Annex C of ANSI S3.6-1996: the Sennheiser HDA200 and
Koss HV/1A.
Environmental conditions
It is recommended from various standards that the extended
high-frequency calibration of circumaural earphones be performed when the following environmental conditions are
met.
Condition
Range in ANSI S3.6-1996
(Annex C)
Range in IEC 318-1:1998
Clause 6 Calibration
Ambient Pressure
98 to 104 kPa
98.3 to 104.3 kPa
Temperature
18 to 26 degrees C
20 to 26 degrees C
Relative Humidity
30 to 80% RH
30 to 70% RH
Any condition not met
Calibration is not allowed
State actual values
Test Configurations
The following steps are suggested for circumaural earphone
audiometer calibration with the AEC101.
3-4
Step 1
Assemble the coupler as described in the Initial
Assembly above. The coupler base should rest on
the isolation pad and ambient noise and vibration
should be minimized.
Step 2
Perform a calibration of the system as described in
the Calibration chapter.
AEC101 User Manual
September 8, 1999
Step 3
As desired, apply sealant on the lower portion of
the microphone to prevent air leakage from the
coupler through paths other than the capillary leak
hole. Screw the coupler over the base (figure 3-5).
The sealant should not affect the volume of the
cavity or occlude the leak hole.
Figure 3-5 Coupler being installed on AEC101
Step 4
For earphones designed to be calibrated with a
Type 1 adapter (such as the Sennheiser HDA200),
install the Type 1 adapter on the coupler, with the
cylindrical rim facing down. Place the black conical ring on the top of the coupler and plate, with its
flat base on the bottom (figure 3-6).
Figure 3-6 AEC101 with Type 1 Adapter installed.
September 8, 1999
Testing Transducers with the AEC101
3-5
Step 5
For earphones designed to be calibrated with a
Type 2 adapter (such as the Koss HV/1A), use the
Type 2 adapter, which has crenellated distance
clamps around its circumference. Do not use the
black conical ring (figure 3-7).
Figure 3-7 Type 2 adapter adapter installed on AEC101.
Step 6
3-6
Center the test earphone on the coupler or place it
as recommended if the cushion is asymmetrical.
AEC101 User Manual
September 8, 1999
Step 7
ANSI S3.6-1996 requires a static force of 9 to 10
N on the earphone during calibration. Use the
large weight (figure 3-8).
Figure 3-8 Sennheiser earphone and weight being installed on
AEC101
The coupler and earphone are now ready for measurement.
Set tone type, level and presentation and make the reading
on the measurement system.
September 8, 1999
Testing Transducers with the AEC101
3-7
3-8
AEC101 User Manual
September 8, 1999
APPENDIX
A
AEC101 Specifications
Standards
Fulfills the requirements of:
•
International Standard IEC 60318-1 (1998-07), Electroacoustics - Simulators of human head and ear - Part 1 Ear
simulator for the calibration of supra-aural earphones
when used with the Larson Davis Model 2559 1/2" precision air condenser microphone
•
International Standard IEC 60318-2 (1998-08), Electroacoustics - Simulators of human head and ear - Part 2 An
interim acoustic coupler for the calibration of audiometric earphones in the extended high-frequency range
when used with the Larson Davis Model 2559 1/2" precision air condenser microphone and Type 1 and Type 2
adapter plates
•
American National Standards Institute ANSI S3.7-1995
Methods for Coupler Calibration of Earphones:
Section 5.4: IEC coupler for supra-aural earphones
described in Annex C (normative) Calibration of
circumaural earphones for extended high frequency testing
September 8, 1999
A-1
Physical
AEC101 Coupler and Base
Nominal acoustic volumes:
2500 mm3, 1800 mm3, 7500 mm3
Acoustic volume tolerances:
better than 1%
Microphone mounting thread:
0.4606-60 UNS-2A
Preamplifier mounting thread:
0.4606-60 UNS-2B
Maximum diameter:
82 mm (3.2")
Height:
50 mm (2.0") without weight and earphone retainer,119
mm (4.7") with earphone retainer ring
Weight:
1.4 kg (3.2 lb.)
Type 1 Plate: Larson Davis Model MAEC101.06
Maximum diameter:
120 mm (4.72")
Height:
10.8 mm (.42")
Weight:
260 g (.57 lb.)
Typical earphone:
Sennheiser HDA200
Type 2 Plate: Larson Davis Model MAEC101.07
A-2
Maximum diameter:
78.5 mm (3.09")
Height:
10.8 mm (.53")
Weight:
247 g (.54 lb.)
Typical earphone:
Koss HV/1A
AEC101 User Manual
September 8, 1999
Weights
Small mass with handle (supra-aural earphones):
460 g (1.01 lb.)
Large mass (circumaural earphones):
970 g (2.14 lb.)
Calibration Environmental Conditions
Reference ambient pressure:
101.3 kPa
Reference temperature:
23º C
Reference relative humidity:
50%
IEC 318-1 Calibration should be performed at the above conditions within ±3,0 kPa,
±3,0 ºC, and ±20% R.H. or else actual values shall be stated.
Compatibility
Microphone:
Larson Davis Model 2559 1/2" condenser microphone of
Type WS2P per IEC 61094-4
Preamplifier:
Larson Davis Model PRM902, PRM904, PRM900B or C,
PRM826
Type 1 Plate:
Larson Davis Model MAEC101.06
Type 2 Plate:
Larson Davis Model MAEC101.07
Please contact Larson Davis for compatibility with other accessories.
September 8, 1999
A -3
A-4
AEC101 User Manual
September 8, 1999
APPENDIX
B
AEC101 Verification or
Calibration
This appendix describes the method used to verify calibration and overall stability of the Larson Davis AEC101 IEC
318 coupler. Some custom components are required for this
procedure. They are available from LD. Please contact Larson Davis if you have any questions about this procedure.
This procedure uses the Larson Davis Model 2900 real-time
analyzer, which provides the input signal and measures the
AEC101 output. Refer to the 2900 User's Manual for complete instructions on this instrument.
Safety Precautions
Follow general electrical precautions for working with energized, low voltage (200V maximum) circuits. The microphone bias voltage may be present on exposed microphone
contacts. Do not turn on the Model 2900 analyzer until all
connections have been made. All other standard safety procedures should be followed.
Equipment & Materials
The following equipment is required for this calibration procedure. The response of the Model 2575 microphone used as
a driver should be known with the appropriate degree of
accuracy.
August 26, 1999
B-1
Part Number
Description
Comments
2900, 2800-OPT 11
Analyzer and signal generator
Provides excitation voltage and measurement
ADP042 or ADP008
1" to 1/2" adapter
Adapts driver to preamplifier
ADP050
AC/DC adder
Combines driver bias and excitation voltages
ADP051
Mic adapter / connector
Feeds excitation voltage to driver
CBL061
1/8" phone to BNC cable
Connects 2900 signal output to adder AC input
EXC001.5 (qty 3)
Microphone extension cable
MAEC101.01 and .03
Coupler housing and tuning
cavity
AEC101 stainless steel upper assembly
MAEC101.50
Coupler tuning tool
AEC101 base (MAEC101.04) may be used if no
adjustment is necessary
MAEC101.51
Driver tuning tool
Cylindrical apparatus for mounting excitation
driver on test AEC101
2575
1" precision microphone
Driver microphone
2559
1/2" precision microphone
AEC101 cavity microphone
Before beginning this procedure, the Coupler subassembly
should be assembled. Verify that the stainless steel port tube
is securely mounted in the coupler housing (MAEC101.01)
and that its hole is open and free of blockage.
Verification
The following procedure may be used to measure the characteristic frequency response of the AEC101 coupler.
Step 1
B-2
Assemble the coupler configuration shown in Figure 1. The assembly may be oriented vertically or
horizontally. The driver tuning tool must be held
tight against the coupler (rubber bands or clamps
AEC101 User Manual
August 26, 1999
work well). Isolate the assembly from external
sound or vibration (e.g. on soft foam blocks in a
very quiet environment).
Figure 1 - Coupler Test Configuration
Step 2
August 26, 1999
Connect the coupler configuration to the analyzer
and signal generator as shown in Figure 2.
B -3
Figure 2 - Coupler connection to analyzer
Step 3
Use the Model 2900 analyzer and its internal noise
generator to perform a frequency response of the
AEC101 coupler. The internal noise generator
may be set to a sweeping sine wave test with
appropriate sweep rate and level to measure the
response with the analyzer's filters. When corrected for the frequency response of the driver section, the measured spectrum provides the
frequency response of the AEC101 coupler. This
response should compare to the acoustical
response indicated in the standard.
Tuning
The coupler adjustment screws are sealed in position with
locking compound. Under normal circumstances, they
should not require adjustment. Tuning (adjusting the coupler's tuning screws) is performed with the equipment and
setup described in this appendix. Please contact Larson
Davis for information about this procedure.
B-4
AEC101 User Manual
August 26, 1999
SPARK™ 706RC, 705, 703+, 703 and BLAZE™ USER MANUAL
Index
A
S
About this manual ............................... 1-3
AEC100 NBS 9-A ................................. 3-1
ANSI S3.7-1995 ..................................... 1-2,
AA-1
Assembly ............................................... 2-1
Audiometer Calibration ...................... 1-3
Sennheiser HDA200 ............................ 3-1
SRC20 .................................................... 1-4
Standards .............................................. 1-2,
AA-1
Supra-aural earphone ......................... 3-1
T
C
Calibration Environmental
Conditions ............................................ AA-3
Circumaural earphone ........................ 3-1
Compatibility ....................................... AA-3
Connecting the PC ............................... 3-2
Construction ......................................... 1-2
Telephonics TDH-39, 49, 50 ............... 3-1
Test Configurations ............................. 3-1
Testing Circumaural Earphones ....... 3-4
Testing Transducers ............................ 3-1
transducers ........................................... 3-1
Type 1 Plate .......................................... AA-2
Type 2 Plate .......................................... AA-2
E
W
Earphone Frequency Response ......... 1-4
Environmental ...................................... AA-3
Weights ................................................. AA-3
I
IEC 60318-1 ........................................... AA-1
1998 ................................................. 1-2
IEC 60318-2 ........................................... AA-1
IEC 60318-3 ........................................... 1-2
Initial Inspection .................................. 2-1
K
Koss HV/1A ......................................... 3-1
M
Measurements ...................................... 1-3
Microphone mounting thread
AA-2
P
Parts List ............................................... 2-1
Production Testing .............................. 1-4
i


