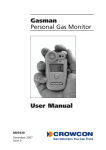
1
Xgard
Gas Detectors
Installation, operating
and maintenance
instructions
M07249
Issue 11
January 2015
2. Installation
Safety
information
Xgard Type 1
• Xgard gas detectors must be installed, operated and maintained in
strict accordance with these instructions, warnings, label information,
and within the limitations stated.
• The lid on flameproof versions of Xgard must be kept tightly closed
until power to the detector is isolated otherwise ignition of a flammable
atmosphere can occur. Before removing the cover for maintenance or
calibration purposes, ensure the surrounding atmosphere is free of
flammable gases or vapours.
• Xgard detectors are designed to detect gases or vapours in air, and
not inert or oxygen deficient atmospheres. Xgard oxygen detectors
can measure in oxygen deficient atmospheres.
• Electrochemical cells used in toxic and oxygen versions of Xgard
contain small volumes of corrosive electrolyte. Care should be
observed when replacing cells to ensure that the electrolyte does not
come into contact with skin or eyes.
• Maintenance and calibration operations must only be performed by
qualified service personnel.
• Only genuine Crowcon replacement parts must be used, substitute
components may invalidate the certification and warranty of the
detector.
• Xgard detectors must be protected from extreme vibration, and direct
sunlight in hot environments as this may cause the temperature of the
detector to rise above its specified limits and cause premature failure.
A sunshade is available for Xgard.
• This equipment must not be used in a Carbon Disulphide
atmosphere.
• Xgard Types 2, 3, 5 & 6 are certified for use in atmospheres that
may contain flammable dusts. They will not however detect the
presence of flammable dust, and the response of the gas sensor
may be compromised by becoming blocked in a dusty environment.
Xgard detectors should be inspected regularly if used in a dusty
environment.
• For Exd certified Xgard’s (Types 2-6) cable glands with a sealing
compound must be used where Group IIC gases are likely to be
present (ref: EN60079-14:2008 section 10.4.2).
2
Safety information
Hazardous area classifications:
Zone 0: An area classified as Zone 0 will have ignitable concentrations
of flammable gases, vapours or liquids either continuously
present or present for long periods of time under normal
operating conditions. Intrinsically Safe (Exia) detectors are
suitable for use in Zone 0, provided they are connected via a
suitable zener barrier or galvanic isolator.
Zone 1: An area classified as Zone 1 is likely to have ignitable
concentrations of flammable gases, vapours or liquids present
under normal operating conditions. Flameproof (Exd) detectors
are suitable for use in Zone 1. Intrinsically Safe (Exia) detectors
are suitable for use in Zone 1, provided they are connected via
a suitable zener barrier or galvanic isolator.
Zone 2: An area classified as Zone 2 is not likely to have ignitable
concentrations of flammable gases, vapours or liquids present
under normal operating conditions. Flameproof (Exd) detectors
are suitable for use in Zone 2. Intrinsically Safe (Exia) detectors
are suitable for use in Zone 2, provided they are connected via
a suitable zener barrier or galvanic isolator.
Areas that may contain flammable dusts are categorized as Zone, 20,
Zone 21 and Zone 22.
Notes:
In North America ‘Divisions’ are used to categorise risk where:
Division 1 is equivalent to Zone 0 or 1
Division 2 is equivalent to Zone 2
Under European ATEX rules hazardous area equipment has been
re-defined under ‘equipment categories’ where:
Equipment Category 1 is suitable for Zone 0
Equipment Category 2 is suitable for Zone 1
Equipment Category 3 is suitable for Zone 2
3
2. Installation
Overview
Xgard Type 1
Product overview
Xgard are a family of gas detectors for monitoring a very wide range
of toxic and flammable gases and oxygen. Xgard are available as
either Intrinsically Safe (Exia) or Flameproof (Exd) detectors, dependant
upon sensor type and customer preference. Intrinsically Safe versions
are suitable for use in Zone 0, 1 or 2 hazardous areas when used with
a suitable Zener barrier or galvanic isolator. Flameproof versions are
suitable for use in Zone 1 or 2 hazardous areas.
Please refer to the certification label on the detector junction box to identify
the type of certification that relates to the product supplied. Hazardous
area definitions are shown in the Hazardous area classifications section
on page 3.
Note: if no certification label is fitted to the junction box, the
detector is not certified for use in hazardous areas.
Vmax:28V, Pmax:1.2W, Imax:150mA, Ci:14.4nF, Li:0 uH
66Y6
C
Securite Intriseque. Classified as to Intrinsic Safety For use in
Class I, Groups A, B, C and D Haz. Loc when installed in accordance with control
drawing No S-4838-A3. WARNING Substitution of Components May Impair Intrinsic
Safety. To prevent ignition of flammable or combustible atmospheres read,
understand and adhere to the manufacturer's live maintenance procedures.
XX
Xgard Intrinsically Safe - Type 1 UL
Diagram 1: Xgard certification labels
4
CL
66Y6
AS TO RISK OF FIRE, ELECTRIC SHOCK & EXPLOSIVE HAZARDS ONLY.
WARNING To reduce the risk of ignition of Hazardous Atmosheres
disconnect the equipment from the supply circuit before opening.
Keep assy tightly closed when in operation. Conduit runs must have
sealing fitting connected within 18 inches of enclosure.
Xgard UL Flameproof
SS IFI
LA
ED
C
XX
CROWCON
< a<
CLASS I, DIVISION 1, GROUPS B, C, & D
A SS IF I
ED
< a<
Vmax: 28V, Pmax: 1.2W, Ci: 15.6nF, Li: 0uH
66Y6
C
US
Securite Intriseque. Classified as to Intrinsic Safety For use in
Class I, Groups A, B, C and D Haz. Loc when installed in accordance with control
drawing No S-4838-A3. WARNING Substitution of Components May Impair Intrinsic
Safety. To prevent ignition of flammable or combustible atmospheres read,
understand and adhere to the manufacturer's live maintenance procedures.
CROWCON XGARD GAS DETECTOR TYPE 1
Exia
TOXIC -40°C<Ta<+55°C T4
Intrinsically Safe Type 1
XGARD GAS DETECTOR TYPE
SS IFI
LA
ED
CROWCON XGARD GAS DETECTOR TYPE 1
Exia
OXYGEN -40°C < Ta < +55°C T4
Xgard Type 4 ATEX and
IECEx Flameproof label
C
Xgard Types 2,3,5,6 ATEX
and IECEx Flameproof
label
2006
Overview
Each type of Xgard detector is identified by a label fitted on the junction
box body. Please quote the ‘model number’, ‘gas range’ and ‘sensor
type’ when contacting Crowcon for advice or spares.
This manual covers all versions of Xgard, care should be taken to ensure
that the correct section is referenced according to the type of detector
used. The Xgard detector type is detailed on the product label. The
Xgard range is as shown:
Type 1: Intrinsically safe toxic and oxygen gas detector
Type 2: Flameproof toxic and oxygen gas detector
Type 3: Flameproof flammable gas detector
Type 4: Flameproof high temperature flammable gas detector
Type 5: Flameproof flammable gas detector with 4-20mA output
Type 6: Flameproof thermal conductivity type gas detector
Product description
Xgard comprises of a universal assembly to accommodate the full range
of toxic, flammable and oxygen gas sensors. The assembly comprises
five main parts; the junction box, junction box lid, amplifier/terminal PCB,
sensor PCB and sensor retainer. These are shown in exploded form in
Diagram 3.
A cover is fitted over the amplifier PCB to provide protection when the
junction box is opened. This cover is designed to allow access to all cable
terminals, test points and potentiometers without the need for removal.
The junction box is available in three versions: Glass-reinforced Nylon
for Xgard Type 1; Corrosion-resistant aluminium for all Types; or 316
Stainless Steel for all Types. The junction box is supplied with 1 x M20,
1
/2” or 3/4”NPT cable gland entry, on the right hand side for customer use.
The junction box is suitable for fixing on the wall or ceiling using M6
fixings. Cable gland adaptors are available if required (see Spare parts
and accessories section).
5
2. Installation
Overview
Slots to suit M6
or 1/4” fixings for
ceiling mount
Xgard Type 1
36 Slot
CRS
M20, 1/2” or 3/4” NPT
cable entry
155.5 Overall
166.3 Overall
Height 111
All dimensions in millimetres
Diagram 2: Xgard dimensioned view
6
Slots to suit M6 or 1/4” fixings
146 CRS
Overview
Grub screw
Certification label
PCB cover
(M04770)
Enclosure
base
Lid O-ring
(M04829)
Amplifier PCB
Sensor module
Sensor seal
Sensor retainer O-ring
(M04828)
Grub screw
Sensor retainer
Diagram 3: Xgard exploded view (part numbers shown in brackets where applicable.
For part numbers not shown, see Spares and Accessories on page 61)
7
8
Table of contents
Type 1 - Intrinsically safe toxic and oxygen gas detector............... 11
1. Introduction..................................................................................... 11
2. Installation....................................................................................... 12
3. Operation........................................................................................ 15
4. Specification................................................................................... 18
Type 2 - Flameproof toxic and oxygen gas detector....................... 19
1. Introduction..................................................................................... 19
2. Installation....................................................................................... 20
3. Operation........................................................................................ 23
4. Specification................................................................................... 26
Type 3 - Flameproof flammable gas detector.................................. 27
1. Introduction..................................................................................... 27
2. Installation....................................................................................... 28
3. Operation........................................................................................ 31
4. Specification................................................................................... 34
Type 4 - Flameproof high temperature flammable gas detector.... 35
1. Introduction..................................................................................... 35
2. Installation....................................................................................... 36
3. Operation........................................................................................ 39
4. Specification................................................................................... 42
Type 5 - Flameproof flammable gas detector with 4-20mA output.43
1. Introduction..................................................................................... 43
2. Installation....................................................................................... 44
3. Operation........................................................................................ 47
4. Specification................................................................................... 51
Type 6 - Flameproof thermal conductivity type gas detector......... 52
1. Introduction..................................................................................... 52
2. Installation....................................................................................... 53
3. Operation........................................................................................ 56
4. Specification................................................................................... 60
Spare parts and accessories.............................................................. 61
Appendix: Sensor limitations.............................................................. 63
Warranty............................................................................................... 64
9
10
1.Introduction
Xgard Type 1
1.1 Intrinsically safe toxic and oxygen gas detector
This version of Xgard is an Intrinsically safe loop-powered (current-sink)
4-20 mA toxic or oxygen gas detector, designed to detect a wide range
of gases when fitted with the appropriate electrochemical sensor. The
detector is certified
II 1 G Ex ia IIC T4 Ga, and is suitable for use in
Zone 0, Zone 1 and Zone 2 hazardous areas when used with a suitable
Zener barrier or galvanic isolator.
Electrical connections to the detector are made via the terminal block
on the amplifier PCB shown below. The amplifier provides power to
the sensor, and converts the sensor signal into a 4-20 mA signal for
connection to a control panel.
Internal
grounding
terminal
(earth)
Test
points
Supplemental
external
grounding
terminal
(earth)
Set zero
Run
Links for Crowcon
use (toxic version
only)
Diagram 4: Xgard Type 1 PCB layout
(Shown with PCB cover removed).
11
2. Installation
2.Installation
Xgard
Type 1
1
Xgard
Type
WARNING
This detector is designed for use in Zone 0, Zone 1 and Zone 2
hazardous areas, and is certified
II 1 G Ex ia IIC T4 Ga
when used with a suitable Zener barrier or galvanic isolator.
Installation must be in accordance with the recognised
standards of the appropriate authority in the country
concerned.
For further information please contact Crowcon. Prior to
carrying out any installation work ensure local regulations and
site procedures are followed.
2.1 Location
The detector should be mounted where the gas to be detected is most
likely to be present. The following points should be noted when locating
gas detectors:
• To detect gases which are lighter than air, detectors should be
mounted at high level and Crowcon recommend the use of a collector
cone (Part No. C01051) and accessory adaptor (Part No. M04666).
• To detect heavier than air gases, detectors should be mounted at low
level.
• When locating detectors consider the possible damage caused by
natural events e.g. rain or flooding. For detectors mounted outdoors
Crowcon recommend the use of a Spray Deflector (Part No. C01052)
and accessory adaptor (Part No. M04666).
• Mounting of oxygen detectors requires knowledge of the gas
displacing the oxygen. For example, carbon dioxide is heavier than air
and collects in low lying areas. It will displace oxygen and so detectors
should be placed at low level.
• Consider ease of access for functional testing and servicing.
• Consider how the escaping gas may behave due to natural or forced
air currents. Mount detectors in ventilation ducts if appropriate.
• Consider the process conditions. For example, ammonia is normally
lighter than air, but if released from a cooling system, the gas may fall
rather than rise.
The placement of sensors should be determined following advice
of experts having specialist knowledge of gas dispersion, the plant
processing equipment as well as safety and engineering issues. The
agreement reached on the locations of sensors should be recorded.
Crowcon would be pleased to assist in the selection and siting of gas
detectors.
12
2. Installation
Xgard Type 1
2.2 Mounting
Xgard should be installed at the designated location with the sensor
pointing down. This ensures that dust or water will not collect on the
sensor and stop gas entering the cell. The mounting detail is shown in
Diagram 2. Care should be taken when installing the detector to avoid
damaging the painted surface of the junction box and sensor retainer.
2.3 Cabling requirement
Cabling to Xgard must be in accordance with the recognised standards
of the appropriate authority in the country concerned and meet the
electrical requirements of the detector.
Crowcon recommend the use of 2-core screened cable with a minimum
cross-sectional area of 0.5 mm2 (20awg). Suitable weatherproof cable glands
must be used. Intrinsically Safe cables should be identified by some means,
for example coloured blue. Alternative cabling techniques such as steel
conduit may be acceptable provided appropriate standards are met.
Xgard requires a dc supply of 8-30 V and is loop powered (if mounted
in a hazardous area, do not apply a voltage higher than the maximum
rating of the Zener barrier, typically 28 V). Ensure there is a minimum of
8 V at the detector, taking into account the voltage drop due to cable
resistance, the Zener barrier (if fitted) and the sense resistance of the
control panel to which it is connected.
For example, a nominal dc supply at the control panel of 24 V has a
guaranteed minimum supply of 19.5 V. The circuit may demand up to
20 mA. Given a sense resistor in the control panel of 232 Ohms the
maximum voltage drop allowed due to cable resistance is 6.8 V. The
maximum loop resistance allowed is 340 Ohms (approx.).
A 1.5 mm2 cable will typically allow cable runs up to 14 km. Table 1 below
shows the maximum cable distances given typical cable parameters.
C.S.A.
Resistance
Max. Distance
(Ohms per km)
(km)
mm2 Awg Cable Loop
1.0 17
1.5 15
2.5 13
18.1
12.1
7.4
36.2
24.2
14.8
Max. Distance with 330 ž
Zener barrier km
9.4
14
23
0.35
0.5
0.85
Table 1: Maximum cable distances for typical cables
The acceptable cross sectional area of cable used is 0.5 to 2.5 mm2
(20 to 13awg). The table is provided for guidance only, actual
cable parameters for each application should be used to calculate
maximum cable distances.
13
2. Installation
Xgard Type 1
2.4 Electrical connections
All connections are made via the screw terminal block mounted on the
amplifier PCB in the junction box. The terminals are marked ‘+’ and ‘-’
and correct polarity should be observed when connecting the detector
to control equipment. This version of Xgard is a 4-20 mA current sink
device, and requires a dc supply of 8-30 V.
Note: The internal grounding terminal (see diagram 4) shall be used as
the grounding means of the Xgard gas detector. The external grounding
terminal ( see diagram 4) is only a supplemental bonding connection,
and is only to be used where local authorities permit or require such a
connection. To limit radio interference, the junction box and cable armour
should be grounded (earthed) at the control panel. Ensure the earth
connection is provided in a safe area only, so as to avoid earth loops and
maintain I. S. certification.
Pepperl & Fuchs and MTL Zener barriers
Xgard Type 1 PCB
Control Panel
2 Pepperl & Fuchs 7
1 Z715 / Z728 8
SIG
I.S. Earth
HAZARDOUS AREA
SAFE AREA
4
3
2
1
MTL7715+-/
MTL7728+-
SIG
I.S. Earth
Pepperl & Fuchs and MTL galvanic isolators
Xgard Type 1 PCB
Control Panel
.)'67&([
3HSSHUO)XFKV 24V dc
Supply
HAZARDOUS AREA
Earth
SAFE AREA
07/
24V dc
Supply
Diagram 5: Xgard Type 1 electrical connections
14
6,*
6,*
Earth
3.Operation
Xgard Type 1
WARNING
Prior to carrying out any work ensure local regulations and
site procedures are followed. Never attempt to open the
detector or junction box when flammable gas is present.
Ensure that the associated control panel is inhibited so as to
prevent false alarms.
3.1a Commissioning procedure
– toxic types only
1. Open the junction box of the detector by NB Glass-reinforced
unscrewing the lid in an anti-clockwise Nylon junction boxes
direction (having loosened the retaining grub- do not include a grub
screw first).
screw.
2. Check that all electrical connections have
been made and are correct as per Diagram 5.
3. Apply power to the detector and ensure the minimum supply voltage
of 8 V dc is present at the ‘+’ and ‘-’ terminals of the detector.
4. Leave the detector to stabilise for at least 1 hour, dependant upon
sensor type.
5. Connect a digital volt meter (DVM) to the test points on the amplifier
PCB.
Note: At the test points, Zero will read 40 mV = 4 mA.
Full scale deflection will read 200 mV = 20 mA.
Zeroing the detector
6. Ensure you are in clean air. Adjust the ‘ZERO’ pot on the amplifier
(which is accessible via a hole in the PCB cover) until the DVM reads
40 mV. Check that the control equipment display reads zero.
Calibrating the detector
7. Apply calibration gas (concentration should be at least 50% of sensor
full-scale) to the detector at a flow rate of 0.5 - 1 litre/minute via a
flow adaptor (Part No. C03005). Contact Crowcon for the supply of
calibration gas.
8. Allow the gas reading to stabilise (usually 30 to 60 seconds) and
adjust the ‘CAL’ pot until the DVM reads the appropriate reading. To
calculate the reading use the formula and example below:
(
160
Range
x Gas
)
+ 40 = mV setting
Example:calibrating a 0-250 ppm carbon monoxide sensor using
150 ppm gas.
15
3. Operation
(
160
Xgard Type 1
)
x 150
+ 40 = 136 mV
250
9. If the control equipment display requires adjustment consult the
operating manual for the equipment.
10.Remove the gas and allow the sensor to completely settle before
re-checking the zero setting.
11.Close the junction box of the detector ensuring that the lid is securely
tightened, and the grub-screw is secured.
12.The detector is now operational.
3.1b
Commissioning procedure
– oxygen type only
Warning: A label is fitted over the sensor retainer
aperture on oxygen detectors prior to shipment
from Crowcon. The label isolates the oxygen
sensor from air to minimize sensor life usage
during storage and transit. It is essential that this
label is removed prior to commissioning or before
putting the detector into use.
1. Follow steps 1 to 5 given in 3.1a above.
Zeroing the detector
2. Remove the amplifier PCB covers and move the LINK on the
amplifier board from ‘RUN’ to ‘SET ZERO’. Adjust the ‘ZERO’ pot
on the amplifier until the DVM reads 40 mV. Check that the control
equipment display reads zero.
Calibrating the detector
3. With normal clean air present at the detector, replace the LINK to ‘RUN’
on the amplifier board, adjust the ‘CAL’ pot until the DVM reads 174 mV,
(20.9% O2). Leave the LINK in ‘RUN’ position and re-fit the PCB covers.
4. If the control equipment display requires adjustment consult the
operating manual for the equipment.
5. Follow steps 11 and 12 given in 3.1a above. The detector is now
operational.
3.2 Routine maintenance
The operational life of the sensors depends on the application, frequency and
amount of gas being seen. Under normal conditions (6 monthly calibration
with periodic exposure to CAL gas) the life expectancy of the toxic sensors
is 2-3 years. Oxygen sensors must be replaced every two years.
16
3. Operation
Xgard Type 1
Site practices will dictate the frequency with which detectors are tested.
Crowcon would recommend that detectors be gas tested at least every
6 months and re-calibrated as necessary. To re-calibrate a detector
follow the steps given in 3.1 above. The calibration frequency should
be increased in environments subject to extreme heat and/or dust, and
where gas is frequently present.
When performing maintenance on Xgard, ensure that the sensor retainer
and junction box lid O-rings are present and in good condition to
maintain the ingress protection of the product. See the ‘Spare parts and
accessories’ section for the part numbers of replacement O-rings.
3.3 Sensor replacement/servicing of detectors
Xgard uses a modular design, which makes replacement of sensors
extremely simple. Replacement sensors are supplied fitted to a sensor
PCB to allow simple plug-in installation. An exploded view of Xgard
is given in Diagram 3. The following procedure may be followed when
servicing a Xgard detector.
WARNING
This work should be carried out by Crowcon or an approved
service centre unless suitable training has been received.
1. Switch off and isolate power to the detector requiring attention.
2. Open the junction box of the detector by unscrewing the lid in an anticlockwise direction (having loosened the retaining grub-screw first).
3. Unscrew the sensor retainer and remove the sensor and sensor
PCB.
4. Fit the replacement sensor (having checked that the part number
matches that stated on the detector junction box label), taking care to
align the locating pins correctly with the slots in the junction box.
5. Re-fit the sensor retainer.
6. Follow the Commissioning Procedure given in 3.1.
Storage Instructions: The sensor used in this detector has a maximum
non-powered storage life of 3 months. Sensors stored within a detector
for longer than 3 months prior to commissioning may not last for the
full expected operational life. The warranty period for the sensor begins
from the date of shipment from Crowcon. Detectors should be stored
in a cool and dry environment where temperatures remain within the
0-20°C range.
Cleaning: When cleaning Glass-reinforced Nylon junction boxes use a
damp rather than dry cloth to avoid building up static electricity.
17
2. Installation
4.Specification
Xgard
Type 1
1
Xgard
Type
Junction box material
ATEX: Glass-reinforced Nylon
UL Version: Aluminium
316 Stainless Steel (optional)
Dimensions
156 x 166 x 111 mm (6.1 x 6.5 x 4.3 inches)
Weight
Alumnium: 1 kg (2.2 lbs)
Glass-reinforced Nylon: 0.5 kg (1.1lb)
Stainless Steel: 3.1 kg (6.8lbs) approx.
Operating voltage
8–30 V dc
Output
4-20 mA Sink (loop powered)
Fault signal
< 3 mA
Operating temperature -20°C to +50°C (-4°F to +122°F)
dependant upon sensor type
18
Humidity
0–90% RH, non condensing
Degree of protection
IP65
Explosion protection
Intrinsically Safe
Approval code
II 1 G Ex ia IIC T4 Ga
ATEX
IECEx BAS 05.0042X
Tamb = -40°C to 55°C
UL& cUL Class I, Division 1, Groups A, B, C & D
Safety certificate no.
ATEX Baseefa04ATEX0115X
Standards
EN60079-0:2012, EN60079-11:2012
IEC 60079-0:2011 (Ed 6), IEC60079-11: 2011 (Ed 6), UL913
Zones
Certified for use in Zone 0, Zone 1 or Zone 2
(see hazardous area classifications section)
Gas groups
IIA, IIB, IIC (UL groups A, B, C, D)
EMC
EN50270
1. Introduction
Xgard Type 2
1.1 Flameproof toxic and oxygen gas detector
This version of Xgard is a Flameproof loop-powered (current-sink)
4-20 mA toxic or oxygen gas detector, designed to detect a wide range
of gases when fitted with the appropriate electrochemical sensor. The
detector is certified II 2 GD Ex d IIC T6 Gb, and is suitable for use in
Zone 1 and Zone 2 hazardous areas.
Electrical connections to the detector are made via the terminal block
on the amplifier PCB shown below. The amplifier provides power to
the sensor, and converts the sensor signal into a 4-20 mA signal for
connection to a control panel.
Internal
grounding
terminal
(earth)
Test
points
Set zero
Supplemental
external
grounding
terminal
(earth)
Run
Links for Crowcon
use (toxic version
only)
Diagram 6: Xgard Type 2 PCB layout
(Shown with PCB cover removed).
19
2.
Installation
2.Installation
Xgard
Type 2
1
Xgard
Type
WARNING
This detector is designed for use in Zone 1 and Zone 2
hazardous areas, and is certified 2 GD Ex d IIC T6 Gb.
Installation must be in accordance with the recognised
standards of the appropriate authority in the country
concerned.
For further information please contact Crowcon. Prior to
carrying out any installation work ensure local regulations and
site procedures are followed.
2.1 Location
The detector should be mounted where the gas to be detected is most
likely to be present. The following points should be noted when locating
gas detectors:
• To detect gases which are lighter than air, detectors should be
mounted at high level and Crowcon recommend the use of a collector
cone (Part No. C01051) and accessory adaptor (Part No. M04666).
• To detect heavier than air gases, detectors should be mounted at low
level.
• When locating detectors consider the possible damage caused by
natural events e.g. rain or flooding. For detectors mounted outdoors
Crowcon recommend the use of a Spray Deflector (Part No. C01052)
and accessory adaptor (Part No. M04666).
• Mounting of oxygen detectors requires knowledge of the gas
displacing the oxygen. For example, carbon dioxide is heavier than air
and collects in low lying areas. It will displace oxygen and so detectors
should be placed at low level.
• Consider ease of access for functional testing and servicing.
• Consider how the escaping gas may behave due to natural or forced
air currents. Mount detectors in ventilation ducts if appropriate.
• Consider the process conditions. For example, ammonia is normally
lighter than air, but if released from a cooling system, the gas may fall
rather than rise.
The placement of sensors should be determined following advice
of experts having specialist knowledge of gas dispersion, the plant
processing equipment as well as safety and engineering issues. The
agreement reached on the locations of sensors should be recorded.
Crowcon would be pleased to assist in the selection and siting of gas
detectors.
20
2. Installation
Xgard Type 2
2.2 Mounting
Xgard should be installed at the designated location with the sensor
pointing down. This ensures that dust or water will not collect on the
sensor and stop gas entering the cell. The mounting detail is shown in
Diagram 2. Care should be taken when installing the detector to avoid
damaging the painted surface of the junction box and sensor retainer.
2.3 Cabling requirement
Cabling to Xgard must be in accordance with the recognised standards
of the appropriate authority in the country concerned and meet the
electrical requirements of the detector.
Crowcon recommend the use of steel wire armoured (SWA) cable
and suitable explosion proof glands must be used. Alternative cabling
techniques, such as steel conduit, may be acceptable provided
appropriate standards are met.
Xgard requires a dc supply of 8-30 V and is loop powered. Ensure there
is a minimum of 8 V at the detector, taking into account the voltage drop
due to cable resistance and the sense resistance of the control panel to
which it is connected.
For example, a nominal dc supply at the control panel of 24 V has a
guaranteed minimum supply of 19.5 V. The circuit may demand up to
20 mA. Given a sense resistor in the control panel of 232 Ohms the
maximum voltage drop allowed due to cable resistance is 6.8 V. The
maximum loop resistance allowed is 340 Ohms (approx.).
A 1.5 mm2 cable will typically allow cable runs up to 14 km. Table 2 below
shows the maximum cable distances given typical cable parameters.
C.S.A.
mm2 Awg
Resistance (Ohms per km) Max. Distance (km)
Cable
Loop
1.0
17
18.1
36.2
1.5
15
12.1
24.2
9.4
14
2.5
13
7.4
14.8
23
Table 2: Maximum cable distances for typical cables
The acceptable cross sectional area of cable used is 0.5 to 2.5 mm2
(20 to 13awg). The table is provided for guidance only, actual
cable parameters for each application should be used to calculate
maximum cable distances.
21
2. Installation
Xgard Type 2
1
2.4 Electrical connections
All connections are made via the screw terminal block mounted on the
amplifier PCB in the junction box. The terminals are marked ‘+’ and ‘-’
and correct polarity should be observed when connecting the detector
to control equipment. This version of Xgard is a 4-20 mA current sink
device, and requires a dc supply of 8-30 V.
Note: The internal grounding terminal (see diagram 6) shall be used as
the grounding means of the Xgard gas detector. The external grounding
terminal (see diagram 6) is only a supplemental bonding connection,
and is only to be used where local authorities permit or require such a
connection. To limit radio frequency interference, the junction box and
cable armour should be grounded (earthed) at the control panel. Ensure
the earth connection is in a safe area only, so as to avoid earth loops.
Xgard Type 2 PCB
Control Panel
SIG
Earth
8-30 V dc
4-20 mA
(Source)
Diagram 7: Xgard Type 2 electrical connections
22
3. Operation
Xgard Type 2
WARNING
Prior to carrying out any work ensure local regulations and
site procedures are followed. Never attempt to open the
detector or junction box when flammable gas is present.
Ensure that the associated control panel is inhibited so as to
prevent false alarms.
3.1a Commissioning procedure
– toxic types only
1. Open the junction box of the detector by unscrewing the lid in an anticlockwise direction (having loosened the retaining grub-screw first).
2. Check that all electrical connections have been made and are correct
as per Diagram 7.
3. Apply power to the detector and ensure the minimum supply voltage
of 8 V dc is present at the ‘+’ and ‘-’ terminals of the detector.
4. Leave the detector to stabilise for at least 1 hour, dependant upon
sensor type.
5. Connect a digital volt meter (DVM) to the test points on the amplifier
PCB.
Note: At the test points, Zero will read 40 mV = 4 mA.
Full scale deflection will read 200 mV = 20 mA.
Zeroing the detector
6. Ensure you are in clean air. Adjust the ‘ZERO’ pot on the amplifier
(which is accessible via a hole in the PCB cover) until the DVM reads
40 mV. Check that the control equipment display reads zero.
Calibrating the detector
7. Apply calibration gas (concentration should be at least 50% of sensor
full-scale) to the detector at a flow rate of 0.5 - 1 litre/minute via a
flow adaptor (Part No. C03005). Contact Crowcon for the supply of
calibration gas.
8. Allow the gas reading to stabilise (usually 30 to 60 seconds) and
adjust the ‘CAL’ pot until the DVM reads the appropriate reading. To
calculate the reading use the formula and example below:
(
160
Range
x Gas
)
+ 40 = mV setting
Example:calibrating a 0-250 ppm carbon monoxide sensor using
150 ppm gas.
160
x 150
+ 40 = 136 mV
250
(
)
23
2. Operation
3.
Installation
Xgard Type 2
1
9. If the control equipment display requires adjustment consult the
operating manual for the equipment.
10.Remove the gas and allow the sensor to completely settle before
re-checking the zero setting.
11.Close the junction box of the detector ensuring that the lid is securely
tightened, and the grub-screw is secured.
12.The detector is now operational.
3.1b Commissioning procedure
– oxygen type only
Warning: A label is fitted over the sensor retainer
aperture on oxygen detectors prior to shipment
from Crowcon. The label isolates the oxygen
sensor from air to minimize sensor life usage
during storage and transit. It is essential that this
label is removed prior to commissioning or before
putting the detector into use.
1. Follow steps 1 to 5 given in 3.1a above.
Zeroing the detector
2. Remove the amplifier PCB cover and move the LINK on the
amplifier board from ‘RUN’ to ‘SET ZERO’. Adjust the ‘ZERO’ pot
on the amplifier until the DVM reads 40 mV. Check that the control
equipment display reads zero.
Calibrating the detector
3. With normal clean air present at the detector, replace the LINK to ‘RUN’
on the amplifier board, adjust the ‘CAL’ pot until the DVM reads 174 mV,
(20.9% O2). Leave the LINK in ‘RUN’ position and re-fit the PCB cover.
4. If the control equipment display requires adjustment consult the
operating manual for the equipment.
5. Follow steps 11 and 12 given in 3.1a above. The detector is now
operational.
3.2 Routine maintenance
The operational life of the sensors depends on the application, frequency and
amount of gas being seen. Under normal conditions (6 monthly calibration
with periodic exposure to CAL gas) the life expectancy of the toxic sensors
is 2-3 years. Oxygen sensors must be replaced every two years.
Site practices will dictate the frequency with which detectors are tested.
Crowcon would recommend that detectors be gas tested at least every
24
3. Operation
Xgard Type 2
6 months and re-calibrated as necessary. To re-calibrate a detector
follow the steps given in 3.1 above. The calibration frequency should
be increased in environments subject to extreme heat and/or dust, and
where gas is frequently present.
The sinter should be inspected regularly, and replaced if it has become
contaminated. A blocked sinter may prevent gas from reaching the sensor.
When performing maintenance on Xgard, ensure that the sensor retainer
and junction box lid O-rings are present and in good condition to
maintain the ingress protection of the product. See the ‘Spare parts and
accessories’ section for the part numbers of replacement O-rings.
3.3 Sensor replacement/servicing of detectors
Xgard uses a modular design, which makes replacement of sensors,
or sinters extremely simple. Replacement sensors are supplied fitted to
a sensor PCB to allow simple plug-in installation. An exploded view of
Xgard is given in Diagram 3. The following procedure may be followed
when servicing a Xgard detector.
WARNING
This work should be carried out by Crowcon or an approved
service centre unless suitable training has been received.
1. Switch off and isolate power to the detector requiring attention.
2. Open the junction box of the detector by unscrewing the lid in an anticlockwise direction (having loosened the retaining grub-screw first).
3. Unscrew the sensor retainer and remove the sensor and sensor PCB.
4. Fit the replacement sensor (having checked that the part number
matches that stated on the detector junction box label), taking care to
align the locating pins correctly with the slots in the junction box.
5. Re-fit the sensor retainer having first inspected the sinter to make sure
that it has not become contaminated. Contaminated items should be
replaced (see Spare Parts section for replacement part numbers),
as any blockages may result in slow sensor response to gas, and
reduced sensitivity.
6. Follow the Commissioning Procedure given in 3.1.
Storage Instructions: The sensor used in this detector has a maximum
non-powered storage life of 3 months. Sensors stored within a detector
for longer than 3 months prior to commissioning may not last for the full
expected operational life. The warranty period for the sensor begins from
the date of shipment from Crowcon. Detectors should be stored in a cool
and dry environment where temperatures remain within the 0-20°C range.
25
2. Installation
4.Specification
Xgard
Type 2
1
Xgard
Type
Junction box material
Corrosion resistant alloy with polyester
powder coating
316 Stainless Steel (optional)
Dimensions
156 x 166 x 111 mm (6.1 x 6.5 x 4.3 inches)
Weight
Alloy: 1 kg (2.2 lbs)
Stainless Steel: 3.1 kg (6.8lbs) approx.
Operating voltage
8–30 V dc
Output
4-20 mA Sink (loop powered)
Fault signal
< 3 mA
Operating temperature -20°C to +50°C (-4°F to +122°F)
dependant upon sensor type
Humidity
0–90% RH, non condensing
Degree of protection
IP65
Explosion protection
Flameproof
Approval code
II 2 GD Ex d IIC T6 Gb
ATEX
Extb IIIC T80°C Db
IECEx BAS 05.0042
Tamb = -40°C to 50°C
UL Class I, Division 1, Groups B, C & D
Safety certificate no.
ATEX Baseefa04ATEX0024X
StandardsEN60079-0:2012, EN60079-1:2007,
EN60079-31:2009 IEC 60079-0:2011 (Ed 6),
IEC60079-1: 2007 (Ed 6), IEC60079-31:2008
(Ed 1) UL1203
ZonesCertified for use in Zones 1 & 2 (Gas), and Zones
21 & 22 (Dust)
26
Gas groups
IIA, IIB, IIC (UL groups B, C, D)
EMC
EN50270
1. Introduction
Xgard Type 3
1.1 Flameproof flammable gas detector
This version of Xgard is a Flameproof gas detector, designed to detect
flammable gas present in ambient air, at concentrations not exceeding
the Lower Explosive Limit (LEL) of the target gas for which it is calibrated.
Xgard Type 3 operates using pellistors as part of a 3-wire Wheatstone
Bridge (WB) circuit, and must be connected to a suitable control card.
The detector is certified II 2 GD Ex d IIC T6 Gb for operation up to 50°C
(120°F),
II 2 GD Ex d IIC T4 Gb for operation up to 80°C (176°F), and
is suitable for use in Zone 1 and Zone 2 hazardous areas.
Electrical connections to the detector are made via the terminal block on
the PCB shown below.
Internal
grounding
terminal
(earth)
Supplemental
external
grounding
terminal
(earth)
Diagram 8: Xgard Type 3 PCB layout
(Shown with PCB cover removed).
27
2. Installation
2.Installation
Xgard
Type 3
1
Xgard
Type
WARNING
This detector is designed for use in Zone 1 and Zone 2
hazardous areas, and is certified
II 2 GD Ex d IIC T6 Gb for
II 2 GD Ex d IIC T4 Gb for
operation up to 50°C (122°F),
operation up to 80°C (176°F). Installation must be in
accordance with the recognised standards of the appropriate
authority in the country concerned.
For further information please contact Crowcon. Prior to
carrying out any installation work ensure local regulations and
site procedures are followed.
2.1 Location
The detector should be mounted where the gas to be detected is most
likely to be present. The following points should be noted when locating
gas detectors:
• To detect gases which are lighter than air, detectors should be
mounted at high level and Crowcon recommend the use of a collector
cone (Part No. C01051) and accessory adaptor (Part No. M04666).
• To detect heavier than air gases, detectors should be mounted at low
level.
• When locating detectors consider the possible damage caused by
natural events e.g. rain or flooding. For detectors mounted outdoors
Crowcon recommend the use of a Spray Deflector (Part No. C01052)
and accessory adaptor (Part No. M04666).
• Consider ease of access for functional testing and servicing.
• Consider how the escaping gas may behave due to natural or forced
air currents. Mount detectors in ventilation ducts if appropriate.
• Consider the process conditions. For example, butane is normally
heavier than air, but if released from a process which is at an elevated
temperature and/or pressure, the gas may rise rather than fall.
The placement of sensors should be determined following advice
of experts having specialist knowledge of gas dispersion, the plant
processing equipment as well as safety and engineering issues. The
agreement reached on the locations of sensors should be recorded.
Crowcon would be pleased to assist in the selection and siting of gas
detectors.
28
2. Installation
Xgard Type 3
2.2 Mounting
Xgard should be installed at the designated location with the sensor
pointing down. This ensures that dust or water will not collect on the
sensor and stop gas entering the cell. The mounting detail is shown in
Diagram 2. Care should be taken when installing the detector to avoid
damaging the painted surface of the junction box and sensor retainer.
2.3 Cabling requirement
Cabling to Xgard must be in accordance with the recognised standards
of the appropriate authority in the country concerned and meet the
electrical requirements of the detector.
Crowcon recommend the use of steel wire armoured (SWA) cable
and suitable explosion proof glands must be used. Alternative cabling
techniques, such as steel conduit, may be acceptable provided
appropriate standards are met.
Maximum permissible cable lengths depend on the cable resistance
and sensor being used. It is important that the correct bridge voltage be
applied to the detector. This will vary depending on the part number of
the sensor fitted (see ‘Sensor type’ on the label fitted to the junction box).
Table 3 below summarises the bridge voltage requirements for different
sensor types.
Sensor
Part No.
Pellistor
Type
Bridge Volts Comment
(Vdc)
Contact CrowconVQ21T
2.0
Contact Crowcon 300P
2.0
ontact Crowcon VQ8
C
2.5
Standard for CH4
Alternative for CH4
Lead resistant for leaded
petrol
Contact Crowcon VQ25
2.0
For halogens
Contact Crowcon VQ41
2.0
For Jet fuel
Contact Crowcon VQ41
2.0
For Ammonia
Table 3: Sensor options, please contact Crowcon for advice on alternative
gases or vapours.
29
2. Installation
Xgard Type 3
1
The following cable lengths are calculated assuming a 300mA constant
current drive, with a minimum supply of 18 V dc from the control
equipment:
C.S.A.
mm2 Awg
Resistance
(Ohms per km)
Cable
Loop
Max. Distance
Max. Distance
(km)
(km)
2.0 volt pellistors2.5 volt pellistors
1.0
17
18.1
36.2
1.47
1.42
1.5
15
12.1
24.2
2.2
2.13
2.5
13
7.4
14.8
3.6
3.5
Table 4: maximum cable distances for typical cables
The acceptable cross sectional area of cable used is 0.5 to 2.5mm2
(20 to 13awg). The table is provided for guidance only, actual
cable parameters for each application should be used to calculate
maximum cable distances.
2.4 Electrical connections
All connections are made via the screw terminal block mounted on the
PCB in the junction box. The terminals are marked ‘+’, ‘sig’ and ‘-’ and
correct polarity should be observed when connecting the detector to
control equipment. This version of Xgard operates as part of a 3-wire mV
Wheatstone bridge circuit and must be connected to a suitable control card.
Note: The internal grounding terminal (see diagram 8) shall be used as
the grounding means of the Xgard gas detector. The external grounding
terminal (see diagram 8) is only a supplemental bonding connection,
and is only to be used where local authorities permit or require such a
connection. To limit radio frequency interference, the junction box and
cable armour should be grounded (earthed) at the control panel. Ensure the
earth connection is provided in a safe area only, so as to avoid earth loops.
Xgard Type 3 PCB
Control Panel
SIG
SIG
Earth
See table 3 for sensor voltage settings
Diagram 9: Xgard Type 3 electrical connections
30
3.Operation
Xgard Type 3
WARNING
Prior to carrying out any work ensure local regulations and
site procedures are followed. Never attempt to open the
detector or junction box when flammable gas is present.
Ensure that the associated control panel is inhibited so as to
prevent false alarms.
3.1
Commissioning procedure
1. Open the junction box of the detector by unscrewing the lid in an anticlockwise direction (having loosened the retaining grub-screw first).
2. Check that all electrical connections have been made and are correct
as per Diagram 9.
3. Measure the voltage across the ‘+’ and ‘-’ terminals and adjust
according to the type of pellistor fitted (see Table 3).
4. Leave the detector to stabilise for at least 1 hour.
5. Balance the WB circuit at the control panel if necessary. Refer to the
control equipment instruction manual.
Zeroing the detector
6. Ensure you are in clean air. Adjust the control equipment to read
zero.
Calibrating the detector
7. Apply calibration gas (concentration should be 50% LEL) to the
detector at a flow rate of 0.5 - 1 litre/minute via a flow adaptor (Part
No. C03005). Contact Crowcon for the supply of calibration gas.
8. Allow the gas reading to stabilise (usually 30 to 60 seconds) and adjust
the control equipment to read 50% LEL.
9. Remove the gas and allow the sensor to completely settle before
re-checking the zero setting.
10.Close the junction box of the detector ensuring that the lid is securely
tightened, and the grub-screw is secured.
11.The detector is now operational.
Note: ATEX certified Xgard flammable gas detectors will be supplied
calibrated for compliance with EN60079-20-1 (where for example 100%
LEL methane = 4.4% volume). UL certified detectors will be supplied
calibrated for compliance with North American standards (where 100%
LEL methane = 5% volume).
For further advice on balancing the amplifier and sensor module,
especially where signal drift appears to have occurred, please contact
Crowcon.
31
3. Operation
Xgard Type 3
3.2 Routine maintenance
Pellistors can suffer from loss of sensitivity when there is a presence
of poisons or inhibitors such as silicones, sulphides, chlorine, lead or
halogenated hydrocarbons. Crowcon use poison resistant pellistors
to maximise the operational life of Xgard. In applications where such
compounds are continuously present we recommend the use of
Crowcon’s fixed point infrared flammable gas detectors, which are
immune to such poisons and inhibitors. Please contact Crowcon for
further details.
The operational life of the pellistors depends on the application and
amount of gas to which the pellistor has been exposed. Under normal
conditions (6 monthly calibration with periodic exposure to CAL gas) the
life expectancy is 3-5 years.
Site practices will dictate the frequency with which detectors are tested.
Crowcon would recommend that detectors be gas tested at least every 6
months and re-calibrated as necessary. To re-calibrate a detector follow
the steps given in 3.1.
The sinter should be inspected regularly, and replaced if it has become
contaminated. A blocked sinter may prevent gas from reaching the
sensor.
When performing maintenance on Xgard, ensure that the sensor retainer
and junction box lid O-rings are present and in good condition to
maintain the ingress protection of the product. See the ‘Spare parts and
accessories’ section for the part numbers of replacement O-rings.
32
3. Operation
Xgard Type 3
3.3 Sensor replacement/servicing of detectors
Xgard uses a modular design, which makes replacement of sensors,
or sinters extremely simple. Replacement sensors are supplied fitted to
a sensor PCB to allow simple plug-in installation. An exploded view of
Xgard is given in Diagram 3. The following procedure may be followed
when servicing a Xgard detector.
WARNING
This work should be carried out by Crowcon or an approved
service centre unless suitable training has been received.
1. Switch off and isolate power to the detector requiring attention.
2. Open the junction box of the detector by unscrewing the lid in an anticlockwise direction (having loosened the retaining grub-screw first).
3. Unscrew the sensor retainer and remove the sensor and sensor
PCB.
4. Fit the replacement sensor (having checked that the part number
matches that stated on the detector junction box label), taking care to
align the locating pins correctly with the slots in the junction box.
5. Re-fit the sensor retainer having first inspected the sinter to make sure
that it has not become contaminated. Contaminated items should be
replaced (see Spare Parts section for replacement part numbers),
as any blockages may result in slow sensor response to gas, and
reduced sensitivity.
6. Follow the Commissioning Procedure given in 3.1.
Storage Instructions: The sensor used in this detectors should be
stored in a dry environment, and protected from exposure to silicones,
sulphides, chlorines and lead. Exposure to these compounds will
significantly reduce the sensitivity of the sensor, and render the sensor
warranty void.
33
2. Installation
4.Specification
Xgard
Type 3
1
Xgard
Type
Junction box material
Corrosion resistant alloy with polyester
powder coating
316 Stainless Steel (optional)
Dimensions
156 x 166 x 111 mm (6.1 x 6.5 x 4.3 inches)
Weight
Alloy: 1 kg (2.2 lbs)
Stainless Steel: 3.1 kg (6.8lbs) approx.
Electrical output
3-wire mV bridge.
Typically 12-15 mV per % CH4
Operating temperature -40°C to +80°C (-40°F to +176°F)
Humidity
0–99% RH, non condensing
Degree of protection
IP65
Explosion protection
Flameproof
II 2 GD Ex d IIC T6 Gb
Approval codeATEX
Tamb = -40°C to 50°C
Extb IIIC T80°C Db
ATEX
II 2 GD Ex d IIC T4 Gb
Tamb = -40°C to +80°C
Extb IIIC T110°C Db
IECEx BAS 05.0042
UL Class I, Division 1, Groups B, C & D
IECEx BAS 05.0043X
Safety certificate no.
ATEX Baseefa04ATEX0024X
StandardsEN60079-0:2012, EN60079-1:2007,
EN60079-31:2009 IEC 60079-0:2011 (Ed 6),
IEC60079-1: 2007 (Ed 6), IEC60079-31:2008
(Ed 1) UL1203
ZonesCertified for use in Zones 1 & 2 (Gas), and Zones
21 & 22 (Dust)
34
Gas groups
IIA, IIB, IIC (UL groups B, C, D)
EMC
EN50270
1. Introduction
Xgard Type 4
1.1 Flameproof high temperature flammable gas
detector
This version of Xgard is a Flameproof high temperature (150°C / 302°F)
gas detector, designed to detect flammable gas present in ambient air, at
concentrations not exceeding the Lower Explosive Limit (LEL) of the
target gas for which it is calibrated. Xgard Type 4 operates using
pellistors as part of a 3-wire Wheatstone Bridge (WB) circuit, and must be
connected to a suitable control card. The detector is certified
II 2 GD
Ex d IIC T3 Gb, and is suitable for use in Zone 1 and Zone 2 hazardous areas.
Electrical connections to the detector are made via the terminal block on
the PCB shown below.
36 slot CRS to suit M6 or 1/4”
fixings for ceiling mount
M20, M25, 1/2”
or 3/4” NPT cable
entry
Internal
grounding
terminal
(earth)
Additional
external
grounding
terminal
(earth)
IG- ++ SSIG
Red
Black
White
196 Overall
146
The
detector
head and
sensor
+are
SI
retainer
bonded
together
and
must be
replaced as
a unit.
166.3 Overall
Height 111
Diagram 10: Xgard Type 4 dimensioned view
35
G-
2. Installation
2.Installation
Xgard
Type 4
1
Xgard
Type
WARNING
This detector is designed for use in Zone 1 and Zone 2
hazardous areas, and is certified
II 2 GD Ex d IIC T3 Gb.
Installation must be in accordance with the recognised
standards of the appropriate authority in the country
concerned.
For further information please contact Crowcon. Prior to
carrying out any installation work ensure local regulations and
site procedures are followed.
2.1 Location
The detector should be mounted where the gas to be detected is most
likely to be present. The following points should be noted when locating
gas detectors:
• To detect gases which are lighter than air, detectors should be
mounted at high level.
• To detect heavier than air gases, detectors should be mounted at low
level.
• When locating detectors consider the possible damage caused by
natural events e.g. rain or flooding.
• Consider ease of access for functional testing and servicing.
• Consider how the escaping gas may behave due to natural or forced
air currents. Mount detectors in ventilation ducts if appropriate.
• Consider the process conditions. For example, butane is normally
heavier than air, but if released from a process which is at an elevated
temperature and/or pressure, the gas may rise rather than fall.
The placement of sensors should be determined following advice
of experts having specialist knowledge of gas dispersion, the plant
processing equipment as well as safety and engineering issues. The
agreement reached on the locations of sensors should be recorded.
Crowcon would be pleased to assist in the selection and siting of gas
detectors.
36
2. Installation
Xgard Type 4
2.2 Mounting
Xgard should be installed at the designated location with the sensor
pointing down. This ensures that dust or water will not collect on the
sensor and stop gas entering the cell. The mounting detail is shown in
Diagram 2. Care should be taken when installing the detector to avoid
damaging the painted surface of the junction box and sensor retainer.
2.3 Cabling requirement
Cabling to Xgard must be in accordance with the recognised standards
of the appropriate authority in the country concerned and meet the
electrical requirements of the detector.
Crowcon recommend the use of steel wire armoured (SWA) cable
and suitable explosion proof glands must be used. Alternative cabling
techniques, such as steel conduit, may be acceptable provided
appropriate standards are met. The cable selected must be suitable for
use in temperatures of up to 150°C (302°F).
Maximum permissible cable lengths depend on the cable resistance
and sensor being used. It is important that the correct bridge voltage be
applied to the detector. This will vary depending on the part number of
the sensor fitted (see ‘Sensor type’ on the label fitted to the junction box).
Table 5 below summarises the bridge voltage requirements.
Detector
Part No.
Pellistor
Type
S011954
VQ21T
Bridge Volts Comment
(Vdc)
2.0
Poison resistant
Table 5: Bridge voltage settings
37
2. Installation
Xgard Type 4
1
The following cable lengths are calculated assuming a 300mA constant
current drive, with a minimum supply of 18 V dc from the control
equipment:
C.S.A.
mm2 Awg
1.0 17
1.5 15
2.5 13
Resistance
(Ohms per km)
Cable
Loop
18.1
36.2
12.1
24.2
7.4
14.8
Max. Distance
Max. Distance
(km)
(km)
2.0 volt pellistors2.5 volt pellistors
1.47
1.42
2.2
2.13
3.6
3.5
Table 6: maximum cable distances for typical cables
The acceptable cross sectional area of cable used is 0.5 to 2.5mm2
(20 to 13awg). The table is provided for guidance only, actual
cable parameters for each application should be used to calculate
maximum cable distances.
2.4 Electrical connections
All connections are made via the screw terminal block mounted on the
PCB in the junction box. The terminals are marked ‘+’, ‘sig’ and ‘-’ and
correct polarity should be observed when connecting the detector to
control equipment. This version of Xgard operates as part of a 3-wire mV
Wheatstone bridge circuit and must be connected to a suitable control card.
Note: The internal grounding terminal (see diagram 10) shall be used as
the grounding means of the Xgard gas detector. The external grounding
terminal (see diagram 10) is only a supplemental bonding connection,
and is only to be used where local authorities permit or require such a
connection. To limit radio frequency interference, the junction box and
cable armour should be grounded (earthed) at the control panel. Ensure the
earth connection is provided in a safe area only, so as to avoid earth loops.
Xgard Type 4 PCB
Control Panel
SIG
Earth
SIG
See table 5 for sensor voltage settings
Diagram 11: Xgard Type 4 electrical connections
38
3.Operation
Xgard Type 4
WARNING
Prior to carrying out any work ensure local regulations and
site procedures are followed. Never attempt to open the
detector or junction box when flammable gas is present.
Ensure that the associated control panel is inhibited so as to
prevent false alarms.
3.1
Commissioning procedure
1. Open the junction box of the detector by unscrewing the lid in an anticlockwise direction (having loosened the retaining grub-screw first).
2. Check that all electrical connections have been made and are correct
as per Diagram 11.
3. Measure the voltage across the ‘+’ and ‘-’ terminals and adjust
according to the type of pellistor fitted (see Table 5).
4. Leave the detector to stabilise for at least 1 hour.
5. Balance the WB circuit at the control panel if necessary. Refer to the
control equipment instruction manual.
Zeroing the detector
6. Ensure you are in clean air. Adjust the control equipment to read
zero.
Calibrating the detector
7. Apply calibration gas (concentration should be 50% LEL) to the
detector at a flow rate of 0.5 - 1 litre/minute via a flow adaptor (Part
No. C01886). Contact Crowcon for the supply of calibration gas.
8. Allow the gas reading to stabilise (usually 30 to 60 seconds) and adjust
the control equipment to read 50% LEL.
9. Remove the gas and allow the sensor to completely settle before
re-checking the zero setting.
10.Close the junction box of the detector ensuring that the lid is securely
tightened, and the grub-screw is secured.
11.The detector is now operational.
Note: Where possible, Crowcon recommends that Xgard Type 4
detectors are calibrated at the temperature at which they normally
operate.
39
2. Operation
3.
Installation
Xgard Type 4
1
3.2 Routine maintenance
Pellistors can suffer from loss of sensitivity when there is a presence
of poisons or inhibitors such as silicones, sulphides, chlorine, lead or
halogenated hydrocarbons. Crowcon use poison resistant pellistors
to maximise the operational life of Xgard. In applications where such
compounds are continuously present we recommend the use of
Crowcon’s fixed point infrared flammable gas detectors, which are
immune to such poisons and inhibitors. Please contact Crowcon for
further details.
The operational life of the pellistors depends on the application and
amount of gas to which the pellistor has been exposed. Under normal
conditions (6 monthly calibration with periodic exposure to CAL gas) the
life expectancy is 3-5 years.
Site practices will dictate the frequency with which detectors are tested.
Crowcon would recommend that detectors be gas tested at least every 6
months and re-calibrated as necessary. To re-calibrate a detector follow
the steps given in 3.1.
Xgard Type 4 uses a high temperature detector, which incorporates a
sinter. The detector has no user servicable parts, thus the complete unit
must be replaced if it fails to calibrate during routine tests.
When performing maintenance on Xgard, ensure that the sensor retainer
and junction box lid O-rings are present and in good condition to
maintain the ingress protection of the product. See the ‘Spare parts and
accessories’ section for the part numbers of replacement O-rings.
40
3. Operation
Xgard Type 4
3.3 Sensor replacement/servicing of detectors
Xgard uses a modular design, which makes replacement of sensors
extremely simple. Xgard Type 4 uses a high temperature detector, which
must be replaced as a whole, complete with sensor retainer (see page
35).
A detailed view of Xgard Type 4 is given in Diagram 10.
The following procedure may be followed when servicing a Xgard Type 4.
WARNING
This work should be carried out by Crowcon or an approved
service centre unless suitable training has been received.
1. Switch off and isolate power to the detector requiring attention.
2. Open the junction box of the detector by unscrewing the lid in an anticlockwise direction (having loosened the retaining grub-screw first).
3. Loosen the terminals retaining the detector wires.
4. Loosen the grub-screw on the sensor retainer.
5. Unscrew the detector and sensor retainer.
6. Fit the replacement detector and sensor retainer taking care to ensure
the wires do not become twisted. Ensure the new detector is securely
tightened.
7. Secure the sensor retainer grub-screw.
8. Re-connect the detector wires as shown in Diagram 10.
9. Follow the commissioning procedure given in 3.1.
Storage Instructions: The sensor used in this detectors should be
stored in a dry environment, and protected from exposure to silicones,
sulphides, chlorines and lead. Exposure to these compounds will
significantly reduce the sensitivity of the sensor, and render the sensor
warranty void.
41
2. Installation
4.Specification
Xgard
Type 4
1
Xgard
Type
Junction box material
Corrosion resistant alloy with polyester
powder coating
316 Stainless Steel (optional)
Dimensions
195 x 166 x 111 mm (7.6 x 6.5 x 4.3 inches)
Weight
Alloy: 1.5 kg (3.3 lbs)
Stainless Steel: 3.6 kg (7.9lbs).
Electrical output
3-wire mV bridge.
Typically 10 mV per % CH4 (Minimum)
Operating temperature -20°C to +150°C (-4°F to +302°F)
Humidity
0–99% RH, non condensing
Degree of protection
IP54
Explosion protection
Flameproof
Approval codeATEX II 2 GD Ex d IIC T3 Gb
Tamb -40°C to +150°C
Extb IIIC T180°C Db
Safety certificate no.
Baseefa04ATEX0024X/1
StandardsEN60079-0:2012, EN60079-1:2007,
EN60079-31:2009 IEC 60079-0:2011 (Ed 6),
IEC60079-1: 2007 (Ed 6), IEC60079-31:2008
(Ed 1) UL1203
ZonesCertified for use in Zones 1 & 2 (Gas), and Zones
21 & 22 (Dust)
42
Gas groups
IIA, IIB, IIC
EMC
EN50270
1.Introduction
Xgard Type 5
1.1 Flameproof flammable gas detector
This version of Xgard is a Flameproof gas detector, designed to detect
flammable gas present in ambient air, at concentrations not exceeding
the Lower Explosive Limit (LEL) of the target gas for which it is calibrated.
Xgard Type 5 is powered by 24 V dc (nominally) and provides a 4-20 mA
signal (sink or source) proportional to the gas concentration. The detector
is certified II 2 GD Ex d IIC T6 Gb, and is suitable for use in Zone 1 and
Zone 2 hazardous areas.
Electrical connections to the detector are made via the terminal block on
the PCB shown below.
Internal
grounding
terminal
(earth)
TP2
Sink
TP4
Test
points
Supplemental
external
grounding
terminal
(earth)
VR3
TP3
Srce
TP1
Diagram 12: Xgard Type 5 PCB layout
(Shown with PCB cover removed).
43
2. Installation
2.Installation
Xgard
Type 5
1
Xgard
Type
WARNING
This detector is designed for use in Zone 1 and Zone 2
hazardous areas, and is certified II 2 GD Ex d IIC T6 Gb.
Installation must be in accordance with the recognised
standards of the appropriate authority in the country
concerned.
For further information please contact Crowcon. Prior to
carrying out any installation work ensure local regulations and
site procedures are followed.
2.1 Location
The detector should be mounted where the gas to be detected is most
likely to be present. The following points should be noted when locating
gas detectors:
• To detect gases which are lighter than air, detectors should be
mounted at high level and Crowcon recommend the use of a collector
cone (Part No. C01051) and accessory adaptor (Part No. M04666).
• To detect heavier than air gases, detectors should be mounted at low
level.
• When locating detectors consider the possible damage caused by
natural events e.g. rain or flooding. For detectors mounted outdoors
Crowcon recommend the use of a Spray Deflector (Part No. C01052)
and accessory adaptor (Part No. M04666).
• Consider ease of access for functional testing and servicing.
• Consider how the escaping gas may behave due to natural or forced
air currents. Mount detectors in ventilation ducts if appropriate.
• Consider the process conditions. For example, butane is normally
heavier than air, but if released from a process which is at an elevated
temperature and/or pressure, the gas may rise rather than fall.
The placement of sensors should be determined following advice
of experts having specialist knowledge of gas dispersion, the plant
processing equipment as well as safety and engineering issues. The
agreement reached on the locations of sensors should be recorded.
Crowcon would be pleased to assist in the selection and siting of gas
detectors.
44
2. Installation
Xgard Type 5
2.2 Mounting
Xgard should be installed at the designated location with the sensor
pointing down. This ensures that dust or water will not collect on the
sensor and stop gas entering the cell. The mounting detail is shown in
Diagram 2. Care should be taken when installing the detector to avoid
damaging the painted surface of the junction box and sensor retainer.
2.3 Cabling requirement
Cabling to Xgard must be in accordance with the recognised standards
of the appropriate authority in the country concerned and meet the
electrical requirements of the detector.
Crowcon recommend the use of steel wire armoured (SWA) cable
and suitable explosion proof glands must be used. Alternative cabling
techniques, such as steel conduit, may be acceptable provided
appropriate standards are met.
Xgard Type 5 requires a dc supply of 10-30 V, at up to 100 mA.
Ensure there is a minimum of 10 V at the detector, taking into account
the voltage drop due to cable resistance. For example, a nominal dc
supply at the control panel of 24 V has a guaranteed minimum supply
of 18 V. The maximum voltage drop is therefore 8 V. Xgard Type 5 can
demand up to 100 mA and so the maximum loop resistance allowed is
80 Ohms.
A 1.5 mm2 cable will typically allow cable runs up to 3.3 km. Table 7 below
shows the maximum cable distances given typical cable parameters.
C.S.A.
mm2
Awg
1.0
17
1.5
15
2.5
13
Resistance (Ohms per km) Max. Distance
Cable
Loop
(km)
18.1
36.2
2.2
12.1
24.2
3.3
7.4
14.8
5.4
Table 7: maximum cable distances for typical cables
The acceptable cross sectional area of cable used is 0.5 to 2.5 mm2
(20 to 13awg). The table is provided for guidance only, actual
cable parameters for each application should be used to calculate
maximum cable distances.
45
2. Installation
Xgard Type 5
1
2.4 Electrical connections
All connections are made via the screw terminal block mounted on the
PCB in the junction box. The terminals are marked ‘+’, ‘sig’ and ‘-’ and
correct polarity should be observed when connecting the detector to
control equipment. Xgard Type 5 is factory set as a ‘current sink’ device
unless otherwise specified when ordering. To reset to ‘current source’,
open the junction box and move the two links on the amplifier PCB from
the ‘sink position to the ‘srce’ position, as shown in Diagram 12.
Note: The internal grounding terminal (see diagram 12) shall be used as
the grounding means of the Xgard gas detector. The external grounding
terminal (see diagram 12) is only a supplemental bonding connection,
and is only to be used where local authorities permit or require such a
connection. To limit radio frequency interference, the junction box and
cable armour should be grounded (earthed) at the control panel. Ensure
the earth connection is provided in a safe area only, so as to avoid earth
loops.
Xgard Type 5 PCB
SIG
Control Panel
SIG
Earth
10-30 V dc
4-20 mA
(Sink or Source)
Diagram 13: Xgard Type 5 electrical connections
46
3.Operation
Xgard Type 5
WARNING
Prior to carrying out any work ensure local regulations and
site procedures are followed. Never attempt to open the
detector or junction box when flammable gas is present.
Ensure that the associated control panel is inhibited so as to
prevent false alarms.
3.1
Commissioning procedure
1. Open the junction box of the detector by unscrewing the lid in an anticlockwise direction (having loosened the retaining grub-screw first).
2. Check that all electrical connections have been made and are correct,
as shown in Diagram 13.
3. Measure the voltage across the ‘+’ and ‘-’ terminals and check a
minimum supply of 10 V dc. is present.
4. Leave the detector to stabilise for at least 1 hour.
5. Before calibration of the detector can commence, the pellistors must
be balanced. To do this remove the PCB cover, and connect a digital
volt meter (DVM) to the test points marked ‘TP3’ and ‘TP4’ on the
amplifier PCB, as shown in Diagram 12). The DVM should be set to the
dc mV range, and the potentiometer marked ‘VR3’ should be adjusted
until the DVM reads 0.00 mV. The PCB cover can now be replaced.
6. To zero the detector, reconnect the DVM to the test points marked
‘TP1’ and ‘TP2’ on the amplifier PCB, as shown in Diagram 12.
Note: At the test points, Zero will read 40 mV = 4 mA.
Full scale deflection (100% LEL) will read 200 mV = 20 mA. There is a
current clamp of 25 mA on the 4-20 mA output.
Zeroing the detector
7. Ensure you are in clean air. Adjust the ‘ZERO’ pot on the amplifier
(which is accessible via a hole in the PCB cover) until the DVM reads
40 mV. Check that the control equipment display reads zero.
Calibrating the detector
8. Apply calibration gas (concentration should be 50% LEL) to the
detector at a flow rate of 0.5 - 1 litre/minute via a flow adaptor (Part
No. C03005). Contact Crowcon for the supply of calibration gas.
9. Allow the gas reading to stabilise (usually 30 to 60 seconds) and adjust
the ‘CAL’ pot until the DVM reads the appropriate reading (ie 120 mV
= 12 mA = 50% LEL). If the concentration of the calibration gas used
is not 50% LEL, the following formula can be used to calculate the
reading:
47
2. Operation
3.
Installation
Xgard Type 5
1
)
(
160
x Gas
+ 40 = mV setting
Range
Example: calibrating using 25% LEL test gas
(
160
x 25
100
)
+ 40 = 80 mV
10. If the control equipment display requires adjustment consult the
operating manual for the equipment.
11. Remove the gas and allow the sensor to completely settle before
re-checking the zero setting.
12. Close the junction box of the detector ensuring that the lid is securely
tightened, and the grub-screw is secured.
13. The detector is now operational.
Note: ATEX certified Xgard flammable gas detectors will be supplied
calibrated for compliance with EN60079-20-1 (where for example 100%
LEL methane = 4.4% volume). UL certified detectors will be supplied
calibrated for compliance with North American standards (where 100%
LEL methane = 5% volume).
For further advice on balancing the amplifier and sensor module,
especially where signal drift appears to have occurred, please contact
Crowcon.
48
3. Operation
Xgard Type 5
3.2 Routine maintenance
Pellistors can suffer from loss of sensitivity when there is a presence
of poisons or inhibitors such as silicones, sulphides, chlorine, lead or
halogenated hydrocarbons. Crowcon use poison resistant pellistors
to maximise the operational life of Xgard. In applications where such
compounds are continuously present we recommend the use of
Crowcon’s fixed point infrared flammable gas detectors, which are
immune to such poisons and inhibitors. Please contact Crowcon for
further details.
The operational life of the pellistors depends on the application and
amount of gas to which the pellistor has been exposed. Under normal
conditions (6 monthly calibration with periodic exposure to CAL gas) the
life expectancy is 3-5 years.
Site practices will dictate the frequency with which detectors are tested.
Crowcon would recommend that detectors be gas tested at least every 6
months and re-calibrated as necessary. To re-calibrate a detector follow
the steps given in 3.1.
The sinter should be inspected regularly, and replaced if it has become
contaminated. A blocked sinter may prevent gas from reaching the
sensor.
When performing maintenance on Xgard, ensure that the sensor retainer
and junction box lid O-rings are present and in good condition to
maintain the ingress protection of the product. See the ‘Spare parts and
accessories’ section for the part numbers of replacement O-rings.
49
2. Operation
3.
Installation
Xgard Type 5
1
3.3 Sensor replacement/servicing of detectors
Xgard uses a modular design, which makes replacement of sensors,
or sinters extremely simple. Replacement sensors are supplied fitted to
a sensor PCB to allow simple plug-in installation. An exploded view of
Xgard is given in Diagram 3. The following procedure may be followed
when servicing a Xgard detector.
WARNING
This work should be carried out by Crowcon or an approved
service centre unless suitable training has been received.
1. Switch off and isolate power to the detector requiring attention.
2. Open the junction box of the detector by unscrewing the lid in an anticlockwise direction (having loosened the retaining grub-screw first).
3. Unscrew the sensor retainer and remove the sensor and sensor PCB.
4. Fit the replacement sensor (having checked that the part number
matches that stated on the detector junction box label), taking care to
align the locating pins correctly with the slots in the junction box.
5. Re-fit the sensor retainer having first inspected the sinter to make sure that
it has not become contaminated. Contaminated items should be replaced
(see Spare Parts section for replacement part numbers), as any blockages
may result in slow sensor response to gas, and reduced sensitivity.
6. Follow the Commissioning Procedure given in 3.1.
Sensor
Part No.
Pellistor
Type
Bridge Volts Comment
(Vdc)
Contact CrowconVQ21T
2.0
Contact Crowcon 300P
2.0
ontact Crowcon VQ8
C
2.5
Standard for CH4
Alternative for CH4
Lead resistant for leaded
petrol
Contact Crowcon VQ25
2.0
For halogens
Contact Crowcon VQ41
2.0
For Jet fuel
Contact Crowcon VQ41
2.0
For Ammonia
Table 8: Sensor options, please contact Crowcon for advice on alternative
gases or vapours.
Storage Instructions: The sensor used in this detectors should be
stored in a dry environment, and protected from exposure to silicones,
sulphides, chlorines and lead. Exposure to these compounds will
significantly reduce the sensitivity of the sensor, and render the sensor
warranty void.
50
4.Specification
Xgard Type 5
Junction box material
Corrosion resistant alloy with polyester
powder coating
316 Stainless Steel (optional)
Dimensions
156 x 166 x 111 mm (6.1 x 6.5 x 4.3 inches)
Weight
Alloy: 1 kg (2.2 lbs)
Stainless Steel: 3.1 kg (6.8lbs) approx.
Operating voltage
10-30 V dc
Current consumption
100 mA @ 10 V 50 mA @ 24 V
Output
4-20 mA Sink or Source (Selected by Links)
Fault signal
< 3 mA
Maximum cable resistance
40 Ohms @ 18 V (power) +ve terminal
450 Ohms @ 18 V (signal) sig terminal
Relative to -ve terminal (common)
Operating temperature -40°C to +55°C (-40°F to +131°F)
Humidity
0–99% RH, non condensing
Degree of protection
IP65
Explosion protection
Flameproof
II 2 GD Ex d IIC T6 Gb
Approval codeATEX
Tamb -40°C to 50°C
Extb IIIC T80°C Db
ATEX
II 2 GD Ex d IIC T4 Gb
Tamb -40°C to 80°C
Extb IIIC T110°C Db
IECEx BAS 05.0042
UL Class I, Division 1, Groups B, C & D
IECEx BAS 05.0043X
Safety certificate no.
Baseefa04ATEX0024X
StandardsEN60079-0:2012, EN60079-1:2007,
EN60079-31:2009 IEC 60079-0:2011 (Ed 6),
IEC60079-1: 2007 (Ed 6), IEC60079-31:2008
(Ed 1) UL1203
ZonesCertified for use in Zones 1 & 2 (Gas), and Zones
21 & 22 (Dust)
Gas groups
IIA, IIB, IIC (UL groups B,C,D)
EMC
EN50270
51
2. Installation
1.Introduction
Xgard
Type 6
1
Xgard
Type
1.1 Flameproof thermal conductivity type gas detector
This version of Xgard is a Flameproof thermal conductivity type gas
detector, designed to monitor binary gas mixtures (such as hydrogen in
nitrogen, methane in carbon dioxide) in % volume concentrations. The
detector relies on there being a substantial difference in the thermal
conductivity properties of the gases in the mixture being monitored.
Precautions should be taken to ensure that humidity in the gas mixture is
kept to a minimum, and the operating temperature remains stable,
otherwise the sensor readings may be affected. For a list of gas mixtures
that can be detected using Xgard Type 6 please contact Crowcon.
Xgard Type 6 is powered by 24 V dc (nominally) and provides a 4-20 mA
signal (sink or source) proportional to the gas concentration. The detector
II 2 GD Ex d IIC T6 Gb, and is suitable for use in Zone 1 and
is certified
Zone 2 hazardous areas.
Electrical connections to the detector are made via the terminal block
on the PCB shown below.
Internal
grounding
terminal
(earth)
TP2
Sink
TP4
Test
points
Supplemental
external
grounding
terminal
(earth)
VR3
TP3
Srce
TP1
Diagram 14: Xgard Type 6 PCB layout
(Shown with PCB cover removed).
52
2.Installation
Xgard Type 6
WARNING
This detector is designed for use in Zone 1 and Zone 2
hazardous areas, and is certified II 2 GD Ex d IIC T6 Gb.
Installation must be in accordance with the recognised
standards of the appropriate authority in the country
concerned.
For further information please contact Crowcon. Prior to
carrying out any installation work ensure local regulations and
site procedures are followed.
2.1 Location
The detector should be mounted where the gas to be detected is most
likely to be present. The following points should be noted when locating
gas detectors:
• To detect gases which are lighter than air, detectors should be
mounted at high level and Crowcon recommend the use of a collector
cone (Part No. C01051) and accessory adaptor (Part No. M04666).
• To detect heavier than air gases, detectors should be mounted at low
level.
• If the detector is to be used to monitor gas in a sample line rather
than ambient conditions, a flow adaptor is available for 6mm (1/4”) o/d
pipe (Part No. C01339). Crowcon recommend a flow rate of 0.5 - 1
litre/minute, and the sample gas must be suitably filtered to remove
dust and moisture.
• When locating detectors consider the possible damage caused by
natural events e.g. rain or flooding. For detectors mounted outdoors
Crowcon recommend the use of a Spray Deflector (Part No. C01052)
and accessory adaptor (Part No. M04666).
• Consider ease of access for functional testing and servicing.
• Consider how the escaping gas may behave due to natural or forced
air currents. Mount detectors in ventilation ducts if appropriate.
• Consider the process conditions. For example, butane is normally
heavier than air, but if released from a process which is at an elevated
temperature and/or pressure, the gas may rise rather than fall.
The placement of sensors should be determined following advice of
experts having specialist knowledge of gas dispersion, the plant processing
equipment as well as safety and engineering issues. The agreement
reached on the locations of sensors should be recorded. Crowcon
would be pleased to assist in the selection and siting of gas detectors.
53
2. Installation
Xgard Type 6
1
2.2 Mounting
Xgard should be installed at the designated location with the sensor
pointing down. This ensures that dust or water will not collect on the
sensor and stop gas entering the cell. The mounting detail is shown in
Diagram 2. Care should be taken when installing the detector to avoid
damaging the painted surface of the junction box and sensor retainer.
2.3 Cabling requirement
Cabling to Xgard must be in accordance with the recognised standards
of the appropriate authority in the country concerned and meet the
electrical requirements of the detector.
Crowcon recommend the use of steel wire armoured (SWA) cable
and suitable explosion proof glands must be used. Alternative cabling
techniques, such as steel conduit, may be acceptable provided
appropriate standards are met.
Xgard Type 6 requires a dc supply of 10-30 V, at up to 100 mA. Ensure
there is a minimum of 10 V at the detector, taking into account the
voltage drop due to cable resistance. For example, a nominal dc supply
at the control panel of 24 V has a guaranteed minimum supply of 18 V.
The maximum voltage drop is therefore 8 V. Xgard Type 6 can demand
up to 100 mA and so the maximum loop resistance allowed is 80 Ohms.
A 1.5 mm 2 cable will typically allow cable runs up to 3.3 km. Table 9 below
shows the maximum cable distances given typical cable parameters.
C.S.A.
mm2
Awg
1.0
17
1.5
15
2.5
13
Resistance
Cable
18.1
12.1
7.4
(Ohms per km)
Loop
36.2
24.2
14.8
Max. Distance
(km)
2.2
3.3
5.4
Table 9: maximum cable distances for typical cables
The acceptable cross sectional area of cable used is 0.5 to 2.5 mm2
(20 to 13awg). The table is provided for guidance only, actual
cable parameters for each application should be used to calculate
maximum cable distances.
54
2. Installation
Xgard Type 6
2.4 Electrical connections
All connections are made via the screw terminal block mounted on the
PCB in the junction box. The terminals are marked ‘+’, ‘sig’ and ‘-’ and
correct polarity should be observed when connecting the detector to
control equipment. Xgard Type 6 is factory set as a ‘current sink’ device
unless otherwise specified when ordering. To reset to ‘current source’,
open the junction box and move the two links on the amplifier PCB from
the ‘sink’ position to the ‘srce’ position, as shown in Diagram 14.
Note: The internal grounding terminal (see diagram 14) shall be used as
the grounding means of the Xgard gas detector. The external grounding
terminal (see diagram 14) is only a supplemental bonding connection,
and is only to be used where local authorities permit or require such a
connection. To limit radio frequency interference, the junction box and
cable armour should be grounded (earthed) at the control panel. Ensure
the earth connection is provided in a safe area only, so as to avoid earth
loops.
Xgard Type 6 PCB
SIG
Control Panel
SIG
Earth
10-30 V dc
4-20 mA
(Sink or Source)
Diagram 15: Xgard Type 6 electrical connections
55
2. Installation
3.Operation
Xgard
Type 6
1
Xgard
Type
WARNING
Prior to carrying out any work ensure local regulations and
site procedures are followed. Never attempt to open the
detector or junction box when flammable gas is present.
Ensure that the associated control panel is inhibited so as to
prevent false alarms.
3.1
Commissioning procedure
1. Open the junction box of the detector by unscrewing the lid in an anticlockwise direction (having loosened the retaining grub-screw first).
2. Check that all electrical connections have been made and are correct
as per Diagram 15.
3. Measure the voltage across the ‘+’ and ‘-’ terminals and check a
minimum supply of 10 V dc is present.
4. Leave the detector to stabilise for at least 1 hour.
5. Before calibration of the detector can commence, the thermal
conductivity sensor must be balanced. To do this remove the PCB
cover, and connect a digital volt meter (DVM) to the test points
marked ‘TP3’ and ‘TP4’ on the amplifier PCB, as shown in Diagram
14. The DVM should be set to the dc mV range.
Check the detector label for details of the background gas. This is
normally air, carbon dioxide, nitrogen or argon. Apply a sample of the
background gas (100% volume concentration) to the sensor at a flow
rate of 0.5 – 1 litre/minute via a flow adaptor (Part No. C03005). If the
background gas is air, the sensor may simply be exposed to ambient
clean air. The potentiometer marked ‘VR3’ should be adjusted until
the DVM reads 0.00 mV. The PCB cover can now be replaced.
6. Reconnect the DVM to the test points marked ‘TP1’ and ‘TP2’ on the
amplifier PCB, as shown in Diagram 14.
Note: At the test points, Zero will read 40 mV = 4 mA.
Full scale deflection will read 200 mV = 20 mA. There is a current
clamp of 25 mA on the 4-20 mA output.
Zeroing the detector
7. Check the detector label for details of the background gas. This is
normally air, carbon dioxide, nitrogen or argon. Apply a sample of the
background gas (100% volume concentration) to the sensor at a flow
rate of 0.5 – 1 litre/minute via a flow adaptor (Part No. C03005). If the
background gas is air, the sensor may simply be exposed to ambient
clean air. Adjust the ‘ZERO’ pot on the amplifier (which is accessible
via a hole in the PCB cover) until the DVM reads 40 mV. Check that
the control equipment display reads zero.
56
3. Operation
Xgard Type 6
Calibrating the detector
8. Apply calibration gas (which should either be 100% volume target
gas, or be a representative mix of the required range, for example
60% CH4 / 40% CO2) to the detector at a flow rate of 0.5 - 1 litre/
minute via a flow adaptor (Part No. C03005). Contact Crowcon for the
supply of calibration gas.
9. Allow the gas reading to stabilise (usually 30 to 60 seconds) and
adjust the ‘CAL’ pot until the DVM reads the appropriate reading
(200mV if 100% volume target gas is used). Use the following formula
to calculate the DVM reading if the target gas concentration in the
calibration gas is lower than 100% volume:
Where the ‘Range’ is the maximum value of the target gas, and ‘Gas’ is
(
160
Range
x Gas
)
+ 40 = mV setting
the concentration of the target gas in the calibration mixture.
Example: calibrating a detector to measure 0-100% volume methane in
carbon dioxide, using 60% CH4 / 40% CO2 calibration gas:
10.If the control equipment display requires adjustment consult the
(
160
x 60
100
)
+ 40 = 136 mV
operating manual for the equipment.
11.Remove the gas and allow the sensor to completely settle before
re-checking the zero setting.
12.Close the junction box of the detector ensuring that the lid is securely
tightened, and the grub-screw is secured.
13.The detector is now operational.
Note: Xgard Type 6 will only measure reliably when exposed to a gas
mixture for which it is calibrated. If, for example, a detector is calibrated
for a CH4 / CO2 mixture, but exposed to air, erroneous signals will be
produced.
For further advice on balancing the amplifier and sensor module,
especially where signal drift appears to have occurred, please contact
Crowcon.
57
2. Operation
3.
Installation
Xgard Type 6
1
3.2 Routine maintenance
The operational life of the sensor depends on the application for which it
is being used. It is expected that a thermal conductivity sensor will work
satisfactorily for up to 5 years in ideal conditions. Sensors are prone to
damage by vibration and shock, so measures should be taken to ensure
that the detector is not affected by these influences.
Site practices will dictate the frequency with which detectors are tested.
Crowcon would recommend that detectors be gas tested at least every 6
months and re-calibrated as necessary. To re-calibrate a detector follow
the steps given in 3.1.
The sinter should be inspected regularly, and replaced if it has become
contaminated. A blocked sinter may prevent gas from reaching the
sensor.
When performing maintenance on Xgard, ensure that the sensor retainer
and junction box lid O-rings are present and in good condition to
maintain the ingress protection of the product. See the ‘Spare parts and
accessories’ section for the part numbers of replacement O-rings.
58
3. Operation
Xgard Type 6
3.3 Sensor replacement/servicing of detectors
Xgard uses a modular design, which makes replacement of sensors,
or sinters extremely simple. Replacement sensors are supplied fitted to
a sensor PCB to allow simple plug-in installation. An exploded view of
Xgard is given in Diagram 3. The following procedure may be followed
when servicing a Xgard detector.
WARNING
This work should be carried out by Crowcon or an approved
service centre unless suitable training has been received.
1. Switch off and isolate power to the detector requiring attention.
2. Open the junction box of the detector by unscrewing the lid in an anticlockwise direction (having loosened the retaining grub-screw first).
3. Unscrew the sensor retainer and remove the sensor and sensor PCB.
4. Fit the replacement sensor (having checked that the part number
matches that stated on the detector junction box label), taking care to
align the locating pins correctly with the slots in the junction box.
5. Re-fit the sensor retainer having first inspected the sinter to make sure
that it has not become contaminated. Contaminated items should be
replaced (see Spare Parts section for replacement part numbers),
as any blockages may result in slow sensor response to gas, and
reduced sensitivity.
6. Follow the Commissioning Procedure given in 3.1.
59
2. Installation
4.Specification
Xgard
Type 6
1
Xgard
Type
Junction box material
Corrosion resistant alloy with polyester
powder coating
316 Stainless Steel (optional)
Dimensions
156 x 166 x 111 mm (6.1 x 6.5 x 4.3 inches)
Weight
Alloy: 1 kg (2.2 lbs)
Stainless Steel: 3.1 kg (6.8lbs) approx.
Operating voltage
10-30 V dc
Current consumption
100 mA @ 10 V 50 mA @ 24 V
Output
4-20 mA Sink or Source (Selected by Links)
Fault signal
< 3 mA
Maximum cable resistance
40 Ohms @ 18 V (power) +ve terminal
450 Ohms @ 18 V (signal) sig terminal
Relative to -ve terminal (common)
Operating temperature +10°C to +55°C (50°F to +131°F)
Humidity
0–90% RH, non condensing
Degree of protection
IP65
Explosion protection
Flameproof
Approval codeATEX
II 2 GD Ex d IIC T6 Gb
Tamb -40°C to 50°C
Extb IIIC T80°C Db
II 2 GD Ex d IIC T4 Gb
ATEX
Tamb -40°C to 80°C
Extb IIIC T110°C Db
IECEx BAS 05.0042
UL Class I, Division 1, Groups B, C & D
IECEx BAS 05.0043X
Safety certificate no.
Baseefa04ATEX0024X
Standards
N60079-0:2012, EN60079-1:2007,
E
EN60079-31:2009 IEC 60079-0:2011 (Ed 6),
IEC60079-1: 2007 (Ed 6), IEC60079-31:2008
(Ed 1) UL1203
ZonesCertified for use in Zones 1 & 2 (Gas), and Zones
21 & 22 (Dust)
60
Gas groups
IIA, IIB, IIC (UL groups B, C, D)
EMC
EN50270
Spare parts and accessories
Please refer to the Sensor Type section on the main junction box label for
the correct replacement sensor part number.
Description Part Number
Xgard
Version
Sensor retainer (aluminium)
S012132/S Type 1 only (UL)
Sensor retainer (Glass-reinforced Nylon)
S012982
Sensor retainer with sinter (aluminium)
S012133/S Types 2,3,5,6*
Type 1 only (ATEX)
Sensor seal (aluminium and Glass-reinforced Nylon) M04885
All Types*
Sensor retainer (stainless steel) M01945 Type 1
Sensor retainer with sinter (stainless steel) M01932
Types 2,3,5,6
Sensor seal (stainless steel retainer) M04971 Types 1,2,3,5,6
Sensor retainer O-ring (aluminium and stainless steel) M04828
All Types*
Sensor retainer O-ring for Glass-reinforced Nylon M04481
Type 1
Junction box lid O-ring
M04829
All Types*
Amplifier PCB for the following gas types: S011238/2
Types 1 & 2
S011896/2
Types 1 & 2
Amplifier PCB (Oxygen)
S011240/2
Types 1 & 2
Amplifier PCB (flammable, bridge)
S011469/2
Type 3
Amplifier PCB (flammable, high temperature)
S011720
Type 4
Amplifier PCB (flammable, 4-20mA)
S011242/2
Type 5
Amplifier PCB (thermal conductivity, 4-20mA)
S011837
Type 6
PCB cover
M04770
All Types*
Calibration adaptor
C03005
All Types
Duct mounting kit
S011918
All Types*
Sensor retainer O-ring M04909 Type 4
Junction box lid O-ring M04910 Type 4
Carbon Monoxide, Chlorine, Chlorine Dioxide,
Hydrogen, Hydrogen Sulphide, Nitrogen Dioxide,
Sulphur Dioxide
Amplifier PCB for the following gas types: Ammonia, Arsine, Bromine, Diborane, Fluorine
Germane, Hydrogen Cyanide, Hydrogen Fluoride
Ozone, Phosgene, Phosphine, Silane (Sensoric cells)
*Except Xgard Type 4
61
Spare parts and accessories
Accessory adaptor
C011061
Spray deflector
C01052
Weatherproof cap
C01442
Flow adaptor
C01339
Collector cone
C01051
Sun Shade
C011063
Note: these accassories are not compatible with Xgard Type 4
62
1.
2.
Introduction
Installation
Appendix:
Sensor
limitations
Xgard Type 1
The sensors used in Xgard have limitations common to all such gas
sensors, and users should be aware of the points listed below. Crowcon
can advise on particular situations and suggest alternative sensors if the
instrument is likely to experience extreme conditions.
• Electrochemical sensor performance changes at extremes of
temperature; consult Crowcon if the detector will be exposed to
ambient temperatures below -20°C or above +40°C (-4 and 104°F).
• Extreme levels of humidity can also cause problems. The sensors are rated
for an (average) ambient of 15-90% R.H. However they are used from the
tropics to deserts to tundra without this normally presenting a problem.
• Water, contaminants or paint should not be allowed to impede
the sensor, as this will prevent gas diffusion. Detectors should be
mounted with the sensor pointing down to help prevent this.
• Persistent exposure to certain compounds may contaminate the
sensors. Calibration checks should be performed in accordance with
the instructions for each detector type to ensure that the sensor is
working correctly.
• Persistent exposure to high levels of toxic or flammable gas will
shorten the life of the sensor. If the high level gas is corrosive
(e.g. hydrogen sulphide) damage may occur over time to metal
components.
• Sensors may be cross sensitive to other gases. If unsure, contact
Crowcon or your local agent.
• Storage Instructions: Electrochemical sensors used in Xgard Types
1 and 2 have a maximum non-powered storage life of 3 months.
Sensors stored within a detector for longer than 3 months prior to
commissioning may not last for the full expected operational life. The
warranty period for all sensors begins from the date of shipment from
Crowcon. Detectors should be stored in a cool and dry environment
where temperatures remain within the 0-20°C range.
There are no rules which dictate the siting and location of detectors,
however considerable guidance is available from BS EN50073:1999
‘Guide for Selection, Installation, Use and Maintenance of Apparatus
for the Detection and Measurement of Combustible Gases or Oxygen’.
Similar international codes of practice may be used where applicable. In
addition certain regulatory bodies publish specifications giving minimum
gas detection requirements for specific applications.
The detector should be mounted where the gas is most likely to be
present.
63
Warranty
This equipment leaves our factory fully tested and calibrated. If within the warranty
period of one year from Despatch, the equipment is proved to be defective by reason
of faulty workmanship or material, we undertake at our option either to repair or
replace it free of charge, subject to the conditions below.
Warranty Procedure
To facilitate efficient processing of any claim, contact our customer support team on
+44 (0)1235 557711 with the following information:
Your contact name, phone number, fax number and email address.
Description and quantity of goods being returned, including any accessories.
Instrument serial number(s).
Reason for return.
Obtain a Returns form for identification and traceability purpose. This form may be
downloaded from our website ‘crowconsupport.com’, along with a returns label,
alternatively we can ‘email’ you a copy.
Instruments will not be accepted for warranty without a Crowcon Returns
Number (“CRN”). It is essential that the address label is securely attached to the
outer packaging of the returned goods.
The guarantee will be rendered invalid if the instrument is found to have been altered,
modified, dismantled, or tampered with. The warranty does not cover misuse or
abuse of the unit.
Any warranty on batteries may be rendered invalid if the use of an unauthorized
charger is proven. Non-rechargeable batteries are excluded from this warranty.
Warranties on sensors assume normal usage, and will be rendered invalid if the
sensors have been exposed to excessive concentrations of gas, extended periods of
exposure to gas or have been exposed to ‘poisons’ that can damage the sensor, such
as those emitted by aerosol sprays
Warranty Disclaimer
Crowcon accept no liability for consequential or indirect loss or damage howsoever
arising (including any loss or damage arising out of the use of the instrument) and all
liability in respect of any third party is expressly excluded.
This warranty does not cover the accuracy of the calibration of the unit or the
cosmetic finish of the product. The unit must be maintained in accordance with the
Operating and Maintenance Instructions.
The warranty on replacement consumable items (such as sensors) supplied under
warranty to replace faulty items, will be limited to the unexpired warranty of the
original supplied item.
Crowcon reserves the right to determine a reduced warranty period, or decline a
warranty period for any sensor supplied for use in an environment or for an application
known to carry risk of degradation or damage to the sensor.
Our liability in respect of defective equipment shall be limited to the obligations set
out in the guarantee and any extended warranty, condition or statement, express or
64
Warranty
implied statutory or otherwise as to the merchantable quality of our equipment or its
fitness for any particular purpose is excluded except as prohibited by statute. This
guarantee shall not affect a customer’s statutory rights.
Crowcon reserves the right to apply a handling and carriage charge whereby units
returned as faulty, are found to require only normal calibration or servicing, which the
customer then declines to proceed with.
For warranty and technical support enquiries please contact:
Customer Support
Tel +44 (0) 1235 557711
Fax +44 (0) 1235 557722
Email [email protected]
65
UK Office
Singapore Office
Crowcon Detection Instruments Ltd
172 Brook Drive,
Milton Park,
Abingdon
Oxfordshire
OX14 4SD
Tel: +44 (0) 1235 557700
Fax: +44 (0) 1235 557749
Email: [email protected]
Website: www.crowcon.com
USA Office
Crowcon Detection Instruments Ltd
Block 194, Pandan Loop
#06-20 Pantech Industrial Complex
Singapore 128383
Tel: + 65 6745 2936
Fax: +65 6745 0467
Email: [email protected]
Website: www.crowcon.com
China Office
Crowcon Detection Instruments Ltd
1455 Jamike Ave, Suite 100
Erlanger
KY 41018
Tel: +1 859 957 1039 or 1 800 527 6926
Fax: +1 859 957 1044
Email: [email protected]
Website: www.crowcon.com
Netherlands Office
Crowcon Detection Instruments Ltd
(Beijing)
Unit 316, Area 1, Tower B, Chuangxin
Building
12 Hongda North Road, Beijing
Economic Technological Development
Area
Beijing, China 100176
Tel: +86 10 6787 0335
Fax: +86 10 6787 4879
Email: [email protected]
Website: www.crowcon.com
Crowcon Detection Instruments Ltd
Vlambloem 129
3068JG, Rotterdam
Netherlands
Tel: + 31 10 421 1232
Fax: + 31 10 421 0542
Email: [email protected]
Website: www.crowcon.com
1180
© 2015 Crowcon Detection Instruments Ltd.
Crowcon and Xgard are registered trade marks.