1
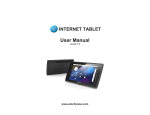
INTERNET TABLET
User Manual
version 1.2
www.elocitynow.com
Safety Instructions
Use the following safety guidelines to help protect yourself and your
Tablet.
General Warnings
• Do not operate your Tablet for long periods of time while it has direct
contact with your body or other surface that might completely cover the
bottom of the unit. This may cause overheating.
• Do not attempt to disassemble the Tablet yourself. Always follow
installation instructions closely.
• To avoid personal injury from electric shock or fire:
¾
¾
¾
Do not operate the Tablet close to water, for example, near the
bathtub, kitchen sink, laundry tub, wet basement, swimming pool,
or in the rain.
Do not connect or disconnect any cables or perform maintenance
or reconfiguration of this product during thundershower, tempest or
storm.
Do not push objects into the air vents or openings of your interior
components.
• If the battery pack leaks and the battery fluid comes into contact with
your eyes, do not rub them. Wash the eyes with clean running water
and immediately seek medical attention. Otherwise, eye injury may be
result.
• If battery fluid contacts your skin or clothing, immediately wash with
running water. Otherwise, skin inflammation can occur.
• Operate the Tablet at the recommended temperature range of +5˚C to
+35˚C (+41˚F to +95˚F). Store it at a temperature of -20˚C to +60˚C
(-4˚F to +140˚F).
Adapter Warnings
• Use only the AC adapter that is approved for use with this Tablet. Use
of another type of adapter may risk fire or explosion.
• Before you connect the Tablet to a power source, ensure that the
voltage rating of the AC adapter matches that of the available power
source:
¾
220 V/50 Hz in China.
¾
115 V/60 Hz in most of North and South America and some Far
Eastern countries such as South Korea and Taiwan.
¾
100 V/50 Hz in eastern Japan.
¾
100 V/60 Hz in western Japan.
¾
230 V/50 Hz in most of Europe, the Middle East, and the Far
East.
• If you use an extension cable with your AC adapter, ensure that the
total ampere rating of the products plugged into the extension cable
does not exceed the ampere rating of the extension cable.
• Do not cover the AC adapter with papers or other items that will reduce
cooling. Also, do not use the AC adapter while it is inside a carrying
case.
• To remove power from the Tablet, turn it off, remove the battery, and
disconnect the AC adapter from the electrical outlet.
Battery Pack Warning
• Do not carry the battery pack in your pocket, purse, or other container
where metal objects (such as car keys) could short-circuit the battery
terminals. The resulting current flow can cause extremely high
temperatures and may result in damage or injury from burns.
• There is a danger of explosion if the battery pack is incorrectly
replaced. Replace only with the same or equivalent type battery
recommended by the manufacturer.
See the installation instructions before connecting the power supply
(refer to “Charging the Battery” on page 5).
• Do not dispose of battery pack near a heat source. Heat can melt the
insulation and damage other safety features, possibly leading it to leak
acid, overheat, emit smoke, burst and /or ignite.
• When using your adapter, make sure to position it around objects so it
will not be cut or damaged.
• Do not immerse the battery pack in water or allow it to get wet. Its
protective features can be damaged, it can be charged with extremely
A7 Internet Tablet – User Manual v1.2
Page 1
high current and voltage, abnormal chemical reactions may occur,
possibly leading it to leak acid, overheat, emit smoke, burst and/or
ignite.
• Do not crush, disassemble, puncture, incinerate or short circuit
external contacts of the battery pack.
• Do not connect the positive (+) and negative (-) terminals with a metal
object such as wire. Short-circuiting may occur, leading the battery
pack to leak acid, overheat, emit smoke, burst and/or ignite.
• Do not use an apparently deformed or damaged battery pack, which
may leak acid, overheat, emit smoke, burst and/or ignite.
• If the battery pack leaks fluid, gives off a bad odor, generates heat, or
becomes discolored, immediately remove it from the Tablet or charger
and stop using it.
• Recycling & disposal:
¾
Do not dispose of your product which has the WEEE logo (shown
as right) on it or on its box in the general household waste bin.
¾
Be sure to dispose of all your products in the designed collection
facilities for recycling of such hazardous wastes.
¾
Separate collection and proper recovery of your WEEE at the time
of disposal will allow us to help conserving natural resources.
Moreover, proper recycling of WEEE will ensure safety of human
health and environment.
¾
For more information about WEEE disposal, recovery, and
collection points, please contact your local city center, household
waste disposal service, retailer or manufacturer of the equipment.
Battery Pack Disposal
• Dispose of the lithium ion battery packs only at approved disposal
sites. To locate an appropriate site, contact the solid waste disposal
officials where you live or look for a rechargeable battery recycling
website that lists disposal locations near you.
• Do not dispose of battery packs in a fire, throw them in a trash
receptacle, put them in a recycling bin not intended for their disposal,
or otherwise discard them in a manner that may result in their being
hazardous to the environment.
Environment
For human health and environment protection, please take notice of
below information.
WEEE NOTICE
• The Directive 2002/96/EC on Waste Electrical and Electronic
Equipment (WEEE) which entered into force on 13th February 2003, is
to ensure that WEEE are recycled using best available treatment,
recovery and recycling techniques in order to protect human health
and natural resources.
A7 Internet Tablet – User Manual v1.2
RoHS Compliance
This product is in compliance with Directive 2002/95/EC of the European
Parliament and of the Council of 27 January 2003, on the restriction of
the use of certain hazardous substances in electrical and electronic
equipment (RoHS) and its amendments.
According to Management Methods for Controlling Pollution Caused by
Electronic Products and Management Methods for Controlling Pollution
Caused by Electronic information Products, the information required by
SJ/T11364-2006 is listed in the following table.
Names and Contents of Toxic or Hazardous Substances or Elements
Contained in Products.
Page 2
Federal Communications Commission (FCC) Statement
You are cautioned that changes or modifications not expressly approved
by the party responsible for compliance could void the user’s authority to
operate the equipment.
This equipment has been tested and found to comply with the limits for a
Class B digital Tablet, pursuant to part 15 of the FCC rules. These limits
are designed to provide reasonable protection against harmful
interference in a residential installation. This equipment generates, uses
and can radiate radio frequency energy and, if not installed and used in
accordance with the instructions, may cause harmful interference to
radio communications. However, there is no guarantee that interference
will not occur in a particular installation. If this equipment does cause
harmful interference to radio or television reception, which can be
determined by turning the equipment off and on, the user is encouraged
to try to correct the interference by one or more of the following
measures:
• -Reorient or relocate the receiving antenna.
• -Increase the separation between the equipment and receiver.
• -Connect the equipment into an outlet on a circuit different from that to
which the receiver is connected.
Chapter 1 – Introduction
1.1 Overview
1.2 Front Panel
1.3 Right / Left Panel
1.4 Back Panel
1.5 Top / Bottom Panel
1.6 Features
1.1 Overview
Congratulations on the purchase of your new advanced Tablet. You’re
about to discover so many things about your Tablet that will help you
maximize the experience of its usage. Read this chapter and the next
one to learn more about the functions of the Tablet, battery and SD card
installation, charging the battery, and more.
1.2 Front Panel
• -Consult the dealer or an experienced radio/TV technician for help.
This Tablet complies with Part 15 of the FCC Rules. Operation is subject
to the following two conditions:
1. This Tablet may not cause harmful interference, and
2. This Tablet must accept any interference received, including
interference that may cause undesired operation of the Tablet.
FCC RF Radiation Exposure Statement:
This equipment complies with FCC radiation exposure limits set forth for
an uncontrolled environment. End users must follow the specific
operating instructions for satisfying RF exposure compliance. This
transmitter must not be co-located or operating in conjunction with any
other antenna or transmitter.
A7 Internet Tablet – User Manual v1.2
Page 3
1.3 Right / Left Panel
1.5 Top / Bottom Panel
LEFT
RIGHT
Audio
Connect to the supplied stereo
Earbuds for audio output
Power Button
Card Reader
Insert a Micro SD card
to access media and other data
TOP
Press to turn
on/off power
USB Port
BOTTOM
Use to connect to
USB Tablets
HDMI
Supports standard, enhanced or
High‐definition audio and video
DC In
Docking
Use to connect to the
Power cable
Speaker
Outputs audio
Speaker
Outputs audio
1.6 Features
The Tablet is optimized for rich internet and entertainment experiences
as well as daily business and productivity needs. The Tablet features:
1.4 Back Panel
• Touch screen panel
• WiFi network connection for quick access to the web
• Bluetooth connection to send and receive data to and from other
Bluetooth devices
• Browser applications for web surfing on the go
• Chat with friends through the instant messenger and built-in webcam
• Email exchange that allows you to keep in touch with personal and
business contacts
• Media Player for music and movies
• Built-in camera to take digital pictures and record video clips
• Powerful tools and office programs for your business needs
• USB connections for connecting external devices
A7 Internet Tablet – User Manual v1.2
Page 4
Chapter 2 – Getting Started
2.1 The SIM Card Slot
2.2 Charging the Battery
2.3 Checking the Battery Status
2.4 Connecting USB Devices
2.5 Inserting a Micro SD card
2.6 Connecting Earphones
2.7 Using the Mouse
2.8 Inputting Information
2.9 The Power Switch
To Charge the Battery
1. Connect the power cable to the Tablet as shown.
2. Plug the power cable into an electrical outlet.
3. Remove the power cable when charging is complete.
Battery Charging Time
It takes approximately 3.5 hours to fully charge the battery while the
power is off.
2.3 Checking the Battery Status
There are two ways to check the battery level of your Tablet: the Power
LED Indicator and the Battery Icon on the Status Bar.
2.1 The SIM Card Slot
The A7 Tablet comes with a SIM Card Slot for future functionality, but the
unit does not currently support any SIM functions.
Power LED Indicator
The Power LED Indicator indicates the charge level status of your
battery:
• When the Power LED indicator is orange, the battery is charging.
2.2 Charging the Battery
• When the Power LED indicator is green, the battery is fully charged.
The battery that comes with your Tablet is partially charged. It is
recommended that you use your Tablet until the battery is completely
discharged before charging the battery the first time. Batteries perform
best after being fully charged.
When the battery is fully charged, disconnect the charger from the outlet
first, then disconnect it from the Tablet.
Battery Icon on the Status Bar
While the Tablet is turned on, you can check the battery level icon
located on the Status Bar.
A green icon
indicates that the battery is completely charged.
While the battery is charging, the icon on the status bar starts scrolling
on the display. When the battery is fully charged, the icon stops scrolling
and indicates green with a flash logo.
A7 Internet Tablet – User Manual v1.2
Page 5
The Tablet will have the following defined behaviors when the battery
reaches certain charge levels:
• 15% Charge Remaining – the Tablet will show “Battery Low” warning
message when the charge drops to 15%. The message will also
appear at boot up or when the Tablet is reactivated after being put in
suspend mode if the AC charger is not plugged in and battery capacity
is less than 15%.
• 6% Charge Remaining – the Tablet will power off automatically.
2.4 Connecting USB Devices
You can connect USB flash drives to your Tablet to access external files.
The tablet supports drives up to 64GB in size. Please note that some
older USB 1.1 devices may have compatibility issues.
To Remove an External Drive Connected to the USB
1.
Before removing an external drive, tap the connection icon to safely
remove the Tablet to avoid data loss.
2.
Your Tablet will pop up a message to confirm the removal. Tap the
message.
3.
Remove the USB device and close the port cover door.
Plug and Play Devices
A Plug and Play (PnP) device does not require installation or drivers after
being connected. Plug the device, then “play” or use it at once. You can
remove the PnP device from the Tablet at any time.
2.5 Inserting a Micro SD Card
To Connect USB Devices
The Tablet supports Micro SD cards up to 32GB in size.
1. Locate the USB port on the top of the Tablet, See “Right / Left Panel”
to locate the USB port.
To insert a Micro SD Card:
2. Open the port cover.
1. Open the protective cover door and slide it over to reveal the slots
3. Connect the USB device as shown on the left.
2. Insert the card into the slot closest to the back of the unit by pushing
until it clicks into place.
3. Close the card cover door.
4. The Tablet detects the card and opens the File Manager application.
A7 Internet Tablet – User Manual v1.2
Page 6
To Remove a Micro SD Card
1. Before removing the card, tap the connection icon to safely remove
the Tablet to avoid data loss.
2. Your Tablet will pop up a message to confirm the removal. Tap the
message.
3. Open the slot cover.
4. Push the card into the slot, until you hear a click sound, to release
the locks.
5. Gently remove the card and close the slot cover door.
2.7 Using the Mouse
You can navigate the Tablet with your finger (see Chapter 2 Connecting
USB Devices on how to connect a mouse to your Tablet).
Mouse/Finger Functions:
Mouse
Single click
Finger
Single-tap
Double click
Double-tap
Right click
Tap and hold
Click and drag
Flick
Drag
Flick
2.6 Connecting Earphones
Function
Click or single-tap to select or run an
item.
Double click or double-tap to select
or run an item.
Press and hold for more than 3
seconds to display the Pop-up menu.
Drag an item to move it.
Flick the pen across the screen in a
particular direction to scroll up,
down, left, or right.
To listen to music, voice recordings and video sounds in your Tablet,
plug in the earphones included with your Tablet or connect other audio
output devices such as external speakers. All earphones and speakers
can be connected through the headphone jack located at the top of the
Tablet.
2.8 Inputting Information
1. Find the headphone jack on the top of the Tablet. See” Top / Bottom
Panel” to locate the jack.
The Tablet has a software keyboard for inputting text.
2. Connect the earphones to the Tablet as shown below.
2.9 The Power Switch
3. To listen to audio outputs, open an entertainment application.
A7 Internet Tablet – User Manual v1.2
The Power Switch is located
on the left side panel of the
Tablet. It is used to power
on/off the Tablet.
Page 7
Suspend Mode
Power Button behaviors
System
Status
Power off
Power on
Action
Result
Short press
Short press
Turns on the power
Enters suspend mode
Shows power menu
Suspend
Long press
(2 seconds)
Press once
To conserve battery power, your Tablet will automatically enter Suspend
Mode if there is no activity for a defined period of time. Some users
prefer a very short timeout of one minute while others may prefer a long
timeout of 30 minutes or even never. The A7 gives you several options.
Waking the Tablet from Suspend Mode
Resume from suspend
mode
To unlock the Tablet
After pressing the power button to turn on the Tablet, you need to move
the lock as indicated to enter the system. Just slide the lock up in the
direction of the arrow as pictured below.
When the Tablet enters Suspend Mode (Screen Timeout), the screen
goes dark and the unit appears to be turned off. Unlike a laptop or
desktop computer, you cannot “wake up” the unit by tapping the screen,
moving a mouse or typing on the keyboard.
To reactivate the Tablet, give the power button on the left side a short
press. The screen will light up within 2-3 seconds. The Tablet will be
locked, so you will need to slide the green lock up as described in the left
column of this page. If your Tablet goes into Suspend Mode too quickly,
you can adjust the Screen Timeout as described below.
Changing the Screen Timeout Setting
To change the Screen Timeout, click the MENU Smart Key on the black
bezel (just below the HOME key). On screen, several choices will
appear. Tap SETTINGS to display a long list of choices. From the list,
tap DISPLAY, then tap SCREEN TIMEOUT.
In this submenu you will see a wide variety of choices. A green radio
button on the right indicates the Tablet’s current setting. If you want to
make a change, just tap your selection and the screen will change back
to the previous menu to indicate that your selection has been selected.
To verify your new setting, tap SCREEN TIMEOUT again and you will
see that the green radio button on the right is set to your preferred
setting.
Tap the HOME key on the black bezel and you’re ready to go.
A7 Internet Tablet – User Manual v1.2
Page 8
Chapter 3 – Your Tablet
3.1 Home Screen
3.2 The Status Bar
3.3 The Smart Key
3.4 The Smart Menu
3.2 The Status Bar
The Status Bar appears on top of the Tablet Screen. It indicates your
current mode and contains Time, Alarm Clock, Battery Status, WiFi
Status, SIM card Status, Bluetooth Status.
Icons
12:00pm
Description
Time and Clock
3.1 Home Screen
The Home Screen contains 8 application groups. Flick your finger across
the screen to scroll through all the application groups.
Scroll Bar
Tap the left/right arrows to
scroll through the Main Toolbar.
Status Bar
Displays time, battery,
WiFi, and Bluetooth
Alarm Clock
Battery Status: Indicates battery level, more bars denotes
more power
Status
WiFi: Indicates the status of the internet connection
SIM card Status
Bluetooth
Quick Menu
WiFi signal
Tap the icon to go directly to the application.
Icons can be changed by user.
Note:
1.
You can add a shortcut to the desktop Menu by dragging an icon to the Home Screen.
2.
You can delete shortcut Menu by keeping press the icon until the Recycle Bin appear
Displays current input method
in the right of the Home Screen, then move the icon to Recycle Bin.
A7 Internet Tablet – User Manual v1.2
Page 9
3.3 The Smart Key
3.4 The Smart Menu
The Status Keys are located on the right side of the front Tablet panel. It
contains 5 keys as below:
The Status Menu is located at the right edge of the Tablet Screen.
It contains 5 keys as described in the following pages:
Icons
Description
Search: Tap to open a Quick Search box with internal
keyboard
1.
Tap this to bring up the Music screen.
Music is classified by Artists, Albums, Songs, Playlists, and Now
Playing.’
Back: Tap to go back to the previous page
Home: Tap to go back to the Start Menu
Menu: Tap to bring up the related shortcuts
Media Volume: Tap to bring up the volume controls
1
A7 Internet Tablet – User Manual v1.2
Page 10
4.
2.
You can browse pictures or take photos by pressing the camera icon on
the top right corner as shown below.
3.
Tap this to bring up the Web Browser screen.
Tap this to bring up the Gallery screen.
Tap this to bring up the Home Menu screen.
The Home Menu contains 18 icons. You can browse by tapping the icon
you need.
A7 Internet Tablet – User Manual v1.2
You can browse the web by typing in the web address at the top of the
screen.
5.
Tap this to bring up the Email screen.
Set up your email when you first log in by following a few simple
on-screen instructions.
Page 11
Chapter 4 – Basic Settings
4.1 Date and Time
4.2 Language Setting
4.3 Desktop Wallpaper
4.4 Location & Security
4.5 Applications
4.6 Accounts & Sync
4.7 Text-to-Speech
To change the Date
From the Smart Menu, select Settings>Date & Time. Select and open
the Set Date setting window. Set the month/date/year as shown below,
then click Set to save changes and exit, or click Cancel to exit the
application if you don't want to change the setting.
Displays the year.
Use the +/‐ to
change the year,
or tap to open the
built‐in keyboard
to key in the year
directly.
Displays the month.
Use the +/‐ to
change the month,
or tap to open the
built‐in keyboard
to key in the month
directly.
4.1 Date and Time
To open the date and time application
From the Smart Menu, select Settings>Date & Time. When you open
the Date & Time Settings windows, there are 6 six items: Automatic, Set
Date, Select Time Zone, Set Time, Use 24-Hour Format, Select Date
Format. The Set Date, Select Time Zone and Set Time can't be set
when Automatic is chosen.
Displays the date. Use the +/‐ to
change the date, or tap to open the
built‐in keyboard to key in the date
directly.
To set the Time Zone
To change the Time
Select and open the Set Time setting window. Click Set to save
changes and exit, or click Cancel to exit the application if you don't want
to change the setting.
From the Smart Menu, select Settings>Date & Time. Select and open
the Select Time Zone setting window. Select time zone and click Set to
save changes.
To set the Time Format
Displays the hour.
Use the +/‐ to
change, or tap the
hour to open the
built‐in keyboard to
key in the hour
directly.
A7 Internet Tablet – User Manual v1.2
Displays AM/PM.
Click the button to
change directly.
From the Smart Menu, select Settings>Date & Time. Tap the Use 24Hour Format menu to change the time format directly.
12 and 24-Hour time formats are available:
Displays the minute.
Use the +/‐ to change,
or tap the minute to
open the built‐in
keyboard to key in
the minute directly.
• 1:00 pm
• 13:00
Page 12
To set the Date Format
To change the Android Keyboard
From the Smart Menu, select Settings>Date & Time. Tap Select Date
Format to open the date format windows, then select from the following
date formats:
From the Smart Menu, select Settings>Language & Keyboard. Tap
Android Keyboard to open the setting window, which includes 6 items:
• Normal (month/date/year)
• International (date/month/year)
• Year/month/date
• Vibrate on keypress
Choose this and the Tablet will vibrate when the keyboard is pressed.
• Sound on keypress
•
•
•
•
Choose this and the Tablet will make a sound when the keyboard is
pressed.
Auto-capitalization
Choose this to engage the Tablet’s Auto-capitalization function.
Quick fixes
Choose this and the Tablet will correct commonly-typed mistakes.
Show suggestions
Choose this and the Tablet will display suggested words while you are
typing.
Auto-Complete
Choose this and you can use the spacebar to automatically insert a
highlighted word suggested by the Tablet.
3. User Dictionary
4.2 Language Setting
When you open it the first time, there are no words in the user dictionary.
Tap the smart key
, then the Add button will appear at the bottom of
the screen. Click the Add button to open the Add to Dictionary screen
pictured below, key in the word you want, then select OK to save the
addition.
From the Smart Menu, select Settings>Language & Keyboard. There
are 3 items in Language and Keyboard setting windows: Select Locale,
Android Keyboard, User Dictionary.
To change the Language
From the Smart Menu, select Settings>Language & Keyboard. Tap
Select Locale to open a list of available languages, then select the
language you want.
A7 Internet Tablet – User Manual v1.2
Page 13
4.3 Desktop Wallpaper
Passwords
To change the Desktop wallpaper
You can see the passwords as you type by setting the Visible
passwords.
1. From Add to Home screen, select Wallpapers>Wallpaper gallery
2. From Wallpaper gallery select the picture you want.
Credential Storage
3. Click the Set wallpaper button.
My Location
Your Tablet allows applications to access secure certificates and other
credentials by setting Use Secure Credentials. You can install
encrypted certificates from an SD card and set or change the credential
storage password.
You can find your location by Wi-Fi and/or mobile networks or see your
location in applications (Such as Maps) using wireless networks.
You can clear credential storage of all contents and reset its password
by selecting Clear Storage.
Screen unlock pattern
4.5 Application Settings
You can protect your Tablet from unauthorized use by creating a
personal screen unlock pattern.
There are four items that can be set for application:
4.4 Location & Security
1. On the next screen, watch while an example pattern is drawn.
2. When ready, draw your own personal unlock pattern. Experiment
with different patterns but connect at least four dots.
3. Redraw your pattern to confirm.
You can change your pattern to unlock the screen.
• Unknown sources: It can be used to install non-Market applications.
• Manage applications: It can be used to manage and remove installed
applications.
• Running services: It can be used to view and control currently
running services.
• Development:
It can be used to set options for application
development.
4.6 Accounts & Sync
General Sync Settings
You can sync/send/and receive data at any time by setting general sync
applications
Auto-Sync
The applications can sync data automatically by setting Auto-sync. You
can Add accounts in two ways: Corporate and Facebook.
A7 Internet Tablet – User Manual v1.2
Page 14
4.7 Text-to-Speech
Listen to an example
Select this and your Tablet will play a short demonstration of speech
synthesis. There are two Default settings.
Chapter 5 – Making a Connection
5.1 Connecting to the Internet via WiFi
5.2 Bluetooth
5.3 Flight Mode
Speech rate
Select this to set the speed at which the text is spoken. There are five
choices: Very Slow, Slow, Normal, Fast and Very Fast.
Language
Select this to set the language-specific voice for the spoken text. There
are six choices: American English, British English, French, German,
Italian and Spanish.
Always use my settings
5.1 Connecting to the Internet via WiFi
The Wireless & networks application makes the Internet connection for
your Tablet. It contains four modules: Airplane mode, WiFi, Bluetooth,
and VPN. Airplane mode, WiFi, Bluetooth and VPN are turned off by
default. To turn a function on, tap the application's Selected Button.
To open Connection Manager
Select this and the Tablet will make your settings the new default
settings, overriding any application settings.
A7 Internet Tablet – User Manual v1.2
Page 15
Wireless Connection Settings
5.2 Bluetooth
The advantages of a WiFi network include advanced network security,
enhanced reliability, network flexibility, better performance and shared
broadband and internet access.
Bluetooth is a short-range wireless communications technology. With
Bluetooth capabilities, devices can exchange information within a
distance of about 10 meters. Use Bluetooth to:
The internet is a gateway for knowledge, entertainment and business.
Practically every piece of information you want to know can be found
there. The Tablet features wireless connection for your internet needs.
Use WiFi when you are in range of a hotspot.
• Transfer files.
• Share Internet access with the other computer.
• Connect to Internet through a mobile phone modem function.
• Connect to a Bluetooth supported device such as a mouse, a keyboard
or a cordless earphone.
Before you start the setup, contact your network administrator to get the
name of the network (SSID), and any relevant security information, such
as WEP or WAP keys, and the network password.
• Share audio input or output with the other Bluetooth device.
The easiest way to connect to a WiFi network is to automatically scan
and connect to a nearby network.
Bluetooth Device Requirements
To automatically scan and connect to a network
1. Tap Wi-Fi directly or Wi-Fi settings to open Setting windows to
enable WiFi application. If WiFi is turned off, the Tablet will scan and
list all the available networks automatically.
• Connected to the printer or modem via serial service.
The A7 Tablet supports only A2DP Bluetooth devices with stereo audio
capability. Mono devices such as cell phone speakers and earpieces are
not compatible.
To Open the Bluetooth Application
2. Select a network then click Connect.
1. Tap the Home Menu, select settings> Wireless & networks
3. If the network has security, a popup window will appear. Enter the
password and select Done.
2. Be sure the Airplane mode is not selected.
4. After a WiFi connection is made, the Wireless signal will appear on
the Status Bar.
3. Tap the Bluetooth directly or Bluetooth settings to open the Setting
windows.
4. If the Bluetooth application has opened, the Bluetooth icon will appear
on the Status Bar.
To Search Remote Bluetooth Devices
1. After the Bluetooth application is open, Click Bluetooth settings>
Scan for Devices
2. You can modify your device name. Click Device Name and a
modifying window will pop up.
A7 Internet Tablet – User Manual v1.2
Page 16
3. All available devices will list below Scan for Devices. A scroll bar at
the far right will allow you to move down through a long list if
necessary. Select the device you want.
Chapter 6 – Browsing the Web
6.1 Accessing Websites
You use the internet for so many things: checking email, finding driving
directions, getting news, and instant messaging among others. Now you
can bring the internet with you almost anywhere you go. Use your Tablet
to make internet connections and the web browser opens the entire
online world for you. To access the internet, your Tablet must be setup
properly (see Chapter 5 Making a Connection).
The Tablet features Google as its internet browser.
To open the browser
From the Home Menu, select Browser.
To Transfer/Receive Files via Bluetooth
Click a scanned device, and then a popup window will appear: Bluetooth
pairing request, you need to key in a PIN to link the device, then click the
File Transfer button on the up right corner to open File Transfer window.
5.3 Airphone Mode
Enabling Airphone Mode ensures your safety when using your Tablet on
board an aircraft. All connection applications that might interfere with
aircraft operation are automatically disabled. When you power up your
Tablet, this module is turned off by default. To enable, tap Wireless &
network settings, then tap the mode button on the right. A check mark
will appear. To disable, tap the check mark.
6.1 Accessing Websites
You can open web pages, navigate through pages and do the same
things you can do with a desktop browser in the Google application.
To view a website
1. Enter the address of the website in the address field.
2. Tap Go.
Favorite
Type to open the
Bookmarks, Most
visited, History.
Address Field
Type the web
page address
here.
Small
Type to small
the windows.
A7 Internet Tablet – User Manual v1.2
Large
Type to large
the windows.
Page 17
To Add a bookmark
To edit a bookmarked web page
1. Tap
1. Tap
to open the bookmark window.
2. Tap Add to open the Add bookmark window:
3. Key in Name and Location
to open the bookmark window.
2. Press the bookmark you want to edit, holding it for about 2 seconds
until a popup windows opens.
4. Click OK to finish Adding or Click Cancel to exit the Adding window.
A7 Internet Tablet – User Manual v1.2
Page 18
Item
Description
Open
Tap to open the Web.
Open in new
window
Edit Bookmark
Tap to open the Web in a new window.
Tap to open the Edit bookmark window. You can
edit the Name and Location.
Add Shortcut
to Home
Tap to add the shortcut to the Home Screen.
Share Link
Tap to share link in one of 3 ways: Facebook,
Twidroid, and Messaging.
Copy link URL
Chapter 7 – Communication
7.1 Instant Messenger
7.2 E-mail
Tap to copy the link URL.
Your Tablet is
communication.
equipped
with
Instant
Messenger,
E-mail
for
Before you start online communication, your Tablet must have an active
internet connection (see Chapter 5 Connecting to the Interenet via WiFi
for detailed instructions on how to connect to the internet).
7.1 Instant Messenger
Instant messenger allows you to send and receive instant messages
online.
To open Messenger
Delete
Bookmark
Set as
Homepage
Tap to open the Delete window. You can select
OK to delete the bookmark or Cancel to exit the
Delete window.
Tap to set as the homepage.
From Mail menu, select Messaging.
1. Click New message to open the message window.
2. Select the receiving phone number where you want to send the
message.
3. Type in the message you wish to send.
4. Click Send.
7.2 E-mail
E-mail lets you enjoy the efficiency of staying in touch with personal and
business contacts. Your Tablet uses Gmail as the default e-mail client.
Gmail allows you to access email on your Tablet by an account from an
email provider or from your corporate domain server.
A7 Internet Tablet – User Manual v1.2
Page 19
To open Gmail application
Using Email
From Main Menu, select Email.
To use Gmail, you need to setup an account for the first time.
After setting up your email accounts, you can start sending and receiving
emails. There are some folders in the left of your email windows. You
could add or delete some favorite folders by press and move the folders.
To setup an account for the first time
You can configure Email for most accounts in just a few steps.
1. After opening Gmail, the set up mail window pop-up window will
appear.
2. Enter the email address and password, then tap Next button.
3. Then the Checking incoming server settings window will open. It
will take several seconds to finish this.
Displays the
folders. Tap the
folder name to
view the content
in the message
window. See
folder information
below.
4. If the settings are correct, your incoming email will appear. You can
enter Email by Internet also.
Message
windows. Displays
the email subject,
sender, date and
time sent. Tap the
subject to view the
email.
Some Folders:
A7 Internet Tablet – User Manual v1.2
•
Inbox. Received mails are sent to this folder.
•
Sent. Sent messages are saved in this folder.
•
Drafts. Composed mails that are not yet sent are saved in this
folder.
•
Trash. Deleted mails are saved in this foler.
•
Chart list. All chart contents are saved in this folder.
Page 20
To Send Email
Send
Save
Write email.
Tap to open
the Writing
Discard. Tap
to discard the
email.
Recipient
(type or add
from your
contact list)
Chapter 8 – Applications
8.1 Sound Recorder
8.2 Camera
8.3 e-book Reader
8.1 Sound Recorder
Subject
The Sound Recorder allows you to record your voice.
Content.
To record your sound
1. From the Main Menu, select Sound Recorder.
2. Tap
● to start recording a voice clip.
3. Tap ■ to stop recording.
The Sound recorder interface
A7 Internet Tablet – User Manual v1.2
Page 21
To save the recording
1. After tapping Stop, the system will automatically display the Save
dialogue box, and ask if you want to save the sound file.
8.2 Camera
Your Tablet comes with a built-in webcam and a camera to take photos
and video clips.
2. You can select Use this recording to save the sound or Discard to
delete the recording.
To activate the Camera
To play back a recording
From the Main Menu, select Camera.
1. From the Main Menu, select Music>Playlists>My recordings.
To Take a Picture
2. Choose the recording you want to play
3. Tap ► to begin playback.
4. Tap ■ to stop playback.
When you open the Camera application, the camera is set to photo
capture by default.
1. Focus your camera on the image you want to capture.
2. Tap
and hear a click as the picture is captured.
3. Tap the photo. There are four icons: Delete, Share, Set As, Done.
You can view video clips in the Gallery, and browse the photo by move
your finger in left and right direction.
Icon
Description
Delete: Tap to delete the photo or video.
Share: Tap to share the photo or video with others via
Bluetooth, Email, Facebook, Messaging or Twidroid.
Set As: Tap to open a window where you can choose Contact
icon or Wallpaper.
The Playback interface
Play: Tap to play video.
Done: Tap to open the camera application again.
A7 Internet Tablet – User Manual v1.2
Page 22
To Record a Video Clip
1. Slide the Button from bottom to
Top as pictured at right.
2. Tap
and hear the sound to
start recording.
3. Tap camera to finish the recording.
4. Tap the recording. There are four icons:
Delete, Share, Play, Done.
8. Once you start reading a book, it will show up on the home shelf in
the Current Reads list.
9. When viewing your collection of books, just start typing characters
using the keyboard to filter the list.
10. While reading a book, you can navigate forward and backward using
either filing or tap gestures (this can be reconfigured in the settings).
11. When you stop reading, the application will remember which page
you were reading and bring you right back to that page the next time
you open the book.
You can view video clips in the Gallery, and browse the photos by
moving your finger left and right across the screen.
12. When viewing your collection of books, rotate your Tablet to
landscape mode to switch to bookshelf view.
8.3 e-Book Reader
13. When you download a book, it is automatically assigned tags based
on its subjects (novel, science-fiction, etc.).
Your Tablet supports Aldiko as the default e-book client. From the Main
Menu, select Aldiko. When you open the Aldiko application, some tips
will pop-up automatically.
14. Some books include links embedded in the text. Select a link by long
pressing and holding the link. If the link is a webpage, it will open in
your browser. If the link points to another book, that book will
download and import into your library.
Some Tips:
1. The books you download are saved on your SD card in the eBooks
directory.
15. If you add a bookmark to a book and don't specify a title for that
bookmark, the current position in the book will be the default title (e.g
“14%”)
2. Pressing Book for a few seconds will bring up a context menu that
allows you to delete the book, edit the book details, etc.
16. The books you are currently reading are easily accessible from the
home screen in the Current Reads list.
3. While reading a book, you can adjust the brightness of the display
without leaving the page by swiping your finger along the left edge of
the screen (this can be reconfigured in the settings).
17. Books on the home shelf's Current Reads list will be removed from
the shelf when you finish them. You can also remove them manually
by pressing and holding the book and selecting the Remove from
reading list option.
4. When browsing online catalogs, books that you have already
downloaded will be highlighted in green.
5. Some online catalogs provide a search function to help you find what
you are looking for. Check the option menu when browsing a
catalog.
18. From any screen, you can quickly get back to the home screen by
selecting the Home menu option.
19. You can define your own Collections to help you arrange your books.
6. From any screen, you can quickly get back to the home screen by
selecting the Home menu option.
7. The search tool displays suggestions as you type. Click on a
suggested item to open the book.
A7 Internet Tablet – User Manual v1.2
Page 23
Aldiko home screen has 2 choices: Bookshelf and Download Books.
Chapter 9 – Tools
9.1 OI File Manager
9.2 Calculator
9.3 Alarm Clock
9.4 SD Card Manager & Tablet Storage
9.1 OI File Manager
The OI File Manager lets you browse and manage the contents of your
Tablet.
9.2 Calculator
Bookshelf
You can click the book on bookshelf to open the E-book you want to read
directly, or keep pressing the book you want until a window opens to give
you five options: Open this Book, Book Details, Change Cover Art,
Delete this Book, and Remove from Reading List.
Download Books
Before you down load books online, be sure your network connection is
available. Choose your book and go… it’s that easy!
A7 Internet Tablet – User Manual v1.2
You can do basic calculations using the Calculator in your Tablet. From
the Main Menu, select Calculator.
The Calculator Interface
You can move your finger left and right to select other mathematics.
Page 24
9.3 Alarm Clock
The Tablet comes equipped with an alarm clock. From the Main Menu,
select Alarm Clock.
9.4 SD Card Manager & Tablet Storage
The Alarm Clock interface
There are 5 clock face choices to choose from.
Check and manage micro SD card contents through the SD card &
Tablet storage.
To access SD Card & Tablet storage
From the Main Menu, select Setting>SD Card & Tablet storage.
The Alarm Clock display faces
A7 Internet Tablet – User Manual v1.2
Note: Format will delete all data in the Tablet and cannot be restored!
Page 25
Chapter 10 – System Setting
10.1 System Information
10.2 Volume Setting
10.3 Power Management
10.4 S3 System
10.5 Reboot the Tablet
10.6 System Restore
You can set system sound and display in Sound & display settings
windows.
Sound settings includes Silent mode, Media Volume, Notification
ringtone, Audible touch tones, Audible selection, Haptic feedback and
SD card notifications.
Display settings includes Orientation, Animation, Brightness, and
Screen timeout.
You can view your Tablet's system information such as: System updates,
Status, Battery use, Model number, Firmware version, Baseband version
and so on. To view system settings, from the Main Menu select
Settings>About Tablet.
10.1 System information
Check system information such as storage status, Model number, Kernel
version through the system info application.
10.2 Volume & Display Setting
By pressing the volume buttons. See Chapter 1 Top Bottom Panel for
the location of the Volume buttons. Tap and slide the sliders to adjust the
Volume.
A7 Internet Tablet – User Manual v1.2
The Sound & display settings interface
Page 26
10.3 Power Manager
10.4 S3 System
You can view the detail battery using information.
You can set your Tablet sleep to save power when it isn't working by
entering S3 system.
To access battery use detail
To enter S3 system
From the Main Menu, select Settings>About Tablet>Battery use.
Tap the power button on the left panel. The Tablet will enter S3 system
with power LED flickering.
To Exit S3 system
Tap the power button on the left panel. The Tablet will exit S3 system
and enter the normal working state.
10.5 Reboot the Tablet
If your Tablet stops responding, or responds slowly, or freezes, you can
reboot it.
Reboot Hole
Insert a paper clip into the reboot hole on the back of the Tablet to
activate the reboot switch.
The Battery use detail interface
Power Requirements:
•
Android System requires 75% power.
•
Display requires 12% power when working. Press and hold the
Display icon to access a pop-up a windows that shows the display
working time. To save power, you can reduce the screen brightness
and/or screen timeout.
•
Bluetooth requires 8% power when working. Press and hold the
Bluetooth icon to access a pop-up window that shows the Bluetooth
working time. Turn off Bluetooth when you aren't using it to save
power.
•
10.6 System Restore
If you encounter any problems with the Tablet system, you can reset
factory data. After the Recovery, the Tablet will be set to the factory
default status and all internal data might be lost. Therefore, please
backup all data before attempting a system restore.
To access system restore
From the Main Menu, select Settings> Privacy> Factory data reset.
Wi-Fi requires 7% power when working. Press and hold the WiFi
icon to access a popup window that shows Wi-Fi working time. Turn
off Wi-Fi when not using it or where it is not available to save power.
A7 Internet Tablet – User Manual v1.2
Page 27