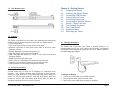
1
INTERNET TABLET
User Manual
version 1.5
www.elocitynow.com
ELOCITY A7+ INTERNET TABLET – TABLE OF CONTENTS
Safety Warnings & Notifications
Chapter 5 – Making a Connection
5.1 Wi-Fi ……………………………..……21
5.2 Bluetooth ………………………………22
5.3 VPN ……………………………...…….23
5.4 Airplane Mode ………………………..23
Chapter 1 – Introduction
1.1 Overview ……………………………....1
1.2 Front Panel …………………………….1
1.3 Right / Left Panel ……………………...1
1.4 Back Panel …………………………….1
1.5 Top / Bottom Panel ……………………2
1.6 Features ………………………………..2
1.7 Caring for the Tablet ………………….2
Chapter 6 – Browsing the Web
6.1 The Default Browser ………….……..23
6.2 Bookmarking Favorite Sites …………24
6.3 Browser History ………………………25
Chapter 7 – Communication
7.1 E-mail Setup ………………………….25
7.2 Multiple Accounts …………………….28
7.3 VoIP – Internet Phone Calling ………28
Chapter 2 – Getting Started
2.1 Charging the Battery …………………..2
2.2 Checking the Battery Status ………….3
2.3 Connecting USB Devices …………….3
2.4 Using a Micro SD card ………………..4
2.5 Connecting Earphones ………………..4
2.6 Connecting an External Monitor ……..5
2.7 Mouse / Finger Functions …………….5
2.8 The Software Keyboard ………………5
2.9 The Power Switch ……………………..6
2.10 Suspense Mode ……………………….6
2.11 Rebooting the Tablet ………………….6
Chapter 8 – Applications
8.1 App Stores …………………………….29
8.2 Installing Apps ………………………..29
8.3 Uninstalling Apps …………………….31
8.4 Managing Apps ………………………31
8.5 Developing Apps …………………….31
8.6 Notifications …………………………..31
8.7 Camera ………………………………..32
8.8 Sound Recorder ………………………34
8.9 Contact Manager …………………….34
8.10 OI File Manager ………………………35
8.11 Calculator ……………………………..36
8.12 Alarm Clock …………………………..36
8.13 Aldiko e-Book Reader ………………..37
Chapter 3 – Your Tablet
3.1 Home Screen / Desktop ………………7
3.2 Status Bar ………………………………7
3.3 Smart Keys …………………………….8
3.4 Smart Menu …………………………….8
Chapter 4 – Basic Settings
4.1 Display Options ………………………10
4.2 Volume & Sound ……………………..11
4.3 Customizing the Desktop ……………13
4.4 Date & Time …………………………..15
4.5 Language ……………………………..17
4.6 Location & Security …………………..18
4.7 Accounts & Sync ……………………..20
Chapter 10 – The Music Player
10.1 Player Features ………………………41
10.2 Supported Audio Formats …………..41
10.3 Importing Music ……………………...41
10.4 Playing Music …………………………43
10.5 Creating Playlists ………………….…43
Chapter 11 – System Management
11.1 System Information ……………….…45
11.2 Power Management ………………….45
11.3 Storage Management ………………..45
11.4 Backup & Restore …………………...46
11.5 Factory Data Reset ………………..…46
11.6 Search Function …………………..….47
11.7 Firmware Updates ……………….…..47
Chapter 12 – Support
12.1 Product Registration ………………….48
12.2 Technical Support ……………………48
12.3 Limited Warranty ……………………..48
12.4 Product Specifications ……………….49
Chapter 9 – The Gallery
9.1 Supported Photo & Video formats ….39
9.2 Viewing Photos ……………………….39
9.3 Editing Photos ………………………..40
9.4 Sharing Photos ……………………….40
9.5 Deleting Photos ………………………40
9.5 Viewing Video Clips ………………….41
A7+ Internet Tablet – User Manual v1.5 Page i Safety Instructions
Use the following safety guidelines to help protect yourself and your
Tablet.
General Warnings
• Do not operate your Tablet for long periods of time while it has direct
contact with your body or other surface that might completely cover the
bottom of the unit. This may cause overheating.
• Do not attempt to disassemble the Tablet yourself. Always follow
installation instructions closely.
• To avoid personal injury from electric shock or fire:
¾
¾
¾
Do not operate the Tablet close to water, for example, near the
bathtub, kitchen sink, laundry tub, wet basement, swimming pool,
or in the rain.
Do not connect or disconnect any cables or perform maintenance
or reconfiguration of this product during thundershower, tempest or
storm.
Do not push objects into the air vents or openings of your interior
components.
• If the battery pack leaks and the battery fluid comes into contact with
your eyes, do not rub them. Wash the eyes with clean running water
and immediately seek medical attention. Otherwise, eye injury may be
result.
• If battery fluid contacts your skin or clothing, immediately wash with
running water. Otherwise, skin inflammation can occur.
• Operate the Tablet at the recommended temperature range of +5˚C to
+35˚C (+41˚F to +95˚F). Store it at a temperature of -20˚C to +60˚C
(-4˚F to +140˚F).
Adapter Warnings
• Use only the AC adapter that is approved for use with this Tablet. Use
of another type of adapter may risk fire or explosion.
• Before you connect the Tablet to a power source, ensure that the
voltage rating of the AC adapter matches that of the available power
source:
¾
220 V/50 Hz in China.
¾
115 V/60 Hz in most of North and South America and some Far
Eastern countries such as South Korea and Taiwan.
¾
100 V/50 Hz in eastern Japan.
¾
100 V/60 Hz in western Japan.
¾
230 V/50 Hz in most of Europe, the Middle East, and the Far
East.
• If you use an extension cable with your AC adapter, ensure that the
total ampere rating of the products plugged into the extension cable
does not exceed the ampere rating of the extension cable.
• Do not cover the AC adapter with papers or other items that will reduce
cooling. Also, do not use the AC adapter while it is inside a carrying
case.
• To remove power from the Tablet, turn it off, remove the battery, and
disconnect the AC adapter from the electrical outlet.
Battery Pack Warning
• Do not carry the battery pack in your pocket, purse, or other container
where metal objects (such as car keys) could short-circuit the battery
terminals. The resulting current flow can cause extremely high
temperatures and may result in damage or injury from burns.
• There is a danger of explosion if the battery pack is incorrectly
replaced. Replace only with the same or equivalent type battery
recommended by the manufacturer.
See the installation instructions before connecting the power supply
(refer to “Charging the Battery” on page 5).
• Do not dispose of battery pack near a heat source. Heat can melt the
insulation and damage other safety features, possibly leading it to leak
acid, overheat, emit smoke, burst and /or ignite.
• When using your adapter, make sure to position it around objects so it
will not be cut or damaged.
• Do not immerse the battery pack in water or allow it to get wet. Its
protective features can be damaged, it can be charged with extremely
A7+ Internet Tablet – User Manual v1.5 Page ii high current and voltage, abnormal chemical reactions may occur,
possibly leading it to leak acid, overheat, emit smoke, burst and/or
ignite.
• Do not crush, disassemble, puncture, incinerate or short circuit
external contacts of the battery pack.
• Do not connect the positive (+) and negative (-) terminals with a metal
object such as wire. Short-circuiting may occur, leading the battery
pack to leak acid, overheat, emit smoke, burst and/or ignite.
• Do not use an apparently deformed or damaged battery pack, which
may leak acid, overheat, emit smoke, burst and/or ignite.
• If the battery pack leaks fluid, gives off a bad odor, generates heat, or
becomes discolored, immediately remove it from the Tablet or charger
and stop using it.
• Recycling & disposal:
¾
Do not dispose of your product which has the WEEE logo (shown
as right) on it or on its box in the general household waste bin.
¾
Be sure to dispose of all your products in the designed collection
facilities for recycling of such hazardous wastes.
¾
Separate collection and proper recovery of your WEEE at the time
of disposal will allow us to help conserving natural resources.
Moreover, proper recycling of WEEE will ensure safety of human
health and environment.
¾
For more information about WEEE disposal, recovery, and
collection points, please contact your local city center, household
waste disposal service, retailer or manufacturer of the equipment.
Battery Pack Disposal
• Dispose of the lithium ion battery packs only at approved disposal
sites. To locate an appropriate site, contact the solid waste disposal
officials where you live or look for a rechargeable battery recycling
website that lists disposal locations near you.
• Do not dispose of battery packs in a fire, throw them in a trash
receptacle, put them in a recycling bin not intended for their disposal,
or otherwise discard them in a manner that may result in their being
hazardous to the environment.
Environment
For human health and environment protection, please take notice of
below information.
WEEE NOTICE
• The Directive 2002/96/EC on Waste Electrical and Electronic
Equipment (WEEE) which entered into force on 13th February 2003, is
to ensure that WEEE are recycled using best available treatment,
recovery and recycling techniques in order to protect human health
and natural resources.
RoHS Compliance
This product is in compliance with Directive 2002/95/EC of the European
Parliament and of the Council of 27 January 2003, on the restriction of
the use of certain hazardous substances in electrical and electronic
equipment (RoHS) and its amendments.
According to Management Methods for Controlling Pollution Caused by
Electronic Products and Management Methods for Controlling Pollution
Caused by Electronic information Products, the information required by
SJ/T11364-2006 is listed in the following table.
Names and Contents of Toxic or Hazardous Substances or Elements
Contained in Products.
A7+ Internet Tablet – User Manual v1.5 Page iii Federal Communications Commission (FCC) Statement
You are cautioned that changes or modifications not expressly approved
by the party responsible for compliance could void the user’s authority to
operate the equipment.
This equipment has been tested and found to comply with the limits for a
Class B digital Tablet, pursuant to part 15 of the FCC rules. These limits
are designed to provide reasonable protection against harmful
interference in a residential installation. This equipment generates, uses
and can radiate radio frequency energy and, if not installed and used in
accordance with the instructions, may cause harmful interference to
radio communications. However, there is no guarantee that interference
will not occur in a particular installation. If this equipment does cause
harmful interference to radio or television reception, which can be
determined by turning the equipment off and on, the user is encouraged
to try to correct the interference by one or more of the following
measures:
Operating System Notice
This A7+ unit ships with the Android 2.2 "Froyo" operating system
preinstalled. The OS software cannot be upgraded.
Stream TV
Networks provides regular firmware updates on its website at
www.elocitynow.com. These firmware updates maximize the unit's
performance within the Android 2.2 Operating System.
• -Reorient or relocate the receiving antenna.
• -Increase the separation between the equipment and receiver.
• -Connect the equipment into an outlet on a circuit different from that to
which the receiver is connected.
• -Consult the dealer or an experienced radio/TV technician for help.
This Tablet complies with Part 15 of the FCC Rules. Operation is subject
to the following two conditions:
1. This Tablet may not cause harmful interference, and
Third Party Applications
Links to the Appoke, Getjar and Soc.io Mall stores have been preinstalled for your convenience as a means to access potential apps for
your tablet. Please note that these stores contain apps that have been
created for a wide variety of devices with different processing speeds
and screen sizes. While some popular apps like Angry Birds perform
perfectly, not all apps available in these stores have been optimized for
the A7+. There is no guarantee that any third party app will install
correctly, run with optimized performance, or function at all.
Support for Third Party Applications
We regret that our customer service center (phone and email/web
submissions) is unable to support questions related to third party
applications unless they have come pre-installed on the tablet.
For questions related to applications that were not pre-installed, there is
some limited information in the FAQ Section of our website. Just go to
http://www.elocitynow.com/support and click on the link near the top for
FAQ’s>A7+ FAQ’s. There are also a variety of online community forums
and user groups that may have answers.
2. This Tablet must accept any interference received, including
interference that may cause undesired operation of the Tablet.
FCC RF Radiation Exposure Statement:
This equipment complies with FCC radiation exposure limits set forth for
an uncontrolled environment. End users must follow the specific
operating instructions for satisfying RF exposure compliance. This
transmitter must not be co-located or operating in conjunction with any
other antenna or transmitter.
A7+ Internet Tablet – User Manual v1.5 Page iv 1.3 Right / Left Panel
Chapter 1 – Introduction
1.1
Overview
1.2
Front Panel
1.3
Right / Left Panel
1.4
Back Panel
1.5
Top / Bottom Panel
1.6
Features
1.7
Caring for the Tablet
1.1 Overview Congratulations on the purchase of your new advanced Tablet. You’re
about to discover so many things about your Tablet that will help you
maximize the experience of its usage. Read this chapter and the next
one to learn more about the functions of the Tablet, battery and SD card
installation, charging the battery, and more.
1.4 Back Panel
1.2 Front Panel
A7+ Internet Tablet – User Manual v1.5 Page 1 1.5 Top / Bottom Panel
Chapter 2 – Getting Started
2.1
Charging the Battery
2.2
Checking the Battery Status
2.3
Connecting USB Devices
2.4
Using a Micro SD card
2.5
Connecting Earphones
2.6
Connecting an External Monitor
2.7
Mouse / Finger Functions
2.8
The Software Keyboard
2.9
The Power Switch
2.10 Suspense Mode
2.11 Rebooting the Tablet
1.6 Features
The Tablet is optimized for rich internet and entertainment experiences
as well as daily business and productivity needs. The Tablet features:
• Touch screen panel
• Wi-Fi network connection for quick access to the web
• Bluetooth connection to send and receive data to and from other
Bluetooth devices
• Browser applications for web surfing on the go
• Chat with friends through the built-in webcam
• Email exchange that allows you to keep in touch with personal and
business contacts
• Media Player for music and movies
• Built-in camera to take digital pictures and record video clips
• Powerful tools and office programs for your business needs
• USB connection for connecting external flash memory
2.1 Charging the Battery
The battery that comes with your Tablet is partially charged. It is
recommended that you use your Tablet until the battery is completely
discharged before charging the battery the first time. Batteries perform
best after being fully charged.
1.7 Caring for the Tablet
A clean screen free of finger oils is necessary for responsive touch
operation. Use a cleaning solution made specifically for touch screens,
applying a small amount to a microfiber cloth and gently wiping the
screen. Do not use paper products, even soft facial tissue which can
scratch the screen, and never spray liquid directly onto the tablet as
overspray may seep into the DC input or IO ports.
To Charge the Battery
1. Connect the power cable to the Tablet as shown.
2. Plug the power cable into an electrical outlet.
3. Remove the power cable when charging is complete.
A7+ Internet Tablet – User Manual v1.5 Page 2 Battery Charging Time
2.3 Connecting USB Devices
It takes approximately 3.5 hours to fully charge the battery while the
power is off.
With the USB 2.0 host port, you can connect USB flash drives to your
Tablet to access external files. The Tablet supports drives up to 64GB in
size. Please note that some older USB 1.1 devices may have
compatibility issues.
2.2 Checking the Battery Status
There are two ways to check the battery level of your Tablet: the Power
LED Indicator and the Battery Icon on the Status Bar.
The Tablet supports flash memory drives only; it does not support other
mechanical drives and it does not support tethering to computers and
other devices.
Power LED Indicator
To Connect USB Devices
The Power LED Indicator indicates the charge level status of your
battery:
1. Locate the USB port on the left side of the Tablet (see “1.3 Right /
Left Panel”).
• When the Power LED indicator is orange, the battery is charging.
2. Open the port cover.
• When the Power LED indicator is green, the battery is fully charged.
3. Connect the USB device as shown below.
When the battery is fully charged, disconnect the charger from the outlet
first, then disconnect it from the Tablet.
Battery Icon on the Status Bar
While the Tablet is turned on, you can check the battery level icon
located on the Status Bar.
A green icon
indicates that the battery is completely charged.
While the battery is charging, the icon on the status bar starts scrolling
on the display. When the battery is fully charged, the icon stops scrolling
and indicates green with a flash logo.
The Tablet will have the following defined behaviors when the battery
reaches certain charge levels:
• 15% Charge Remaining – the Tablet will show a “Battery Low” warning
message when the charge drops to 15%. The message will also
appear at bootup or when the Tablet is reactivated after being put in
Sleep Mode if the AC charger is not plugged in and battery capacity is
less than 15%.
• 6% Charge Remaining – the Tablet will power off automatically.
To Remove an External Drive Connected to the USB
1. Before removing an external drive, you should unmount the drive.
2. Go to Settings>SD card & device storage>
3. Scroll down and tap Unmount USB0.
4. In the status bar at the top left, you will see a message saying
“External storage safe to remove”.
5. Remove the USB drive.
A7+ Internet Tablet – User Manual v1.5 Page 3 Plug and Play Devices
To Remove a Micro SD Card
A Plug and Play (PnP) device does not require installation or drivers after
being connected. Plug the device, then “play” or use it at once. You can
remove the PnP device from the Tablet at any time.
1. Before removing the Micro SD Card, you should unmount it.
2.4 Using a Micro SD Card
2. Go to Settings>SD card & device storage>
3. Tap Unmount SD card.
4. In the status bar at the top left, you will see a message saying
“External storage safe to remove”.
The Tablet supports Micro SD cards up to 32GB in size. The cards must
be formatted in FAT16 or FAT32. NTSF format is not supported. If the
Tablet does not recognize your card, please use a computer to check
and reformat the card if necessary.
5. Open the slot cover door. To remove the micro card, push it deeper
into the slot until you hear a click as the lock releases, then let go of
the card and it will come half way out of the slot.
For best performance, a class 4 card or higher is recommended.
6. Gently remove the card and close the slot cover door.
2.5 Connecting Earphones
To Insert a Micro SD Card
1. Open the protective cover door and slide it over to reveal the slot.
2. Insert the card – metal contacts in first, facing the back – into the
small slot closest to the back of the unit by pushing until it clicks into
place. Note that there is a larger non-functioning SIM Card slot that
has been capped inside.
The Tablet comes equipped with two 0.5-watt stereo speakers, but if you
wish to use headphones for private listening or powered external
speakers for greater volume, these devices can be plugged into the
3.5mm stereo headphone jack located at the top of the Tablet (see “1.5
Top / Bottom Panel”).
3. Close the card cover door.
4. The Tablet will automatically detect the card. On the left side of the
status bar on top, you will see the message “Preparing external
storage” followed by the addition of the SD Card icon when the card
is ready to access.
A7+ Internet Tablet – User Manual v1.5 Page 4 Mouse/Finger Functions:
2.6 Connecting an External Monitor
Even though the screen resolution of the Tablet is 1024x600, the Tablet
is capable of playing back true 1080p HD video through the HDMI output
to an external monitor.
1. Locate the HDMI port on the left side of the Tablet (see “1.3 Right /
Left Panel”).
2. Plug one end of a standard full-size HDMI cable into the Tablet and
the other into the HDMI input port of the external monitor.
3. Note: The HDMI connection overrides the Tablet’s audio output, so
you will see picture on both the Tablet and external monitor, but you
will only hear audio on the external monitor. The Tablet’s speakers
and headphone jack will not produce sound when the HDMI cable is
plugged in.
Finger
Single-tap
Tap and hold
Drag
Flick
Function
Click or single-tap to select or run an item.
Press and hold for more than 3 seconds to
display the Pop-up menu.
Drag an item to move it.
Flick the pen across the screen in a particular
direction to scroll up, down, left, or right.
2.8 The Software Keyboard
The Tablet has a software QWERTY keyboard for inputting text. Whether
you are surfing the web, writing an email, or using any other app, just tap
on any field requiring data entry and the keyboard will appear. Type in
the desired text, then tap the “Go” button at the top right or the bottom
right to complete your entry.
In situations where there are consecutive data fields, the “Go” button at
the top may “Next” instead and will take you from one field to the next
until all fields have been completed.
2.7 Mouse/Finger Functions
The capacitive touch screen allows you to navigate the Tablet with your
fingers. The table to the right lists common movements and their
corresponding functions.
A7+ Internet Tablet – User Manual v1.5 Page 5 2.9 The Power Switch
2.10 Suspense Mode
The Power Switch is located on the left side
panel of the Tablet. It is used to power on/off
the Tablet.
To conserve battery power, your Tablet will automatically enter
Suspense Mode if there is no activity for a defined period of time (see 4.1
Display Options to see how to change Screen Timeout). Some users
prefer a very short timeout of one minute while others may prefer a long
timeout of 30 minutes or even never if they operate the Tablet on AC
power and are not concerned about battery life. The A7+ gives you
several options.
Power Button behaviors
System
Status
Power off
Power on
Suspend
Action
Result
Long press
(2 seconds)
Turns on the power
Short press
Enters Suspense
Mode
Long press
(2 seconds)
Shows power menu
Press once
Resume from
Suspense Mode
When the Tablet enters Suspense Mode (Screen Timeout), the screen
goes dark and the unit appears to be turned off except for the power light
which slowly flashes green.
Putting the Tablet into Suspense Mode
If you want to put the Tablet to “sleep” without waiting for the automatic
Screen Timeout, you can manually put the Tablet in Suspense Mode by
giving the power button a short press. The screen will immediately go
dark.
To unlock the Tablet
After pressing the power button to turn on the Tablet, move the lock as
indicated to enter the system. Just slide the lock up in the direction of the
arrow as pictured below.
Waking the Tablet from Suspense Mode
Unlike a laptop or desktop computer, you cannot “wake up” the unit by
tapping the screen, moving a mouse or typing on the keyboard.
To reactivate the Tablet, give the power button a short press. The screen
will light up within 2-3 seconds. The Tablet will be locked, so you will
need to slide the green lock up as described in the left column of this
page. If your Tablet goes into Suspense Mode too quickly, you can
adjust the Screen Timeout as described in Chapter 4.1.
2.11 Rebooting the Tablet
In the event that the Tablet becomes unresponsive, it is possible to
reboot the unit. Locate the Reboot Key hole on the back of the Tablet
(see “1.4 Back Panel”) and insert a paper clip or other thin object into the
small hole. Press the button inside until you feel a click and the Tablet
screen goes black and initiates the bootup process.
A7+ Internet Tablet – User Manual v1.5 Page 6 Chapter 3 – Your Tablet
3.1 Home Screen / Desktop
3.2 Status Bar
3.3 Smart Keys
3.4 Smart Menu
3.2 Status Bar
The Status Bar appears as a thin white band across the top of the Tablet
Screen. A variety of small icons indicates relevant information at a
glance: current time, alarm clock, battery status, Wi-Fi status, Bluetooth
Status and more.
Icons
Description
3.1 Home Screen / Desktop
Indicates a Micro SD Card is installed
The Home Screen consists of 5 Desktop Pages that can be customized
with shortcuts for applications and web pages you use most often. Swipe
your finger left or right across the screen to scroll from one desktop page
to another.
Indicates a USB Flash Drive is connected
Scroll Bar
Tap the left/right arrows to
scroll through the Main Toolbar.
Status Bar
Displays key status
Indicates that Bluetooth is turned on
information
Indicates that Wi-Fi is turned on
Indicates battery status: more green denotes more power
Indicates that Alarm clock is set
7:10 PM
The Scroll Bar indicates which of the 5 desktop screens you are currently
viewing. The Status Bar above the Scroll Bar displays status information
as described in Chapter 3.2. By default, tapping the Home Smart Key as
described in Chapter 3.3 will return you to Deskop Page 3.
Indicates current time of day
You can pull down the Status Bar like a window shade, making it full
screen to reveal details about certain items, then swipe it back up top
until it becomes a small white bar again.
A7+ Internet Tablet – User Manual v1.5 Page 7 3.3 Smart Keys
3.4 Smart Menu
The Smart Keys are located on the black bezel, just to the right side of
the front Tablet screen.
The Smart Menu is located at the right edge of the Tablet Screen and
consists of 5 quick keys that link to the most often-used features:
Smart Menu
Tap to access
Smart Keys
The most often-used
Tap to access
Categories – music
additional menus,
Player, gallery,
go back to a
Main apps listing,
previous screen,
Web browser
or to escape to
And email
the Home Screen
any time
1.
There are 3 Smart Keys as below:
Icons
Tap this to open the Music Player.
This versatile player organizes music by Artists, Albums, Songs,
Playlists, and Now Playing (see Chapter 11 for details).
Description
Back: Tap to go back to the previous screen or
web page (if browsing the internet)
Home: Tap to go back to the Main Desktop Page (3)
Menu: Tap to bring up the additional menu options
(varies from application to application)
1
A7+ Internet Tablet – User Manual v1.5 Page 8 2.
Tap this to open the Gallery.
4. Tap this to open the Web Browser. You can watch videos, browse pictures or take photos by pressing the
camera icon on the top right corner as shown below.
You can browse the web by typing in the web address at the top of the
screen (see Chapter 6 for details).
3.
Tap this to display the Master List of Apps.
You can browse the list and choose the app you need by tapping the
icon.
5.
Tap this to open the Email utility.
Set up your email when you first log in by following a few simple
on-screen instructions (see Chapter 11 for details)..
A7+ Internet Tablet – User Manual v1.5 Page 9 2. Launch Settings>Display>Brightness and adjust the slider bar.
Chapter 4 – Basic Settings
4.1 Display Options
4.2 Volume & Sound
4.3 Customizing the Desktop
4.4 Date & Time
4.5 Language
4.6 Location & Security
4.7 Accounts & Sync
4.1 Display Options
The A7+ offers easy flexibility in setting the screen brightness level,
animation options and screen timeout settings.
Setting the Brightness Level
Changing the Screen Timeout Setting
To set your preferences for how quickly the Tablet goes into Suspense
Mode (Screen Timeout), launch Settings>Display>Screen timeout and
make your selection from the popup menu as shown below.
There are two ways to set the brightness level of your Tablet:
1. Slide the Status Bar down from the top of the screen to reveal the
brightness slider bar. Adjust it to the desired level or tap the check
box to turn on/off the auto-brightness function.
In this submenu you will see a wide variety of choices. A green radio
button on the right indicates the Tablet’s current setting. If you want to
make a change, just tap your selection and the screen will change back
to the previous menu to indicate that your selection has been selected.
A7+ Internet Tablet – User Manual v1.5 Page 10 Changing the Animation Preferences
4.2 Volume & Sound
To set your preferences for what animations are displayed on the Tablet,
launch Settings>Display>Animation and make your selection from the
popup menu as shown below.
The Tablet has user-defined audio settings that include ringtones, silent
mode (vibrate), and separate volume options for media, alarm and
notifications. To access these settings, launch Settings>Sound.
Screen Auto-Rotate
The Tablet can auto-rotate the image on your screen depending on
whether you are holding the Tablet in a vertical (portrait) or horizontal
(landscape) position. To turn the feature on or off, slide the Status Bar
down from the top of the screen to reveal the check box for Auto-rotate
screen. If the box has a green check mark, the feature is turned on. Tap
the box again to toggle the feature off if desired.
Adjusting the Volume
There are two ways to adjust the volume. To adjust the master volume or
to mute the Tablet entirely, slide the Status Bar down from the top of the
screen to reveal the volume slider bar. Adjust it to the desired level or tap
the check box to mute all sound.
A7+ Internet Tablet – User Manual v1.5 Page 11 To adjust separate volume levels for media, alarm and notifications
separately, launch Settings>Sound>Volume. In the popup menu as
shown below, set the sliders to the desired levels.
Notification Ringtones
Although the Tablet is not a phone, you can select a ringtone to be used
for audible notifications. Launch Settings>Sound>Notification ringtone
and make your selection.
Selecting Silent Mode
To put the Tablet into Silent mode, launch Settings>Sound and tap the
check box as shown below.
Additional Audio/Vibration Settings
In Settings>Sound you also have the opportunity to have the Tablet
make sounds or vibrate while you use it.
A7+ Internet Tablet – User Manual v1.5 Page 12 4.3 Customizing the Desktop
The Tablet desktop is fully customizable, allowing you to select the
desktop wallpaper and add shortcuts for widgets, folders and apps.
2. As shown below, the Select wallpaper from menu will pop up,
allowing you to choose the source of your new wallpaper: Gallery (for
images you have imported), Live wallpapers (for animated
background that are attractive but consume more battery power) or
Wallpaper (for non-moving pre-loaded images).
Selecting the Desktop Wallpaper
The background image – the Desktop Wallpaper – may be selected from
pre-loaded images and animations or it may be an original photo or
image imported through the Gallery. To change the desktop wallpaper:
1. Tap and hold a blank spot on the Home Screen to bring up the Add
to Home screen popup menu, then select Wallpapers.
Choose Gallery if you have your own image you want to use.
Note: You can also access this menu by tapping the Menu Smart Key
(bottom button on the black bezel) and then tapping the Wallpaper button
as shown below.
If you want to select an animated background, there are several Live
wallpapers to choose from, as shown below. Tap on the wallpaper you
want to select and you will see a preview of the new background. If you
like it, press the Set wallpaper button at the bottom. If you don’t’ like it,
press the Back Smart Key on the black bezel to return to the menu of
choices.
Note: Live wallpapers use more battery power than static wallpapers.
A7+ Internet Tablet – User Manual v1.5 Page 13 If you want to select a static background, choose Wallpapers from the
Select wallpaper from menu and you will see a variety of still images to
choose from. Move the scroll through the bar near the bottom until the
image you want is shown big at the top. Press the Set wallpaper button
at the bottom to make your selection.
Organizing and Removing Shortcuts
If you want to organize the shortcuts on a page, you can rearrange them
easily. Tap the icon you want to move, pressing with a long push until the
icon enlarges. Once it does, you can drag it to any available spot on the
page. Drop it where you want it.
The Smart Menu on the right is replaced with a trash can when you drag
shortcuts, so if you want to delete one, just drop it in the trash. When the
app and trash can turn red, just let go and it’s gone. There is no need to
empty the trash, as Android does not hold files there for later retrieval.
Adding Shortcuts
To make it quicker to use the apps you like best, it is possible to add
shortcuts to the 5 desktop pages.
1. Go to the desktop page where you want to add the shortcut.
2.
Tap this to display the Master List of Apps.
3. Locate the app you want to create a shortcut for, then push and
HOLD the icon until it “pushes through” to the desktop page.
Adding Widgets
You can also add Widgets to your desktop pages:
1. Tap and hold a blank spot on the Home Screen to bring up the Add
to Home screen popup menu, then select Widgets
A7+ Internet Tablet – User Manual v1.5 Page 14 2. Tap on the widget you want, and it will be added to the desktop.
2. Tap the kind of folder you want, and it will be added to the desktop.
Adding Folders
To help you stay organized, you can also add Folders to your desktop
pages:
1. Tap and hold a blank spot on the Home Screen to bring up the Add
to Home screen popup menu, then select Folders
4.4 Date and Time
To Open the Date and Time Application
Launch Settings>Date and time to see the master menu. Here you can
set the time, time zone, time format and date format.
A7+ Internet Tablet – User Manual v1.5 Page 15 To Set the Time
If you would like to have the time automatically updated, go to
Settings>Time and date. You must select your time zone, but the time
zone selector will be greyed out unless you uncheck the box for
Automatic at the top. If there is a green check, tap the box to uncheck it.
Then tap Select time zone and scroll through the list to find your time
zone.
To manually set the time, make sure the box for Automatic is not
checked, then tap Set time. A popup window allows you to increase or
decrease the hours and minutes and select AM/PM. Tap the +/- buttons
to adjust the time as desired, then tap Set.
Displays the hour. Use the +/‐ to change, or tap the hour to open the built‐in keyboard to key in the hour directly.
Displays AM/PM. Click the button to change directly.
Displays the minute. Use the +/‐ to change, or tap the minute to open the built‐in keyboard to key in the minute directly.
Setting the Time Format
From the main Time and date menu, you can choose whether or not to
view the time in 24-hour format. If the box is unchecked, 1:00 PM will
show as 1:00 PM. If the box is checked the time will show as 13:00.
Once you have selected your time zone, tap the Automatic box at the top
and the time will automatically update.
A7+ Internet Tablet – User Manual v1.5 Page 16 To Set the Date
4.5 Language
Launch Settings>Time and date>Set date to access the adjustable
popup window. Using the +/- buttons, you can adjust the month, day and
year as desired, then tap Set.
The Tablet has a default language of English, but there are more than 20
additional languages to choose from. If you would like to change the
language, launch Settings>Language and keyboard>Select language.
Displays the year. Use the +/‐ to change the year, or tap to open the built‐in keyboard to key in the year directly.
Displays the month. Use the +/‐ to change the month, or tap to open the built‐in keyboard to key in the month directly.
Displays the date. Use the +/‐ to change the date, or tap to open the built‐in keyboard to key in the date directly.
Setting the Date Format
Tap the language you want and all menus will instantly adapt.
From the main Time and date menu, tap Select date format to choose
from three different date formats.
Changing the Android Keyboard
The Android keyboard has certain customizable features that can be
accessed at Settings>Language & Keyboard>Android keyboard. Here
you can toggle on/of the following 6 items:
• Vibrate on keypress – Choose this and the Tablet will vibrate when the
keyboard is pressed.
• Sound on keypress – Choose this and the Tablet will make a sound
when the keyboard is pressed.
• Auto-capitalization – Choose this to engage the Tablet’s Auto-
capitalization function.
• Quick fixes – Choose this and the Tablet will correct commonly-typed
mistakes.
• Show suggestions – Choose this and the Tablet will display suggested
words while you are typing.
• Auto-Complete – Choose this and you can use the spacebar to
automatically insert a highlighted word suggested by the Tablet.
A7+ Internet Tablet – User Manual v1.5 Page 17 User Dictionary
My Location
Launch Settings>Language & Keyboard>User dictionary to access your
user-defined dictionary. When you open it the first time, there are no
words in it. To add words, tap the Menu Smart Key on the black bezel
and an Add button will appear at the bottom of the screen. Tap Add to
get in Add to dictionary field as shown below. Type in the word you want
to add, then select OK to save the addition.
From the main Location & security menu, tap Use wireless networks to
find your location by Wi-Fi and/or mobile networks or to see your location
in applications (such as Maps) using wireless networks. Use the check
box to toggle this feature on/off.
Security Options – Locking your Tablet
You can protect your Tablet from unauthorized use in 3 different ways: a
pattern lock, a PIN requirement or logon password. Launch
Settings>Location & security>Set up screen lock.
4.6 Location & Security
Launch Settings>Location & security to access the choices for protecting
your Tablet from unauthorized use and for using a wireless network to
pinpoint your location.
Setting a Screen Lock Pattern
To create a personal screen unlock pattern:
1. Launch Settings>Location & security>Set up screen lock>Pattern.
2. On the next screen, watch while an example pattern is drawn.
A7+ Internet Tablet – User Manual v1.5 Page 18 2. Enter a PIN number with at least 4 numbers, then tap OK at the
bottom.
3. Draw your own personal unlock pattern. Do not tap the dots; you
must drag your finger from one to the next so that you are drawing
one long line that passes through at least 4 dots.
3. Enter your PIN number again to confirm it, then tap OK.
4. If you are not happy with the pattern, tap Retry on the left and draw
again. If you like the pattern, tap Continue on the left.
Creating a Password
5. Redraw your pattern, then tap Confirm on the left.
To create a Logon Password:
1. Launch Settings>Location & security>Set up screen lock>Password.
You can change your pattern any time you are logged in, but if you forget
your pattern, the only solution will be to do a factory data reset, erasing
all your data and settings. Draw something you will remember!
2. Enter a password with at least 4 characters, then tap OK.
Setting a PIN
3. Enter your password again to confirm it, then tap OK.
To create a PIN requirement:
1. Launch Settings>Location & security>Set up screen lock>PIN.
Visible Passwords
If you would like to see your passwords and PIN numbers on screen
when you are entering them, there is an option to enable Visible
Passwords.
Launch Launch Settings>Location & security and tap the check box next
to Visible Passwords. A green check in the box means the feature is
enabled and you will be able to see your passwords. If the box is not
checked, password entry will appear as a series of dots to prevent others
nearby from seeing and possibly stealing your codes.
A7+ Internet Tablet – User Manual v1.5 Page 19 Credential Storage
Background Data
Your Tablet allows applications to access secure certificates and other
credentials. To enable this, you must enter a password (at least 8
characters). Enter the password twice for confirmation, then tap OK.
The Tablet is set with a default that allows applications to sync data in
the background while you are engaged in other activities.
By tapping the check box next to Use secure credentials, you activate
this feature. You can install encrypted certificates from an SD card and
set or change the credential storage password.
Tap the check box next to Background data if you want to disable this
feature. Disabling background data extends battery life and lowers data
use, but some applications may still use the background data
connection.
Auto-Sync
Applications can sync data automatically with your Tablet if the box next
to Auto-sync is checked.
You can Add accounts by tapping the button at the bottom.
You can clear credential storage of all contents and reset its password
by selecting Clear Storage.
4.7 Accounts & Sync
You can sync/send/and receive data at any time by setting general sync
applications. Launch Settings>Accounts & sync to access the main Sync
menu.
A7+ Internet Tablet – User Manual v1.5 Page 20 Wireless Connection Settings
Chapter 5 – Making a Connection
5.1 Wi-Fi
5.2 Bluetooth
5.3 VPN
5.4 Airplane Mode
The internet is a gateway for knowledge, entertainment and business.
Practically every piece of information you want to know can be found
there. The Tablet features wireless connection for your internet needs.
Use Wi-Fi when you are in range of a hotspot.
Before you start the setup, contact your network administrator to get the
name of the network (SSID), and any relevant security information, such
as WEP or WAP keys, and the network password.
The Wireless & networks application makes the Internet connection for
your Tablet. It contains four modules: Wi-Fi, Bluetooth, VPN and Airplane
mode. All are turned off by default. To turn a function on, launch
Settings>Wireless & networks, then tap the check box to the right of the
desired function.
The easiest way to connect to a Wi-Fi network is to automatically scan
and connect to a nearby network.
To Automatically Scan and Connect to a Network
1. Launch Settings>Wireless & networks and tap Wi-Fi settings to open
the Wi-Fi settings menu.
2. Tap Wi-Fi at the top to turn it on. The Tablet will begin an auto-scan
to determine available networks within range, listing them in order of
signal strength and showing security details for each network.
5.1 Wi-Fi
The Tablet comes equipped with a built-in 802.11b/g wireless receiver.
The advantages of a Wi-Fi network include advanced network security,
enhanced reliability, network flexibility, better performance and shared
broadband and internet access.
Note: the Tablet does not support 802.11n. If your Wi-Fi signal comes
from a “wireless N-only” router, the Tablet may perform poorly or may
have no Wi-Fi functionality at all.
3. Select the network you wish to connect to.
4. If the network has security, a popup window will appear. Tap the
data field to bring up the keyboard, enter the password, tap Done
and then tap Connect.
A7+ Internet Tablet – User Manual v1.5 Page 21 5. After a Wi-Fi connection is made, the Wireless signal will appear on
the Status Bar and the network status will indicate Connected.
not support printers, scanners, bar code readers or most other peripheral
devices even though the Tablet will detect and “pair” with such devices.
The necessary “connection” can only be made with proper drivers. Until
hardware manufacturers of these devices create the necessary drivers to
support both Android and the Tegra 2 processor, these devices will not
successfully connect.
Opening the Bluetooth Application
1. Launch Settings>Wireless & networks and tap Bluetooth settings to
open the Bluetooth settings menu. Note: You can only access this
menu if the Airplane mode box is not checked.
2. Tap Bluetooth at the top to turn it on. The Tablet will begin an autoscan to determine available devices within range, listing them at the
bottom of the screen. A scroll bar at the far right will allow you to
move down through a long list if necessary.
5.2 Bluetooth
Bluetooth is a short-range wireless communications technology. With
Bluetooth capabilities, devices can exchange information within a
distance of about 10 meters. Bluetooth is commonly used to:
• Transfer files.
3. If the Tablet does not automatically scan, tap Scan for devices to
start the search.
4. Select the device you want to pair and connect with. A popup
window will appear: Bluetooth pairing request, you need to key in a
PIN to link the device.
• Share Internet access with the other computer.
• Connect to Internet through a mobile phone modem function.
• Connect to a Bluetooth supported device such as a mouse, a keyboard
or a cordless earphone.
• Share audio input or output with the other Bluetooth device.
• Connected to the printer or modem via serial service.
Bluetooth Device Requirements
The A7+ Tablet officially supports only A2DP Bluetooth devices with
stereo audio capability. Mono devices such as cell phone speakers and
earpieces are not compatible.
Important Note: The A7+ does have limited Bluetooth compatibility with
certain Mac computers and other assorted peripheral devices, but it does
5. When Bluetooth is turned on, the Bluetooth icon will appear on the
Status Bar.
Giving Your Tablet a Device Name
Tap Device name to bring up the keyboard so you can create the
equipment ID of your choice.
A7+ Internet Tablet – User Manual v1.5 Page 22 5.3 VPN
Launch Settings>Wireless & networks and tap VPN settings to set up
and manage Virtual Private Networks (VPN’s). Tap Add VPN to add a
PPTP, L2TP, L2TP/IPSec PSK or L2TP/IPSec CRT network.
Chapter 6 – Browsing the Web
6.1 The Default Browser
6.2 Bookmarking Favorite Sites
6.3 Browser History
Use your Tablet to make internet connections and the web browser
opens the entire online world for you. To access the internet, your Tablet
must be setup properly (see Chapter 5 Making a Connection).
6.1 The Default Browser
5.4 Airplane Mode
Airplane mode ensures your safety when using the Tablet on an aircraft.
All connection applications that might interfere with aircraft operation are
automatically disabled. There are two ways to enable Airplane mode:
1. Launch Settings>Wireless & networks, then tap Airplane mode at the
top. A green check in the box confirms your selection.
Although there are several third party web browsing apps available like
Dolphin and Opera, the A7+ comes equipped with the Android default
browser and is ready to surf the web right out of the box.
Visiting a Website
1. Establish a Wi-Fi connection (confirm that there is a Wi-Fi symbol on
the right side of the Status Bar).
2. Tap to open the Web Browser. 3. The browser will automatically open to you Home Page (Google.com
by default unless you change it). 2. You can also put the Tablet in Airplane mode by holding the power
button for 2 seconds, as you would normally do to turn off the unit.
Instead of selecting Power off, select Airplane mode.
4. Use the Google search engine to find your desired page, or type in
the URL address directly in the address bar. Often the address bar is
not visible unless you scroll up to the top of the page. A7+ Internet Tablet – User Manual v1.5 Page 23 5. Type the address of the site you want to visit, then tap Go. It’s that
simple. With the Tegra 2 process and Flash 10.3 pre-installed, you’ll
reach your destination with lightning speed and watch web video with
quality normally reserved for high-end desktop computers. 4. Tap the Add button, then edit the top data field in the popup screen
to name the page whatever you like.
Pinch & Zoom The Tablet features a Pinch & Zoom technology that allows you to zoom
into a website or photo by touching two fingers to the screen and sliding
them apart from each other. To zoom out, touch two fingers to the screen
and slide them closer together. When you are zooming, you will see +/buttons that give you another way to zoom in and out.
5. Tap OK and the site will now appear in the list of bookmarked pages.
By tapping the Menu Smart Key on the black bezel, you can open a
menu at the bottom of the screen and choose List View instead of
Thumbnails if you prefer to see your bookmarks that way.
Editing a Bookmark & Setting Your Home Page
1. Tap
to open the bookmark window.
2. Press and hold the bookmark you want to edit for about 2
seconds until a popup windows opens.
6.2 Bookmarking Favorite Sites
3. From this menu, you can edit the bookmark, add a shortcut to
the desktop, share it (via Facebook, Bluetooth or Twitter) delete
it or make it your home page.
Bookmarking your favorite web pages is very easy:
1. Navigate to the page you want to bookmark.
2. Tap the bookmark button in the upper right corner.
3. The page you are on will show up in the top left corner underneath a
white star and the word Add.
A7+ Internet Tablet – User Manual v1.5 Page 24 6.2 Browser History
Most Visited Pages
The Browser keep track of the pages you visit most often, and you can
easily review and return to a popular page even if you have not
bookmarked it.
1. Tap
Chapter 7 – Communication
7.1 E-mail Setup
7.2 Multiple Accounts
7.3 VoIP – Internet Phone Calling
to open the bookmark window.
2. Tap the Most visited tab at the top of the screen to display a list of
pages you’ve been to most often.
Before you start online communication, your Tablet must have an active
internet connection (see Chapter 5 Making a Connection).
7.1 Email Setup
E-mail lets you enjoy the efficiency of staying in touch with personal and
business contacts. Your Tablet allows you to access webmail from large
providers like Gmail or your own POP and IMAP domain servers.
To Setup an Email Account for the First Time
3. Tap on any page in the list and you’ll be directed to that page right
away.
You can configure Email for most accounts in just a few steps. Before
you start, make sure you have the following information from your
internet service provider:
History
¾
Type of Incoming Server (POP3, IMAP or Exchange)
¾
Incoming server name (i.e. pop.att.yahoo.com) as well as any
specific Port # and SSL encryption info
¾
Username
¾
Password
¾
Outgoing SMTP server name (i.e. smtp.att.yahoo.com) as well as
any specific Port #, SSL encryption info and whether they require
sign-in for outgoing mail
The History tool is a nice feature because it tracks page visits
chronologically, not by how often you visit a page. History lists are
grouped by days and weeks:
Once you have the above information, you are ready to set up the
account.
1. On the Smart Menu at the right side of the screen, Tap
the Email utility.
to open
A7+ Internet Tablet – User Manual v1.5 Page 25 2. Enter your email address and password in the data fields, then press
the Manual setup button at the lower left.
Security pull-down menu:
Mail deletion pull-down menu:
3. Choose POP3, IMAP or Exchange depending on the type of mail
server you have.
4. Enter the information for your incoming mail server – username,
password, server name, port # (if applicable), security type (if
applicable), and how often you want the mail removed from the
server.
Note that the Security type and Mail deletion selections are pull-down
menus with specific choices:
5. When all the fields have been filled in correctly, tap the Next button
at the bottom right. The Tablet will automatically test a connection to
the Incoming Mail server and Check incoming server settings. If you
have entered any wrong information, or if the Tablet is unable to
reach the mail server, an error message will appear and you will be
asked to Edit details:
If the settings check is good, you will be taken to the next setup screen to
enter information about your Outgoing mail server.
A7+ Internet Tablet – User Manual v1.5 Page 26 6. Enter the information for your outgoing mail server – server name,
port # (if applicable), security type (if applicable), username, and
password. Make sure you check/uncheck the box depending on
whether or not your outgoing server requires sign-in.
8. If the outgoing server check is good, you will be asked how often the
Tablet should check for mail, whether this account should be the
default account, and whether you want notifications when new mail
arrives. Make your selections, then tap Next at the bottom.
7. After you enter all the required information, tap the Next button at the
bottom right. As it did with the Incoming Server, the Tablet will
automatically test a connection to the Outgoing Mail server and
Check outgoing server settings.
9. Give your mail account a name (i.e. Bob Work) and enter the sender
name as you want it listed for your outgoing mail. Tap Done at the
bottom. That’s it. You’ll be taken to your Inbox.
10. By tapping the Menu Smart Key on the black bezel, you can call up
the popup menu with choices for composing and navigation. Tap the
Accounts button to go from the Inbox up one level to Accounts.
If you have entered any wrong information, or if the Tablet is unable to
reach the mail server, an error message will appear and you will be
asked to Edit details.
A7+ Internet Tablet – User Manual v1.5 Page 27 At the account level, you can see your main Inbox as well as a
Combined Inbox (but since there is only a single account, the contents
are the same).
To add an additional email account, go to the Combined Inbox, then tap
the Menu Smart Key on the black bezel to get the popup menu at the
bottom. Select Add account.
From here you can compose, refresh or add additional accounts.
Follow all steps in Chapter 7.1. When you are done, you can see both
email accounts. You can check the Inboxes individually, or you can
check one combined Inbox.
Tapping on the Inbox shows individual emails. Tap on the mail to read,
reply, reply all or delete. When the mail is open, you can tap the Menu
Smart Key on the black bezel to open an additional submenu with more
choices like Forward and Mark as Unread.
7.3 VoIP – Internet Phone Calling
The A7+ comes with the Fring application pre-installed for internet phone
calling with video and voice. The app is fully supported by the Tablet and
is free to use as long as you set up a user account and communicate
with others who have a Fring account.
At the time of this release, the Skype application for Android has partial
compatibility with the A7+ but does not support video calls. The voiceonly app can be downloaded from the eLocity website at
www.elocitynow.com/freeapps.
7.2 Multiple Accounts
If you would like to monitor more than one email account with your
Tablet, it is possible to set up multiple accounts, though only one account
can be the default for sending outbound mail.
A7+ Internet Tablet – User Manual v1.5 Page 28 1. Launch Settings>Applications.
Chapter 8 – Applications
8.1 App Stores
8.2 Installing Apps
8.3 Uninstalling Apps
8.4 Managing Apps
8.5 Notifications
8.6 Camera
8.7 Sound Recorder
8.8 Contact Manager
8.9 OI File Manager
8.10 Calculator
8.11 Alarm Clock
8.12 Aldiko e-Book Reader
2. Tap Unknown sources at the top to allow installation of non-Android
Market apps.
3. This will bring up a warning screen informing you that third party
apps may make your Tablet vulnerable to attack. This screen is
normal, so click OK.
8.1 App Stores
The A7+ comes with 3 app stores pre-installed to give you maximum
access to thousands of Android apps worldwide: Apppoke, Getjar and
Soc.io Mall.
Google has not certified the A7+ for Android Market due to the Tablet’s
large screen combined with its Android 2.2 operating system. At this time
the Tablet does not have access to Android Market.
4. Once the Unknown sources check box has a green check, you are
ready to load up on apps.
8.2 Installing Apps
Applications can be installed 3 different ways: downloaded directly, sideloaded via USB or loaded from a Micro SD card.
Important note: Android 2.2 has a default setting that only allows apps to
be installed through Android Market. In order to install apps from outside
sources, you will have to enable Unknown Sources:
A7+ Internet Tablet – User Manual v1.5 Page 29 Downloading Applications Directly to the Tablet
You can access thousands of apps at Stores like Appoke, Getjar, Soc.io
Mall and other third party sites.
1. Use the web browser to visit the download location, then find the
appropriate download link. In the upper left corner of the Status Bar
you will see an animated down arrow icon indicating the download is
in progress. When the arrow stops its animation and becomes solid
white, the download is complete.
5. After installing the app, you will get a confirmation screen that the
Application was installed. Tap the Open button at the bottom if you
want to launch the app or tap Done if you do not.
6. A shortcut icon for the new app will automatically be added to the
main apps page.
Side-Loading Applications from a USB Flash Drive
You can also use your PC or Mac to download Android apps:
1. Download the APK file to your computer, then copy it to a USB flash
drive. APK files are generally fairly small so there should not be a
space issue.
2. Insert the flash drive into the side port of the A7+ tablet.
3. Launch the OI File Manager application (see Chapter 8.10).
2. Slide the Status Bar down to reveal the brightness, volume and
Notifications. You will see a notification for the application you have
just downloaded. Note: All Android apps have an APK file type.
4. Open the sdcard/usb0-disk0 folder and tap on the application you
wish to install. Complete the installation process the same as direct
download.
Loading Applications from a Micro SD Card
3. Under Notification, tap the APK file you just downloaded to begin the
installation process. Note: If you clear the notifications before
installing the app, you can use the OI File Manager to locate the file
in the sdcard/download folder (see Chapter 8.10).
1. Download the APK file to your computer, then copy it to a Micro SD
card.
4. After you tap the APK file, the Application Manager will ask if you
want to Install the app or Cancel. Choose Install.
3. Launch the OI File Manager application (see Chapter 8.10).
2. Insert the Micro SD card into the top slot of the A7+ tablet.
4. Open the sdcard-disk0 folder and tap on the application you wish to
install. Complete the installation process the same as direct
download.
A7+ Internet Tablet – User Manual v1.5 Page 30 8.3 Uninstalling Apps
8.5 Developing Apps
Removing applications can be done very simply in just a few steps:
The A7+ has some system tools to assist app developers. Launch
Settings>Applications>Development to access the following screen:
1. Launch Settings>Applications>Manage applications.
2. A list of currently installed applications will be displayed. Select the
application you wish to uninstall and tap it.
3. Application info will be displayed, including program version and disk
usage. Near the top right there is a large button for Uninstall. Touch
the Uninstall button.
8.6 Notifications
The Tablet will notify you when certain key activities occur. Depending
on your preferences, there may be a chime or other audio cue when new
notifications post, or there may only be the addition of icons on the left
side of the Status Bar.
4. The tablet will ask if you want to confirm the uninstall command.
Choose OK. In a few seconds the app will be removed and the
shortcut deleted from your main apps page. There is no trash to
empty.
8.4 Managing Apps
With the Application Manager you can easily check several application
statistics such as file size, data use, caching and application
permissions. Just launch Settings>Applications>Manage applications to
open a list of installed apps.
Tap on an app you want to review. From the detailed screen you can
Force stop an app that has failed, clear data it has stored, or uninstall the
app altogether as described above.
By clicking the tabs at the top, you can view Downloaded Apps, Currently
Running Apps, or All Apps.
In the example above, there are notifications that a file has been
uploaded, a Micro SD card is installed, a USB flash drive is connected,
and a third party camera application is enabled in the background.
To view your notifications, just pull down the Status Bar like a window
shade and scroll to the bottom. Some will be Ongoing, like the Micro SD
card, USB drive and camera app in this example, but some will be onetime notifications that can be acted upon and cleared.
One-time notifications include uploads and downloads, application
update announcements from app developers if an app you have
previously installed has a new version available, etc.
Tapping on the one-time notifications will initiate a corresponding action
(installation of a downloaded APK file, etc.) and will clear the item from
your Notification screen.
A7+ Internet Tablet – User Manual v1.5 Page 31 8.7 Camera
Still Photo Settings
Your Tablet comes with a built-in front-facing webcam for taking photos
and recording video clips. There is no rear-facing camera on the A7+.
The Camera app offers several settings that can be adjusted for still
photo capture, including exposure, picture quality, white balance and
zoom. On the right edge of the picture area are 3 small icons that open
groups of options to select from:
Activating the Camera
There are three ways to activate the camera:
1. Tap the Gallery key on the Smart Menu
icon in the upper right corner.
then tap the camera
2. Tap the Master Apps key on the Smart Menu
shortcut for the Camera app.
then tap the
3. Add a shortcut to the desktop for the Camera app (see Chapter 4.3)
Taking a Still Photo
When you open the Camera application, the camera is set to photo
capture by default. You can toggle between photo mode and video mode
by sliding the selector switch on the right.
1. Focus your camera on the image you want to capture.
2. Tap the shutter icon
at the bottom right and hear a click as the
picture is captured.
3. The photo is automatically added to the Gallery for viewing (see
Chapter 9).
A7+ Internet Tablet – User Manual v1.5 Page 32 Recording a Video Clip
Video Camera Settings
Toggle the camera from photo mode to video mode by sliding the
selector switch on the right.
The Camera app offers some settings that can be adjusted for video
recording, including color effect, white balance and video quality. On the
right edge of the picture area are 3 small icons that open groups of
options to select from:
1. Focus your camera on the subject you want to record.
2. Tap the record button
at the bottom right to begin recording.
3. A red dot appears in the lower left corner to indicate you are in
record mode, and a running clock lets you know how long you have
been recording.
4. Press the record button again to stop recording.
5. The video is automatically added to the Gallery for viewing (see
Chapter 9).
Note: It is possible to jump immediately from the Camera to the Gallery
by tapping the small box in the upper right corner.
A7+ Internet Tablet – User Manual v1.5 Page 33 8.8 Sound Recorder
To Play Back a Recording
The Sound Recorder allows you to record your voice.
Use the Music Player app for playback of recorded voice clips (see
Chapter 10).
Activating the Sound Recorder
8.9 Contact Manager
There are two ways to activate the sound recorder:
1. Tap the Master Apps key on the Smart Menu
shortcut for the Sound Recorder app.
then tap the
2. Add a shortcut to the desktop for the Sound Recorder app (see
Chapter 4.3)
The Contact Manager allows you to keep a virtual rolodex with you
wherever you go.
Activating the Contacts App
Recording Audio
1. Tap the Master Apps key on the Smart Menu
shortcut for the Contacts app.
1. Tap ● to start recording.
2. Add a shortcut to the desktop for the Contacts app (see Chapter 4.3)
2. A large running clock in the upper right corner lets you know how
long you have been recording.
Adding Contacts
3. Tap ■ to stop recording.
then tap the
When you first launch the Contacts app, there are no contacts to display.
Tap the Menu Smart Key on the black bezel to bring up a menu at the
bottom of the screen that will allow you to search, add new contacts
manually, set up accounts for organizing and/or syncing, and
importing/exporting.
To Save the Recording
1. After tapping the Stop button, a popup menu will give you the option
to save or delete the recording
2. You can listen to the recording by tapping the Play ► button in order
to determine if you want to save or delete it.
3. Select Use this recording to save the recording or Discard to delete
it.
A7+ Internet Tablet – User Manual v1.5 Page 34 Press the New Contact button to open the data entry screen for a new
contact. Tapping the data fields will open the virtual keyboard so you can
type in the information.
8.10 OI File Manager
The OI File Manager works like Windows Explorer or the Mac Finder,
allowing you to you browse and manage the contents of your Tablet.
Activating the File Manager
There are two ways to activate the File Manger:
3. Tap the Master Apps key on the Smart Menu
shortcut for the File Manager app.
then tap the
4. Add a shortcut to the desktop for the File Manager (see Chapter 4.3)
The icons at the top left of the screen indicate the levels of depth you are
viewing. In the example below, the view shows that you are looking at
the internal SD memory, which is indicated by the blue SD card icon.
As you tap each folder and go deeper, additional icons are added to the
line at the top.
You can set define sort options in the Contact Manager as well as
display options like first name first or last name first.
A7+ Internet Tablet – User Manual v1.5 Page 35 The standard functions are the same as any basic calculator, but if you
swipe the screen to the right, there are additional mathematical options.
Managing Files
You can use the File Manager to Send, Move, Copy, Rename or Delete
files. Just browse through your folders until the file you want to work with,
then press and hold the file until a popup menu appears.
8.12 Alarm Clock
The File Manager is optimized for working with individual files but has
limitations for working with folders. For comprehensive file management,
third party apps like ES File Explorer are recommended.
8.11 Calculator
You can do basic calculations using the Calculator in your Tablet. Tap
the Master Apps key on the Smart Menu
then tap the shortcut for the
Calculator app.
The Tablet comes equipped with an alarm clock. Tap the Master Apps
key on the Smart Menu
then tap the shortcut for the Clock app.
A digital clock will be displayed on screen, with a menu along the bottom.
The menu button on the left shows an icon of an alarm clock. Tap this
button to display a screen that shows current alarm settings and gives
the option to Add Alarm.
A7+ Internet Tablet – User Manual v1.5 Page 36 Tap Add Alarm to input additional alarm settings. After inputting the hour
and minute settings for the new alarm, you will see a screen that allows
you to set On/Off, Repeat, Ringtone and Vibrate functions.
The Bookshelf
The bookshelf gives a visual representation of the books in your library
(you can also get a list view by tapping the home icon in the left corner
and selecting List View). The shelf can be filtered by the following
criteria: all books by title, all books by author, all books by rating, Recent
Reads (in progress), recently added books, and Recently Finished
books.
To delete an alarm setting, tap the alarm setting you wish to delete, then
tap the delete button in the lower right to confirm.
8.13 Aldiko e-Book Reader
¾
Pressing a picture of a Book on your bookshelf for two seconds will
open a popup menu that allows you to open the book, view the book
details or delete it.
Downloading Books
¾
Before you attempt to download books online, be sure a wi-fi connection
is available. Choose your book and go… it’s that easy!
The books you are currently reading are easily accessible from the
home screen in the Recent Reads list.
¾
¾
The books you download are saved on your internal SD card in the
eBooks directory.
Once you start reading a book, it will automatically be added to the
Recent Reads list.
¾
¾
When browsing online catalogs, books that you have already
downloaded will have a green button indicating that the title has
already been downloaded.
Books on the Recent Reads list will be removed from the list when you
finish them. You can also remove them manually by pressing and
holding the book and selecting the Remove from Recent list option.
Reading
¾
Some online catalogs provide a search function to help you find what
you are looking for. Check the option menu when browsing a catalog.
Just tap a book on the bookshelf to open it and you’re on your way.
¾
When you download a book, it is automatically assigned tags based on
its subjects (novel, science-fiction, etc.).
Your Tablet supports Aldiko as the default e-book client. From the Main
Menu, select Aldiko to launch the e-reader.
¾
There are two ways to move back and forth through the pages: you
can swipe your finger left and right across the page, or you can tap the
left edge of the screen to go back or the right edge to go forward.
A7+ Internet Tablet – User Manual v1.5 Page 37 ¾
When you stop reading, the application will remember which page you
were reading and bring you right back to that page the next time you
open the book.
¾
Some books include links embedded in the text. Select a link by long
pressing and holding the link. If the link is a webpage, it will open in
your browser. If the link points to another book, that book will download
and import into your library.
¾
From any screen, you can quickly get back to the home screen by
selecting the Home menu option.
Night and Day Settings
For your convenience, you can set the display to appear black text on
white pages, or reversed white text on black background. To toggle
between the day and night modes, just tap the Menu Smart Key on the
black bezel to bring up the submenu at the bottom of the page, then tap
the Day/Night button.
Bookmarks
To help you navigate, it is possible to place bookmarks, and jump back
and forth within a book. Tap the Menu Smart Key on the black bezel to
bring up the submenu at the bottom of the page, the tap the Go To
button as shown below left. This will open a popup menu that allows you
to view the table of contents, existing bookmarks, or add a new
bookmark. You can also move forward or backward by tapping on the
slider bar just above the submenu.
Adjusting the Brightness
While reading a book, you can adjust the brightness of the display
without leaving the page by swiping your finger up or down along the left
edge of the screen (this can be reconfigured in the settings).
You can also adjust the brightness by tapping the Menu Smart Key on
the black bezel to open the popup menu at the bottom of the screen,
then selecting Settings>Brightness.
A7+ Internet Tablet – User Manual v1.5 Page 38 Additional Settings
As shown below, another button on the popup submenu at the bottom
allows you to adjust several additional settings: font size, margins,
colors, text alignment, line spacing and screen timeout.
Chapter 9 – The Gallery
9.1 Supported Photo & Video Formats
9.2 Viewing Photos
9.3 Editing Photos
9.4 Sharing Photos
9.4 Deleting Photos
9.5 Viewing Video Clips
9.1 Supported Photo & Video Formats
The Tablet supports 4 photo file formats: JPEG, BMP, GIF and PNG.
Supported video formats include:
¾ Decode: H.264 MP, H.263 and VC-1
¾ Encode/Decode: MPEG4 SP and H.264 BP
¾ A/V Containers: Quicktime, AVI, MP4, MP3, 3GP, ASF and OGA
9.2 Viewing Photos
To make the submenu at the bottom disappear, just tap the Menu Smart
Key on the black bezel again.
On the Smart Menu at the right side of the screen, Tap
to open the
Gallery utility. The Tablet will display groups of photos and videos
available on the internal memory, USB drive (if attached) and external
Micro SD card (if inserted into the top slot). If your photos are grouped
into folders, the folders will display as separate groups:
A7+ Internet Tablet – User Manual v1.5 Page 39 Tapping on a folder group will open that folder to display thumbnails of
the individual photos:
9.4 Sharing Photos
The bottom menu has an option to Share your photos. Facebook,
Bluetooth and Twitter are default options, and if you have set up your
Tablet with an email account (see Chapter 7) there is also an option to
share via email.
If your folder has more photos than can be displayed on the screen at
one time, there is a scroll bar at the bottom that will allow you to move
through the thumbnails to find the image you want to look at.
Tap the thumbnail of the photo you want to view and the image will open
up full screen. You can use your fingers to pinch/zoom or tap the photo
to display the -/+ magnifier buttons. Tapping the photo also brings up a
menu at the bottom that will allow you to play a slide show of images.
9.5 Deleting Photos
Use the bottom menu to delete photos as desired.
9.3 Editing Photos
Next to the Slideshow button at the bottom is a Menu button that gives
options to Share, Delete and Edit photos. This menu can also be
accessed at any time by tapping the Menu Smart Key on the black bezel.
A7+ Internet Tablet – User Manual v1.5 Page 40 9.6 Viewing Video Clips
When you open the Gallery, you will see a folder of Video Clips in
addition to the various photo folders. Tap the Video Clips folder to
display thumbnail images of the video clips.
Chapter 10 – The Music Player
10.1 Player Features
10.2 Supported Audio Formats
10.3 Importing Music
10.4 Playing Music
10.5 Creating Playlists
10.1 Player Features
Tap the thumbnail of the video you wish to play and the clip will begin to
play with the player controls overlaid for a few seconds. The player
control panel consists of volume at the top; reverse, play/pause and
forward shuttle control buttons under the video, and a playback progress
bar beneath the main shuttle control buttons.
The player control panel auto-hides after a few seconds but can be made
visible at any time by tapping the video. You can jump to any part of the
video by dragging the progress bar or tapping on the playback progress
bar at the desired play point.
The Tablet’s built-in Music Player is a robust application with playlist,
shuffle and repeat functionality as well as the ability to sort songs by
Title, Artist or Album for catalogue, reference and playback purposes.
The player control panel has buttons for previous, reverse, play/pause,
forward and next. There is also a playback progress bar at the bottom.
10.2 Supported Audio Formats
The Tablet is capable of playing many different types of audio files.
Supported audio formats include:
¾ Decode: AMR-NB, AMR-WB, eAAC+, BSAC, MP3, Ogg Vorbis, WMA 10
¾ Encode/Decode: PCM, AAC LC, AAC+
¾ A/V Containers: Quicktime, AVI, MP4, MP3, 3GP, ASF and OGA
10.3 Importing Music
On the Smart Menu at the right side of the screen, Tap
to open the
Music Player. There is no need to import music into the player because
the Tablet automatically recognizes compatible audio tracks available on
the internal memory, USB drive (if attached) and external Micro SD card
(if inserted into the top slot).
As shown below on the next page, the list of audio tracks will be
compiled into a list sorted by Artist. You can see the Artist name and
number of albums. The number of albums has an expansion arrow that
reveals Album titles and number of songs.
A7+ Internet Tablet – User Manual v1.5 Page 41 In addition to viewing songs by Artist, you can view them by Album:
Tapping the Album title above reveals a detailed screen that shows the
song titles and running times for all tracks within the album.
Or you can view them by Song Title:
Tapping a song title above reveals a detailed screen that shows the song
titles and running times for all tracks within the album.
A7+ Internet Tablet – User Manual v1.5 Page 42 10.4 Playing Music
Once you navigate down to an individual song, you will see the player
control panel. Just tap on the play button to begin. Note: you can also
automatically launch the Music Player and begin playing a song by
tapping it in OI File Manager or other explorer app that allows you to
access individual files.
If you don’t want to navigate down to a specific song, you can tap the
Menu Smart Key on the black bezel to reveal a menu at the bottom that
allows for Party Shuffle or Shuffle All. Just tap either of those buttons to
begin playing immediately. A list view of all songs will appear, along with
a green play indicator to let you know what track is playing.
At the top of the screen are 3 buttons the give you options for Song List,
Shuffle and Repeat/Repeat All.
10.5 Creating Playlists
Icons
Description
Once you have navigated down to a song title, you can tap the Menu
Smart Key on the black bezel to bring up a menu with additional choices.
Tap the Add to Playlist button at the bottom center.
List view of songs
Shuffle Play - toggle between choices:
Grey = Shuffle Play is off
Green = Shuffle Play is on
Repeat Play - toggle between choices:
Grey = Repeat Play is off
Green with Two Arrows = Repeat Play is on
Green with Arrows and O = Repeat current song only
A7+ Internet Tablet – User Manual v1.5 Page 43 If you are building a new playlist, tap New; if you are adding to a playlist
you are currently building, tap Current Playlist.
Tap on the name of the playlist to reveal all songs that are included.
If you are creating a new playlist, give it a name.
Press and hold any of the song titles in the playlist to open a popup
menu that allows you to play, remove from playlist, or delete completely.
From this screen, you can tap the Menu Smart Key on the black bezel to
open a menu at the bottom that allows for Shuffle Play.
If you tap the Playlists tab, you will see your new Playlist added to the
list. The Recently Added list is always there; push and hold it to open a
popup menu that allows you to play the recent songs or to edit the time
duration that determines if a song is recent or older.
Press and hold your playlist and a popup menu will allow you to play, edit
or delete the playlist.
A7+ Internet Tablet – User Manual v1.5 Page 44 11.2 Power Management
Chapter 11 – System Management
11.1 System Information
11.2 Power Management
11.3 Storage Management
11.4 Backup & Restore
11.5 Factory Data Reset
11.6 Search Function
11.7 Firmware Updates
The Tablet has the following power requirements:
11.1 System Information
To view key system information, launch Settings>About device. There
you can access items such as System Updates, System Status, Battery
use, Model number, Firmware version, Serial Number and more.
•
Android System requires 75% power.
•
Display requires 12% power when working. Press and hold the
Display icon to access a pop-up a windows that shows the display
working time. To save power, you can reduce the screen brightness
and/or screen timeout.
•
Bluetooth requires 8% power when working. Press and hold the
Bluetooth icon to access a pop-up window that shows the Bluetooth
working time. Turn off Bluetooth when you aren't using it to save
power.
•
Wi-Fi requires 7% power when working. Press and hold the Wi-Fi
icon to access a popup window that shows Wi-Fi working time. Turn
off Wi-Fi when not using it or where it is not available to save power.
11.3 Storage Management
The Tablet has a utility that allows you to check and manage micro SD
card content storage.
To access SD Card & Tablet storage
Launch Settings>SD Card & device storage for a master screen that
shows Total space and available space on the internal and external
devices.
External
Micro SD Card
Storage Statistics
Internal Memory
Storage Statistics
(4 GB total – 2.44 GB
operating system =
1.56 GB available)
External USB
Storage Statistics
A7+ Internet Tablet – User Manual v1.5 Page 45 11.4 Backup & Restore
If you would like to backup or restore the data on your tablet, the
Backup/Restore utility can be accessed by launching Settings>Privacy>
Backup/restore settings and applications.
Backing up Your Tablet
To backup your Tablet, tap the top selection Backup settings and
applications.
The restore process will begin automatically and you will see a
notification that reads, “System is doing restore settings and applications
process. It may take a long time to finish. And will auto reboot when
process if done. Please wait.”
The backup procedure will start automatically and you will see a
notification that reads, “System is doing backup settings and applications
process. It may take a long time to finish. Please wait.” When the
backup is complete, you will see the name of the backup file and the
location where the file has been stored on the internal memory.
Restoring Your Tablet
To restore data from an automatic backup, launch Settings>Privacy>
Backup/restore settings and applications and tap Restore settings and
applications.
The Tablet will reboot when the restore is finished, taking you to the
initial unlock screen.
11.5 Factory Data Reset
In the event that your Tablet develops operating problems due to
software induced issues, it is possible to restore the Tablet to original
factory specifications and clear out any software conflicts or malware that
may have been introduced into the system while surfing the web or
installing third party applications.
The Factory Data Reset has been known to correct a wide variety of
software issues, but it is important to note that the procedure will delete
all data in the Tablet and the data cannot be restored.
To begin the procedure, launch Settings>Privacy>Factory data reset.
A list of available backups will appear. The numeric file name reveals the
date and time of the backup – year, month, day, hour, minute, second.
Tap on the backup you would like to restore.
A7+ Internet Tablet – User Manual v1.5 Page 46 A warning screen will inform you that all data will be erased. Tap the
Reset device button to continue.
Tap on Searchable items to determine which items shall be open to the
search:
A second warning asks you to confirm if you want to erase all of your
personal information. Tap the Erase everything button to continue. Note:
You can escape the reset procedure at any point by tapping the Previous
Smart Key on the black bezel.
A prompt will warn you that you must make sure the Tablet is plugged
into a working power outlet via the AC charger, regardless of how much
battery power remains. A battery failure during the reset process can
result in catastrophic system failure that can severely damage the Tablet.
Make sure the Tablet is plugged into the AC charger and follow the
prompts. The Tablet will reboot, re-installing the factory-loaded software
recovered from the main image file. When the reset is complete, the
Tablet will return to the main unlock screen.
11.6 Search Function
The Tablet offers the ability to search the web as well as a variety of
installed applications. To set the search options or initiate a search,
launch Settings>Search.
11.7 Firmware Updates
To correct issues or enhance performance and features, firmware
updates may be published from time to time on the company’s website.
Installation of upgraded firmware is not required but is recommended.
The updates are not “pushed” to the Tablet; you must check the
eLocitynow website periodically to make sure your firmware is current.
To determine the firmware version currently installed on your tablet, go to
Settings>About device and scroll to the bottom to see Build number. The
last 5 digits of the Build number indicate your current firmware version.
The Firmware Update for your A7+ Tablet must be downloaded to
your PC or Mac and copied to a MicroSD card or USB flash drive for
installation.
DO NOT RENAME THE FILE - THE TABLET WILL ONLY RECOGNIZE
THE NEW FIRMWARE IF THE FILENAME IS UPDATE.ZIP.
A7+ Internet Tablet – User Manual v1.5 Page 47 Note: Since the files stored in the Tablet may be deleted or overwritten
during the update process (including the pre-installed movie trailers),
please copy any files which you have stored in the Tablet before
updating.
Update Procedure
Chapter 12 – Support
12.1 Product Registration
12.2 Technical Support
12.3 Limited Warranty
12.4 Product Specifications
Please follow these directions carefully for a successful update:
¾
Download the Firmware Update ZIP file to your PC or Mac from the
eLocity website: http://www.elocitynow.com/support and click on the
link near the top for Downloads>A7+ Downloads.
¾
Copy the ZIP file from your PC or Mac to a MicroSD card or USB flash
drive (the “External Memory”). The file must be copied to the ROOT
DIRECTORY of the External Memory, so make sure you do not copy
the file into a subfolder.
¾
Do not rename the file – it must be called update.zip
¾
Insert the External Memory into the Micro Card slot or the USB port of
the A7+ Tablet. If you are using the USB drive for the update, make
sure the micro SD card slot is empty so that the USB will have priority.
12.2 Product Registration
Stream TV Networks strongly encourages you to register your Tablet for
most effective support, notification of firmware updates and other
benefits. Your information is never used for solicitation and never shared
with any third parties. You can register your Tablet at the company’s
website: http://www.elocitynow.com/registration
12.3 Technical Support
Stream TV Networks offers technical support for the A7+ Tablet via email
and telephone. See the company website for contact procedures and
information: http://www.elocitynow.com/support
¾
Plug the A7+ Tablet into an electrical outlet using the AC adaptor. A
low or dead battery during the update process can result in severe
software damage that may not be recoverable.
¾
Launch Settings>About device>System updates>Update device.
12.4 Limited Warranty
¾
Follow the on-screen prompts. The system will restart automatically in
update mode, then will restart when the update is complete.
¾
To confirm that your update has been correctly installed, open Settings
> About device. Scroll down to Build version and you should see a new
build number that matches the description on the website update page.
Your Tablet is covered by Stream TV Networks’ Limited Warranty for a
period of 90 days for commercial use or 1 year for personal use. Details
of the warranty can be found on the company’s website:
http://www.elocitynow.com/docs/warranty_details.pdf
A7+ Internet Tablet – User Manual v1.5 Page 48 12.4 Product Specifications
Model Number Form Factor & Case CPU Graphics Operating System Memory Storage LCD Display Touch Screen Audio Communication Camera Keyboard I/O Ports A7‐004 Tablet Type NVIDIA® Tegra™ II T‐250, 1~1.2GHz, 1MB L2 Cache NVIDIA® ULP GeForce® Android™ 2.2 Froyo 512MB On‐Board Memory, Supports 1.8V DDR2 667 MHz 4GB eMMC Module via HSMMC Interface for System Boot and Storage 7‐Inch WVGA (1024x600), 200 dpi, 262K Colors, LVDS I/F Brightness: Typ 400 Nits, 8 Scales, User Adjustable Panel Backlight Brightness is Adjusted Automatically by Ambient Light Sensor Capacitive Touch Panel 4 Point Multi‐Touch 1 x Built‐in Microphone 2 x 0.5 Watt Stereo Speakers 1 x 3.5mm Stereo Headphone Jack (Combined with Mic) WLAN – 802.11b/g Bluetooth® 2.1 – A2DP, AVRCP, BIP, OPP, FTP VPN – PPTP, L2TP, IP Sec SIP Module SDIO (Wi‐Fi) and UART (BT) Interface 1 Internal Antenna for Wi‐Fi and BT Front‐Facing 1.3MP CMOS Webcam via Parallel Interface Software Keyboard 1 x Standard USB 2.0 Host 1 x HDMI Output for 1080p True HD Viewing 1 x 3.5mm Headphone Out Audio Jack 1 x Micro SD card, Push‐Push Type DC‐in Connector Video Codecs Audio Codecs Audio/Video Containers Streaming Protocols Image Formats Applications: Internet Applications: Entertainment Applications: Personal Tools Sensors System Status Indicators Universal AC Adaptor Battery Dimensions Weight Decode: H.264 MP, H.263, VC‐1 Encode/Decode: MPEG4 SP, H.264 BP Decode: AMR‐NB, AMR‐WB, eAAC+, BSAC, MP3, Ogg Vorbis, WMA 10 Encode/Decode: PCM, AAC LC, AAC+ AVI, MP4, 3GP, ASF, MP3, OGA, QT RTP, RTSP JPEG, BMP, GIF, PNG Android Default Browser, Search Function Flash 10.3 Plug‐in Photo Gallery – Viewing, Rotation, Slideshow, Photo Album, Photo Editing Music Player – Play/Pause/Next/Previous/Time Slider/Shuffle/Repeat/Playlist, Sort Video Player – Play/Pause/Fast Forward/Rewind/Time Slider/Full Screen/Enlarge Camera – Photo Snapshot/Video Recording Contact – Add/Edit/Delete Contacts, Phone Number, Email Calculator – Basic and Advanced Alarm Clock E‐Book Reader – FBReaderJ Sound Recorder 3‐Axis Accelerometer Ambient Light Sensor (for adjusting LED backlight) Vibrator 1 Dual‐Color LED for Power Status: Green (Fully Charged or DC‐in) / Tangerine (Battery Low) / Orange (Charging) Output: 19V 1.57A 30W DC‐in Input: 100~240V 2‐Cell Li‐Polymer Battery Pack (3.7V x 1530mAh x 2) 8.2” (W) x 4.8” (H) x .5” (D) 1.02 lbs. A7+ Internet Tablet – User Manual v1.5 Page 49