1
RUIN & WESEN
MIDI COMMAND
User manual
Ruin & Wesen
c/o Odendahl Systemprogrammierung, Jägerstrasse 36 76227, Durlach, Germany
[email protected]
http://ruinwesen.com/
Ruin & Wesen Electronics
Midi Command
3
Introduction
3
Midi Command User Interface
4
Midi Command basic operation
5
Macro Knob
7
Midi Command settings
9
Page type submenu
10
Page settings menu
12
MID type page settings 13
Machinedrum type page settings (ECH, REV. EQ, DYN)
15
Macro Knob settings 17
MIDI Command Incoming MIDI Support
20
Using the MIDI Command to control Ableton Live
21
Midi Command Sysex Reference
24
Midi Command Schematics
29
Midi Command Documentation
2
Ruin & Wesen Electronics
Midi Command
Introduction
Thank you for choosing the Ruin & Wesen Midi Command. The Midi Command is a flexible MIDI controller designed to
be small and easy to use. It is especially designed for users of the Elektron Machinedrum synthesizer, as it can directly
control the parameters of it’s 4 effects. This document describes how to use the Midi Command to control other musical
gear, how to edit its settings, and how to control Ableton Live with the Midi Command. It also describes the SYSEX
commands supported by the device, and how to load new firmware on the device. Finally, the electronic hardware of the
Midi Command is described, allowing you to design your own firmware.
We provide a one-year warranty covering all malfunctions occuring from normal use. Damage caused by abusive
handling is not covered. Please contact us before returning a device for repair. Shipping to Ruin & Wesen is covered by
the customer, shipping from Ruin & Wesen is covered by Ruin & Wesen.
Midi Command Documentation
3
Ruin & Wesen Electronics
Midi Command User Interface
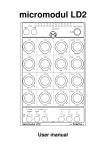
The Midi Command features a LCD display (1), 4 control encoders (2), a menu encoder (3) and a shift button (4). It also
has a MIDI IN connector (5), a MIDI OUT connector (6), a power supply connector (7), and a power indicator LED (8). The
4 control encoders are used to send MIDI control parameters, as well as to set values while editing the settings of the
MIDI Command. The menu encoder is used as a macro knob in normal operation (for more information see the section
Macro Knob). The shift button is used to access additional functions in order to switch pages, change patches, access
the editing functions and to set secondary settings.
5. MIDI IN
6. MIDI OUT
1. display
4. shift button
7. power connector
RUIN & WESEN
3. menu encoder
8. power led
2. control encoders
Midi Command User Interface
Midi Command Documentation
4
Ruin & Wesen Electronics
Midi Command basic operation
To use your Midi Command, hook up a device that you want to control by connecting the MIDI OUT port (6) of the Midi
Command to the MIDI IN port of the device you want to control. Power up the Midi Command by plugging in the power
supply into the power supply connector (7). The power indicator LED (8) will light up, and the display (1) will show the
company logo “RUIN AND WESEN”. After a short amount of time, the Midi Command will show the parameters values
for the first page of the first patch. The upper line of the display shows the parameter names, while the lower line shows
the current parameter value.
Parameter name
Parameter value
C01 C02 C03 C04
002 080 003 100
Turn encoders (press for bigger steps)
Changing parameters
You can adjust the parameters of the current page by turning the control encoders (2). Each parameter can go from 0 up
to 127. Pressing a control encoder and turning it will make the values increment or decrement faster (by an amount of 5
instead of 1). This is similar to the push-turn functionality of the Elektron machines. Double clicking a control encoder will
reset the value of the parameter to 0. Be careful not to turn the encoder while double-clicking it because this will cancel
the double-click. Turning the menu encoder (3) will activate the macro knob feature, which is describe in more detail in
the section Macro Knob.
Midi Command Documentation
5
Ruin & Wesen Electronics
EDIT PAGE 1
MIDI PAGE
Double-click encoder to reset parameter to 0
Resetting a parameter to 0
The Midi Command can store 8 patches, where each patch is made of 4 parameter pages. Each parameter page is a
grouping of 4 MIDI parameter that can be controlled using the 4 control encoders (2). To switch pages, press the shift
button (4) and hold it down, then press one of the control encoders (2). Be careful not to turn the control encoder while
turning it, as this will cancel the press. The display will display the number of the new page, as well as the page type, for
a short amount of time, and then show the parameter values of the new page. The control encoders now control the
values of the new page.
Page number
Page type
PAGE 2
MIDI PAGE
Hold shift down
Press encoder button
Switching pages
To switch the current patch, press the shift button (4) and turn the menu encoder (3). Be careful not to press the menu
encoder while turning it, as this will cancel the turn. The display will show the number of the newly loaded patch for a
short amount of time, as well as the number of the current page, and will then show the values of the parameters of the
Midi Command Documentation
6
Ruin & Wesen Electronics
new current patch. You can then adjust the parameters using the control encoders (2), and switch pages as described in
the paragraph above.
PAGE 2
LOADING PATCH 2
Page number
Patch number
Hold shift down
Turn menu encoder
Switching patches
The factory patches of the MIDI Command are described in the appendix “Factory patches”.
Macro Knob
Each parameter page features 4 parameters that can be directly controlled using the control encoders (2). In addition to
these 4 encoders, the Midi Command features a Macro Knob that is controlled by turning the menu encoder. The Macro
Knob allows you to modify the 4 page parameters by twisting a single knob. You can adjust the range inside which each
page parameter is modified by editing the Macro Knob settings (see the section Macro Knob Settings below). You can
set the lower boundary and upper boundary for each parameter independently. For example, you could configure the
Macro Knob to modify the first parameter from 30 to 60, the second parameter from 60 to 30, the third parameter from 0
to 127 and the fourth parameter from 127 to 0.
Midi Command Documentation
7
Ruin & Wesen Electronics
C01 C02 C03 C04
000 000 000 000
Turn macro knob (press for bigger steps)
Macro Knob
Turning the menu encoder (3) to set the Macro Knob to 0 will set the first parameter to 30, the second parameter to 60,
the third parameter to 0 and the fourth parameter to 127. Gradually turning the menu encoder to the right will change the
value of the first parameter from 30 to 60, the value of the second parameter from 60 to 30, the third parameter will
follow the Macro Knob exactly, and the fourth parameter will be the inverse of the Macro Knob value. You can also
double-click the menu encoder to set the Macro Knob to 0, thus resetting all the 4 parameters to a default value.
Using the Macro Knob, you can achieve drastic sound modifications at the twist of a single knob.
The Macro Knob can also be used to send two different relative CCs. This way, stepping through software menus or
other relative CC functions can easily be reached from each page. This is especially useful for scrolling through tracks in
scenes in a program like Ableton Live.
Midi Command Documentation
8
Ruin & Wesen Electronics
Midi Command settings
To edit the settings of the Midi Command, press the shift button (4) and hold it down, and while keeping it down, hold the
menu encoder (3) down. After approximately 1 second, the Midi Command will enter the settings menu. The settings
menu edits the settings of the current patch.
MENU
PAGE TYPES
Hold shift button
Press for 1 second to enter settings menu
Entering the Settings menu
To change the edited patch, hold the shift button (4) down and turn the menu encoder (3). The changes to the current
patch settings will not be saved when loading a new patch. To exit the settings menu without saving the settings, hold
PAGE 3
MIDI PAGE
Hold shift button
Double-click to leave settings menu without saving
Leaving the settings menu without saving
the shift button (4) down and double-click the menu encoder (3). The Midi Command will go back to the current page. To
exit the settings menu and save the settings, hold the shift button (4) down and press the menu encoder (3) for about 1
seconds. The Midi Command will save the modifications made to the current patch and go back to the current page.
Midi Command Documentation
9
Ruin & Wesen Electronics
SAVING SETTINGS
TO PATCH 1
Hold shift button
Press for 1 second to save the current settings
Saving the current settings
The settings menu is composed of a number of submenus which can be accessed by pressing the different encoders.
The following diagram shows how the submenus are organized.
Page type submenu
The Page Types menu is used to set the “type” of the 4 pages of the current patch. Each page can be of one of the
following types:
• MID Type: MIDI page type. The encoders send MIDI CC messages. The channel and number of the CC message can
be configured.
• ECH Type: Machinedrum DELAY page type. The encoders send SYSEX messages used to control the Delay effect of
the Elektron Machinedrum. The parameter of each encoder can be configured.
• REV Type: Machinedrum REVERB page type. The encoders send SYSEX messages used to control the Reverb effect
of the Elektron Machinedrum. The parameter of each encoder can be configured.
• EQ Type: Machinedrum EQUALIZER page type. The encoders send SYSEX messages used to control the Equalizer
effect of the Elektron Machinedrum. The parameter of each encoder can be configured.
• DYN Type: Machinedrum DYNAMIX page type. The encoders send SYSEX messages used to control the Compressor
effect of the Elektron Machinedrum. The parameter of each encoder can be configured.
Midi Command Documentation
10
Ruin & Wesen Electronics
PG1 PG2 PG3 PG4
ECH REV EQ MID
Turn control encoders to adjust page type
Changing page types
The type of each page can be adjusted by turning the corresponding control encoder (2). The new type will be displayed
on the display. Changing the type of a page will reset the parameters values to the default values. Be careful when
changing the types of a page (you can always cancel the change by holding shift down and double-clicking the menu
encoder to leave the Settings mode).
You can also activate or deactivate the display backlight while in the page type submenu. Hold the menu encoder down
PG1 PG2 PG3 PG4
MID MID MID MID
Hold for 1 second to activate backlight
Toggling the LED backlight
for 1 second to toggle the LED backlight.
Midi Command Documentation
11
Ruin & Wesen Electronics
Page settings menu
To edit the settings of an individual page, press the control encoder (2) corresponding to the page. The display will show
the settings for the selected page.
EDIT PAGE 1
MIDI PAGE
Click encoder to edit a page
Edit an individual page
To go back to the page type submenu, hold the shift button (4) down and press the menu encoder (3).
MENU
PAGE TYPES
Hold shift button
Press to return to page type menu
Return to page type menu
Midi Command Documentation
12
Ruin & Wesen Electronics
MID type page settings
MID type pages have two settings pages. The first page shows the name of the parameter on the first line of the display,
and the selected CC value on the second line. To change the CC value, turn the encoder corresponding to the
C01 C02 C03 C04
001 002 003 004
Parameter names
CC number
Turn encoder to adjust CC number
Edit MIDI page CC numbers
parameter. Be careful not to press the encoder as this will change the edited page.
Pressing the encoder corresponding to the selected page again will switch to the second MID type settings page.
EDIT PAGE 1 (2)
MIDI PAGE
Press page encoder a second time to enter second page
Editing second MIDI page
The second page shows the name of the parameter on the first line of the display, and the MIDI channel of the CC
message on the second line. To change the MIDI channel, turn the encoder of the corresponding parameter. Be carefu
not to press the encoder as this will change the edited page.
Midi Command Documentation
13
Ruin & Wesen Electronics
Parameter names
CC number
C01 C02 C03 C04
001 002 003 004
Turn encoder to adjust CC number
Edit MIDI page MIDI channels
To edit the name of a parameter, hold the shift button (4) and press the corresponding control encoder (2).
EDIT NAME 1
PAGE 1
Hold shift button
Press encoder to edit name
Edit MIDI parameter name
The name edit menu shows the number of the selected parameter on the first line and the name of the parameter on the
second line. Each name can have up to 4 characters. It is recommended to leave the last character empty to separate
the names of the parameters on the display. Turn the 4 control encoders (2) to edit the individual characters of the
Midi Command Documentation
14
Ruin & Wesen Electronics
EDIT NAME 1
C01
Name
Turn encoder to the name's letters
Edit MIDI parameter name
parameter name. Once the parameter name is edited, hold the shift button down and press the control encoder
corresponding to the edited parameter again to exit the name edit menu and return to the MID page settings menu. If
you want to edit another name, you can hold the shift button down and press the encoder corresponding to the
parameter you want to edit to go directly to another name edit menu.
Machinedrum type page settings (ECH, REV. EQ, DYN)
The machinedrum type page settings are much simpler than the MID type page settings. You can chose the selected
effect parameter for each encoder by turning the respective encoder.
FRQ FLF FLW LEV
Turn encoder to adjust the MD parameter number
Editing Machinedrum pages
The different parameters are:
• ECH page:
Midi Command Documentation
15
Ruin & Wesen Electronics
• TIM: delay time
• MOD: delay time modulation amount
• FRQ: delay time modulation frequency
• FB: delay feedback
• FLF: delay filter frequency
• FLW: delay filter width
• MON: stereo width parameter
• LEV: delay level
• REV page:
• DVL: delay send volume
• PRE: pre-delay time
• DEC: reverb decay time
• DMP: reverb damping amount
• HP: highpass frequency
• LP: lowpass frequency
• GAT: gate threshold
• LEV: reverb level
• EQ page:
• LP: low filter frequency
• LG: low frequency gain
• HP: high filter frequency
• HG: high frequency gain
• PF: bandpass filter frequency
• PG: bandpass filter gain
• PQ: bandpass filter resonance
• LEV: EQ level
• DYN page:
• ATK: compressor attack time
Midi Command Documentation
16
Ruin & Wesen Electronics
• REL: compressor release time
• THR: compressor threshold level
• RTO: compressor ratio
• KNE: compressor knee setting
• HP: compressor highpass filter frequency
• LEV: compressor output level
• MIX: dry/wet signal mix
Macro Knob settings
EDIT MACRO
PAGE 3
Press menu encoder while in menu edit to enter macro edit
Accessing the Macro edit page
To access the macro knob settings for one of the four pages, enter the page settings menu as described above, and
press the menu encoder (3).
Midi Command Documentation
17
Ruin & Wesen Electronics
030 060 000 127
060 030 127 000
Lower boundary
Upper boundary
Hold shift to access
upper boundaries
Turn encoder to adjust lower/upper boundaries
Editing macro boundaries
The display will show the number of the edited macro page, and will then show the macro knob settings menu. The
upper line displays the lower boundary for each of the 4 parameters, while the lower line displays the upper boundary for
each of the 4 parameters. To adjust the lower boundary of a parameter, turn the corresponding encoder. You can also
press-turn the corresponding encoder to adjust the lower boundary value by bigger steps. To adjust the upper boundary
of a parameter, hold the shift button (4) down and turn the corresponding encoder. While holding the shift button down,
you can also press-turn the corresponding encoder to adjust the upper boundary value by bigger steps.
Setting the same lower and upper boundary value will disable macro for this parameter (turning the macro knob won’t
affect the current value of the parameter).
Using the Macro Knob to send relative CCs
Setting a lower boundary of 128 for the first encoder activates the relative CC mode of the Macro Knob. When the Macro
Knob is set to relative CC, it sends out 2-bits complement Relative CC messages, which are recognized by softwares like
Ableton Live. You can set two CC values for the relative CC mode using the shift button and the first and second
encoders.
Midi Command Documentation
18
Ruin & Wesen Electronics
RELATIVE CC
000 001
Hold shift to modify
CC values
Turn encoder to adjust CC values
When in normal mode, turning the macro knob will send a CC message with the first CC number. Pressing down the
macro knob and turning it will send a CC message with the second CC number. This way, you can for example scroll
through scenes and tracks in Ableton Live.
Midi Command Documentation
19
Ruin & Wesen Electronics
MIDI Command Incoming MIDI Support
The Midi Command reacts to incoming MIDI CC messages and updates its parameter values accordingly. This way,
annoying parameter discrepancy jumps are avoided when modifying parameters on the controlled gear. To achieve this,
connect the MIDI OUT connector of the controlled gear or software to the MIDI IN connector of the Midi Command.
Make sure that the controlled gear or software sends out the modified values. Midi Command only supports absolute CC
messages.
Midi Command Documentation
20
Ruin & Wesen Electronics
Using the MIDI Command to control Ableton Live
The MIDI Command comes with a remote control surface script for Ableton Live 5, 6 and 7. To install this script,
download the installation files from http://ruinwesen.com/software/MidiCommand-AbletonScript.zip . Unzip the zip file
and copy the folder “FCB1010” into the Ableton Live’s “MIDI Remote Scripts” folder. Under MacOSX, this folder can be
found inside the Live.app bundle by right clicking on the “Live.app” file and choosing “Show Package Contents”:
Under Windows, this folder is found in the Ableton installation directory (most often in “C:\Program Files\Ableton\”) in the
folder “Resources”.
After the folder was copied, plug-in your MIDI Command, select patch 1 and connect it to your computer’s MIDI interface. Then start Ableton Live. Open up the preferences panel and go to “MIDI Sync” panel. Select “MidiCommand” as
your control surface (if “MidiCommand” does not appear in the list, verify that you have copied the “MidiCommand” folder
to the correct location as described above), and configure the input MIDI port and the output MIDI port accordingly. In
this example I use the Port 1 of a MidiLink adapter.
Midi Command Documentation
21
Ruin & Wesen Electronics
Once the correct input and output devices have been chosen, Ableton will update the parameter names on the Midi
Command. The first page of patch 1 shows the volumes of the first 4 tracks:
Track numbers
Volume
LV1 LV2 LV3 LV4
110 110 110 110
Turn encoder to adjust track volume
The second page of patch 1 shows parameters of the currently selected track. It allows you to control the current track’s
volume and the first send. Furthermore, if the track contains an EQ (either the 8 parameter EQ or the 3 parameter EQ), it
allows you to control the volume of the low and high frequencies of the last EQ in the track.
Send A
Low volume
Track volume
LEV SD1 LP HP
107 000 107 107
High volume
The third and fourth page of patch 1 allow you to control the best-of bank parameters of the currently selected device.
When selecting a device, the Midi Command flashes the name of the newly selected device and updates the parameter
names accordingly. For example, when selecting a Compressor device, page 3 looks like the following picture:
Midi Command Documentation
22
Ruin & Wesen Electronics
THR RAT ATK REL
116 063 050 047
Finally, the macro knob is used in its relative CC mode. Turning the macro knob will scroll through the scenes of your
Ableton set. Turning the macro knob while pushing it down will scroll through the tracks (including the mastertrack).
LV1 LV2 LV3 LV4
107 107 107 107
Turn encoder to scroll through scenes
Push and turn to scroll through tracks
The Ableton remote surface mappings use the first patch of the Midi Command. Make sure that patch 1 is selected. The
remote surface mappings will not overwrite the saved patch 1 in the Midi Command memory. Changing the patch while
using the Ableton surface mappings is not recommended because the Midi Command will be out of sync with the Ableton GUI.
Midi Command Documentation
23
Ruin & Wesen Electronics
Midi Command Sysex Reference
The Midi Command uses a number of sysex messages to support firmware flashing, patch backup and special features.
It also can send sysex data to control Elektron’s Machinedrum effect machines.
Common Messages
All sysex messages start with a common header:
Midi Byte
Purpose
0xF0
MIDI Sysex Start
0x00
Extended Vendor ID
0x13
Byte 1 of Vendor ID = 0x13
0x37
Byte 2 of Vendor ID = 0x37
When 8-bit data has to be sent over sysex, the following mechanism is used. 7 bytes of 8-bit data are converted into 8
7-bit sysex data bytes. The first of these 8 bytes contains the MSB of the following 7 bytes:
BYTE1 BYTE2 BYTE3 BYTE4 BYTE5 BYTE6 BYTE7 is converted to (0 MSB7 MSB6 MSB5 MSB4 MSB3 MSB2 MSB1)
(BYTE1 & 0x7F) (BYTE2 & 0x7F) (BYTE3 & 0x7F) (BYTE4 & 0x7F) (BYTE5 & 0x7F) (BYTE6 & 0x7F) (BYTE7 & 0x7F).
16 bit values are encoded as either 3 or 4 sysex bytes, send with MSB first.
Midi Bootloader Messages
Midi Bootloader ACK message
Used to acknowledge a firmware page.
Midi Byte
Purpose
(Sysex Header)
0x01
CMD = CMD_BOOT_BLOCK_ACK
0xF7
MIDI Sysex End
Midi Bootloader NAK message
Used to signal an error while flashing a firmware page.
Midi Byte
Purpose
(Sysex Header)
0x10
CMD = CMD_BOOT_BLOCK_NAK
0xF7
MIDI Sysex End
Midi Bootloader Start Program message
Signal the Midi Command Bootloader to jump to the main program.
Midi Command Documentation
24
Ruin & Wesen Electronics
Midi Byte
Purpose
(Sysex Header)
0x04
CMD = CMD_MAIN_PROGRAM
0xF7
MIDI Sysex End
Midi Byte
Purpose
(Sysex Header)
0x10
CMD = CMD_BOOT_BLOCK_NAK
0xF7
MIDI Sysex End
Midi Bootloader Start Bootloader message
Signal the Midi Command to jump to invalidate the current firmware and start the bootloader. This will invalidate the
current firmware and will require you to reprogram the firmware.
Midi Byte
Purpose
(Sysex Header)
0x05
CMD = CMD_START_BOOLOADER
0xF7
MIDI Sysex End
Midi Bootloader Firmware Page message
Transmit a firmware page. The bootloader will flash this page into the firmware and answer with either an ACK or NAK
message (see above). While programming the firmware, wait for ACK before sending the next page.
Midi Byte
Purpose
(Sysex Header)
0x01
CMD = CMD_BLOCK_DATA_BLOCK
len
length of firmware page
address (4 bytes)
16 bit page address = address[0] <<
21 | address[1] << 14 | address[2] <<
7 | address[3]
firmware page (8-bit data)
Firmware page (max 64 bytes), 8-bit
data encoded in sysex
checksum
XOR of all sysex bytes starting with
the CMD byte
0xF7
MIDI Sysex END
Midi Bootloader Firmware Checksum message
Transmits the sum of all the firmware bytes, used by the Midi Command to check if the current firmware is valid.
Midi Command Documentation
25
Ruin & Wesen Electronics
Midi Byte
Purpose
(Sysex Header)
0x03
CMD =
CMD_FIRMWARE_CHECKSUM
firmware length (3 bytes)
16 bit firmware length= length[0] <<
14 | length[1] << 7 | length[2]
firmware checksum (2 bytes)
14 bit firmware checksum =
checksum[0] | checksum[1] << 7
0xF7
MIDI Sysex END
Midi Command Messages
Send Page message
This message is used to update a page (but not save it to the Midi Command’s patch memory). If the page is in another
patch than the current patch, this message has no effect.
Midi Byte
Purpose
(Sysex Header)
0x11
CMD = CMD_SEND_PAGE
patch number
patch number of page (from 1 to 8)
page number
Page number (from 0 to 3)
page type
page type: 0 for MIDI page, 1 for MD
Reverb page, 2 for MD Echo page, 3
for MD EQ page, 4 for MD
Compressor page)
page data (8bit data)
8-bit encoded page data (see section
“Page formats” below)
0xF7
MIDI Sysex END
Save Page message
This message is similar to Send Page, but the page is stored in patch memory.
Midi Byte
Purpose
(Sysex Header)
0x14
CMD = CMD_SAVE_PAGE
patch number
patch number of page (from 1 to 8)
page number
Page number (from 0 to 3)
Midi Command Documentation
26
Ruin & Wesen Electronics
Midi Byte
Purpose
page type
page type: 0 for MIDI page, 1 for MD
Reverb page, 2 for MD Echo page, 3
for MD EQ page, 4 for MD
Compressor page)
page data (8bit data)
8-bit encoded page data (see section
“Page formats” below)
0xF7
MIDI Sysex END
Get Patch message
This message is used to ask the Midi Command to send a patch over MIDI. The Midi Command will respond by sending
4 SEND_PAGE messages (see above) with the content of the patch.
Midi Byte
Purpose
(Sysex Header)
0x13
CMD = CMD_GET_PATCH
patch number
patch number (from 0 to 7)
0xF7
MIDI Sysex END
Switch Patch message
This message is used to ask the Midi Command to load a patch from patch memory.
Midi Byte
Purpose
(Sysex Header)
0x12
CMD = CMD_SWITCH_PATCH
patch number
patch number (from 0 to 7)
0xF7
MIDI Sysex END
Set Flash message
This message is used to make the Midi Command flash 2 lines of text on its display..
Midi Byte
Purpose
(Sysex Header)
0x15
CMD = CMD_SET_FLASH
flash data (32 8-bit bytes)
two times 16 bytes, one for the upper
row of the LCD, one for the lower row
of the LCD
0xF7
Midi Command Documentation
MIDI Sysex END
27
Ruin & Wesen Electronics
Midi Command Page Format
This section documents the format of page data in memory. This format is also used when sending page data over
sysex.
Midi Page format
Byte
Purpose
CCs (4 bytes)
CC number for each encoder
Channel (4 bytes)
Channel number for each encoder
Macro (8 times 2 bytes) = lower
Lower and upper boundaries for the
boundary (1 byte), upper boundary (1
macro knob
byte)
Names (4 times 4 characters)
Name of each encoder (4 chars)
MachineDrum Page format
This format is used for all the 4 types of MachineDrum pages.
Byte
Purpose
Parameter number (4 bytes)
The parameter number of the
parameter on the effect page
Unused (4 bytes)
Unused bytes
Macro (8 times 2 bytes) = lower
Lower and upper boundaries for the
boundary (1 byte), upper boundary (1
macro knob
byte)
Midi Command Documentation
28
Ruin & Wesen Electronics
Midi Command Schematics
Midi Command Documentation
29