1
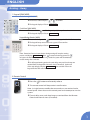
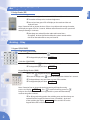
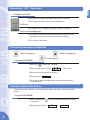
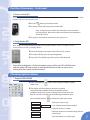
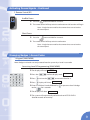
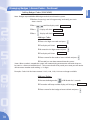
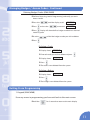
Pointillés / Blitz Studio USER GUIDE Get Videofied. Visit us at www.videofied.com English p. 1-12 We recommend that you read this user manual carefully to ensure that your security system is operated with maximum efficiency and in optimal conditions. The VIDEOFIED® system complies with European radio standards and is designed to operate in frequency ranges which are not harmful to the user. Arming - Away1-2 Arming - Stay2 Disarming - Off3-4 Activating Emergency Requests4 Activate/Deactivate Chime4 Partition Arming5-6 Partition Disarming6-7 Checking System Status7 Direct Device Bypass8 Activating Duress Signals8-9 Managing Badges and Codes9-11 Notes12 ENGLISH Arming - Away 1. Keypad (XMA/WMB) Code Arming (XMA/WMB): Enter access code and press The keypad display will show Quick Arm (XMA/WMB): Press and hold to confirm. ARMING THE SYSTEM until the keypad rapdily beeps three times. The keypad display will show or SYSTEM ARMING AWAY Keypad Badge Reader (WMB): Present the badge to the symbol on the keypad and hold it for 2 seconds. The keypad beeps once and shows a green LED to confirm. The keypad display will show ARMING THE SYSTEM Note: Detection from an instant device during arming will stop the arming DETECTION process and display "DEVICE . Press to restart the arming process or NAME" to bypass the device. If no command is registered the system will automatically restart arming after 3 minutes. For all keypad arming options the exit delay starts and short beeps are emitted from the keypad and internal sirens (if installed). At the end of the exit delay the display SYSTEM ARMED shows and the LED on the keypad flashes RED ever two seconds. 3. Remote Control Press the button and instantly release. The remote control will beep twice in confirmation. Note: A single low tone notifies the command was not received at the control panel. Move closer to the control panel and reattempt to arm the system. The exit delay starts and short beeps are emitted from the Remote Control and internal sirens (if installed) 1 2. Badge Reader (BR) Present the badge to the reader and hold for two (2) seconds. The reader will beep twice in acknowledgement. One red and one green LED will display on the reader and the exit delay will start. Note: Detection from an instant device or if there is a problem with arming the reader will display two green LEDs for 5 seconds. Without action from the user the system will attempt rearming in 3 minutes. Short beeps are emitted from the reader and internal sirens (if installed). At the end of the time delay the system is armed and the red LED on the reader flashes every two seconds. Arming - Stay 1. Keypad (XMA/WMB) Code Arming (XMA/WMB): Enter access code and press The keypad display will show Quick Arm (XMA/WMB): Press and hold until the keypad rapdily beeps three times. The keypad display will show ARMING SP1 SYSTEM ARMING SP1 Keypad Badge Reader (WMB): Press the . Keypad will display Present the badge to the ALARM SP1 BADGE OR CODE symbol on the keypad and hold it for 2 seconds. The keypad beeps once and shows a green LED to confirm. The keypad display will show ARMING SP1 Note: Detection from an instant device during arming will stop the arming DETECTION process and display "DEVICE . Press to restart the arming process or NAME" to bypass the device. If no command is registered the system will automatically restart arming after 3 minutes. For all keypad arming options the exit delay starts and short beeps are emitted from the keypad and internal sirens (if installed). At the end of the exit delay the display SYSTEM ARMED shows and the LED on the keypad flashes RED ever two seconds. 2 ENGLISH Arming - Away Continued... Disarming - Off 1. Keypad (XMA/WMB) No Event: Code Disarming (XMA/WMB) Enter access code and press The keypad display will show or to confirm. Mon 01/02 04:49 DISARMED LVL:1 Quick Disarm (XMA/WMB): Press and hold until the keypad rapdily beeps three times. The keypad display will show DISARMING BADGE OR CODE Enter access code and press The keypad display will show Mon 01/02 04:49 DISARMED LVL:1 Keypad Badge Reader (WMB): Present the badge to the symbol on the keypad and hold it for 2 seconds. The keypad beeps once and shows a green LED to confirm. The keypad display will show Mon 01/02 04:49 DISARMED LVL:1 Event Acknowledgment: During disarming you must acknowledge any events that have happened since the system was last armed. Perform any of the above disarming options The keypad display will show Press to acknowledge that the event has occured since last arming The keypad display will show Press "Event" , display will show "Event" "Device Name" Mon 01/02 04:49 DISARMED LVL:1 2. Remote Control (RC) Press the button and instantly release after the first beep The remote control will beep twice in confirmation Note: A single low tone notifies the command was not recieved at the control panel. Move closer to the control panel and reattempt to disarm the system. The system is disarmed. 3 ENGLISH Disarming - Off - Continued 3. Badge Reader (BR) Present the badge to the reader and hold for 2 seconds. The reader will beep twice in acknowledgement. No Event: Event Acknowledgment: Two green LEDs will light up and the system is disarmed. The top LED will blink twice and the reader will beep 4 times to indicate an event has occured since the last arming. The system is disarmed. Activating Emergency Requests Medical Emergency Police Emergency Fire Emergency 1. Keypad (XMA/WMB) Press the button for 3 seconds. They Keypad display flashes Press the desired emergency button. Display shows A valid user code or badge for the system must be used to clear the event. for 10 seconds. POLICE BADGE OR CODE Activate/Deactivate Chime *The chime function will only sound through an indoor siren that is learned into the system* 1. Keypad (XMA/WMB) 4 Press and hold the three times. They display will show button until the keypad beeps rapidly CHIME ACTIVATED or CHIME DEACTIVATED . Partition Arming 1. Keypad (XMA/WMB) Code Partition Arming (XMA/WMB) Press until the desired partition is shown Enter a user code and press The system displays ARMING A A - - Note: Detection from an instant device during arming will stop the arming process and DETECTION display "DEVICE . You may press to retry the arming or to bypass the device. NAME" If no command is registered the system will automatically retry arming after 3 minutes. The exit delay starts and short beeps are emitted from the keypad and internal sirens (if installed). At the end of the exit delay the red LED on the keypad flashes every two seconds. Keypad Badge Reader Partition Arming (WMB): Press until the desired partition is shown Present the badge to the seconds. symbol on the keypad and hold it for 2 The keypad beeps once and shows a green LED to confirm. The keypad display will show ARMING A A - - Note: Detection from an instant device during arming will stop the arming DETECTION process and display "DEVICE . Press to restart the arming process or NAME" to bypass the device. If no command is registered the system will automatically restart arming after 3 minutes. For all keypad arming options the exit delay starts and short beeps are emitted from the keypad and internal sirens (if installed). At the end of the exit delay the display shows what partitions and what mode Thu 05/13 14:24 they have been armed in PA1=A and the LED on the PA2=A L:1s keypad flashes RED ever two seconds. 2. Remote Control (RC) Note: Remote Controls are configured during installation to use specfic partitions. There is no option to choose which partition to arm on the Remote Control. Press the button and instantly release. The remote control will beep twice in confirmation and the exit delay starts. Note: A single low tone notifies the command was not recieved at the control panel. Move closer to the control panel and reattempt to disarm the system. The system is armed for the parition(s) the device is set. 5 ENGLISH Partition Arming - Continued 3. Badge Reader (BR) Note: Badges are configured during installation to use specfic partitions. There is no option to choose which partition to arm with the Badge Reader. Present the badge to the reader and hold for two (2) seconds. The reader will beep twice in acknowledgement. One red and one green LED will display on the reader and the exit delay will start. Note: Detection from an instant device or if there is a problem with arming the reader will display two green LEDs for 5 seconds. Without action from the user the system will attempt rearming in 3 minutes. Short beeps are emitted from the reader and internal sirens (if installed). At the end of the time delay the system is armed and the red LED on the reader flashes every two seconds. Partition Disarming 1. Keypad (XMA/WMB) No Event: Partition Code Disarming (XMA/WMB) Press until the desired partition to be disarmed is shown Enter access code and press The keypad display will show or to confirm. Mon 01/02 04:49 DISARMED LVL:1 Keypad Badge Reader Partition Disarming (WMB) Press until the desired partition to be disarmed is shown Present the badge to the seconds. symbol on the keypad and hold it for 2 The keypad beeps once and shows a green LED to confirm. The keypad display will show Mon 01/02 04:49 DISARMED LVL:1 Event Acknowledgment: During disarming you must acknowledge any events that have happened since the system was last armed. Perform any of the above disarming options The keypad display will show Press to acknowledge that the event has occured since last arming The keypad display will show Press 6 "Event" , display will show "Event" "Device Name" Mon 01/02 04:49 DISARMED LVL:1 Partition Disarming - Continued 2. Remote Control (RC) Note: Remote Controls are configured during installation to use specfic partitions. There is no option to choose which partition to disarm on the Remote Control. Press the button and instantly release. The remote control will beep twice in confirmation Note: A single low tone notifies the command was not recieved at the control panel. Move closer to the control panel and reattempt to disarm the system The system is disarmed for the parition(s) the device is set 3. Badge Reader (BR) Note: Badges are configured during installation to use specfic partitions. There is no option to choose which partition to disarm on the Badge Reader. Present the badge to the reader and hold for two (2) seconds The reader will beep twice in acknowledgement Two green LEDs will light up and the system will be disarmed Event Acknowledgment: Perform the above steps and the top LED will blink twice and the reader will beep 4 times to indicate that there has been an event since arming and then system will be disarmed. Checking System Status 1. Keypad (XMA/WMB) Press and hold the three times button until the keypad beeps rapidly The display will show devices that are in trouble, communication methods that are enabled but have problems or that the system is Ready To Arm if no faults are found. Use the arrow keys to scroll through all devices that are in trouble or press There are no Faults found READY TO ARM ETHERNET BAD DEVICE TAMPER SUPERVISION PROBLEM SUPERVISION PROBLEM to exit back to the main screen 2G3G BAD Issue with the communication method Displayed device is in tamper Displayed device is not communicating with the control panel The listed detector is currently open 7 1. Keypad (XMA/WMB) Press and hold the rapidly three times The display will show button until the keypad beeps BADGE OR CODE for 10 seconds Enter a user code for the system followed by Use the arrow keys to find the device you would like to bypass and press Repeat the steps above until all desired devices have been set to be bypassed Selected devices will be bypassed on the next arming. If the system is not armed in the next 24 hours the devices will return to "Not Bypassed" When arming with any number of devices set to be bypassed the display will read Activating Duress Signals 1. Keypad (XMA/WMB) Note: Duress codes are automatically set by the system when a code is added. For an audible Duress enter a 4-6 digit user code with 2 numbers higher than the actual code For a silent Duress enter a 4-6 digit user code with 1 number higher than the actual code Example 1: User code is set to: 1234 Audible Duress: 1236 Silent Duress: 1235 Example 2: User code is set to: 123456 Audible Duress: 123458 Silent Duress: 123457 8 ENGLISH Direct Device Bypass Activating Duress Signals - Continued 2. Remote Control (RC) Audible Duress Press the button and hold for 4 seconds. The remote control will beep twice in confirmation and all sounders will begin Note: A single low tone notifies the command was not recieved at the control panel. Silent Duress Press the button and hold for 4 seconds. The remote control will beep twice in confirmation Note: A single low tone notifies the command was not recieved at the control panel. Managing Badges / Access Codes 1. Keypad (XMA/WMB) Note: Badges and codes can only entered into the system by a Level 3 user code Accessing Level 3 Programming (XMA/WMB) The display will read Press the Press Press DATE/TIME DISARMED LVL 1 until the display reads and use the to move the level to 3 . Display will show BADGE OR CODE Enter a valid level 3 code followed by to the for 2 seconds. The display will show ACCESS LEVEL 1 or present a level 3 badge ACCESS LEVEL 3 The system will automatically default back to ACCESS LEVEL 1 after 60 seconds of inactivity. 9 ENGLISH Managing Badges / Access Codes - Continued Adding Badges/Codes (XMA/WMB) Note: Badges require WMB or BR badge reader learned into the system. Perform 'Accessing Level 3 Programming' and verify you are in Access Level 3 Press until the display reads Press . Display will show Press . Display will show BADGES AND ACCESS CODES ENTER A BADGE / CODE BADGE / CODE Adding a Code: Enter a 4-6 digit user code and press The display will show CONFIRM THE CODE Re-enter the 4-6 digit code and press The display will show NAME OF CODE Enter a name for the code or leave it blank and press The code has now been entered into the system Note: When a code is created the system will automaticaly generate two sub-codes that can be used as a silen and audible duress. This means that for every code you create you will not be able to create another code withing +/- 2 digits. Example: Code 1234 has been created. 1235, 1236, 1233, 1232 are no longer available Adding a Badge: Present the Badge to the or BR Reader for 2 seconds The reader will beep and the display will change to NAME OF BADGE Enter a name for the badge or leave it blank and press 10 Managing Badges / Access Codes - Continued Deleting Badges/Codes (XMA/WMB) Perform 'Accessing Level 3 Programming' and verify you are in Access Level 3 Press the Press until the display reads and use the to move to BADGES AND ACCESS CODES DELETING BADGES / ACCESS CODES Press . Display will show the first badge or code that is learned into the system Use the to find the badge or code you wish to delete Press Deleting a Code: Display shows RE-ENTER THE CODE Enter teh code you wish to delete and press Display shows DELETING CODE NAME OF CODE Press The code is now deleted from the system Deleting a Badge: Display shows Press DELETING BADGE NAME OF BADGE The badge is now deleted from the system Exiting From Programming 1. Keypad (XMA/WMB) From any menu in programming you have exit back to the main screen Hold the for 5 seconds to retunr to the main display 11 NOTES 12 NOTES 12 NOTES 12