1
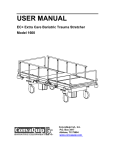
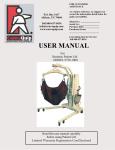
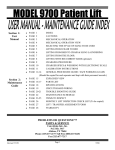
Owner’s Manual
Bariatric Manual Wheelchairs
700 LB CAPACITY
XL Series Wheelchair
by ConvaQuip
Specializing in Bariatric Patient Aids
P.O. Box 3417 * Abilene, TX 79604 U.S.A.
Toll 800/637-8436 * FAX 325/677-7217
www.convaquip.com
Form P44-12 (6/02)
User manual Rev A 5.27.15
[email protected]
Thank you for choosing ConvaQuip!
CHAIR MAINTENANCE AND SAFETY INSPECTION
“Uni-Mold” Mag Composite Wheels- Our exclusive wheel design provides high strength, low
maintenance, and lightweight. One piece molded construction guarantees superior rollability and
performance. Outlasts conventional tires by up to three times. Periodically examine tires for wear.
Worn tires will make your wheelchair difficult to propel. Both wheels should be replaced at the same
time to prevent chair from pulling to one side
6-8” Casters- Wheel is secured to the caster fork by an axle bolt and nut. To adjust, rotate bolt and
lock with nut. Wheel should be snug but free spinning. If the caster flutters, remove the caster cap.
Adjust the lock nut located under the caster cap. Take-up all play. Back-off about ¼ turn. Replace
caster cap.
20-24” Wheels- Adjust loose or wobbly wheels. First remove hub cap. Remove all dirt and lint from
outside of bearings. Loosen axle locknut. Tighten axle bolt until all wobble is eliminated. Back off
about 1/4 turn. Retighten locknut. Tilt the wheel chair to one side and spin the wheel. If it stops
abruptly, it is too tight. Readjust the axle bolt. Replace hub cap.
X-Braces- The pivot bolt’s nuts must be snug, but not over tight. If pivot bolt becomes worn,
replace.
Lubrication- Periodically, lubricate all pivot and wear points on your wheelchair with a good grade
of silicone spray. All bearings are sealed and lubricated at the factory for the life of the bearing.
Cleaning and Polishing- The upholstery, vinyl components, wheels and tires may be cleaned with
warm water and a mild detergent. Wipe dry immediately with a soft clean cloth. Metal parts were
polished at the factory to provide a bright shiny appearance. To maintain new appearance, use a
good grade of car wax.
Opening and Closing Chair- To open, apply pressure to both seat tubes located at the sides of
the seat and force downward until the chair is fully open. Keep fingers away from pinch points
under seat tube while opening chair. Fold the chair by gripping the center of the seat upholstery at
the front and rear edges and lift upward, then push side frames together.
Entering and Exiting Chair- Lock both wheels. Use armrests as support when entering or exiting the
chair. Place both hands on armrests. Do not place hands and/or fingers under the seat or in corners as
they can get injured: including bruising, mashed, cut or broken.
Seat and Back Upholstery- Only premium grade nylon is used. Inner liners are made of quality,
tested material to prevent sag and wear. All seats and backs are sewn, not heat sealed. Replace
immediately if upholstery is ripped or sags. To ensure comfort and uniform appearance, both seat
and back upholstery should be replaced together.
WARNING!
• ConvaQuip recommends that users not be transported in vehicles while seated in the wheelchair.
We do not approve of any- tie down system for transportation of users in any moving vehicle while
seated in the wheelchair.
• Do not tilt the wheelchair back when occupied. This may cause serious injury to wheelchair user or
assistant.
• Do not attempt to go up or down steps.
• Do not ride over curbs or obstacles. This may cause the wheelchair to become unstable and cause
bodily harm to you or damage the wheelchair. Always use curb cuts.
• Do not use your chair on a slope grade steeper than 10%. (A 10% slope grade means one foot in
elevation for every ten feet of slope length.)
• Do not park the wheelchair on an incline.
• Do not operate the wheelchair on slippery surfaces.
• Do not lift the wheelchair by any removable parts including armrests and footrests. Lifting the wheelchair
by these parts, occupied or not, may damage the wheelchair.
• Do not stand on footrests. When entering and exiting chair always fold up footrests.
• Do not move forward in seat to reach for objects. Do not pick objects up from the floor by reaching down
between your knees.
• Do not lean over the top of the back upholstery.
• The back height, caster position, rear wheel position, and anti-tip position all define the stability of the
wheelchair. Any of these setting changes must be done in accordance with the descriptions in this manual.
• When opening or preparing the wheelchair to use, do NOT grab side seat tubes with fingers underneath.
This could pinch fingers between seat tubes and the seat tube rest.
• Before sitting in wheelchair to use,
First, lock both wheel brakes.
Second, place both hands on arm rests, do NOT place hands in corners of wheelchair
INCORRECT WAY
CORRECT WAY
Wheel Locks- As tires wear, adjust locks to prevent rear wheels from turning when locks are
engaged. To adjust, loosen the locknuts located behind the clamp bracket. Slide clamp on rail to
the proper position. Retighten the locknuts. If wheel locks become worn, replace them.
Caution!
ALWAYS ENGAGE WHEEL LOCKS WHEN ENTERING OR EXITING CHAIR.
UNLOCKED
LOCKED
RAIL
LOCKNUTS
Armrests- Cushioned armrests are designed to be
comfortable and durable. To maintain appearance
and comfort, replace armrest if they become
cracked, worn, or discolored. All armrests are
adjustable from front to rear along the rail by
loosening the two locknuts behind the clamp
bracket shown to the left. To adjust the height on
the optional adjustable armrest, pull the pull knob
and move upper armrest up or down. Release knob
when desired height is achieved and make sure it
clicks into place. To remove the armrests push the
spring button and pull the arm out of the socket.
The spring button adjustment on the lower arm is
set at the factory and should not be changed. All
chairs EXCEPT for those with 16” seat to floor
height use lower spring button hole.
Reclining Back Models
- Open wheelchair,
install headrest and push bar shown below.
Make sure spring buttons are fully extended
through handles before use. This chair must
never be used without both headrest and
push bar installed. To adjust back angle,
grasp both pusher handles securely and pull
both release levers at the same time. Gently
lower or raise the back to the desired height,
then release the levers.
PULL KNOB
HEADREST
SPRING BUTTON
RELEASE LEVER
PUSH BAR
Footrests/Elevating Legrests- All footrests and elevating legrests are length adjustable. A simple
thru-bolt provides quick and easy adjustments.
SWINGAWAY
RELEASE LEVER
FOOTREST
ADJUSTMENT
Swingaway Footrests- On wheelchairs equipped with
swingaway footrests, activate the black swingaway release
lever and the assembly will swing to the side. This feature
permits easy entrance and exit to the chair.
LEG HEIGHT
RELEASE LEVER
CALFPAD ADJUSTMENT
SWINGAWAY
RELEASE LEVER
Elevating Legrests- Some models are
equipped with elevating legrests. Adjust the
calfpad to any one of five positions to provide
best comfort.
CALFPAD
FOOTREST
ADJUSTMENT
CASTER CAP
ROD & RELEASE
Backrest- Backrests on all models are height adjustable by
removing the two bolts and locknuts shown in the diagram to the
right. Do not set the backrest to any position other than the ones
illustrated here, and always use both bolts and locknuts.
Rear Wheels- Rear wheel position is adjustable to change seat
to floor height. If these settings are changed, the caster settings
must also be changed to keep a safe seat angle. Use the chart
below to attain proper wheel position for desired seat height. For
safe operation of wheelchair only use these settings.
Casters- Caster Wheel position is adjustable to match rear wheel settings. Use the chart below to match
correct wheel position with desired seat height. For safe operation of wheelchair only use these settings.
Anti-Tip- (optional) Anti-tip settings are shown below. These settings must match the illustrations
for your wheelchair’s seat height. If seat height is changed make sure the anti -tip settings are
changed. All anti -tips are the same for each seat height, only configuration defines correct anti-tip
for your wheelchair’s seat height.
Push Bar- (optional except on reclining back models and 6800 series) Push bar is inserted over
wheelchair pusher handles. Make sure spring buttons
are fully extended through handles before use. Push
bar may be retained on the left side while wheelchair
is folded by swinging the push bar down and
extending spring button through push bar. Push bar
must always be properly attached to all reclining back
models and 6800 series chairs while in use.
Push Bar
Spring Button
Adjusta-Front- (6800 series only) The foot
rests or leg rests are adjustable across the
full width of the wheelchair. Slide the
riggings across the front for the most
comfortable placement. To enter or exit the
chair, slide the front riggings out of the way.
To attach riggings; lift lock levers, hang
rigging slots over pins and push until fully
engaged with pins. To lock riggings in place
move the lock lever down. Adjusta
Front
must always be installed while chair is in
use.
Wheelchair Push Handle
Pins
Lock Lever
Slots
Model No.
Serial No.
LIMITED WARRANTY
This limited warranty is extended to the original purchaser/user and cannot be transferred.
All ConvaQuip labeled wheelchair products are warranted for one year against defects in
material and workmanship.
All wheelchair side frames and cross braces currently distributed by ConvaQuip are
warranted against defects in material and workmanship for the production life of the
wheelchair and these components.
Defective parts will be repaired or replaced by the company or its appointed agent. The
warranty does not cover damage caused by misuse or negligence, nor does it cover
defects or damages by use of unauthorized parts or service by an unauthorized person.
This warranty gives you specific legal rights, and you may also have other rights that vary
from state to state.
Do not return merchandise without prior authorization. All correspondence relating to this
warranty must indicate Model number and Serial number and be addressed to:
ConvaQuip Ind., Inc.
P.O. Box 3417
Abilene, TX 79604
NOTICE
FREIGHT DAMAGE - The carrier who delivers merchandise to your door is responsible for
loss and damages. Acceptance of the shipment by you is acknowledgment that all articles
delivered were in good condition and properly packed. Therefore, all claims for loss or
damage must be filed immediately with the freight carrier. Then notify us. We will mark our
records accordingly. After settling claim, damaged merchandise will be picked up by the
freight carrier and returned. Should you need assistance with the claim, call our customer
service at 800-637-8436.
RETURN GOODS - Within 60 days from date of purchase returns will be subject to a
handling and re- stocking charge plus any additional costs resulting from damage or use.
After 60 days from date of purchase: ConvaQuip reserves the right to not accept return
goods for any reason. If accepted, the amount of credit will be at the discretion of
ConvaQuip. Returned merchandise without prior authorization will not be accepted.