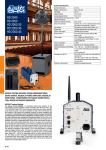
1
0XOFS«T.BOVBM
Congratulations on choosing Krix
Krix loudspeakers are designed to reproduce the highest quality sound. To ensure the best
performance from your speakers please read this owners manual carefully. Please contact
your friendly Krix retailer or Krix directly with any further queries.
before you begin
!
Loudspeakers contain permanent magnets
and the magnetic field extends beyond the
speaker cabinet. As a guide, magnetically
sensitive equipment (such as old CRT
televisions or credit cards) should be
positioned at least 300mm away from the
speakers to avoid magnetic interference.
amplifier power
Loudspeakers have a recommended power
rating. This rating is given as a guide to match
the appropriate amplifier to your speakers.
Your amplifier is likely to reach maximum
power output before the maximum volume
setting is achieved. Source material volume
levels can vary, however as a guide, we
suggest that you do not exceed zero on the
digital display or 12 o’clock on conventional
volume dials. Turning the volume dial past the
amplifier’s maximum output power will create
clipping (distortion).
!
Driving your amplifier into clipping is likely
to damage your speakers. Clipping can be
recognised as harsh, aggressive distortion.
floor spikes
The Krix models: Harmonix and Neuphonix are
supplied with spikes sets. The use of these
spikes is optional. The spikes may be used to
help create a solid foundation for the speaker,
particularly on carpeted floors. To protect
uncarpeted floors place the supplied metal
disks under each spike. The height of each
spike is adjustable and allows the speaker to
be levelled on uneven floor surfaces. Install
the spikes by screwing them into the threaded
inserts on the base of the speaker and secure
by tightening the lock nuts.
in cabinet use
Krix speakers can be used in TV cabinets,
bookcases and custom joinery, however care
must be taken to avoid creating acoustic
problems.
•
•
Avoid placing your speakers deep within
cabinetry as this can create acoustic
reflections and echoes detrimental to
sound quality (figure 1a). Flush mounting
is best (figure 1b).
Rear vented models: Atomix, Equinox,
Rhythmix and Neuphonix require care to
avoid restricting bass output from the
vent. (figure 2a, 2b)
Front vented Krix models are ideally
suited for use in cabinets. (figure 2c)
It is possible to damage a 200 Watt speaker
with a 50 Watt per channel amplifier, as
clipping occurs at a lower volume level with a
lower powered amplifier.
•
rated impedance
The nominal impedance of Krix loudspeakers
are conservatively rated to present a
comfortable load to quality electronics. The
nominal rated impedance of your speaker
affects how much electrical current the
speaker will draw from your amplifier. A 4Ω
(ohm) speaker will draw more current from an
amplifier than a 6Ω or 8Ω ohm speaker.
grille
Krix speakers are supplied with acoustically
transparent cloth grilles. These grilles may be
removed if desired. To remove the grille firmly
grip the edges and gently pull away to reveal
the front baffle and drivers. To reinstall the
grille, line up the grille clips with small holes
in the front baffle and gently push until locked
in place.
cabling
Connecting your speakers with adequately
sized speaker cable will ensure optimum
performance. As a guide, use at least 16AWG
cabling for runs up to 8m, for longer runs
consider using thicker 14 or 12 AWG cable.
connecting your speakers
Note: Krix models: Phoenix, Harmonix and
Neuphonix have 2 pairs of terminals for the
high-frequency (HF) and low-frequency (LF)
inputs. These inputs must remain linked for
conventional use (figure 4). When Bi-wiring,
these links should be removed and each pair
of terminals connected independently
(figure 5). Bi-amping is also possible, where
an independent amplifier is used for the low
frequency and high frequency sections of
the speaker. Please ask your Krix dealer for
specific recommendations.
speaker positioning - 2 channel, stereo
When positioning your speakers try to find the
best compromise between the suggestions
below to suit your listening preferences and
room.
a. The widest stereo separation is achieved
when the left and right speakers form
an equilateral triangle with the primary
listening position. In this setup small
movements from the primary listening
position can create large shifts in the
central stereo ‘image’. (figure 6a)
b. If the speaker spacing in reduced to 2/3
the distance from the primary listening
position the central stereo ‘image’ will
become more homogeneous but also more
monophonic. This setup will create a larger
‘sweetspot’ that can be enjoyed by more
listeners. (figure 6b)
c. A good balance between the above
suggestions can often be found with an
‘equal legged T’ arrangement. (figure 6c)
Angling your speakers inwards towards the
listener can also help to focus the centre
stereo ‘image’ of your speakers.
speaker positioning - home theatre
tone controls
Krix speakers have been designed to create
an accurate, balanced sound without tone
control adjustment. However, for reasons
of personal taste or room acoustics, some
adjustments may be desirable. Be aware that
excessively boosting the bass can overload the
low frequency drive units, particularly at high
volume levels.
To ensure optimum speaker performance it
is important that your system is connected
properly.
1. Turn off all electronic equipment.
2. Follow the connection instructions
supplied with your amplifier or receiver.
3. Prepare speaker cables for connecting to
speakers by neatly stripping cable ends.
Care should be taken to eliminate loose
strands of wire that may be present a
short circuit hazard. Alternately you can
use spade lugs or banana plugs (figure 3)
4. Take care to assign the same cable colour
or trace from the positive (+) connector on
the amplifier to the positive (+) connector
on the speaker. (figure 4)
2
left and right speakers
The desired spacing of your left and right
speakers for home theatre applications may
be a slightly closer together than for two
channel stereo. A good configuration to try
first is ‘equal legged T’ arrangement (figure
6c). The goal is to create a smooth, consistent
soundstage across the front of your room that
complements the action on the screen.
centre channel speaker
Position the centre channel speaker above
or below your screen. To help anchor the
dialogue to the screen, keep the centre
speaker as close to the screen as possible,
at approximately seated ear level. Angling
your centre speaker up or down towards
the listening position can improve dialogue
intelligibility.
rear speakers
Rear speakers should be placed to each side
and/or behind the listening position. Exact
positioning will be dependent on your room
layout and the number of surround/rear
speakers in your system (e.g 5.1, 6.1, 7.1
and beyond). Refer to your receiver/amplifier
manual or ask your Krix dealer for more
recommendations.
banana plug
binding post
subwoofer
If a subwoofer is to be used, please refer
to your subwoofer manual for suggested
subwoofer placement.
spade lug
speaker fine tuning
wire
Obtaining the best sound from your speakers
may require some experimentation. Try to find
a balance that suits your listening preferences
and room from the suggestions listed below:
•
•
•
Moving speakers closer to a wall or
corner will increase bass output but
decrease aural ‘clarity’ and ‘depth’. (As a
guide try position your speakers at least
50cm away from a corner and 20cm
from a rear wall)
Try to keep the acoustic environment
(bookcases, walls, curtains etc)
surrounding your left and right speakers
similar to help create a balanced
soundstage.
In rooms with few soft furnishing your
speaker can sound bright and lack ‘detail’.
Therefore adding curtains, carpets,
picture frames, couches and bookcases
etc can help absorb reflected sound and
improve sound quality. Also rooms with
bare parallel walls can suffer from ‘slap
echoes’ as sound bounces or ‘flutters’
between the walls. Improvements can
be made by adding soft furnishings on or
between these walls.
caring for your speakers
figure 1
left speaker
figure 3
left speaker
HF
HF
LF
LF
to right
speaker
to right
speaker
amplifier
L
amplifier
R
L
outputs
R
outputs
figure 4
figure 5
2
3
equal
To clean your speaker cabinet gently wipe
with a damp cloth. Do not rub hard on the
cabinet at any one point or you may leave a
polished spot. To clean the grille, remove from
the speaker cabinet, as previously described,
and vacuum at a low power setting using a
soft brush attachment. The bass driver(s) and
tweeter can be gently dusted by using a soft
bristled brush.
!
figure 2
1
Wherever possible, do not touch the
speaker diaphragms, particularly the
tweeter diaphragms, as they are fragile
and easily damaged.
equal
1
figure 6
Thankyou for choosing Krix
3
,SJY-PVETQFBLFST1UZ-UE
$IBQNBO3PBE
)BDLIBN4"
"VTUSBMJB
5
'
MJTUFO!LSJYDPN
3FW