Transcript
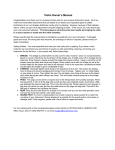
Cricut ® Scoring Tip with
Housing Instructions
Detailed instructions on how to use the Cricut® scoring tip with housing.
Cricut®, Cricut Create® & Cricut Expression® machines
•Insert the Tags, Bags, Boxes & More® 2 cartridge.
•Select the desired scoring lines.
•Replace the cutting blade and housing with the scoring tip and housing.
•Adjust the machine pressure, speed, and blade depth according to the material being used.
•Load Mat and press CUT!
•Once scoring is finished, DO NOT unload mat. Press LOAD MAT to return the machine to the starting position.
•Carefully remove the scoring tip and insert the cutting blade assembly.
*Note: Moving the carriage will cause the score and cut lines to misalign.
•Adjust the machine pressure, speed, and blade depth according to the material being cut.
•Select the coordinating image and press CUT!
•Once finished, unload mat, remove the images, and assemble according to directions shown in the
Assembly Instructions handbook.
Cricut Expression® 2 &
Cricut Expression® 2: 5th Anniversary Edition machines
•Insert the Tags, Bags, Boxes & More® 2 cartridge.
•Select the desired scoring lines and then click the HOME button.
•Replace the cutting blade and housing with the scoring tip and housing.
•Select the Multi-tool feature in the Apply All settings menu.
•Select LOAD MAT.
•Select CUT SETTINGS.
•Select the scoring tip from the materials dropdown menu.
*Note: Remember to add the scoring tip to the materials and tools. Refer to the Cricut Expression ® 2 or Cricut Expression ® 2: 5th Anniversary Edition user manual.
•Adjust blade depth according to material being used. Select CUT!
•Once scoring is finished, DO NOT unload mat. Carefully remove the scoring tip and insert the Cricut® cutting blade assembly. Adjust the depth according to the material being used.
*Note: Moving the carriage will cause the score and cut lines to misalign.
•Click the IMAGE GALLERY button to return to the overlay view.
•Delete the scoring image.
•Select the coordinating image and then the HOME button.
•Select CUT SETTINGS and the correct material from the dropdown menu. Click CUT!
•Once finished, unload mat, remove the image, and assemble according to directions shown in the Assembly Instructions handbook.
19153