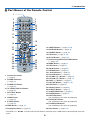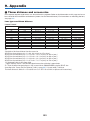
1
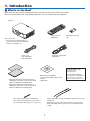
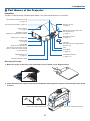
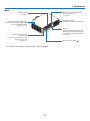
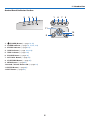
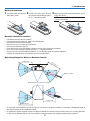
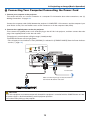
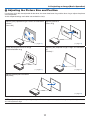
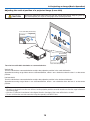
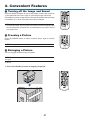
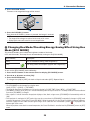
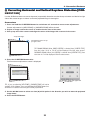
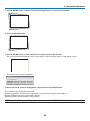
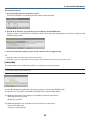
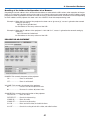
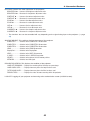
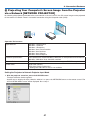
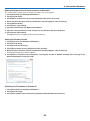
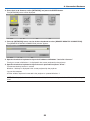
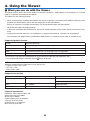
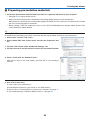
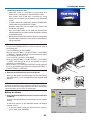
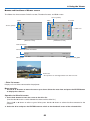
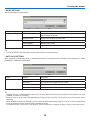
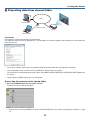
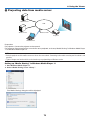
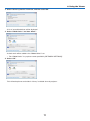
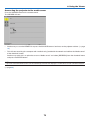
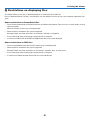
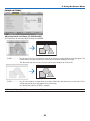
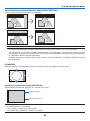
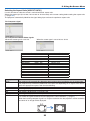
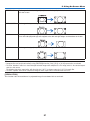
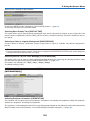
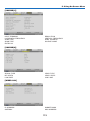
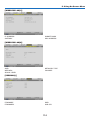
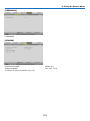
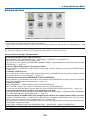
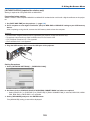
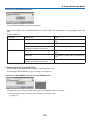
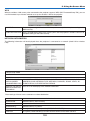
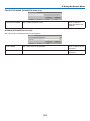
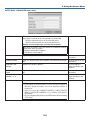
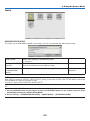
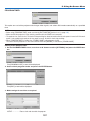
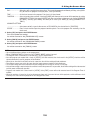
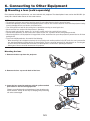
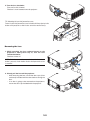
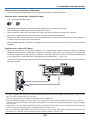
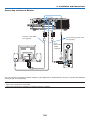
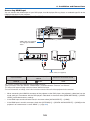
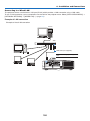
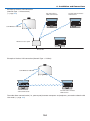
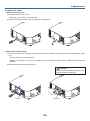
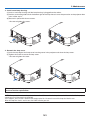
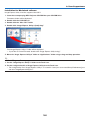
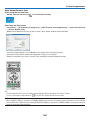
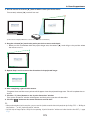
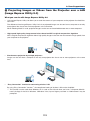
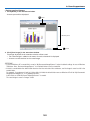
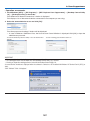
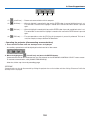
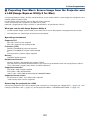
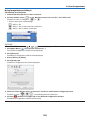
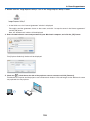
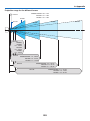
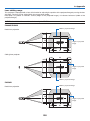
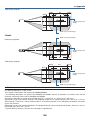
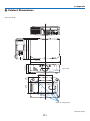
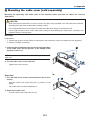
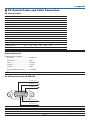
6. Installation and Connections Making Connections The projector can be connected to a computer using the computer cable (included), a BNC cable (5-core type) (commercially available), HDMI cable (commercially available) or DisplayPort cable (commercially available). Analog RGB signal connection • Connect the included computer cable between the computer’s display output connector (mini D-Sub 15-pin) and the projector’s Computer 1 or Computer 2 video input connector. • When connecting the computer’s display output connector (mini D-Sub 15-pin) and the projector’s Computer 3 video input connector, use a BNC cable (5-core) → mini D-Sub 15-pin converter cable. Stereo mini-plug audio cable (not supplied) RGB - to - BNC cable (not supplied) Stereo mini-plug audio cable (not supplied) Computer cable (VGA) (supplied) To mini D-Sub 15-pin connector on the projector. It is recommended that you use a commercially available distribution amplifier if connecting a signal cable longer than the cable supplied. NOTE: For Macintosh, use a commercially available pin adapter (not supplied) to connect to your Mac’s video port. • Select the source name for its appropriate input connector after turning on the projector. Input connector SOURCE button on the projector cabinet Button on the remote control COMPUTER 1 IN COMPUTER 1 COMPUTER 1 COMPUTER 2 IN COMPUTER 2 COMPUTER 2 COMPUTER 3 IN COMPUTER 3 COMPUTER 3 143