1
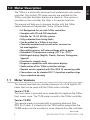
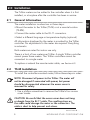
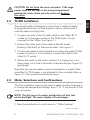
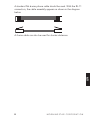
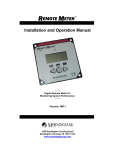
Digital Meters
Installation and Operation Manual
Version: TS-M
Version: TS-RM
1098 Washington Crossing Road
Washington Crossing, PA 18977 USA
phone: 215.321.4457
fax: 215.321.4458
email: [email protected]
www.morningstarcorp.com
Table of Contents
Important Safety Instructions .............................................................. ii
1.0
Meter Description........................................................................ 1
1.1 Meter Versions ........................................................................ 1
1.2 General Use ................................................................................ 2
2.0
Installation ...........................................................................................
2.1 General Information ..................................................................
2.2 TS-M Installation ........................................................................
2.3 TS-RM Installation ......................................................................
2.4 Meter Selections and Confirmations .....................................
3.0
Operation ............................................................................................ 7
3.1 Display Structure ........................................................................ 7
3.2 Meter Display Charts ................................................................ 8
3.3 Backlighting ................................................................................ 8
3.4 Operating Displays ....................................................................11
3.5 Manual Operations ....................................................................12
4.0
Diagnostics..........................................................................................14
4.1 Locate Diagnostics ....................................................................14
4.2 Faults & Alarms Displayed .......................................................14
4.3 Using the Diagnostic Data .......................................................15
5.0
TriStar Settings..................................................................................17
5.1 Locate System Settings ............................................................17
5.2 Information Displayed ..............................................................17
5.3 Language and Temperature Selections ................................17
6.0
Troubleshooting the Meter..........................................................19
6.1 Troubleshooting Steps ..............................................................19
6.2 Repair RJ-11 Connection .........................................................20
7.0
Warranty ..............................................................................................22
8.0
Specifications .....................................................................................23
i
3
3
3
4
5
T R I S TA R D E S C R I P T I O N
IMPORTANT SAFETY INSTRUCTIONS
SAVE THESE INSTRUCTIONS:
This manual contains important safety, installation and operating
instructions for the TriStar meters.
The following symbols are used throughout this manual to indicate
potentially dangerous conditions or important safety instructions.
WARNING: Indicates a potentially dangerous condition.
Use extreme caution when performing this task.
CAUTION: Indicates a critical procedure for safe and
proper operation of the controller.
NOTE: Indicates a procedure or function that is important
to the safe and proper operation of the controller.
General Safety Information
• Read all the instructions and cautions in the manual before
starting the installation.
• There are no user serviceable parts in the meters. Do not
disassemble or attempt to repair the meter.
• Ensure that both the battery and the solar power have been
disconnected before installing or disconnecting the meter.
• There are no fuses or user replaceable parts in the meters.
• Do not allow water to enter the meter.
ii
SAVE THESE INSTRUCTIONS
1.0 Meter Description
This manual will help you to become familiar with the TriStar
meters features and capabilities. Some of these follow:
• UL Recognized for use with TriStar controllers
• Complies with CE and LVD standards
• Suitable for 12, 24, 48 Vdc systems
• Fully protected from wiring faults
• Can be added to a TriStar at any time
• Controller-mounted and remote meter versions can
be used together
• Nonvolatile memory will retain settings with no power
• Extended LCD temperature rating (–20ºC to +70ºC)
• Multilingual display (English, French, German, Portuguese,
Spanish)
• Provides for manual resets
• Diagnostic capabilities with informative displays
• Confirmation of the TriStar controller settings
• Remote version supplied with 30m (98.4 ft) connecting cable
• Connections are by standard RJ-11 6-position modular plugs
• 5-year standard warranty
1.1
Meter Versions
This manual describes two standard versions of a 2x16 digital LCD
meter that can be used with the TriStar solar controller:
Version TS-M:
This local meter is provided as an assembly that replaces the TriStar
front access cover. The TS-M meter mounts to the TriStar controller.
Version TS-RM:
This remote meter is provided with a mounting plate and 30m
(98.4 ft) of cable. It is identical to the TS-M version except that the
TS-RM version can be mounted at some distance from the controller.
continued...
1
M O R N I N G S TA R C O R P O R AT I O N
1.0
The TriStar is a technically advanced and professional solar system
controller. Two digital LCD meter versions are available for the
TriStar controller, and their displays are identical. One version is
mounted on the controller, the other is for remote locations.
1.1
Meter Versions
continued...
Both meters display a full range of operating and diagnostic
information for the TriStar’s battery charging, load, and diversion
operating modes. This manual will generally describe the solar
battery charging mode with notes where the load or diversion
mode displays are different.
1.2
General Use
The meter will display a great deal of information about the TriStar
controller and the operation of your system. In addition, the meter
enables manual functions and controller diagnostics. These capabilities will increase your confidence that the system is working
properly and will help you to improve system reliability, battery
life, and system performance. It is worth the time getting to know
your meter!
The organization of the display screens is described in Section 3.1.
It is easy to move around the various display areas and to scroll
up or down, and left or right using the four pushbuttons as
indicated below:
LEFT
RIGHT
UP DOWN
There is a limit of two meters that can be used with a single TriStar
controller. Both can be remote, or one local and one remote. Only
one meter is able to have backlighting at any given time.
2
T R I S TA R D E S C R I P T I O N
2.0 Installation
The TriStar meters can be added to the controller when it is first
installed, or at anytime after the controller has been in service.
2.1
General Information
All information displayed by the meter is provided by the TriStar
controller. No adjustments to the meter are required. Everything
is automatic.
Both meters are rated for indoor use only.
There is a limit of two meters per TriStar. A single TriStar controller
cannot power three meters. Two TriStar controllers cannot be
connected to a single meter.
To replace or extend the remote meter cable, see Section 6.0.
2.2
TS-M Installation
To install the controller-mounted meter, follow these steps in order:
NOTE: Disconnect all power to the TriStar. The meter will
not be damaged if connected with power, but power
should be disconnected whenever the access cover is
removed for safety.
1. Use a phillips screwdriver to remove the TriStar’s four access
cover screws.
CAUTION: Be careful that the access cover does not hang
or dangle from the RJ-11 cable. The resulting stress on
the cable could damage the meter or the connectors. The
cable is short to help prevent such stress.
continued...
3
M O R N I N G S TA R C O R P O R AT I O N
2.0
The meter installation involves two or three steps:
• Mount the meter to the TriStar (TS-M) or at a remote location
(TS-RM).
• Connect the meter cable to the RJ-11 connectors.
• Select a different language or temperature display (optional)
2.2
TS-M Installation
continued...
2. Connect the cable to the RJ-11 socket on the TriStar, and then
to the meter. Looking at the back of the meter, connect to the
left RJ-11 socket.
Note that if the cable is connected to the wrong RJ-11 meter
socket, there will not be any damage and the LCD display will
remain blank. Move the cable connection to the other socket.
3. Carefully mount the TS-M cover on the controller and fasten
the 4 screws.
TS-RM Remote Meter
TriStar
30m
(98 ft.)
TS-M Meter
150mm
(6 in.)
Meter Connections Figure 2.1
4
T R I S TA R I N S TA L L AT I O N
CAUTION: Do not force the cover into place. If the large
power wires are too high in the wiring compartment,
pushing the meter down onto the wires will damage
the meter.
2.3
TS-RM Installation
1. Connect one end of the 30 meter cable to the TriStar RJ-11
socket (or to the open socket on the TS-M meter if one is
mounted to the TriStar). See Figure 2.1.
2. Connect the other end of the cable to the left socket
(looking at the back) of the remote meter. See Figure 2.1.
3. Confirm the meter is working before mounting the meter (TriStar
power must be on). If not working, connect the cable to the
other RJ-11 socket.
4. Mount the meter to the wall or cabinet. If a 2-gang box is not
being used, cut a hole in the wall or cabinet sized per Figure 2.2
(next page).
Note that two remote meters can be connected to a single TriStar
controller if a TS-M meter is not attached to the controller. Refer to
Figure 2.1. The connections will be the same.
2.4
Meter Selections and Confirmations
This final installation step can be used to select another language or
to change the temperature displays from ºC to ºF. See Section 5.3 for
more information.
NOTE: The first press of a meter pushbutton will only turn
on the backlight. The meter display will not change.
1. Press the pushbutton to scroll down to ”TriStar Settings“.
continued...
5
M O R N I N G S TA R C O R P O R AT I O N
2.0
The remote meter is designed to mount into a standard duplex
(2-gang) electrical box, or flush against a wall or cabinet with a
correctly sized mounting hole.
2.4
Meter Selections and Confirmations
continued
2. Press the
pushbutton and then scroll down to the display for
changing the language. Select one of the four languages if other
than English is desired.
3. Move down to the next display for changing temperature units
from ºC to ºF. If a change to ºF is desired, follow the directions
in the display.
4. The other ”Settings“ displays can be used to confirm that the
TriStar DIP switch settings are correct.
5. Return to one of the top three operating displays.
Ø
4.57
(0.18)
8.89
(0.35)
33.02
(1.30)
33.02
(1.30)
8.89
(0.35)
27.94
(1.10)
22.86
(0.90)
22.86
(0.90)
27.94
(1.10)
mm
(inches)
Remote Meter Mounting Figure 2.2
6
T R I S TA R I N S TA L L AT I O N
3.0 Operation
The four pushbuttons are in the shape of directional arrows.
Changing a display screen will be in the direction of the arrow
(up or down / left or right).
The meter can be left in any display screen, but it is recommended
to use one of the top three operating displays for useful system
information.
Solar Charging mode will be used in this manual to illustrate
general meter displays. The displays for Load and Diversion
are similar to Solar Charging.
3.1
Display Structure
There are over 30 display screens that can selected with the four
pushbuttons. These displays are organized into four functional
groups to make it easy to access the display you need. Refer to
the charts in Section 3.2 that show the complete set of meter displays.
First Group: Operating Displays
Three displays provide real-time operating figures, volt/amp bar
charts, and cumulative operating figures. Using the
pushbuttons, each of these three display screens can be quickly accessed.
Second Group: Manual Operations
The next two display screens provide for frequently needed manual
operations. These include resetting amp-hours and high/low battery
voltage, starting and stopping battery equalization, and LVD (low
voltage load disconnect) override in load mode.
Third Group: Diagnostics
The next screen enters a section of diagnostic displays. This area
indicates faults or alarms, and real-time operating data for the
controller. At the bottom of this group are less frequently used
manual operations.
continued...
7
M O R N I N G S TA R C O R P O R AT I O N
3.0
There are two initial screens (TriStar version and serial number) that
are only displayed at start-up. This information can also be found
under ”TriStar Settings“ during normal operation.
3.1
Display Structure
continued...
Fourth Group: TriStar Settings
The final group of displays describe the TriStar settings. This includes
reference information to verify the settings selected for the controller,
the software and hardware versions, and the TriStar serial number. At
the bottom of this group are user selections for temperature display
and language.
3.2
Meter Display Charts
The next two pages exhibit the Solar Charging and Load Control
display charts. Diversion is similiar to Solar Charging. These charts
can be useful for locating specific display screens. The four groups
of displays discussed above are identified in the display charts.
3.3
Backlighting
The first push of any of the four meter pushbuttons will turn on the
backlight. The backlight will remain on for 5 minutes from the last
button press.
NOTE: When turning on the backlight, there is no change
in the display. The second press of any pushbutton will
then change the display screen. This applies to both TS-M
and TS-RM meter versions.
NOTE: Only one meter will be backlit at a time. Pushing a
button on a second meter will automatically turn off the
backlight on the first meter.
If the battery voltage falls below 12.7V, the backlighting will begin
to dim. Backlighting will continue to dim proportionally to the
battery voltage down to 10.0V. Below 10 volts the backlighting will
begin to cycle, which could cause backlighting conflicts with two
meters installed. The lower voltage limit for the meter is 9.3V. If the
voltage falls below 9V, the meter display will turn off.
The backlight draws very little current. The backlighting would have
to be turned on more than 28 hours to consume 1 Ah of energy.
8
T R I S TA R O P E R AT I O N
SOLAR CHARGING
Operating
Displays
(Section 3.4)
Manual
Operations
(Section 3.5)
13.5v 25c 12.3A V
1234.5Ah FLOAT A
14.4V
12.3V
11357Ah
11.3kWh
Reset Ah
(Hold 2 sec)
Equalize START
(Hold 2 sec)
3.0
Diagnostics
(Section 4.0)
( to Return)
Diagnostics
Diagnostics
(Press )
Faults: 1 of 3
HVD
TriStar
Settings
(Section 5.0)
TriStar Settings
(Press )
( to Return)
TriStar Settings
TS-60 v01.01.01
Serial: 03010001
Meter v01.01.01
Mode:
Charge
12v (Auto)
Battery Type: 5
Float:
13.40v
Regulation:
14.40V PWM
Equalize: 15.15V
Automatic 28d
Language:
English
Units:
C
9
Alarms:
NONE
Battery
14.35V
-- C
10.30A
Battery Sense
14.40V valid
State:
Solar:
Last Eq:
PWM10%
17.70V
13d
total: 11357Ah
reset: 1234.5Ah
TriStar:
35 C
123456 hours
Battery Service
13d ( 2s reset)
Reset Ah total
(Hold 2sec)
M O R N I N G S TA R C O R P O R AT I O N
LOAD
Operating
Displays
(Section 3.4)
Manual
Operations
(Section 3.5)
Diagnostics
(Section 4.0)
13.5v 25c 12.3A V
1234.5Ah NORMAL A
14.4V
12.3V
11357Ah
11.3kWh
Reset Ah
(Hold 2 sec)
Turn Load OFF
(Hold 2 sec)
( to Return)
Diagnostics
Diagnostics
(Press )
Faults: 1 of 3
Overcurrent
TriStar
Settings
(Section 5.0)
TriStar Settings
(Press )
( to Return)
TriStar Settings
TS-60 v01.01.01
Serial: 03010001
Meter v01.01.01
Mode:
Load
12v (Auto)
Battery Type: 5
LVD:
LVR:
11.9V
13.4V
Language:
English
Alarms:
NONE
Battery
13.23V
12.34A
Battery Sense
13.51V valid
State:
Load:
NORMAL
14.35V
total: 11357Ah
reset: 1234.5Ah
TriStar:
35 C
123456 hours
Reset Ah total
(Hold 2sec)
Units:
C
10
T R I S TA R O P E R AT I O N
3.4
Operating Displays
A few seconds after the TriStar is powered-up, one of the following
screens will be displayed:
13.5v 25c 12.3A V
1234.5Ah FLOAT A
14.4V
12.3V
11357Ah
11.3kWh
These display screens are configured in a continuous circular loop
and can be quickly accessed by scrolling either left or right.
3
1
2
13.5v 25c 12.3A
1234.5Ah FLOAT
4
5
1. Battery voltage
2. Battery current
3. Battery temperature (only if the remote temperature sensor (RTS)
is installed)
4. Amp-hours generated (since the last reset)
5. Present operating state (NightCHECK / DISConnect / NIGHT /
FAULT / BULK / PWM00% / FLOAT / EQULIZ). A Fault indication
will blink on and off. An Alarm indication will alternate with the
present state.
Operating status conditions for Load mode are: NORMAL /
LVDWARNing / LVD / FAULT / DISConnect.
The second display (below), provides bar graphs for battery voltage
and charging current.
V
A
Fault, Alarm, and Battery Service will blink in the lower right corner
if one of these conditions is present.
11
M O R N I N G S TA R C O R P O R AT I O N
3.0
The first display (below), provides general operating information.
For battery charging, this information includes:
The third display (below), provides cumulative information,
collected over time. For battery charging, this includes:
1
3
14.4V
12.3V
11357Ah
11.3kWh
2
4
1. Highest battery voltage (resets with Ah reset)
2. Lowest battery voltage (resets with Ah reset)
3. Total amp-hours generated by the system
4. Total kWh’s generated by the system
Fault, Alarm, and Battery Service will blink in the lower right corner
if one of these conditions is present.
NOTE: The cumulative meter information will be retained
if the controller power is disconnected.
Also note that the amount of CO2 saved by the solar energy can be
calculated from the total kWh generated: 1 kWh ≈ 1 kg (2.2 pounds)
of CO2 saved. These figures are for coal and petroleum generated
electricity delivered to the home.
3.5
Manual Operations
Display screens located below the operating displays and also in
the Diagnostic group provide for various resets and manual
functions. These are shaded in the Meter Charts.
3.5.1 Manual Resets
A frequently used manual reset is located below the operating
displays:
Reset Ah: This display screen can be used to reset the Ah value
indicated on the first operating display (the ”resetable“ Ah). This
will also reset the High & Low battery voltages in the third operating
display at the same time. Hold the
pushbutton
for 2 seconds and all three values will be reset to zero.
12
T R I S TA R O P E R AT I O N
Two other manual resets can be found at the bottom of the
”Diagnostics“ screens:
Reset Ah Total: This will reset the total Ah and total kWh values to
zero. These values are normally not reset. However, if a new battery
is installed for example, the owner may wish to reset these figures.
Note that once these are reset, the previous total Ah and total kWh
values are lost.
Battery Service: If battery service was done early, this screen can
be used to reset the service interval back to zero.
Battery equalizations are typically a very important element of battery
service and life. A manual equalization can serve many purposes:
• continue beyond the programmed equalization cycle if the battery
requires additional equalization
• perform an early equalization cycle before the automatic cycle
begins (resets the automatic cycle)
• equalize Diversion batteries (can only be done manually unless
made automatic using the PC software)
• level battery cell voltages
Note that in the Load Control mode, this display screen can be
used to reconnect loads for 10 minutes after a low voltage load
disconnect (LVD). There is no limit to LVD reconnects. In addition,
pressing the right pushbutton in a normal operating mode will
toggle the load on and off.
13
M O R N I N G S TA R C O R P O R AT I O N
3.0
3.5.2 Manual Equalization (or Load Control)
The display screen below ”Reset Ah“ will start an equalization
cycle. While in equalization, holding the
pushbutton again
for 2 seconds will stop the equalization cycle. This can be repeated
without limit.
4.0 System Diagnostics
The TriStar meter can be used to troubleshoot both the controller
and problems with the solar system.
4.1
Locate Diagnostics
Scroll down to the display screen ”Diagnostics“. Press the
pushbutton to reach the subset of displays with diagnostic
information. In addition to Faults and Alarms, many system
operating parameters are also displayed. Use the up and down
pushbuttons to scroll through the display screens.
To return to the primary meter displays, scroll up to the top of the
Diagnostics displays, and then press the
pushbutton to return to
the main Diagnostic screen. Then scroll up to the top three
operating displays.
4.2
Faults & Alarms Displayed
In the event a Fault or Alarm condition has been detected by the
TriStar, ”FAULT“ or ”ALARM“ will be indicated in the top three
operating displays. Moving the meter display down to the
Diagnostic displays, the specific fault or alarm condition will be
identified. Use the
pushbutton to display each specific problem.
A Fault causes automatic protection and the current switches (FET’s)
will open. The Faults that can be displayed include the following:
• ”External Short“ — external short circuit
• ”Overcurrent“ — current exceeds rating
• ”RTS shorted“ — remote temperature probe short circuit
• ”RTS disconnected“ — RTS was working but is now disconnected
• ”FET Short“ — FET switches are shorted closed
• ”Software“ — a software problem
• ”HVD“ — a high voltage disconnect
• ”TriStar hot“ — heat sink temperature exceeded limits
• “DIP sw changed“ — a DIP switch changed while running or a
setting error
• ”Setting edit“ — an EEPROM setting was edited while running
14
T R I S TA R S Y S T E M D I A G N O S T I C S
• “Reset?“ — a reset due to an interrupted fault (typically power cycle)
• ”Miswire“ — a system wiring fault
An Alarm indicates a problem, but the TriStar continues to operate.
The problem must be recognized and repaired as soon as possible.
The Alarms that can be displayed include the following:
NOTE: If the RTS or battery sense wire is disconnected (or
the wire is broken or loose) while working properly, a fault
is indicated. However, if power is removed and the TriStar is
restarted, the controller cannot detect the RTS or battery
sense and there will no longer be an alarm or indication of a
problem. If there is any question about the status of these
attachments, use the Diagnostic displays to confirm that the
battery sense or RTS is working correctly.
4.3
Using the Diagnostic Data
A full set of operating information is displayed below the Fault and
Alarm display screens. These values are real-time and can change
while the screen is being displayed.
15
continued...
M O R N I N G S TA R C O R P O R AT I O N
4.0
• ”Ths disconnected“ — heat sink temperature sensor is open
• ”Ths shorted“ — heat sink temperature sensor short circuit
• ”TriStar hot“ — limiting output due to high heat sink temperature
• ”Current limit“ — limiting an overcurrent condition
• ”Current offset“ — current reading an offset greater than 1 amp
• ”Battery sense“ — battery voltage sense error
• Batt Sense disc“ — battery sense was working but is now
disconnected
• “Uncalibrated“ — calibration out of range – return to factory
for calibration
• ”RTS miswire“ — sense wires are connected to the RTS terminal
• ”HVD“ — high voltage alarm in diversion mode
• ”high d“ — high duty cycle in diversion mode
• ”miswire“ — system wiring problem detected (outside the TriStar)
• ”FET open“ — FET’s should be closed but are open
• ”P12“ — check the TriStar power supply
4.3
Using the Diagnostic Data
continued...
Most of the information is self-explanatory. Some comments follow:
• Battery temperature is displayed only if a Remote Temperature
Sensor is connected. If the RTS was connected and then failed,
the display will indicate: ”- - ºC“ (or - -ºF)
• ”Battery“ voltage is measured at the controller terminals.
• The ”Battery sense“ display is the actual battery voltage
(measured with the sense wires to avoid the voltage drop to the
battery terminals). ”valid“ means the sense wires are connected
and working correctly.
• The ”Solar“ voltage is measured at the solar input terminals. If
in a PWM state, the voltage will be the average of solar Voc
and battery voltages with the FET switches opening and closing.
• “Last Eq“ displays the number of days since the last equalization
cycle.
• ”TriStar“ temperature displays the heat sink temperature.
For the Load mode, some of the above display screens are not
shown. The load voltage and current consumption are displayed.
16
T R I S TA R S Y S T E M D I A G N O S T I C S
5.0 System Settings
This set of display screens provides the following functions:
• confirm that the setup and DIP switches are correct
• provide version numbers and other information for tech support
• select a language or change the temperature display to ºF
5.1
Locate System Settings
Scroll down to the display screen ”TriStar Settings“. Press the
pushbutton to reach the subset of displays with information about
the TriStar settings and system setup. In addition to the controller
configuration, hardware and software versions are identified to
support troubleshooting. Use the up and down pushbuttons to
scroll through the screens.
To return to the primary meter displays, press the up pushbutton
until ”to Return“ is displayed. Press the
pushbutton as indicated
to return to the main ”TriStar Settings“ display screen. Then scroll
up to the top three operating displays.
Information Displayed
The first displays indicate the TriStar and meter software versions
and the TriStar serial numbers. This identification will be important
if technical support is required.
The remaining displays provide specific information that describes the
operating mode, charging algorithm, and specific functions. If in a
charging mode, the PWM or On-Off method of charging is identified.
This information can be used to confirm that the controller has been
adjusted and setup as desired. If any of these values do not seem
correct, review the TriStar controller manual and confirm the DIP
switch positions.
5.3
Language and Temperature Selections
The bottom two display screens provide for selecting a language
or different temperature units:
continued...
17
M O R N I N G S TA R C O R P O R AT I O N
5.0
5.2
5.3
Language and Temperature Selections
continued...
1. Change Language
One of four languages other than English can be selected for the
meter displays. The available languages are French, German,
Portuguese, and Spanish. After changing the language, all the
displays will be in the selected language.
2. Change Temperature
The temperatures are displayed in ºC, but can be changed to ºF.
Refer to the installation, Section 2.4, for more information.
Both of these selections can be changed at any time and
without limit.
18
T R I S TA R S Y S T E M S E T T I N G S
6.0 Troubleshooting the Meter
The TriStar meters take all the displayed information directly from
the TriStar controller. There should not be any conflicts between the
meter and the controller regarding data values. So the meter troubleshooting will focus on problems and faults with the meter itself.
6.1
Troubleshooting Steps
There is no display:
• the RJ-11 cable may be plugged into the wrong connector socket
— move to the other socket on the meter (refer to Figure 2.2)
• the connector may be loose in the socket — remove and
reconnect, press firmly until there is a ”click”
• there may be a break in the cable wire (see Section 6.2 below)
• note that the TS-M (controller-mounted) version must be working
correctly for the remote meter to work — troubleshoot the TS-M
version first if both are installed
• battery voltage is below 9.0 volts (meter turns off)
The chart in the manual does not match the meter display:
• the meter being used may not exactly match the charts in this
manual due to software revisions
• if there are substantial differences between your meter display and
the charts, either the wrong chart is being used, or the wrong
controller operating mode was selected
Meter ”settings“ displayed do not match the TriStar manual:
• there may be slight differences due to revisions
• if some important setpoints displayed do not match the controller
settings, it is likely that a DIP switch in the controller has been set
in the wrong position (all meter information is taken directly from
the controller)
19
M O R N I N G S TA R C O R P O R AT I O N
6.0
LCD meter backlighting is dim or does not light:
• if there is enough ambient lighting in the room, the backlighting
may not be noticeable
• below 12.7V the backlighting starts to dim in proportion to the
battery voltage
• below 10V the meter will cycle the backlighting
• use a flashlight, if necessary, to see the display for troubleshooting
Cannot return to the top displays or exit a display:
• follow the meter chart in this manual, and the arrows on the
meter display
• the meter may not be able to move in the direction of the
pushbutton being used — try other pushbutton directions until
the display screens change
• as the display screens change, follow your progress using the
meter charts
• at the bottom of ”TriStar Settings“ and ”Diagnostics“ it is
necessary to scroll back up to the top and then return to the
main path of display screens (see Section 4.1 or 5.1)
Does not respond to the pushbutton:
• press the pushbutton down harder — it will not break
• try the other pushbuttons to confirm one or more are working
• if the others work, this pushbutton may have dirt on the contact
• to clean: disconnect the power, remove the 2 phillips screws that
fasten the meter to the cover plate, and remove the meter
assembly from the yellow pad — clean the pushbutton contact
and the circuit board contact area with alcohol and a cotton swab
Dirt is trapped between the display and the label window:
• disconnect power and remove the 2 phillips screws that fasten the
meter to the cover plate
• remove the meter assembly from the cover plate
• clean the label window and replace the meter assembly
Cable or connector has been damaged:
• if ”Morningstar Corp“ remains in the first display screen, there is a
cable wiring fault
• if ”Communications Error“ is displayed, there is a broken cable wire
• see the notes below for repair
6.2
Repair RJ-11 connection
The meter connecting cable is a standard 6-conductor telephone
cable with RJ-11 modular connectors. If the cable or connectors are
damaged, the cable can either be repaired or replaced.
20
TROUBLESHOOTING THE METER
A standard flat 6-wire phone cable should be used. With the RJ-11
connectors, the cable assembly appears as shown in the diagram
below:
A 4-wire cable can also be used for shorter distances.
6.0
21
M O R N I N G S TA R C O R P O R AT I O N
7.0 Warranty
LIMITED WARRANTY
The TriStar meters (versions TS-M and TS-RM) are warranted to be
free from defects in material and workmanship for a period of FIVE (5)
years from the date of shipment to the original end user. Morningstar
will, at its option, repair or replace any such defective products.
CLAIM PROCEDURE
Before requesting warranty service, check the Operator’s Manual to
be certain that there is a fault with the meter. Return the defective
product to your authorized Morningstar distributor with shipping
charges prepaid. Provide proof of date and place of purchase.
To obtain service under this warranty, the returned products
must include the model, serial number and detailed reason for
the failure, the panel type, array size, type of batteries and
system loads. This information is critical to a rapid disposition
of your warranty claim.
Morningstar will pay the return shipping charges if the repairs are
covered by the warranty.
WARRANTY EXCLUSIONS AND LIMITATIONS
This warranty does not apply under the following conditions:
• Damage by accident, negligence, abuse or improper use.
• Unauthorized product modification or attempted repair
• Damage occurring during shipment
THE WARRANTY AND REMEDIES SET FORTH ABOVE ARE
EXCLUSIVE AND IN LIEU OF ALL OTHERS, EXPRESS OR IMPLIED.
MORNINGSTAR SPECIFICALLY DISCLAIMS ANY AND ALL IMPLIED
WARRANTIES, INCLUDING, WITHOUT LIMITATION, WARRANTIES
OF MERCHANTABILITY AND FITNESS FOR A PARTICULAR
PURPOSE. No Morningstar distributor, agent or employee is
authorized to make any modification or extension to this warranty.
MORNINGSTAR IS NOT RESPONSIBLE FOR INCIDENTAL OR
CONSEQUENTIAL DAMAGES OF ANY KIND, INCLUDING BUT
NOT LIMITED TO LOST PROFITS, DOWNTIME, GOODWILL OR
DAMAGE TO EQUIPMENT OR PROPERTY.
1098 Washington Crossing Road, Washington Crossing, PA 19877
USA Tel 215-321-4457
Fax 215-321-4458
Email: [email protected] www.morningstarcorp.com
22
M O R N I N G S TA R W A R R A N T Y
8.0 Technical Specifications
These specifications are for the TriStar LCD meters only.
METER
• Voltage accuracy
• Self-consumption
• Limit of meter
• Display limit
• LCD temp. rating
BACKLIGHTING
• Time backlit
• Backlighting current
• Start to dim backlight
• Start to cycle backlight
MECHANICAL
• Mounting plate dimensions
• Plate material
• Meter weight
• Connector type
• TS-M cable
• TS-RM cable
• Cable temperature
• Storage temperature
• Humidity
5 minutes
35 mA
(28 hours backlighting = 1 Ah)
< 12.7 V
< 10.0 V
116 x 116 mm (4.56 x 4.56 inch)
powder coated steel
0.23 kg / 0.5 lb - TS-M
0.18 kg / 0.4 lb - TS-RM
RJ-11 (6 pin)
0.13m (5 inch) - 6 conductor
30m (98.4 ft) - 6 conductor
60ºC rating
–40ºC to +60ºC (display may
darken temporarily below –20ºC)
–55ºC to +85ºC
5-95% (NC)
MS-ZMAN-TSM01-A (MAY 03)
23
M O R N I N G S TA R C O R P O R AT I O N
8.0
Specifications subject to change without notice.
Designed in the U.S.A.
Assembled in Taiwan.
7.0
ENVIRONMENTAL
• Ambient temperature
12/24V: ≤ 0.1 % ± 50 mV
48V:
≤ 0.1 % ± 100 mV
7.5 mA (not backlit)
42.5 mA with backlighting
9.3 V
9.0 V
–20ºC to +70ºC
(extended temperature rated)
Notes
Notes
Notes