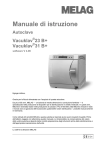
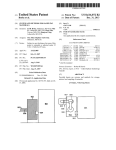
1
User Manual Autoclave Vacuklav®41-B Vacuklav®43-B Dear doctor, We thank you for your confidence demonstrated by the purchase of this autoclave. Over 55 years ago, MELAG began as a medium-sized family-run enterprise to specialise in the manufacture of sterilization equipment for medical practices. In the meantime our company has grown into one of the world's leading producers of sterilization equipment. Verification of it success has been the sale of more than 410,000 MELAG units worldwide, attesting to the high quality of our sterilizers, which are exclusively made in Germany. This autoclave has also been manufactured and tested according to the most stringent quality criteria. Nevertheless, please read the Operating Instructions carefully before the initial start-up of the device. The long-term serviceability and the retention of value of your autoclave depend primarily on the careful preparation of the instruments and the regular maintenance of the device. MELAG - General Management and employees For physicians, physician's assistants, and service personnel Please read this User Manual before you start operation of the autoclave. The instructions contain important safety precautions. .Make sure to keep the User Manual near to the autoclave. The instructions are a part of the product. User Manual Vacuklav®41-B and Vacuklav®43-B MELAG Medical Technology Berlin Valid for Vacuklav®41-B, Vacuklav®43-B as of software version 2.4x 1st edition September 2006 Responsible for the contents: Engineering Department MELAG Medical Technology Geneststraße 7–10 10829 Berlin Germany E-mail: [email protected] www.melag.de ©2006-2009 MELAG Berlin Document: BA_2_GB_41B_43B.doc/ Revision: 3 – 09/0187 Subjects to technical changes Foreword Thank you for deciding to buy this premium class MELAG autoclave. ® This User Manual describes both the autoclaves Vacuklav 41-B and ® Vacuklav 43-B. They are identical except for their chamber depth and device depth. Device name The device name "autoclave" is used in this User Manual to designate the ® ® steam sterilizers Vacuklav 41-B and Vacuklav 43-B. User Manual The User Manual contains important safety instructions and information which you need to operate the autoclave. Read these instructions carefully and thoroughly in proper sequence. Avoid dangers Please read all the safety instructions attentively before using the autoclave. About this manual Symbol Meaning Explanation Risk to health Indicates a dangerous situation which if not avoided could entail slight to life-threatening injuries. Attention Observe without fail Indicates a dangerous situation which if not avoided could entail damage to the instruments, the practice equipment or the autoclave. Notice Important information Indicates important information. Danger Table 1: Meaning of the symbols used in this User Manual Example of emphasis Meaning Explanation →Double jacket steam generator Glossary entry Words or phrases marked with an arrow are explained in the glossary. The glossary is listed alphabetically. It can be found at the end of this manual. Universal program Software citation Words or phrases appearing on the →display of the autoclave are marked as software citations. Chapter 6 – Logging Figure 1/(5) Cross-reference Reference to another text section within this User Manual. Cross-reference Reference to a detail in a figure – in the example, to Part No. 5 in Figure 1. Table 2: Meaning of the emphasized text within this User Manual Safety instructions Danger To operate the autoclave, pay attention to the following safety instructions given below and in the individual chapters of this User Manual. Instruction ■ Do not sterilize any liquids with this autoclave. Mains cable and power plug ■ ■ Never damage or change the mains cable or power plug. Never operate the autoclave if the mains cable or power plug are damaged. Never pull on the mains cable to take it out of the socket. Always take hold of the power plug itself. ■ →Double-jacket steam generator ■ Setting up, installation, commissioning ■ ■ ■ Preparation and sterilization of textiles and instruments ■ ■ ■ Program termination ■ ■ Removal of the items to be sterilized ■ ■ ■ The autoclave remains under pressure after being switched off. Check the pressure display of the manometer located on the autoclave lower front side. Only have the autoclave set up, installed, and commissioned by people →authorized by MELAG. Only operate the autoclave in areas which are not subject to explosion hazards. The electric connections and connections for feed water and used water may only be completed by a specialist technician. Follow the instructions of the textile and instrument manufacturers for preparing and sterilizing textiles and instruments. Observe the relevant standards and directives for the preparation and sterilization of textiles and instruments, e.g. →RKI [Robert Koch Institute] and →DGSV [German Society for Sterile Supply]. Only use wrapping materials and systems which are suitable for steam sterilization according to the manufacturer's information. Take heed that when opening the door after terminating a running program, hot water steam can escape out of the chamber, depending on when the program was terminated. Depending on the time of the program termination, the load might not be sterile. Observe the clear instructions shown on the →display of the autoclave. If necessary, sterilize the affected →objects after rewrapping. Never open the door by force. Use a tray lifter to remove the tray. Never touch the →sterilized items, the chamber or the door with unprotected hands. The parts are hot. Check the wrapping of the sterilized objects for damage when removing them from the autoclave. If a wrapping is damaged, wrap the object again and re-sterilize it. Maintenance ■ ■ Have the maintenance done only by →authorized persons. Comply with the predetermined maintenance intervals. Carrying the autoclave ■ ■ Two people are necessary to carry the autoclave. Use a suitable carrying strap to transport the autoclave. Errors ■ If repeated error messages occur while operating the autoclave, turn the device off. Only have the autoclave repaired by →authorized persons. ■ Safety instructions Contents Proper use .............................................................. 3 User benefit ............................................................ 3 Overview of sterilization programs.......................... 5 Setting date and time............................................ 34 Determine format for program log files ................. 34 Reading log files correctly .................................... 35 Finding logs .......................................................... 37 Chapter 2 – Device Description........................... 6 Chapter 6 – Maintenance ................................... 38 Scope of delivery .................................................... 6 Equipment views .................................................... 7 Effective capacity.................................................... 8 Mountings for the load ............................................ 8 Switch on autoclave................................................ 9 After switching on ................................................... 9 Control panel ........................................................ 10 Acoustical signals ................................................. 12 Overview of menus and symbols.......................... 13 Supply with feed water ......................................... 14 Close the door ...................................................... 14 Cleaning ............................................................... 38 Avoid formation of spots ....................................... 39 Use qualitatively high-grade feed water................ 39 Oil door spindle..................................................... 40 Maintenance ......................................................... 40 Chapter 1 – Performance Specification.............. 3 Chapter 7 – Operating pauses........................... 41 Sterilization frequency .......................................... 41 Pause times.......................................................... 41 Decommissioning ................................................. 42 Transport .............................................................. 42 Re-commissioning after change of locality ........... 43 Chapter 3 – Initial commissioning .................... 15 Conditions for setting up, installing and commissioning...................................................... 15 Set-up location requirements................................ 15 Connections required ........................................... 16 Prerequisites for initial commissioning.................. 17 Installation and installation report ......................... 17 Chapter 8 – Function test................................... 44 Automatic function test ......................................... 44 Manual function test ............................................. 44 Testing in daily operation...................................... 44 Vacuum test.......................................................... 44 Bowie & Dick test.................................................. 45 Validation.............................................................. 45 Chapter 4 – Sterilization..................................... 18 Create prerequisites ............................................. 18 Prepare items to be sterilized ............................... 18 Load the autoclave ............................................... 20 Select program ..................................................... 22 Start program........................................................ 23 Program is running ............................................... 23 Sterilization phase is finished ............................... 25 Drying phase ........................................................ 26 Program is finished............................................... 26 Display batch number........................................... 26 Remove sterilized items ....................................... 26 Storage of sterilized items .................................... 27 Chapter 9 – Errors .............................................. 46 Chapter 5 – Logging........................................... 28 Appendix B – Symbols on the autoclave ......... 55 Batch documentation............................................ 28 Plug in and remove CF card ................................. 29 Automatic immediate log output ........................... 31 Subsequent output of stored logs ......................... 32 Use log printer as output medium......................... 33 Using the PC as output medium ........................... 34 A warning is not an error ...................................... 46 Messages ............................................................. 46 Warning messages............................................... 46 Error messages .................................................... 46 Before you call...................................................... 47 Bad drying results................................................. 50 Glossary .............................................................. 51 Appendix A – Accessories................................. 54 Chapter 1 – Performance Specification In this chapter you learn under which conditions and for which purpose you should use this autoclave what benefit you can achieve by using this autoclave which sterilization programs you can use Proper use Application area Sterilization tasks The autoclave is intended for use in the medical field, e.g. in general physician and dental practices. According to →DIN EN 13060 this autoclave is considered a Class B sterilizer. It is suited as a universal autoclave for demanding sterilization tasks. For instance, you can sterilize narrow-bore instruments and transmission instruments – wrapped or unwrapped – and larger quantities of textiles. Observe the following instructions for using the autoclave: Danger ■ Do not sterilize any liquids with this autoclave. It is not approved for the sterilization of liquids. In case of non-observance, the consequences could be →delayed boiling, damage to the autoclave and burns. ■ Attention ■ ■ Use the autoclave only for the intended purposes outlined in the related technical documents and only in connection with the devices and components recommended by MELAG. The sterilization of instruments and textiles with this autoclave, like the foregoing instrument sterilization, is only to be done by competent personnel. Only use instruments, wrappings and textiles which are suitable for steam sterilization according to the manufacturer's information. In case of non-observance the consequences can entail damage to the autoclave and/or to the →items to be sterilized. User benefit Universal use The autoclave sterilizes on the basis of the →fractionated vacuum method. This ensures the complete and effective wetting or penetration of the →items to be sterilized with saturated steam. This method makes it possible to sterilize all kinds of loads which occur in a physician's medical practice. Large quantities Small time expenditure No pause times Overheating protection To generate the sterilization steam, the autoclave uses a →double jacket steam generator. Once heated up, it provides permanent steam. The walls of the →sterilization chamber thus have a defined temperature. The sterilization chamber is protected from overheating and you can consecutively sterilize large quantities of instruments or textiles very rapidly and achieve excellent drying results. Clean feed water The autoclave works with a one-way feed water system. This means that it uses fresh purified →feed water for every sterilization run. The quality of the feed water is constantly monitored via integrated →conductivity 3 Chapter 1 – Performance Specification measurement. This prevents stains on instruments and soiling of the autoclave, assuming the instruments have been carefully prepared. 4 Automatic feed water supply The supply with purified →feed water for the steam production is automatically provided from an internal supply tank or a water treatment unit (e.g. MELAdem® 40, MELAdem® 47). Optimal drying for wrapped items to be sterilized The →items to be sterilized are dried by the →vacuum. (→vacuum drying). This way you achieve optimal drying results for wrapped objects as well. Optimized total operating time The autoclave works with an →electronic parameter control. This way the autoclave optimizes the total operating time of a program depending on the load. High degree of safety by extensive safety devices The autoclave checks the pressure and temperature in the sterilization chamber at all times and does not permit the door to be opened in case of overpressure in the chamber. The motor-operated automatic door lock opens the door by slowly turning the locking spindle and holds the door while it opens. Pressure compensation takes place even if there is any difference in pressure until the door is completely opened. The quantity and quality of the →feed water is checked. A →process evaluation system is integrated in the electronics of the autoclave. During a program it compares such process parameters as temperatures, times and pressures with each other. It monitors the parameters with respect to their limit values at activation and control and guarantees a safe and successful sterilization. A monitoring system checks the device components of the autoclave with respect to their functional reliability and their plausible interaction. If one or more parameters exceed defined limits, the autoclave issues warnings or error messages, and if necessary aborts the program. In the event of an automatic program abort, observe the information on the display. Additional function check You can conduct an additional function check at any time with the help of test programs. Use the vacuum test to check the autoclave for leaks in the steam system. Use the →Bowie & Dick test to check whether there is sufficient steam penetration for porous material to be sterilized (e.g. textiles). Effective batch documentation The autoclave has an internal log memory. All data of the completed sterilization programs are automatically stored here. You can read out the internal log memory immediately after the end of the program, or at a later time. You determine whether the logged data are issued to one or several different output media (e.g. log printer ® MELAprint 42, MELAflash CF card, computer). Chapter 1 – Performance Specification Overview of sterilization programs Type tests Program type as per →DIN EN 13060 UniversalProgram QuickProgram B QuickProgram S GentleProgram PrionProgram Type B Type B Type S Type B Type B →Dynamic pressure test of the sterilization chamber X X X X X →Air leak X X X X X →Empty chamber test X X X X X →Solid load X X X X X →Porous partial load X X X →Porous full load X X X →Hollow body B X X X X →Hollow body A X X X X →Simple wrapping X X X X →Multiple wrapping X X X Drying →solid load X X X Drying →porous load X X X Sterilization temperature Sterilization pressure Sterilization time X X X 134 ˚C 134 ˚C 134 ˚C 121 ˚C 134 ˚C 2 bar 2 bar 2 bar 1 bar 2 bar 5.5 minutes 3.5 minutes 3.5 minutes 20.5 minutes 20.5 minutes X = Conformity with all applicable sections of the standard →DIN EN 13060 Table 3: Overview of sterilization programs 5 Chapter 2 – Device Description In this chapter you learn which components are included in the standard scope of delivery which components the autoclave contains what safety devices the autoclave has how the operating elements are designed and how you should use them how the menus of the user interface are structured which acoustical signals the autoclave emits what kind of water supply the autoclave needs Scope of delivery Standard scope of delivery Optionally 6 ® ® Vacuklav 41-B or Vacuklav 43-B User Manual Technical Manual Record of installation and setting up Warranty certificate Pressure device directive certificate Manufacturer’s inspection report 1 Mounting for trays or cassettes 1 hose for draining the internal storage tank 1 Tray lifter 1 Allen wrench for emergency opening of the door 1 Torx wrench to remove the carrying strap Trays Standard tray cassette and lifter Additional tray mounts MELAflash CF card MELAflash CF card reader Chapter 2 – Device Description Equipment views <Front view (1) Protective cap for slot of the →CF card (2) Control panel (3) Door (pivots opens to the left) (4) Protective cap for manometer to display the pressure of the →double jacket-steam generator (5) Cap for emergency opening of the door (6) Draining hose covering of the supply tank (7) Mains switch (concealed, accessible from the side) (8) Ethernet-1 data connection* (9) Back foot of the unit (fixed) (10) Reset button overheating protection* (11) Front foot of the unit (adjustable) *behind covering Rear view (12) Tank filler cap (13) Ethernet-2 data connection (14) Ethernet-3 data connection* (can be retrofitted) (15) Power cable (16) Emergency overflow (17) Safety valve, chamber (18) Sterile filter (19) Safety valve, double jacket (20) One-way drain Purified feed water inlet (for MELAdem®; swivelling (21) threaded fitting for hose 8x1, alternatively straight) (22) Connection pressure discharge (23) Cooler Figure 1: Front and rear view 7 Chapter 2 – Device Description Interior view (1) Chamber (2) Mounting to hold the load (3) Door spindle (4) Threaded bushing (5) Chamber sealing surface (6) Door seal (7) Door plate Figure 2: Interior view Effective capacity ® ® The autoclaves Vacuklav 41-B and Vacuklav 43-B differ only with respect to the respective depth of the units. As a result, their effective capacities are different. Diameter Depth Volume ® 25 cm 35 cm 18 litters ® 25 cm 45 cm 22 litters Vacuklav 41-B Vacuklav 43-B Table 4: Dimensions of the effective capacity (usable space) Mountings for the load The autoclave is always delivered with a mounting to hold trays or cassettes. The mounting (C) is standard and can hold either six trays or three standard tray cassettes rotated by 90˚. Figure 3: CMounting C The mounting (B) can hold four standard tray cassettes or four trays. Figure 4: Mounting B The mounting (D) can hold two high cassettes (e.g. for implants) or four trays rotated by 90°. Figure 5: Mounting D 8 Chapter 2 – Device Description Switch on autoclave Observe the following precautionary measures when handling the mains cable and power plug: Danger ■ ■ ■ ■ ■ ■ ■ ■ Never splice or modify the mains cable. Never bend or twist the mains cable. Never pull on the mains cable to take it out of the socket. Always take hold of the power plug itself. Never place any heavy objects on the mains cable. Never run the mains cable over places where it could be squeezed (e.g. doors or windows). Do not run the mains cable along a heat source. Do not use any nails, staples or similar objects to fixate a cable. If the mains cable or the power plug is damaged, turn off the autoclave. Mains cables or power plugs may only be replaced by →authorized persons. If these points are not observed, the cable or plug can be damaged and/or a fire or electrical shock might occur. Serious injuries could be the consequence. Plug power plug into the socket Switch on mains If the autoclave is still not connected to the supply mains, plug the power plug into the socket. Turn the mains switch on to power the autoclave (page 7, Figure 1/(7)) After switching on On the →display you see the start screen Welcome. The →software of the autoclave is →initialized and its device components are checked. The level of the →feed water in the →double jacket steam generator is automatically checked and if necessary maintained by the feed procedure (feed pump runs). The feed water is preheated for generating steam. Preparation time After the autoclave was switched on at the mains switch (page 7, Figure 1/(7)), it requires a →heating-up period for the initial preheating of the →double jacket-steam generator. For normal operation, this time is Vacuklav®41-B 9 minutes Vacuklav®43-B 13 minutes The main menu appears on the →display. As soon as the device is switched on, the default program selection is Universal-Program. 9 Chapter 2 – Device Description Control panel The control panel consists of a display and four membrane keys. The →display can show 320 x 240 pixels. (1) Key 1 – serves primarily for navigation (2) Key 2 – serves primarily for navigation (3) Key 3 – serves primarily for selecting options (4) Key 4 – serves primarily for selecting options (5) General display areas (6) Area for displaying the current allocation of the respective membrane key directly underneath. (7) Area with membrane keyboard Key1 Key2 Key3 Key4 Figure 6: Control panel Key settings You operate the autoclave by pressing the membrane keys. The keys are differently allocated with functions depending on the operating situation (soft keys). You can see the current key settings in the display field directly above a key. Use key 1 and 2 primarily to navigate within the menu. These keys are forthwith called "navigation keys". Keys 1 and 2 can also be used to select additional functions. Use keys 3 and 4 to select the option displayed directly above this key. Hot keys Certain →hot keys are defined for individual functions. There are hot keys for which you are notified on the →display, and other hot keys which are hidden. These are not shown on the display. Several of the important hot keys are given below: 10 Chapter 2 – Device Description Current operating situation Hot keys Function/explanation After the operator has terminated the Briefly simultaneously program press key 1 (CONFIRM) and key 3 (OPEN) Opens the door after a program termination (see page 25, Manually terminate program) DOCU Menu/Logging list Press each one of the keys 1 to 4 Sort the list: Key 1 – by →batch Key 2 – by date Key 3 – by program Key 4 – by success (see page 33, Logging list Immediately before starting a program Press key 1 for longer than one second Additional drying (see page 23, Additional drying Immediately before starting a program Press key 4 (START) for longer than one second Pre-selection start time (see page 23) In all menus and displays Briefly press key 2 and 3 simultaneously Status display; Display automatically returns to the previously displayed screen after 30 seconds. Running program Press key 3 Displays details to the currently running program Table 5: Important Hot Keys Acoustical signals Time delay When you press a key, your entry is confirmed by a short acoustical signal. There can be a very brief time delay between pressing a key and the corresponding display. Buffered entry Despite this time delay you can press the keys quickly after one another, once you've gained a certain routine with the autoclave. The autoclave has an input buffer. This buffer registers which key was pressed in what sequence, and implements the corresponding functions. Diverse messages Diverse messages are issued in the right upper corner of the →display. Several examples are shown below. Messages are marked by an envelope icon. Such information supports you in the operation of the autoclave. Messages are not error messages or warning messages. Messages Warning messages Warning messages help you to ensure a smooth operation and to recognize undesirable conditions. Warning messages are not error messages. 11 Chapter 2 – Device Description Error messages Reverse (selected) display Error messages indicate an error or a malfunction. You can only start programs or change settings if these are marked as selected, indicated by reverse display (highlighted). Example: not marked (normal display) marked (reverse display) Acoustical signals The autoclave emits acoustical signals. The signals are meant to catch your attention and serve as sources of information. The time interval between two signals is 0.5 seconds. Signal Meaning 1 x 0.1 seconds Confirms the correct pressing of a key 1 x 0.5 seconds Warning or communication 2 x 0.5 seconds Door is open (sounds every 30 seconds) 3 x 0.5 seconds Attention, program abort or end of abort reached 5 x 0.5 seconds Program successfully finished 8 x 0.5 seconds Program for unwrapped instruments has been started 10 x 0.5 seconds Fault Table 6: Overview of acoustical signals 12 Chapter 2 – Device Description Overview of menus and symbols Menus Main menu ├ Universal-Program ├ Quick-Program B ├ Quick-Program S ├ Gentle-Program ├ Prion-Program ├ SPECIAL menu │ ├ Vacuum test │ ├ Bowie & Dick test │ ├ Conductivity measurement │ ├ Draining │ ├ DOCU menu │ │ ├ Output of stored logs on │ │ └ ├ Logging list │ │ ├ Last log │ │ ├ Daily log file │ │ ├ Log files of the week │ │ ├ Log files of the month │ │ ├ All program logs │ │ ├ Last error log │ │ ├ Error logs for the day │ │ ├ Error logs for the week │ │ ├ Error logs for the month │ │ ├ All error logs │ │ ├ Legend log file │ │ ├ Status log │ │ ├ System log │ │ └ CF card formatting │ └ Return to Main Menu ├ SETUP menu │ ├ Water supply │ ├ Automatic logging │ │ ├ CF card │ │ ├ Computer │ │ ├ MELAprint │ │ ├ Immediate output │ │ ├ Batch format │ │ └ LAN TCP/IP FTP │ │ │ └ │ │ └ Graphic logs │ │ └ │ ├ Date │ ├ Display contrast │ ├ Language │ ├ Energy-saving mode │ └ DIAGNOSIS+SERVICE… │ └ └ INFO Menu └ (many important information texts) Symbols Universal-Program Quick-Program B Quick-Program S Gentle-Program Prion-Program SPECIAL Menu Vacuum test Bowie & Dick test Conductivity measurement Draining double jacket DOCU menu Return to Main Menu SETUP menu INFO menu Additional drying Message Warning message Error message Diagnosis and Service DEMO Mode Table 7: Overview of menus and symbols 13 Chapter 2 – Device Description Supply with feed water The autoclave requires →demineralized or →distilled →feed water for generating steam. The feed water supply is provided either with the internal supply tank or with a water treatment unit (e.g. MELAdem®40 / ® MELAdem 47). The autoclave automatically sucks in the feed water. Feed water with internal storage tank Internal supply tank Distilling unit MELAdest®65 If you employ the internal supply tank for the feed water supply, you must fill it manually from time to time. Employ only water available on the market according to →VDE 0510 as →feed water. The internal supply tank holds maximum 5 liters. This quantity of →feed water suffices for up to 7 sterilizations. With the MELAdest®65 distilling unit, you can produce →feed water in the practice cost effectively. Feed water with water treatment unit A water treatment unit is connected to the drinking water grid. It produces the →feed water required for generating the steam for the autoclave. The purified feed water connection for the autoclave is directly connected to the water treatment unit. If you use a water treatment unit, then there is always sufficient feed water available. You no longer need to fill the water storage tank. Water treatment units ® MELAdem 40 and ® MELAdem 47 The water treatment units MELAdem®40 and MELAdem®47 produce the optimal purified feed water quality for the autoclave. The selection of the respective unit depends on the number of sterilizations per day and the respective loads. Every MELAG autoclave can be supplemented with a water treatment unit. Notice Please first consult with MELAG if you would like to use water treatment units from other manufacturers. Close the door When closing the door of the autoclave, observe the following instructions: Attention ■ ■ ■ Do not press the door too hesitantly against the autoclave housing. Hold the door pressed closed for at least 3 seconds. Under no circumstances should you slam the door shut. If you don't observe this instruction, you may impair the functional reliability of the door lock mechanism. The autoclave has an automatic motor-driven door lock with threaded spindle. In order to lock the door, press it tightly closed. The door locks pressure-proof once the program is started. Locked door Notice 14 Inputs at the →display of the autoclave are only possible when the autoclave door is locked. Leave the door open only for loading and unloading the autoclave. If you keep the door closed, you will save energy. Chapter 3 – Initial commissioning In this chapter you learn who may set up, install and commission the autoclave which prerequisites you must create for setting up, installing and commissioning the autoclave where you will find additional information Conditions for setting up, installing and commissioning ■ Danger Attention Only have the autoclave set up, installed, and commissioned by people →authorized by MELAG. ■ According to the currently valid VDE standards, this device is not suitable for use in areas subject to explosion hazards. ■ The autoclave is intended for use outside the patient environment. The minimum distance to the treatment area must have a radius of at least 1.5 meters. Damages to the autoclave and/or injuries can occur in case this precaution is not observed. Set-up location requirements Location Set up the autoclave in a dry and dustproof location. The air humidity should be 30% to 60% and the ambient temperature 16° to 26 ˚C. ■ Attention Without fail, keep the specified distance free to the surrounding surfaces at the sides and above the autoclave. Non-observance can lead to heat accumulation. This could adversely affect the function of the autoclave and entail the shorting of the service life of the vacuum pump and extended program times. Distance to the surrounding surfaces The distance of the autoclave to the surrounding surfaces must be at least 5 centimetres on both sides and 10 centimetres at the back side. The autoclave should be freely accessible from above, so that the built-in supply tank can be filled and a good ventilation is guaranteed. 15 Chapter 3 – Initial commissioning Space requirements Vacuklav®41-B Vacuklav®43-B Width A = 46 cm A = 46 cm Height B = 56 cm B = 56 cm Depth C = 58 cm C = 69 cm D = 25 cm D = 36 cm E = 21 cm E = 21 cm F = 5 cm G = 10 cm F = 5 cm G = 10 cm Table 8: Space requirements of the autoclave Additional space for feed water supply Other than for the autoclave, you will possibly require space for a water treatment unit for the feed water supply. Space requirements for a water treatment unit MELAdem®40 Can be directly attached to the autoclave The attachment can be next to the autoclave or above or below the autoclave ® MELAdem 47 Mount next to the autoclave or above or below the autoclave (e.g. in a lower cabinet) is delivered with water storage tank MELAdem®40 ® MELAdem 47 module housing Width Height Depth 32 cm 35 cm 15 cm 39 cm 47 cm 15 cm ® MELAdem 47 water storage tank Table 9: Space requirements MELAdem Notice 51 cm Diameter 24 cm ® In no case may you subject the water storage tank to sunlight. This way you avoid algae formation. The maximum suction height for an external water storage tank is 1.5 meters. Connections required ■ Danger Electrical connection 16 The electric connections and connections for feed water and used water may only be completed by a specialist technician. Non-observance could lead to a short-circuit and/or fire and/or water damage and/or electrical shock. Serious injuries could be the consequence. Provide the following electrical connections for the autoclave: Electric circuit with 230 V and 50 Hz 16 A separate fuse protection – at least Automat Type B Protection from leakage current 30 mA Connected load 3400 VA Chapter 3 – Initial commissioning Notice Wastewater drain Notice In order to prevent water damage, MELAG recommends the use of a leak monitor, e.g. a water stop valve from MELAG. You can discharge the autoclave alternatively with the connection pressure release (see page 7, Figure 1/ (22))or over the one-way drain (see page 7, Figure 1 (20))directly to the drain. The drain must be located below the autoclave. Connection pressure discharge: Rotate the pipe fitting on the device and replace the copper gasket (MELAG Art. No. 32050) (You can order the required parts with the MELAG Art. No. 39181. ) One-way drain hose as wastewater connection: You can a order two meter long hose (MELAG Art. No. 36582) for this purpose. The waste water hose must be able to be laid with a continuous dip-free descent. For wastewater paths which are longer than two meters, MELAG recommends a fixed laying of HT (high temperature) pipe carried out by a specialized installation firm. Prerequisites for initial commissioning The following prerequisites must be satisfied for initial commissioning: The feed water supply must be secured. For the first-filling of the steam generating system the autoclave requires about three litters →feed water. The power supply of the autoclave must be assured. If available, the MEALflash →CF card should be plugged in the card slot. Installation and installation report Notice As documentation of proper setting up, installation and commissioning as well as for your warranty claim, the record of installation must be filled out by the person responsible and a copy send to MELAG. 17 Chapter 4 – Sterilization In this chapter you learn which prerequisites you must create for successful sterilization what you should observe on preparation of the items to be sterilized how you correctly load the autoclave which programs you should use for what how you start a program which stages a program runs through how to cancel a program how you can recognize that the sterilization is successfully finished what you can do to improve the drying results what you must consider when removing the items to be sterilized Create prerequisites You create the prerequisites for a smooth and successful sterilization process as follows: Provide cooling water Provide feed water Switching on Plug in CF card Manufacturer's recommendations for daily routine operation If the spigot for the cooling water inlet of the vacuum pump is closed, open the tap. If you are employing a water storage tank for the →feed water and the filling level lies below the MIN marker on the canister, fill up the water storage tank. The feed water must have a quality at least according to →VDE 0510 (see page 41, "Use qualitatively high-grade feed water"). ® If you employ a water treatment unit, e.g. MELAdem 40, ® MELAdem 47, and the water feed is closed, then open it up. If the water storage tank of the MELAdem®47 is empty, turn the water feed tap on at least one hour before the sterilization. If the autoclave is still not switched on, switch it on at the mains switch (page 7, Figure 1/(7)). See here as of page 9, Switch on autoclave and After switching on. If you would like to use the automatic logging feature with a →CF card as the output medium and the MELAflash CF card is still not plugged in, plug it in the card slot (see page 29, Plug in and remove CF card) Observe the manufacturer's recommendations from MELAG on the routine operation of Class B autoclaves. Prepare items to be sterilized A significant prerequisite for the secure disinfection and sterilization of →sterilizing materials is the appropriate cleaning and maintenance of the items to be sterilized according to the manufacturer's instructions. Furthermore the materials, cleaning agents and processing procedure employed are of significance. Notice 18 Possibly sterilize textiles and instruments separately from each other in separate sterilization containers or sterilization packages. Chapter 4 – Sterilization Textiles Observe the following instructions for treating textiles and putting the textiles into sterilization containers: ■ Danger Instruments Comply with the instructions of the textile manufacturer for treatment and sterilization and observe relevant standards and directives, e.g. of →RKI and →DGSV. ■ Adjust the folds of the textiles parallel to each other. ■ Stack the textiles in the sterilization containers vertically if possible, and not too closely together, so that current channels can form. ■ Retain the vertical stacking method when you pack the textiles in sterilization containers. ■ If textile packages do not stay together, wrap the textiles in sterilization paper. ■ Sterilize only dry textiles. ■ The textiles may have no direct contact to ground and walls of the sterilization chamber, otherwise they absorb →condensate. In case of non-observance, the steam penetration of the washing packet can be obstructed and/or bad drying results can result. In that case the textiles cannot be sterilized, which can entail endangerment to the health of the patient and the practice team. Observe the following instructions for treating used and brand new instruments: ■ Danger ■ ■ ■ Follow without fail the instructions of the instruments manufacturer for treatment and sterilization, and observe the relevant standards and directives, e.g. of →BGV A1, →RKI and →DGSV. Clean the instruments very thoroughly, for instance with the help of a thermal disinfector. After disinfection and cleaning, rinse the instruments with →demineralized or distilled water and subsequently thoroughly dry the instruments with a clean, non-fuzzing cloth. Employ only cleaning materials which are suitable for steam sterilization. Ask the manufacturer about the cleaning materials. In case of non-observance, residual dirt can possibly be loosened up during sterilization in the steam pressure. Rests of the disinfection and cleaning agents lead to →corrosion. Increased maintenance requirements and the impairment of the function of the autoclaves can be the consequence. Unsuitable cleaning materials, e.g. water-rejecting cleaning materials or steam-impermeable oils, can result in unsterile instruments. This endangers your health and the health of your patients. When using the following devices, observe without fail the preparation instructions of the instrument manufacturer. To disinfect and clean the instruments, MELAG recommends the use of auxiliary materials such as: Ultrasonic units Maintenance appliances for hand and angle pieces Cleaning and disinfection devices 19 Chapter 4 – Sterilization Load the autoclave Only if the autoclave is properly loaded can the sterilization be effective and the drying deliver good results. Notice Place trays or cassettes in the chamber only with the accompanying mounting. Use perforated trays, such as the trays from MELAG. Only this way can →condensate run off. If you use closed materials or shell halves to bear the items to be sterilized, you risk bad drying results. Please note that the use of tray insertions made of paper can perhaps likewise lead to worse drying results. Wrapping Attention The correct use of suitable wrapping is important for the success of the sterilization. Only use packaging materials and systems which satisfy the DIN EN 868 standard. You can employ recyclable rigid packaging such as Standard tray cassette or soft packaging such as Transparent sterilization packages, paper bags, sterilization paper, textiles, fleece. Closed sterilization containers Attention Use sterilization containers made of aluminium. Aluminium conducts and stores heat well and thereby quickens drying. When using closed sterilization containers, observe the following instructions for bearing the →sterilizing materials: ■ Closed sterilization containers must be equipped at least on one side – possibly below – with perforations or valves. Non-observance leads to insufficient steam penetration which could make the sterilization ineffective. Furthermore the condensate drainage is prevented, and bad drying results are the consequence. This can ultimately lead to unsterile instruments and thereby to the endangerment of the health of the patient and the practice team. The MELAG sterilization containers satisfy all requirements for successful sterilization and drying. They are perforated in the lid and in the floor and are equipped with disposable paper filters. Stack sterilization containers Attention If possible, stack only sterilization containers of the same size on top of each other, where the →condensate can run off to the side at the walls. ■ When stacking the sterilization containers, take care that the perforations are not covered. In case of non-observance, the →condensate cannot drip off to the vessel bottom. It would soak →sterilizing materials lying underneath. The consequence would be bad drying results. This can ultimately lead to unsterile instruments and thereby to the endangerment of the health of the patient and the practice team. Soft sterilization wrapping →Soft sterilization wrapping can be sterilized in sterilization containers as well as on trays. When using soft sterilization packages such as e.g. ® MELAfol , observe the following instructions: ■ Attention ■ ■ 20 Order →soft sterilization packages vertically standing and at a small interval to each other. Do not lay several soft sterilization packages flat on top of each other on a tray or in a container. If the welding seam tears open during sterilization, then it might be that the wrapping was too small. If this is not the case, re-wrap the Chapter 4 – Sterilization ■ instruments and sterilize them once again. If the welding seam tears open during sterilization, extend the sealing cycle of the package sealing device or weld a double seam. Non-observance can ultimately lead to unsterile instruments and thereby to the endangerment of the health of patient and practice team. Multiple wrapping Mixed loads The autoclave works with the →fractionated vacuum method. This permits the use of →multiple wrapping. For sterilizing mixed loads, observe the following instructions: Always place textiles on the top Sterilization containers are on the bottom Transparently wrapped sterilization packages and paper packaging on the top – exception: in combination with textiles on the bottom Transparent sterilization packages if possible vertically endwise ,and if this is not possible, with the paper side facing downwards Vacuklav®41-B Maximum measurements for each component Loading variant mounting C * Vacuklav®43-B Instruments Textiles Instruments Textiles 2 kg 2 kg 2 kg 2 kg max. 6 trays, depth 290 mm max. 3 Steriliz. containers 15K max. 3 Steriliz. containers 15M max. 2 Steriliz. containers 15G max. 3 Steriliz. containers 17K max. 2 swab drums 23R max. 2 Steriliz. containers 28M max. 1 Steriliz. containers 28G max. 3 standard tray cassettes max. 6 trays, depth 420 mm max. 6 Sterilization containers 15K max. 3 Sterilization containers 15M max. 2 Sterilization containers 15G max. 6 Sterilization containers 17K max. 3 Sterilization containers 17M max. 1 Sterilization containers 17G max. 3 swab drums 17R max. 2 Sterilization containers 23M max. 1 Sterilization containers 23G max. 2 swab drums 23R max. 2 Sterilization containers 28M max. 1 Sterilization containers 28G max. 3 standard tray cassettes 6 kg 7 kg max. 3 swab drums 17R Maximum total weight 2 kg 2.5 kg * Tray mounts, trays, sterilization containers, standard tray cassettes from MELAG: see Appendix A Accessories Table 10: Loading variants, example of mounting C, and maximum load 21 Chapter 4 – Sterilization Select program Select the desired program with the navigation keys in the main menu. Select the sterilization program accordingly, depending on how the →sterilizing materials are wrapped. Furthermore, consider the resistance to high temperature of the items to be sterilized. All sterilization programs are displayed in the main menu. The following table shows which program to use for which items to be sterilized. Universal program Prion program Wrapping Especially suitable for Sterilization Operation for time* Drying Load 41-B/43-B →single and →multiple wrapping →mixed loads; long, narrow-bore hollow bodies 134 ˚C about 21 min 15 min 6kg/7kg Instruments where a danger of infection by pathologicallymodified proteins is suspected (e.g. Creutzfeld-Jacob, BSE) 134 ˚C single and multiple wrapping about 38 min 15 min 6kg/7kg Larger quantities of textiles; Thermo-instable goods (e.g. plastic, rubber articles) Gentle program single and multiple wrapping Quick program B Single wrapped and unwrapped long narrow-bore instruments (no hollow bodied instruments textiles) Quick program S Simple →solid instruments; only transmission unwrapped (no instruments; simple textiles) hollow bodies ® Textiles 2kg (41-B) 2.5kg (43-B) 121 ˚C about 36 min 15 min Thermoinstable goods 6kg/7kg single wrapped max. 1.5 kg 134 ˚C about 12 min 6 min unwrapped 6kg/7kg 134 ˚C about 12 min 2 min 6kg/7kg ® * without drying (full load in the Vacuklav 41-B: 6 kg; Vacuklav 43-B: 7 kg) and depending on the load and installation conditions (such as the cooling water temperature and supply voltage) Table 11: Overview of the application areas of the sterilization programs 22 Chapter 4 – Sterilization Additional drying The program-specific drying times guarantee very good drying of →items to be sterilized for a load as described in this Chapter (see page 20, Load the autoclave ). For difficult drying tasks you can extend the drying time of a program by 50% with the function Additional Drying. To do this, before starting a program hold key 1 pressed down until the symbol for additional drying appears above the key on the →display. Additional drying is always active at program start. Deactivate additional drying If you have inadvertently activated the additional drying feature, press a navigation key in order to deactivate it again. Pre-selection start time The function start time pre-selection enables you to select any program and start it at a time of your choice. In order to do so after selecting a program, hold the START key depressed until the display changes to the “start time pre-selection” display. Press the EDIT key to change the pre-set time / date. The field Time and Date are highlighted. You can change the time by pressing the + and – keys. The date can only be changed in conjunction with the clock by crossing the 24/ 0 hours border. Then press the OK key. The display remains in the display screen preselection start time and does not return to the main menu. Notice Warning After setting the program start time, no further changes or settings to the autoclave can be undertaken as the start time pre-selection would otherwise be deleted. The start time pre-selection is only active for the unique time and program selection. That means that after completion of the program, the ´preselected start time is deleted ■ Unsupervised operation of electrical devices, including this autoclave at the operator’s risk. MELAG accepts no liability what so ever for any damage resulting from unsupervised operation. Start program If you have selected a program with the navigation keys, it is displayed marked (inversely highlighted). You can now activate it by pressing the START key. The door locks pressure-proof as soon as the program starts. The autoclave checks the quantity of the →feed water and its →conductivity. At the start of the quick program S a cautionary note appears, coupled with an acoustic signal. Unwrapped instruments may exclusively be sterilized with the quick program S. If the load exclusively contains unwrapped instruments, confirm with YES to start the program. Program is running A program runs in three phases. After starting a program, you can track the program sequence on the →display. Chamber temperature and pressure as well as the duration until sterilization or end of drying are displayed. 23 Chapter 4 – Sterilization By pressing the DETAILS button you can have additional information on the ongoing program provided on the →display. By repeated long pressing of the DETAILS button, this information is once again hidden. Follow the programme run on the computer You can follow the current progress of a current sterilization programme in a web browser on every computer of the user network via the website integrated in the autoclave. The autoclave must be assigned an IP address and is connected to the user network. Open a web browser window (we recommend Mozilla Firefox or Internet Explorer). Enter the autoclave IP address on the user P.C. in the address bar of the web browser, e.g. 192.168.57.41. and confirm with enter. Now you can display the program run or information about your autoclave (e.g. serial number, software version and selected values). Evacuation phase Air is repeatedly evacuated in the evacuation phase until a programdependent pressure is achieved. This occurs in alternation with the inflow of steam up to a slight overpressure. Sterilization phase After achieving the sterilization parameters of pressure and temperature, the sterilization phase begins. The sterilization time is shown on the →display. There is a pressure discharge at the end of the sterilization phase. Drying phase The drying phase begins after the pressure discharge. The regular drying time for the quick program S is two minutes, for the quick program B six minutes and for all other programs 15 minutes. 24 Chapter 4 – Sterilization Manually terminate program You manually terminate a running program in any of the phases. ■ Danger Please note that hot water steam can escape upon opening the door after you terminate a program, depending on the time of the termination. ■ Use a tray lifter to remove the tray. Never touch the →sterilized items, the chamber or the door with unprotected hands. The parts are hot. In case of non-observance, you can suffer burns. To terminate a running program, press the STOP key and confirm with YES. After a short time, as shown on the →display, you can open the door by simultaneously briefly pressing the CONFIRM and DOOR OPEN keys. Manual termination before beginning of drying If you terminate a program before the beginning of drying, then the →items to be sterilized are still unsterile. A cautionary note appears on the →display. The log reports that the sterilization was NOT successful. Manual termination during drying In the drying phase, you can terminate the program with the STOP key without the autoclave registering an error. You must then, especially for wrapped →sterilized items, expect insufficient drying. Sufficient drying is a prerequisite for sterile storage. Therefore, if possible, let programs with wrapped items to be sterilized continue up to the end of the drying phase. In a quick program, sterilized unwrapped instruments dry from their own heat after removal from the autoclave. Sterilization phase is finished Sterilization successfully finished From a distance you can recognize from the →display whether the sterilization phase is already successfully completed. The first square on the progress bar which symbolizes the time course during the program is then displayed in black and shows 0 min for the time until sterilization end. Below you see: Program successful. Sterilization not successfully finished The sterilization is not successful if it was terminated by the operator or aborted by the system in the event of an error. Program abort by the system At a system abort, the system puts the double jacket into a pressureless state. Therefore a system abort takes longer to complete than a termination executed by the operator. 25 Chapter 4 – Sterilization Drying phase Improve drying results The autoclave does an excellent job of drying the items to be sterilized. In the event of difficult drying tasks it might however be necessary to take the following measures to further improve drying: Load the autoclave correctly for drying. Place items wrapped in clear plastic or paper upwards like filing cards. Observe the section on page 20, Load the autoclave . Use the package holder where applicable. Activate the function Additional Drying. Observe instructions under Additional drying on page 23. Program is finished The chamber pressure is adapted to the ambient pressure at the end of a program. If the program was successfully finished, an appropriate notification appears on the →display. Look at the log header on the display Automatic logging Before you open the door you can look at the header of the log of the just finished program on the display. To do this, press DOKU. With activated automatic logging, the log of the completed program is outputted to the activated output media (see page 28, Chapter 5 – Logging). Display batch number In the final screen after a completed program About DOCU in the log You see on the →display the daily and the total batch number after a completed program. This is also shown if the program was terminated by the operator or aborted by the system. As described above, after a completed program you can press on DOCU before the door is opened. This activates the →display to show the header of the log of the completed program. The log contains the daily and the total batch number. You will naturally find this number also in the header of the stored or printed logs. Remove sterilized items After the end of a program observe the following instructions for removing the →sterilized objects: ■ Danger ■ ■ Never open the door by force. The autoclave could be damaged and/or hot steam could escape. Use a tray lifter to remove the tray. Never touch the →sterilized items, the chamber or the door with unprotected hands. The parts are hot. In case of non-observance, you can suffer burns. 26 Chapter 4 – Sterilization ■ Danger ■ Check the wrapping of the sterilized objects for damage when removing them from the autoclave. If a wrapping is damaged, wrap the object again and re-sterilize it. Non-observance can result in unsterile instruments. This endangers the health of the patient and the practice team. Condensate residues on the sterilized items If you remove the →sterilized items from the autoclave directly after the end of the program, it can happen that slight quantities of condensate moisture are found on the sterilized items. According to →DIN 58953, Part 7, smaller quantities of water which may be are found on the upper side of the paper bags and clear plastic sterilization packages are unobjectionable if they dry out within 30 minutes after removal from the autoclave. Storage of sterilized items Storage conditions Storage time Only wrap items to be sterilized in wrappings that comply to the standards. Do not store sterilized items in the preparation room. For the storage of the sterilized items, observe DIN 58953, Part 7 and the mentioned criteria below. Sealed against dust e.g. in a closed instrument cabinet Protected from damage on smooth surfaces Protected from excessive fluctuations in temperature Protected from moisture (e.g. alcohol, disinfectant) Storage duration in accordance with the type of package wrapping The maximum storage life depends on the packaging and the storage conditions. For →sterilized items which have been wrapped in compliance with the standards (dust-protected storage is assumed) – this time period is up to six months. 27 Chapter 5 – Logging in this chapter you learn Why and how you document batches Which output media you can employ for the batch documentation in which way Where you can find the logs for the batch documentation How to read the logs correctly How to set the date and time at the autoclave Batch documentation The batch documentation is indispensable as documentation for the successfully completed sterilization process and as an obligatory measure of quality assurance. The data, such as type of program as well as →batch and process parameters of all completed programs, are stored in an internal log memory of the autoclave. For the batch documentation you can transfer the internal log memory readout and the data onto diverse output media. This can take place immediately after every completed program or subsequently, e.g. at the end of a work day in the practice. Output media You have the possibility of storing the logs of the completed programs on the following output media and to archive them accordingly. MELAflash CF card Computer (over the network) ® Log printer MELAprint 42 You can arbitrarily combine the output media. It is thereby possible, for instance, to store logs on the MELAflash →CF card and additionally to permit printing. The logs are outputted on several activated media in sequence. You select the desired output media by activating automatic logging in the SETUP menu or in the DOCU menu for the subsequent log output. (For more on the SETUP Menu and DOCU Menu, see page 13, Overview of menus and symbols) State on initial delivery Automatic log output immediately after the end of the program Log output at time selected by yourself 28 In the state at initial delivery of the autoclave, the MELAflash →CF card is defined in the SETUP Menu as the output medium for text and graphic logs and automatic logging thereby the activated. The automatic logging is set so that immediately after a program has finished, the associated log is issued onto the activated storage medium (Immediate output = YES). If you retain this state, then when the autoclave is commissioned for the first time, as soon as a program finishes the associated log is outputted to the CF card and stored there. Prerequisite is that the CF card is plugged in the card slot of the autoclave. After a program has finished, you can immediately look at the header of the accompanying log on the display (see page 34, Determine format for program log files . To do this, press on DOCU before opening the door. In order to then output the report immediately, select OUTPUT. The output medium defined in the SETUP menu under automatic logging is then used. If you would like to check which storage media are activated, Chapter 5 – Logging briefly press the keys 2 and 3 simultaneously to permit viewing of the status at the →display. You can output logs subsequently with the DOCU Menu. There are many diverse possibilities for reading out the internal log memory. You can output all stored logs on media selected for automatic logging or to some other media (see page 32, Subsequent output of stored logs ). Capacity of the internal log memory The capacity of the internal storage suffices for about 120 logs. If the internal log memory is almost full and at least one log has not yet been issued to an activated medium, the cautionary warning Internal memory of program logs almost full appears on the →display. If this cautionary warning appears, you should prepare the output media determined in the SETUP Menu and output the respective logs. Shortly thereafter the notification log memory full is displayed. Then you have the last opportunity of archiving logs that have not yet been outputted, before the data in the log memory of the autoclaves is automatically deleted except for the last 40 logs. CF card as output medium Notice If no →CF card is plugged into the card slot, but was for instance already activated as the output medium in the factory settings, a cautionary warning appears on the →display. Thus if you would like to employ the CF card as the output medium, it must be inserted in the card slot if this has not yet been done. If you at this time have no CF card at hand, you can output the logs later with the DOCU menu. Due to the large memory requirements with real time graphical recording, it is recommended that you use only MELAflash CF cards with a memory capacity of 1GB or more from MELAG. These are despatched in a certified and formatted state. It is well-known that some older CF cards with 256 MB memory capacity can cause file system problems (e.g. implausible files on the CF card). Plug in and remove CF card Follow the following instructions for using a →CF card: Attention Never insert the CF card forcibly into the card slot. Never draw the CF card out from the card slot during write and read access. During write and read access, the red →LED to the lower right next to the card slot briefly lights up in irregular short intervals. Non-observance can result in data loss, damage to the card and/or the autoclave and/or its →software. The card can become unusable. Plug in CF card The card slot for the →CF card is located behind a protective cover to the right next to the control panel (page 7, Figure 1/ (1)). Proceed as follows to insert the CF card in the card slot: 29 Chapter 5 – Logging Push the protective cover as far as possible to the right until the card slot is freely accessible. Card slot for CF card Protective cover Figure 7: Protective cover for card slot to the right Use the CF card with the palpable grip edge facing left in the card slot. The palpable grip edge of the CF card must be facing left. Figure 8: Figure 8: Insert the CF card Insert the CF card until it engages in the card slot. If the CF card is correctly placed, the red →LED to the lower right next to the card slot briefly lights up. The LED lights up briefly after the CF card is inserted in the card slot. Figure 9: Insert the CF card into the card slot Push the protective cover back into the initial position and thus close the card slot. The protective cover for the card slot is back in its initial position. Figure 10: Closed card slot Remove CF card Proceed as follows in order to remove the →CF card from the card slot: Push the protective cover, which is in the right upper corner next to the →display of the autoclave, to the right until the card slot is freely accessible. (see above Figure 8). Look at the →LED to the lower right next to the card slot (LED see Figure 10). when logs are stored on the →CF card, the red LED lights up in irregular short intervals. If this is the case, wait until the LED goes out permanently. Press on the ejection button below the card slot and remove the CF card. Ejection button for the CF card Figure 11: Ejection button for CF card 30 Chapter 5 – Logging Push the protective cover back into its initial position and thereby close the card slot. Automatic immediate log output Text and graphic log issue Requirements for the automatic issue of text protocols immediately after program end Optional issue of the graphic log If you want to issue the associated text and graphic protocols automatically after the end of a program on an output medium, use the automatic logging with immediate issue. As delivered, the autoclave is set to automatic protocol issue of both the text and graphic protocols via the CF card, immediately after the program has ended. The following requirements must be fulfilled for the log ouput immediately after the end of a program. In the menu SETUP menu Æ 02 Automatic loggingÆ Immediate output set to YES. In the SETUP menu Æ 02 Automatic logging at least one output medium is set to YES and automatic logging is thus set as ACTIVE. The activated output medium is attached (protocol printer MELAprint® 42) or. Plugged in (MELAflash→CF card). If the protocol automatic is unable to issue a log, for example, because the output medium activated is not connected, a warning will appear. The autoclave registers as yet not issued logs for every output medium. It provides the option of issuing this log at the next possible time. MELAG recommends using the Automatic logging with immediate output of the logs (corresponding to the state of delivery). The following requirements must be fulfilled in order to record graphic protocols in real time: In the SETUP menu Æ 02 Automatic logging Æ with navigation keys +/- for the graphic logs, at least one output medium must be set to YES At least one of the selected output media corresponds to an output medium for the text log. The activated output medium is attached (computer) or plugged in (MELAflash→CF card). Explanation of the possible settings for graphic recording: CFC recording interval in sec. – indicates the time intervals in which the program curve is recorded on the CF card. The smaller the time interval, the more exact the curve. In the example, the time interval is set at 1 second. PC recording interval in sec. – indicates the time intervals in which the program curve is recorded, if the computer is selected as output medium. The smaller the time interval, the more exact the curve. In the example, the time interval is set at 1 second. PC backup interval in sec. – indicates the time interval in which the graphic data is saved from the autoclave is saved on the computer. In the example, the backup interval is set at 30 seconds. Notice Graphic logs can not be saved in the internal log memory. If you wish to record optional graphic protocols in addition to the text protocols, please always ensure that at least one common output medium has been set for issuing text and graphic protocols. This means that at least the computer or the CF card should correspond as output medium for both protocol types. 31 Chapter 5 – Logging Subsequent output of stored logs With the DOCU Menu you have the possibility of subsequently outputting logs independent of the time of a program end. You can employ activated output media or another output medium for automatic logging in the SETUP menu. This function is not possible for graphic protocols. Below is an example of how you can deactivate the automatic logging with immediate output (corresponds to the state on initial delivery of the autoclave), if you e.g. would like all text logs of the completed programs to be output collectively once a week. Example: Deactivation of automatic logging with immediate output Example: Output all stored logs on CF card 32 Initial state for the example: In the SETUP Menu/Automatic logging, the CF card is activated as output medium and immediate output is on YES. Navigate in the main menu with the navigation keys to the symbol for the SETUP Menu. Press SELECT. The SETUP Menu is opened. Go with the navigation keys to the menu item Automatic logging. The selection frame is on Automatic logging ACTIVE. Press EDIT. A notification for automatic logging appears. Press CONTINUE in order to carry on. Go with the navigation keys to Immediate Output. Immediate output YES appears framed. Press EDIT. Press a navigation key in order to change the value now represented in inverse to NO. Press OK to confirm this modification. Press CONFIRM. Go with the navigation keys to Exit MENU and SAVE. Press OK. In the following example read how you can output all stored logs onto the CF card. Prerequisite is that the CF card is plugged into the card slot. Use the navigation keys to go in the main menu to the symbol for the SPECIAL Menu. Press SELECT. The SPECIAL Menu is opened. In the SPECIAL Menu, go with the navigation keys to the symbol for the DOKU Menu. Press SELECT. The DOCU Menu is opened. On the →display appears: Output of stored logs on and below, presented in inverse, an output option. Press EDIT until CF card is shown as output medium. Press CONTINUE. Chapter 5 – Logging In the selection list, go to the menu item All program logs. Press SELECT. Press OUTPUT. At the →display the notification Log output is shown and the →LED to the right next to the card slot lights up. For the output of a log record onto the CF card, the autoclave requires about four seconds. If the log memory is full, the output of all logs can take up to four minutes. Press CONFIRM twice in order to return to the SPECIAL menu. Output of stored logs on Log output options Go to the symbol for CONFIRM to the Main menu and press SELECT. The main menu is displayed. As shown in the above described example, you can select the output medium in Output of stored logs. Among others, there is the option of selecting media selected for automatic logging as output media. If you are not certain whether and which media are activated in the SETUP Menu in Automatic logging, press the display Output of stored logs in INFO or briefly simultaneously press the keys 2 and 3, thereby activating the status display. Under Position 06 you will find which media are activated for automatic logging in the SETUP Menu (see page 11, Hot keys). Diverse log output options are offered in the selection list of the DOCU menu (see example above). A few examples are shown below Menu item in the DOCU Menu Explanation Logging list All program logs existing in memory are shown on the →display. You can sort the list by holding down one of the keys 1 to 4 (see page 11, Hot keys). Select individual logs by briefly pressing the navigation keys. These will be outputted via OUTPUT to the previously selected storage medium. Last log Daily log files Log files of the week All program logs Error logs for the day The log report of the last completed program is outputted to the previously selected medium. The logs of the current day are outputted to the previously selected medium. The logs of the week – Monday to Sunday – are outputted to the previously selected medium. All program logs existing in memory are outputted to the previously selected medium. The fault logs of the current day are outputted to the previously selected medium. Table 12: Examples of log output options Use log printer as output medium Connect printer ® If you want to employ the printer MELAprint 42 as the output medium, connect it as follows to the autoclave: 33 Chapter 5 – Logging (2) (3) (4) (1) Plug the power supply (1) into the wall socket. Connect the →MELAG network adapter (3) with the supplied cable (2) to an Ethernet data connection point of the autoclave (see page 7, Figure 1/. (13)) Plug the →MELAG network adapter (3) into the serial connection of ® the printer MELAprint 42 (can be screwed). Plug cable (4) of the adapter (3) into the power supply socket of the printer. Switch on autoclave and wait for the main menu (start up!) The printer is switched on when the power supply cable (1) is plugged into the power supply socket of the network adapter (3). ® After you have thus connected the MELAprint 42 to the autoclave, switch the autoclave off and on again in order to store the IP address of the autoclave in the →network adapter Figure 12: Printer connection, top view Using the PC as output medium You can connect a computer to the autoclave directly or over a network. Prerequisite is that the PC has a network card with RJ45 socket and the autoclave is equipped with →software as of Version 2. 0. Moreover, for protocol issue via FTP, you need an FTP server (communications program) on your PC or an FTP service. Log output via TCP requires an additional suitable program e.g. MELAview V2.0. Setting date and time Observe time re-settings Date and time of the autoclave must be correctly set for proper batch documentation. Observe the time re-settings in autumn and spring ("daylight saving time"), since this is not reset automatically. Once set, the clock of the autoclave is very precise. Set date and time as described below: In the main menu, go to the symbol for the SPECIAL Menu with the navigation keys. Press SELECT. The SETUP Menu is opened. With the navigation keys, go to the menu item date or time. Press EDIT. With the navigation keys, go to the parameter which you want to modify. (Day, month, year or hour, minute, second) Modify the respective parameter value with the navigation keys. Confirm the modification with OK. Repeat the last three steps for all parameters which you want to modify. Press CONFIRM to return to the SETUP Menu. Go with the navigation keys to Exit MENU and SAVE. Press OK in order to save the settings permanently. Determine format for program log files One log report is stored in the internal log memory for every completed program. You determine with the logging format which of the stored data should be outputted. You can choose between a short form (0000), a medium-sized form (0001) and a long form (0002). 34 Chapter 5 – Logging Standard format 0002 The medium logging format 0002 is the standard format. You determine the print formats for the program log files in the SETUP menu under the menu item Automatic logging – Logging format. Logging format Component Header Values for the program steps 0000 0001 0002 X X X X X X Standard format Legend Table 14: Logging format and their components Reading log files correctly Header Values of the program steps Legend The header is outputted for all three selectable log report formats. The format 0000 contains only the header of a log record. The header of the program log record comprises the lines 10 to 80 and contains the most important information for the completed program, such as whether the program was successfully concluded and the authenticity proof. Among other data, the time pressure and the temperature are recorded during the program. If you select the program format 0001 or 0002 then these values are outputted. The legend is a component of the most extensive logging format 0002. It serves for the designation of the program steps to which the specified values refer. In digitally outputted logs (→CF card, PC), the legend is directly next to the values of the respective program step. Every legend line thereby refers to the line just to the left of it. ® For logs which are outputted to the log printer MELAprint 42, the appropriate legend line is always below the line to which it refers. 35 Chapter 5 – Logging Header ---------------------------------------10 MMELAG Vacuklav 41-B ---------------------------------------- 10 Type of the autoclave 15 Program: Quick-Program B 20 Program type: 134°C 1x wrapped 25 Date: 20.01.2009 30 Daily batch: 02 Whole: 00301 ---------------------------------------- 15 20 25 30 Program name Sterilization parameters of the program Date Day and total batch number 40 Quick-Program B successfully ended 42 = = ---------------------------------------- 40 42 Control message Program termination by … in case program not successful 45 Temperature: 50 Pressure: 55 Plateau time: 60 Conductivity: 65 Start time 70 End time: ====== 45 50 55 60 65 70 Sterilization temperature with max. deviations Sterilization pressure with max. deviations Sterilization time →Conductivity of the →feed water Time at start of the program Time at finish of the program 80 SN:200741-B1224 ====== 80 Serial number of the autoclave 81 FW V2.431 Nov 28 2008 17:59:06 82 Para V2.430 26.11.2008 83 BO V2.431 11.12.08 81 82 83 Current version of the device firmware Current version of the device parameter Current version of the user interface Step 135.3 +0.11/-0.16 °C 2.17 +0.01/-0.01 bar 03 min 30 s 35 µS/cm (245:0.0) 10:29:15 10:46:03 (16:48 min) Time t[m:s] P[mbar] T[°C] SP-S 0:01 0:01 989 99.6 . . . SK12 1:08 0:23 1295 109.0 SK21 1:14 0:06 1646 109.9 SK22 1:37 0:23 1293 112.8 SK21 1:43 0:06 1632 112.5 SK22 2:06 0:23 1293 115.6 SF12 2:23 0:17 500 112.3 SF13 2:54 0:31 1627 113.2 SF21 3:03 0:09 1291 114.1 SF22 3:45 0:42 180 99.8 SF23 4:27 0:42 1829 115.3 SF31 4:38 0:11 1294 109.7 SF32 5:24 0:46 200 91.2 SF33 5:56 0:32 1933 117.3 SH01 6:32 0:36 2709 129.6 SH02 6:53 0:21 2844 131.5 SS01 7:27 0:34 3084 134.1 SS02 10:57 3:30 3178 135.2 SA00 11:26 0:29 1295 109.5 ST01 13:47 2:21 94 45.0 ST02 13:52 0:05 351 46.3 ST03 16:12 2:20 83 59.8 SB10 16:28 0:16 800 67.1 SB20 16:48 0:20 986 73.5 SP-E 16:48 0:00 986 73.5 ---------------------------------------- Time Time (minutes:seconds) elapsed since the start of the program t Duration (minutes:seconds) of a program step [m:s] P Pressure in the chamber in millibar [mbar] T[˚C] Temperature in the chamber in degrees centigrade At the beginning of the individual lines are initials which indicate the type of the respective program step. You will receive a listing of all step initials when you output a legend log report with the DOCU Menu. Program steps: SK Conditioning SF Fractionation SH Hold SS Sterilisation SA Pressure discharge ST Drying SB Ventilation SP-E End -0.00 0.0 0.0 0.0 0.0 0.0 -edk----etm---etd---etp---etv--ett-ENDE- Sensor measured values are shown here in case of a malfunction. The values are helpful for the technician. >> Never change code in following row << A000000500A7018953C9030704D6043231A43490 >> Proof of veracity batch log files << Authenticity proof Should never be changed; permits inference that the data was created and not changed on an autoclave from MELAG Table 15: Example of a program listing for a successfully concluded Quick-Program B Log types 36 Apart from log files for successfully concluded programs, there are diverse other log types. You can likewise output these with the selection list of the DOCU Menu. You recognize the type of log record by its file name extension. Chapter 5 – Logging Extensio Stands for n Explanation PRO Program log file Log of a successfully concluded program GPD Graphic log Log in which the sterilization processes are recorded graphically STR Fault log Log of a terminated program STB Error in standby Log of errors without a program running LOG System log Listing of all errors and modifications of the system that occurred in temporal sequence (logbook) STA Status log Summary of all important settings and system status states (counters, measured values etc.) LEG Legend log Contains all step initials which are used in the logs of the sterilization programs DEM Demo log Log of a successfully concluded simulated program in DEMO mode (only for presentation purposes) DES Demo error Log of a terminated simulated program (presentation) Table 16: Possible log file extensions Finding logs After a log output you will find a directory on the storage media →CF card or PC. Directory name, log file name The name of this directory consists of five characters, e.g. 44D0J. These characters encrypt the serial number of your autoclave. The directory is therefore also called the device directory. Subdirectories A device directory has subdirectories which are named after the months of the log creation, e.g. 04_2006. In the subdirectories you will find all the logs generated in the respective month. Every log file name, like the device directory, begins with the five characters of the encoded serial number (e.g. 44D0J). Log output The autoclave checks the output medium at every log output. If it does not already exist, the autoclave automatically creates a device directory with the encoded serial number and a subordinate month directory. Log output on the CF card The device directory is created directly on the →CF card, and thus without a superior directory. Log output on a PC Notice Multiple output of log files If you output the logs on a PC, then the device directory is created in the directory which is specified in the FTP server program. For very simple FTP servers it is the directory in which the FTP server program itself is located. If possible do not rename the directories. The autoclave would create a new directory, because it would no longer recognize the existing one. There would be logs in the renamed directory as well as in the directory created once again by the autoclave. If there is a multiple output of logs on the same output medium, a subdirectory named Double is created in the device directory. The longs are only stored once in this directory. 37 Chapter 6 – Maintenance In this chapter you learn How to clean the autoclave and which cleaning agents are suitable How to avoid the formation of spots Which feed water to use How to oil the door spindle What you must observe for the autoclave maintenance Cleaning Weekly inspection of chamber, door seal, mounting, chamber sealing surface In case of contaminations Attention Examine the chamber including the door seal and chamber sealing surface and the mounting for loading (page 8, Figure 1) for contaminants, deposits or damage once a week. If you determine any contaminations, draw the existing trays or cassettes and the associated mounting forwards out of the chamber. Clean the contaminated parts. When cleaning the chamber, the loading mounting, the chamber sealing surface and the door seal, observe the following: ■ Switch the autoclave off before cleaning and pull the power plug from the wall socket. ■ Make sure that the chamber is not hot. ■ Employ a soft and lint-free cloth. ■ Use chlorine- and vinegar-free cleaning agents. ■ First drench the cloth with cleaning alcohol or methylated alcohol and attempt to wipe off the contamination. ■ For persistent soiling of the chamber, mounting or chamber sealing surface, employ only a mild →stainless steel cleaning agent with a pH value between 5 and 8. ■ Employ neutral liquid cleaning agents for cleaning the door seal. ■ No cleaning agents may get into the piping system which exits the autoclave chamber. ■ Do not use any rough objects such as pot cleaners made of metal or steel brushes. In case of non-observance the cleaned surface could become scratched or damaged and the sealing surfaces untight. This would promote dirt deposits and →corrosion in the sterilization chamber. Housing parts Clean the housing parts with neutral liquid cleaners or methylated alcohol. Internal water storage tank for feed water If you provide the feed water supply manually via the internal storage tank, check for soiling when you refill the feed water. if necessary, clean the tank with a cloth and fresh feed water before refilling. Empty internal storage tank Clean the left side of the water storage tank (waste water) every two weeks. The both chambers are emptied as follows: Attach the drain hose on a quick-fitting connection (left of the wastewater tank, to the right of the feed-water tank), until this 38 Chapter 6 – Maintenance perceptibly engages Drain off the water into a container with at least 5 litres holding capacity. To remove the drain hose again, press the grey release knob at the quick-fitting connection. The hose detaches itself automatically from the connection. Warning Please observe the following when removing the quick-fitting connection: ■ When draining the storage chambers, stand to the side of the connection ■ Be sure to hold the hose tight with the other hand while pressing on the grey release button of the quick-fitting connection in order to arrest the spring tension of the connection. Non-observance can lead to injuries. Avoid formation of spots Formation of spots due to improperly cleaned instruments Only if you correctly clean the instruments before sterilization can you avoid the detachment of residues resulting from loading or instrument preparation under steam pressure during the sterilization. Detached dirt residues can clog the filter, nozzles and valves of the autoclave and form as stains and deposits on the instruments and in the chamber (see page 18, Prepare items to be sterilized). Formation of spots due to third-party rust All steam-conducting parts of the autoclave are made of non-rusting materials. This excludes the formation of rust caused by the autoclave. Should rust stains occur, then we are dealing with third-party rust. If the instruments have been incorrectly prepared, rust can form even on stainless steel instruments of leading manufacturers. Often a single rustproducing instrument already suffices for third-party rust to form on the other instruments or in the autoclave. Remove third-party rust from the instruments with a chlorine-free →stainless steel cleaning agent (see page 38 , Cleaning) or send the damaged instruments to the manufacturer for reconditioning. Formation of spots due to inadequate quality of the feed water The extent of the formation of spots on the instruments also depends on the quality of the →feed water employed for steam production. Use qualitatively high-grade feed water Observe the following when using →feed water for the steam sterilization: ■ Attention Use only →demineralized or distilled water according to →DIN EN 13060, Appendix C (VDE 0510). In case of non-observance, stains can form on the instruments and the functional readiness of the autoclaves can be adversely affected. Water in accordance with VDE 0510 Notice You can also use distilled or demineralized water from do-it-yourself markets, pharmacies or service stations as feed water, if the →VDE 0510 is explicitly noted on the label of the packaging. →Feed water which you can inexpensively produce by the osmosis ® ® method with MELAdem 47 or with the ion exchanger MELAdem 40 or by ® distillation with MELAdest 65 satisfies the feed water requirements. 39 Chapter 6 – Maintenance Oil door spindle Oil the door spindle at 2-month intervals as follows: Notice Clean the spindle with a lint-free cloth. Apply two drops oil from the supplied oil bottle (Art. -No.27515) in the threaded bushing (page 7, Figure 1/(4)) in the autoclave door. You will find the instructions for oiling the door spindle on the inner surface of the autoclave door. Maintenance ■ Danger ■ Have maintenance carried out only by trained field service technicians or technicians of the specialist trade. Turn to your specialist dealers or MELAG customer service in your vicinity. Comply with the predetermined maintenance intervals. Non-observance can lead to damage of the autoclave and to serious injury to health. For retention of value and functional reliability Maintenance intervals Notice 40 Regular maintenance is indispensable for the retention of value and the reliable practice operation of the autoclave. During maintenance, all functional and safety-relevant components and electrical facilities must be checked, and replaced if necessary. The maintenance must be carried out according to the maintenance instructions relevant for this autoclave. Have the maintenance regularly carried out at intervals of two years or after 2000 program cycles. At this point in time, the autoclave issues a maintenance reminder message. National pressure vessel requirements may ask the user of pressure vessel, such as autoclaves, to carry out safety inspections. Please check the download area from our website and find our recommendation in accordance with German requirements. Fore more information ask your local authorities. Chapter 7 – Operating pauses In this chapter you learn How quickly you can start sterilization programs in sequence What you must observe for short breaks and longer operating pauses How to put the autoclave out of operation, transport it and re-commission it Sterilization frequency No pause times required Pause times between individual programs are not required, since the →sterilization chamber is permanently held at the required temperature. After the expiration or termination of the drying time and removal of the →items to be sterilized, you can immediately re-load the autoclave and start a program. Pause times Short pauses between sterilizations Pauses which last longer than one hour Energy saving Keep the door closed in the pauses between the sterilizations if the autoclave is switched on. This requires less energy to maintain the →double jacket steam generator at the desired temperature. If the pauses between two sterilizations last longer than one hour, MELAG recommends that you switch off the autoclave. You can save energy this way. If the autoclave was switched off for one hour, then it requires about four minutes in order for the →double jacket steam generator to heat up again and be ready for operation. If the autoclave is not be switched off during longer operating pauses, the energy saving mode can be set. This reduces the time which the autoclave requires in order to pre-heat the →double jacket steam generator to the necessary start temperature. Two levels can be set in energy saving mode. Waiting time 1: After a preset waiting time of 15 minutes, the temperature of the double-jacket steam generator is reduced to 103°C. The program run time becomes c. 2 minutes longer upon the next start. The waiting time can be changed in intervals of one minute. Waiting time 2: After a preset waiting time of 60 minutes, the double-jacket steam generator is no longer heated. Accordingly, the length of the program run time increases by about 5 minutes upon the next start, depending on the length of the operating pause, as the double jacket steam generator must first be pre-heated to the necessary start temperature. The waiting time can be changed in intervals of 30 minutes. Set the energy saving mode as follows: In the main menu, use the navigation keys 1 or 2 to go to the symbol for the SETUP Menu. Press SELECT. The SETUP Menu will open. Use the navigation keys 1 or 2 to go to the menu point Energysaving mode. Press EDIT. 41 Chapter 7 – Operating pauses Longer operating pauses Operating pauses which last longer than two weeks Modify the respective values for waiting time 1 or waiting time 2 via the navigation keys. Switch the autoclave off for longer operating pauses, e.g. overnight or on the weekend, and leave the door ajar. The door seal is thus relieved and protected from premature fatigue. Furthermore it prevents the sticking of the door seal. Turn the cooling water inlet off and, if available, also the water feed of the water treatment unit. After operating pauses which last longer than two weeks, conduct a vacuum test and thereafter an empty sterilization with the Quick Program S (see page 44, Chapter 8 – Function test). The following situations can occur after longer pauses: Event Possible cause What you can do →conductivity too high Bad feed water Change the →feed water or the mixed-bed-resin pellets for a MELAdem® unit Despite running motor, the door does not open Door seal is sticking to the Switch the autoclave off and pull vigorously at the door to sealing surface open it. Table 13: Possible situations after operating pauses which last longer than two weeks Function test after pauses After pauses and depending on the pause duration, conduct tests described in Chapter 8 – Function test. Decommissioning If you would like to decommission the autoclave (put it out of operation) for a longer period of time, for instance because of holidays or a planned transport, proceed as follows: Switch the autoclave off at the mains switch. Pull the power plug from the wall socket. Turn off the cooling water inlet and if applicable also the water feed of the water treatment unit. Transport Carrying the autoclave Danger Observe the following when carrying the autoclave: ■ ■ ■ Two people are necessary to carry the autoclave. Use a suitable carrying strap to transport the autoclave. Make sure that the distance between the housing floor plate of the autoclave and setup location is small. In case of non-observance spine damage and contusions can result. Transport over larger distances, shipping To transport the equipment, for instance to remove or ship the autoclave, observe the following: ■ Attention To transport over a longer distance and/or when danger of frost and/or to ship the unit, an →authorized person must prepare the autoclave according to instructions and completely empty the →double jacket steam generator (see Empty double jacket). In case of non-observance, damages to the autoclave and errors can occur. Transport within the medical practice 42 Observe the following for transporting the autoclave within a room or within the practice: Chapter 7 – Operating pauses ■ Attention Empty double jacket Before you move the autoclave, wait after switching off the power until the manometer for the pressure display of the →double jacket steam generator (page 7, Figure 1/(4)) shows zero bar. ■ Close the water feed and remove the hose connections at the rear of the device. ■ If you would like to leave the mounting and the trays or cassettes in the chamber during transport, protect the surface of the door plate. Lay a piece of foam plastic or bubble wrap between the door plate and mounting. ■ Close the door of the autoclave before you move the device. In case of non-observance, damages to the autoclave and errors can occur. You have the option of draining the water in the → double jacket steam generator easily via the program Draining in the SPECIAL menu. In order to do so, the autoclave is heated once, building up pressure in the double-jacket so that the water can be drained fully from the double jacket steam generator. Switch off the autoclave in the program end graphic Drainage completed so that the autoclave does not feed water back into the double jacket. Re-commissioning after change of locality Proceed as with the initial commissioning For re-commissioning the autoclave after a change of locality, proceed as for an initial commissioning (see page 15, Chapter 3 – Initial commissioning) 43 Chapter 8 – Function test In this chapter you learn How the autoclave automatically carries out the function test Which possibilities you have for the manual function test Which function tests should be conducted in daily operation Why and how you should conduct a vacuum test Why and how you should conduct a Bowie & Dick test Automatic function test Process evaluation and monitoring system The interaction of the sterilization-relevant parameters of pressure, temperature and time are continually automatically monitored by the electronic parameter control. The →process evaluation system of the autoclave compares the process parameters with each other during the program and monitors them with respect to their limit values. The monitoring system of the autoclave checks the device components with regard to their functional reliability and their plausible interaction. If the parameters exceed defined limit values, the autoclave outputs warning messages or error messages. If necessary, it aborts the program with a corresponding notice. If the program was successfully concluded, an appropriate message is issued on the →display. Manual function test On the display and based on the logs You have the possibility of tracking the program sequence, based on the values shown on the →display. By pressing the DETAILS button you can view additional information about the currently running program. Furthermore based on the logs recorded for every program, you can logically reconstruct whether a program was successful (see page 28, Chapter 5 – Logging). Testing in daily operation Notice Observe the manufacturer's recommendation from MELAG on the routine operations of Class B autoclaves according to the recommendations of the Robert Koch Institute from April 2006. Vacuum test Weekly in routine operation, at initial commissioning, after pauses longer than two weeks and in case of error 44 Conduct a vacuum test in the following situations: Once weekly in routine operations At initial commissioning After longer operating pauses Chapter 8 – Function test In case of a respective error (e.g. in the vacuum system) The test serves to determine leaks in the autoclave. The leakage rate is determined. Conduct the vacuum test with a cold and dry autoclave as follows: Turn the mains switch on to power the autoclave (page 7, Figure 1/ (7). In the main menu, navigate with the navigation keys to the SPECIAL Menu. Press the key SELECT. Proceed with the navigation keys to the symbol for vacuum test. Press START. The chamber is →evacuated until the pressure for the vacuum test is achieved. An equilibration time of five minutes and a measurement time of ten minutes follow. The rise in pressure in the chamber is measured within the measurement time. At the end of the measurement time you will see a message with a specification of the leakage rate at the →display. If the leakage rate is too high, an appropriate message is issued on the display. Press DOOR OPEN and then close the door. With the navigation keys, go in the SPECIAL Menu to the symbol for BACK to the Main Menu and subsequently press SELECT, in order to leave the SPECIAL Menu and return to the main menu. Bowie & Dick test The →Bowie & Dick test serves the verification of the steam penetration of porous materials such as textiles. As a function check, you can routinely conduct the verification of steam penetration. For this purpose, use the test program - Bowie & Dick test. Diverse test systems are offered by specialist dealers for the →Bowie & Dick test. Conduct the test according to the manufacturer's instructions of the test system. Start the program Bowie & Dick Test from the SPECIAL Menu. Validation The guidelines for the validation of small sterilizers have still not been conclusively specified. 45 Chapter 9 – Errors In this chapter you learn Which type of messages exist What you should do in case of errors What you can do before calling the Hotline What you can do if there are bad drying results A warning is not an error Not all messages which appear on the →display are error messages. Symbols which are shown with a message in the right upper corner of the display indicate whether it is a notification, a cautionary warning or an error message. Warning messages and error messages are shown on the display with an event number. This number serves for the identification. Messages Many messages are communications which serve for your Information. Messages are not error messages or warning messages. Such information supports you in the operation of the autoclave. Messages are symbolized by an envelope. Warning messages Warning messages are displayed when necessary. These contain operating procedures for you. Warning messages are not error messages. They help to ensure smooth operation and to recognize undesirable conditions. Observe these warning messages promptly in order to avoid errors. Error messages Fault messages are displayed if safe operation or sterilization security is not guaranteed. These can appear on the →display shortly after switching on the autoclave or while a program is running. The program is aborted if an error occurs during a program run. ■ Danger 46 If a program is aborted before the drying cycle is complete, then the load is unsterile. Possibly rewrap and repeat the sterilization for the affected →sterilizing materials. Nichtbeachtung gefährdet die Gesundheit Ihrer Patienten und des Praxisteams.Non-observance endangers the health of your patient and the practice team. Chapter 9 – Errors Before you call Follow the operating procedures which are shown in connection with a cautionary warning or an error message on the →display of the autoclave. You will find the most important events in the following table. Possible causes and appropriate operating instructions are listed for the events. If you do not find the event in the table below or your efforts do not lead to success, turn to your specialist dealer or the →authorised MELAG customer service centre in your vicinity. In order for us to help you, keep the serial number of your autoclave and a detailed fault description in readiness. Event Key Possible causes What you can do 54 SUUS Operator has terminated the program with the STOP key Acknowledge termination by simultaneous pressing the keys CONFIRM and DOOR OPEN 61 FW11 For external supply tank for →feed water: No water in the tank Intake hose bent Suction filter clogged or not in the water For water treatment unit: Produces no water because the water tap is not open Fill external supply tank Check intake hose and clean suction filter or For external supply tank for →feed water: Water with inadequate water quality was poured into the supply tank (>60µS/cm) For water treatment unit: Mixed bed resin pellets in the water treatment unit are exhausted Empty and clean supply tank (see page 38, Empty internal storage tank) and fill with feed water of the quality →VDE 0510 or 63 64 65 WW12 FW12 WW13 open water inlet for the water treatment unit renew mixed bed resin pellets for the water treatment unit 67 68 WW22 FW 22 Water outlet not guaranteed Check waste water hose, let water drain out, check siphon 72 73 74 75 WW14 WW15 WW16 WW17 The feed water quality is declining (>40 µS/cm) Mixed bed resin pellets soon exhausted You can still carry out all work with the autoclave but should fill up with new feed water as soon as possible or renew the mixed bed resin pellets 76 WW21 See event 67 78 79 80 FW31 WW33 WW32 Waste water tank was not or only incompletely emptied 102 FA8 Waste water hose is bent or installed with a Check waste water hose: It must be laid large droop dip-free with continuous descent Empty waste water tank completely 47 Chapter 9 – Errors 48 Event Key Possible causes What you can do 113 FUN1 Autoclave was switched off while a program was running Power connection not completely made Power plug was withdrawn Power loss in the building power supply Do not switch off autoclave at the mains switch while a program is running Check building-side installation, operate autoclave on a separate electric circuit. 116 FS1T Upon repeated occurrence, inform your Maximum permissible difference between specialist dealer. the theoretical temperature and that measured by temperature sensor 1 (AIN01) is too large 117 FS2T Temperature sensor 1 or 2 is defective; temperature difference is too large. Upon repeated occurrence, inform your specialist dealer. 118 FS3T Maximum admissible sterilization temperature has been exceeded at temperature sensor 1 (AIN01). Upon repeated occurrence, inform your specialist dealer 119 FS4T Minimum admissible sterilization temperature not reached at temperature sensor 1 (AIN01). Upon repeated occurrence, inform your specialist dealer 123 124 125 126 FT1 FV5 FV0 FV8 Ambient temperature too high Built-in autoclave gets no or too little cooling air Autoclave is overloaded Autoclave was operated without mounting so that for instance a washing packet has direct contact with the chamber and large quantities of →condensate were absorbed. Observe installation instructions (see page, 15, Set-up location requirements). Check loading, observe instructions for loading (see page 22, "Load autoclave"). 128 WA3 See event 102 129 WE3 Autoclave overloaded Defective power supply (underdimensioned house connection for the outlet, defective outlet, numerous devices to one outlet or fuse) 134 WV3 See event 123 135 FW40 Cooling water inlet not opened Coolant hose bent Shut-off cock in the cellar is turned off or filter in the cellar clogged If available: leak-water alarm not functioning Open intake for cooling water Examine coolant hose Check shut-off cock for house water connection or have it checked Pull power supply line of the water stop valve from the wall socket and plug it in again after 30 seconds; switching sound at the leak-water valve (black box at the faucet) must be audible 136 FA1: Ambient temperature too high Ventilating louvers covered, minimal edge spacing (5 centimetres) not maintained Door is permanently open Observe installation instructions (see Page 15, Set-up location requirements). Close the door 183 WV4 See event 123 175 176 FOY1 FOY2 ACOUT1 main heating or ACOUT2 regular heating, electrical supply interrupted; FOY1+ FOY2 can occur in alternation. Check load, (see page 20, Load the autoclave ). Check power supply 1. Press reset button overheating protection (page 7, Figure 1/(10)) again 2. Acknowledge error message 3. Switch Chapter 9 – Errors Event Key Possible causes What you can do Hissing from the SV emergency release can occur with E179/ FOY5 the autoclave off and then again on, continue sterilization or conduct an empty sterilization. If this is not successful, it is necessary to switch on the vacuum pump. 192 WW29 Notice of following rinsing procedure. Rinsing condition in the feed water tank should be produced Top off water storage tank with feed water or ensure water supply of the water treatment unit 231 WCF0 In the following situations, no →CF card is plugged in: CF card is activated in the SETUP Menu as output medium and immediate output is on YES or Log output is started from the DOCU Menu and CF card is specified as output medium or Formatting of the CF card Plug CF card in card slot (see page 29, Plug in and remove CF card). Change to the DOCU Menu and from there save the desired logs on the CF card (see page 32, Subsequent output of stored logs ) Reformat the CF card 239 WCF1 Month directory on the CF card is full (more At the computer, transfer logs from month than about 500 logs) directories into newly created directories. 248 MX1R Vacuum test at residual moisture in the chamber or with load Repeat vacuum test if autoclave is cold, dry and empty 351 WART Two years have elapsed since the initial commissioning or since the last maintenance or 3000 sterilization programs have been completed Call MELAG customer service or specialist dealers and make a maintenance appointment; autoclave can continue to be used 377 W377 Attempt to output log over the printer, but no printer is connected Connect printer (see page 33, Use log printer as output medium ) 386 WMP8 Internal memory of the autoclave for the logs of the completed programs is almost full Read out the internal log memory on the storage medium of your choice with the DOCU menu (see page 33, "Subsequent output of stored logs") 387 WMS8 Autoclave internal memory for the error logs is almost full Error logs are required by the technicians for maintenance and fault analysis. Read the internal error log memory to a storage medium of your choice with the DOCU Menu. 394 WCF8 In the SETUP Menu, immediate output Press YES if you now would like to output the still not outputted logs to the CF card is set to YES, and the →CF card is activated as the output medium, but was previously not plugged in 395 WPR8 Press YES if you now would like to print the Immediate output is set to YES in the SETUP Menu and the printer is activated as logs still not printed out output medium, but was previously not connected 396 WPC8 Immediate output is set to YES in the Press YES if you now would like to output SETUP Menu and the computer is activated the log files still not transferred to the PC as the output medium, but was previously not connected or switched on 408 FW41 See event 135 414 FV1 Direct connection to waste water drain: Kinked effluent tube Check the effluent tube for kinks or pinching; 49 Chapter 9 – Errors Event Key Possible causes What you can do Autoclave is overloaded observe the maximum loads; use insert frame; Please ensure sufficient air feed to Surrounding temperature is too high, the autoclave rear panel, check for Autoclave is installed and is receiving no or packaging residue in the chamber. insufficient cooling air. The autoclave was operated without an insert frame with the result that e.g. the packages of textiles has come into direct contact with the chamber and absorbed a large amount of condensate. This condensate vaporized upon evacuation and forms a large amount of steam. 428 439 FG1 FK1 Direct connection to waste water drain: Kinked effluent tube Poor installation (multiple devices attached to a single siphon, sagging effluent tube. Check the effluent tube for kinks or pinching. Check for packaging residue in the chamber Pressure release clips blocked by packaging residue. 433 FS8T Maximum permissible difference between the theoretical temperature and that measured by temperature sensor 2 (AIN02=Display) is too large Upon repeated occurrence, inform your specialist dealer 434 FS5T Maximum admissible sterilization temperature has been exceeded at temperature sensor 2 (AIN02=Display). Upon repeated occurrence, inform your specialist dealer 435 FS6T Minimum admissible sterilization temperature not reached at temperature sensor 2 (AIN02=Display). Upon repeated occurrence, inform your specialist dealer Table 18: Important warning messages and error messages Bad drying results Apart from a proper device function, the drying process depends decisively on the correct setting up and loading of the autoclave. What you can do 50 Check the correct set-up of the autoclave. If necessary increase the tilt by unscrewing the front feet of the unit by max. two revolutions. The floor of the vessel must be free. Where applicable, remove fallen instruments, filter paper, etc. Pay attention to the correct loading of the autoclave (see page 20, Load the autoclave ). Do not overload the autoclave. Pay attention that textiles have no direct contact with the chamber wall and floor. Employ the Additional Drying function (see page 23, Additional drying). Glossary Glossary Air leakage – checking the air leakage Corrosion Air leakage is an untight location through which unwanted air can enter or escape; Checking the air leakage serves to verify that the volume of the air leak in the sterilization chamber during the vacuum stages does not exceed a value where it would prevents the intrusion of steam into the sterilizer load, and that the air leakage is not a possible cause of a renewed →contamination of the sterilizer load during drying Chemical change or destruction of metallic materials by water and chemicals aqua dem →demineralized water Delayed boiling This is the phenomenon that in certain conditions liquids can be heated beyond their boiling point without boiling; this state is unstable; a slight shock can cause a very rapid formation of a large gas bubble which expands like an explosion Demineralized water →distilled water Water without the minerals which occur in normal mineral or tap water; obtained from normal tap water by ion exchange, here used as →feed water Authorised persons DGSV Technicians from depots or employees from service companies designated by MELAG that are trained by MELAG Deutsche Gesellschaft für Sterilgutverordnung (German Association for Sterile Material Directive); the training guidelines of the DGSV are listed in DIN 58946, Part 6 as "Personnel Requirements" aqua dest Batch Collection of the →items to be sterilized that together passed through one and the same sterilization program DIN 58953 BGV A1 DIN EN 285 Trade association regulations – Principles of Prevention European standard – sterilization – steam sterilizers – large sterilizers Bowie & Dick Test Steam penetration test with standard testing packet; described in →DIN EN 285; test is recognised for largescale sterilizations CF card Compact Flash Card; Memory card for digital data of compact model size; CF is a normed standard, i.e. this memory card can be employed in every device with a CF slot. The CF Card can be read and possibly written by every device that supports the standard, Condensate A liquid (e.g. water), which forms upon cooling from the vaporous state and thereby separates Conductivity is the reciprocal value of the electrical resistance; unit of measurement in microsiemens/centimetre (µS/cm); the more materials are dissolved in water, the better it conducts electrical current and the higher is its conductivity. →distilled water ideally has the conductivity zero Conductivity measurement Measurement of the →conductivity Contamination here: Soiling of the sterilized load with unwanted or harmful materials European standard: sterilization, sterile goods supply DIN EN 867-5 European standard: non-biological systems for use in sterilizers – Part 5: Stipulations of indicator systems and testing bodies for performance tests of small sterilizers of Type B and Type S DIN EN 868 European standard: Packaging materials and systems for medical devices to be sterilized DIN EN 13060 European standard –Small steam sterilizers DIN EN ISO 11140-1 European standard – Sterilization of products for health care – chemical indicators – Part 1: General requirements Display Display device on electronic devices; here: Graphic display of the control panel Distilled water also Aquadest from lat. aqua destillata; is largely free of salts, organic materials and microorganisms, obtained by the distillation (vaporising and subsequent condensation) of normal tap water or pre-cleaned water, here used as →feed water Double jacket steam generator Serves the rapid steam production outside of the actual sterilization chamber, surrounds the sterilization chamber 51 Glossary Dynamic pressure test of the sterilization chamber Serves to verify that the rate of the change of pressure occurring in the sterilization chamber during a sterilization cycle does not exceed a certain value, which could lead to damage of the wrapping material [→DIN EN 13060] Empty chamber test Test without load; carried out in order to evaluate the performance of the sterilizer without the influence of the load; permits checking the maintained temperatures and pressures with respect to the intended settings [→DIN EN 13060] Evacuation Unsterile objects, materials still to be sterilized LED Abbreviation for Light Emitting Diode; Semiconductor diode which lights up when powered by current. LEDs are predominantly employed for status displays in devices, for example to display hard disk access. Lubricants Instrument oil or instrument milk MELAG Ethernet adapter Ethernet printer module for the MELAG printer ® MELAprint 42; the printer connection is located on one side, the socket connector for a network cable on the other Creation of a →vacuum in a vessel Mixed load Feed water Wrapped and unwrapped materials to be sterilized within one load is required for the creation of water steam for the sterilization; typical values for the water quality according to →DIN EN 285 or →DIN EN 13060 – Appendix C, at least however battery water according to →VDE 0510 Fractionated vacuum method Multiple wrapping e.g. instruments doubly sealed in foil or wrapped in foil are additionally found in one container or in a textile wrapped container Technical methods of steam sterilization; the repeated →evacuation of the →sterilization chamber alternating with steam intake Porous Heating-up period Made of materials which can absorb fluids (e.g. liquids) After switching on the autoclave or after starting a sterilization program, it is the time required for heating up of the →double jacket-steam generator before the sterilization process starts; duration depends on the temperature of the sterilizing process Hollow A One-sided open bodies, for which applies: 1 ≤ L/D ≤ 750 and L ≤ 1500 mm or a double-sided open body for which applies: 2 ≤ L/D ≤ 1500 and L ≤ 3000 mm and which does not correspond to the hollow body B L…hollow body length D…hollow body diameter [→DIN EN 13060] Hollow B One-sided open bodies, for which applies: 1 ≤ L/D ≤ 5 and L ≤ 5 mm or a double-sided open body for which applies: 2 ≤ L/D ≤ 10 and D ≥ 5 L…hollow body length D…hollow body diameter [→DIN EN 13060] Hot Key Quick Key; key or combination of several keys which was assigned to a certain function 52 Items to be sterilized Pervious to liquids and air, e.g. textiles Porous small parts Porous partial load – Check of porous partial load Serves to verify that for the values set on the control, the steam quickly and uniformly penetrates into the defined test packet [→DIN EN 13060] Porous full load – Check of porous full load Serves to verify that for the values set on the control, the required sterilization conditions are achieved in porous loads with the maximum density for their sterilization in a sterilizer designed according to →DIN EN 13060 [DIN EN 13060] Process evaluation system Also self-monitoring system – observes itself, acts during the programs, compares sensors with each other RKI Robert Koch Institute Self-monitoring system →process evaluation system Simple wrapping Wrapped once, e.g. instruments sealed in a foil. – contrasted to: →Multiple wrapping Soft sterilization package Initialization e.g. paper bags or clear-plastic sterilization packages Creation of a certain initial state of the →software at startup Software non-material components of a EDP system; e.g. computer programs Glossary Solid Without hollows or spaces; firm, dense, closed Solid load – check of solid load Serves to verify that for the values set on the control, the required sterilization conditions were achieved within the entire load. The load must represent the maximum measurements of solid instruments for whose sterilization a sterilizer has been designed according to →DIN EN 13060 [DIN EN 13060] Standards-compliant Conformity with all the relevant standards Stainless steel cleaning agent e.g. Sidol Sterilization chamber Interior of a sterilizer Takes up the →items to be sterilized Sterilized items also designated as →batch, if already successfully sterilized: sterile goods TCP (engl.: transmission control protocol) designates a standard-protocol for a connection between computers and networks Vacuum colloquially: Space free of matter in the technical sense: Volume with reduced gas pressure (usually air pressure) Vacuum drying Gentle drying; the drying goods are exposed to an underpressure which reduces the boiling point and thereby also at low temperatures leads to a vaporizing of the water VDE Verband der Elektrotechnik, Elektronik und Informationstechnik e.V. (Association of German Electricians) VDE 0510 Standard of the →VDE – Provisions for accumulators and battery units Warming-up time →heating-up period Water ring pump Pump which creates the vacuum for the sterilization, cooled with water 53 Appendix A - Accessories Appendix A – Accessories Article Order Number Vacuklav®41-B Vacuklav®43-B Tray mounts Sterilization containers with single-use paper filters according to DIN EN 868-8 Swab drum with filter cloth Swab drum with filter cloth Standard tray cassettes B for 4 standard tray cassettes 40234 40224 C for 6 trays or 3 standard tray cassettes 40232 40242 D for 2 high cassettes or 4 trays 46840 15K depth/width/height in centimetres: 18/12/4,5 00151 15M depth/width/height in centimetres: 35/12/4,5 00152 15G depth/width/height in centimetres: 35/12/8 00153 17K depth/width/height in centimetres: 20/14/5 00171 17M depth/width/height in centimetres: 41/14/5 00172 17G depth/width/height in centimetres: 14/14/9 00173 17R diameter/height in centimetres: 13/10,5 00174 23M depth/width/height in centimetres: 42/16/6 00231 23G depth/width/height in centimetres: 42/16/12 00232 23R diameter/height in mm: 18/14 00233 28M depth/width/height in mm: 32/16/6 00284 28G depth/width/height in mm: 32/16/12 00285 perforated, depth/width/height in mm: 29/19/4 with filter cloth 00289 without filter cloth 00286 trays tray 00280 Helix test body system MELAcontrol consisting of Helix test body and 250 indicator strips Water treatment units MELAdem 40 ion exchanger ® 00230 01080 ® 01049 MELAdem 47 reverse-osmosis system ® 01047 MELAflash CF card 01043 MELAflash CF card reader 01048 For the Documentation ® Water stop valve MELAprint 42 log printer 01042 MELAG Ethernet adapter for use of ® MELAprint 42 40295 Water stop valve 01056 54 Appendix B - Symbols on the autoclave Appendix B – Symbols on the autoclave The manufacturer of the apparatus declares with the accompanying sticker that the medical device corresponds to the basic requirements of the European Standard EN1717 – "Protection of drinking water from contaminants…." The symbol of the struck out trashcan identifies a device that may not be disposed with domestic waste. An appropriate and competent disposal must be carried out by the marketing party. With the designation of an apparatus with this symbol, the manufacturer furthermore declares that he satisfies all requirements of the law concerning the release, withdrawal and environmentally compatible disposal of electric and electronic appliances. With the CE sign CE 0124, the manufacturer declares that the medical device corresponds to the basic requirements of the German Medical Device Guideline. The four-digit number means that an approved certification body (DEKRA) monitors the product certification. With the CE sign CE 0035, the manufacturer declares that the medical device corresponds to the basic requirements of the German Printing Device Guideline. The four-digit number means that an approved certification body (TI Rheinland-Berlin/Brandenburg) monitors the product certification. 55