1
User and Developer manual for Parempi-renderer using PlasTeX
September 6, 2010
Contents
1 Introduction
2 User manual
2.1 Installing Parempi-renderer to
2.2 Using Parempi-renderer . . .
2.3 Parts of Parempi-renderer . .
2.4 Usecase examples . . . . . . .
2.5 User configuration . . . . . .
2
.
.
.
.
.
.
.
.
.
.
.
.
.
.
.
.
.
.
.
.
.
.
.
.
.
.
.
.
.
.
.
.
.
.
.
.
.
.
.
.
.
.
.
.
.
.
.
.
.
.
.
.
.
.
.
.
.
.
.
.
.
.
.
.
.
.
.
.
.
.
2
2
2
3
3
5
3 Developer manual
3.1 Adding unidentified command or environment . . . . . . . . . . . .
3.1.1 Forcing PlasTeX to identify a command . . . . . . . . . . .
3.1.2 Forcing PlasTeX to identify an environment . . . . . . . . .
3.1.3 Handling the command or environment in Parempi-renderer
3.2 Recursion, unicode(node) and default(node) . . . . . . . . . . . .
3.2.1 unicode(node) . . . . . . . . . . . . . . . . . . . . . . . . .
3.2.2 default(node) . . . . . . . . . . . . . . . . . . . . . . . . . .
3.3 Debugger . . . . . . . . . . . . . . . . . . . . . . . . . . . . . . . .
.
.
.
.
.
.
.
.
.
.
.
.
.
.
.
.
.
.
.
.
.
.
.
.
.
.
.
.
.
.
.
.
.
.
.
.
.
.
.
.
.
.
.
.
.
.
.
.
.
.
.
.
.
.
.
.
.
.
.
.
.
.
.
.
.
.
.
.
.
.
.
.
.
.
.
.
.
.
.
.
.
.
.
.
.
.
.
.
.
.
.
.
.
.
.
.
.
.
.
.
.
.
.
.
7
7
7
8
9
10
10
10
10
PlasTeX framework
. . . . . . . . . . . .
. . . . . . . . . . . .
. . . . . . . . . . . .
. . . . . . . . . . . .
1
.
.
.
.
.
.
.
.
.
.
.
.
.
.
.
.
.
.
.
.
.
.
.
.
.
.
.
.
.
.
.
.
.
.
.
.
.
.
.
.
1
Introduction
This document is meant for both users and developers as we suppose most of the users will at the same
time find themselves also as developers.
Parempi-renderer is a renderer created in the group of renderers already available for PlasTeX. It is
written in Python and renders .tex-files into .txt-files. Its intended main audience is visually impaired
users, who wish to read content from code-ridden .tex-files.
Many of the features added for Parempi-renderer when compared to PlasTeX’s normal Text-renderer
are meant to help visually impaired users to be able to both read and communicate what they read
to other people. This is also the reason why for example the figure-captions generated using Parempirenderer have page numbers, although the document, i.e. the .txt-file, hasn’t got any page numbers.
We tried to leave as many parts of the program as configurable as possible for easy configuration.
Hope you enjoy using the program.
-Software Engineering Project Course Group Parempi
2
User manual
2.1
Installing Parempi-renderer to PlasTeX framework
Installation of Parempi is just like any other Python package. Parempi is a rendering module for a
plasTeX framework, so make sure plasTeX is installed before installing this. It is recommended to
download and install plasTeX manually, using Python style install (’python setup.py install’). We had
some problems installing Parempi-renderer after installing plasTeX from Ubuntu’s Software Centre.
To install Parempi, run the following command after installing plasTeX. Python 2.4+ is required.
python setup.py install
You may need to run the command as a root (’sudo’) to be able to install the renderer to the same
location as plasTeX. After installing Parempi-renderer, please copy manually the following files to the
locations listed below:
.plasTeXrc
.ParempiMathrc
i18n.xml
slides.py
amsmath.py
to ~/.plasTeXrc
to ~/.ParempiMathrc
to [plasTeX dir]
to [plasTeX dir]/Packages
to [plasTeX dir]/Packages
PlasTeX may be located in ’/usr/local/lib/python2.6/dist-packages/plasTeX’ or similar, depending
on your system. The files ’.plasTeXrc’ and ’.ParempiMathrc’ are configuration files, that should be located in home directory (’~’). To get slides environment working with Parempi-renderer, ’slides.py’ is
needed. The file ’i18n.xml’ is used to get more language specific terms. The file ’amsmath.py’ fixes the
parsing of equation* environment. While using this package, both ’equation*’ and ’equation’ environments will be parsed in the same way. However, they can still be rendered in a different way.
To be able to render table of contents or citations, you will also need to have a LaTeX distribution
installed.
2.2
Using Parempi-renderer
Using Parempi-renderer is simple assuming that you don’t want to do any changes to initial configurations
and you have installed at least
• LaTeX 5.3
• plasTeX 0.9.2
• Parempi-renderer
2
If these qualifications apply to you, proceed. Now when you are in the directory where your file.tex
is located, you can just type ’plastex file.tex’ to run the program. PlasTeX also takes a whole set
of different command-line parameters. They are all documented in PlasTeX’ own documentation (see
http://plastex.sourceforge.net/ or 1 ). However, the few and the most useful command-line features
are also listed below in different usecase examples, as a normal user or developer probably will have to
use them.
2.3
•
Parts of Parempi-renderer
init .py
• .plasTeXrc
• .ParempiMathrc
2.4
Usecase examples
Creating a txt-file from a tex-file:
• in this scenario one uses only PlasTeX and its classes
• simply type ’plastex file.tex’
• in this case it is important that your config-file is the default provided with Parempi, otherwise
you might not use Parempi-renderer as your default renderer
• if Parempi-renderer is not your default renderer, then you can use it by typing ’plastex –renderer=Parempi
file.tex’, provided that it has been installed under PlasTeX properly
• after running Parempi-renderer you should find the output in the same directory named as ’file.txt’
if you are using default configuration provided
Adding table of contents
• in this scenario one uses both LaTeX and plasTeX
• Note, that in the beginning of the .tex-file one has to include a row, which says ’\tableofcontents’.
Otherwise no file.toc will be generated using LaTeX and no table of contents will be generated by
using PlasTeX. PlasTeX uses LaTeX generated .toc-files to generate a similar table of contents as
LaTeX created.
• first type ’latex file.tex’
• second type ’plastex file.tex’
Adding references
• in this scenario one uses both LaTeX and plasTeX
• note, that in the end of the .tex-file one has to include a row, which says ’\bibliography{references}’
or otherwise no file.aux with references will be generated using LaTeX and no references using
PlasTeX
• in addition one has to have references.bib in this case in the same directory with the file.tex with
proper LaTeX bib-file format
• note that the page numbers of the pictures appearing in pdf are taken from the same file.aux
generated by LaTeX
• first type ’latex file.tex’
1 You
can also render the documentation to a format you want using either Parempi-renderer or PlasTeX renderers. You
can find the documentation from the directory ’plastex/Doc’
3
• second type ’bibtex file’
• third type ’plastex file.tex’
Changing config file
• in this case just go to your home directory and find .plasTeXrc or .ParempiMathrc and edit the file
• The file has an INI-format although it is not named as .ini-file. You can see more about the
INI-format for example from wikipedia (see http://en.wikipedia.org/wiki/INI_file)
• below is a one example of how to do changes to the INI-files
Changing emphasize format in .plasTeXrc
• first look for .plasTeXrc in your home directory and open the file using some text editor
• next change the text on the line starting with emphasizeFormat after =-mark for example as
’\em{%s}’
• what you get out after this change is \em{text} for \emph{text}
• remember to save your changes to the file before next time using PlasTeX in order to see the
changes
Using input-specific configuration overriding
Each time the renderer is ran, it reads a special configuration file from the current directory. This
configuration file has the same name as the input file, except that the file extension is .ini and not .tex.
The setting ’ignore’ under the configuration section parempi is a special case. There is currently
no way to take away any commands listed as the value of this setting without changing the main
configuration file itself. The commands listed in the ’ignore’ of the input-specific configuration can only
make the renderer to ignore more commands.
If the symbolProfile setting is overridden, the ordinary settings will be read first with the ordinary
symbolProfile, and the overriding symbolProfile will be effective while reading the overriding .ini. These
two will be combined. Note that it is possible to have a math configuration section named as ’parempi’
in the overriding .ini, but this is not recommended as this may cause the ordinary overriding settings
to be read as a part of the math config (that, though, won’t typically cause problems, as the names are
likely to be different).
Here is an example. If the current directory contains files ’test.tex’ and ’test.ini’ and PlasTeX is ran
with the renderer Parempi and test.tex as input, the settings in normal user configuration files .ParempiMathrc and .plasTeXrc are overridden (and extended) with the correspondingly formatted settings found
in ’test.ini’.
If our .plasTeXrc file were:
[parempi]
wrapText=True
lineWidth=76
mathIndent=3
symbolProfile=’mymath’
ignore=mbox,pagebreak,clearpage,nopagebreak
,and our .ParempiMathrc file were:
[mymath]
alpha=’A’
beta=’B’
gamma=’C’
then our test.ini file could be like this:
4
[choise2]
gamma=’G’
geq=’>=’
[mymath]
alpha=’bad’
[parempi]
mathIndent=1
quoteIndent=1
ignore=fakecommand,mbox,nbox
symbolProfile=’choise2’
That would make our effective PlasTeX and Parempi configuration have a similar effect as the combined
effects of the following .plasTeXrc file:
[parempi]
wrapText=True
lineWidth=76
mathIndent=1
quoteIndent=1
symbolProfile=’choise2’
ignore=mbox,pagebreak,clearpage,nopagebreak,fakecommand,nbox
and the following .ParempiMathrc file:
[choise2]
alpha=’A’
beta=’B’
gamma=’G’
geq=’>=’
However, our real configuration files would remain unchanged in the process.
2.5
User configuration
This section of the user manual covers the user configuration options of the Parempi-renderer in the
main PlasTeX configuration file, ’.plasTeXrc’.
All of the covered options exist under the section [parempi] in the .ini-file. All of the covered options
are also optional. Their default values are listed here.
wrapText=True
True wraps long lines to multiple lines. False keeps them as one-liners.
lineWidth=76
The maximum allowed width of a line in amount of characters.
itemMark=" - "
A string. Appears before an item in itemize. Also sets the indentation length, if item content is
wrapped.
enumMark=" %s. "
A string. Appears before an item in enumerate. %s is replaced with item count. Also sets the
indentation length, if item content is wrapped.
emphasizeFormat=’{em %s}’
A string. %s is replaced with the emphasized content.
5
boldfaceFormat=’{bf %s}’
A string. %s is replaced with the boldfaced content.
quotePre="\\begin{quote}"
A string. Line that appears before quote or quotation.
quotePost="\\end{quote}"
A string. Line that appears after quote or quotation.
quoteIndent=3
Amount of whitespace characters before each line of quoted content.
refFormat="{ref%s}"
A string. Appears where something in the document has been referenced. %s is replaced with an
unique number for each reference target (label).
labelFormat="{label%s}"
A string. Appears where there is a label in the document.
pagerefFormat="{pageref%s}"
A string. Appears where some page of the document has been referenced. %s is replaced with an
unique number for each reference target (label).
cellspacingHorizontal=1
The amount of empty spaces between cells or vertical lines in a table: [spacing] cell1 [spacing] cell2
[spacing] etc.
dollarsInText=False
True surrounds math environment inside text with dollars. False will let math content inside text
without such precaution.
symbolProfile=’hlub’
A string. The name of the section in .ParempiMathrc where math symbol rules are read from.
mathIndent=1
The amount of whitespace indentation in math commands that use indentation (cases, equation,
equation*, displaymath, align, align*, eqnarray, eqnarray*)
renderUndefinedCommands=True
True keeps the information of the existence of commands that are undefined outside math environment. False hides them.
formulaNumbering=25
Amount of whitespace characters before formula numbering in equations and aligns.
ignore=
A string. List of commands that will be hidden outside math environments. Their content is still
processed. Use comma to separate different commands in the list.
mathignore=
A string. List of math environment commands that will be hidden. Their content is still processed.
Use comma to separate different commands in the list.
’.ParempiMathrc’ configuration file stores the math symbol rules. Each rule should be in its own
line. Each profile will have its own section. The format of a single rule to change math symbol command
’command’ into output ’symbol’ is as follows:
command=’symbol’
6
3
3.1
Developer manual
Adding unidentified command or environment
In the following we explain a bit how to make PlasTeX first recognize an unidentified command and after
that to handle the command or environment in question. We use an example usecase where the user has
defined a command ’\underlinet’ in the .tex-file, which is not yet implemented in Parempi-renderer. It
could for example be some different underline command or environment defined in some LaTeX package.
As PlasTeX doesn’t in every case load all LaTeX packages correctly, this kind of usecase could just be
something worth noticing especially for developers, but maybe it could be helpful for users as well.
When running PlasTeX, the program first creates a document structure (i.e. a document tree)
from the .tex-file given for the program as input. After it has parsed all the commands properly into
corresponding nodes in the document tree, it unleashes the renderer, which then renders the document
to certain specific format. When PlasTeX parser is creating the document structure and choosing how
to group different commands under nodes, it looks for a certain command from both documentclasses
and packages. This naturally means that the easiest way to add a command is to put it into a place,
where either documentclasses or packages are defined.
In PlasTeX both of these changes can be made by adding some approriate lines of code to the corresponding Python class. For both packages and document classes one of the possible directories is ’plasTeX/Packages/’. Another place to do changes would be for example ’plasTeX/LaTeX’ or ’plasTeX/Base’directory. As an example we shall next consider articles. For them this trick can be done by using the
article documentclass, which is defined in a file article.py in the Packages folder. There one can define
a new class named exactly as the command in question excluding stars used in math-environment. For
taking care of stars in math-environment one can look advice for example from amsmath.py, which is
located in directory ’plasTeX/Packages’.
One should now also note, that a large part of the commands and environment PlasTeX knows,
are defined in classes that are located in the directory ’plasTeX/Base/LaTeX’. It also seems that these
classes are always loaded, and adding these few lines in there has the same affect as in directory ’plasTeX/Packages/’. However, one has to understand, that the packages in directory ’plasTeX/Packages’
(like article.py) are loaded only if so stated in the .tex-file. This means that to be able to use new commands in article.py, one has to use the precise package by using ’usepackage’ or ’documentclass’-command
in .tex-file. However, including the few lines in a Python class located in ’plasTeX/Base/LaTeX’ will
make the commands available almost everywhere while including them in a class located in the directory ’plasTeX/Packages’ will make the commands available only after ’usepackage’ or ’documentclass’
command.
3.1.1
Forcing PlasTeX to identify a command
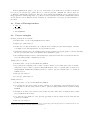
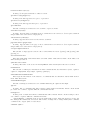
If one were to introduce a new command ’\underlinet’, then the solution would be to define a new class
in the article.py in the following way:
#!/usr/bin/env python
from report import *
from plasTeX import Command
def ProcessOptions(options, document):
import report
report.ProcessOptions(options, document)
document.context[’thesection’].format = ’${section}’
document.context[’theindex’].counter = ’section’
document.context[’theindex’].level = Environment.SECTION_LEVEL
document.context[’printindex’].counter = ’section’
document.context[’printindex’].level = Command.SECTION_LEVEL
document.context[’bibliography’].counter = ’section’
document.context[’bibliography’].level = Command.SECTION_LEVEL
7
class appendix(Command):
class thesection(TheCounter):
format = ’${section.Alph}’
def invoke(self, tex):
self.ownerDocument.context.counters[’section’].setcounter(0)
self.ownerDocument.context[’thesection’] = type(self).thesection
# Define here your new class. After adding these lines the parser will
# know that \underlinet is a command and parses it as a command
class underlinet(Command):
args = ’self’
Unless you also define args = ’self’, the document will not be parsed correctly by PlasTeX for some
reason. This can be easily verified using the debugger we provided. Another point to notice, is that the
new class we just defined inherits Command class defined in ’plasTeX’.
3.1.2
Forcing PlasTeX to identify an environment
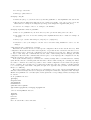
The same basic ideas apply also with environments almost in a similar manner. However, the minor detail
in this case is that one should not include args = ’self’ new class, as it makes the parser to duplicate the
nodes for some reason. Instead using just Python phrase ’pass’ is enough this time. Another change is
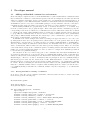
that now class underlinet has to inherit Environment. After adding a new class for the new environment
in the article.py file, one should end up with the following code.
File Edit Options Buffers Tools Python Help
#!/usr/bin/env python
from report import *
from plasTeX import Command, Environment
def ProcessOptions(options, document):
import report
report.ProcessOptions(options, document)
document.context[’thesection’].format = ’${section}’
document.context[’theindex’].counter = ’section’
document.context[’theindex’].level = Environment.SECTION_LEVEL
document.context[’printindex’].counter = ’section’
document.context[’printindex’].level = Command.SECTION_LEVEL
document.context[’bibliography’].counter = ’section’
document.context[’bibliography’].level = Command.SECTION_LEVEL
class appendix(Command):
class thesection(TheCounter):
format = ’${section.Alph}’
def invoke(self, tex):
self.ownerDocument.context.counters[’section’].setcounter(0)
self.ownerDocument.context[’thesection’] = type(self).thesection
class underlinet(Environment):
8
pass
This changed code now enables PlasTeX’s renderer to correctly interpret the .tex-file with environments. Unfortunately one cannot define two classes with the same name, so making the same command
to work for both commands and environments doesn’t seem to be possible.
3.1.3
Handling the command or environment in Parempi-renderer
After PlasTeX identifies the command or environment properly, all there is left, is to define how to render
it. Easiest way to write a new command, is to create a new do-function in Parempi-renderer. In other
words, this means writing a few lines of code to init .py situated in ’plasTeX/Renderers/Parempi/’directory. Below are the few steps one has to take in order to implement a working new do-function
in init .py. Fortunately for the developer, PlasTeX parser outputs commands and environments into
document tree in exactly the same manner, if they are just interpreted correctly. This reduces needed
studying as the following steps will apply for both commands and environments.
First one has to decide will the do-function have one, two or three -marks in its name. In the ordinary
case, one uses only a single -mark, and this case will be used unless the command’s or environment’s
name has some nasty characters like stars (*). If the function name has marks that cannot be used in a
function name in Python, then usually one has to select two -marks. On the other hand, three marks
are dedicated to math-environment’s non-numbering option. Thus, usually one will use a single -mark,
but in some cases either two or three -marks are needed. Now we can conlude that we will name our
underlying function as do underlinet. What we have now is the following piece of code:
def do_underlinet(self, node):
....
In the parameters self is derived from Python notation, and node from the fact that the rendering process means going through the document tree, where each of the nodes correspond to a certain
command as defined by PlasTeX parser. As in this case the command has been ’underlinet’, function
’do underline(self, node)’ has been called. Thus, the -marks and the do-beginning ensure that the
Parempi-renderer notices our new function, and knows when to use it.
Next one has to think a little about the commands or environments structure. If it can include
other environments or commands inside it, then the recursion has to be continued from underlinet-node.
This means, that the do underlinet()-function has to somehow handle the nodes inside it. Usually one
ends up using unicode(node)-function, which searches the whole Parempi-renderer for the possible dofunctions. On the other hand, in some cases it might be more convenient to end the recursion, in which
case unicode(node) would not be called. If we assume that the underlinet-command or -environment can
include only text, then one solution could be to use following function:
def do_underlinet(self, node):
return u’{underlinet ’+unicode(node.textContent)+u’}’
What is worth noticing now, that although unicode()-function is used above, the recursion is not
beign continued. This is derived from the fact, that the unicode()-function is given as an argument only
text. In that case, it just transforms the text into unicode-format, which is required from all output
that is returned by the renderer. This requirement is also the reason why the type transformation is also
done for both ’underlinet ’ and ’’ in the code by using u-operator in front of the text.
On the other hand, if one wanted to continue the recursion, then the solution could for example be
the following:
def do_underlinet(self, node):
return u’{underlinet ’+unicode(node)+u’}’
9
These two basic examples should give the reader some intuition for handling new commands. Another
good idea is probably to have a look at the different commands already implemented in Parempi-renderer
or other renderers.
3.2
3.2.1
Recursion, unicode(node) and default(node)
unicode(node)
unicode() is a function in the base class of all plasTeX renderers, including parempi.2 Assuming the
document is a tree of nodes representing document elements at some point of processing, unicode() is
simply put a function to continue processing for all remaining nodes in the same branch.
Among others, the function checks whether the node needs processing anymore and if the node has
children to process. So unicode() can be called at any point of the node tree without having to worry
about what the node contains or what the current tree depth is.
The same in Python-like pseudocode:
def do_element:
output <- process element # indent, number lists, format tables, etc.
return output + unicode(element)
def unicode(element): # grossly simplified
if element is text:
return element as text
if not (element has children):
return None
else:
for each child:
process child
3.2.2
default(node)
default(node) is called when a proper handling function for a document element has not been found.
In other words, it handles all unrecognised elements. These might be rare or specific enviroments and
commands. This also includes complex document author macros.
Depending on the renderUndefinedCommands option3 , Parempi-renderer will either skip it or print
it the way it is in the TeX file, and in any case attempt to process the unknown element’s children.
The same in Python-like pseudocode:
def default:
write unknownCommand to logfile
if not renderUndefinedCommands:
return unicode(node) # skips current element
else:
return ’\begin{’ + unknownCommand + ’}’ +
unicode(node) +
’\end{’ + unkownCommand + ’}’
3.3
Debugger
Debugger is a renderer like parempi, only that it tries to render the the DOM-tree of the LaTeX document
created by the PlasTeX parser for debugging, not for (content) reading purposes. It prints all the nodes
and their parameters. The debugger comes in handy when you don’t know how parser generates nodes
or what the hierarchy of nodes is.
Using debugger
2 See
3 See
plasTeX/Renderers/ init .py
the configuration file ˜/.plasTeXrc
10
• type ’plastex –renderer=debugger file.tex’
• open output, for example, by typing ’emacs file’ (note that there is no file extension)
11