Transcript
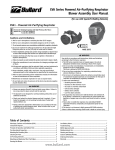
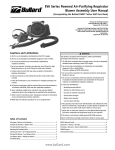
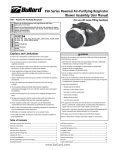
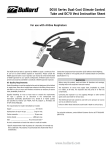
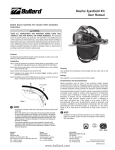
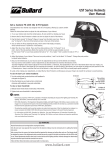
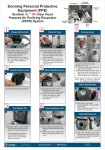
Bullard EVAHL PAPR Pre-Operational Checklist:
Initials
Task
______
1. Check the blower housing for visible signs of
damage or deterioration.
______
2. Check that the belt is free from damage and that the
belt buckle functions properly.
_____
3. Remove the battery from the charger, checking that
the green LED light is on to indicate a full charge.
_____
4. Install the battery into the back of the blower and
secure with screw head latch.
_____
5. Remove the filter cartridge from the packaging and
ensure that it is appropriate for the application.
_____
6. Inspect the filter cartridge (including the gasket
seal) for damage.
_____
7. Record the “in-service” date on the filter cartridge label.
_____
8. Install the filter cartridge into the open filter
retainer port on the blower housing. Ensure that the
filter locking tab is fully engaged.
_____
9. Check that the rubber gasket is in place in the
breathing tube connection port.
_____
10. Connect the breathing tube to the blower by
screwing the male breathing tube adaptor into the
female opening on the top of the blower housing.
_____
11. Hold the Air Flow Indicator (PA1AFI for hoods and
PA4AFI for masks) on the end of the breathing
tube. Power on the blower by pressing the power
switch on top of the blower for 1-2 seconds and a
short beep sounds. Verify that the ball of the air
flow indicator is above the pass line. If not, refer
to the user manual for additional instruction.
_____
12. Verify that the speed selection is operational by
toggling the on/off switch just until it beeps to
indicate the change in speed. When the unit is first
powered on, it operates at high speed (8.5 cfm),
and when toggled to the lower speed it operates at 7.0 cfm.
Americas:
Bullard
1898 Safety Way
Cynthiana, KY 41031-9303 • USA
Toll-free within USA: 877-BULLARD (285-5273)
Tel: +1-859-234-6616
Fax: +1-859-234-8987
Europe:
Bullard GmbH
Lilienthalstrasse 12
53424 Remagen • Germany
Tel: +49-2642 999980
Fax: +49-2642 9999829
_____
13. V erify that the low flow alarm is operational by
covering the end of the breathing tube with your
hand and waiting approximately 5 seconds.
_____
14. P ower off the blower by holding down the on/off
switch for 3-4 seconds. This is indicated by a long
beep and the shut down of the motor.
_____
15. C heck that the hood and lens are free from
damage. If using a hood constructed with sealed
seams, check that the seams are free from
damage.
_____
16. C heck that a suspension or hard hat is installed in
the hood (not applicable for RT Series).
_____
17. C onnect the hood by inserting the breathing tube
approximately five inches into the air entry sleeve
at the rear of the hood. Use the nylon clamp to
secure the breathing tube to the plastic anchor
plate on the hood for CC20 Series or directly to the
hood for RT Series. If it’s a T-Series hood, connect
the breathing tube by threading the male end of the
breathing tube into the female port on the rear of
the hood.
_____
18. F or the loose-fitting facepiece, insert the breathing
tube into the opening on the rear of the headpiece
and twist clockwise to lock the breathing tube into place.
You are now ready to don the respirator.
Refer to the User Manual for donning and use information.
Asia-Pacific:
Bullard Asia Pacific Pte. Ltd.
LHK Building
701, Sims Drive, #04-03
Singapore 387383
Tel: +65-6745-0556
Fax: +65-6745-5176
www.bullard.com
©2012 Bullard. All rights reserved.
60815010269A (0812)