1
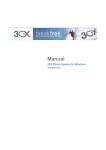
Video Softphone Manual
Version 2.8
Table of Contents
Table of Contents ............................................ 1
Installation ....................................................... 1
VSP Configuration........................................... 1
Connection Tab ............................................... 2
Audio Devices Tab .......................................... 2
Video Devices Tab........................................... 4
Miscellaneous Tab........................................... 5
Using Your Video Softphone .......................... 5
Placing Calls ................................................. 5
Answering Calls............................................. 6
Hanging Up ................................................... 6
Hold .............................................................. 6
Redial............................................................ 6
Multiple Lines ................................................ 6
Call List ......................................................... 6
VoIP Control Panel ........................................ 6
Switch Handset/Speakerphone...................... 6
Adjusting Volumes......................................... 6
Mute.............................................................. 6
Info Button..................................................... 6
Setting Up Videomail....................................... 7
Note: If you have VSP version older than 2.5 on
your computer, the first thing you’ll need to do will
be to choose between Repair and Remove.
Before proceeding please make sure the earlier
VSP application is not running, and then choose
Remove. After removal is finished, you will need
to run installation again. If you are running 2.5 or
newer release of VSP you may choose to use the
automatic update functionality available under the
Miscellaneous tab.
VSP Configuration
Next, you need to configure the application. While
VSP specializes in video calls, it also can be
used for regular, voice-only phone calls with no
video.
When the application starts up, you’ll see the
VSP “window”, which looks like this:
Installation
The Video Softphone (VSP) application is
distributed via a Windows Installer Package or as
the same package in a ZIP archive. The second
distribution method is preferred for email
distribution because many virus protection tools
block or even remove executable (.msi)
attachments.
Please follow the on-screen instructions during
the installation process. After installation is
finished, the VSP shortcut icon will be placed on
your computer desktop, and it will also be added
to your Start menu.
Video Softphone Manual
Page 1 of 7
When you run VSP for the very first time on your
computer, the initial Dialer Settings window
below with Connection selected should appear
automatically.
Connection Tab
Initial Dialer Settings
If it didn’t, or if later you decided to change any of
your Dialer Settings, click on the phone’s wrench
icon, which looks like this:
Connection Tab
The first tab of Dialer Settings window is
Connection, which registers VSP to use the
services. The second tab is for configuring Audio
Devices. The third tab is for configuring the
Video Device. The fourth tab – Miscellaneous will not be needed in most cases.
The Connection tab is shown in the next figure.
Configuring Connection is needed to insure that
VSP is properly registered. It also allows
enforcing low bit rate codecs, which is needed if
you don’t always have abundant Internet
bandwidth; e.g., a dialup connection or a heavily
used, low-bandwidth DSL or cable modem
service.
Video Softphone Manual
Please enter the phone number provided to you
as your User ID. The Password is the same one
you use to access the VoIP Control Panel (VCP)
where you check your voicemail and manage
your account. Host is the domain name for your
VCP.
Note: You can check that the proper credentials
were entered during this step by clicking the OK
button. VSP will attempt to register and will
display the word Ready with your phone number
below it, if successful. See the image of VSP
application on page 1.
Note: If you have Windows Firewall or any other
firewall running on your computer, you will need
to grant VSP access to the Internet before it will
operate properly.
Audio Devices Tab
Clicking on the second tab brings up Audio
Devices, as you see here:
Page 2 of 7
click the Test button to check for loudness and
adjust if necessary.
Some hardware devices have built-in Acoustic
Echo Cancellation (AEC). In this case, you do
not need to use the AEC that comes with VSP.
We recommend that you test your service both
with and without AEC enabled.
It is possible that AEC may not be available for
your particular hardware under Windows XP. If
that is the case, a message will tell you if you
have incompatible hardware.
The Audio Codecs setting allows you to specify
the codec that VSP should try to use for each
type of call. If the remote device does not offer
the codec you have chosen, it will automatically
try and find another compatible codec. We
recommend that you select Auto Configuration
(default) as that lets the application decide which
codec to use.
Once you have made your choices, click either of
the Apply or the OK buttons. The Apply button
allows you to go on to other tabs, while the OK
button saves your choices and closes the Dialer
Settings window.
Audio Devices Tab
Getting Ready for Video Calling!
You may have different audio devices connected
to your computer. This tab allows you to choose
which device to use as a handset and which to
use as a speakerphone. Keep in mind that VSP
allows you to switch from handset to
speakerphone at any time, even during a call.
To switch back and forth between
Speakerphone mode and Handset mode, click
on the speakerphone button, just to the right of
the “9” key on the dial-pad. It looks like this:
The above configuration means that if
Speakerphone is selected, the computer’s
speakers and microphone will be used, and if
Speakerphone is de-selected, the USB Audio
Device will be used.
We recommend checking Use Speakerphone
for Ringing, otherwise you may never hear the
ringing from the tiny USB handset speaker.
Checking Lock Ring Volume at (0-100) will
maintain a constant ring volume no matter what
you have your computer speakers set to for other
applications. Once you have this set, you can
Video Softphone Manual
Page 3 of 7
Video Devices Tab
Clicking on the third tab brings up the Video
Devices window, as shown here:
Low mode. This is adequate to provide basic
communication, but is not enough for ASL
(American Sign Language) to be understood.
This mode should also be used if you have a
relatively slow computer or a netbook computer.
Unless you have a powerful computer, Low or
Medium Low mode should be selected. Intel
Core 2 Duo and high-end Pentium 4 workstations
are capable of running in Medium mode. We also
recommend using Medium mode if some of the
parties you call are using hardware-based
videophones. In most cases these devices have
limited support for VGA mode and their screens
do not have sufficient pixels to display a highquality picture.
Ultra-High mode provides quality comparable to
digital TV, but requires a modern Core 2 Duo or
faster CPU.
Each mode has a short description in
parenthesis. For example Medium (320x240 30
fps 256 Kbit 1:105) means that the resolution of
the transmitted image will be 320 x 240 pixels, at
30 frames per second, with a bit rate 256 Kbit
and the average compression of the transmitted
image will be 105 times. The Video Modes
available to you will depend on the camera you
are using.
Video Devices Tab
This tab allows you to configure and test your
webcam. Make sure Enable Video is checked,
as that allows video calls to be supported.
The default aspect ratio of the VSP window is
4:3. If you resize the window, the aspect ratio
may change. If you would like it to stay at 4:3,
check Maintain Aspect Ratio. That will force the
image to maintain the same proportions as the
one that was transmitted no matter what the
window size. This is similar to what modern HD
TV sets do with movies, for example.
Your webcam(s) should show up in the Video
Device dropdown list. If you have more than one
video device, select the one you’ll be using with
VSP.
The most complicated option is your next one choosing the proper Video Mode. If you have
limited bandwidth - for example DSL with only
128 Kb upstream - we recommend selecting Very
Video Softphone Manual
Now you are ready to click the Preview’s Start
button. If for some reason the preview does not
start, please make sure that there is no other
application using your camera. If no other
application was using the camera and the
preview still doesn’t start, please reboot your
computer. While VSP was developed to avoid
restarting your computer if at all possible, this is
one of the few cases where it is necessary.
If the preview still didn’t start after this reboot, and
you know that your camera is connected and
functioning properly, please click on the tab
Miscellaneous and file a Trouble Shooting
Report with a description of your problem.
Preview allows you to see how the video will look
to the other party after going through the
encoding process. You can choose an available
encoder from the ‘Encoding’ list or choose ‘None’
to see the video stream directly from the camera.
The Aspect Ratio allows you to choose the
aspect ratio of the incoming video stream and
adjust the video display accordingly. Choosing
Remove Webcam will always use the aspect ratio
of the other party’s camera. Choosing Local
Monitor will attempt to ask the other party’s
system to use the aspect ratio used by your
Page 4 of 7
monitor, this may not be successful if the other
party’s device does not support this option.
The Video Codecs setting allows you to specify
the codec that VSP should try to use for each
type of call. If the remote device does not offer
the codec you have chosen, it will automatically
try and find another compatible codec. We
recommend that you select Auto Configuration
(default) as that lets the application decide which
codec to use.
You can choose any mode in Video Call Dialog.
Keep in mind that when Picture-in-Picture is
selected, the preview window can be moved with
your mouse to any location inside the main
window. Just click and drag the preview window
around.
Once you have made your choices, click either of
the Apply or the OK buttons.
Miscellaneous Tab
Clicking on the last tab brings up Miscellaneous
settings, as you see here:
Many users will keep all settings in this tab at
their default values, but you can run VSP on
startup by checking Run Dialer On Windows
Start Up. You can also turn off the audible
“touchtone” sounds by unchecking Play Sound
When Pad Buttons Are Clicked.
If your computer has multiple network interfaces for example a laptop with different wireless and
wired connections or a VPN - you will need to
choose the appropriate network Interface
depending on how you are connected to the
Internet at the time of your call. VSP
automatically finds IP addresses available for the
computer and allows you to choose one of them
in drop down list. Please note that using an IP
address that corresponds to a VPN may
noticeably reduce the quality of your connection.
SIP Port allows you to specify particular port for
signaling instead of allowing VSP to automatically
pick one. While in most cases it is not needed, it
could be required on a high security network. The
same is applicable to RTP Ports.
Once you have made your choices, click either of
the Apply or the OK buttons.
The last button on this tab – Send
Troubleshooting Report - does just what it
sounds like. Write a concise but comprehensive
description of the problem you encountered,
enter your email address and click Send. This will
help us to quickly address the issue and improve
our product.
Using Your Video Softphone
Now that you’ve finished configuring VSP, it’s
time to make a call.
VSP runs under Windows Vista and XP. You will
need at least a high end Pentium III CPU with
256 MB of memory to use the lowest quality
settings.
Placing Calls
When VSP is ready for your call, the display will
look like the ‘VSP Window’ (figure on page one).
You can dial the number by typing the digits from
your keyboard and then pressing enter or you
can click the digits on the display with your
mouse and then click the green phone
button to dial.
Miscellaneous Tab
Video Softphone Manual
Page 5 of 7
The phone’s status will change to ‘Dialing’ and
the line will indicate ‘In Use’. Next, you will hear
the line ringing. Once the other party answers
your call, a video window may appear (if they
have a compatible video phone).
Tip: In order to keep good eye contact on your
calls, put the video window on your screen as
close as possible to the physical camera. This
way, when you look at the video your eyes will be
also looking near the camera.
Answering Calls
When VSP gets a call it will make itself visible (if
it was minimized or covered by other windows)
and start to play a ringing sound. On the display it
will show the Caller ID information and show the
status as ‘incoming’. Simply click the green
phone button to answer the call or click the red
“hang-up” button to end the call.
Hanging Up
When your call is finished, press the
red hang up button. VSP will
disconnect the call and return to
‘Ready’ status.
Hold
To place a call on hold, press the green phone
button. You will see the phones status change to
‘On Hold’. To take the call off hold, press the
green phone button again.
Redial
Clicking on the Redial button will
call the last number you dialed.
Multiple Lines
VSP allows you to have multiple calls at a time.
The line buttons allow you to
see which line is active as well
as selecting a line.
If you are on a call using line one, and you would
like to make or answer another call, press the line
two button. Line one will be placed on hold. When
you are done with the call on line two press the
red hang up button to end the call and it will
automatically pickup line one. You could also
place line two on hold and pickup line one by
pressing the line one button.
for each call. On each row is the status of the call
(Dialed, Received, or missed), the number, and
the date and time of the call.
VoIP Control Panel
Clicking on the VoIP Control Panel (VCP)
button will automatically open up a
browser window and log you into your VCP.
From within VCP you can alter your VoIP
settings, review your call records, change your
password, as well as many other things. Please
consult your VoIP Service User Manual for
complete information and instructions.
Switch Handset/Speakerphone
In the Audio Devices tab (explained earlier in this
document), you can configure two sets of audio
devices, one to act as a speakerphone and
another to act as a handset. When you press the
Switch Handset/Speakerphone button
it will switch between the Handset and
the Speakerphone, pressing it again
will switch back. Move the mouse over the button
(without clicking) and VSP will display the current
mode and the devices used for the modes.
Adjusting Volumes
VSP has two sliders controls to adjust
the volumes, one for the speaker and
one for the microphone.
Sliding the control up makes the
volume louder and down makes it quieter.
These sliders also function as level indicators.
The background of the slider shows the current
audio level.
Mute
During a phone call you can mute the
microphone by pressing the Mute
button. This will prevent the other party
from hearing you; however you can continue to
hear the other party. Pressing the Mute button
again will turn the microphone back on.
Info Button
The info button shows you the
version number of VSP and allows
you to check for software updates.
Call Transfer
Call List
The Call List button
allows you to
review the calls to or from VSP. It shows a row
Video Softphone Manual
The Trn button allows you to transfer a
call to another number. While you have
the call, press the Trn button, the call will then be
Page 6 of 7
placed on hold and you can dial the number to
transfer the call to. Press the green phone button
to complete the transfer.
Attended Call Transfer
The Trn button also allows you to do a
transfer where you can announce the
call prior to the transfer. While you have the call,
press the Line 2 button, the call will then be
placed on hold and you can dial the number to
transfer the call to. Press the green phone button
you will then be able to talk the second party.
When you want to transfer the first line to the
second press the Trn button.
Setting Up Videomail
Enter 00 and then click on the green phone
button. After you enter your password, you will
hear several prompts that allow you to set up and
manage your videomail account. To learn more
about these and other great options, please refer
to the section called “Voice & Videomail Set Up
and Use” in your VoIP Service User Manual.
Video Softphone Manual
Page 7 of 7