1
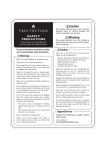
Thank you for choosing a Free The Tone product. In order to take full advantage of the features and performance it provides, please read this owner’s manual thoroughly, and keep it in a safe place for future reference. Handling Precautions • Never connect or disconnect plugs to/from the input/output terminals on the MC-3 when the external device that drives speakers is powered. Doing so can cause noises and damage the speaker. • Avoid applying excessive force to the footswitches, tact switches, and DIN connectors on the MC-3. • If the unit malfunctions or behaves erratically, cease operation at once and contact your local dealer or Free The Tone directly. Support/Service Contact the following for support and/or repair service. e-mail address: [email protected] SAFETY PRECAUTIONS Precautions are identified by the two types of symbols below: Caution This symbol indicates that a risk of serious personal injury or material damage may result if precautions are ignored. Warning This symbol indicates that a risk of death or serious personal injury may result if precautions are ignored. Be sure to read these precautions and the user’s manual before using this product. Caution Do not use or store the unit in environments where it will be exposed to: Extreme temperatures (direct rays of the sun, heat sources such as radiators or stoves.) High humidity or moisture. Excessive dust or sand. Excessive vibration or shock. Whenever leaving the unit unattended for long periods, be sure to unplug the AC adapter from the power source to avoid creating a fire hazard. Take care not to drop the unit, and do not subject it to excessive pressure or weight. Do not press the switches on the unit with a bare foot, or unexpected injury may result. Do not use solvents (such as benzine, paint thinner) on the unit, since these may dull the finish or damage the surface. Warning Never try to disassemble, or modify the unit. Stop using the unit if you notice smoke or a strange odor coming from it and unplug the AC adapter from the outlet. Never try to repair the unit or replace parts unless so instructed by the user’s manual. For other repair or parts replacement contact your local dealer or Free The Tone. Never unplug the the AC adapter while your hands are wet. Do not apply too much pressure or tension or place a heavy object on the power cord. Doing so may damage the power cord and create a danger of fire or electrical shock. Turn off the unit and unplug the AC adapter from the outlet and contact your local dealer or Free The Tone for repair in the case of any of the following: The power cord is damaged Foregin objects (coins, pins, etc.) or liquid enter the unit. The unit gets wet from rain or other liquid. The unit is out of order. Be careful of heat radiation from the unit. Never cover the AC adapter with cloth or other objects. Built-up heat can deform the case or cause a fire hazard. 2 3 Table of Contents Main Features of MC-3 • A MIDI function to be sent can be assigned to each footswitch. • MIDI program change numbers and control change numbers can be sent. • MIDI channels and operation types can be set separately when sending control change numbers. • Can be powered by a battery. • A unique battery holder that enables one-touch battery replacement. 1. Front Panel Section 6 2. Rear Panel Section 8 3. Battery Holder Section 10 5. Operation Types in Control Change Number Sending 10 6. Battery Powered Operation 11 7. How to Use MC-3 12 7-1. Operation Modes 12 7-2. How to Configure Presets 13 7-3. Edit Mode 14 8. Application Examples 16 8-1. Turning ARC-3’s LOOP1 On/Off from MC-3’s SW1 16 8-2. Turning ARC-53M’s MUTE Switch On/Off from MC-3’s SW2 16 8-3. Performing FLIGHT TIME’s Tap Tempo Entry from MC-3’s SW3 17 9. Specifications 4 9 4. Character Indications on 7-Segment LED 18 5 1 FRONT PANEL REAR PANEL Display section MODE indicator When sending a program change number, this display shows that number. When sending a control change number, that number is displayed. In Edit mode, the display shows the content of each setup item. Shows the current operation mode. When the MODE-1 LED illuminates, then the unit is in Mode-1 (Program Change Number Send mode). When the MODE-2 LED illuminates, then the unit is in Mode-2 (Preset mode). MIDI SIG: This dot LED blinks once when sending a MIDI signal. SW1/DEC switch BATT.LOW: This dot LED blinks when the unit is powered by a battery and the voltage of the battery becomes low. In Mode-1, used to decrement the program change number to be sent. In Mode-2, used to send the MIDI data that has been set to SW1. CC: This dot LED illuminates when a control change number is sent. EDIT button Used to put the MC-3 in Edit mode. Pressing and holding this button for about three seconds puts the MC-3 in Edit mode in which you can set detailed configurations such as operation mode and MIDI send channel. The LED above the EDIT button illuminates in Edit mode. Press this button again to exit from Edit mode. 6 SW2/INC switch In Mode-1, used to increment the program change number to be sent. In Mode-2, used to send the MIDI data that has been set to SW2. SW3/ENTER/STORE switch In Mode-1, this switch is used to confirm and send the program change number. In Mode-2, used to send the MIDI data that has been set to SW3. If this switch is pressed and held down to configure the preset directly, then it is used to store your changes. 7 2 REAR PANEL MIDI OUT DC9V IN Output terminal for MIDI signal. Connect this terminal to the MIDI IN terminal on an external device. When the unit is powered from an AC adapter, connect the adapter to this terminal. Use an AC adapter with a regulated 9 VDC output and current capacity higher than 25 mA with a negative center pin in the output plug (such as the Free The Tone “FA-9” AC adapter). A standard 5.5 x ø2.1 mm plug can be used. POWER switch Turns on/off the power to the MC-3. Be sure to turn off this switch to prevent battery depletion if the unit is powered from an AC adapter. 8 3 BAT TERY HOLDER Holder that houses a 006P (6F22) type battery. To open the cover, slide it downward and then pull it up. When inserting a new battery, be sure to confirm its orientation (±). The battery polarity is shown on the sheet attached inside the holder. The cover will not close correctly if the battery polarity is wrong. Do not apply excessive force to the cover in such a case. Doing so can damage the cover. 9 4 6 CHARACTER INDICATIONS ON 7-SEGMENT LED BAT TERY POWERED OPERATION In several modes such as Edit mode, the MC-3 uses the following three special characters on the 7-segment LED: This unit can be driven by a 9-V (006P/6F22) type battery. The actual battery life is as follows though it depends on the battery type and/or LED activity during operation: M➔ m W➔ w Manganese battery: about 10 hours Alkali battery: about 35 hours 5 OPERATION T YPES IN CONTROL CHANGE NUMBER SENDING When the battery voltage becomes low and the battery low dot (BATT.LOW) flashes, exchange the battery with a new one quickly. Note that the unit will be inoperative after 30 min. to 1 hour after the BATT.LOW dot starts flashing. The MC-3 has three types of switch operations in control change number sending: LATCH, MOMENTARY, and ON SEND. The table below lists the MIDI data to be sent. MIDI data sent when a switch is pressed and LED status Switch is pressed (LED status) Switch is pressed again (LED status) LATCH 7f (LED: illuminates when on) 00 (LED: goes out when off) MOMENTARY 7f wait 00 (LED: blinks) 7f wait 00 (LED: blinks) ON SEND 7f (LED: blinks) 7f (LED: blinks) NOTE: 7f is a hexadecimal expression of the maximum MIDI value 127. 10 11 7 HOW TO USE 7-1. Operation Modes The MC-3 has the following two operation modes. 1) MODE-1: Program Change Number Send Mode Press the INC or DEC switch and recall the desired program change number. The display flashes during selection. When the desired program change number is shown, press the ENTER switch to send the MIDI signal. If the display is flashing, then the MIDI signal is not sent, but it will be sent when the ENTER switch is pressed. 2) MODE-2: Preset Mode 7-2. How to Configure Presets The MC-3 provides the following two ways to configure presets: 1) Edit presets in Edit mode (refer to 7-3. Edit mode on p.14) 2) Configure presets directly without entering Edit mode Now let’s look at how to configure a preset directly. Press the desired footswitch (SW1, SW2, SW3) for about 3 seconds. The display flashes [ pgm ]. If you want to set a program change number, press the ENTER switch and set the number to be sent (proceed to step ). If you want to set a control change number, press the INC switch to show [ ctl], press the ENTER switch, and set the number to be sent (proceed to step ). • To set a program change number For each of SW1–SW3, you can preset a program change number or control change number. Note that A program change number can be set in the range of 001–128. Use the INC and DEC switches to you cannot send both a program change number and a control change number at the same time. At select the desired number and press the STORE switch. When the configuration completes the moment you press one of the switches, the MIDI signal configured for that switch is sent. Available parameters are as follows. successfully, the display shows [ --- ]. • To set a control change number • When sending a program change number: Use the INC and DEC switch to select the desired number and press the ENTER switch. Then set the Program change number 001–128 NOTE: The MIDI channel to be used will be the send channel set in the Edit menu. • When sending a control change number: Control change numbers off, 000–120, MIDI channels CH1–CH16, Switch operation type: LATCH, MOMENTARY, ON SEND MIDI channel. A MIDI channel can be set from CH1 to CH16. Use the INC and DEC switches to select the desired channel and press the ENTER switch. Then set the operation type of the switch. Set from the operation type from the following three types: [ ltc] (LATCH), [ mom ] (MOMENTARY), and [ ons ] (ON SEND). Use the INC and DEC switches to select the desired type and press the STORE switch. When the configuration completes successfully, the display shows [ --- ]. 12 13 8 E X AMPLES By combining the MC-3 with a Free The Tone product, the convenience of the whole system is increased and you can use them in various practical ways. 2) In the MIDI setup menu’s Item 4 “control change number setting” on the ARC-53M in Edit mode, set the MUTE [ mt]’s control change number to 002. 3) With the Item 1 “mode setting” of the MC-3 in Edit mode, select Mode-2. 4) With the Item 3 “footswitch setting” of the MC-3 in Edit mode, set SW2 to control change number: 002, MIDI channel: CH1, operation type: LATCH. 8-1. Turning ARC-3’s LOOP1 On/Off from MC-3’s SW1 This completes the setup. Connect a MIDI cable between the MC-3’s MIDI OUT and the ARC-53M’s Let’s assume that the control change number is 001 and the MIDI channel is 1. MIDI IN. 1) In the MIDI setup menu’s Item 1 “MIDI Rx MIDI receive channel setting” on the ARC-3 in Edit mode, By pressing SW2 on the MC-3, the MIDI signal is sent and the MUTE on the ARC-53M is turned on/off. set the MIDI channel to 1. When the LED above SW2 is illuminated, the MUTE is turned on and when the LED is off, the MUTE is 2) In the MIDI setup menu’s Item 6 “control change number setting” on the ARC-3 in Edit mode, set the turned off. LOOP1 [ l1 ]’s control change number to 001. 3) With the Item 1 “mode setting” of the MC-3 in Edit mode, select Mode-2. 8-3. Performing FLIGHT TIME’s Tap Tempo Entry from MC-3’s SW3 4) With the Item 3 “footswitch setting” of the MC-3 in Edit mode, set SW1 to control change number: Let’s assume that the control change number is 62 and the MIDI channel is 1. 001, MIDI channel: CH1, operation type: LATCH. This completes the setup. Connect a MIDI cable between the MC-3’s MIDI OUT and the ARC-3’s MIDI IN. By pressing SW1 on the MC-3, the MIDI signal is sent and the ARC-3’s LOOP1 is turned on/off. When the LED above SW1 is illuminated, LOOP1 is turned on and when the LED is off, LOOP1 is turned off. The control change number 62 is used for the FLIGHT TIME’s TAP tempo entry. 1) Set the FLIGHT TIME’s MIDI receive channel to channel 1. 2) With the Item 1 “mode setting” of the MC-3 in Edit mode, select Mode-2. 3) With the Item 3 “footswitch setting” of the MC-3 in Edit mode, set SW3 to control change number: 062, MIDI channel: CH1, operation type: MOMENTARY. This completes the setup. Connect a MIDI cable from the MC-3’s MIDI OUT to the FLIGHT TIME. When 8-2. Turning ARC-53M’s MUTE Switch On/Off from MC-3’s SW2 you enter the tempo by stomping on the MC-3’s SW3, the FLIGHT TIME’s BPM or delay time will be Let’s assume that the control change number is 002 and the MIDI channel is 1. changed according to the tap-entered tempo. 1) In the MIDI setup menu’s Item 1 “MIDI Rx MIDI receive channel setting” on the ARC-53M in Edit mode, set the MIDI channel to 1. 16 17 9 95 120 (0.7) SPECIFICATIONS • Terminal: MIDI OUT (5-pin DIN connector) (15.5) 37 (1.6) • Power supply: 9 V battery (006P), AC adapter • Consumption current: max. 25 mA /9 VDC • Dimensions (W x D x H, incl. protuberances such as footswitches): 120 x 95.7 x 54.1 mm (4.72 x 3.77 x 2.13”) • Weight (excl. battery): approx. 315 g (0.69 lbs) • Supplied items: Owner’s manual, 9 V battery Specifications and appearance subject to change without notice. 18 19