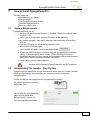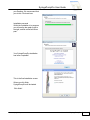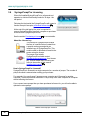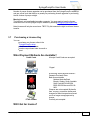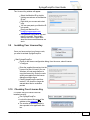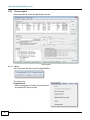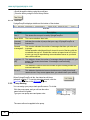
1
Control programmable infusion syringe pumps (including OEM models)
from several of the major syringe pump suppliers.
User Guide
Version 1.55
Created by
TBITC Pty Ltd
http://www.syringepumppro.com
Email: [email protected]
User Guide
©2012 SyringePumpPro
All rights reserved. No parts of this work may be reproduced in any form or by any means graphic, electronic, or mechanical, including photocopying, recording, taping, or information
storage and retrieval systems - without the written permission of TBITC Pty Ltd.
Products that are referred to in this document may be either trademarks and/or registered
trademarks of the respective owners. The publisher and the author make no claim to these
trademarks.
While every precaution has been taken in the preparation of this document, the publisher
and the author assume no responsibility for errors or omissions, or for damages resulting
from the use of information contained in this document or from the use of programs and
source code that may accompany it. In no event shall the publisher and the author be liable
for any loss of profit or any other commercial damage caused or alleged to have been
caused directly or indirectly by this document.
Printed: Saturday, March 31, 2012 in Adelaide, South Australia
Table of Contents
Part I Introduction
5
1 About
...................................................................................................................................
SyringePumpPro
7
Where Am I?......................................................................................................................................................... 8
2 Contact
...................................................................................................................................
SyringePumpPro
8
3 Getting
...................................................................................................................................
Support
9
4 New
...................................................................................................................................
in this Version
10
Past Version
.........................................................................................................................................................
History
10
5 Is your
...................................................................................................................................
Pump Compatible?
11
6 Trial
...................................................................................................................................
Limitations
12
7 Looking
...................................................................................................................................
for a Labview Driver?
13
Part II Quick Start Guide
Part III How to Install SyringePumpPro
15
20
1 System
...................................................................................................................................
Requirements
20
2 Downloading
...................................................................................................................................
The Installer - Step By Step
20
3 How
...................................................................................................................................
to Download SyringePumpPro
21
4 Digitally
...................................................................................................................................
Signed for Your Safety
21
5 Installing
...................................................................................................................................
SyringePumpPro
22
6 SyringePumpPro
...................................................................................................................................
Licensing
25
7 Purchasing
...................................................................................................................................
a License Key
26
Pricing
......................................................................................................................................................... 27
8 Obtaining
...................................................................................................................................
Your License Key
27
9 Installing
...................................................................................................................................
Your License Key
28
10 Checking
...................................................................................................................................
Your License Key
28
11 Uninstalling
...................................................................................................................................
SPP
29
Part IV Connecting Your Pump
31
1 Pump
...................................................................................................................................
Network Components
32
2 Using
...................................................................................................................................
USB-RS232 Adaptors
32
3 Determining
...................................................................................................................................
The Com Port
33
4 Port
...................................................................................................................................
and Network Configuration
35
5 Automatically
...................................................................................................................................
determine the Baud Rate
36
6 Serial
...................................................................................................................................
Ports Throughput
36
7 RS232
...................................................................................................................................
Cable Lengths
37
8 Pump
...................................................................................................................................
Connections
37
9 Test
...................................................................................................................................
Coms
38
10 How
...................................................................................................................................
to Reset Your Pump
38
©2012 SyringePumpPro
2
11 Troubleshooting
...................................................................................................................................
Communications
38
Part V SyringePumpPro in Action
42
1 A First
...................................................................................................................................
Look
42
Start Menu .........................................................................................................................................................
Entries
42
Files and Folders
......................................................................................................................................................... 42
Folders .................................................................................................................................................. 43
Files
.................................................................................................................................................. 44
2 Using
...................................................................................................................................
SyringePumpPro
44
Screen Layout
......................................................................................................................................................... 45
Menus
.................................................................................................................................................. 45
Connected..................................................................................................................................................
Pumps
46
Pump Context
...........................................................................................................................................
Menu
46
All Pumps .................................................................................................................................................. 47
Manual Command
..................................................................................................................................................
Window
47
Quick Set Window
.................................................................................................................................................. 47
Pump Explorer
.................................................................................................................................................. 48
History Window
.................................................................................................................................................. 48
Status Bar.................................................................................................................................................. 49
Pump Naming
......................................................................................................................................................... 49
Issuing Commands
......................................................................................................................................................... 50
Pump Selection
.........................................................................................................................................................
and Control
51
Starting/Stopping
.........................................................................................................................................................
Pumps
52
3 Adding
...................................................................................................................................
and Configuring New Pumps
52
Pump Netw .........................................................................................................................................................
ork Open
54
Set Pump Address
.........................................................................................................................................................
Manually
54
Automatic Pump
.........................................................................................................................................................
Discovery
54
4 Syringe
...................................................................................................................................
Configuration
55
Using Quick.........................................................................................................................................................
Set
55
Using Connected
.........................................................................................................................................................
Pumps
56
Changing the
.........................................................................................................................................................
Syringe List
57
List Format.................................................................................................................................................. 57
Default Syringe
..................................................................................................................................................
Data
57
5 Logging
...................................................................................................................................
Pump Activity
59
What Is Logged
......................................................................................................................................................... 60
Log Entry Timing
......................................................................................................................................................... 60
Sample Log.........................................................................................................................................................
Entries
61
6 Pump
...................................................................................................................................
Programming
61
Sample PPL.........................................................................................................................................................
Files
62
Creating Pump
.........................................................................................................................................................
Programs
62
Writing and.........................................................................................................................................................
Saving PPL Files
63
Uploading PPL
.........................................................................................................................................................
Files to Your Pump
63
Part VI End User License Agreement
66
1 EULA
................................................................................................................................... 66
3
©2012 SyringePumpPro
Part
I
User Guide
www.syringepumppro.com
1
Introduction
SyringePumpPro is a computer application which provides a user interface for controlling
one or more programmable syringe pumps configured as a network of Syringe Pumps.
Manages standard and Microfluidic pumps
Control pump networks containing both
standard and Microfluidic pumps
Easily configure and control your multipump protocols.
Designed and built to be an easier interface
than programming pumps manually via
terminal programs.
Synchronise multi-pump operations.
Start and stop pumps individually (you
select the pump from a list of connected
pumps) or as a group (all connected
pumps told to start and stop as a group)
Upload pump programs to each pump.
Different pumping programs to each
connected pump.
Each pump can have it's own rates and
flows etc.
Safe mode – CRC detection and
functionality is automatic. SyringePumpPro
detects when a pump is in safe mode and
will communicate appropriately with the
32 pum ps connected to SyringePum pPro
pump. SyringePumpPro sends periodic
“pings” to safe mode pumps to avoid
alarms. The operator can set this interval.
Up to 100 pumps can be connected to SyringePumpPro.
Auto-baud and pump detection – SyringePumpPro will detect the baud rate of the network
(using pump 00’s settings) and also detect all pumps on the network.
Pump response history – pump commands and responses are logged on the screen.
User-configurable COM port and baud rates.
Send commands manually to connected pumps - just type your command and click
enter
Communications errors – COM port errors/disconnects are noted and handled.
Automatic refresh of pump value(s) after ‘set’ commands are issued.
PPL file functionality – upload a program to the pump from a text file.
Logging – all communications with the pump network are logged.
Real-time display of message statistics.
Assign labels to each pump to help with identification.
and much more..
5
Introduction
©2012 SyringePumpPro
SyringePumpPro User Guide
©2012 SyringePumpPro
Introduction
6
www.syringepumppro.com
1.1
About SyringePumpPro
SyringePumpPro is owned
by TBITC Pty Ltd and run by
me, Tim Burgess.
As a single person business I undertake computer consulting work, usually in the field of
creating software for manufacturers of devices. My speciality is creating programs that
interface humans to a computer and the computer to some piece of hardware.
A fantastic thing about dealing with a one person company is that when you interact with
SyringePumpPro, you are talking to the CEO/Software Guy. If you need technical support
or a question answered, you'll get a response straight from the one person who should
know or can get you an answer!
I support SyringePumpPro like my life depends on it - it does!.
SyringePumpPro benefits from my experience in:
Defence Research laboratories where I wrote software to collect and process
experiment data.
Working for a medicines manufacturer.
Creating machine control software for a world leading manufacturer of
transformer core making machines. This software has been exported worldwide for several years.
Training - I was a senior lecturer in programming a few years ago.
A lengthy career in building software and computer administration.
If you have any questions or comments about SyringePumpPro, I'd love to hear from you.
My address is [email protected].
I would be delighted to hear about your syringe pump application, and any suggestions you
may have for future versions of SyringePumpPro.
Sincerely,
Tim Burgess
7
Introduction
©2012 SyringePumpPro
SyringePumpPro User Guide
TBITC Pty Ltd
1.1.1
SyringePumpPro.com is owned and operated by TBITC Pty Ltd.
TBITC Pty Ltd is a registered Australian Company.
Australian Company numbers, ACN 107 578 370
Tim Burgess - CEO
TBITC Pty Ltd
PO Box 506, Gawler
South Australia 5118
Where Am I?
I get asked quite a lot - where am I? This map should help clear things up
In the land dow n under!
1.2
Contact SyringePumpPro
If you are having any problems with your pumps or SyringePumpPro, please send me an
email and I will get you up and running.
I like to respond quickly and keep responding till you tell me it's all working correctly.
Tim Burgess
CEO SyringePumpPro
Web: http://www.syringepumppro.com
: [email protected]
SyringePumpPro
SyringePumpPro
SyringePumpPro
©2012 SyringePumpPro
Introduction
8
www.syringepumppro.com
Postal: PO Box 506, Gawler, South Australia 5118
1.3
Getting Support
I want SyringePumpPro to be a valuable tool that let's you do
more with your syringe pumps. So if you need some support
please email me [email protected]
FAQ's
There are frequently asked questions on the SyringePumpPro website
which you may view.
Links will take you to a page of interesting syringe pump related web
sites.
User Manual is presented online.
Blog The SyringePumpPro blog is a diary of developments and
happenings.
Contact
Use the forms provided to make:
Requesting New features requests
Suggestions
Reporting Bugs
Licensing Issues
Please let us know about features you could use. When you do this,
please describe your application, and how this feature would work for
you. Don't forget to tell us why this would make SyringePumpPro more
useful.
By all means please tell me what you use SyringePumpPro for - I like
hearing about it's adventures in the real world.
Send your email to: [email protected] if you would prefer.
9
Introduction
©2012 SyringePumpPro
SyringePumpPro User Guide
1.4
New in this Version
Note All users of SyringePumpPro Version 1 may upgrade to the latest version free of
charge.
Version 1.55 - Microfluidics Update
Updated Microfluidics Units and Rates support.
New End User License agreement
Updated development tools
Many new syringes added to the preset syringe list. You can add more.
Some users report manual not opening from Help menu. Note if your computer
doesn't have pdf files associated with pdf reader software see Remaking your
PDF association
1.4.1
Past Version History
Version 1.54 - Maintenance release only
Resize SyringePumpPro screen layout to fit on net-books. 1024x600
Change default start up action from Auto Detect
Pump Network to Open. This eliminates the
communications baud detection on every start
up and eliminates the need for a pump at
address 0 to be present in order to detect any
other address pump.
Pum p Netw ork Menu
Clarification about pump detection.
For Auto Detect Pump Network to function a pump must be configured for
address 0.
If you do not have a pump at address 0, then you should ensure that the baud rate
in Pump Network -> Configuration is configured to match your pump settings.
Then, once the automatic detection process has been completed. select Pump
Network -> Open should detect your pump.
Quick Set clarification. Whilst a selected pump
is running, the Quick Set 47 controls will be
disabled.
Quick Set Dialog
Version 1.53 - Maintenance release only
Version 1.52 repackaged for general consumption
Version 1.52 - Limited release to one customer for testing
Installer improvements from SyringePumpPro Version 2 development.
Minor spelling and other corrections to the User Guide and online help.
Latest versions of software development tools.
Windows 7 UAE fix - inspired by issues affecting 1 Windows 7 user.
©2012 SyringePumpPro
Introduction
10
www.syringepumppro.com
Version 1.51 - Maintenance release only
New purchasing information section in manual to help Purchasing Clerks get the
answers they need.
Update web links throughout application and manual.
Corrected pump network diagram.
Reduce the number of 'buy a license' work flow interruptions.
If no pump connected, or pumps connected but none selected, do not attempt to
upload a PPL file, and certainly don't decide to shove it in pump address 0. Ask
the user to select the target pump.
Reflect changes to SyringePumpPro website.
Manual corrections.
Minor wording changes to program prompts.
New About section in the manual.
Minor corrections to the installer.
Version 1.50
Completely redesigned screen layout. Wider and taller window - no more cut off
information.
Larger History and Pump Explorer Windows - less scrolling. Status displays now
show all information.
Menu Logging -> View Log File now opens log file for viewing.
Logging time resolution is now better than 1/10th of a second.
New Start menu entries for example PPL files.
PPL Files now load from c:\Program Files\SyringePumpPro\PPL.
New updated manual.
Manual now available in both US Letter and A4 paper sizes.
Changed to TBITC Pty Ltd ownership.
1.5
Is your Pump Compatible?
SyringePumpPro is compatible with a number of manufacturer's pumps. Some
manufacturers carry more than one line of pumps, so you will need to confirm that your
pump is supported.
The best way to do this is:
Visit the compatible pump pages Compatible Pumps, look for your pump.
or
Download SyringePumpPro and try it.
If you find a pump that is not listed on the compatibility list, please send an email to
[email protected] and let me know.
The manufacturers supported at the time of writing are:
Manufacturer
Aladdin
by WPI
11
Introduction
©2012 SyringePumpPro
SyringePumpPro User Guide
Brain Tree Scientific
Cole-Parmer
Landgraf HLL
New Era Systems
Next Advance
Protea Bioanalytical
Biology
Stoelting
TSE Systems
1.6
Trial Limitations
Lim itations of the Trial
Version
The trial version will operate fully with one pump for a
period of thirty days following installation on your
computer. It will show other pumps but not send
commands to them.
After the trial period expires, SyringePumpPro will cease to function.
During the trial period a number of limitations are imposed on SyringePumpPro. These are:
It is limited to controlling one pump. This means that commands may only be sent
to one pump.
Pump programs may only be uploaded to a single pump.
The All Pumps start and stop buttons will only work with the first pump.
SyringePumpPro will be able to “see” and chat with multiple pumps, however it
©2012 SyringePumpPro
Introduction
12
www.syringepumppro.com
will be unable to send commands where the pump replies with data, nor will it
process PPL files for more than one pump.
Users of the trial version of SyringePumpPro are invited to submit support
requests. These support requests will be dealt with as time permits once the
issues of licensed users have been addressed.
A license reminder is displayed each time SyringePumpPro is started and closed
and at times when some SyringePumpPro features are accessed. This 'nag'
feature is removed when a valid license code is entered.
License Rem inder Screen
To have access to the full functionality please
purchase a SyringePumpPro license by contacting
[email protected].
1.7
Looking for a Labview Driver?
There is an old driver...
There is a driver for the NE50X available on the National Instruments website. Driver is here
.
This driver is
not National Instruments certified
not endorsed by the pump manufacturer.
old and is not being maintained.
If you need to control more than one pump, then I don't think this driver will be of any
use to you.
I haven't tried it. Have you? Let me know how well it works.
Does this interest you?
I am thinking of writing a driver to support all New Era Pumps.
Please send an email to [email protected] If enough folks indicate their interest
then I will get started.
13
Introduction
©2012 SyringePumpPro
Part
II
User Guide
www.syringepumppro.com
2
Quick Start Guide
This section will show you how to very quickly get SyringePumpPro up and running with 2
or more connected pumps.
Step
1
2
3
Instructions
Unpack your pumps and lay them out
on the bench.
Connect the power packs to the mains
supply and to the pumps.
Power on each pump and you should
see a blinking display.
Press any arrow key to stop the
blinking.
Turn off all the pumps.
Illustration
NOTE: If you are working through this quick
start guide for the second time because you
could not get a connection in step 5, reset all
of your pumps by:
1. Hold down the left most arrow key
on the key pad and power the
pump on.
2. Release the button when the
display shows the pump software
version number mine shows r460..
3. Turn the pump off
Unpack your cables, and familiarise yourself with How to connect your pump(s)
Download and install SyringePumpPro.
See the section How to Install
SyringePumpPro 20 for details on how to do
this.
NOTE For this exercise you don't need to have purchased a license. However at the
end of this Quick Start Guide if you haven't got a license to use SyringePumpPro you
will only be able to issue commands to one of the connected pumps.
15
Quick Start Guide
©2012 SyringePumpPro
SyringePumpPro User Guide
Step
Instructions
4 Connect the USB-RS232 device to your
computer.
Windows should take you through installing
a driver.
There is more detail on this in the section
Using USB-RS232 Adaptors 32
Illustration
You should see Windows pop up a balloon
to say that the device has been successfully
installed. Yours may not say ATEN
5
Now it's time to connect your first pump.
We will start by connecting one pump and
confirming that it is working.
Connect the data cable. The large end
connects to your USB-RS232 device and the
small end (similar to a telephone connector)
plugs into the pump to the socket labeled "To
Computer".
The photo of the rear of the pump shows
where the telephone style connector goes.
IT's the socket on the right hand side looking
at the rear panel like the photo on the right.
Do not attempt to use the DB9 connector
marked TTL - this is not the
communications port.
There's more detailed information about
connecting your pumps in the section
Working with Pumps.
6
So now you have your computer, USBRS232 adaptor and pump connected.
1. Turn your pump on.
2. Start SyringePumpPro.
You should see the pump explorer flashing
between Default and Pump Network not
opened. It will do this for a short while and
either discover your pump, or stop staying
Pump Network not Open.
If your pump is found jump to step 7 - it most
©2012 SyringePumpPro
Pum p Found
Pum p NOT found
Quick Start Guide
16
www.syringepumppro.com
Step
7
Instructions
likely wont be found at this stage. The next
step will solve this issue.
Your pump wasn't detected in step 5.
Illustration
This is probably because we haven't set the com port in the configuration page of
SyringePumpPro.
8
Refer to the section Determining the Com Port
correctly setting the com port configuration.
Your pump is connected
Test your pump quickly by entering the
command VER in the Command Entry
window, and clicking Send Command.
You should see the pump respond like this....
33
which will lguide you through
Note the Response text will vary depending
on your model of pump.
9
Repeat steps 4, 5, and 7 for each pump to be connected. This will confirm your
cabling and the pumps operation.
Do not proceed to step 9 until all pumps have been tested.
10 Connecting multiple pumps using the Pump Wizard.
From here I assume that you have successfully completed the first part of this guide
and have one pump connected and accepting commands.
11 With only one pump connected and
operating...
From the SyringePumpPro menu select
Address Wizard
12 Enter the number of pumps to add to
network as the total number of pumps in
your network, in our case this is 2.
The Next Pump Number is used to as the first address number to assign. This will
normally be one, however if you have an existing network of say 4 pumps and you
wish to add a further single pump, you would enter the Number of pumps to add to
network as 1, and the next pump number as 4. Four being the address of the first
new pump to be added.
Click Start
13 SyringePumpPro will now configure the address of the connected pump. Once the
17
Quick Start Guide
©2012 SyringePumpPro
SyringePumpPro User Guide
Step
14
15
16
17
Instructions
Illustration
configuration of the pump is complete the pump will beep twice.
After hearing the 2 beeps, disconnect the pump, and connect the next pump that will
be in your network. After a short pause you will hear 2 beeps from the newly connect
pump. This pump has been configured with it's new address.
Repeat this for the remainder of your pumps.
When you have configured all of your pumps click the red close window X on the
Pump Address Wizard.
Exit SyringePumpPro
Now it's time to connect all of your pumps at the same time. It is important that you
connect them correctly. The pumps are connected in a daisy chain as explained in
the section Before Connecting Your Pump 31 Here is diagram of the connection
scheme.
18
1. Make sure all of your pumps have
power turned on.
2. Start SyringePumpPro
All of your pumps should be connected now.
©2012 SyringePumpPro
Quick Start Guide
18
Part
III
User Guide
SyringePumpPro User Guide
3
How to Install SyringePumpPro
The basic steps are:
Download from the website
Run the installer
Trial SyringePumpPro for 30 days
Purchase SyringePumpPro
Enter your License Key
3.1
System Requirements
SyringePumpPro will run on:
Windows XP, and Vista. and Windows 7, Windows 7 Starter (for netbooks) and
Windows 7 X64
Users report it running under Windows Emulation on Mac platforms.
Any modern computer - less than 5 years old. Older computers will most likely
work too.
Requires a correctly set and advancing computer clock.
About 200mb of free disk space
Adobe Reader
A pre-installed pdf reader. I recommend Adobe Reader
.
At least one RS232 serial port is required along with the appropriate connecting
cable(s) to the pump and/or pump network. (Please follow the instructions
contained in the New Era Pump manual.) or a compatible USB to serial converter.
Note some of these converters work better than others.
Pump cables - see the cabling diagrams.
Windows 2000, Windows NT and Windows 9X are NOT supported
3.2
Downloading The Installer - Step By Step
SyringePumpPro is delivered as a single file download, which when run, installs a number
of files on your computer, and configures your computer's menu's to work with
SyringePumpPro.
First be sure that you have logged into the SyringePumpPro Website.
You should see a new menu entry,
Downloads. Click.
This will take you to the downloads
page. Look for the file titled
SyringePumpPro Version 1.51
Click the green Download button.
©2012 SyringePumpPro
How to Install SyringePumpPro
20
www.syringepumppro.com
Read the license agreement.
Then if you accept those conditions,
tick the I agree box and click download.
Your web browser will now download
SyringePumpPro for you.
3.3
How to Download SyringePumpPro
Visit the SyringePumpPro website at www.syringepumppro.com
SyringePum pPro w ebsite - m enu
Click Download
To download SyringePumpPro from the website you will need to create a user account.
The account creation process confirms that the email address you provide is genuine.
Why do I do this?
It helps stop bad guys downloading SyringePumpPro, wrapping it in their own bad
software and offering it on download sites.
This registration lets you to access software support and other materials on the
SyringePumpPro website.
The registration process reduces the amount of spammer activity.
3.4
Digitally Signed for Your Safety
How do you know that the files you download, are the ones I prepared and
have not been interfered with by some spammer? Bad guys are out there and
precautions should be taken to protect your computer's security.
21
How to Install SyringePumpPro
©2012 SyringePumpPro
SyringePumpPro User Guide
To check your download (Windows):
Locate the downloaded installer which will be named SyringePumpPro-Vx.y-Setup.exe,
where x.y is the version of SyringePumpPro.
Right click on the installer exe and in
the pop up menu select Properties.
A window will pop up to show the
properties of the installer
executable.
Select the Digital Signatures tab at
the top
In the Signature list area, click on
the signer name TBITC Pty Ltd.
By now your confidence about the
authenticity can begin to increase.
Click the Details button and the
display will now show the image on
the right, without the red rectangle
which I have placed to draw your
attention to the statement 'The
digital signature is OK.'
3.5
Installing SyringePumpPro
Download the installation program.
To do this follow the instructions in the Purchasing A
License 26 section of this manual
On your computer double click the
installer executable file.
Note the number V1.55 is the
version number and will change as
new releases are made.
©2012 SyringePumpPro
How to Install SyringePumpPro
22
www.syringepumppro.com
A window like the following will
appear ->
This is the installer program running.
This is the License Agreement
Screen.
Read the contents of the license
and if you do not agree to the terms,
cancel the installation.
If you do agree to the license terms,
indicate your acceptance by clicking
on "I accept the agreement".
Click next
For help with connecting your
pumps see the section in this
manual Working with Pumps
NOTE SyringePumpPro does not support installation on network shares, or running
multiple copies of SyringePumpPro from a single network folder.
Creating a desktop shortcut
The default action is to create a
desktop shortcut and we
recommend that you do.
With the box ticked - a shortcut to
SyringePumpPro will be placed on
23
How to Install SyringePumpPro
©2012 SyringePumpPro
SyringePumpPro User Guide
your Desktop. We recommend that
you do this. Click next here.
Installation proceeds
Whilst the installation is in progress
you will see the bar graph move to
the right, and file names will flicker
past.
Your SyringePumpPro installation
has been completed!
This is the final installation screen.
When you click finish
SyringePumpPro will be loaded.
Click finish!
©2012 SyringePumpPro
How to Install SyringePumpPro
24
www.syringepumppro.com
3.6
SyringePumpPro Licensing
When first installed SyringePumpPro is unlicensed and
operates in a limited functionality mode for 30 days - the
trial period.
Following the trial period the SyringePumpPro will cease to
function except to accept a purchased license key 26 .
At the end of the trial period, the user is expected to
remove SyringePumpPro from their computer or purchase
a license from SyringePumpPro.com.
See the section Purchasing a License
26
Visit the SyringePumpPro Website
for more details.
About the License key
The license for SyringePumpPro takes
the form of a serial number created from
a special number generated by an
installed copy of SyringePumpPro. This
serial number is delivered via email to the
person using the license.
The person who installs
SyringePumpPro should contact
[email protected] for a license
key. Further details about licensing are
found in the section of this manual
Installing the License 28 .
How is SyringePumpPro Licensed?
SyringePumpPro is licensed to a single computer for a number of pumps. The number of
pumps licensed is entered when making your purchase.
For example: You may license 5 pumps on one computer and 10 pumps for another
computer. These two licenses are distinct. Pumps may move from computer to computer
without effecting the license.
If you connect more pumps than you have purchased a license for, you will not be able to
operate the extra pumps.
Num ber licensed pum ps exceeded
25
How to Install SyringePumpPro
©2012 SyringePumpPro
SyringePumpPro User Guide
Number of pumps license upgrades can be purchased from the SyringePumpPro webshop
and are priced such that there is no penalty for purchasing license upgrades or purchasing
the full number of pumps outright.
Moving Licenses
The license is not transferable to another computer. You may apply to have the license
transferred once at the SyringePumpPro website by emailing [email protected]
Note Licenses will only be moved once. TBITC Pty Ltd reserves the right to refuse a license
transfer.
3.7
Purchasing a License Key
You can
purchase your license online in the
SyringePumpPro shop,
email me a written request,
send me a purchase order via email or
post.
What Payment Methods Are Available?
Credit Cards
PayPal
Direct Transfer
Cheque
PTAO number
All major Credit Cards are accepted.
.Paypal
In the shop, select payment method Generate Purchase Order
Bank Account details
National Australia Bank
Branch: Gawler, South Australia
Swift Code NATA AU3305A
BSB: 085-599 Account:56-6190421
Cheques are not accepted. My bank's
fees, currency conversion losses and
charges for failed cheques have forced
me to no longer accept payment by
cheque.
Currently not accepted.
Will I Get An Invoice?
©2012 SyringePumpPro
How to Install SyringePumpPro
26
www.syringepumppro.com
The Online shop will email you an invoice.
If you don't receive it, please email [email protected]
and I can resend it, or print and post it.
Do I Offer Discounts?
I don't offer educational discounts.
I do offer volume discounts. Generally I will give 10% off for 5+
licenses.
How Will The Software Be Delivered?
SyringePumpPro is available via download from the
SyringePumpPro website. This provides instant delivery and no
import or customs worries.
As downloaded the software is configured in trial mode and will
only operate for 30 days following installation.
Purchase a SyringePumpPro CD in the Webshop. This CD
does not contain a license key. It's not a cheap licensed version
of the software.
3.7.1
Pricing
If you decide to purchase SyringePumpPro, you will need to pay for a license based on the
number of pumps you wish to have connected at one time. See the Pricing page at the
SyringePumpPro Webshop.
You may purchase a license for say 2 pumps and then purchase an upgrade for another
pump at any time in the future. The upgrade pricing means that there is no price penalty for
making the 2 purchases over time.
3.8
Obtaining Your License Key
Install and run the SyringePumpPro. See
Installing SyringePumpPro 22
Select License ->License Key from the main
menu.
27
How to Install SyringePumpPro
©2012 SyringePumpPro
SyringePumpPro User Guide
The .License Key window will appear.
Select the Machine ID by double
clicking somewhere on the Machine
ID text.
Right click your mouse and select
copy.
You can now paste your Machine ID
into emails.
Email your Machine ID to
[email protected]
I will generate your license key and
return it via email. This usually
within a few hours. Please think
about the time zone differences we
are in.
3.9
Installing Your License Key
Once you have received your license code,
you need to activate SyringePumpPro.
Start SyringePumpPro.
Return to the license configuration dialog, from the menu, select License>Configure.
Enter the supplied license key into the
License Key box. It's best if you use
Windows cut and paste feature to
copy the license key. Enter the code
exactly as supplied into the license
dialog box shown above.
Close SyringePumpPro and then
restart it. You should no longer be
warned about trial or evaluation
periods
3.10
Checking Your License Key
To confirm that your license code has
installed correctly,
Run SyringePumpPro
Look at the lower left corner of the
window on the status bar 49 .
The number of licensed pumps is
also reported in the application title
bar.
©2012 SyringePumpPro
How to Install SyringePumpPro
28
www.syringepumppro.com
After entering your license key - you
can check it buy selecting License>License Key
Entered license key is displayed
3.11
Uninstalling SPP
If you need to uninstall SyringePumpPro simply
click on Uninstall in the start menu.
Start Menu
29
How to Install SyringePumpPro
©2012 SyringePumpPro
Part
IV
User Guide
www.syringepumppro.com
4
Connecting Your Pump
Let's talk for a moment about how the pumps are connected. An understanding of this will
help you diagnose communications problems with your pumps.
The pumps are connected in a daisy chain to form a network. Each pump listens to all of
the commands sent down the wire. All pumps see all the commands at the same time.
The pumps only obey commands after they have 'heard' their address number come down
the line. There is a special address '*' which all pumps obey.
This means that all pumps on a network MUST :
be set to the same communications parameters in order for the commands to
travel down the network and be understood by all the pumps.
be connected into the daisy chain correctly and securely to participate in the
network.
be set to a unique address. Two pumps set to the same address will answer
commands at about the same time and cause communications to become
garbled for all pumps on the network.
Communications Check List
Here are the things that you need to do in order to have a pump communicate.
Configure SyringePumpPro with the correct communications port, See
Determining the Com Port 33
Configure SyringePumpPro to communicate at the correct baud rate
Pump needs to be connected with the correct cable, to the correct port on your
computer,
Pump needs to be turned on.
Each pump in the network needs to be set at a unique pump address (if it is
connected with other pumps). All pumps are shipped from the factory set to
address 0.
Pump and SyringePumpPro need to be talking in the same mode - use Basic
31
Connecting Your Pump
©2012 SyringePumpPro
SyringePumpPro User Guide
There must be a pump configured with the address 0.
All pumps on a network/port MUST be set to the same baud in order to work
correctly.
Pumps will be discovered in numerical order of their configured network address.
Pumps configured with an identical address to another pump on the network will
not be detected and will lead to communication problems with all pumps on the
network.
4.1
Pump Network Components
This diagram shows the components used to build a pump network connected to your
computer. The cables are available from your pump supplier.
4.2
Using USB-RS232 Adaptors
Most computers no longer come with a built in serial
port and this adapter creates a RS232 (serial) Port.
There are many different manufacturers of these
devices and they are fairly cheap to purchase.
USB-RS232 adaptor
If you do use one of these adapters, then you should check that you have installed the
device driver software by:
©2012 SyringePumpPro
Connecting Your Pump
32
www.syringepumppro.com
Disconnecting the device
Follow the manufacturer's installation instructions, and install the driver software
for your device.
Insert the device into your computer - your
should see Windows acknowledge the
device's insertion by displaying a balloon
message in the bottom right hand corner of
the screen.
Window s Detected ATEN Device
If you experience reliability issues with a USB-RS232 device, please purchase
another brand for testing.
Whilst they are generally very reliable, some are known to fail under high traffic
loads.
4.3
Determining The Com Port
To get your USB-RS232 adaptor
working with SyringePumpPro you
need to configure the correct com
port in the drop down box.
Different manufacturers USBRS232 devices and their driver
software configure on a range of
com ports. They can sometimes
change com port when they are
inserted or re-inserted.
You will now need to determine what communications port has been assigned to the
device. To do this:
Open an Explorer Window. Use the
Windows Key (between Ctrl and
ALT) and press E.
Right click on the grey area (My
Computer) and a menu will appear.
33
Connecting Your Pump
©2012 SyringePumpPro
SyringePumpPro User Guide
Select Properties at the bottom left click it.
The System Properties Window
will appear.
Up the top of the Window left click
on the Hardware Tab
Click on the plus sign next to the
label Ports (COM & LPT)
You can see my ATEN device
listed here.
Note in this screen shot the device
is assigned COM3
©2012 SyringePumpPro
Connecting Your Pump
34
www.syringepumppro.com
In SyringePumpPro use the menu
entry configuration entry to open
the configuration settings.
Select the Comport shown in red
above, this image shows COM12
4.4
Port and Network Configuration
SyringePumpPro by default comes configured
to work with the first communications port
at19200 baud.
If you use a USB-RS232 converter you will
probably need to select a different com port.
See Determining the Com Port
33
Configure Netw ork Dialog
Note that most users will NOT need to
configure these settings.
Select Pump Network -> Configuration from
the main menu to view/modify the
configuration. The name of the configuration is
'Default'.
Baud Rate Selection List
When you have set the port and baud values appropriately, click OK.
I recommend against changing the default values for the COM port
timeouts and intervals.
These settings have been made configurable so that user's with a
35
Connecting Your Pump
©2012 SyringePumpPro
SyringePumpPro User Guide
detailed understanding of the communications protocol may fine tune the
settings for maximum performance.
The default values will provide reliable communications.
If you are experiencing communication issues make sure these values
are set to their defaults.
Users who understand the ramifications of modifying the values have
more control over SyringePumpPro's behavior.
Improper configuration can result in unreliable communications which
may impact your protocol.
4.5
Automatically determine the Baud Rate
SyringePumpPro can determine the appropriate baud rate for a pump/network.
To do this:
Select Pump Network -> Discoer from the main
menu.
SyringePumpPro will search for pump addressed
00 on the network and use its baud rate to
configure the network. All pumps will be
interrogated for their values as in the Open and
Discover functionality above.
NOTE:
Your cabling must be working and installed correctly.
Your USB RS232 device must be connected and have the driver installed.
There must be a pump configured with the address 0.
All pumps on a network/port MUST be set to the same baud in order to work
correctly. Preferred rate is 19200.
Pumps will be discovered in numerical order of their configured network address.
Pumps configured with an identical address to another pump on the network will
not be detected.
4.6
Serial Ports Throughput
When many pumps are connected to the computer the traffic on the serial port may
become an issue. Below is a table of baud rates and maximum throughput on the serial
port.
You may wish to increase the user interface refresh interval for active pump values. This
interval is used by SyringePumpPro to trigger queries of active pumps. Active pumps are
those with status that is NOT Stopped.
The default value for the update interval is one second. Please see the configuration
section for details on how to modify the setting.
The following table shows the approximate max throughput rate of a COM port at a given
baud rate. We assume an average command or response message of 18 bytes long.
©2012 SyringePumpPro
Connecting Your Pump
36
www.syringepumppro.com
Baud
Bytes Per Second
Avg Message per Second
19200
2400
133
9600
1200
66
1200
150
8
300
37
2
As you can see, when a number of pumps are operating and a few values are queried for
each pump at the query intervals the serial port throughput may become an issue. You
must consider the amount of communications traffic on the serial port when configuring the
interval(s).
Note that the numbers above are maximum throughput for the serial port. The user will
most likely never see values close to those numbers as SyringePumpPro must also
process the user commands and the responses that come from the pump.
Our current testing at 19200 baud has shown maximum throughput rates of 72 messages
per second (a message is either a pump command or response) and 1300 bytes per
second.
72 messages would translate to 36 pump command/response pairs per second
4.7
RS232 Cable Lengths
The following are the maximum recommended cable lengths for the different baud rates.
Baud Rate
Max Recommended Length Feet / Meters
19200
50ft / 15m
9600
500ft / 150m
2400
3000ft / 900m
In a laboratory or manufacturing scenario it may be easy to require cable runs of over 15m.
Note if your environment is electrically noisy these cable lengths may be shorter. You can
try running the RS232 cable inside a braid that is earthed at the computer end.
A connection can be made via radio - however it is expensive and takes some configuration
to get reliable connections. If you need more information, please email
[email protected]
4.8
Pump Connections
The blue arrow in this picture
shows where the two rs232
communications connections are
made.
The D connector to the right is not
used for communications - it is
the digital input/output port.
There are two square holes in the
black recess.
37
Connecting Your Pump
©2012 SyringePumpPro
SyringePumpPro User Guide
The hole on the left is the
connection to the next pump in the
network and the hole on the right
is to connect to the computer or
the next pump on the daisy chain
closest (electrically) to the
computer.
4.9
Test Coms
The test Coms button floods the pump network with commands. This is
handy for confidence testing you computer, your USB-RS232 adaptor, your
wiring and your pumps to see that the communications are reliable. This is
recommended prior to running protocols.
You can watch the status bar area 49 and see the number of messages in
the message que and the throughput 36 of the system under load.
4.10
How to Reset Your Pump
This is the reset procedure for
Aladdin (WPI), Brain Tree Scientific, Cole-Parmer, Landgraf HLL, New Era Systems, Next
Advance, Protea Bioanalytical Biology, Stoelting, and TSE Systems Programmable Syringe
Pumps
Key Pad Models
1. Turn pump off.
1. Hold down the right most arrow key on the key pad and power the pump on.
2. Release the button when the display illuminates..
Note the following OEM reset technique will work with Key Pad pumps too.
OEM Models
Note this method relies on working
pump communications.
To reset these pumps:
1. Start SyringePumpPro
2. Let the automatic connections time out.
3. Check that SyringePumpPro is configured to use the correct communications
port and parameters.
4. Despite thinking that no pumps are connected enter the command *RESET and
send it.
5. SyringePumpPro may indicate that communication errors have occurred. This
depends on a number of factors - and is quite normal.
6. This will reset all your connected and powered on pumps.
4.11
Troubleshooting Communications
Communication problems happens to some - if your reading this it's probably happening to
Email timb for help
you.
and tell me about your problems - I will help you get your pumps
communicating. If you do email me, please send me:
A list of the make and models for all your pumps
©2012 SyringePumpPro
Connecting Your Pump
38
www.syringepumppro.com
What addresses the pumps are configured to.
Please indicate which pump(s) is/are not working - if some are working and some
aren't.
Is there a triangle displayed on the pumps front LCD panel? (Non OEM pumps
only)
SyringePumpPro works fine with lots of
pumps - I regularly test with 6 pumps
connected.One customer has 32 pumps
working.
Don't reinstall SyringePumpPro!
It is unlikely that reinstalling SyringePumpPro
will fix any problems with communications.
You won't do any damage if you do reinstall.
Here's a list of some of the things that can be causing pump communications problems:
Operator (you) have connected the pump communications cables incorrectly.
Pump is set to the wrong communications parameters - a reset will fix that. See
How To Reset Your Pump 38
Pump is set to the wrong address - a reset will force it to address 0
Cabling - these are easily damaged - and well worth a careful check.
USB RS232 device is faulty or the driver is not installed.
A malfunctioning pump - This happens very rarely in my experience.
Basic checks
Check these basic items before reinstalling SyringePumpPro and drivers
1. If you are using the RS232 USB adapter check that you have installed the driver.
2. Ensure that the communications cable from your Pumps to the computer is
connected at both ends and that the cable is in physically good condition.
3. Ensure that the connection cables between pumps are inserted fully and that the
cable is in physically good condition.
4. Make sure your pump communications cables are inserted in the correct sockets.
See Before Connecting Your Pump 31
5. Ensure that your pumps are powered up.
6. Can you see an led on the USB-RS232 adaptor? Does it flash when you attempt to
send a command? If you have a led on your adaptor and it doesn't flash check the
USB-RS232 driver and com port number - See Determining the Com Port 33
7. Is there a triangle displayed on the pumps front LCD panel? (Non OEM pumps
only)
Troubleshooting Procedure - No Pumps Communicating
1. Make sure you have checked the items in the previous heading 'Basic Checks'
2. Connect a single pump directly to the computer as the only pump.
3. Reset that pump. See How To Reset Your Pump 38
4. Run SyringePumpPro
5. Do you get a connection for a pump at address 0? If you don't stop here and
resolve this communication problem
6. Send the command *VER - any responses?
7. Send the command *BUZ5 - the pump should beep five times.
39
Connecting Your Pump
©2012 SyringePumpPro
SyringePumpPro User Guide
8. Send the command *ADR0B19200
9. Send the command VER
Troubleshooting Procedure - Some Pumps Communicating
1. Move the non communicating pump(s) to one side.
2. Connect a single known working pump directly to the computer as the only pump.
3. Reset that pump. See How To Reset Your Pump 38
4. Run SyringePumpPro
5. Do you get a connection for a pump at address 0? If you don't stop here and
resolve this communication problem - or try another pump from step 1
6. Now change the connected pump for a non communicating pump. - Make sure the
cable is in the correct socket - to Computer
7. Reset the pump
8. Run SyringePumpPro
9. Do you get a connection for a pump at address 0? - If you have successfully
connected in step 5 you should get a connection now - if we don't we are looking
for something out of the ordinary or you might have a faulty pump..
10.Does SyringePumpPro give any error reports at all?
11.Send the command *VER - any responses?
12.Send the command *BUZ5 - the pump should beep five times.
13.Send the command *ADR0B19200
14.Send the command VER
After attempting this once with no success - please turn the pump off and the computer
and take a short break - I know this sounds a bit weird - but it really helps.
Now repeat the entire procedure again - up till step 14.
©2012 SyringePumpPro
Connecting Your Pump
40
Part
V
User Guide
SyringePumpPro User Guide
5
SyringePumpPro in Action
Enter topic text here.
5.1
A First Look
This section will walk you through the displays and tell you where to find things. Then there
will be a section of this manual dedicated to each screen to tell you what all the controls do.
Be sure to spend some time familiarising yourself with the controls and core options.
There's a lot of functionality here!
5.1.1
Start Menu Entries
The installation program creates a new entry in
your start menu called SyringePumpPro
Note: Your icons may appear in a different order this is determined by Windows.
Inside this are the entries shown to the right.
Launches SyringePumpPro
Edit the syringe list used by Quick Set
PPL Example1,2,3,4,5,6,7 Launches the
PPL Example files in Windows Notepad
Opens the SyringePumpPro Manual (Letter
or A4)
Uninstall SyringePumpPro
Opens the pump log file in Windows
Notepad
Loads the SyringePumpPro Website into
your web browser
Start Menu
5.1.2
Files and Folders
When SyringePumpPro is installed on your computer is creates a number of folders and
files. The following sections tell you what they are used for.
As a general rule: Don't delete any files or edit/change any files with any other application.
SyringePumpPro expect all files and folders to be where they are installed.
©2012 SyringePumpPro
SyringePumpPro in Action
42
www.syringepumppro.com
5.1.2.1
Folders
Here is the layout of the c:\Program Files\SyringePumpPro directory. The icon to launch
SyringePumpPro is the one showing the syringe. The SyringePumpPro installation
program creates menu entries in your Start Menu 42 and on your desktop.
43
SyringePumpPro in Action
©2012 SyringePumpPro
SyringePumpPro User Guide
Folder Name
Use
This is where
SyringePumpPro places
your saved PPL files.
Sample PPL Files stored
here
5.1.2.2
Files
SyringePumpPro uses a number of different file types. Their icons and any issues are
listed here.
PPL files
These files contain a saved PPL.
Electronic version of this manual.
This icon will be determined by the PDF reader software you have installed.
Double clicking on this icon will load the electronic version of this manual into
your PDF viewing software.
This icon indicates an internet shortcut.
Note that the icon will change depending on the Web browser you use.
For safety, speed and compliance with standards, I recommend using Firefox
which is available from www.mozilla.com
5.2
Using SyringePumpPro
How to get things done with SyringePumpPro.
©2012 SyringePumpPro
SyringePumpPro in Action
44
www.syringepumppro.com
5.2.1
Screen Layout
Here is an overview of the SyringePumpPro screen.
Screen Layout
5.2.1.1
Menus
This is the menu bar at the top of SyringePumpPro
.
The sub menus:
Pump Network
Offers commands to control pump connections
and upload PPL files to pumps
45
SyringePumpPro in Action
©2012 SyringePumpPro
SyringePumpPro User Guide
Logging
Controls the logging and viewing of the logs of
pump communications.
Normally logging is left turned off.
License
Used to go to the website to purchase a license
License Key is used to access the Machine Id
and enter the license key you have purchased.
Help
Will open this user manual on your computer or let
you visit the SyringePumpPro website, send timb
an email, or show you the End User License
Agreement for SyringePumpPro.
5.2.1.2
Connected Pumps
The Connected Pumps worksheet lists the detected and
connected pumps, and allows you to choose which pump in
the pump network will receive the commands entered into the
Manual Command panel.
Connected Pum ps
5.2.1.2.1 Pump Context Menu
The Pump context menu drops down when you right click on a pump in the Connected
Pumps Worksheet. If you click on the Set Syringe entry a further drop down menu will
appear (larger than portrayed here) with all your syringe settings.
©2012 SyringePumpPro
SyringePumpPro in Action
46
www.syringepumppro.com
5.2.1.3
All Pumps
The All Pumps controls effect all of the connected pumps listed
in the connected pumps list 46 .
The start and stop button will start and stop all pumps at the
same time.
The Test Coms button floods the pump network with
commands to test communications reliability.
Pause/Stop explained
5.2.1.4
Manual Command Window
The Manual Command Pane allows
you to send commands to the pump
selected in the Pump Worksheet.
See Issuing Commands 47 for more
details.
Manual Com m and Window
5.2.1.5
Quick Set Window
The Quick Set window is used to quickly configure
the syringe type and pumping actions for the currently
highlighted pump in the Pump Worksheet.
Quick Set Pane
Quick set Volume offers a selection of units - micro
litres, milli litres and for the Microfluidic pumps nano
litres
Quick set Rate offers the following rates: micro litres
per hour, micro liters per minute, milli litres per hour,
milli litres per minute and for the Microfluidic pumps,
nano litres per hour and nano litres per minute.
Using the volume and rate controls will set these parameters for your pump. Be
sure to use the correct units for your pump.
If your pump does not support the microfluidic rates, then attempting use nano litre
47
SyringePumpPro in Action
©2012 SyringePumpPro
SyringePumpPro User Guide
settings will not work. Similarly using milli litre settings with Microfluidic pumps will
not work.
Whilst a pump is running the Quick Set Dialogue is disabled.
5.2.1.6
Pump Explorer
The tree control on the bottom left of the application can be used to explore the connected
pumps and their current settings.
Clicking on the + symbol expands the entry for that pump and will display all pump
parameters. Refer to your New Era Pump Manual to interpret the information presented
here.
5.2.1.7
History Window
The Command History Window shows each command issued and the pump's response.
History Pane
You may:
©2012 SyringePumpPro
SyringePumpPro in Action
48
www.syringepumppro.com
Scroll through the history using the scroll bars
Clear the history using the Clear History Button.
5.2.1.8
Status Bar
SyringePumpPro displays statistics at the bottom of the window.
Status Bar
Field
Description
Port:1
This shows the com port in use by SyringePumpPro
Baud:19200
The communications baud rate.
Licensed
Pumps:5
Indicates the number of pumps that your copy of SyringePumpPro is
licensed for.
Queued
messages:0
This counter indicates the number of messages that have yet to be sent
to pumps.
Normal operation should see this sit at zero for most of the time with the
occasional rise say to 5. Should this number not spend most of it's time
at zero, you may be experiencing communications issues or your baud
rate could be set low.
msgs/sec: 10 This indicator shows the number of messages being exchanged with your
[56]
pumps. The screen shot shows 10 messages a second being
exchanged.
bytes/sec
This indicator is used to show the number of bytes traveling across the
communications link.
Errors:0
This indicates the detected communications errors. Ideally this should
remain at zero. If any errors appear here, you should check your cabling.
When SyringePumpPro is idle, the status bar will show
indicators reading 0. To see the status bar at work, click the
Test Coms 38 button in the All Pumps 47 area.
5.2.2
Pump Naming
You can assign your pumps task specific names. To do this:
Click the pump name, and you will see the entire
name become hi lighted.
Type your new pump name and press enter.
Nam ing a Pum p
The name will now be applied to the pump.
49
SyringePumpPro in Action
©2012 SyringePumpPro
SyringePumpPro User Guide
Pum ps Nam ed
5.2.3
Issuing Commands
You may issue
commands to your
pumps using the
manual command
area. Be sure to
check your
command's syntax
before sending.
Manual Com m and Area
Commands are sent
by hitting the enter key
or by clicking the
Send Command
button.
The command and its
response are
displayed in the text
box in the bottom.
Commands are sent
to the highlighted
pump in the
connected pump
status chart. In the
case shown on the
right, the commands
would be send to the
Glucose pump (the
second pump in the
©2012 SyringePumpPro
Connected Pum p Status Area
SyringePumpPro in Action
50
www.syringepumppro.com
list).
The Command
History Window text
displays the pump's
responses to any
commands sent. You
may use the scroll
bars on the right to
move through the
history list.
Com m and History Window
When SET
commands (ones that
set values) are sent to
the pump, the
SyringePumpPro
automatically followsup with a query
command to confirm
that the SET
command has taken
effect
The result of the
query will be shown in
the tree view under
the pump.
Netw ork and Pum p Details Tree
If a pump is not selected in the Connected Pump Work Sheet, and
commands sent will be sent to the default pump - the pump at address
00.
5.2.4
Pump Selection and Control
When pumps have been detected by
SyringePumpPro they are displayed in the Pump
Worksheet.
To control a pump, select it by clicking on the line that
contains the desired pump. (The first discovered
pump is automatically selected)
51
SyringePumpPro in Action
©2012 SyringePumpPro
SyringePumpPro User Guide
A menu of commands is available when you right
click on a pump in the Pump Work Sheet
You will be unable to control pumps that are not licensed.
The number of licensed pumps is shown in the status bar
5.2.5
Starting/Stopping Pumps
Connected pumps may be stopped and started individually by first
selecting the pump you wish to control in the Connected Pump list and
then clicking the start or stop buttons in the selected pump control area.
You may also start and pause/stop all the pumps listed in the Pump
Worksheet as a group by using the Run All or the Pause/ Stop All
buttons
5.3
Adding and Configuring New Pumps
Introduction
When connecting more than one pump, it is best to configure each pump individually first
before putting all the pumps on a network together. The pumps typically come from the
manufacturer with the address set to the default of '00' (zero). No two pumps can have the
same address on a network. Having duplicate addresses on a network will result in
undefined behavior. Learn more about how the network operates. 31
It is easiest if you decide on a baud rate, and a pump address scheme for your pump
network prior to attempting to configure and network more than one pump.
©2012 SyringePumpPro
SyringePumpPro in Action
52
www.syringepumppro.com
Note SyringePumpPro begins automatically detecting pumps by looking for a
pump at address 0 in each baud rate. This means that your pump network MUST
have a pump at address zero for automatic detection to work.
If you do not have a pump at Address 0, and your baud rate is correctly configured
in Pump Network -> Configure, wait for auto detection to completed, and select
Pump Network -> Open and your pump if connected correctly should be detected.
The pumps should be in Address mode
, not in Reciprocating pump mode
or
.
SyringePumpPro can automate this process. You must physically connect each pump
(individually) to the network, but while in this configuration mode SyringePumpPro will
automatically detect a pump with an address of 0 and will give it a new unique address.
Follow the steps below:
1. Connect each pump to a power
source and turn it on whilst holding
down the right most arrow key.
This will reset the pump to address
zero and the factory set baud rate.
Pum p Address Wizard
1. Start the SyringePumpPro with the existing pumps (or follow the steps in this document
to configure the serial port)
2. Once SyringePumpPro has detected the existing pumps that have unique addresses,
stop and disconnect those pumps.
3. Select “Address Wizard” from the “Pump Network” menu.
4. Enter the number of pumps you will be adding to the network. If you have 3 pumps and
you have not configured any, you would enter 3 here. If you have an established network
of 4 pumps and you are going to add a fifth pump, then you would enter 1 here.
5. SyringePumpPro will set the next pump number to what it believes is the correct value
(you can override this) For example – if you had two pumps with addresses 0 and 1 then
the value in that edit box would be 2 – the next available pump address)
6. Press the Start button
7. Connect one “new” pump to the computer. (note that the pump needs to have an
address of 0 at this point)
8. The pump will be detected and then reassigned a new address.
9. The pump will emit two short beeps – that means it was reassigned a new address.
10.Disconnect the pump.
11.Repeat steps 7 through 10 for each pump you wish to add.
53
SyringePumpPro in Action
©2012 SyringePumpPro
SyringePumpPro User Guide
Note that all the new pumps must commence this process with their address set to 0 for
them to be detected and assigned. To set the pump address back to 0 you can use the
command *ADR0, or reset the pump by:
Turn the power off
Press and hold the right most key on the pump
Turn the power on whilst keeping the key depressed. Release the key after a few
seconds
5.3.1
Pump Network Open
The default network must be opened before communicating
with the pump. Select Pump Network ->| Open from the
main menu or right click on the empty list control area and
select Open from the popup menu. When the port is
opened successfully SyringePumpPro will attempt to
discover all the licensed pumps. (Pumps are searched in
order, starting from pump 00.
You can initiate an exhaustive search by choosing “Discover Pumps” from the menu. In
that case SyringePumpPro will search for all pumps. (00 through 99)
All pumps found on the network will be listed in the pump list box and will be displayed in
tree control as children of the network. It may take some time for the values to be displayed
and for all pumps to be discovered
5.3.2
Set Pump Address Manually
You can manually set the pump address by sending it the command: *ADRnn using the
Manual Command Pane. Where nn is the two digit address you wish the pump to be set
to.
For this to be successful you will need to ensure that cables are correctly connected and
that serial port baud rates match the baud rate set in the pump. You also need to know the
address the pump is currently set to.
5.3.3
Automatic Pump Discovery
SyringePumpPro has an automatic pump discovery feature. This feature combined with a
methodical application of the steps outlined here, will produce a functioning network of
pumps.
A correctly connected pump, that is turned on, will be detected no matter what serial baud
rate it is operating at, or what address it has been configured for.
Note SyringePumpPro begins automatically detecting pumps by looking for a
pump at address 0 in each baud rate. This means that your pump network MUST
have a pump at address zero for automatic detection to work.
If you configure your pumps and Pump Network->Configuration with matching
baud rates, you can wait for Automatic Pump Discovery to finish and select Pump
Network-> Open and your pumps will be detected, and there is no need for a
pump configured for address 0.
©2012 SyringePumpPro
SyringePumpPro in Action
54
www.syringepumppro.com
Once SyringePumpPro has detected and connected to the pump, you can configure the
pump to the settings you desire.
For best results you should reset the pump. Please refer to your pump manual for the reset
procedure. Typically New Era pumps are reset by holding the right most button down whilst
turning on the power.
SyringePumpPro should detect your pumps by itself with no intervention from the user.
This happens at startup.
Note that SyringePumpPro may be slow to respond while it is searching for the pump
network and for the pumps. SyringePumpPro will attempt to interrogate the first 10 possible
pump addresses on the network - 0 to 9.
When you select open from the menu, SyringePumpPro will search for a limited number of
pumps automatically. If while running SyringePumpPro, more pumps are added, or if the
user wants to view unlicensed pumps, the user can discover them by selecting Pump
Network -> Discover Pumps from the main menu. This may take some time, depending on
the number of pumps and the baud rate being used.
If the pump(s) are connected correctly and powered, SyringePumpPro should discover
them by itself. This may take some time depending on the number of COM ports detected
on the computer.
The default pump network settings are: port =1, baud = 19200.
5.4
Syringe Configuration
Many popular syringes are
pre-configured in
SyringePumpPro.
There are two methods you
can use to set the Syringe
parameters for the pump:
Quick Set
Connected Pump list
Syringe Configuration
See the syringe manufacturer's documentation for the range of values.
5.4.1
Using Quick Set
To configure the syringe you are using with a particular pump,
Click on the pump you wish to configure in the Pump
Worksheet
First Select the Pum p
The right most pane of the selected pump control
panel of SyringePumpPro contains controls for quick
set up of a syringe and pump.
The currently selected pump's details will be shown
in the dialog box items. Click on or tab to the windows
to change the values. Once all desired values are
entered click on the “Set” button. To discard changes
55
SyringePumpPro in Action
Quick Set in Action
You can also set the
diameter with a numeric
©2012 SyringePumpPro
SyringePumpPro User Guide
click the “Revert” button.
Commands will be sent to the selected pump that will
set these values.
Use the drop down selectors to set the Volume Units,
the Rate Units and the Pump Direction.
value.
Note that this value is inside
diameter in mm.
Volum e Units
Rate Units
Pum p Direction
The syringe diameter can be set from the drop down
list – many common syringes are listed with their
respective diameters. Choose the one that matches
your syringe.
You may modify the contents of this drop down list.
See Syringe Configuration 55
Syringe Drop Dow n List
Note Illegal or out of range values syringe diameters will be rejected.
See Syringe Configuration 55
5.4.2
Using Connected Pumps
Popular syringes are pre-configured in
SyringePumpPro.
To configure the syringe you are using
with a particular pump,
right click on the pump in the pump
list
select 'Set Syringe' from the menu
which appears.
A list of configured syringe will form
another menu.
Click on the syringe you are using.
©2012 SyringePumpPro
Syringe Selection List
SyringePumpPro in Action
56
www.syringepumppro.com
5.4.3
Changing the Syringe List
The syringe drop down list can have syringes added and removed simply by editing the file
containing the list of syringes.
First you will need to open the list of syringes in a text editor. Windows Notepad is ideal for
this.
A shortcut has been placed in the start menu
5.4.3.1
List Format
Each syringe is represented by a single line in the file syringedata.txt
Manufacturer:<syringe capacity>:Units:<diameter in mm>
Example
Air-Tite:10:cc:15.9
This is the entry for an Air-Tite 10cc syringe with a diameter of 15.9 .
Example
SGE:100:µl:1.457
This entry is for a 100µl syringe which has a diameter of 1.457 millimeters
5.4.3.2
Default Syringe Data
SyringePumpPro ships with the following syringe data:
// syringe file
//manufacturer:size:units:diameter
// Air-Tite
Air-Tite:10:cc:15.9
Air-Tite:20:cc:20.25
Air-Tite:30:cc:22.5
Air-Tite:50:cc:29
// Becton-Dickson
B-D:1:cc:4.699
B-D:3:cc:8.585
B-D:5:cc:11.99
B-D:10:cc:14.43
B-D:20:cc:19.05
B-D:30:cc:21.59
B-D:60:cc:26.59
// HSW Norm-ject
HSW Norm-Ject:1:cc:4.69
HSW Norm-Ject:3:cc:9.65
57
SyringePumpPro in Action
©2012 SyringePumpPro
SyringePumpPro User Guide
HSW
HSW
HSW
HSW
HSW
Norm-Ject:5:cc:12.45
Norm-Ject:10:cc:15.9
Norm-Ject:20:cc:20.05
Norm-Ject:30:cc:22.9
Norm-Ject:50:cc:29.2
// Monoject
Monoject:1:cc:5.74
Monoject:3:cc:8.941
Monoject:6:cc:12.7
Monoject:12:cc:15.72
Monoject:20:cc:20.12
Monoject:35:cc:23.52
Monoject:60:cc:26.64
Monoject:140:cc:38.0
// Terumo
Terumo:1:cc:4.7
Terumo:3:cc:8.95
Terumo:5:cc:13
Terumo:10:cc:15.8
Terumo:20:cc:20.15
Terumo:30:cc:23.1
Terumo:60:cc:29.7
// SGE (Glass - Gas tight)
SGE:0.5:µl:0.1
SGE:1:µl:0.15
SGE:5:µl:0.343
SGE:10:µl:0.485
SGE:25:µl:0.728
SGE:50:µl:1.03
SGE:100:µl:1.457
SGE:500:µl:3.26
SGE:1:cc:4.606
SGE:2.5:cc:7.284
SGE:5:cc:10.3
SGE:10:cc:14.57
SGE:25:cc:23.03
SGE:50:cc:27.5
SGE:100:cc:24.99
// Poulten & Graf (Glass)
PoultenGraf:1:cc:6.7
PoultenGraf:2:cc:8.91
PoultenGraf:3:cc:9.06
PoultenGraf:5:cc:11.75
PoultenGraf:10:cc:14.67
PoultenGraf:20:cc:19.62
PoultenGraf:30:cc:22.69
PoultenGraf:50:cc:26.96
©2012 SyringePumpPro
SyringePumpPro in Action
58
www.syringepumppro.com
PoultenGraf::100cc:34.21
// Steel Syringes
Steel:1:cc:9.538
Steel:3:cc:9.538
Steel:5:cc:12.7
Steel:8:cc:9.538
Steel:20:cc:19.13
Steel:50:cc:28.6
Steel:100:cc:34.93
Steel:200:cc:44.75
// Hamilton Microliter
Hamilton Microliter:0.5:µl:0.103
Hamilton Microliter:1:µl:0.146
Hamilton Microliter:2:µl:0.206
Hamilton Microliter:3:µl:0.326
Hamilton Microliter:5:µl:1.3
Hamilton Microliter:10:µl:0.48
// Cadence
Cadence:2:cc:8.91
Cadence:3:cc:8.91
Cadence:5:cc:11.71
Cadence:10:cc:14.65
Cadence:20:cc:19.56
Cadence:30:cc:22.7
Cadence:50:cc:28.02
5.5
Logging Pump Activity
Logging of pump commands sent and pump responses over time is very useful for keeping
records of pump actions and for “debugging.”
Logging is controlled via the
menu item “Logging.” When
enabled, the menu item will read,
“Disable” and when not active,
will read, “Enable.” .
Logging is ENABLED
59
SyringePumpPro in Action
Logging is DISABLED
©2012 SyringePumpPro
SyringePumpPro User Guide
The log is stored in the file
pumps.log, located in the c:
\Program Files\SyringePumpPro
directory.
The log file defaults to pumps.log
in the directory where
SyringePumpPro is executed.
show contents of a log
5.5.1
What Is Logged
All events include the following:
Date/time
Event type
Item (pump, network)
Data – any associated data corresponding to the event)
SyringePumpPro logs the following events
Network open and close
Pump discovered
User command sent to pump network
Response received from the pump network for user command
Phase change
Pump Status change
Alarm received
The fields in the log files are separated by commas so the file can be viewed in table format
in Excel. The user may wish to set the log file name to *.csv for simplicity if the user
chooses to view primarily with Excel or other spreadsheet software.
5.5.2
Log Entry Timing
Accuracy
Entries in the log file have time resolutions in milliseconds, however, due to timing skew
with the Windows operating system and depending on the load the computer is running
under it is not recommended that you rely on these values to resolutions below tenths of
seconds.
Log Entry and Physical Event
©2012 SyringePumpPro
SyringePumpPro in Action
60
www.syringepumppro.com
The time stamps are taken at the point just before the command message is sent (in the
cases of commands being sent) and just after the pump responses message has been
received and processed.
The time delay between those values is the time taken for the message to pass through the
hardware layer of the operating system, the serial port, the round trip to the pump and back
and the processing time at the pump for a message to be parsed, acted on and responded
to.
5.5.3
Sample Log Entries
The following are sample entries –
<05/ 04/ 06 14: 01: 13> ,
' Us e r c o mma n d ' >
<05/ 04/ 06 14: 01: 13> ,
St a t u s : ' Wi t h d r a wi n g '
<05/ 04/ 06 14: 01: 15> ,
' Us e r c o mma n d ' >
<05/ 04/ 06 14: 01: 15> ,
St a t u s : ' Wi t h d r a wi n g '
<05/ 04/ 06 14: 01: 37> ,
< Co mma n d s e n t > ,
< Pu mp 0 > ,
< Co mma n d :
< Pu mp Re s p o n s e > , < Pu mp 0 > , < Re s u l t :
Da t a : ' 2 7 . 0 0 ' >
< Co mma n d s e n t > , < Pu mp 0 > , < Co mma n d :
' DI A'
So u r c e :
' Co mma n d OK'
' VOL '
So u r c e :
< Pu mp Re s p o n s e > , < Pu mp 0 > , < Re s u l t : ' Co mma n d OK'
Da t a : ' 5 5 . 0 0 ML ' >
< Pu mp St a t u s Ch a n g e > , < Pu mp 0 > , < Wi t h d r a wi n g >
The trial version does not provide specific event details.
< 0 5 / 0 4 / 0 6 1 3 : 4 8 : 0 6 > , < Pu mp St a t u s Ch a n g e > ,
not av ai l abl e i n t r i al v er s i on>
5.6
< Ev e n t
s p e c i f i c i n f o r ma t i o n
Pump Programming
Currently SyringePumpPro uses the Programmable Pump Language (PPL) Creator
spreadsheet supplied by New Era Pump Systems.
This spreadsheet is a
Microsoft Office 2003
spreadsheet. These
spreadsheets also work in
Libre Office the free Office
software suite.
Please see the manufacturer's documentation for the definition of PPL files and the PPL
specification.
SyringePumpPro installs three spreadsheets created and supplied by New Era Pump
Systems which allows simple generation of pump programs.
These are
Name
Purpose
Use with standard (including Microfluidic)
NE-1000 Syringe Pump PPL Creator V2 syringe pumps
Use with X upgraded pumps(including
NE-1000X Syringe Pump PPL Creator V2 Microfluidic) - this spreadsheet has support
for the extra ppl steps and 341
There is a sheet pre-filled in for each of the
NE-1000 Syringe Pump PPL Examples example files in your pump's manual.
61
SyringePumpPro in Action
©2012 SyringePumpPro
SyringePumpPro User Guide
5.6.1
Sample PPL Files
The pump manufacturer has provided sample PPL
files that are very helpful when first starting to learn
to program your pumps.
These sample files are installed, and have been
linked into your start menu. These are the entries
PPL Example 1 - 7
You can upload them to your pumps for testing
using SyringePumpPro.
There is also a PPL creator spreadsheet with
these example already entered. This is the menu
entry NE-1000 Syringe Pump PPL Examples.
start m enu folder w ith ppl files
5.6.2
Creating Pump Programs
Proceedure
Once your PPL file is created, it is then uploaded to the pumps using SyringePumpPro.
At the moment creating programs of PPL files is done using the spreadsheet that is linked
to the start menu. Its called PPL creator.
To use the spreadsheet you will need either Microsoft Excel or LibreOffice Calc installed.
LibreOffice Calc is part of the free Microsoft compatible office suite of software. It is
available from
©2012 SyringePumpPro
http://www.libreoffice.org/
.
SyringePumpPro in Action
62
www.syringepumppro.com
There are instructions at the top of the
spreadsheet. PPL files will upload to the
pump from SyringePumpPro. It is the
only software to load PPL files into
pumps.
PPL creation requires time spent with the pump manuals to understand the commands
the pumps take.
The PPL spreadsheet is good because it creates your PPL file for you, by you clicking and
selecting the commands you want. This means no errors when you upload the PPL file.
Less frustration and lots of time saved.
5.6.3
Writing and Saving PPL Files
Write the PPL
Load the PPL Creator spreadsheet using the start
menu icon.
Select the NE1000 sheet.
Use the drop down selections in the sheet to create
your program lines.
How To Generate PPL from the spreadsheet:
Select the PPL Sheet from the sheets
Select from the above menu: File, Save As…
EXCEL: Select "Save as type" "Text (Tab Delimited) (*.txt)"
SCALC: Select "Save as, Text CSV (.csv), Keep Current Format, then in the
Export Text files Window, check the Fixed Field width box at the bottom of the
dialog.
Select folder to save in, then name the file "nnnnn.PPL", where nnnn is your
project name.
Answer YES/OK to any warnings. Exit spreadsheet without re-saving.
If you launched the PPL creator spreadsheet from the start menu your newly created PPL
File will be in the c:\Program Files\SyringePumpPro\PPL directory which is the default
directory that SyringePumpPro loads PPL files from .
5.6.4
Uploading PPL Files to Your Pump
First select the pump you
wish to receive the PPL file.
Top Pum p Is Selected for PPL Upload
If no pump is connected,
and/or no pump is selected,
SyringePumpPro will give
this message, and stop
attempting to upload a PPL
file.
No Pum p Selected Message
63
SyringePumpPro in Action
©2012 SyringePumpPro
SyringePumpPro User Guide
Choose the PPL file you wish
to upload to the selected
pump.
Clicking cancel will abort the
action.
Upload PPL File Dialog
©2012 SyringePumpPro
SyringePumpPro in Action
64
Part
VI
User Guide
SyringePumpPro User Guide
6
End User License Agreement
6.1
EULA
TBITC End User License Agreement
Version 1.0, March 2012
The individual installing or using this software represents that he or she has authority to
enter into this Agreement with TBITC on behalf of the Licensee, that he or she has read the
terms and conditions set out herein and that the Licensee accepts and agrees to be bound
by this Agreement. If the Licensee does not agree with the terms and conditions, the
Licensee must not use or permit the use of the product known as SyringePumpPro.
1. Definitions
TBITC means TBITC Pty Ltd, ABN 13 107 578 370 of Gawler, South Australia. TBITC Pty
Ltd being the owner of the product SyringePumpPro.
Authorized Machine means a single installation of a copy of the Product on a single
physical computer.
Authorized Use means the defined number of copies or instances of the Product that may
be used by Licensee, and where applicable, limited to the number of Authorized Machines,
as designated in the Quote/Receipt/Invoice issued by TBITC..
Authorized User means a person or user account who is licensed to use the Product,
regardless of whether that person is an employee, contractor, subcontractor, vendor,
partner or customer of the Licensee.
Commencement Date means the date that SyringePumpPro processes payment of the
License or Maintenance Fees from Licensee.
Desktop Version means a version of the Product that works outside the browser, as a
standalone application.
License means the right to use the Product as defined by Authorized Use.
Licensee means the individual or entity (inclusive of affiliates and subsidiaries) that has
licensed the Product under the terms and conditions of this Agreement.
Product means the SyringePumpPro product defined in the Quote/Receipt/Invoice
delivered by TBITC to Licensee, including any documentation and updates provided under
the terms of this Agreement in accordance with Clause 5.
Protected Code means source code contained within the Product SyringePumpPro that
is protected against access by TBITC.
2. License Fee
A one-time fee paid by Licensee to TBITC, as designated by Product, in consideration for
the Authorized Use of the Product. License fee is non-refundable and payable upon
acceptance of the terms and conditions set out herein.
3. Grant of License
©2012 SyringePumpPro
End User License Agreement
66
www.syringepumppro.com
Subject to the terms of this Agreement, including limitations defined by the License, TBITC
hereby grants to Licensee, and Licensee accepts from TBITC, a perpetual, irrevocable
(except pursuant to Clause 12 below), fully paid, worldwide, non-exclusive, non-transferable
(except pursuant to Clause 18 below), non-sub licensable (except to Licensee’s related
entities) License to use the Product as defined by Authorized Use.
4. No Warranty
Except as described in this Agreement and save as provided in Clauses 13, 14 and 16
below, the Product is provided on an “as is” and "as available" basis without warranty,
express or implied, of any kind or nature, including, but not limited to, any warranties of
performance or merchantability or fitness for a particular purpose, including without
limitation that TBITC does not warranty that the Product will be error-free, complete, or
correct. TBITC provides evaluation copies of the Product so that customers can assess
the Product.
5. TBITC's Obligations
Upon receipt of Licensee Fee from Licensee, TBITC will:
(a) Supply the Licensee with the SyringePumpPro Product via electronic download;
and
(b) Provide Software Maintenance as defined in Clause 6 below.
6. Software Maintenance
Software Maintenance includes TBITC’s provisioning to Licensee Product updates and/or
enhancements made generally available to customers from time to time, and online
technical support (and where applicable, phone support) to one Licensee-designated
technical contact for the sole purpose of addressing technical issues relating to the use of
the Product (excluding any form of on-site visits by TBITC personnel or contractors), for a
period of twelve (12) months from the Commencement Date (the "Initial Maintenance
Period").
The Initial Maintenance Period may be renewed for additional twelve (12) month periods
("Renewal Period") at Licensee’s sole and absolute discretion at the then-current rate for
Software Maintenance (or 3% above the previous Renewal Period’s fee paid by Licensee,
whichever is less). Subsequent Renewal Periods commence upon the expiration of the
prior Software Maintenance regardless of when it is purchased.
7. Licensee Obligations
The Licensee must at all times: (a) ensure that only an Authorized User may use the
Product and only for Authorized Use in accordance with the terms and conditions of this
Agreement; (b) promptly advise TBITC, including in writing, if the Licensee becomes aware
of any unauthorized use or distribution of the Product by any person.
8. Unauthorized Use or Distribution
Licensee may not, whether through deliberate or negligent act or act of omission, distribute
or cause the distribution of the Product to any third party other than an Authorized User.
9. Investigation of Unauthorized Use and Distribution
If TBITC reasonably suspects that the Product has been distributed to or obtained by any
person or party without TBITC's prior written consent, TBITC has the right to reasonably
request once per calendar year from the Licensee an unqualified certificate executed by the
Licensee’s auditor at the Licensee’s cost for the purpose of verifying compliance with
Authorized Use of the Product.
10. Licensee's Restrictions
Licensee will not, without the prior written consent of TBITC, which may be withheld in
TBITC's sole discretion and which may include certain conditions:
67
End User License Agreement
©2012 SyringePumpPro
SyringePumpPro User Guide
a) Decompile, reverse engineer, disassemble, analyse, modify, adapt, convert,
create derivative works from, or otherwise attempt to derive, the Protected Code;
sell, sublicense, redistribute, reproduce, transmit, circulate, disseminate, translate
or reduce to or from any electronic medium or machine readable form the Product
or any data/information provided to the Licensee through the Product to a person
(except that nothing in Clause 10(b) is intended to prevent an Authorized Person
undertaking Authorized Use);
b) Vary or amend the Authorized Use without TBITC's prior written approval;
c) Except as otherwise permitted in this EULA, publish, promote, broadcast, circulate
or refer publicly to the TBITC name, trade name, trademark, service mark or logo
d) Commit any act or omission the likely result of which is that TBITC's reputation will
be brought into disrepute or which act or omission could reasonably be expected
to have or does have a material and adverse effect on TBITC's interests.
In addition, the Product includes license protection mechanisms that are designed to
manage and protect the intellectual property rights of TBITC.
Licensee must not modify or alter those features to try to defeat the Product use rules that
the license protection mechanisms are designed to enforce.
11. Term
The term of this Agreement begins on the Commencement Date and will continue in full
force and effect unless terminated in accordance with Clause 12 below
12. Termination
Licensee may terminate this Agreement at any time by destroying all copies of the Product
in its possession. Either party hereto may terminate this Agreement if the other party
commits a material breach and such party does not cure such material breach within thirty
(30) days of written notice of such breach. Licensee agrees upon termination of this
License to destroy all copies of the Product in its possession. Clauses 1, 4, 8 – 10, 13 – 24
shall survive any termination of this Agreement.
13. Infringement Indemnification
(a) TBITC will defend, indemnify, hold Licensee and its directors, officers, employees and
other agents (collectively, “Licensee Indemnitees) harmless, at TBITC's sole cost and
expense, any action brought against any Licensee Indemnitee based upon the claim that
the Product, if used within the scope of the License granted under this Agreement,
infringes, violates, or misappropriates a patent, trademark, copyright, trade secret, or other
intellectual property or proprietary right (“IP Claim”); provided, however, that: (i) Licensee
shall notify TBITC promptly in writing of any such IP Claim; (ii) Licensee shall not enter into
any settlement or compromise on any IP Claim without TBITC's prior written consent; (iii)
TBITC shall have sole control of any such action and settlement negotiations so long as
there is no detriment or liability to Licensee; and (iv) Licensee shall provide TBITC with
reasonable information and assistance, at TBITC's request and sole cost and expense,
necessary to settle, defend, indemnify or hold harmless such IP Claim. TBITC agrees to
pay all damages and costs incurred Licensee attributable to such IP Claim. The foregoing
states the sole liability of TBITC and the exclusive remedy of Licensee for any infringement
of intellectual property rights by the Product or any other items provided by TBITC
hereunder.
(b) If the Product becomes, or in the opinion of TBITC may become, the subject of a claim
of infringement of any third party right, TBITC may, at its option and in its discretion
©2012 SyringePumpPro
End User License Agreement
68
www.syringepumppro.com
promptly: (i) procure for Licensee the right to use the Product free of any liability; (ii) replace
or modify the Product to make it non infringing; or (iii) refund any License Fees related to
this Product paid by Licensee.
(c) Exclusions from Defence Obligation. TBITC will have no duty to defend any IP Claim to
the extent such IP Claim is based on: (i) use of a superseded release of the Product, if
such infringement would have been avoided by the use of a current release of the Product
and TBITC timely notified Licensee of the availability of the non-infringing Product at no
additional cost; (ii) the combination, operation, or use of the Product with programs or data
not furnished by TBITC or at TBITC's direction, or with hardware or operating system
software other than the hardware platform and operating system with which the Product is
designed to function, if such infringement would have been avoided by the use of the
Product without such programs, data, hardware or operating systems; (iii) modification or
attempted modification of the Product by anyone except TBITC or at TBITC's direction, or
use or distributions of such modifications; or (iv) Licensee’s use of the Product in a manner
that results in defamation, violates the privacy rights of individuals, transmits material in
violation of any applicable law, rule, regulation, or uses any proprietary thirty party content
without legally binding consent of such third party.
(d) To the extent an IP Claim is excluded from TBITC's defence obligation, is based upon
the claim that any modifications to the Product or combination of the Product with products,
not provided by TBITC or at TBITC's direction, infringes or violates any third party, Licensee
will defend or settle, at its expense, any action brought against TBITC provided, however,
that: (i) TBITC shall notify Licensee promptly in writing of any such claim; (ii) TBITC shall
not enter into any settlement or compromise any such claim without Licensee’s prior
written consent; (iii) Licensee shall have sole control of any such action and settlement
negotiations; and (iv) TBITC shall provide Licensee with information and assistance, at
Licensee’s request and expense, necessary to settle or defend such claim. Licensee
agrees to pay all damages and costs finally awarded against TBITC attributable to such
claim. TBITC may elect to assume control of the defence and settlement of any such claim
with counsel of its choosing; provided however, that if Licensee will not have breached its
defence and settlement obligations hereunder, Licensee will have no obligation to pay the
costs and expenses of such TBITC-controlled defence or settlement. The foregoing states
the sole liability of Licensee and the exclusive remedy of TBITC for any infringement of
intellectual property rights by the Licensee modifications or combinations or any other items
provided by Licensee hereunder.
(e) Notwithstanding Clause 13(a) above, TBITC assumes no liability hereunder for, and
shall have no obligation to defend Licensee or to pay costs, damages or attorney's fees for,
any claim based upon any modifications to any of the Product not approved by TBITC or at
TBITC's direction or combination of any of the Product with products not approved by
TBITC or at TBITC's direction.
14. Limitation of Liability
Excluding breaches of TBITC's indemnification obligations described in Clause 13 hereof,
neither party hereto will be liable to any third-party for any loss, damage, cost, expense or
other claim (including consequential, directly, indirect, special, punitive or other damages
and loss of data or profits) in relation to this Agreement or the Product including, without
limitation:
(a) Any use or reliance on a Product by the third-party (including the form and content of
errors in and/or omissions from any information contained in a Product);
69
End User License Agreement
©2012 SyringePumpPro
SyringePumpPro User Guide
(b) Any delay, interruption or other failure in the provision of the Product; or
(c) Any change in the form or content of the Product. Excluding breaches of TBITC's
indemnification obligations described in Clause 13 hereof, in no event will either party’s
liability under any claims arising out of this Agreement exceed the fees paid by licensee
under this Agreement. Except for each party's indemnification obligations or breach of
Clauses 2 (“Licensee Fee”), 8 (“Unauthorized Use or Distribution”), or 10 (“Licensee’s
Restrictions”), neither party will be liable for lost profits or for special, indirect, incidental or
consequential damages, regardless of the form of action, even if such party is advised of or
aware of the possibility of such damages. The foregoing liability limitations shall apply to the
maximum extent allowed by applicable law. To the extent the foregoing liability limitations or
the warranty disclaimers of Clause 4 are not allowed by applicable law, then the liability of
TBITC, and the remedy of Licensee, shall be limited to the prompt:
(d) Re-supply of any defective Product; or (e) refund of any license fees paid by Licensee
for such defective Product.
15. Ownership / Intellectual Property
This Agreement only confers the right to use the Product and does not convey any rights of
ownership in or to the Product. The Licensee acknowledges that the Product and all
intellectual property rights in relation to the Product are the property of TBITC and TBITC is
entitled to take whatever action it may decide in order to protect its intellectual property
rights in the Product
16. Open Source Code
With respect to open source software, TBITC hereby represents and warrants:
(a) that the Licensee’s use thereof does not create, or purport to create, obligations on the
Licensee to grant licenses or usage rights to the general public to any source or object
code, whether such code is embedded in the Product or any other software provided under
this Agreement or used in conjunction therewith;
(b) that in no event shall the Licensee be liable for any damages whatsoever, whether direct
or indirect, and whether experienced by TBITC or a third party, which are related to a loss
of TBITC or any third party resulting from such use of Open Source Software hereunder;
and
(c) to, and hereby does, waive any claims it may have against the Licensee in relation to
The Licensee’s use of such open source software. Open source software included in
TBITC Product is listed on Exhibit A attached to this Agreement.
17. Publicity Rights
a) The Licensee grants TBITC the right to include the Licensee as a customer in Product
promotional material.
b) Licensee can deny TBITC this right by submitting a written request via email to
[email protected], requesting to be excluded from Product promotional
material. Confirmation of such denial (via reply email) must be received prior to
purchasing for this exclusion to be effective.
c) Should the Licensee come to be or already be included in Product promotional material,
as a result of any prior purchases where the Licensee did not request exclusion from
Product promotional material, the Licensee can at any point in time, submit a written
request via email to [email protected] to have TBITC remove the Licensee's
©2012 SyringePumpPro
End User License Agreement
70
www.syringepumppro.com
name from Product promotional material. Upon receipt of such request, TBITC will
remove any reference to the Licensee from such promotional material within 30 days
and make no further reference to the Licensee.
18. No Assignment or Amendment
Licensee may not amend this Agreement without prior written consent of TBITC. Licensee
may assign this Agreement to succeeding parties in the case of a merger, acquisition or
change of control so long as in doing so, TBITC is notified in writing within ninety (90) days
of the closure of such transaction. If Licensee merges into or with a direct competitor of
TBITC, as determined in TBITC's sole discretion, then this Agreement will automatically
terminate as of the effective date of such merger. TBITC may assign its rights and
obligation under this Agreement without consent of Licensee..
19. Tax
Payments made by the Licensee under this Agreement exclude any taxes or duties payable
in respect of the goods or services supplied in the jurisdiction where the payment is made
or received. To the extent that any such taxes or duties are payable by TBITC, the Licensee
must pay to TBITC the amount of such taxes or duties in addition to the license fee under
this Agreement unless Licensee is exempt from paying such taxes or duties at the time
such taxes or duties are levied or assessed. TBITC will provide the Licensee with
documents requested by Licensee necessary to enable the Licensee to obtain a tax or duty
refund or credit.
20. Governing Law
This Agreement is governed by the laws of the State of South Australia, regardless of
conflict of law provisions, and the parties hereby irrevocably and unconditionally submit to
the exclusive jurisdiction of the courts in Adelaide, South Australia.
21. Attorney's Fees
The prevailing party in any legal action or arbitration relating to this Agreement will be
entitled to recover its attorneys’ fees and litigation costs and expenses incurred in
connection with such action or arbitration as part of the same proceeding.
22. Counterparts/Faxed Signatures
This Agreement may be executed in any number of counterparts, each of which will be an
original and all of which will constitute together one and the same document. Signatures
transmitted by fax or electronically will be deemed originals.
23. No Waver
The failure of either party hereto to prosecute its rights with respect to a breach hereunder
will not constitute a waiver of the right to enforce its rights with respect to the same or any
other breach.
24. Notices
TBITC may give notice by means of a general notice on the TBITC website; electronic mail
to your e-mail address on record with TBITC, or by written communication sent by first
class mail or pre-paid post to your address on record.
Such notice will be deemed to have been given upon the expiration of 48 hours after mailing
or posting (if sent by first class mail or pre-paid post) or 12 hours after sending (if sent by
email).
You may give notice to TBITC at any time by any of the following: letter delivered by
nationally recognized overnight delivery service or first class postage prepaid mail to
TBITC's addresses on its website.
71
End User License Agreement
©2012 SyringePumpPro
SyringePumpPro User Guide
Licensee agrees that the Product will not be shipped, transferred or exported into any
country or used in any manner prohibited by Australian export laws, restrictions or
regulations.
Exhibit A - Open Source Components
No Open Source Components Used
©2012 SyringePumpPro
End User License Agreement
72
SyringePumpPro
User's Guide
©2012 SyringePumpPro
TBITC Pty Ltd
http://www.syringepumppro.com
Email: [email protected]