1
ü
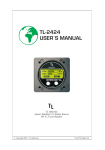
TL-3424
USER`S MANUAL
TL
TL elektronic
Airport, Building 125, Hradec Kralove
503 41, Czech Republic
© Copyright 2003, TL elektronic
Non TSO approved
© Copyright 2003-2006
TL elektronic
All Rights Reserved
Except as expressly provided below, no part of this manual may be downloaded, transmitted, copied,
reproduced, disseminated or stored in any storage medium, for any purpose without the express prior
written consent of the TL elektronic company. Address your questions about the technical information
to TL elektronic. Other information about sale, distribution should be directed to our exclusive
distributors (see World Distributor list on our website).
Producer‘s address:
TL elektronic Inc.
Airport, Building 125,
503 41 Hradec Kralove, Czech Republic
Fax: +420 49 548 23 94 E-mail: [email protected]
Web Site Address: www.tl-elektronic.com
Please, send your e-mail address to [email protected] to receive the latest
information about software upgrade.
Send your ideas to [email protected].
We will evaluate your suggestion and provide an update.
Record of revision
Revision
Revision
date
Description
A
1/6/03
Initial Release
B
1/7/04
Language correction
ECO#
Insertion
date
By
--0001
Windows is registered trademark of Microsoft Corporation.
All trademarks and registered trademarks are acknowledged.
SchecK® is registered trademark of TL elektronic.
iFamily® is registered trademark of TL elektronic.
sModern® is registered trademark of TL elektronic.
All information in this User's manual is subject to change without prior notice.
Page i
Rev. B
TL-3424 USER`S MANUAL
P/N 02-3424-2003
TABLE OF CONTENTS
1. GENERAL DESCRIPTION
1.1. Introduction................................................................................................
1.2. Instrument Description................................................................................
1.3. Technical Specifications...............................................................................
1.4. Limited Conditions......................................................................................
1.5. Limited Warranty.........................................................................................
1.6. Limited Operation........................................................................................
1-1
1-1
1-2
1-3
1-3
1-3
2. INSTALLATION
2.1. Introduction................................................................................................
2.2. Rack Consideration.....................................................................................
2.3. Installation into Panel................................................................................
2.5. Instrument Dimensions................................................................................
2.6. Instrument Dimensions - Version SAS...........................................................
2-1
2-1
2-1
2-2
2-3
3. SYSTEM INTERCONNECT
3.1. Pin Function List.........................................................................................
3.2. TL-3424 Interconnects................................................................................
3.3. TL-3424 Connector Location.......................................................................
3.4. TL-3424 Connector and Pressure Hose Fittings‘ Location - Version SAS........
3-1
3-2
3-3
3-4
4. NAV-MENU DESCRIPTION
4.1. How to Control Instrument via NAV-MENU.................................................. 4-1
5. INSTRUMENT SETUP
5.1. First Instrument Turn-on............................................................................... 4-1
5.2. Main Set-up Functions‘ Description............................................................... 5-1
5.3. How to Select Warning and Alarm Limits of Acceleration.............................. 5-2
5.4. How to Control Recording into Memory......................................................... 5-2
5.5. Speed for Activation of Recording into Memory............................................. 5-2
5.6. Recording with Timer................................................................................... 5-3
5.7. External Signalization Unit............................................................................. 5-3
5.8. Light Signalization........................................................................................ 5-3
5.9. User Button................................................................................................. 5-4
5.10. Delete Long-term Memory of Acceleration.................................................. 5-4
5.11. iFamily® and Other Connecting Devices.......................................................5-4
6. OPERATION MANUAL
6.1. Left Menu Description.................................................................................. 6-1
6.2. Right Menu Description................................................................................ 6-2
6.3. How to Change Configuration........................................................................ 6-3
6.4. Displaying Maximum Acceleration ............................................................... 6-3
6.5. Displaying Time of Exceeding Acceleration.................................................... 6-3
6.6. Measuring Value out of Range....................................................................... 6-4
6.7. Control and Marker External Button............................................................... 6-4
6.8. Storing into Memory Paused......................................................................... 6-4
6.9. Storing into Memory Running........................................................................ 6-5
6.10. Storing into Memory with Timer................................................................... 6-5
6.11. How to Select Timer.................................................................................... 6-5
7. SchecK® DESCRIPTION
7.1. Method of SchecK® for Storing into Memory................................................. 7-1
Page ii
Rev. B
TL-3424 USER`S MANUAL
P/N 02-3424-2003
1. GENERAL DESCRIPTION
1.1. INTRODUCTION
This manual describes the physical, mechanical and electrical features and functions of the
TL-3424 Accelerometer.
1.2. INSTRUMENT DESCRIPTION
The TL-3424 is complete weight acceleration management. The instrument incorporates a high-precision
sensor for measuring acceleration in the vertical axis. The SAS version also incorporates a sensor for
measuring the indicated airspeed, which enables the activation of memory recording. Both versions enable
to utilize an undercarriage scanner that can also activate memory recording.
The Control and Marker Button serves for storing marks in the memory records. Pressing the button enters
marks into the memory records and enables the user manual control of the memory records.
The TL-3424 incorporates a 20,000 line long-term memory and SchecK® memory (see page 7-1) for
storing the measured values at 0.1 to 60 second sample rate.
The TL-3424 checks all measured values at two levels - for a warning and an alarm limit signalization.
When the alarm warning has been activated, the instrument will display a Service message after the next
turn-on of the instrument to inform the user of the exceeded acceleration.
The User Button can be programmed in the main set-up for the quick display of any measured value or for
the quick switch to another function. It is possible to download the measured values from the instrument via
the serial cable RS-232c into your PC.
1.3. TECHNICAL SPECIFICATIONS
The producer guarantees all stated technical parameters only when the instrument is installed by an
authorized service or an aircraft manufacturer.
1.3.1 Physical Characteristics
Width
Height
Depth
Panel hole
TL-3424 Weight
TL-3424 Harness
Page 1-1
Rev. B
71mm (3.346 inches)
67mm (3.346 inches)
102mm (4.015 inches) including connectors with cover
57mm (3.149 inches) diameter
0.25 kg (0.55 lbs) / version SAS 0.30 kg (0.66 lbs)
0.05 kg (0.11 lbs)
TL-3424 USER`S MANUAL
P/N 02-3424-2003
1.3.2 General Specifications
Operating Temperature Range
Humidity
Altitude Range
Power Range
Max. Signalization
Power Consumption
Backlight Consumption
Vibration
Show Rate (LCD Refresh)
-20°C to +70°C
95% non-condensing
4600 meters max.
10.0 to 32.0 Volts
30 Volts, 1 Ampere
0.15 Ampere @ 14 VDC without gear sensor
0.08 Ampere max when ext. power is used
5 to 500 Hz
0.5 second
1.3.3 Long-term Memory and Communication
Storing Rate
Memory Capacity
Stored Values
Data Saved Endurance
Rolling Memory life-time
Communication
Communication Speed
0.1 to 60 seconds user selectable
Scheck® method
Acceleration, (Air speed - version SAS only)
30 years
50 000 hours @ 0.1 second storing rate
RS-232c
38400 bps
1.3.4 Landing Gear Switch
Input Parameter
Type of Switch
Positive pulse 8 to 32 Volts
Inductive sensor of PNP type
or standard gear switch connected
between pins 9 and 5
1.3.5 Instrument Measured Range / Resolution
Acceleration
Air speed
(only SAS version)
Page 1-2
Rev. B
+15.0g to -15.0g / 0.1g
20 to 350 km/h / 5 km (10.8 knots to 189 knots / 2.7 knots)
Absolute maximum speed 500 km/h (270 knots)
TL-3424 USER`S MANUAL
P/N 02-3424-2003
1.4. LIMITED CONDITIONS
1.5. LIMITED WARRANTY
The TL elektronic company warrants this product to be free from defects in materials and manufacture for
three years from the date of purchase. TL elektronic will, at its sole option, repair or replace any
components that fail in normal use. Such repairs or replacement will be made at no charge to the customer
for parts or labour. The customer is, however, responsible for any transportation costs. This warranty does
not cover failures due to abuse, misuse, accident or unauthorized alteration or repairs.
THE WARRANTIES AND REMEDIES CONTAINED HEREIN ARE EXCLUSIVE AND IN LIEU
OF ALL OTHER WARRANTIES EXPRESS OR IMPLIED OR STATUTORY,
INCLUDING ANY LIABILITY ARISING UNDER ANY WARRANTY OF ENCHANT ABILITY
OR FITNESS FOR A PARTICULAR PURPOSE, STATUTORY OR OTHERWISE. THIS
WARRANTY GIVES YOU SPECIFIC LEGAL RIGHTS, WHICH MAY VARY FROM STATE TO
STATE.
IN NO EVENT SHALL TL ELEKTRONIC BE LIABLE FOR ANY INCIDENTAL, SPECIAL,
INDIRECT OR CONSEQUENTIAL DAMAGES, WHETHER RESULTING FROM THE USE,
MISUSE, OR INABILITY TO USE THIS PRODUCT OR FROM DEFECTS IN THE PRODUCT.
SOME STATES DO NOT ALLOW THE EXCLUSION OF INCIDENTAL OR CONSEQUENTIAL
DAMAGES, SO THE ABOVE LIMITATIONS MAY NOT APPLY TO YOU.
To obtain warranty service, call the TL elektronic Customer Service (+420 49 548 23 92) for a returned
merchandise tracking number. The unit should be securely packaged with the tracking number clearly
marked on the outside of the package and sent freight prepaid and insured to a TL elektronic warranty
service station. A copy of the original sales receipt is required as the proof of purchase for warranty
repairs. TL elektronic retains the exclusive right to repair or replace the unit or software or offer a full
refund of the purchase price at its sole discretion.
SUCH REMEDY SHALL BE YOUR SOLE AND EXCLUSIVE REMEDY FOR ANY BREACH
OF WARRANTY.
1.6. LIMITED OPERATION
This product is not TSO approved as a flight instrument, therefore, the manufacturer will not
be held responsible for any damage caused by its use.
All maximum or minimum acceleration limits set either by the manufactures
or by the user cannot be used for flight operations on or beyond the boarder of the
aircraft operational acceleration.
Page 1-3
Rev. B
TL-3424 USER`S MANUAL
P/N 02-3424-2003
2. INSTALLATION
2.1 INTRODUCTION
Careful planning and consideration of the suggestions in this section are required to achieve the
desired performance and reliability from the TL-3424.
2.2 RACK CONSIDERATION
Plan a location that gives the pilot complete and comfortable access to the entire keypad and
is plainly visible from the pilot's perspective. Check that there is adequate depth for the rack
in the instrument panel. A place away from heating vents or other sources of heat generation is
optimal.
2.3 INSTALLATION INTO PANEL
Connect the cables into the connector and use the connector cover.
Secure the incoming leads to prevent their effect on the connector
in the vertical direction.
z axis
+
+
The instrument must be installed parallel with the aircraft axis and in a place
with no vibration.
TL
elektronic
~
0zy=90°
Axis schematic on the aircraft
x axis
ACCELEROMETER
+
~
0yx=90°
y axis
TL-3424
+
~
0zx=90°
Parallel with (z) axis
on the aircraft
Check after the installation that the instrument shows the reading +1.0g on the display
while the aircraft is standing on a plain surface.
Page 2-1
Rev. B
TL-3424 USER`S MANUAL
P/N 02-3424-2003
23.5 (0.925)
Page 2-2
Rev. A
67 (2.637)
TL
23.5 (0.925)
TL-3424
ACCELEROMETER
57
)
44
.2
(2
elektronic
23.5 (0.925)
71 (2.795)
M3.5 (0.137) 4x
2 (.007)
67 (2.637)
Mounting Rack Dimension
+
+
23.5 (0.925)
+
+
57 (2.244)
40 (1.574)
TL-3424 USER'S MANUAL
P/N 02-3424-2003
Figure 1. Rack Dimension
1. Dimension: mm (INCH)
2. Unit weight: 0.25 kg (0.55 lbs)
3. Mounting Rack & Hardware
weight: 0.05 kg (0.11 lbs)
NOTES:
40 (1.574)
23.5 (0.925)
Page 2-3
Rev. A
67 (2.637)
TL
23.5 (0.925)
TL-3424
ACCELEROMETER
57
)
44
.2
2
(
elektronic
23.5 (0.925)
M3.5 (0.137) 4x
2 (.007)
67 (2.637)
71 (2.795)
57 (2.244)
Mounting Rack Dimension - Version SAS with internal Air Speed Sensor
+
+
23.5 (0.925)
+
+
50 (1.968)
TL-3424 USER'S MANUAL
P/N 02-3424-2003
Figure 2. Rack Dimension
1. Dimension: mm (INCH)
2. Unit weight: 0.3 kg (0.66 lbs)
3. Mounting Rack & Hardware
weight: 0.05 kg (0.11 lbs)
NOTES:
40 (1.574)
3.1 PIN FUNCTION LIST
Pin
1
2
3
4
5
6
7
8
9
10
11
12
13
14
15
16
17
18
19
20
21
22
23
24
Page 3-1
Rev. B
Pin Name
Control and Marker button
Ground for Control and Marker button
External status light
Ground for external status light
Output from landing gear switch (pick-up sensor)
Ground for landing gear switch (pick-up sensor)
Aircraft power
Aircraft ground
Power +12 Volts for landing gear switch (pick-up sensor)
Do not connect!
Input for backlight
Internal source for backlight
Do not connect!
Do not connect!
Input for User button
Ground for User button input
Do not connect!
Do not connect!
iFamily® communication ISCL
iFamily® communication ISDA
Signalization unit
Ground for PC communication (RS-232)
RXD from PC (RS-232)
TXD to PC (RS-232)
I/O
In
-Out
-In
-In
-Out
-In
Out
--In
---I/O
I/O
Out
-In
Out
TL-3424 USER`S MANUAL
P/N 02-3424-2003
Page 3-2
Rev. B
TL-3424
ACCELEROMETER
19
20
IFAMILY® ISCL
IFAMILY® ISDA
3
EXTERNAL STATUS LIGHT
24
23
22
9
POWER FOR LND. GEAR SENSOR
RS 232 TX
RS 232 RX
GROUND
9
5
6
POWER FOR LND. GEAR SENSOR
OUTPUT FROM LND. GEAR SENSOR
GROUND LND. GEAR SENSOR
11
12
1
2
CONTROL AND MARKER BUTTON
GROUND FOR CONTROL BUTTON
DISPLAY BACKLIGHT
DISPLAY BACKLIGHT
15
16
21
7
8
P3401
USER BUTTON
GROUND FOR USER BUTTON
SIGNALIZATION UNIT
10-32V AIRCRAFT POWER
AICRAFT GROUND
(Note. 2)
GROUND
OUTPUT
(Note. 3)
1A
Connect other
TL elektronic instruments
via the iFamily® Bus
TL-3424 USER'S MANUAL
P/N 02-3424-2003
Figure 3. Accessories interconnect
D-SUB 9 pins (female)
for communication with a PC
AIRCRAFT POWER
1. Signalization is connected to the aircraft ground
when active.
2. Jumper for the backlight. For the backlight control
install a resistor between the pins 11 and 12.
3. Use the shade cable only and connect it according
to the connection scheme delivered with the sensor.
NOTES:
Landing Gear switch
Sign.
unit
(Note. 1)
j
1A
FUSE
FUSE
External Status Light
(Red Light Emission Diode)
SUPPLY +12V
CONTROL AND MARKER
BUTTON
QUICK PROGRAMMED
USER BUTTON
ISDA
Accessories Interconnect
ISCL
1
2
3
4
5
9
8
7
6
Page 3-3
Rev. A
1
Rear view of connector plate
24
P3401
TL-3424 USER'S MANUAL
P/N 02-3424-2003
Figure 4. Connectors locate
1. Secure the incoming leads to prevent
their effect on the connector in the
vertical direction.
NOTES:
Page 3-4
Rev. B
1
Dynamic pressure
Static pressure
24
P3401
TL-3424 USER'S MANUAL
P/N 02-3424-2003
Figure 5. Connectors locate
1. Secure the incoming leads to prevent
their effect on the connector in the
vertical direction.
2. Secure both hoses of the static and the complete
(pitot) pressure. Any leakage or untightness
could cause incorrect indications of other
instruments.
NOTES:
Rear view of connector plate and pressure fitting - version SAS with Air Pressure Sensor
4. NAV-MENU DESCRIPTION
4.1 How to Control Instrument via NAV-MENU
There are black labels on the display. Each is affiliated to the left and the right button. Before pressing a
button, read the information on the label. Its functions are different in every menu.
The left label is for the Left button.
The right label is for the Right button.
elektronic
ACC
+1.0
MENU
elektronic
g
DELETE
ACCELEROMETER
?
To store a value into the memory, press both buttons
simultaneously. Release buttons when the setting arrows vanish.
3
MEMORY
DELETED
ACCELEROMETER
elektronic
>
PRESS UP+DOWN
FOR STORING
DOWN
UP
ACCELEROMETER
5 INSTRUMENT SETUP
A
5.1 First Instrument Turn-on
Before the Accelerometer starts to indicate you must do the
basic setting of language, contrast, limits, etc. After the first turnon of the instrument, the „FIRST SETUP“ message will show on
the display. This set-up must be completed to continue.
Page 4-1
Rev. B
elektronic
FIRST SETUP
MUST BE COMPLETED
BEFORE FIRST USE
OK
ACCELEROMETER
TL-3424 USER`S MANUAL
P/N 02-3424-2003
5.2 Main Set-up Functions‘ Description
The table of the instrument configuration steps is shown below (Initial - firmware version 1.0).
0
1
2
3
4
5
6
7
8
9
LANGUAGE
DISPLAY CONTRAST
PASSWORD
WARNING MAX
WARNING MIN
ALARM MAX
ALARM MIN
AIR SPEED UNIT
(only version SAS)
REC. ACTIVATE
(SPEED is shown only
in version SAS)
REC. ACT. SPEED
(only version SAS and
when SPEED is set)
10
REC. TIMER
11
ALARM MODE
12
LIGHT MODE
13
USER BUTTON
14
VOICE WARNING
15
16
DELETE MEMORY
INST. ON-LINE
Select your language for communication with the instrument.
Select contrast of the display.
Enter your password.
Set the warning limit for the maximum acceleration.
Set the warning limit for the minimum acceleration.
Set the alarm limit for the maximum acceleration.
Set the alarm limit for the minimum acceleration.
Select your local unit for air speed.
Select the mode for the activation of memory recording.
AUTO = after power supply, MANUAL = manual
control, LAND = landing switch, SPEED = over speed .
Set the air speed that activates memory recording.
Note that the instrument hysteresis is +/- 3 km/h.
That means that when 100 km/h is preset, the instrument
starts recording at 103 km/h and stops at 97 km/h.
Enable or disable the timer that will show whenever recording
into the memory is required.
Select the mode for the external signalization. OFF =
signalization disabled. EXCEEDED = signalization when the
acceleration is exceeded + 1 second.
Select the mode for the light signalization. OFF = signalization
disabled, WHEN RECORDING = light only when
recording acceleration into the memory, WHEN ALARM =
light only when acceleration is exceeded.
Program your button to these functions:
SHOW MIN / MAX = shows the minimum and maximum
acceleration when the button is pressed,
DELETE MIN / MAX = deletes the minimum and maximum
acceleration when the button is pressed.
Enable or disable voice warning into your headphones.
(Only with use of our Intercom TL-2424 or Voice Module)
Delete the long-term minimum and maximum acceleration.
Check the connected instruments from the TL elektronic
iFamily® that are On-Line.
All information on this page is subject to change without prior notice. Download the latest
version of the manual from www.tl-elektronic.com and compare with you version of firmware.
Page 5-1
Rev. B
TL-3424 USER`S MANUAL
P/N 02-3424-2003
5.3 How to Select Warning and Alarm Limits of
Acceleration
elektronic
.............. WARNING MAX ............
The maximum and minimum limit values can be set at two levels
in the Set-up menu. The „Warning“ message informs about the
first level exceeding, the „Alarm“ message informs about
exceeding the second limit and activates recording into the
SchecK® drawer. You can download all exceeded values form
the instrument and analyze them on your PC.
+4.0
CONTINUE
g
SET
ACCELEROMETER
Before setting the maximum and minimum limits, check the limits of these values in the aircraft operation
manual. Set the limits stated in the aircraft operation manual into the Alarm menu. The Warning limits should
be lower, so that the aircraft is operated safely.
The Warning limits activate signalization informing you that the set
acceleration limits have been exceeded. The Alarm limits activate signalization and , in
addition, memory recording of the exceeded value, and also informs the pilot before
the next flight that the set aircraft manufacturer's safety limits have been exceeded.
If memory recording is de-activated, only the Warning limit signalization is active
and no data are recorded into the SchecK® memory.
5.4 How to Control Recording into Memory
Memory recording can be activated or deactivated. The reason
for such control is to separate the ground and the in-flight
acceleration measurement. The user can decide upon the
automatic, manual (by pressing the Control/Marker button),
landing gear or other scanner (recording is done only during
the flight) record activation.
elektronic
............. REC. ACTIVATION ............
CONTINUE
AUTO
MANUAL
CONTINUE
SELECT
ACCELEROMETER
5.5 Speed for Activation of Recording into Memory
elektronic
If you purchase the SAS version, which incorporates a sensor
for measuring the indicated airspeed, you can set an air speed
value in this menu. Set the air speed value, at which you want
memory recording to be activated. This speed activation is
shown only if you have selected „SPEED“ in the REC.
ACTIVATION menu.
........... REC. ACT. SPEED ..........
100 km/h
CONTINUE
SET
ACCELEROMETER
Note that the instrument hysteresis is +/- 3 km/h. That means that if the air speed of
100 km/h is set, the instrument starts recording at 103 km/h and stops at 97 km/h.
Page 5-2
Rev. B
TL-3424 USER`S MANUAL
P/N 02-3424-2003
5.6 Recording with Timer
elektronic
If you, for any reason, require the deactivation of recording after
a certain period of time, select „ON“ in this menu. Always when
recording is activated, a menu for time setting is activated. After
the time lapse, recording is deactivated.
.................. REC. TIMER .................
CONTINUE
OFF
ON
CONTINUE
SELECT
ACCELEROMETER
5.7 External Signalization Unit
The input no. 21 can be used for connecting a signalization unit
that will inform you on exceeding the set limit value. You can
decide on either an acoustic or visual (light) warning. Select
„OFF“ if you do not want to be informed on limit exceeding.
elektronic
................ ALARM MODE ...............
CONTINUE
OFF
EXCEEDED +1 SEC
CONTINUE
SELECT
ACCELEROMETER
During the period of exceeding the limit, the instrument buttons are not active even
when the signalization is OFF. The [- - -] symbol shows instead of actual buttons
description.
5.8 Light Signalization
The input no. 3 can be used for connecting the signalization light
(Led Emission Diode) that will inform you on exceeding the set
limit value, the same as in 5.7, or it can also inform you on other
processes, e.g. activation/deactivation of memory recording.
Page 5-3
Rev. B
elektronic
................ LIGHT MODE ...............
CONTINUE
OFF
WHEN RECORDING
CONTINUE
SELECT
ACCELEROMETER
TL-3424 USER`S MANUAL
P/N 02-3424-2003
5.9 User Button
When pressed, the external User button offers you the
possibility of programming to quick show or quick switch to the
selected menu. After releasing the button, you will get back to
the measured value indication. For example - if you have set
SHOW MIN / MAX, after pressing the button you can monitor
the memory of the minimum and maximum acceleration.
elektronic
................ USER BUTTON ..............
CONTINUE
SHOW
MIN / MAX
DELETE MIN / MAX
CONTINUE
SELECT
ACCELEROMETER
5.10 Delete Long-term Memory of Acceleration
elektronic
The long-term memory of the minimum and maximum
acceleration and also the time of exceeding the limits can be
deleted in this menu.
.............. DELETE MEMORY .............
MAXIMUM
VALUES DELETE ?
NO
YES
ACCELEROMETER
5.11 iFamily® and Other Connecting Devices
As the first of aircraft instruments, The TL-3424 enables you
the connection with other instruments of the TL elektronic family
in order to gain simultaneous recording of the measured values,
the mass PC download of all connected instruments etc. via one
cable.
If some other instruments or the GPS are connected to the
reserved inputs, this menu shows each connected instrument. It
also enables checking the connected instruments and devices.
Page 5-4
Rev. B
elektronic
............... INST. ON-LINE ...............
CONTINUE
VOICE
MODULE
VARIOMETER
CONTINUE
BROWSE
ACCELEROMETER
TL-3424 USER`S MANUAL
P/N 02-3424-2003
6. OPERATIONAL MANUAL
ACC
6.1. Left Menu Description
The left main menu shows the information about the minimum
and maximum acceleration, exceeded time etc.
Left Menu (Initial firmware version 1.0)
First
MAX
MIN
Second
MAX(g)
MIN(g)
MAX(t)
MIN(t)
EXIT
elektronic
+1.0
MENU
g
DELETE
ACCELEROMETER
?
Description
Short-term memory of the maximum measured acceleration
Short-term memory of the minimum measured acceleration
Long-term memory of the maximum measured acceleration
Long-term memory of the maximum measured acceleration
Time during which the maximum acceleration was exceeded
Time during which the minimum acceleration was exceeded
Exit from the second menu
All information on this page is subject to change without prior notice. Download the latest
version of the manual from www.tl-elektronic.com and compare with you version of firmware.
6.1.1 Second Menu
The „OTHER“ dialog will show on the display after pressing
the left button. If you press „YES“ in this dialog, the instrument
will go to the second menu where you can get the information
about the acceleration values from the long-term memory or
about the time, during which the minimum or maximum
acceleration was exceeded.
Page 6-1
Rev. B
elektronic
... OTHER
NO
YES
ACCELEROMETER
TL-3424 USER`S MANUAL
P/N 02-3424-2003
6.2 Right Menu Description
elektronic
The right menu is used for the fast control.
3
MEMORY
DELETED
ACCELEROMETER
>
Right Menu (Initial firmware version 1.0)
First
DELETE
Second
Description
Delete the minimum and maximum acceleration from the short-term
memory
All information on this page is subject to change without prior notice. Download the latest
version of the manual from www.tl-elektronic.com and compare with you version of firmware.
6.2.1 Exit from Right Menu
The instrument will automatically exit the right menu after
1 second.
elektronic
3
MEMORY
DELETED
ACCELEROMETER
Page 6-2
Rev. B
TL-3424 USER`S MANUAL
P/N 02-3424-2003
6.3 How to Change Configuration
If you want to change e.g. units or contrast, press and hold both
buttons and turn the instrument on. The „Setup“ message will
show on the display. Press „OK“ and go to the Instrument
Setup.
elektronic
SETUP
SETUP CONTINUE?
OK
NO
ACCELEROMETER
Note, that any unauthorized change of values in the Setup can cause defect of the
instrument. An incorrect change of the calibration could endanger your life
and the lives of your passengers.
6.4 Displaying Maximum Acceleration
The inverted symbol [M] (on the black background) shown
on the right indicates that the maximum or minimum acceleration
values from the long-term memory are displayed.
elektronic
MAX
+1.5
NEXT
g
M
EXIT
ACCELEROMETER
elektronic
6.5 Displaying Time of Exceeding Acceleration
The inverted symbol [M] (on the black background) shown on
the right indicates the time, during which the minimum or
maximum acceleration was exceeded. See page 5-3 for setting
Alarm limits.
Page 6-3
Rev. B
MAX
0:05
NEXT
M:S
M
EXIT
ACCELEROMETER
TL-3424 USER`S MANUAL
P/N 02-3424-2003
6.6 Measuring Value out of Range
elektronic
When the measured acceleration of the sensor is out of range,
the [----] message will show on the display.
ACC
---
MENU
g
DELETE
ACCELEROMETER
6.7 Control and Marker External Button
elektronic
This datum indicates the number of a sign (Marker) that is
MARKER 1
stored into the memory. If the user needs to mark a certain part
MANUAL
CHANGE
? RECORDING?
of the flight, then e.g. the number „1“ would indicate the
EXIT
STOP
beginning of recording. This value will always rise up by1 if
recording is activated and the Control/Marker Button is pressed
ACCELEROMETER
again.
Five seconds after pressing the button, the instrument returns
back to the acceleration measurement. If the user wants to control recording, then
after pressing the Control/Marker Button and after pushing the right button next, the user can run or stop
recording into the memory.
elektronic
6.8 Storing into Memory Paused
The
symbol shown on the left side of the display indicates
that recording was deactivated. If you want to re-activate
recording, follow the instructions in the point 6.7.
Page 6-4
Rev. B
ACC
+1.0
MENU
g
DELETE
ACCELEROMETER
TL-3424 USER`S MANUAL
P/N 02-3424-2003
6.9 Storing into Memory Running
The
symbol shown on the left side of the display indicates
that recording is activated and will be stopped when turned off
by the user or the undercarriage sensor.
elektronic
ACC
+1.0
MENU
g
DELETE
ACCELEROMETER
6.10 Storing into Memory with Timer
The
symbol shown on the left side of the display
indicates that recording is activated and will be stopped when
the set period of time expires (see 6.11).
elektronic
ACC
+1.0
MENU
g
DELETE
ACCELEROMETER
6.11 How to Set Timer
If you have selected „ON“ in REC. TIMER during the SETUP,
you will be asked to set a period of time (after which the
recording will stop) after every turn-on of the instrument or
every activation of recording. If you do not press the „SET“
button in 2 seconds, the previously set time datum will be used
for the countdown of the recording deactivation..
Page 6-5
Rev. B
elektronic
REC. TIMER DURATION
30 min
OK
SET
ACCELEROMETER
TL-3424 USER`S MANUAL
P/N 02-3424-2003
7.1 SchecK® memory description
The TL-3424 includes a 20,000 lines long-term memory and SchecK memory for storing of measured
values in the 0.1 to 60 second sample rate. The measured data you can be downloaded via a standard PC
serial cable RS-232 into a Laptop or Personal Computer.
Each case (1 to 20) includes
900 lines memory space
with 0.1 to 60 seconds samples
rate of measured values
Begin
Rolling memory included
1 2 3 X X X
1 2 3 X X X
Case 1
Transfer a case
Line 2
Line 3
....
Case 3
0.1 to 60
seconds
samples rate
Case 12
Line 58
Case 13
Line 59
Case 14
End
Rolling memory - last 20,000 lines
with 0.1 to 60 second sample rate
Line 1
Transfer a line
Case 2
Measured
values
1 2 3 X X X
....
Exceeded place
Each line (1 to 60) includes
all highest measured values
©
of SchecK case
Begin
Line 60
End
©
Rolling SchecK memory last 20 cases
Rolling lines last 60 lines
When any case is filled,
this message will show
after turning the instrument on.
When all lines are filled,
this message will show
after turning the instrument on
elektronic
!
elektronic
SERVICE MESSAGE
!
SOME MEASURED
VALUE EXCEDED !
INFO
EXIT
CONTACT SERVICE
SEE MANUAL FOR
MORE INFORMATION !
INFO
EXIT
ACCELEROMETER
ACCELEROMETER
The user can delete
this message.
elektronic
3
This message can be deleted
only by using a special
program, which is possed
only by authorized engine
dealers and when data are
downloaded into a PC
SERVICE
DELETED
ACCELEROMETER
Cases 1 to 20 include 900 lines of exceeded limit values and engine hours when the values
were exceeded.
450 lines after
limit exceeding
450 lines before
limit exceeding
Limit exceeding values
(centered in the middle position)
In this version it is possible to read last 20 exceeded records at total operational time.
Page 7-1
Rev. B
TL-3424 USER`S MANUAL
P/N 02-3424-2003
This page intentionally left blank
Page 8-1
Rev. A
TL-3424 USER`S MANUAL
P/N 02-3424-2003