1
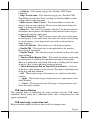
 Enable ... – Each check box determines whether or not to engage
edge acceleration against which edge of screen.
Margin – This list button selects the range to engage edge
acceleration toward the edge before the edge is reached.
Compensation – This list button selects the distance to advance the
mouse toward edge from touch point.
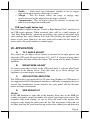
USB touch right button tool
This tool differs slightly from the “Touch as Right Button Click” check box in
the USB touch manager. When executed, there will be a small window of
“One Shot Right Button” appearing on desktop. Any touch on the panel right
after touching this small window will work like clicking the right button of
mouse at that point. However, the next touch will resume the left button of
mouse unless the small window is touched again.
VII. APPLICATION
A.
TILT ANGLE ADJUST
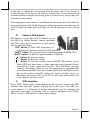
Press down the tilt adjust release button as arrowed in the right picture and
adjust the LCD panel tilt angle between 42.5° and 77.5° for best viewing effect
in application and then release the button. The screen will be firmly held for
operation.
B.
BRIGHTNESS ADJUST
On lower central edge of back of the LCD panel there is a plastic wheel knob
as circled in the picture above. Turn this knob up or down changes the
brightness of screen display accordingly.
C.
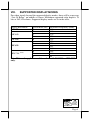
APPLICATION LIMITATION
The USB touch is not applicable for OS other than Windows as USB mouse is
not supported in DOS environment and there is difficulty in engaging driver to
convert the coordination system between the static panel and the dynamic
mouse in Linux environment.
D.
SIDE MOUNT KIT
SD-300
In SD-300 mounted at right side of the monitor, there may be the MSR for
reading a magnetic stripe card and/or the optical type finger print sensor. For
magnetic stripe card reading, be sure to insert the card to the bottom with
magnetic stripe facing the mark aside the slot. The movement of the card can
be either inserting the card from the top surface then sliding the card down out
Page 6