1
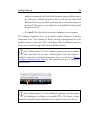
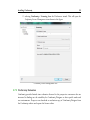
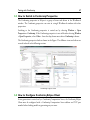
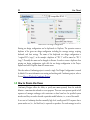
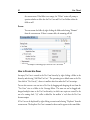
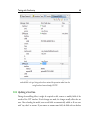
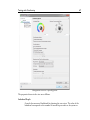
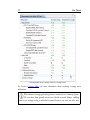
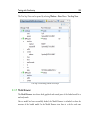
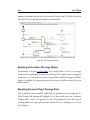
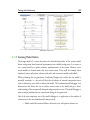
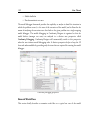
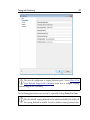
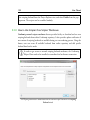
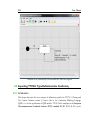
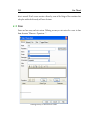
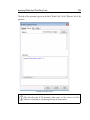
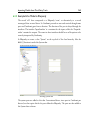
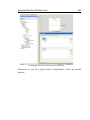
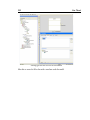
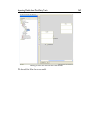
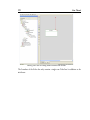
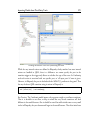
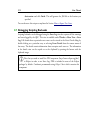
Testing with Conformiq
49
2. From Preferences, select Conformiq.
3. Select "Local computation server" or "Remote computation server" based on your
setup and preferences
4. In case you select "Remote computation server"
1 Enter the address and the port number of the Conformiq Computation Server.
2 Choose whether you wish to utilize any CPUs from the client workstation for
running your test generation tasks by adjusting the “Use additional CPUs from this
node” slider. These CPUs will be added to the cluster for running test generation
tasks started from this workstation (but not from any other node on the network).
You may choose a value between zero and the (automatically detected) number of
CPUs available on the workstation.
i
The "Use additional CPUs from this node" setting will apply independently to
every test generation task started from the client. This means that a new test
generation task will try to use the given number of CPUs even if there is another task
started from the client already running. If you intend to run several test generation tasks
from the same client at the same time, consider lowering the number of CPUs to reserve
for a single task (before starting any of the tasks) to avoid unnecessary load on the
system.
i
Note that if you have used local computation services (ie you have used 'Local
computation server' or you have selected 'Use additional CPUs from this node')
when changing the Conformiq computation settings, you may need to manually
terminate the local computation services now.
i
The location of the Conformiq Computation Server is an Eclipse workspace
specific setting, therefore all Conformiq projects in an Eclipse workspace share