1
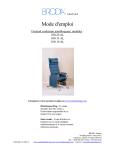
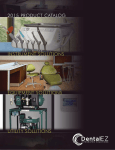
NuSimplicity Chair TM User Manual Table of Contents Section I Introduction Components............................................................................................................................ 2 Specifications........................................................................................................................... 3 Classifications.......................................................................................................................... 3 Dimensions.............................................................................................................................. 4 Notices/Warnings/Cautions..............................................................................................4-5 Section II Pre-installation Unpacking................................................................................................................................. 6 Chair Transport and Placement........................................................................................... 7 Section III Installation Left/Right Spring Covers....................................................................................................... 8 Delivery Units......................................................................................................................... 8 Auxiliary Controller Options.............................................................................................. 8 Air Glide (Optional).............................................................................................................. 9 Chair Upholstery.............................................................................................................. 9-10 Headrest................................................................................................................................. 10 Section IV Operation Manual Positioning................................................................................................................ 11 Automatic Positioning................................................................................................... 11-12 Standard Features................................................................................................................. 12 Optional Features................................................................................................................. 13 Section V Care Cleaning............................................................................................................................ 14-15 Disinfecting............................................................................................................................ 15 Section VI User Service Information Programming Travel Limits.................................................................................................. 16 Troubleshooting.................................................................................................................... 16 Control Valve Speed Adjustment....................................................................................... 17 Service Instruction............................................................................................................... 18 Disposal of Equipment........................................................................................................ 18 Section VII Parts Lists .................................................................................. 19 Limited Warranty ........................................................................................... 20 EMC Information ....................................................................................... 21-24 Wiring Schematic User Manual 1 Section I Introduction NuSimplicity Chair TM This manual contains the installation, operation and care instructions and user service information for the DentalEZ® NuSimplicityTM Chair. The NuSimplicity Chair is intended to be used by trained professional dental care personnel only. The dental chair supports a patient in a reclined seated position. Operators will be position around the patients head as required for optimum access for the specific procedure being performed. The NuSimplicity Chair is designed to provide trouble-free service when installed, operated and cared for according to the procedures set forth in this manual. To ensure proper installation, carefully read all the instructions contained in this manual paying close attention to all warnings, cautions and notes. Before starting installation procedures, please review the illustration below to become familiar with the components of the NuSimplicity Chair. After the NuSimplicity Chair is installed, please review the features, operation procedures and care guidelines with the doctor's staff. Then leave this manual in the doctor's office for future reference. WARNING To prevent injury from falling or crush hazards, patients should be seated upright in the chair facing forward. Their head should be on the headrest with their feet at the toe of the chair. Their arms should be on the armrests or folded across their midsection. WARNING Headrest options that contain magnets can interfere with the function of some medical devices, including pacemakers. Components Headrest Chair Back Armrest Chair Seat Touchpad Armrest Chair Brake Chair Base (Cantilever Section) 1 2 3 L Foot Control 2 User Manual Base (Pump) Cover Chair Base Plate Section I Introduction Explanation of Symbols and Signs: Specifications Environmental Specifications: Storage/Transport Temperature: -29ºC to 74ºC (-20ºF to 165ºF) Operational Temperature: 5ºC to 40ºC (41ºF to 104ºF) Relative Humidity Range: 0% to 95% Indoor Use: Altitude up to 3,000M (9,842') Installation Category II Pollution Degree 2 Electrical Power: 115V, 60 Hz, as applicable 220V, 50/60 Hz, as applicable 15 Amp fused Branch Circuit Shipping Weight: Chair Carton: 193 kg (425 lbs.) Typical Assembled Weight w/delivery unit & light: 258 kg (570 lbs.) Maximum Load: Each chair is factory tested to lift a load of 301 kg (665 lbs.) = Caution = Warning = Biohazard = Warning Dangerous Voltage = Alternating Current = Direct Current = Type B Applied Part = Protective Earth (ground) = General Mandatory Action = Refer to Manual (follow instructions) = European Certification SN =Serial Number = Manufacture Date = Manufacturer = Non-ionizing Electromagnetic Radiation = Box Must Remain Upright = Do Not Place Box On Unlevel Surface ● Type of protection against electric shock: Class 1 = Do Not Stack Box ● Degree of protection against electric shock: Type B Classifications 53HN RISK CLASS 2G Medical - General Medical Equipment Certified as to electrical shock, fire and mechanical hazards only in accordance with UL 60601-1, CAN/CSA-C22.2 No. 601.1, CAN/CSA-C22.2 No. 60601-1 (2008) & ANSI/AAMI ES 60601-1 (2005). Equipment Applied Parts. The upholstery is considered an applied part. ● Equipment not suitable for use in the presence of (-20ºF) 0% (-20ºF) 0% 95% 74ºC (165ºF) -29ºC (-20ºF) 0% 74ºC (165ºF) -29ºC (-20ºF) = Box Contents Safe Temperature Range 95% 0% 95% 74ºC (-20ºF) 95% 74ºC (165ºF) -29ºC (165ºF) -29ºC 95% 74ºC (165ºF) -29ºC 0% = Box Contents Safe Humidity Range a flammable anesthetic mixture with air or with oxygen or nitrous oxide. ● Mode of operation: Duty cycle: 1 min. ON, 6 min. OFF The authorized European representative is: DentalEZ (GB) Ltd., Cleveland Way Hemel Hempstead, Hertfordshire, HP2 7DY, England Phone: (01442) 269301 Attn: Mr. Andy King 3 Section I Introduction NuSimplicity Chair TM Dimensions 74-5/8" 18-1/8" 27-1/2" 26" 10-51/4" 25-3/8" 22-1/4" 66" 56-1/4" 43-3/8" 36-3/8" 26-3/4" 30° 30° 22-5/8" 14-1/8" 42" NOTICE This equipment has been tested and found to comply with the limits for a Class B digital device, pursuant to Part 15 of the FCC Rules. These limits are designed to provide reasonable protection against harmful interference in a residential installation. This equipment generates, uses and can radiate radio frequency energy, and if not installed and used in accordance with the instructions, may cause harmful interference to radio communications. However, there is no guarantee that interference will not occur in a particular installation. If this equipment does cause harmful interference to radio or television reception, 4 User Manual which can be determined by turning the equipment off and on, the user is encouraged to try to correct the interference by one or more of the following measures: ● Reorient or relocate the receiving antenna. ● Increase the separation between the equipment and receiver. ● Connect the equipment into an outlet on a circuit different from that to which the receiver is connected. ● Consult the dealer or an experienced radio/TV technician for help. Section I Introduction WARNING Before proceeding with electrical installation, all wiring must be in accordance with NEC and local electrical codes. WARNING To avoid the risk of electrical shock, this equipment must only be connected to a supply mains with protective earth. WARNING The plug cannot be located in a position that requires tools to access. WARNING Do not modify the NuSimplicity Chair without permission from DentalEZ. WARNING The use of ACCESSORY equipment not complying with the equivalent safety requirements of this equipment may lead to a reduced level of safety of the resulting system. Consideration relating to the choice shall include: ● use of the accessory in the PATIENT VICINITY ● evidence that the safety certification of the ACCESSORY has been performed in accordance to the appropriate IEC 60601-1 harmonized standard. NOTICE ● In accordance with Part 15 of FCC rules, this equipment was tested and complies with Class A digital device limits. These limits are designed to give equipment reasonable protection against detrimental interference when operated in a commercial environment. ● Medical electrical equipment needs special precautions regarding electromagnetic compatibility (EMC) and needs to be installed according to EMC information. (See EMC Information, Pages 21 through 24.) ● Mobile radio frequency (RF) communications equipment can affect medical electrical equipment. NOTICE Isolating the unit from the supply mains is accomplished by unplugging the unit from the power receptacle. NOTICE Wiring schematics are provided with this manual. NOTICE Installation by an authorized DentalEZ dealer service technician is recommended. CAUTION To satisfy FCC RF exposure requirements for mobile and base station transmission devices, a separation distance of 20 cm or more should be maintained between the antenna of this device and persons during operation. To ensure compliance, operation at closer than this distance is not recommended. The antenna(s) used for this transmitter must not be co-located or operating in conjunction with any other antenna or transmitter. CAUTION Rating of main circuit breakers should be 20 Amp maximum. 5 Section II Pre-Installation Unpacking Tools Required: •Pliers • 1/2" Socket and Ratchet Chair Carton 1. Using pliers, remove the staples that secure the shipping carton to the wooden pallet. 2. Remove the carton and packing inserts from the pallet by lifting up. 3. Using a 1/2" socket and ratchet, remove the two bolts that secure the chair base to the shipping pallet. CAUTION If the chair is equipped with an air glide option, be careful not to damage the air bladder when lifting (do not slide) the chair off the pallet and during placement of the chair. NuSimplicity Chair TM Upholstery Carton If the upholstery is ordered separate from the chair, remove and set aside the following items from the NuSimplicity Chair upholstery assembly packaging: • Upholstered Back Assembly • Sling Assemblies • Upholstered Seat • Upholstered Armrests •Headrest • Optional Foot Control • Any Ordered Options • Hardware Package Upholstered Back Assembly 4. Grasp the chair mount casting and slide the chair off the pallet. (If air glide equipped, do not slide.) WARNING The NuSimplicity Chair is shipped with a retaining strap to secure the base mechanism. DO NOT REMOVE this strap until the chair is out of the carton and in its position on the floor. 5. Remove and set aside the following items from the chair carton for installation: • Upholstered Seat •Headrest • Chair Controls • Any Ordered Options • Hardware Package NOTICE For any questions about an order, please contact a DentalEZ Equipment customer service representative at 1-866-DTE-INFO. 6 User Manual Upholstered Seat Chair Controls/ Headrest/ Options/ Hardware Package Upholstered Armrests Section II Pre-Installation Chair Transport and Placement WARNING WARNING Before mounting a delivery unit, it is recommended to anchor the chair to the floor for optimal stability. During transportation, the chair must be at its lowest height and all attachments must be secured in their lowest and most central positions possible. Failure to comply may result in injury and/or damage to equipment. WARNING DO NOT position the chair any place where it would interfere with unplugging the chair power cord. WARNING To prevent injury as a result of chair tipping, chair must be placed on a smooth, hard and level floor. 1. Taking into consideration the NuSimplicity Chair's specifications (found on Page 3) and dimensions (fund on Page 4), position the chair in its permanent location. NOTE: Make sure the chair is placed where nothing will interfere with its movement. 2. Remove the retaining strap that secured the base mechanism during shipment. WARNING DO NOT CONNECT the chair POWER cord until all shipping hardware is removed. Anchor Holes NOTE: The base cover must be removed before anchoring the chair. 7 Section III Installation Left/Right Spring Covers NOTICE The left and right spring covers are now factory installed. Follow the instructions below if there is a need to replace them. Tool Required: • Phillips Screwdriver 1. Remove the following hardware from the bag of supplies: • 10-32 Pan Head Screws (4) • Spring Cover Brackets (2) • Spring Cover Bracket Screws (8) 2. Install a spring cover bracket to the seat frame tube. 3. Using a Phillips screwdriver and two 10-32 pan-head screws (one in front and one in the rear), install a spring cover. 4. Secure using four spring cover bracket screws (two on top and two underneath). 5. Repeat Steps 2 though 4 for the opposite spring cover. NuSimplicity Chair TM Delivery Units Install chair-mounted and Magellan-style delivery units according to the manufacturer's instructions supplied with the unit. Auxilliary Controller Options The NuSimplicity Chair's primary controllers are located on both sides of the chair's back. One wire type controller can be added and should be attached to the chair harness labeled A (auxiliary). Remove the tie strap and route the A harness under the cylinder to the auxiliary controller. (For more information regarding the installation of the additional controller follow the instructions supplied with the control package.) Auxiliary Wiring Harness Tie Strap Phillips Screwdriver 10-32 Pan Head Screw (rear) Spring Cover Bracket Screws Spring Cover Spring Cover Bracket 8 Foot Control (Wireless) User Manual For information, refer to the instruction supplied with the foot control package. Unit Mounted Touchpad Seat Frame Tube A touchpad can be mounted on the delivery head of a Simplicity® chair mounted unit. (For more information, refer to the instructions supplied with the touchpad control package.) Section III Installation Air Glide (Optional) Air Regulator Toggle Switch Air Glide NOTE: If the air glide option was ordered, the air regulator was attached to the base chassis prior to shipment of the chair. NOTICE For proper air glide operation, the floor MUST BE LEVEL and have a smooth, hard and non-obstructive surface. 1. Place the NuSimplicity Chair on a smooth, hard and level (vinyl, tile or terrazzo type) floor. 2. Connect the air glide tubing to a regulated air supply source (usually 552 kPa (80 PSI) on most dental units). Air Glide Tubing Air Regulator 3. The air glide is pre-set at the factory to 138 kPa (20 PSI). Because of additional optional equipment, it may be necessary to increase the pressure. Slowly increase the air pressure by adjusting the air regulator on the base chassis until the chair begins to "bounce". This is an indication that the air pillow is over pressurized and can not seal to the floor. Slowly decrease the pressure until the chair stops bouncing. 4. Actuate the air regulator toggle switch at the rear of the chair on the base cantilever section cover. 5. Check for proper air glide operation. 6. Make sure the doctor and staff receive proper air glide feature operation instructions. (See Operation, Optional Features, Page 13.) Chair Upholstery Seat Upholstery 1. Obtain the 1/4-20 thumb screw provided in the hardware package. 2. Install the upholstered seat by placing the seat over the slide bosses in the back of the seat area. 3.Once the substrate is over the bosses, pull the seat towards the toe of the chair. 4. Align the seat frame tube to the substrate in the toe of the chair and install the 1/4-20 thumb screw. Slide Bosses 1/4-20 Thumb Screw Substrate 9 Section III Installation NuSimplicity Chair TM Back Upholstery (Factory Installed) NOTE: Make sure the blind grip fasteners are firmly secured to the back of the upholstered chair back 1. Align the two upper and two lower blind grip fasteners on the upholstered chair back to the studs on the chair back casting. 2. Firmly press each blind grip fastener onto its corresponding stud. 3. Tug on each stud location to ensure the upholstered chair back is secure. Studs Double Articulating Headrest (Optional) Chair Back Casting Opening Blade 2. Place the magnetic headrest cushion or magnetic neck support on the chair or the fixed headrest of the chair. WARNING The headrests pictured below contain magnets, which can interfere with the function of some medical devices, including pacemakers.. A minimum of 4" distance is required to reduce the magnetic field level below 10 gauss. Blind Grip Fasteners Headrest Magnetic Cushion 1. Slide the blade of the standard fixed headrest or the optional double articulating headrest into the opening of the back casting, making sure the blade aligns with the nylon guides inside the chair back. Standard Fixed Headrest Blade 10 User Manual Magnetic Neck Support Section IV Operation Touchpad Controller Manual Positioning Manual positioning of the NuSimplicity Chair is accomplished by using the touchpad controls located on each side of the chair back, the foot control or the delivery unit touchpad control. To operate these controls: 1. Select the direction of travel. 2. Depress and hold the corresponding button. 3. The chair will move to a factory-set travel limit, or run until the directional button is released. Automatic Positioning Programming Auto Positions Back Up Auto Buttons Back Down Base Up Auto Return Mode Base Down Last Position Mode The NuSimplicity Chair standard controls are capable of executing three auto preset positions, a "Last Position Mode" and an "Auto Exit Mode". To establish the auto preset position condition perform the following steps: Foot Control 1. Situate the chair in the desired auto position. 2. Press and hold the desired auto button (#1, #2 or #3) until it beeps twice (approximately four seconds). 3. Repeat Steps 1 and 2 to program the other two positions. Last Position Auto Buttons Base Up 1 2 3 L Last Position Mode: The chair returns to the last position after one mechanical movement. Auto Return Mode: This mode situates the patient in an optimal exit position. Back Down Base Down Back Up 11 Section IV Operation Activating Auto Positions 1. Depress the #1, #2, #3, A or L button once on the back switch control, foot control or the unit touch pad control. 2. A beep will sound. 3. The chair will automatically stop in the programmed position selected. NOTE: Pressing any button on a chair control module while the NuSimplicity Chair is moving to a programmed position will immediately stop the movement of the chair, and three short beeps will sound. To continue and com- plete the automatic positioning of the chair, simply press the desired position button a second time. Reprogramming Auto Positions To change a programmed position, simply maneuver the NuSimplicity Chair to the desired position and follow the Programming Auto Positions instructions described earlier in this Section. NuSimplicity Chair TM Chair Arms Both of the NuSimplicity Chair's arms lower to allow easy patient entry and exit. Pull the arm out to unlock and lower the arm. Raising the arm up automatically locks it into place. Chair Rotation The NuSimplicity Chair is capable of swiveling 30° to either side of its center position. To swivel the chair: NOTE: Reprogramming a new auto position spontaneously erases the old position. Chair Brake Handle Standard Features Base Lowering Safety The following describes how this feature operates: 1. When the base cantilever section lowers and contacts an obstruction, the cover on the underside of the cantilever section moves up and activates safety switches. 2. Motion of the base down will stop, then the base will start up immediately and the chair will emit a constant short warning beep. 3. Moving the base up and off the obstruction deactivates the safety switches and silences the warning beep. If any auto position buttons are pressed, the chair will sound three short beeps to indicate auto positioning is not available. 12 User Manual 1. Release the chair brake located on the back of the chair seat casting by moving the brake handle completely to the right. 2. Swivel the chair to the desired position. 3. Lock the chair brake by moving the brake handle to the left. Standard Headrest Firmly push down or pull up the blade from the chair back to change the headrest height. Standard Headrest Blade Section IV Operation Optional Features Double Articulating Headrest To position the double articulating headrest: 1. While facing the back of the headrest, fully depress the release mechanism. 2. Keep the release mechanism depressed and tilt the headrest until the desired position is reached. 3. Release the mechanism to lock the headrest in place. Air Glide The air glide option aids the operator in repositioning the chair. To operate the air glide option: 1. Make sure the chair is on a smooth hard, level and non-obstructive surface. 2. Activate the air regulator toggle switch on the base cover at the rear section of the chair. Air Regulator Toggle Switch Double Articulating Headrest (Optional) 3. The rear of the chair base is supported by an air pillow and lifts off the floor. Release Mechanism NOTE: The use of disposable headrest covers is recommended to prevent soiling of the headrest. These covers may be purchased through a local dental supplier. 4. When the base rear is raised, it allows the rollers on the front of the base plate to contact the floor. 5. While the chair is supported only by the rollers and air pillow, reposition the chair as desired. 13 Section V Care WARNING Improper cleaning and disinfection techniques could lead to cross-contamination. Therefore, prior to each use, properly clean and disinfect the chair's exterior in accordance with normal dental procedures. Before attempting to clean or disinfect the NuSimplicity Chair, please read the following instructions carefully. NOTICE The upholstery cleaning/disinfecting information contained in this Section is not a guarantee but represents highly recommended procedures obtained from the upholstery manufacturers. Cleaning CAUTION Pay strict attention to all the cleaning product manufacturer's warnings and cautions. Because any cleaning product may be harmful or irritating: Use protective gloves and eye protection in a well ventilated area. Do not inhale or swallow any cleaning product. Protect surrounding surfaces and clothing from exposure. When using strong cleaning agents, such as bleach or alcohol, it is advisable to first test them in an inconspicuous area to be certain they will not damage the upholstery, plastic or metal surfaces of the NuSimplicity Chair.. (Results may vary under actual conditions.) CAUTION Cleaning agents, other than household bleach or rubbing alcohol, may contain harsh or unknown solvents. Also, these other cleaning agents are subject to formula changes made by the manufacturer without notice. 14 User Manual NuSimplicity Chair TM Chair Upholstery 1. To remove light soil: a. Prepare a solution comprised of one part neutral detergent (household dish washing liquid) and nine parts warm water. b. Apply the liquid solution to the upholstery using a sponge or soft, damp cloth. If necessary, a soft bristle brush may be used. c. Using a soft cloth dampened in clean water, wipe away any residue and dry. 2. To remove heavy soil: a. Dampen a soft, white cloth with lighter fluid (naphtha) and rub the area gently. b. Using a soft cloth rinse thoroughly with clean water and pat surface dry. 3. To remove stains using bleach: a. Prepare a solution comprised of one part household bleach (sodium hypochlorite) and nine parts water. b. Apply the bleach solution to the stain using a dampened, soft, white cloth. c. Allow the bleach solution to puddle on the affected area, or apply a bleach solution-soaked cloth to the area for approximately 30 minutes. d. Using a soft cloth dampened in plain water, rinse the treated area thoroughly to remove any bleach residue. 4. To remove stains using alcohol: a. Dampen a soft, white cloth with rubbing alcohol and rub the stain gently. b. Using a soft cloth dampened in clean water, rinse the treated area thoroughly to remove any alcohol residue and pat dry. 5. To restore luster: a. Apply a light coat of spray furniture wax containing lemon. b. Wait 30 seconds and lightly buff the surface using a clean, white cloth. Section V Care Ultraleather™ Spot clean with mild soap and water Air dry or dry quickly with warm setting of a hair dryer For stubborn stains, use mild solvent For extremely stubborn stains, an alcohol- based solvent can be used Dry cleanable by conventional methods using commercial dry cleaning solvents Ultraleather is a trademark of Ultrafabrics, LLC. Plastic and Coated Metal Surfaces CAUTION ● NEVER use abrasives or petroleum-based cleaners on any plastic or coated metal surfaces unless otherwise specified. ● DO NOT USE alcohol based disinfectants on plastic surfaces. 1. To remove ordinary dirt: a. Prepare a soapy solution comprised of neutral detergent (household dish washing liquid) and water. b. Using a soft cloth or sponge, apply this soapy solution to the plastic and coated metal surfaces. NOTE: To remove heavier dirt, apply Formula 409® or Fantastik® Spray Cleaner. c. Wipe area dry immediately using a soft cloth. 2. To remove stubborn stains: a. Apply a mild abrasive such as toothpaste or liquid tooth polish using a soft, white cloth. b. Using a chamois or moist sponge, remove all traces of the mild abrasive. c. Dry the area thoroughly to prevent marking. Formula 409 is a registered trademark of the Clorox Company. Fantastik Spray Cleaner is a registered trademark of the Texize Division of Dow Products, Inc. Metal Surfaces and Chrome Parts For ordinary dirt, fingerprints, etc., use a non-abrasive, all-purpose cleaner. Disinfecting Upholstery The NuSimplicity Chair's upholstery is comprised of material from the following manufacturers: MOR-CARE™ Collection from MORBERN MOR-GUARD from MORBERN was developed to meet the increased demands of hospital, contract and institutional use. Offers enhanced resistance to most common chemicals used for sterilization and cleaning in medical environments. Contains both an antibacterial and antimicrobial agents to provide resistance to a wide range of bacteria. Naugahyde® BeautyGard™ from UNIROYAL Naugahyde brand fabrics, Spirit II and Neochrome II with advanced BeautyGard contains an agent to protect it against bacterial and fungal microorganisms. This product has been formulated to achieve a superior level of disinfectability with disinfectant products containing sodium hypochlorite (common household bleach) diluted 1:10. Mayfair/Savoy with Permablok3® from Spradling® Mayfair/Savoy fabrics with Permablok advanced vinyl protection contain an antimicrobial and antibacterial protection on an anti-stain finish that is easily cleaned. Mayfair/Savoy with Permablok provides exceptional disinfectability using a wide range of cleaning products. Ultraleather™ from Ultrafabrics, LLC Disinfect with a 5:1 non-chlorinated bleach solution Potentially toxic aftercare not required MOR-CARE is a trademark of Morbern, USA Inc. Naugahyde is a registered trademark and BeautyGard is a trademark of Uniroyal Engineered Products, Inc. Permablok3 is a registered trademark of Spradling International, Inc. All Other Chair Surfaces Cavicide™ is recommended for disinfecting all other surfaces of the NuSimplicity Chair. The use of any disinfectant, other than Cavicide, may cause premature staining, discoloration or damage to the NuSimplicity Chair's materials. Cavicide is a trademark of Micro Aseptic Products, Inc. 15 Section VI User Service Information NuSimplicity Chair TM Programming Travel Limits Upper Limits 1. Press #1 and #2 on the chair mounted touchpad for five (5) seconds. The chair will start to beep and the display will show UL (upper limit). LED Display 2. Raise the base and back to its highest position (limit switches will be engaged). 4. Press #1 on the chair mounted touchpad for four (4) seconds. 5. A double beep will confirm upper limits have been set correctly. Lower Limits 1. Press #2 and #3 on the chair mounted touchpad for five (5) seconds. The chair will start to beep and the display will show LL (lower limit). 2. Lower the base and back to its lowest position (limit switches will be engaged). 3. Raise the chair base and back to the lowest desired height. (Ensure that the limit switches are not engaged.) 4. Press #1 on the chair mounted touchpad for four (4) seconds. 5. A double beep will confirm lower limits have been set correctly. Troubleshooting There is an LED display located on the upper cantilever cover of the chair. This display indicates Power, Service and Run Modes. 16 User Manual Segment Display Codes: n = Power On L = Upper Limit Programming LL = Lower Limit Programming LL = Calibration Mode = Preset #1 Engaged = Preset #2 Engaged = Preset #3 Engaged L 3. Lower the chair base and back to the highest desired height. (Ensure that the limit switches are not engaged.) = Auto Return Engaged L = Last Position Engaged = Open in Base Up Safety Circuit = Open in Back Up Safety Circuit = Open in Base Down Safety Circuit = Base Potentiometer Error = Back Potentiometer Error Section VI User Service Information WARNING Control Valve Speed Adjustment WEAR SAFETY GLASSES while adjusting the valve. Flow control valves should not be turned out farther than the top of their heads being even with the valve body surface. Adjustment of the flow control valves beyond the valve body surface may result in oil leakage with uncontrolled motion of the chair and the possibility of a valve being ejected from the valve body. Tools Required: • Phillips Screwdriver • Flat-head Screwdriver • Safety Glasses 1. Raise the chair base to its full UP position. 2. Take off the base (pump) cover by removing and retaining the four Phillips-head screws that attach it to the base plate. NOTE: Adjustable flow control valves, located in the hydraulic control valve, are used to set the chair function speeds. The base and back cylinders are single acting cylinders. They have two flow control valves each (UP and DOWN) to control their speeds. NOTE: Function times given are based on a 200-pound person sitting in the chair. a. Move the base up and down adjusting the flow controls until it takes 12 seconds for the base to move either up or down the full travel. b. Move the back up and down adjusting the flow controls until it takes 12 seconds for the back to move either up or down the full travel. NOTE: With the flow adjustments closed all the way, the seat may not move at all until the valve is adjusted open a little. Hydraulic Valve UP DOWN BACK CV2 FLOW INC. DEC. UP DOWN CV1 BASE 17 Section VI User Service Information Service Instruction If the area of concern is not addressed in this manual, contact your local DentalEZ full-service dealership. Please have the following product information available: • Model Name: • Model Number: (found on the base plate) • Serial Number: • Date of Installation: NuSimplicity Chair TM Disposal of Equipment Disposal and Decommissioning of DentalEZ products: Note: All local regulatory requirements for disposal and decommissioning of equipment apply. Electrical Salvage: Remove all circuit board and electrical cabling for recycle as electrical salvage. Metal Salvage: Remove all aluminum and steel components for recycle as metal salvage. Plastic Salvage: Remove all plastic components for recycle as plastic salvage. Biologically Contaminated Salvage: Cuspidor, waste lines from the cuspidor, and the oral extraction lines should be handled with precaution and disposed of appropriately. Non-Salvage Components: All other material unsuitable for recycling should be disposed of properly. Model/Serial Number Label 18 User Manual Section VII Parts Lists Controls Hydraulic Part/Kit Name Pump (115 VAC) Pump (220 VAC) Valve (115 VAC) Valve (220 VAC) Fluid Reservoir Assembly Base Cylinder Back Cylinder Hose (Pump to Valve) Hose (Valve to Base) Hose (Valve to Back) Base and Back Cylinder Vent Tubing Pump and Reservoir Tubing Hydraulic Oil (One Pint) Part/Kit No. 3802-451 3802-452 3802-434 3802-435 3802-455 3802-456 3802-457 3802-458 3802-459 3802-460 3801-418 3801-417 3801-549 Electrical Part/Kit Name Master Circuit Board (115 VAC) Master Circuit Board (220 VAC) Fuses (115 VAC) Fuses (220 VAC) Main Wiring Harness Power Cord (115 VAC) Power Cord (220 VAC) Pump Motor Capacitor (115 VAC) Pump Motor Capacitor (220 VAC) Base Potentiometer Limit Switch (All) Back Potentiometer Assembly Touchpad Control Wiring (Switch to Switch) USB Option LED Display/Harness Bracket Part/Kit No. 3802-425 3802-426 3801-766 3801-767 3802-429 3802-430 3802-431 3801-897 3802-433 3802-436 3801-431 3802-438 3802-440 3625-807 3802-501 Exterior Components Part/Kit Name Pump Cover Bottom Cantilever Cover Top Cantilever Cover Chair Pivot Cover Brake Cover Left Side Spring Cover Right Side Spring Cover Left/Right Arm Plug Arm Latch Plug Part/Kit No. 3802-442 3802-443 3802-444 3802-445 3802-446 3802-447 3802-448 3802-449 3802-450 Part/Kit Name Touchpad Switch, RH Touchpad Switch, LH Touchpad Circuit Board Foot Control Option (Wireless) Handpiece Safety Switch Option Wireless Touchpad Wired Foot Switch Battery Box (Wireless) Part/Kit No. 3802-423 3802-441 3802-424 3625-815 3625-562 3625-827 3625-858 3802-521 Mechanical Part/Kit Name Spring Arm Assembly (Right) Arm Assembly (Left) Brake Handle Air Glide Caster Air Glide Regulator Air Glide Toggle Switch Rear Spring Mount Upgrade Kit Lower Brake Assy. Washer Replacemnt Kit Part/Kit No. 3802-461 3802-462 3802-463 3802-465 3801-680 3801-791 3801-792 3658-475 3802-494 Upholstery Part/Kit Name Part/Kit No. Seamless Seat Cushion 3802-466 Seamless Seat Cushion, Ultra 3802-466U Seamless Back Cushion 3802-467 Seamless Back Cushion, Ultra 3802-467U Plush Seat Cushion 3802-468 Plush Back Cushion 3802-469 Standard Headrest Cushion 3801-827 Standard Headrest Magnetic Cushion 3801-826 Double Articulating Headrest Cushion, Optional 3801-535 Back Substrate Blind Grip Fasteners 3801-742 Seamed Back Cushion 3802-496 Seamed Back Cushion, Ultra 3802-496U Seamed Seat Cushion 3802-495 Seamed Seat Cushion, Ultra 3802-495U Wider Double Articulating Headrest Cushion 3802-282 Wider Dbl. Art. Headrest Cushion, Ultra 3802-283 Padded Arm Cushion 3802-497 Padded Arm Cushion, Ultra 3802-497U Arm w/Holes for Pad, RH 3802-498 Arm w/Holes for Pad, LH 3802-499 19 Limited Warranty NuSimplicity Chair TM DentalEZ® Equipment Solutions NuSimplicity Chair TM DentalEZ and its employees are proud of the products we provide in the dental community. We stand behind these products with a warranty against defects in material and workmanship as provided below. In the event you experience difficulty with the application or operation of any of our products, please contact our Technical Service Department at our expense at 1-866-DTE-INFO (1-866-383-4636). If we cannot resolve the issue by telephone, we will arrange for a representative to contact you or suggest that the product be repaired by a dealer service technician. If product repair or return is required, we will provide you with a Return Authorization number and shipping instructions to return the product to the proper facility. If the product is under warranty, we will ask you to provide proof of purchase, such as a copy of your invoice. Please be sure to include the Return Authorization number on the package you are returning. Products returned without a Return Authorization number cannot be repaired. Freight costs for product returns are the responsibility of the customer. Products under warranty will be repaired or replaced at our sole discretion and returned at our expense. Products outside the warranty limits will be repaired and returned with costs invoiced to the customer. We are not responsible for shipping damages. We will, however, help you file a claim with the freight carrier. Written repair estimates are available. DentalEZ warrants the NuSimplicity Chair to be free of defects in material and workmanship, under normal usage, under the following terms: The following items are covered under this limited warranty for a period of six (6) years from the date of installation:* • Structures: Base Plate, Castings, Chair Seat and Back • Hydraulic System: Cylinders, Solenoid Valves and Pump • Electronics: Master Circuit Board and Foot Control Circuit Board, Chair Control The upholstery package is covered under this limited warranty for a period of one (1) year from the date of installation. Please note the following additional terms of our warranty and return policy: • Warranties cover manufacturing defects only and do not cover defects resulting from abuse, improper handling, cleaning, care or maintenance, normal wear and tear or non-observance of operating, maintenance or installation instructions. Failure to use authorized parts or an authorized repair facility voids this warranty. • Liability is limited to repair or replacement of the defective product at our sole discretion. All other liabilities, in particular liability for damages, including, without limitation, consequential or incidental damages are excluded. • THIS WARRANTY IS IN LIEU OF ALL OTHER WARRANTIES, EXPRESSED OR IMPLIED, INCLUDING ANY IMPLIED WARRANTIES OF MERCHANTABILITY OR FITNESS FOR A PARTICULAR PURPOSE. NO EMPLOYEE, REPRESENTATIVE OR DEALER IS AUTHORIZED TO CHANGE THIS WARRANTY IN ANY WAY OR TO GRANT ANY OTHER WARRANTY. WARRANTY REPAIRS: Parts repaired or replaced on a product that is in warranty will be warranted for the duration of that product’s original warranty. NON-WARRANTY REPAIRS: The warranty on parts either repaired or replaced on an out-of-warranty product will cover the repaired part only and will be for the time frame of a new parts warranty period. PRODUCT RETURN: Opened products or product returns more than a year old cannot be returned for credit. There will be a 15% ($25.00 minimum) restocking charge on all items authorized for return. * Provided conditions defined in the Installation, Operation and Care Manual are met. NuSimplicity is a trademark of DentalEZ, Inc. DentalEZ is a registered trademark of DentalEZ, Inc. © DentalEZ Alabama, Inc., 2015 20 User Manual EMC Information WARNING ● Use only replacement cables listed in Parts Section. Other cables and accessories may negatively affect EMC performance. ● When the NuSimplicity Chair is used adjacent to other equipment, observe the Chair to verify normal operation. Table 1 Guidance and manufacturer’s declaration - electromagnetic emissions The NuSimplicity Chair is intended for use in the electromagnetic environment specified below. The customer or the user of the NuSimplicity Chair should assure that it is used in such an environment. Emissions test Compliance Electromagnetic environment – guidance RF emissions CISPR 11 RF Emissions CISPR 11 Harmonic emissions IEC 61000-3-2 Voltage fluctuations/flicker emissions Group 1 Class A Class A, Class A The NuSimplicity Chair uses RF energy only for its internal function. Therefore, its RF emissions are very low and are not likely to cause any interference in nearby electronic equipment. The NuSimplicity Chair is suitable for use in all establishments, other than domestic establishments and those directly connected to the public low-voltage power supply network that supplies buildings used for domestic purposes. Not Applicable Not Applicable IEC 61000-3-3 21 EMC Information NuSimplicity Chair TM Table 2 Guidance and manufacturer’s declaration – electromagnetic immunity The NuSimplicity Chair is intended for use in the electromagnet environment specified below. The customer or the end user of the Chair should assure that it is used in such an environment. IEC 60601 Electromagnetic environment Immunity test Compliance level Test level - guidance Floors should be wood, Electromagnetic +6 kV contact +6 kV contact concrete or ceramic tile. If discharge (ESD) floors are covered with +8 kV air +8 kV air synthetic material, the IEC 61000-4-2 relative humidity should be at least 30 %. Mains power quality should Electrical fast +2 kV for power +2 kV for power be that of a typical transient/burst supply lines supply lines commercial or hospital environment. IEC 61000-4-4 +1 kV for input/output +1 kV for input/output lines lines Surge IEC 61000-4-5 Voltage dips, short interruptions and voltage variations on power supply input lines IEC 61000-4-11 Power frequency (50/60 Hz) magnetic field IEC 61000-4-8 22 User Manual +1 kV differential mode +1 kV differential mode +2 kV common mode +2 kV common mode <5 % UT (>95 % dip in UT) for 0.5 cycle <5 % UT (>95 % dip in UT) for 0.5 cycle 40 % UT (60 % dip in UT) for 5 cycles 40 % UT (60 % dip in UT) for 5 cycles 70 % UT (30 % dip in UT) for 25 cycles 70 % UT (30 % dip in UT) for 25 cycles <5 % UT (>95 % dip in UT) <5 % UT (>95 % dip in UT) for 5 sec for 5 sec 3 A/m 3 A/m Mains power quality should be that of a typical commercial or hospital environment. Mains power quality should be that of a typical commercial or hospital environment. If the user of the NuSimplicity Chair requires continued operation during power mains interruptions, it is recommended that the NuSimplicity Chair be powered from an uninterruptible power supply or a battery. Power frequency magnetic fields should be at levels characteristic of a typical location in a typical commercial or hospital environment. EMC Information Table 4 Recommended separation distance between Portable and mobile RF communications equipment and the model @ 3Vrms The NuSimplicity Chair is intended for use in an electromagnetic environment in which radiated RF disturbances are controlled. The customer or the user of the CMU can help prevent electromagnetic interference by maintaining a minimum distance between portable and mobile RF communications equipment (transmitters) and the NuSimplicity Chair as recommended below, according to the maximum output power of the communications equipment. Separation distance according to frequency of transmitter m Rated maximum output power of transmitter W 0.01 0.1 1 10 100 150 kHz to 80 MHz 80 MHz to 800 MHz 800 MHz to 2.5 GHz ⎡ 3.5 ⎤ d=⎢ ⎥ P ⎣ v1 0.12 ⎦ ⎡ 3.5 ⎤ d=⎢ ⎥ P ⎣ E1 0.12 ⎦ ⎡7⎤ d=⎢ ⎥ P ⎣ E10.23 ⎦ 0.34 1.7 3.7 11.7 0.34 1.7 3.7 11.7 0.74 2.3 7.4 23.3 For transmitters rated at a maximum output power not listed above, the recommended separation distance d in meters (m) can be estimated using the equation applicable to the frequency of the transmitter, where P is the maximum output rating of the transmitter in watts (W) according to the transmitter manufacturer. Note 1: At 80 MHz and 800 MHz, the separation distance for the higher frequency range applies. Note 1:These guidelines may not apply in all situations. Electromagnetic propagation is affected by absorption and reflection from structures, objects and people. 23 EMC Information NuSimplicity Chair TM Table 6 Guidance and manufacturer’s declaration - electromagnetic emissions The NuSimplicity Chair is intended for use in the electromagnetic environment specified below. The customer or the user of the NuSimplicity Chair should assure that it is used in such an environment. Immunity test IEC 60601 Compliance Electromagnetic environment - guidance Test level Level Portable and mobile RF communications equipment should be used no closer to any part of the NuSimplicity Chair including cables, than the recommended separation distance calculated from the equation applicable to the frequency of the transmitter. Radiated RF 3 V/m IEC 61000-4-3 80MHz to 2.5 GHz Conducted RF IEC 61000-4-6 150 kHz to 80 MHz d = 1.7 √P 80 MHz to 800 MHz 3 V/m d = 2.3 √P 800 MHz to 2.5 GHz 3 Vrms d = [3.5/V1] √P Where P is the maximum output power rating of the transmitter in watts (W) according to the transmitter manufacturer and d is the recommended separation distance in meters (m). Field strengths from fixed RF transmitters, as determined by an electromagnetic site survey, should be less than the compliance level in each frequency range. Interference may occur in the vicinity of equipment marked with the following symbol: NOTE 1 At 80 MHz and 800 MHz, the higher frequency range applies. NOTE 2 These guidelines may not apply in all situations. Electromagnetic propagation is affected by absorption and reflection from structures, objects and people. a Field strengths from fixed transmitters, such as base stations for radio (cellular/cordless) telephones and land mobile radios, amateur radio, AM and FM radio broadcast and TV broadcast cannot be predicted theoretically with accuracy. To assess the electromagnetic environment due to fixed RF transmitters, an electromagnetic site survey should be considered. If the measured field strength in the location in which the NuSimplicity Chair is used exceeds the applicable RF compliance level above, the NuSimplicity Chair should be observed to verify normal operation. If abnormal performance is observed, additional measures may be necessary, such as reorienting or relocating the NuSimplicity Chair. b Over the frequency range 150 kHz to 80 MHz, field strengths should be less than 3 V/m. 24 User Manual 2500 Highway 31 South Bay Minette, Alabama 36507 866-DTE-INFO Fax: (251) 937-0461 www.dentalez.com © DentalEZ® Alabama, Inc. Printed in USA PN: 2717-256C May, 2015