1
AO1
1. Heating
2. Cooling
3. Heating
4. Heating
5. Cooling
6. Heating
7. Cooling
/
AO2
/
/
/
/
/
/
/
Cooling
Heating
Cooling
Damper
Damper
Output
symbol
\
/
\/
\\
//
\/
\/
Graphic
symbol
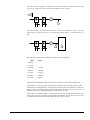
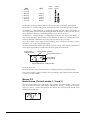
In alternative 4, Heating-Heating AO2 will be activated first on increasing heat demand.
In alternative 5, Cooling-Cooling AO2 will be activated first on increasing cooling cemand.
In alternative 6, Heating-Damper, at temperatures higher than the setpoint the damper on
AO2 will be fully open. On increasing heating demand, the damper on AO2 will first close to
the set minimum value before the heating output on AO1 starts to increase.
In alternative 7, Cooling-Damper, at temperatures lower than the setpoint the damper on
AO2 will be fully open. On increasing cooling demand, the damper on AO2 will first close
to the set minimum value before the cooling output on AO1 starts to increase.
If you have chosen 3-point output in the preceeding menu you will only be able to choose
alternatives 1 or 2 with a single output signal.
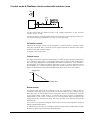
For each alternative the number representing it is shown along with a graphic symbolisation
of the output signal and also a symbol next to the bar-graph for each output.
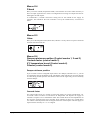
Control mode:
Cascade control
Output signals, graphical
Control mode 3 menu 2
AO1 Heating
AO2 Cooling
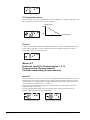
Output alternative 3, Heating/Cooling
Example, Menu X.2
Room temperature control (Cascade control) with output alternative 3 Heating/Cooling.
Since control modes 4 and 5 are fixed to one step heating in their output function the menus
4.2 and 5.2 are not available.
Menus X.3
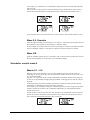
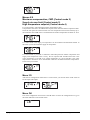
Neutral zone (Control modes 1, 2 and 3)
Here you set the neutral zone. This menu is only available for control modes 1, 2 and 3 and
only if you have chosen the output signal combination 3, heating – cooling. In this output
option you can set a neutral zone between the outputs. The setpoint will be placed at the
middle of the neutral zone.
Optigo OP10 user manual
Chapter 10 Configuration
30