1
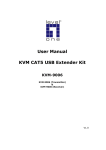
CAT5 KVM Extender User Manual V2.1 2007.7.3 CAT5 KVM Extender Contents 1. Introduction............................................................................................................................... 3 1.1 Product Line........................................................................................................................ 4 1.2 Main Features...................................................................................................................... 5 1.3 Package contents ................................................................................................................. 6 1.4 Cables Diagrams ................................................................................................................. 6 1.4.1 3-in-1 DB15 Cable .......................................................................................................6 1.4.2 3-in-1 CAT5 Transmitter (T-Dongle) ...........................................................................6 1.4.3 PS/2 keyboard to USB adapter ....................................................................................6 1.4.4 CAT5/5E/6 Straight Through UTP/STP Cable ............................................................6 2. Installation ................................................................................................................................. 7 2.1 T-Dongle Installation .......................................................................................................... 7 2.2 R-Box Installation ............................................................................................................... 8 3. 4. Hot Key control ......................................................................................................................... 9 OSD (On Screen Display) on R-Box...................................................................................... 10 4.1 T-Module + R-Box............................................................................................................ 10 4.2 T-Dongle + R-Box............................................................................................................. 10 5. 6. 7. Technical Specifications.......................................................................................................... 13 Troubleshooting....................................................................................................................... 14 Certifications ........................................................................................................................... 15 Figures Figure 1. Figure 2. Figure 3. Figure 4. Figure 5. Figure 6. Application...................................................................................................................... 3 3-in-1 DB15 Cable .......................................................................................................... 6 3-in-1 Cat5 Transmitter (T-Dongle) ................................................................................ 6 PS/2 keyboard to USB adapter ....................................................................................... 6 CAT5/5E/6 Straight Through UTP/STP Cable (8P8C)................................................... 6 Front/Back Panels ........................................................................................................... 8 2 / 15 CAT5 KVM Extender 1. Introduction The CAT5 KVM Extender enables user to access the PC, server or KVM switch up to 1000 feet (300 meters) away with superior auto-adjust RGB gain/delay control capability. There are two types of CAT5 Extenders: CAT5 Transmitter (T-Dongle) + CAT5 Receiver (R-Box) CAT5 Transmitter Module (inserted into KVM Switch) + CAT5 Receiver (R-Box) T-Dongle up to 1000 feet T-Module Figure 1. Application The CAT5 Extender is a pair of devices for high-density applications where you want full use of keyboards, mouse, and monitor, but there is no room for a server nearby. Or for applications where you want to put all PC’s in a safe place, all the users only have keyboard/mouse and monitor on 3 / 15 CAT5 KVM Extender their desk. The T-dongle is able to move your console, keyboard, Mouse, and Monitor, to a suitable control field conveniently over existing network construction. You just need install a pair of extender T-dongle and R-Box into local side and remote side individually. It also saves your cable layout and cable installation cost. The R-Box is a dual functions device that uses Cat5 cable to extend your keyboard, mouse and monitor 1000 feet (300 m) from a computer or KVM switch, it also has built-in 2-to-1 OSD KVM switch used the same peripheral for your local PC. R-Box allows you to control remote PC or computer system 1000 feet away while working on local PC. This makes R-Box an excellent solution for double your productivity in any applications: Banking applications: Teller can control an ATM machine while stay on counter for banking service. Manufacturing applications – Engineers can work on next design while monitor the current design on the field test. 1.1 Product Line Models DCC-150 CAT5 Extender (500 feet, insertion card module + 150m R-Box) DCC-300 CAT5 Extender (1000 feet, insertion card module + 300m R-Box) KEC-150 CAT5 Extender (500 feet, T-dongle + 150m R-Box) KEC-300 CAT5 Extender (1000 feet, T-dongle + 300m R-Box) 4 / 15 CAT5 KVM Extender 1.2 Main Features ■ ■ A single, inexpensive CAT5/5e/6 UTP cable replaces bulky KVM cables Enables user to access the computer, server or KVM switch up to 1000 feet (300 meters) away with superior auto-adjust RGB gain/delay control capability ■ Collocate computers and servers on one location, Ideal for hazardous or unsecured environments ■ ■ ■ ■ ■ ■ ■ ■ ■ Build in 2-to-1 KVM switch with OSD (On-Screen Display) function Switches PCs by push button or keyboard “Hot Key” commands Configurable Programmable Hotkeys User name and Password protection Audible feedback when switching LED indicators for computer status and data transmission 3-in-1 space saving design Work with PC with PS2 port or PC with USB port Easy to install and use with plug-and-play functionality. 5 / 15 CAT5 KVM Extender 1.3 Package contents 1x Transmitter Unit (dongle or Module) 1x Receiver Unit (R-Box or R-Box professional) 1x CD-ROM (User manual, QSG) 1x AC to DC Power Adapter 1.4 Cables Diagrams 1.4.1 3-in-1 DB15 Cable HDDB15 male to one HDDB15 male plus two mini din 6-pin PS/2 connectors. Figure 2. 3-in-1 DB15 Cable 1.4.2 3-in-1 CAT5 Transmitter (T-Dongle) RJ45 female to one HDDB15 male plus two mini din 6-pin special cables Figure 3. 3-in-1 CAT5 Transmitter (T-Dongle) 1.4.3 PS/2 keyboard to USB adapter PS/2 keyboard to USB keyboard and mouse due HID adapter Figure 4. PS/2 keyboard to USB adapter 1.4.4 CAT5/5E/6 Straight Through UTP/STP Cable Figure 5. CAT5/5E/6 Straight Through UTP/STP Cable (8P8C) 6 / 15 CAT5 KVM Extender 2. Installation 2.1 T-Dongle Installation PS/2-USB changer for USB computer Step 1 Plug in VGA connector to the PC VGA port. Step 2 Keyboard, Mouse PC with PS/2 ports ■ ■ Plug in mouse connector to PS/2 mouse port, keyboard connector to PC keyboard port. PS/2 keyboard and PS/2 mouse is not design for hot plug PC without PS/2 port ■ ■ ■ Plug in USB connector to PC USB port (with PS/2 keyboard to USB adaptor) The single USB port can communicate both keyboard and mouse signal, it work as a standard HID (Human Interface Device), no extra driver needed. Please wait for PC bus emulations Step 3 Connect one end of the CAT5 cable to RJ-45 port of T-dongle, and the other end of the CAT5 cable to the RJ-45 port of R-Box or Host port of a KVM Switch. 7 / 15 CAT5 KVM Extender 2.2 R-Box Installation Figure 6. Front/Back Panels Install food pads --- turn R-Box upside down and refer to the following instructions for installation properly. Step 1 Connect keyboard, mouse, and monitor to the R-Box Step 2 Connect the local PC: Connect R-Box and local PC with 3-in-1 DB15 KVM switch cable. Step 3 Connect the remote PC or KVM switch: Connect one end of the CAT5 cable to RJ-45 port of R-Box, and the other end of the CAT5 cable to the RJ-45 port of T-dongle or CAT5 Console of a KVM Switch. Step 4 Power on the monitor, power on the R-Box by plug in power adapter, the OSD Login screen will show up waiting for user name and password. 8 / 15 CAT5 KVM Extender The Default User Name is eight zeros –“00000000”. The Default Password is eight zeros –“00000000”. 3. Hot Key control You can conveniently command R-Box through a simple hot key sequence. To send commands to the R-Box, you must press the hotkey (default Caps Lock) twice within 2 seconds. You will hear a beep sound confirming entering Hotkey mode. Then you have to enter Command in 2 seconds. If you do not press any key during Hotkey mode over 2 seconds the Hotkey mode will be escaped and back to Normal state. The default hotkey is Caps Lock but you can change hotkey as your application convenience. If you prefer to use other hotkey, please go to OSD menu and change the default hotkey to the other. Caps Lock + Caps Lock + please enter next key in 2 seconds in the Hotkey sequence F1 The table blow lists all supported hotkey commands. Command F1 Function To show “Help” OSD window F2 To show “Hotkey” OSD window F3 To “Revise” user name and password in OSD window F4 To log out the OSD, and show up the Login window waiting for username and password. C Toggle switch between Local and Remote ports Q Turn beep sound on/off S To activate the Auto-Scan function. Auto-scan Remote and Local port every 8 seconds repeatedly. A Auto-adjust video signal to optimum 9 / 15 CAT5 KVM Extender 4. OSD (On Screen Display) on R-Box OSD Menu provides a menu-driven interface to control the R-Box switch. 4.1 T-Module + R-Box Under this application the R-Box OSD function is limited to Hotkey OSD windows (not support F3 and F4), since the connected KVM switch has its own OSD system. When press the hotkey twice, then press F1, the Help window will show up. 4.2 T-Dongle + R-Box When power on the R-Box, the Login window will show up, and waiting for user name and password. The Login window The default user name is eight zeros “00000000”. The default password is eight zeros “00000000”. In Login window, you can reset user name and password to default setting by press and hold the SELECT button and press ESC key. After login or port switch by panel button, OSD or Hotkey, the Status screen will show up to display the information of current settings – remote or local console, and current Hotkey type. Pressing any key or clicking the mouse will let the Status screen disappeared. 10 / 15 CAT5 KVM Extender R E M O T E H O T K E Y C O N S O L E n u m OR When press the hotkey twice, then press F1, the window below will show up. When press the hotkey twice, then press F2, the window below will show up. When press the hotkey twice, then press F3, the window below will show up. The Login window Key in the current user name and password, the window below will show up. 11 / 15 CAT5 KVM Extender Key in the new user name and password, and password again in Verify field to complete the change. The maximum length of NAME and PASSWORD is eight characters (A~Z and 0~9). 12 / 15 CAT5 KVM Extender 5. Technical Specifications Feature CAT5-T Dongle(Transmitter) PS/2 keyboard connector 1 PS/2 mouse connector 1 (no use for USB computer) VGA connector 1 (plug on PC directly, no extra cable needed) PS/2 (keyboard) to USB adapter 1 (one serves both keyboard and mouse ) RJ-45 port 1 for CAT 5 cables LED 1 Power adapter No needed Weight (g) 80g Dimension (mm) 85(L) x 30(W) x 20 (H) Feature USB connector VGA connector CAT5-R Box (Receiver) 2 USB connectors for keyboard and mouse Note: PS2 keyboard and mouse user needs a PS2 to USB adapter. 2 HDDB15 connectors, one for VGA monitor port, one for Connect 3-in-1 KVM cables to local PC RJ45 (Cat5) Connect CAT5 cable to remote PC or KVM system LED’s 2 (Local and Remote indicators) Port selection Hot Key, Push Button Hotkey Programmable Security Provide ACL (Access Control List) security function, OSD User Name, Password, Hot key selection. Keyboard Emulation PS/2 or USB Mouse Emulation PS/2 or USB Housing 1680 x 1050 (500 feet) 1280 x 1024 (1000 feet) Metal Power Adapter DC 9V, 500mA Operation Temperature 0 ~ 50℃ Storage Temperature -20 ~ 60℃ Humidity 0~80%, Non-Condensing Weight (g) 370g Dimension (mm) 160 X 70 X 25 VGA Resolution 13 / 15 CAT5 KVM Extender 6. Troubleshooting 1. Receiver power LED is not ON ■ 2. make sure the power adapter is connected to KVM CAT5 receiver. The computer VGA resolution mismatches with the monitor’s supporting resolution ■ Please notice the R-Box support DDC function, but it does not support monitor hot plug. If hot plug the monitor may cause this problem. ■ 3. When you want to change the monitor, please power off the R-Box firstly, connect the new monitor to the R-Box, power on the monitor, finally power on the R-Box, so R-Box can detect the monitor settings and pass the settings to the computer. No video signal is displayed on the monitor. ■ ■ ■ Please check if all connectors are connected properly VGA cable was not attached to computer during boot up process. Power adapter is not connected to the receiver. 4. Video signal is foggy or un-cleared on the screen ■ ■ ■ Please check VGA connector The resolution is too high for the length of cable being used. If the problem happened at VGA resolution, shorten the CAT5 cable length or reduce VGA resolution. ■ It is highly recommended to use “optimal CAT5 cable length “to get the best video quality and don’t waste unnecessary CAT5 cable. 5. There is the error message “keyboard or Mouse not found “on the screen or keyboard mouse not function. ■ PS/2-PC --- keyboard mouse are not hot pluggable, please make sure PS/2 cable are well connected then reboot. ■ USB PC ---- please unplug and plug in the USB connector then wait for USB bus emulations or run the device detection function on the windows control panel . 14 / 15 CAT5 KVM Extender 7. Certifications FCC This equipment has been tested and found to comply with Part 15 of the FCC Rules. Operation is subject to the following two conditions: (1) This device may not cause harmful interference (2) This device must accept any interference received. Include interference that may cause undesired operation. CE This equipment is in compliance with the requirements of the following regulations: EN 55 022: CLASS B. RoHS All contents of this package, including products, packing materials and documentation comply with RoHS. 15 / 15